


So without further ado, I present to you the Crow Soldier! These charming minions are from the anime series Princess Tutu, which has been my favourite series since I first watched it all those years ago! :D Costumes that are actually stylized to look like costumes! What a novel idea! XD
This post will focus on the construction of the base frame and light rigging in the head. As well as the feathers. The beak will have it's own separate post, as it's got quite the tale to tell. The rest of the costume (poncho, tights, shoes) will also have it's own post.
I used the head as part of my Ryerson portfolio interview when it was in a half finished state, but more on that later!


After much thought (and toying with papermaché as a last resort), I decided to go on cosplay.com and look up a tutorial for mascot heads. I found this one (http://matrices.net/matricessuit.asp) which gave me a perfect idea of materials to use. They used plastic canvas and yarn as their base because it was lightweight and easy to work with. It's also really cheap! XD I figured that it would also work for me, but I would need something stronger to hold it into position because this wasn't a mascot head that would be covered in foam for the final shape. That's where the wire came in! I had to find one that malleable enough that I could work with it, but strong enough that it wouldn't get crushed easily.
 |
| Yarn, wire, and plastic canvas. |
In short: The wire would serve as the main framework to help hold the correct shape, the plastic canvas would be used to fill the areas between wires, and the yarn would hold it all together.


I got my little sister to help me tie the hoop to the yarn so it would hang slightly lower in the front, but level on the sides.

 |
| Some of the wires refused to stay in the right position, so I marked where they should be with marker in case they moved. |
Then I used the wire to make a birdcage (no pun intended) to which I could attach the plastic canvas.


 |
| Hmm... not completely round, but the best I could do. |
 |
| The wires were secured to the top with more yarn. |

 Then came the painful task of sewing the plastic canvas to the framework. It was not hard, but my needle (which I am extremely grateful for! what a lucky find!) was just slightly too big for the holes, and was difficult to push through. After a while my fingers felt quite bruised...

I wasn't too concerned about airflow (meaning dying of overheating) as I figured it would not be a problem with the wide hole in the bottom. (I was right btw.)

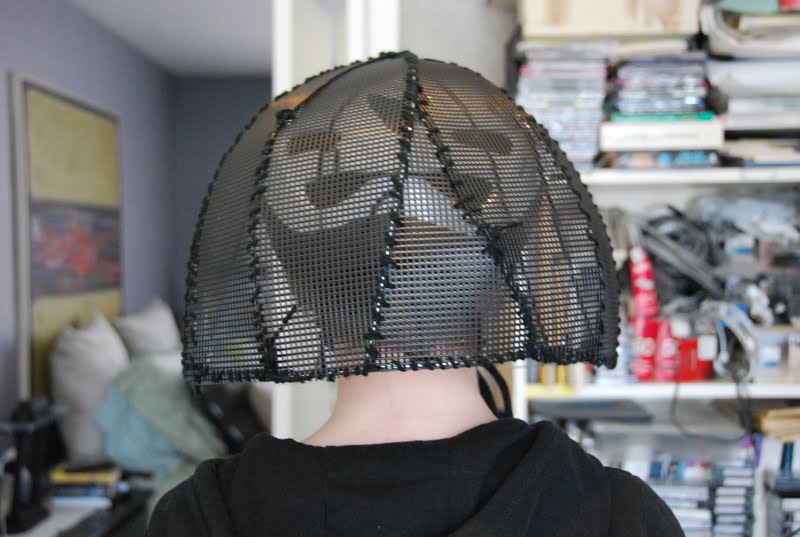 |
| I'm not very happy with the way the back turned out here, as my previous errors carried through right to the end... I ended up with the back having some lumps in it, but I was able to make the bottom less noticeable by making the feathers hang down more on the right side to cover it up. |

 The next step before completing the mesh was to make the eye sockets. I measured and attached the flashlights with tape (I never fixed them on with something better because I'd like to revisit this costume and use an actual circuit with a switch system instead of crappy flashlights. Therefore I made sure they could be removed without destroying the whole frame)
I made a paper cone and then covered it in aluminum foil, so it would reflect the light and make the eyes glow slightly more.


Unfortunately, we now lack access to a laser cutter, (and someone who knows how to operate one) so I had to embark on the long and frightening process of scoring and snapping the plexiglass into shape. Ugh.... why me? D:<

 ^That's what it looks like snapped. That's as close as I dared to go for fear of ruining the piece. I then had to sand the edges until it somewhat resembled my template.
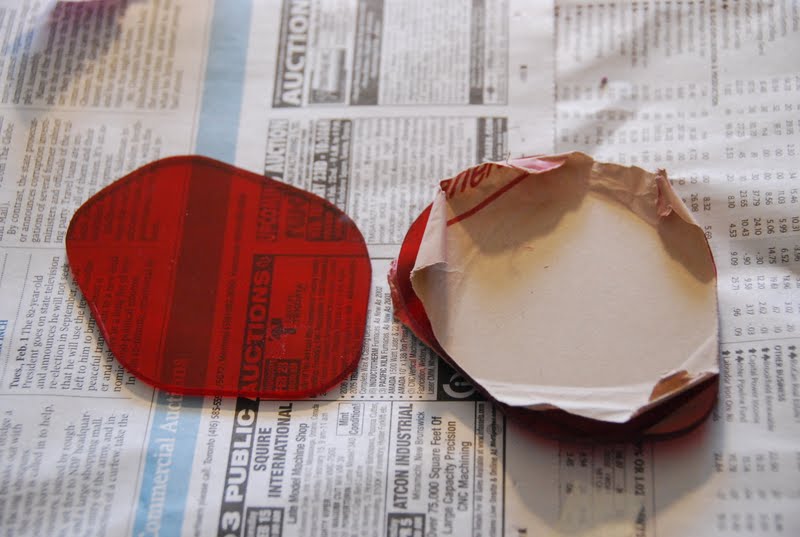

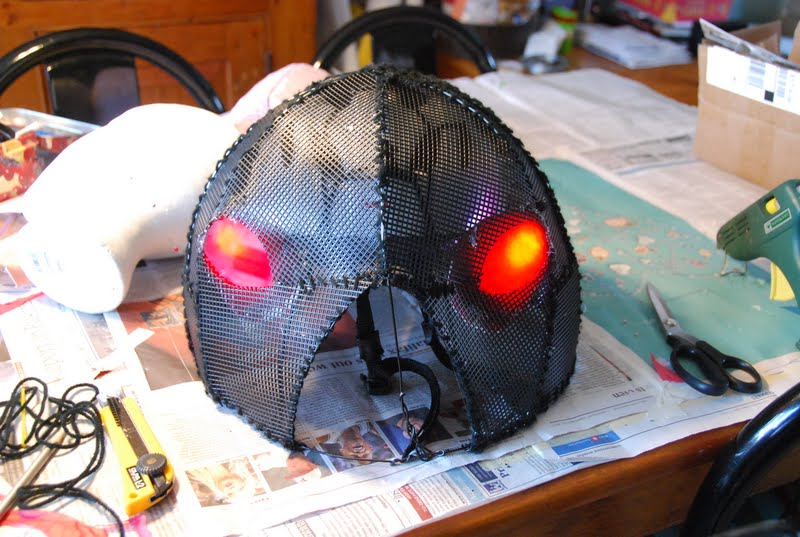
The sockets were then taped to the flashlights and glued to the frame.

 The plexiglass was too see-through for my liking, it wasn't looking as good as I had hoped. So I added a double layer of tissue paper in behind to give it a look like the eyes were glowing from within.
Much nicer.

 |
| I taped it on to secure it while I glued it in place. |


At this point I also spray painted the bottom wire black so it would be less noticeable when I started attaching the feathers.
 I originally started stitching the feathers to the frame because I thought it would be neater. But it was an arduous process that frankly just took too bloody long! D:< I quickly abandoned that approach and settled for the quicker, if messier, process of glue gunning them on. That being said: gluing on 400 feathers individually takes a REALLY LONG TIME. D:< I had to stop in the middle because I ran out of a certain kind of feather. So I was essentially working on this part on and off for 2 months.
This is the point where I brought it in with me to my Ryerson interview. I had wanted to get it done for then, but that was a completely ridiculous fantasy. XD As it is, it was barely ready for Anime North. But I thought that it showed my work progression and how I made things. It is also easier to see how something is made when it is in progress. As well as it is much easier to look at the object itself than pictures of it. They were very interested in my work! :D


 I think it actually ended up looking much better than my original plan. :D
 I had to cut the centre wire so I could slot the beak in at this point. I was able to tuck it in with a bit of difficulty.

Looking good right? :D I did this while having an Anne of Green Gables marathon with my sister. She was working on her costume at the same time.


I don't plan on doing a costume with this many feathers for a long time. It's crazy expensive (if totally worth it!) and time consuming. But it looks AMAZING! I'm really happy with the finished look of this part of the costume. :D
Next part: Crow Soldier - The Beak

Nice to finally see the progress photos posted! It certainly makes it look very methodical - which it really was.
ReplyDelete