Showing posts with label laces. Show all posts

Tuesday, February 23, 2016

Vaporeon Gijinka - Wraps, Bracers & Gloves - Pokémon


Part 5 of the Vaporeon saga! Let's talk about wraps, bracers and gloves! This was probably the most time consuming and difficult part of the entire costume to construct. Lots of hand painting and hand stitching was involved. The end result ended up looking even better than I had envisioned! >:D

Links to Part 1: BoleroPart 2: Under LayersPart 3: Wrap Skirt Tail, and Part 4: Wig and Hairpieces!

Thanks to Elemental Photography for the wonderful photoshoot! Credit for the original costume design goes to Cowslip!

The way I started drafting the pattern for these was super scientific! Not really. I literally traced my leg onto paper. This is so I could figure out the relational distance between my ankle, knee and thigh. This was purely to use to get the proportional heights of the bracers and wraps correct.

From there I was able to mark how tall I wanted the bracers and wraps to be. Then I drafted the pattern for the wraps and bracers separately. I also drafted the arm wraps and bracers at this time.
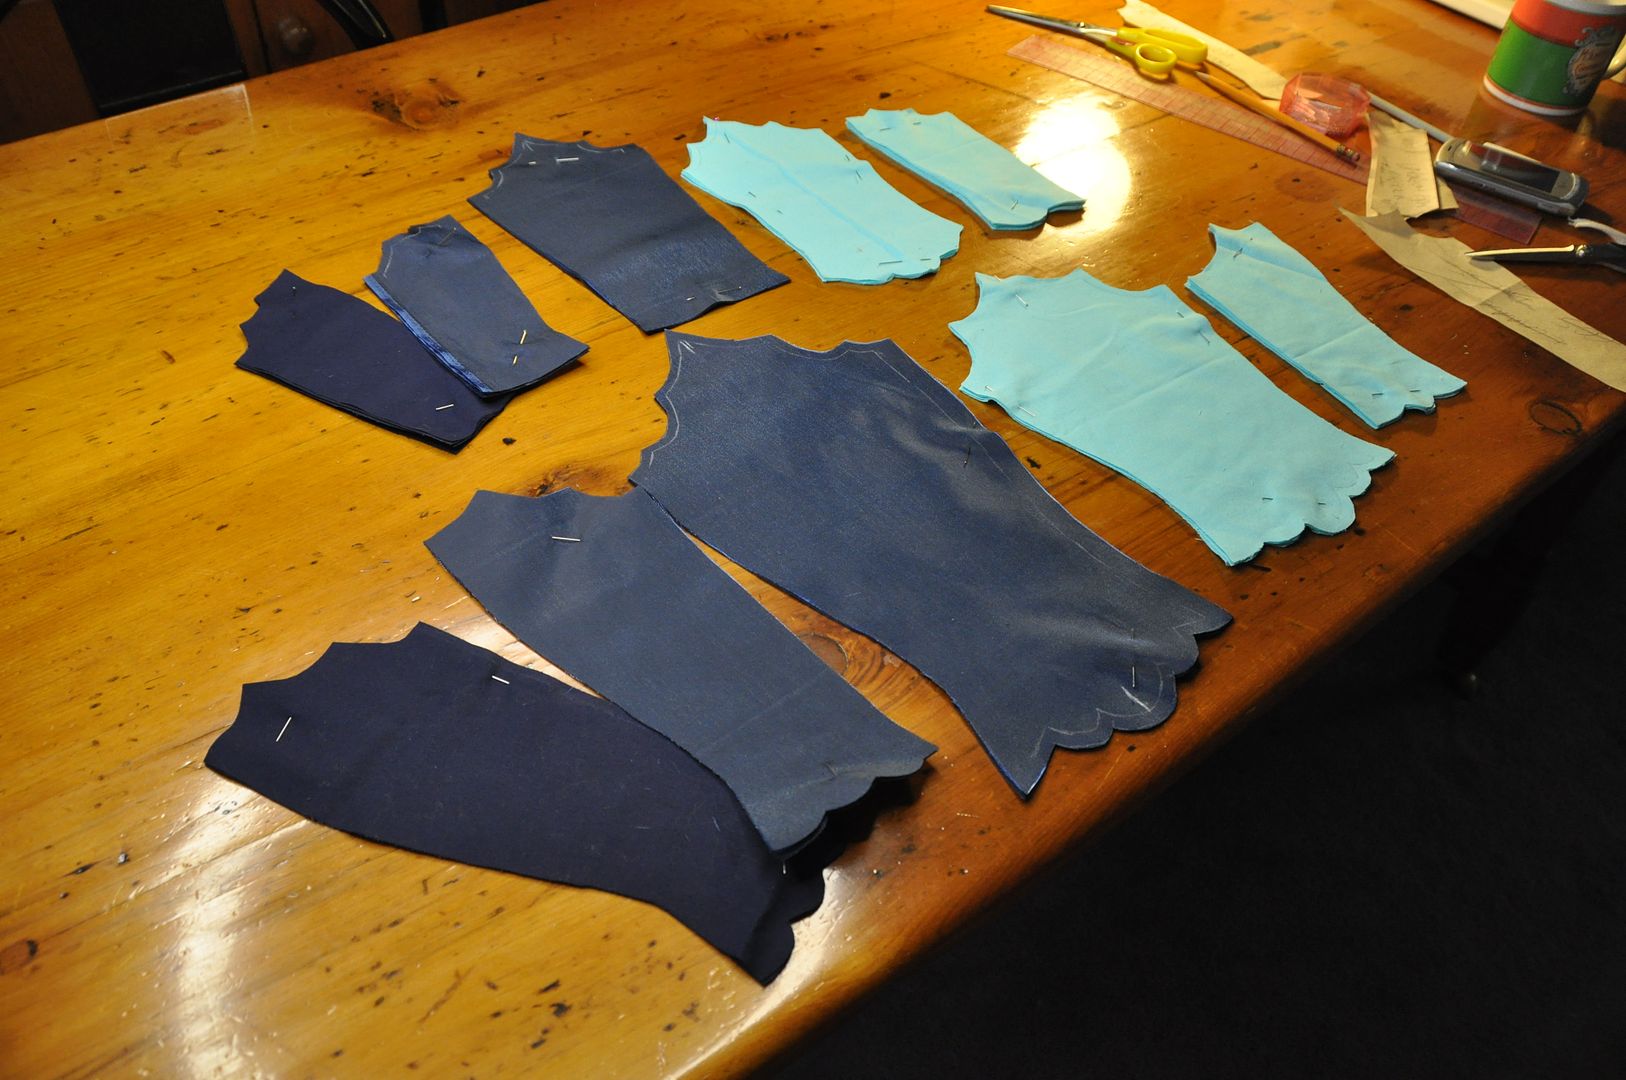
I'll start with the bracers first, since I finished the construction on those first.

I cut out my pieces in the various fabrics. I had an under layer in a shiny synthetic navy blue fabric and an over layer in a light aqua cotton (which was leftover from the Suppi costume).

I nearly cut out the wrong amount of pieces when I was laying out my pattern. Every piece has a backing because I needed that to properly finish the scalloped edges on the top and bottom. This meant every piece was doubled. The navy under layer was backed with the same navy cotton as the bolero lining because I ran out of my other navy fabric.
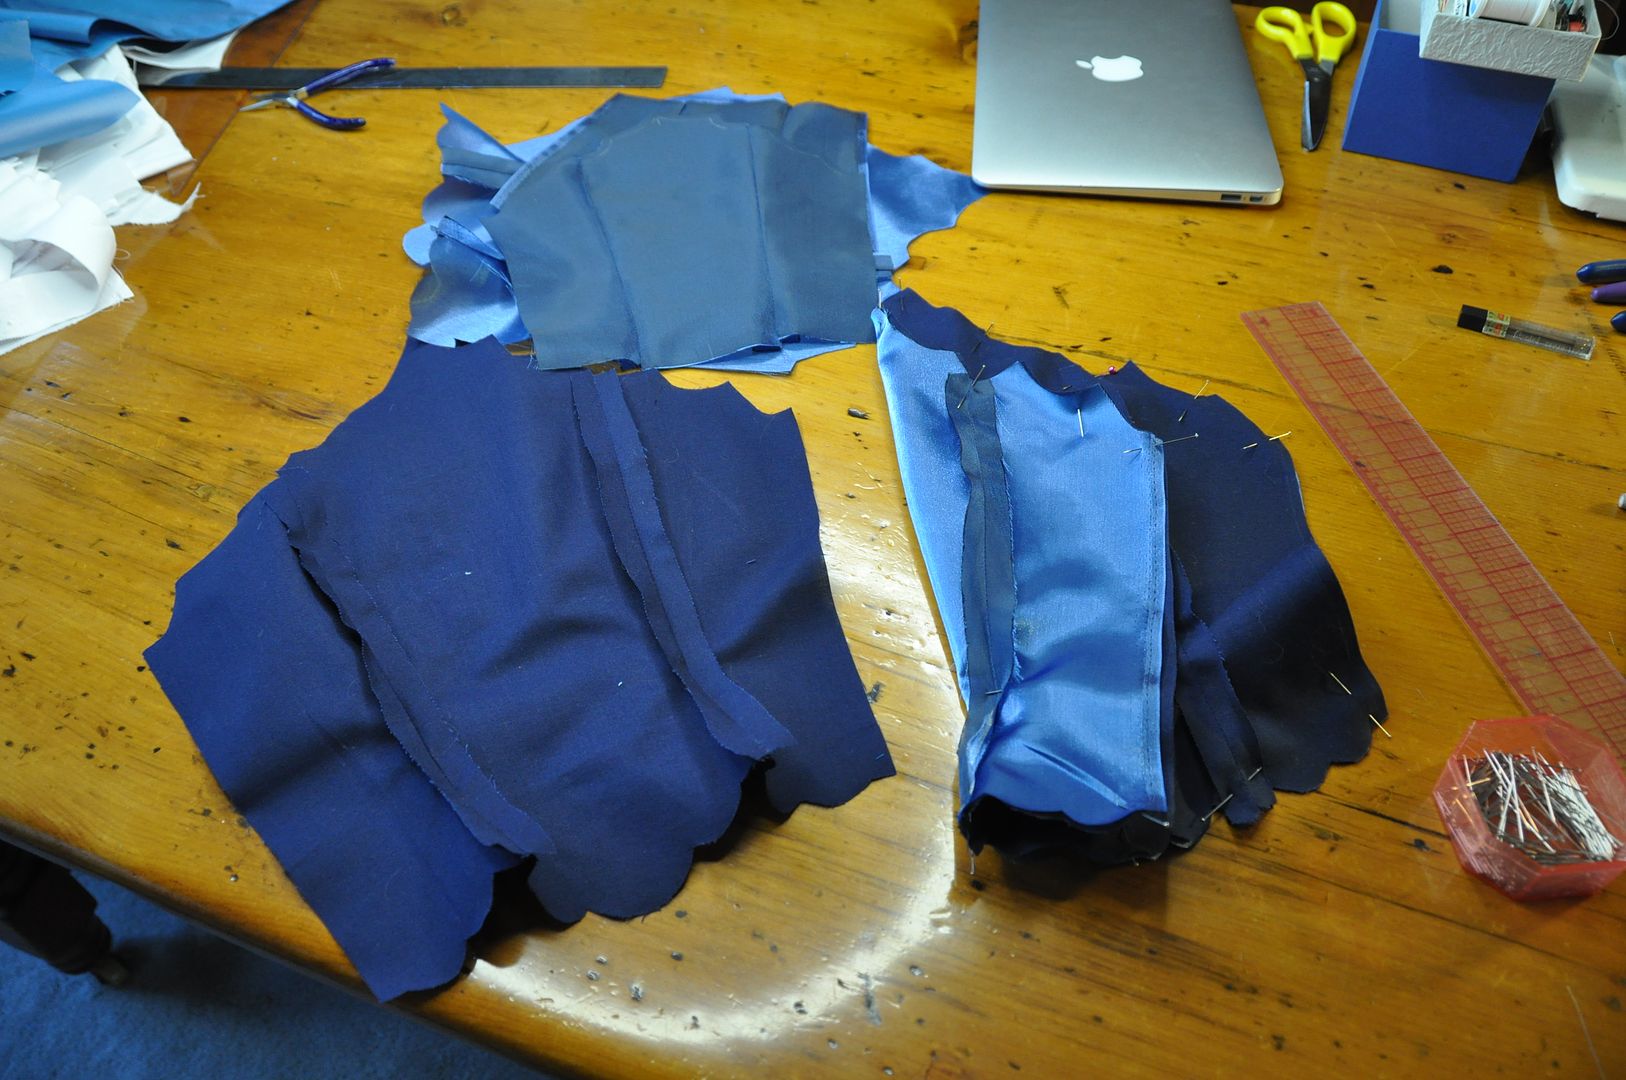
I assembled each of the fronts and backings separately, sewing them along the side seams. I ironed the seams open flat.

At this point I took the front over layer pieces of the bracers and painted on my scale pattern. I lightly drew this out in pencil and then traced over my lines with navy blue fabric paint. It sounds simple, but it took a really long time. I ironed them to set the paint before moving on.

Next I pinned each piece to its backing right sides together. I sewed them together along the top and bottom edges, leaving both sides open to turn them right way out. Before turning them out, I trimmed the excess seam allowance on the inside. I top stitched along the edges to neatly finish them.

I also added in my top stitching detail on the tops of the under layer at this time.

I aligned my side edges, zig zagged stitched over the raw edge of the fabric and then turned that to the inside and top stitched it down.

Then I used a punch to punch out the holes to put the grommets in for the laces. At this point I still had access to the grommet press at school, which I made good use of.

This was the point where I laid the project to rest for a year, because one of the main hurdles was the leg wraps, which I was positively stumped on. I didn't know how to rig them, I didn't know how to do the detailing and I didn't want to rush them and do a crappy job of it.

When I returned to the project, along with replacing the wig to fix the colour matching issue I also found another thing that was bothering me. The bracers were too teal for the rest of the costume, especially now that I had replaced the wig.

After re-evaluating, I decided to upgrade the paint job on the bracers, and in the process change the colour of them to be bluer. I added in depth to the scales, but also dry brushed over the whole thing to tint it. You can really see the difference it made in this progress shot.
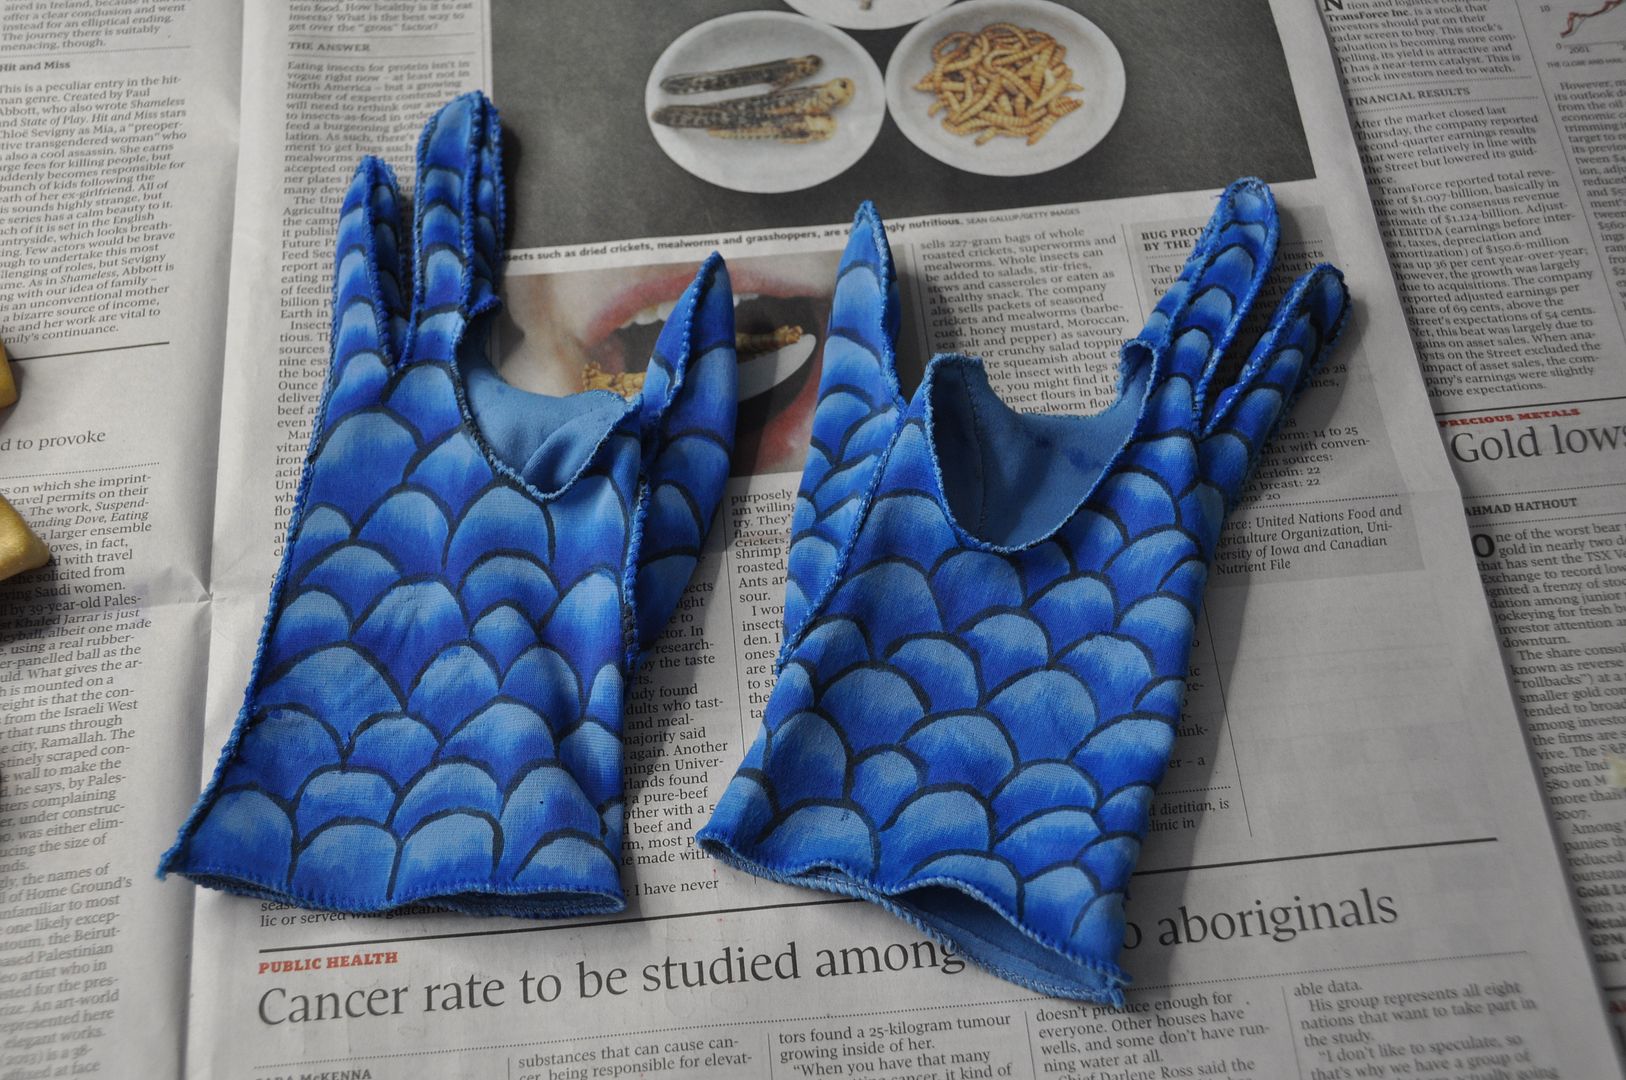
The gloves I bought in Kensington market. I made gloves for an earlier project and decided it was by far the most horribly tedious thing to do ever. So I decided to buy and alter a pair. I cut out the hole that encompassed the index and middle finger on each glove, then zig zagged stitched the edges to finish them so they wouldn't fray all over the place.

The gloves were painted in the same style, except instead of laying them flat, I had to wear them each on my left hand in turn to paint them.

By doing the scale pattern and adding the depth to both the gloves and bracers it helped to meld them together visually and also give the false impression that they are even remotely the same shade of blue. Because they really weren't.

Now let's travel back to the beginning of the project when I traced my leg and started patterning. For the wraps I was venturing into an area I didn't have much experience with at the time--stretch fabric. In this project I can freely admit that I had no idea what I was doing and problems I encountered in the construction of these wraps are one of the main reasons I stopped working on the project for a while.

I will start with my first mistake: I bought fabric that was one-way stretch. Somehow it was more unpredictable than stretch fabric. I don't know, I just didn't like working with it.

I patterned out my pieces, figuring out the overlap at the top. In this picture you can see the two pieces for a leg wrap on the left and the two pieces for an arm wrap on the right.

I took them to school to assemble them with the serger, because this fabric frayed like crazy. I ended up making them slightly uncomfortably snug, but since I had serged off the seam allowance I couldn't let them out, and I used up all my fabric so I couldn't remake them.

I used the silver silk bias tape I had made for the bolero to finish the top edges.

At this point, I had no idea how to rig them. They were super snug, but not enough to stay up without slipping. This is when I threw in the towel on the project.

Zoom forward to one year. I am one year wiser. And I have ideas about how to finish this project.

First I decided to actually add the floral pattern to the fabric, which I had originally decided to not bother with (because of time constraints).

I decided to make stamps to create my design, rather than hand painting on the floral design. This is much quicker and easier if you are making repeating patterns/patterns with repeating elements. Based on the barely visible details in the reference image I sketched out some suitable flower and leaf designs, then traced those onto craft foam and cut them out. I glued the pieces onto a foam backing creating my stamps.

I laid out my wraps and began stamping. Using a blue fabric paint, I used a brush to apply the paint to the stamps and then pressed the stamp into a spot of my choosing on the wraps. I made the paint application purposely patchy. I didn't want the flowers to be solid. 
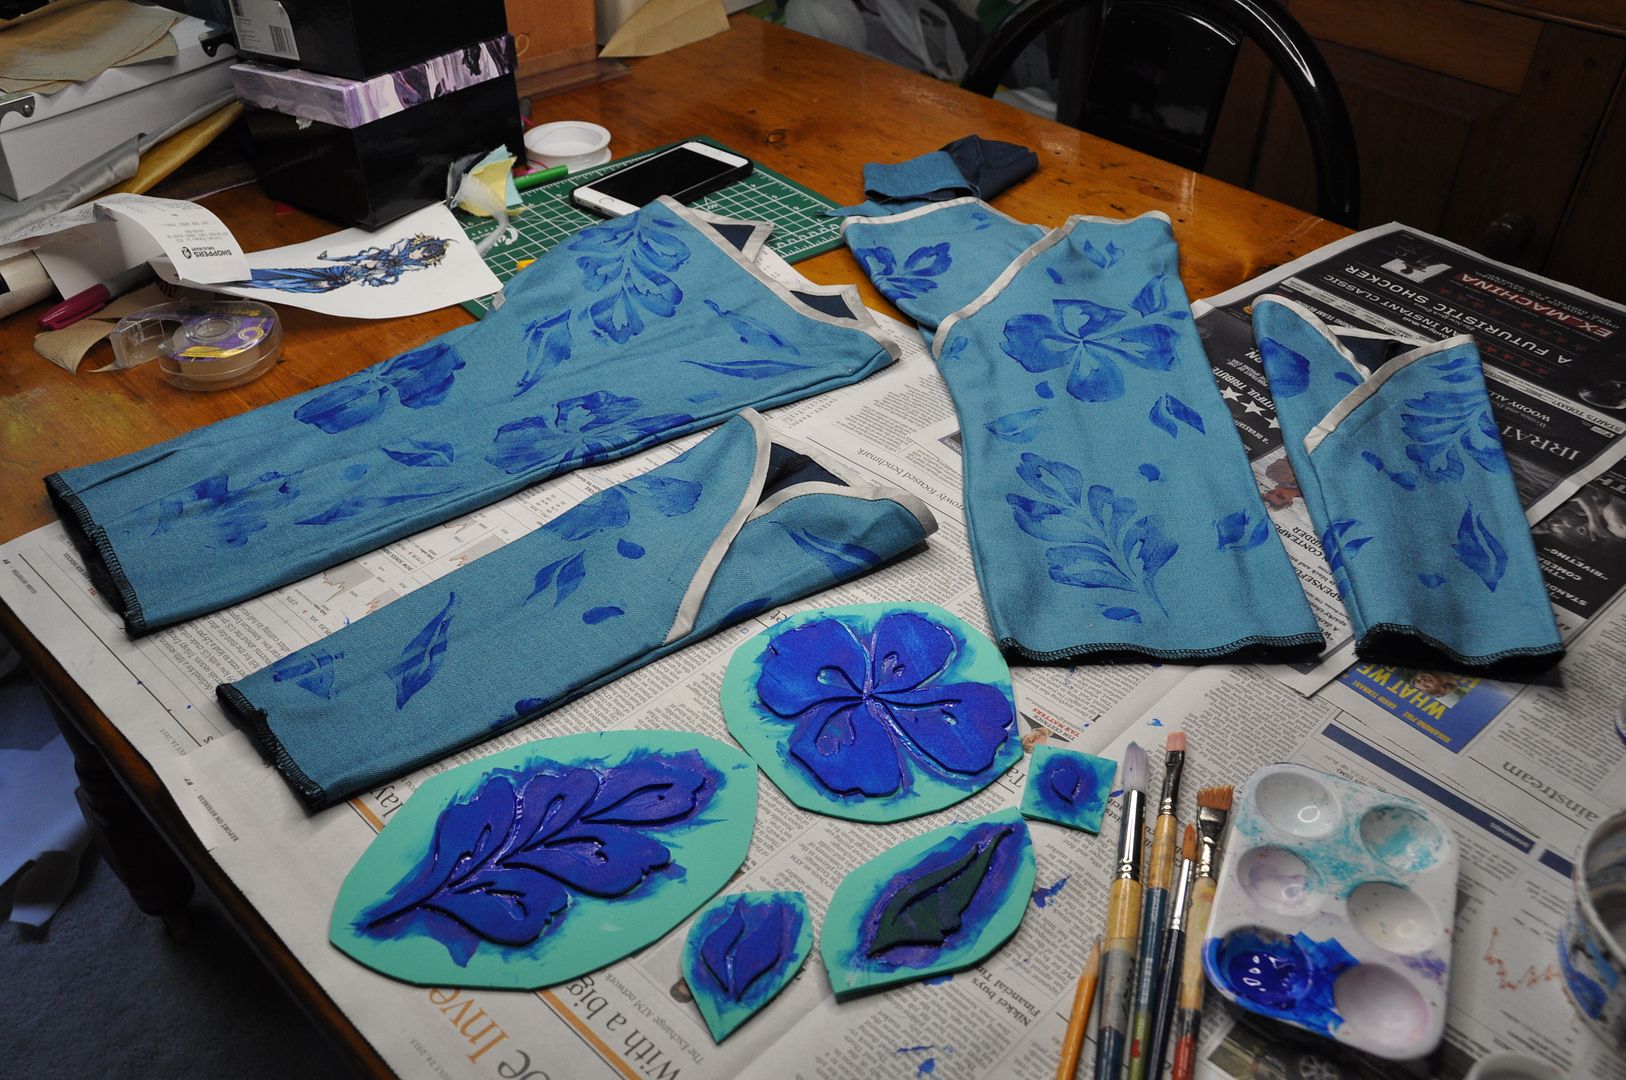
I wanted the flowers to be random and sporadic. There is no science to the design. I just made sure not to have too many of the same stamp to close to each other. 

I had to wait for them to dry before flipping them over and doing the sides and back. When everything was painted and dry I heat set the paint with an iron.

Next I decided to finish the overlaps differently. My original plan was to make the overlaps a functional closure. But it wasn't working--it pulled the fabric on a weird diagonal, and looked super bad. So I decided to sew it shut and just fake it. I sewed the frogs on top as decoration.

Next I used bias tape and hand stitched on all the fancy loops and detailing on each of the wraps. This took forever.

Lastly I had to rig them so they would stay up. As I mentioned in my wrap skirt section, the rigging for the wraps was attached to the inside of the skirt's waistband. At the back there is an elastic strap that attaches to each wrap using garter hooks. They are stretched to be pretty tight, but not so much that I can't bend or sit. Then I have a second backup strap made of webbing that doesn't put as much tension on it. This is for the sake of redundancy--if the first strap fails, the second will keep it up. You can see a bit of the rigging system in the picture below. I tried to keep it as invisible as possible.

The arm wraps are attached to the bolero with simple buttons and loops. Unfortunately they tend to pull the bolero sleeves down oddly. I plan to remedy this in the near future by stuffing the bolero sleeves.


Wednesday, September 16, 2015

Inkling - Outfit & Accessories - Splatoon

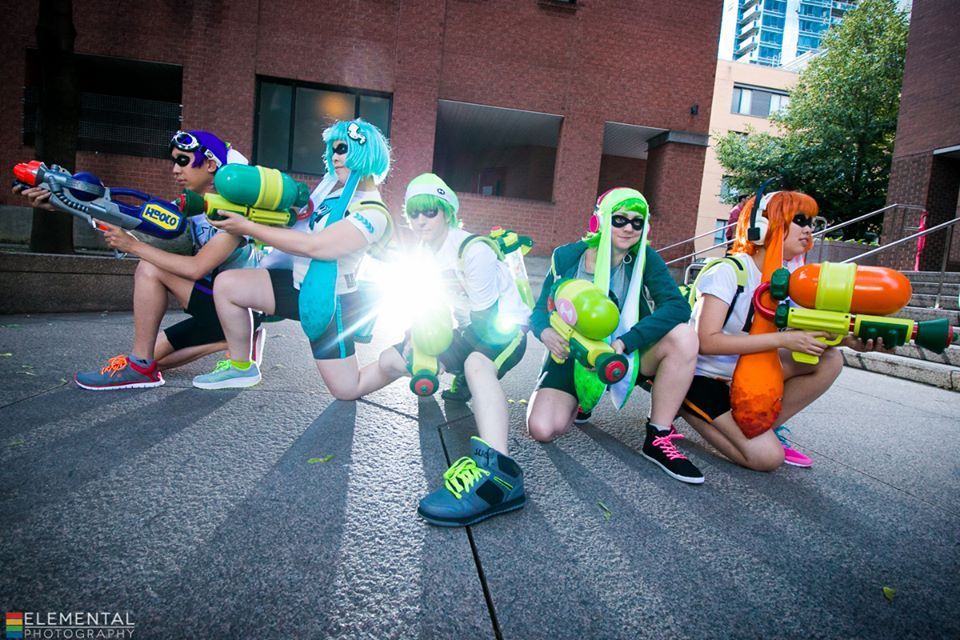
This is the first post on our Splatoon Squad--affectionately referred to by the group as "Squids or Kids?". What was supposed to be a group of easy casual cosplays quickly snowballed into a crazy colossal effort to make the most awesome Inkling costumes possible. Special thanks (and photo credit) to Elemental for doing the group photoshoot! All of the pics from the shoot were wonderful!

The current group from the photoshoot consisted of: Brian (Ragz Cosplay) --the brains of the operation; Andy (Yavarice) --our task manager; Michelle (Mage Cosplay) --a heat n' bond wizard; Kim --the only one who can actually has the power to create vector files; and myself--the squid hat pioneer. Special thanks also to our fellow squids--the wig expert Louise and magical wizard Adrien--for all their hard work as well! We look forward to them joining us for Squids 2.0. :) There will most likely be a second shoot at some point in the future, with even more Kids. Or Squids?

Obviously since this is a large group cosplay there is a certain amount of tasks that were shared or delegated so that everyone's costume would match! I will do my best to generally explain how things came together, but obviously credit goes to the individuals who made each specific thing!


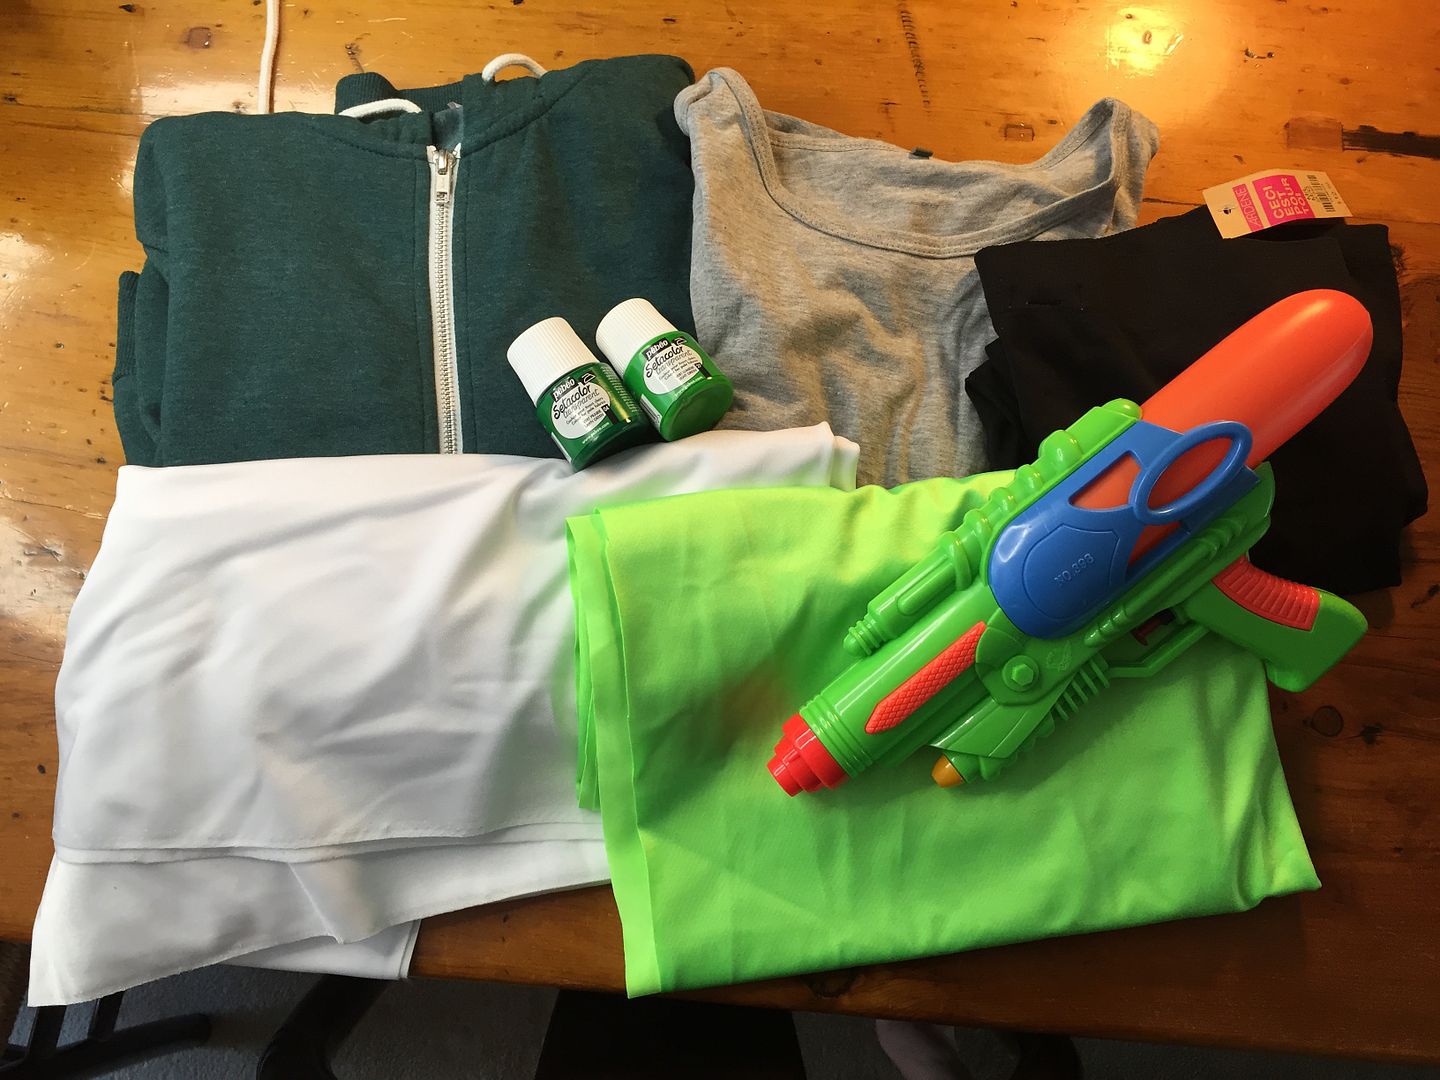
For the clothes we all set about creating our own outfits. I tried to keep the base items I bought on the cheap side.

Since the Inklings all wear a standard pair of black biking shorts with a stripe their team colour down the side, we all found black leggings/bike shorts to modify.

For my shorts, I bought a pair of black leggings at Ardenes for about $10. I marked how short I wanted them, then cut off the excess. I topstitched a stripe of green spandex down the side of each leg using a zig-zag stitch--so it would allow the fabric to stretch. Then I hemmed the pants.
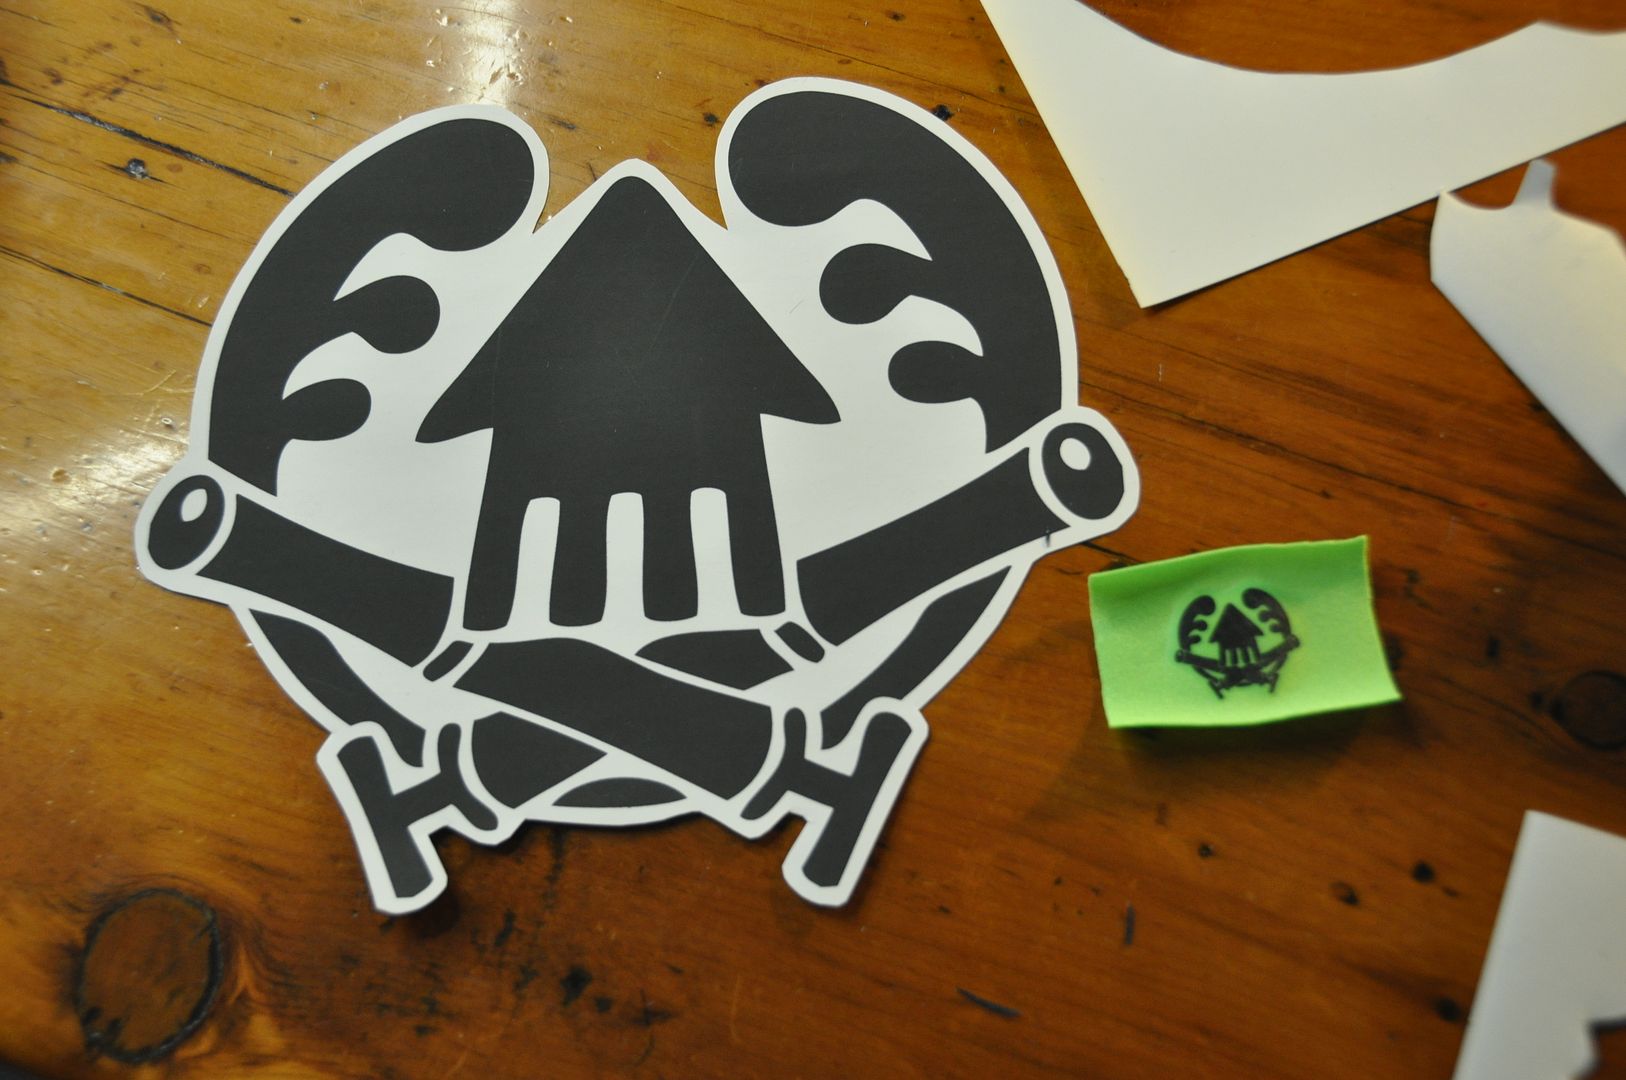
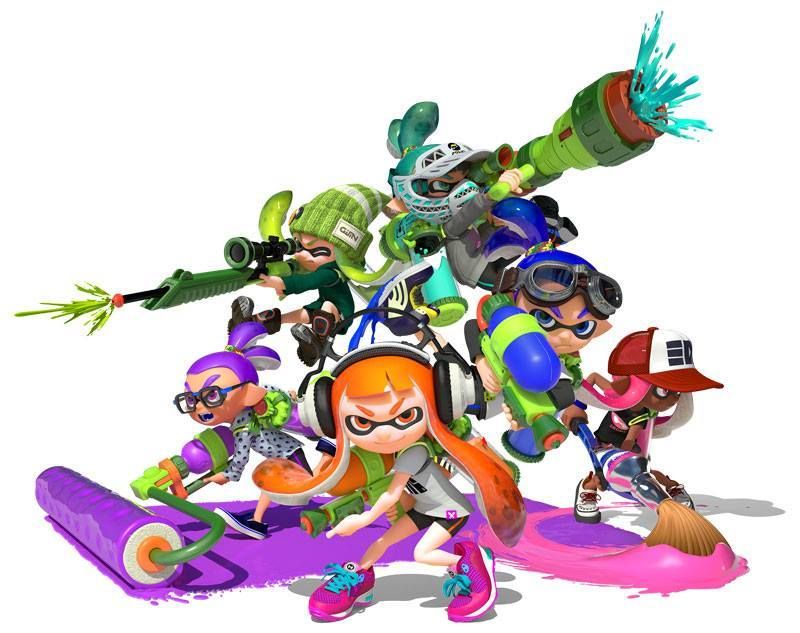
We all opted for t-shirts in varying colours with one of the various logos from the game on them. In the game the clothes you can buy have different brands to choose from, and each brand has a unique logo. For those of us who decided to create our logos with heat transfer paper, Kim vectored and resized the designs. Those of us with inkjet printers printed the logos onto heat transfer paper. (Which I believe was purchased at Michael's?) Those were then applied to the shirts using an iron.

I bought my t-shirt in chinatown for $2. I think other people bought theirs at Walmart. I also got a green hoodie at H&M to match my costume--in case it was cold. Brian layered his shirt over a long sleeved shirt.

For the coloured tags on the shirt we each used a rectangle of our own team colour fabric and used a small version of our logo applied with heat transfer paper. Then we used heat n bond to attach the tags to our shirts.

Mage actually created her adorable squid shirt logo entirely with heat n bond to appliqué the design on in the different coloured fabrics pieces. I think it turned out really awesome! She also made several of the simpler tags (like the one on my hoodie) in this method. She is a heat n' bond wizard.
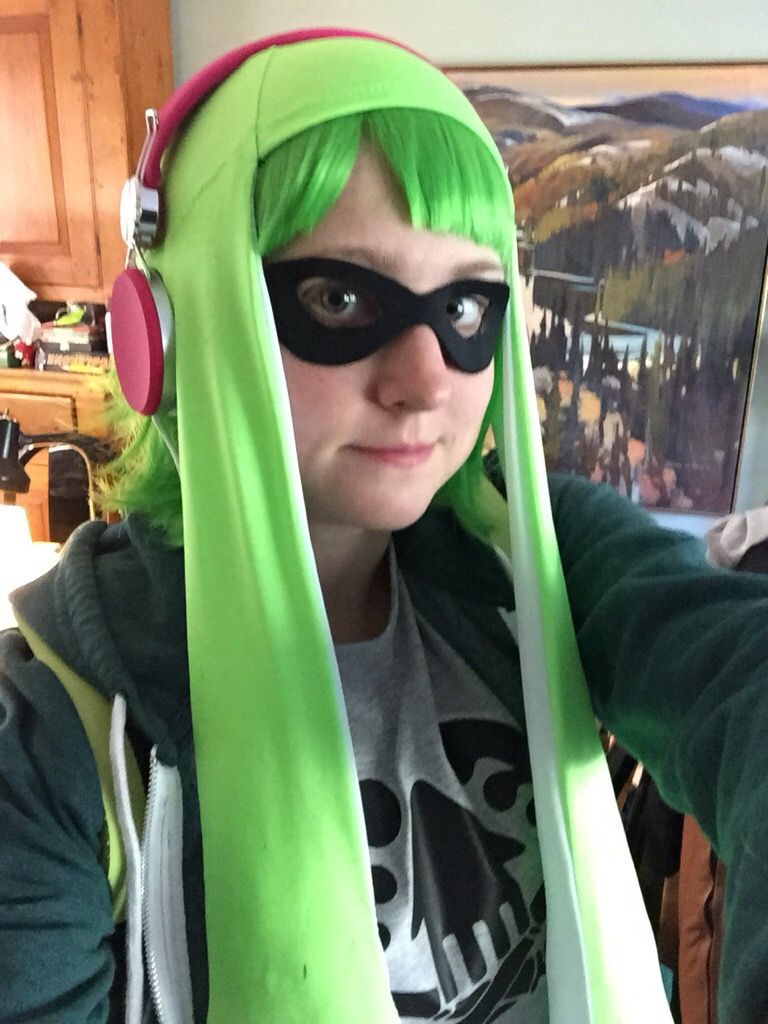
Accessories allowed us to personalize the costumes a bit more. We looked like a cohesive group, but the accessories gave our characters personality. For example: Andy wore goggles, Kim had headphones, Michelle had hair clips, and Brian wore glasses and a headband. In a lot of cases, we would find a colourful item for cheap and then slap a logo on it. Hahaha

For shoes, I got a pair of $14 high tops at Ardenes that I stenciled a logo on using fabric paint. I tried to make my accessories have a colour theme--which was pink. We had a group field trip to Walmart one night to pick up some accessories. We got some packs of brightly coloured shoe laces there, so I was able to swap out the boring white ones that came with my shoes for a pair of neon pink ones! Other members of the group picked up their brightly coloured running shoes at Walmart. I don't think anyone spent more than $30 on shoes.

I picked up a pair of bright pink headphones in chinatown for about $20. So I wouldn't have to worry about making any pointed ears for the costume, which we made a group decision later to forgo anyway. I wish the headphones I bought were a little bigger, but I wasn't willing to spend any more on them. I may mod them at some point. Perhaps for Squids 2.0?

The masks were our solution to not having to paint large areas of our eyes black. A friend of of the group put together an easy superhero mask tutorial, which you can find here! These masks are lightweight and can be spirit gummed directly to your face, or tied on. Andy made my mask for me, and it looks awesome, but unfortunately the felt backing seems to irritate my eyes a lot. :( I am going to look into alternative materials to make the same thing, because I really liked the look of the costume with the mask. Next time I am definitely going to fill in the area around my eyes with black makeup, though.

Stay tuned for part 2!

Friday, July 10, 2015

Floral Cream Underbust Corset

Hey all! I made another corset this past winter. This is not an obsession I swear... This one is an underbust corset that is going to act as a waist cincher/posture modifier, to be worn under my Phoenix costume (which is currently on hiatus). I also made it with another future steampunk outfit in mind... 

Showcasing here the new pistol prop I bought in Austria last month. Also worn with my Long Pleated Skirt.


I like how the shape of this one turned out much better than my black corset. Instead of using a fashion fabric on the outside, I just used the coutil. Except this time my coutil has a cool floral pattern on it! I picked up this fabric from the Farthingales booth at CostumeCon32 last year. It's super strong and super pretty.


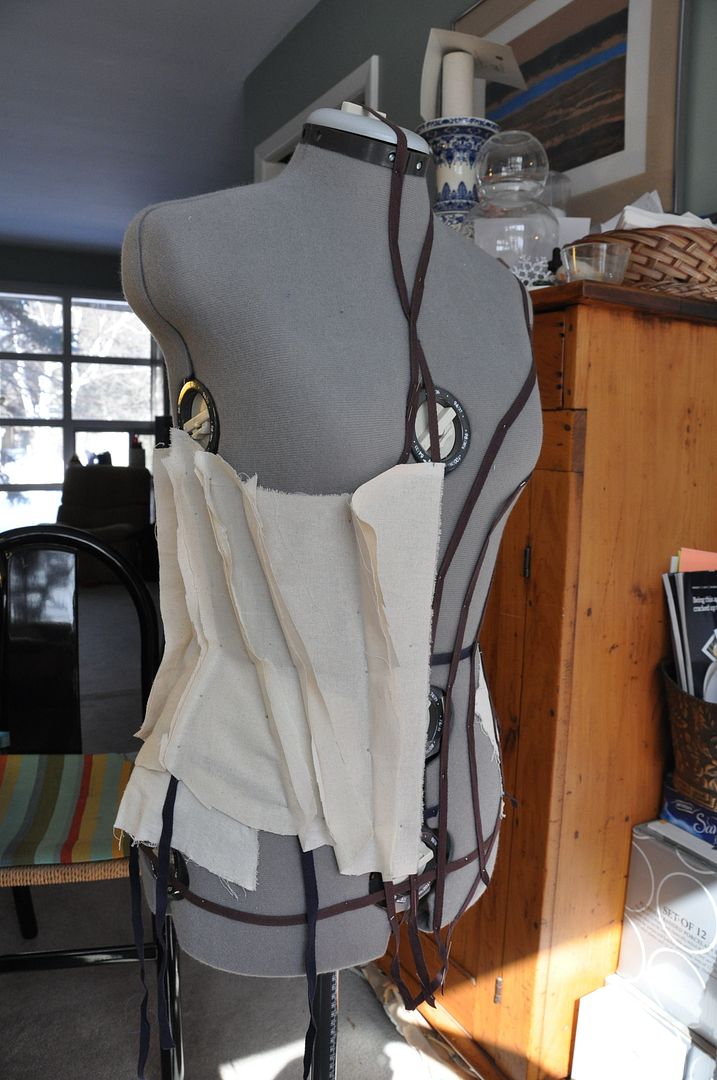
 First I used twill tape to mark out my seam lines on my judy. Then I draped muslin over those sections to get my pattern piece shapes. I used a pen to draw the shapes on the fabric, unpinned the pieces and then cut along the lines I drew.

The pattern I ended up with looked like this. I numbered my pieces from 1-7 (center front to center back).

After making a mockup and tweaking the pattern to reflect the changes I made, I reduced the pattern so that it would have a 2" gap at the back. This means that I divided 2" into 7 parts and shaved off that amount from every seam. I shaved off just slightly more at the waist so that part could cinch even tighter. 
Then I cut my pieces out of my coutil. Remember you need 4 of every piece, a pair for each side.
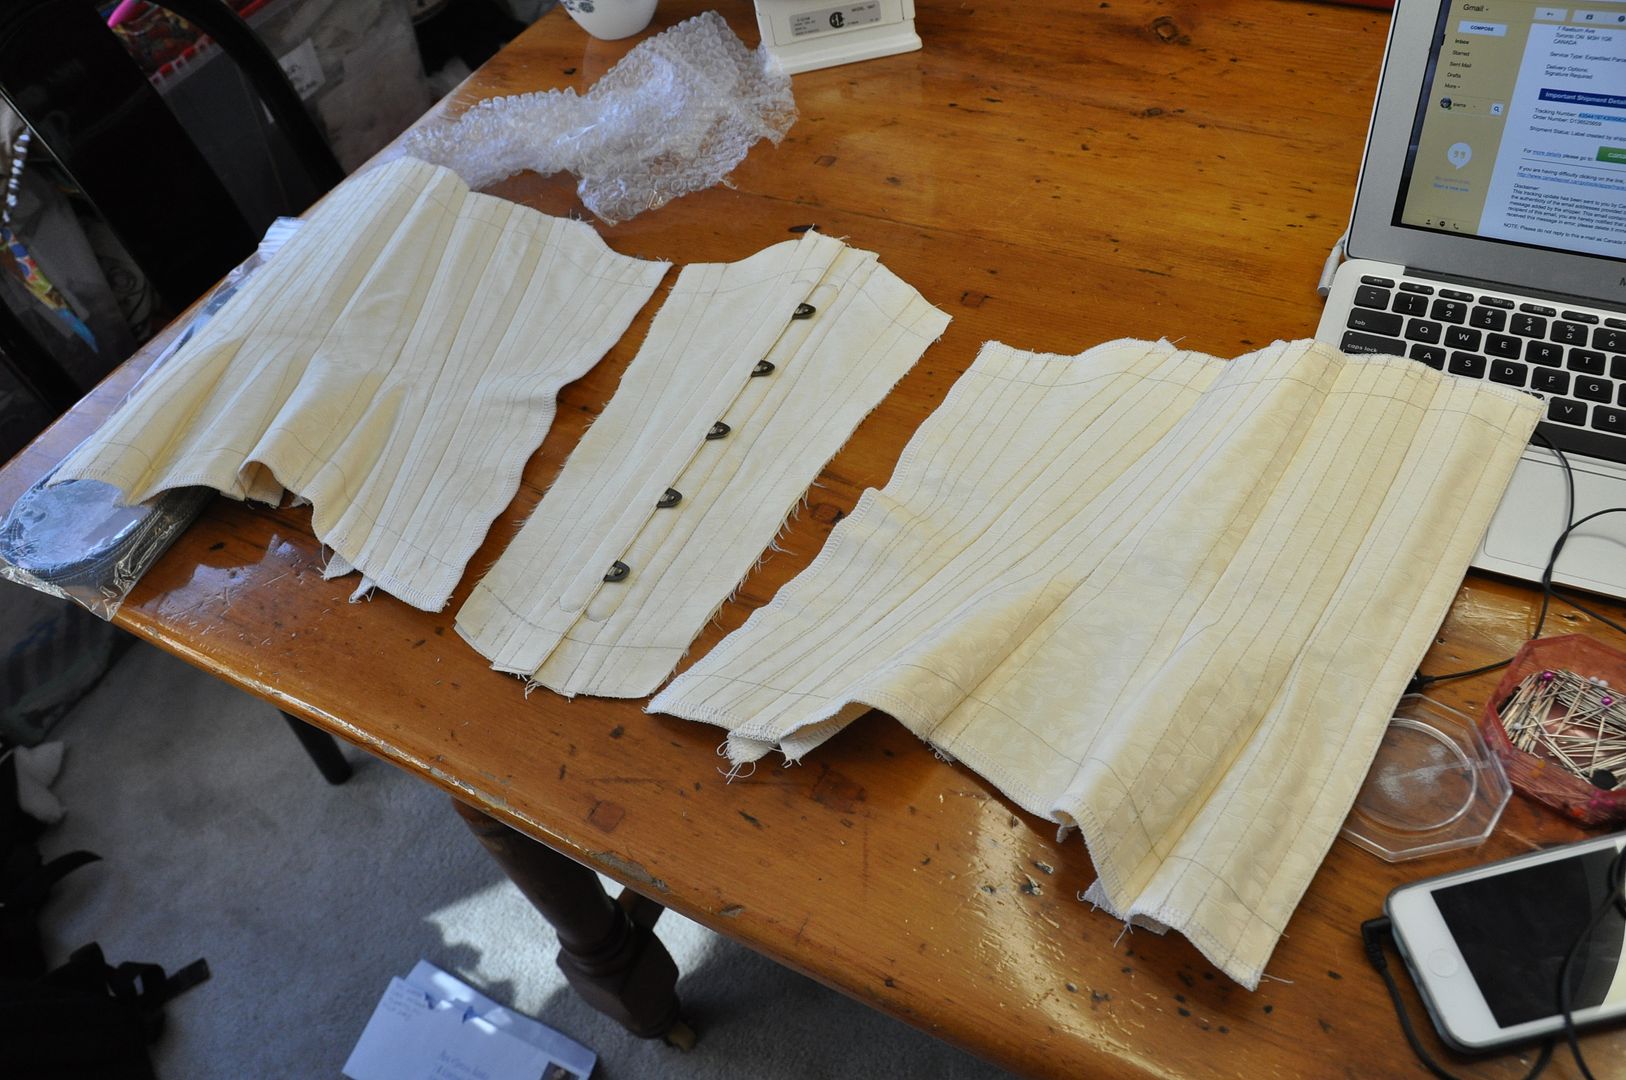
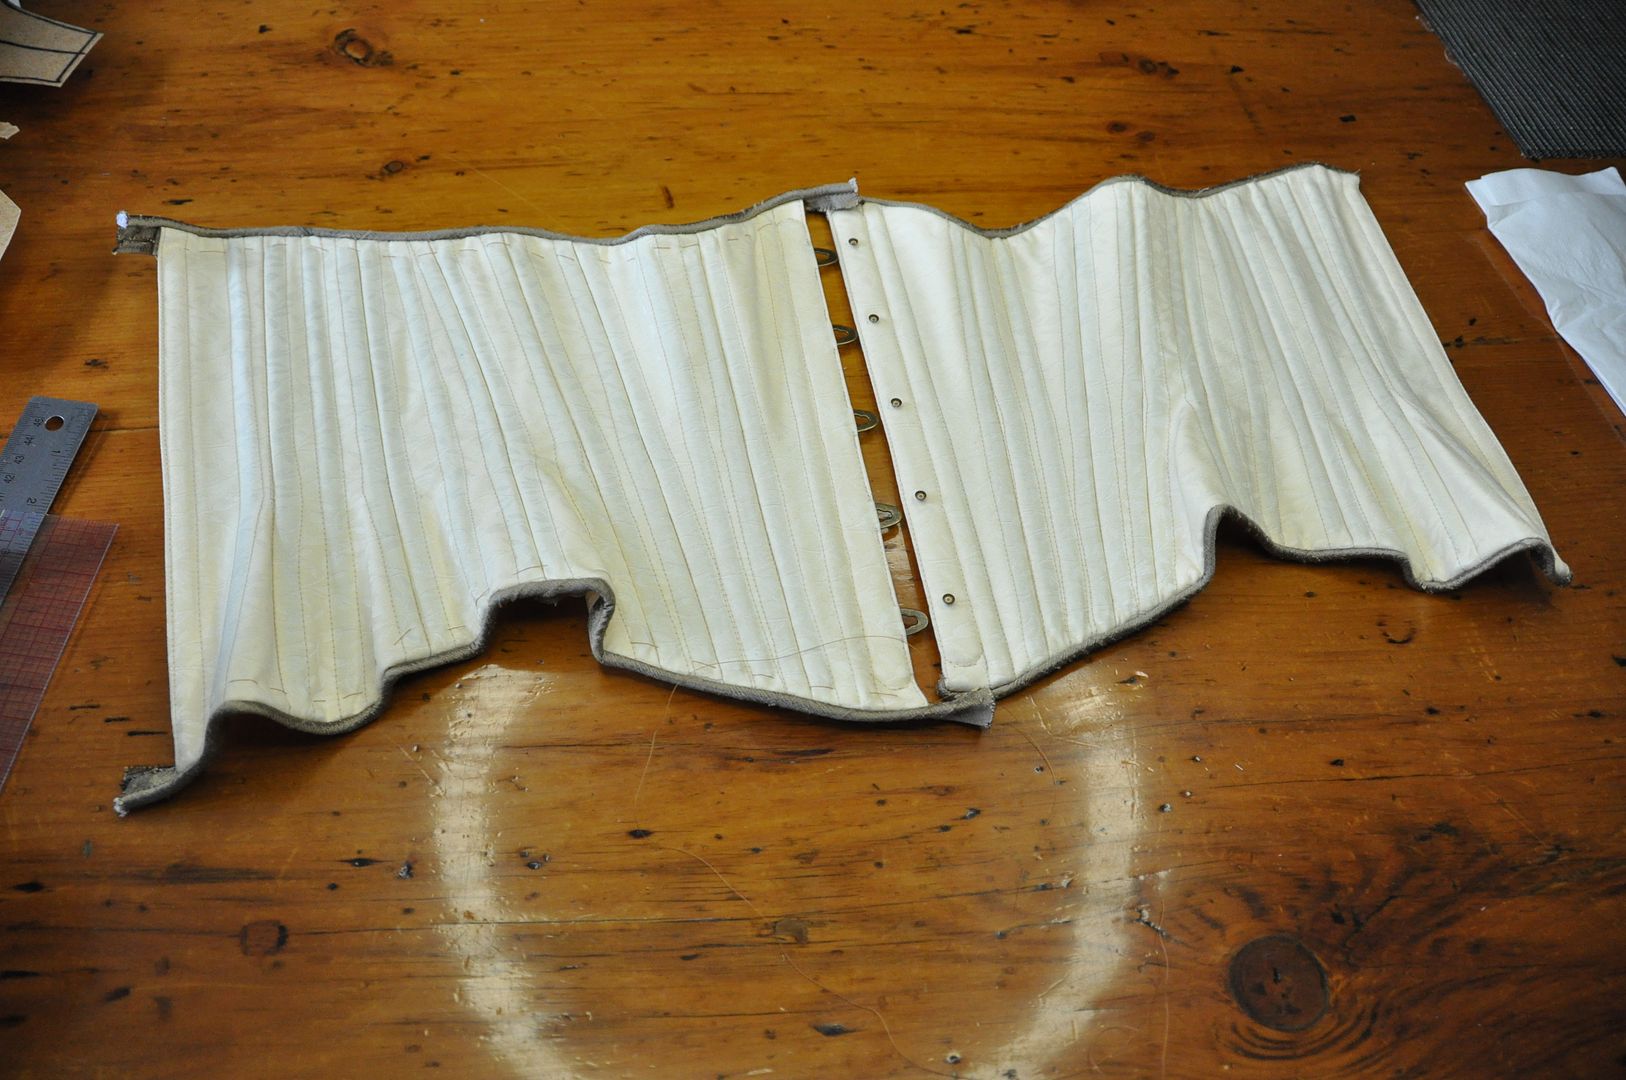
For the center back panels I first sewed the pairs right sides together along the CB edge, then turned them right way out and pressed them. I flat basted all my pairs together (excluding the center front panels) and top stitched all the boning channels. The 14 panels looked like this.


I added in the busk to the center front, then flat basted it and added the last boning channels. If you want a tutorial on how to insert a busk, go here!

Then I began to sew the panels together. This is done very carefully, lining up the flat basted lines and the waist line. Accuracy is your friend.
Then I cut my spiral bones to length and inserted them.


I made my own piping trim from leftover fabric from my Steampunk Corset. If you want a tutorial on how I make piping trim, go here!

I attached the piping, then hand stitched down all the seams on the inside. Then I put the eyelets/grommets in the center back and added some cord to lace it.

Presto! Another corset! ;D


Tuesday, July 15, 2014

Forest Guardian - Belt, Bracers & Quiver

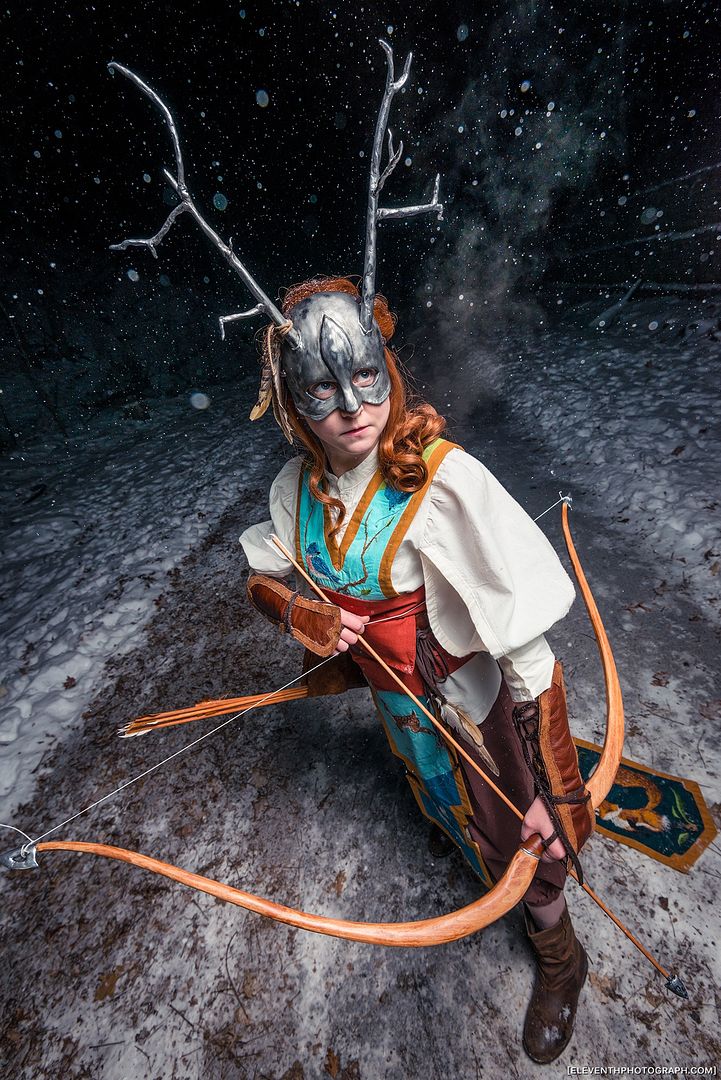
Greetings! Welcome to part 2 of Forest Guardian. If you want to look at my pants, shirt and cape, go here!

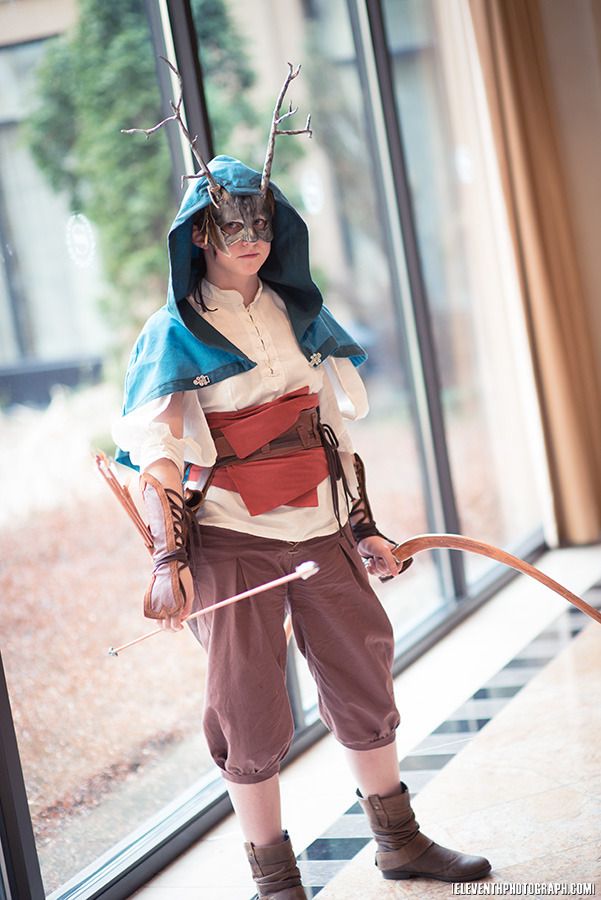
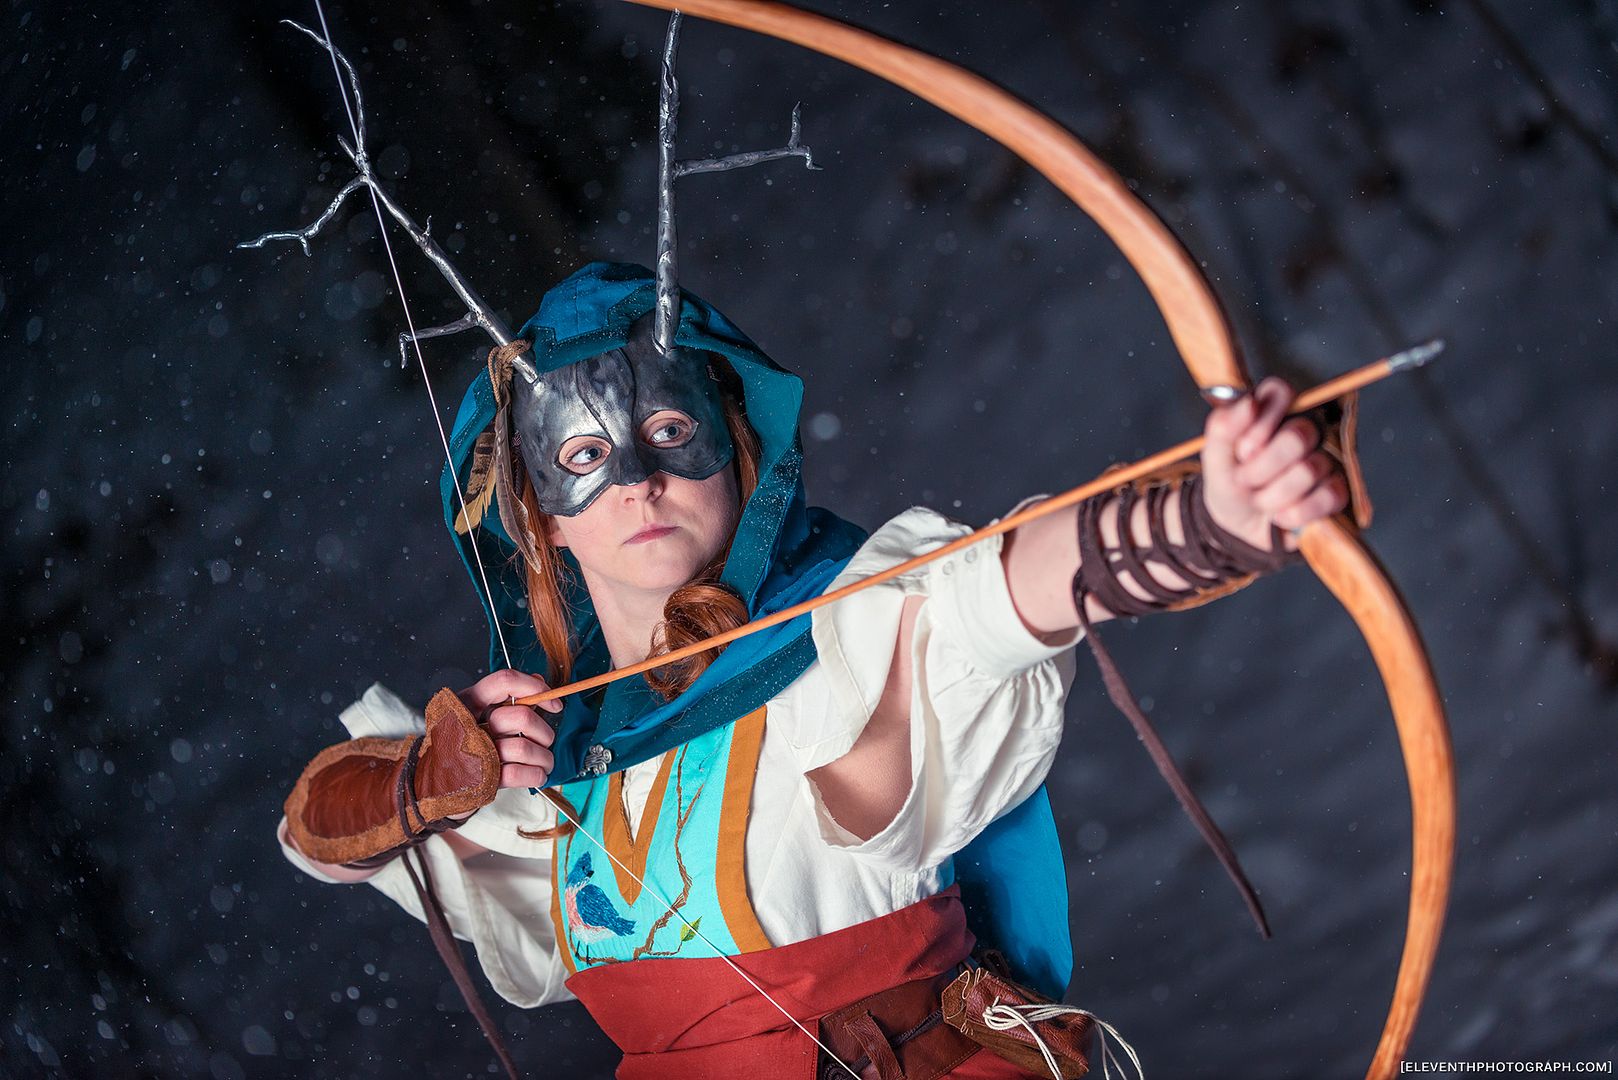
Thanks to EleventhPhotograph for taking some nice shots of me at Costume Con!

I must say, I am very inexperienced at working with leather, but I daresay I learned a great deal on this project! Namely that leather stretches a lot when you try to sew layers together. You can't pin it, but mini bulldog clips work surprisingly well. I suggest picking up a pack from Staples (or any other local office  supply store) if you are going to do this, its worth it. I have red and green ones! :) Also get a leather needle for your sewing machine.

You may notice that there are 2 different colours of leather used in this project; I used the 2 different sides of my main leather (the leather side and the suede side) as well as a matching suede for reinforcement purposes. Any outer detail is done with the suede side of the leather, while the inner reinforcement layers are done in suede.

I started with the bracers. First I patterned my shape in paper, when I was satisfied I cut out 3 for each arm: 1 suede, 1 leather, 1 leather (with the middle cut out).

I sewed the suede and leather layers together, then sewed the fancy outline piece on suede side out.

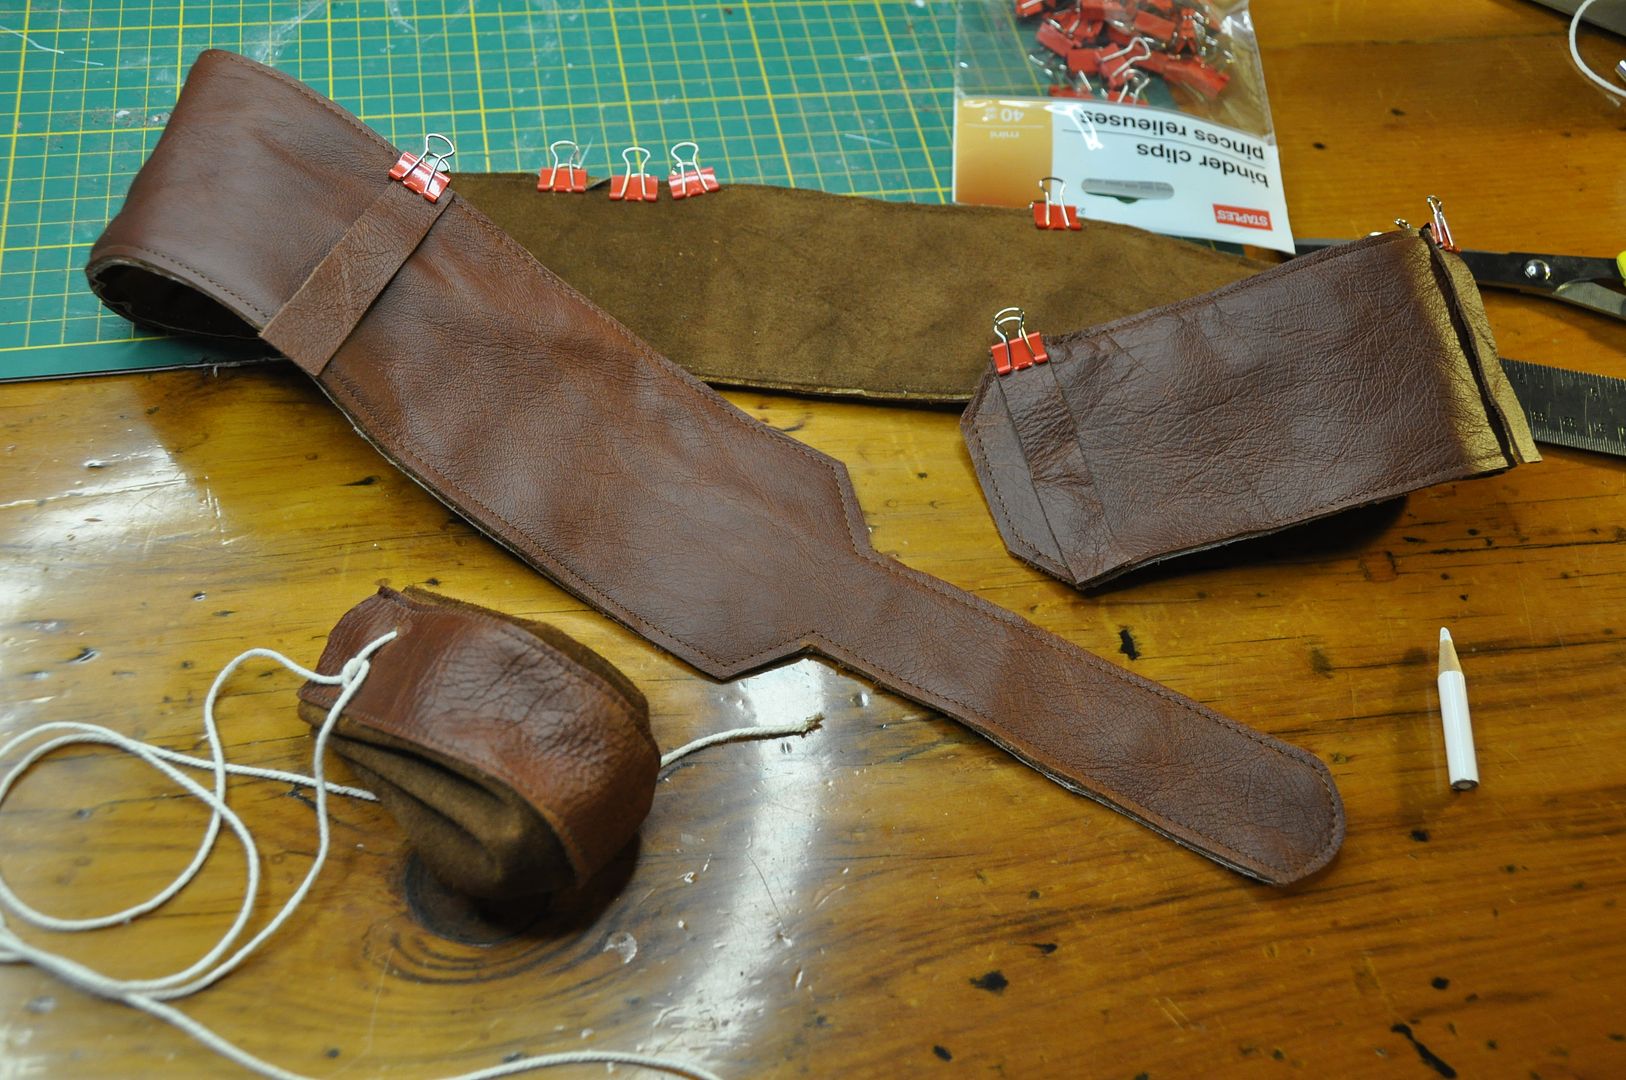
Then I attached the loops for the lacing. It was basically a strip of suede with circles cut out of the middle folded in half. (Above you can see it folded and open) These were sewn on following the top stitching line of the inner part of the topmost detail piece. I added one more loop above where my middle finger would be on the inside so I could take the end of the lace and secure my hand into the bracer. They were designed to go over the top of the hands, and without that loop they would just flap awkwardly. The bracers are strong enough, but still bend easily at the wrists allowing me full range of motion.
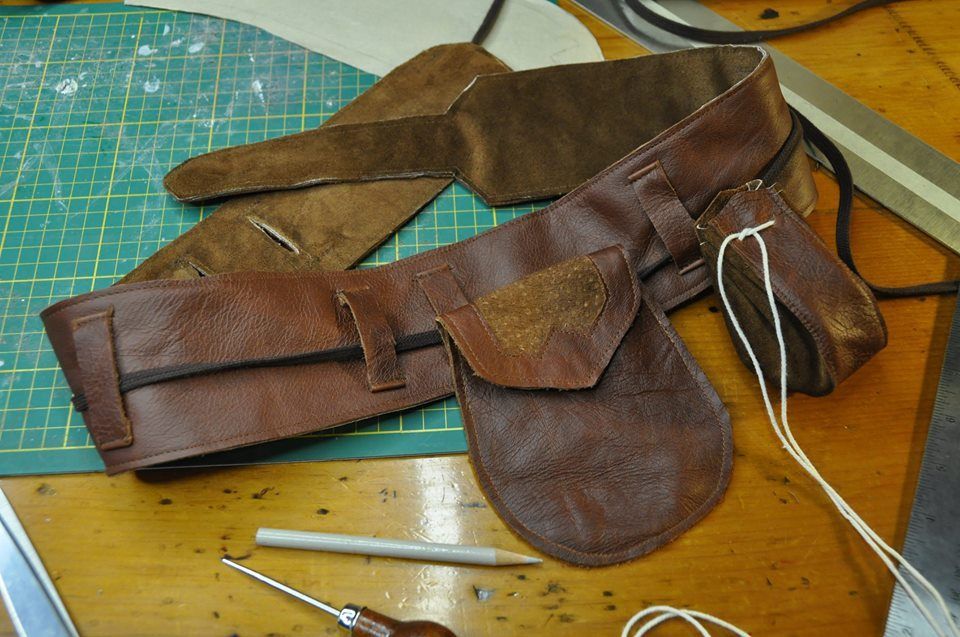
Next I made 2 pouches for the belt. One is a coin purse, the other was for my cellphone. I didn't have any pockets in this garment, so the pouches were both practical from a wearers point of view as well as a design point of view. Meaning most adventuring type characters would need a place to put stuff.

The coin purse was actually based off the dice bag of a friend of mine at D&D. It was made using a strip of leather with an eye shaped piece of suede attached to each side. the suede was pinched and folded evenly along the top edge where I marked and punched holes for the laces. When pulled tight the laces cinch in the top, closing the purse. I attached a loop at the back to hang it off the belt.

The second pouch, or my ye olde cellphone pocket was made by simply plopping my phone down on the leather and drawing a rounded shape slightly bigger than it. I cut 2 pieces like this and attached beltloops to the back piece before sewing them together. Then I made a fancy flap to go over the top.

 The belt itself is both decorative and functional. It had to be strong enough to support the weight of the quiver and pouches while still remaining tight and holding the layers in place at the waist. Like the bracers there is a piece of leather with a piece of suede underneath to give a bit more support. Visually I didn't want any buckles on this costume, I wanted all the closures to be done with ties, because it looks more organic/more handmade. The belt folds under itself and the narrower section is threaded through a slit in the belt.

This is then cinched tight with a tie. On the surface of the belt there are belt loops that hold up the ties. This keeps the pouches and quiver from shifting positions. The tie is simply 4 different laces sewn together at each end with a triangle of leather. There are a couple feathers hanging off the end as a detail.

The quiver itself was a big rectangle with a "cuff" added at the top to make it a little more fancy.

Attached to the main piece on the inside is a thin strip of styrene plastic (leftover from Asuna) to provide reinforcement and help the quiver keep shape when the arrows are removed. I simply sewed a piece of suede over it to attach it. The stitching is visible on the back of the quiver, but that part is to the inside and is therefore unnoticeable. (Though there are 3 pieces pictured I only ended up putting in 1!) I was going to make the quiver lined with an extra layer of suede to hide the reinforcement, but that didn't work well so I scrapped that bit.

I used bulldog clips to "pin" the quiver into it's finished shape and marked where the beltloops needed to go. I attached the beltloops to the back of the quiver, then stitched the bottom in, before closing up the side seam.

In the original design, the quiver was actually supposed to go at the shoulder, but with the straps, embroidered panel and cape that area was going to be too busy. Also I didn't want the straps to tug on any of the embroidery. So it was a last minute decision to move it to the hip, but was worried I would get called out on this for inaccuracy because I know next to nothing about archery. Incidentally I was told by a fellow costumer in the greenroom that it was actually a perfectly accepted location for the quiver (apparently used by Olympic athletes, or so I was told) more logical than a back quiver in certain circumstances. Woo!

Saturday, July 5, 2014

Forest Guardian - Pants, Shirt & Cape

[Edit: New photos added from Feb 2015 shoot with EleventhPhotograph!]

Welcome to my first look at the Forest Guardian! I thought we should start with the pants, shirt and cape because in terms of the actual build of the costume that's where I started. I think at this point it has been a full year since I started the concept sketches for this costume, wow! This is my first real original design costume and I'm pretty proud of it. 
I wore most of the costume to CostumeCon 32, excluding the embroidered panel, which I was sadly unable to finish in time. The costume was completed for Anime North, and I competed it in the Masquerade. I won an award for my embroidery in the Master Division, which I am super proud of! This was my entry.

I still need to do a photoshoot of this costume, hopefully that will happen sometime in the near future. I have been location scouting in the forest behind my house. :P 

I started the design concept of this last summer. I had bought my badge for CostumeCon 32 at Anime North last year, so I knew I wanted to make something original. There were several different designs leading up to this one, several different versions before I arrived at this one. I developed the design over the course of the summer and got started on the project after returning from Otakon. 

 The hardest part once I had the shapes down was colourizing everything. I knew I wanted the character to have auburn hair and that the shirt was going to be off-white but other than that I wasn't sure. I didn't even know if I wanted to make the mask look like metal or clay & bone. There were several different coloured versions before I settled on this one (there was even one where the animals on the embroidered panel were to be done as silver silhouettes). It ended up being quite colourful in the end, I was sort of going for ceremonial garb when I first started drawing it and ultimately I think the colour suits the design. Even then there have been several changes that developed over the course of the build since I did this "final" sketch. I purposefully designed the under clothing for this costume to be quite simple, as I wanted the focus to be on the embroidered panel and accessories. 

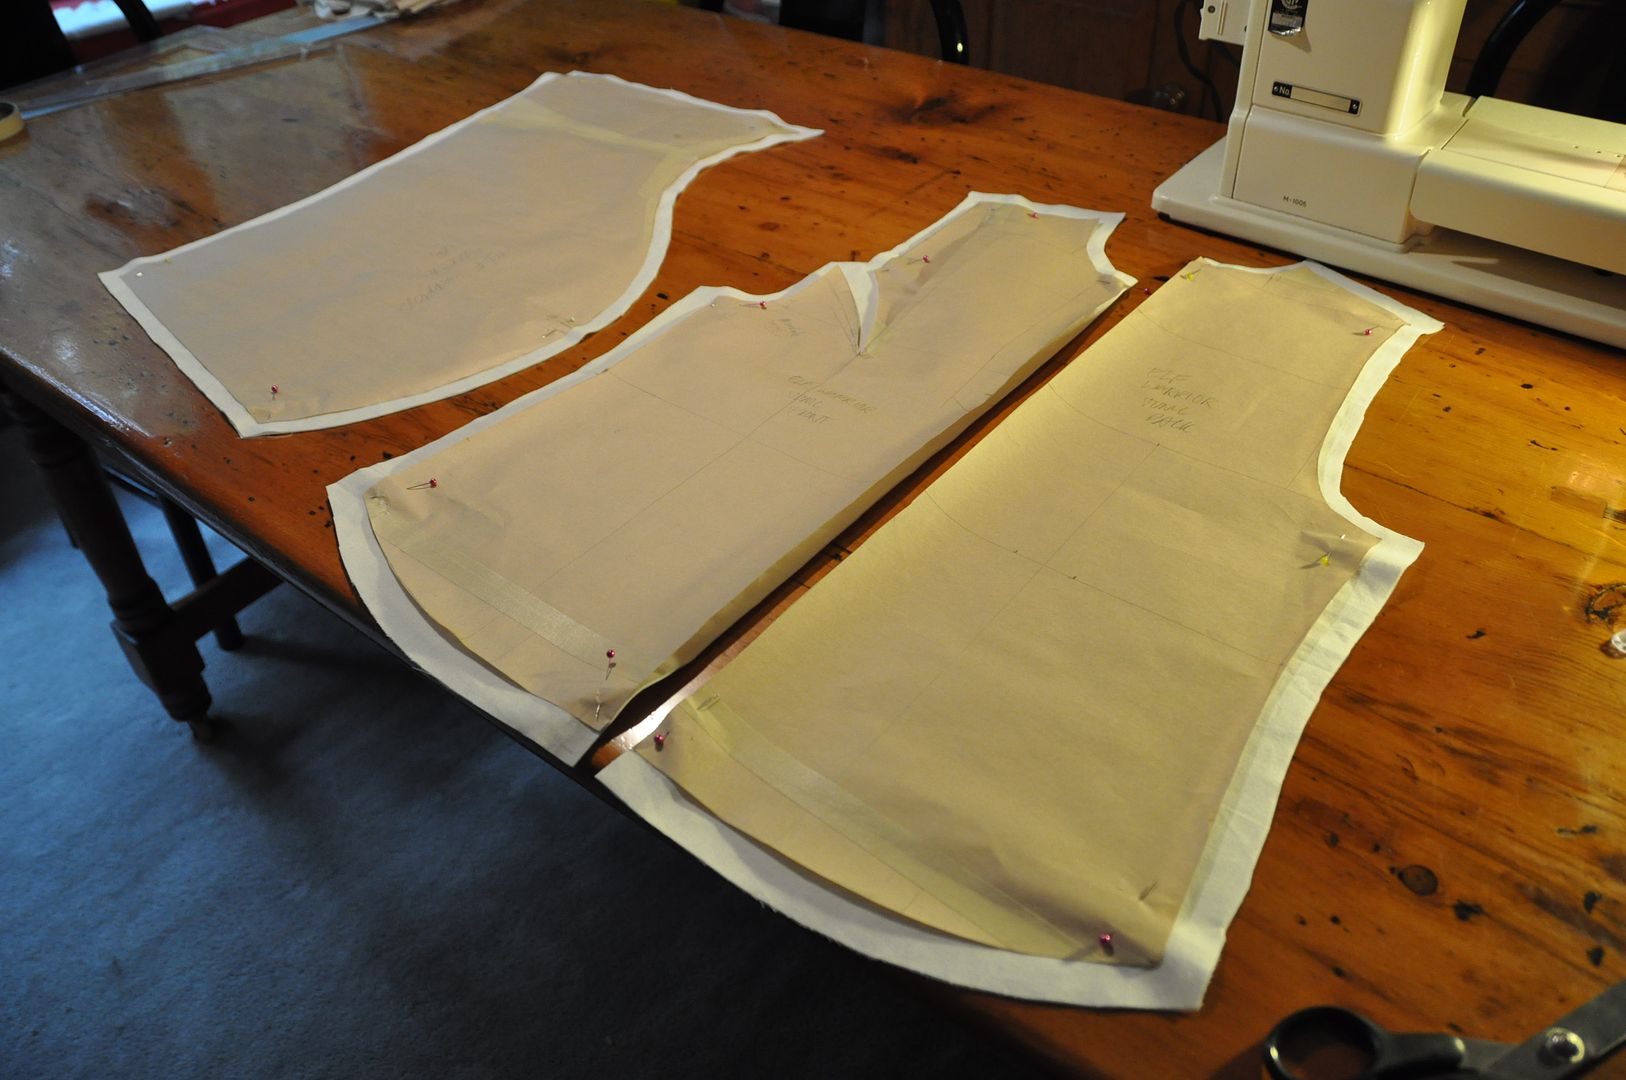
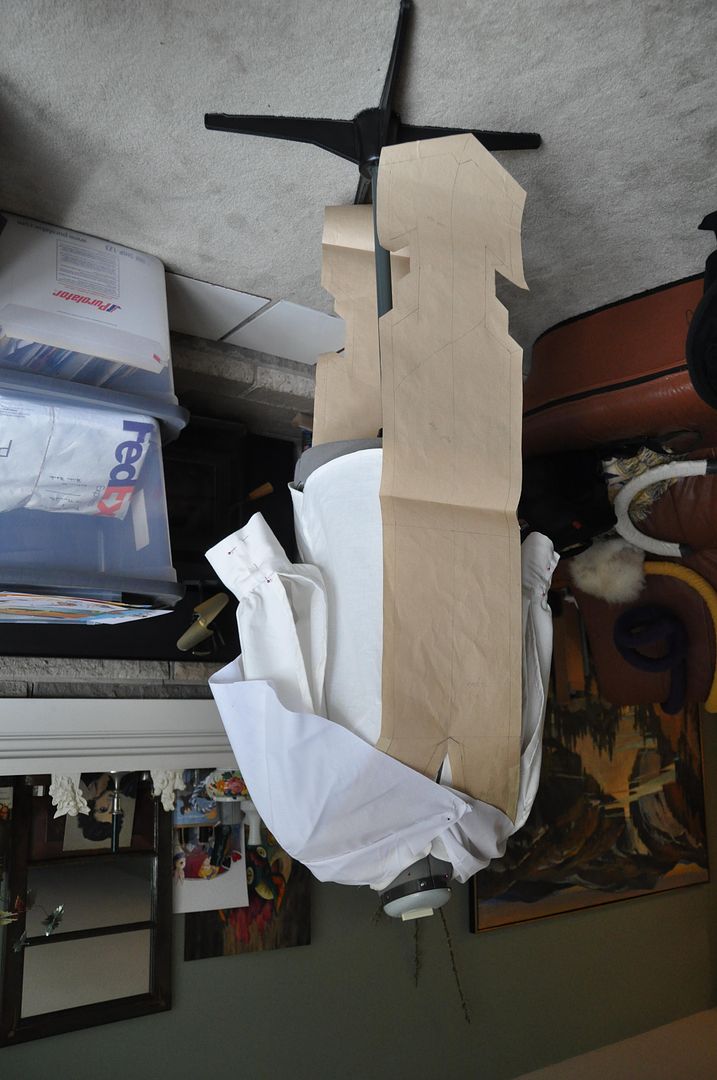
 I started by patterning and mocking up the shirt. The shirt was designed to be a looser fit, with flowy sleeves that would allow easy/unrestricted movement. The shirt itself only has 2 darts at the armhole to the bust, the waist get cinched in by the belt. The sleeve pattern had required some adjustments initially because unlike a regular sleeve this had a slit in the front. So I had to move the seam from the bottom to the front.
 
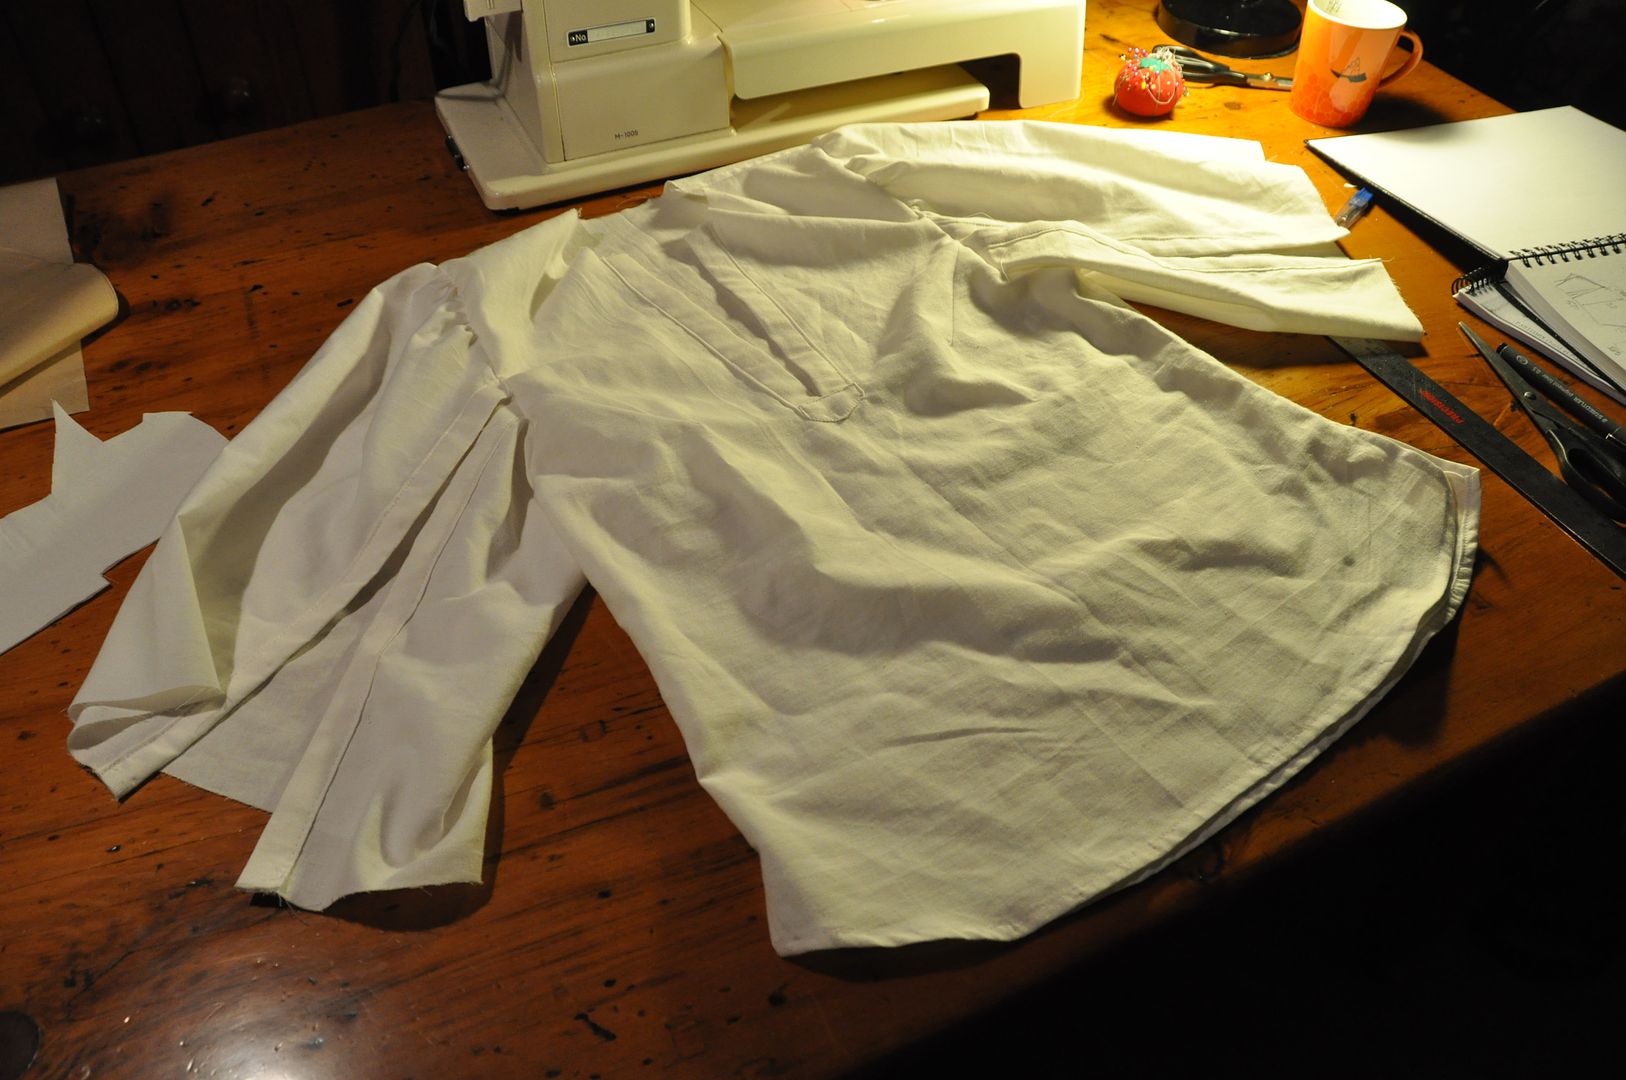
After doing a mockup, I cut and sewed the pieces. I closed the darts and then sewed the front and back pieces together, leaving a little slit open at the bottom of each side seam. I cut the slit open at the front and finished off the edges with a strip I made out of the same fabric. This would reinforce the fabric when I added the laces later.
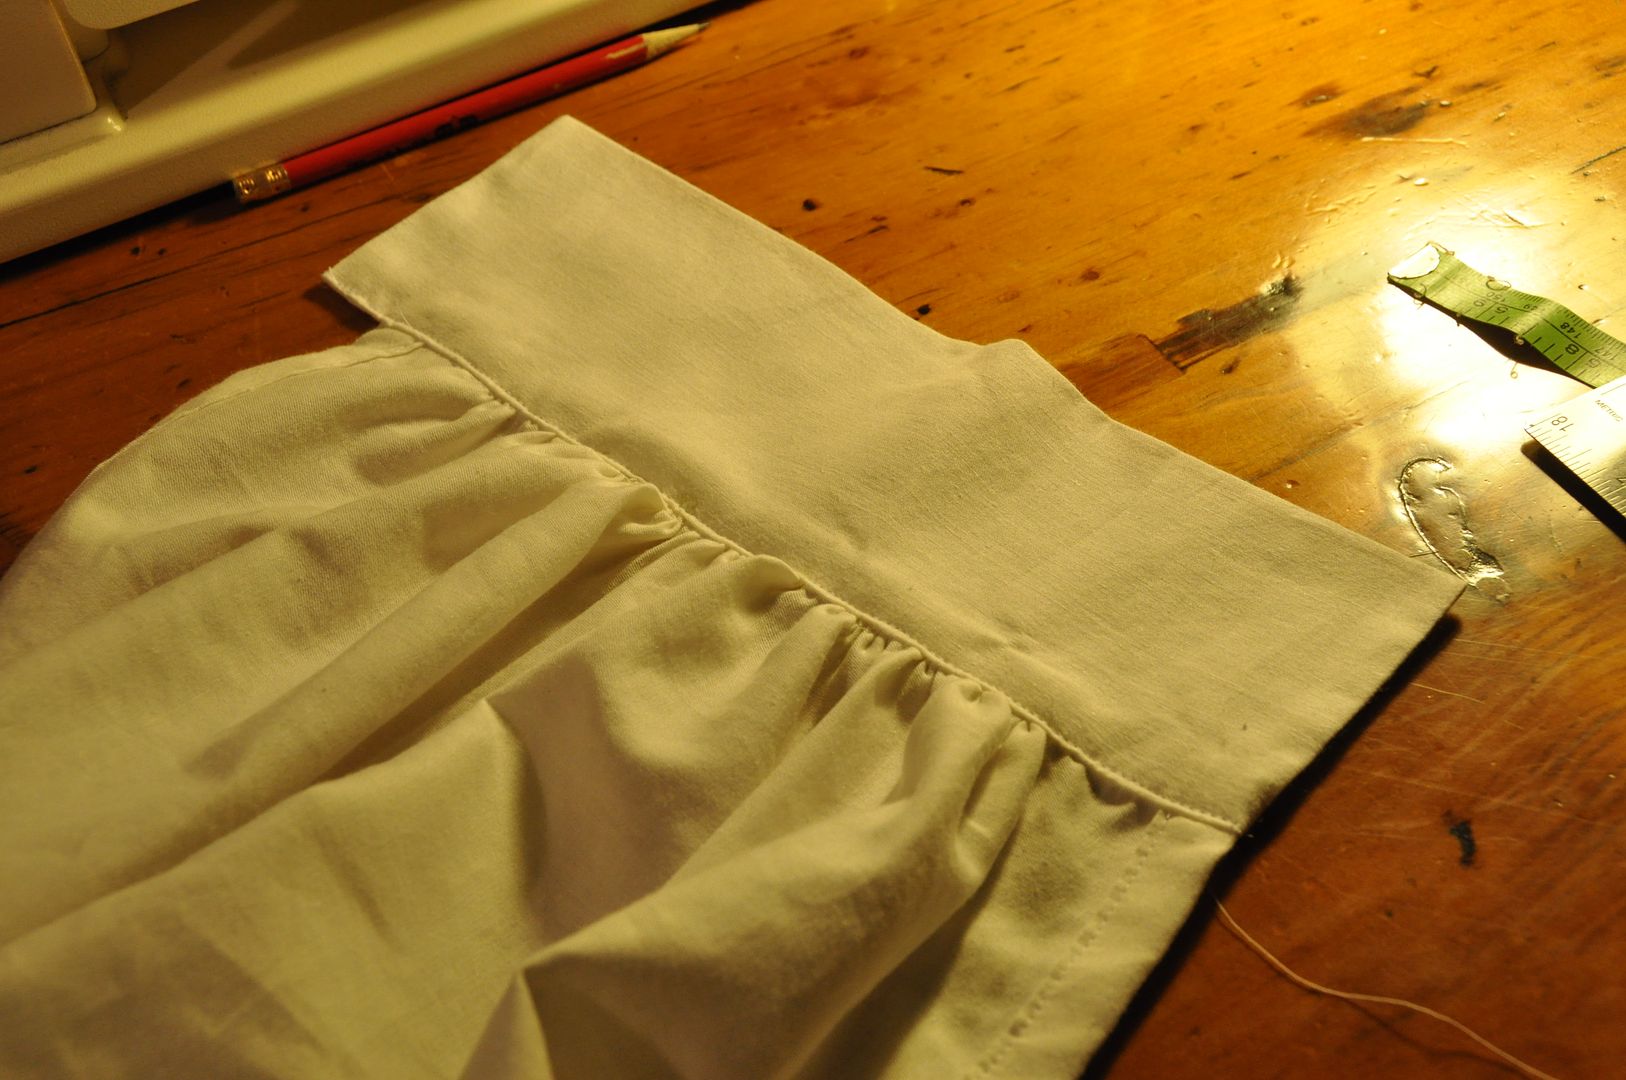
I then sewed on the collar and gathered the sleeves. Then I finished/reinforced the edges of the sleeve opening. Originally I had intended for the sleeves to be laced shut, but I decided I really liked the look of them open and left them that way.

 I hemmed the bottom of the shirt.
Then I gathered the edge of the sleeve and added the cuffs to the sleeve. Later I put 3 buttons & buttonholes on each to close them.I also added in the holes on the front closure for the laces. These were done in the same way as the button holes rather than with grommets.
 Once the shirt was done I began work on the cape.


The cape itself had originally been designed to be longer, but after much consideration I felt it would detract from the embroidered panel so I made it a short cape, but still kept the large hood. I am pretty inexperienced patterning hoods, and this was my first cape. It took a few tries to get it to look how I wanted it. The only advice I can give is make a mockup!
The pattern pieces for this look pretty odd!

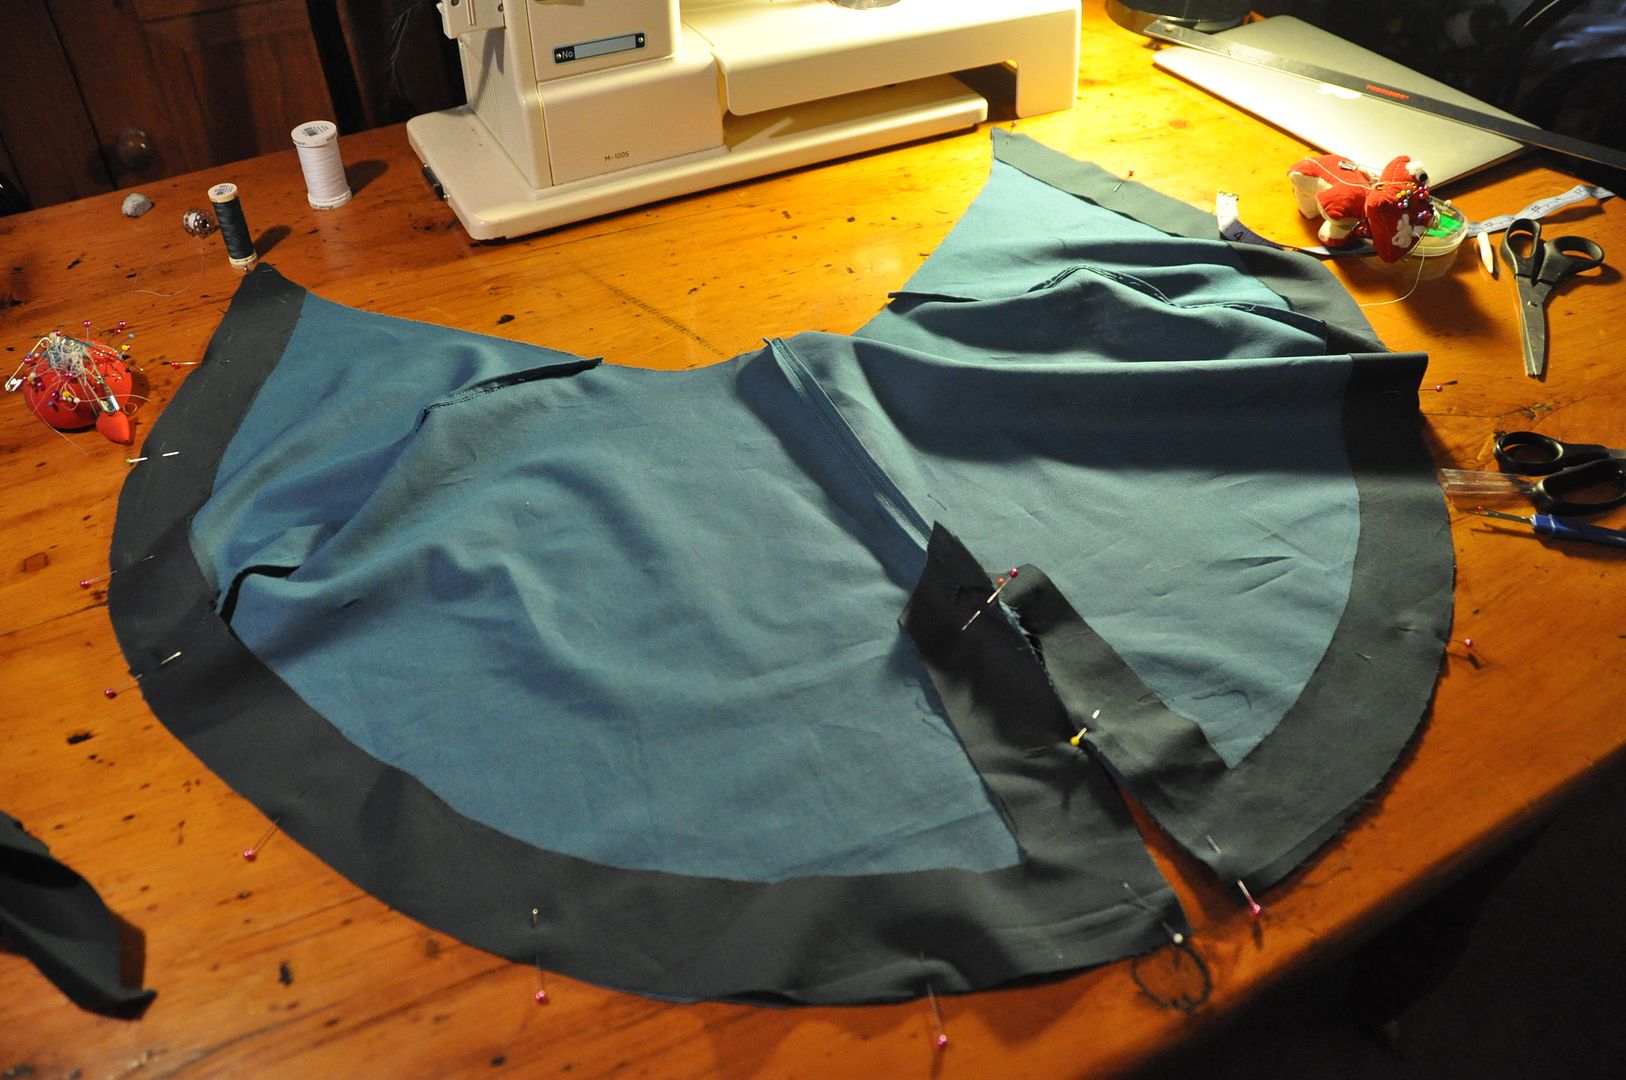
My main design feature on the hood was the two slots for the antlers to stick through. It was one of the design elements from the initial concept sketch that came all the way through to the end. I had to make a reinforced edge piece that went all the way around the edge of the hood and the hem of the cape. It had to conform to all the odd angles and contours. It is made of the same fabric as the hood lining.

I started by sewing the sides and center seams on the hood, hood-lining and cape pieces. For the hood I attached the trim piece to the lining and bagged it out. Then I slotted the outer fabric under the trim and pinned it in place. I carefully measured and folded under the raw edges then top stitched the trim in place.


For the main part of the cape I bagged out the trim, having stitched it directly to the inside of the outer fabric. I folded it to the outside and finished the raw edges in the same way, top stitching it all in place. This way the raw edges are all hidden inside the trim, leaving for a clean look on the inside and outside!

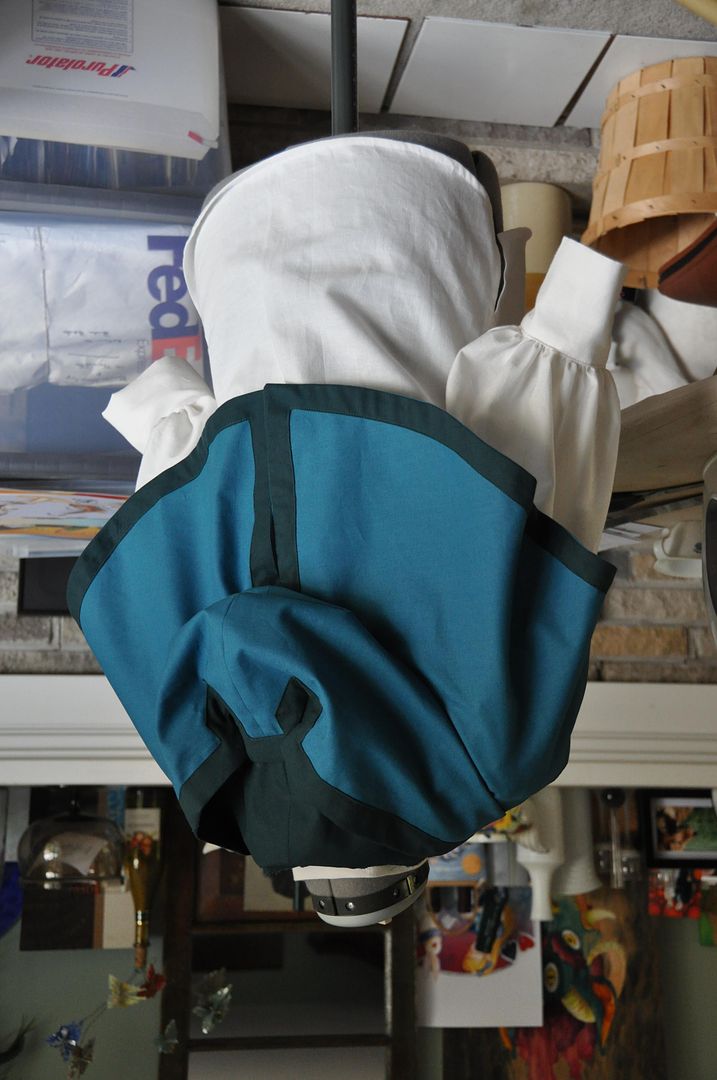
You can see how the hood collapses in on itself. Which was frustrating as even when worn over the mask the edges of the antler slots just drooped. I later re-opened the seam and added in a wire to the hood, which kept it rigid and held the desired shape perfectly!

The red wrap around the stomach is simply a long strip of fabric that is wider at the ends (narrower in the middle) bagged out to finish the edges. It has velcro to close it, which is hidden by the belt. (The belt pictured here is actually from my Presea costume, which I was using when trying things on until I made the actual one.)

The pants are actually based on a pattern I had modified for a costume I started but never finished. (Jack Frost) I modified my modified pattern to get the pants I made for this costume. Haha

To make the leg wider I opened up the front of each pant leg and added in a pleat on each. I flared each pant leg out more as well. This way, it still fit nicely at the butt, but the legs would pouffe out a bit.

When I was satisfied with the changes to the pattern I cut and sewed the pieces.  I started with the pleats on the front, then the side seams. Then I partially closed the crotch seam and finished the inner seams.
Next I added my waistband. The pants front closure was a bit tricky. I decided I wanted laces rather than doing a fly-front... even though it isn't even visible, I wanted authenticity. hahaha I had to reinforce the edges where I put the holes, and add a modestly panel so you can't see my underwear through the gaps in the lacing. But in the end it worked well.

Lastly I finished the cuffs by cinching them and then adding on a strip of fabric that I had closed to be a circle.
I can definitely say that the base outfit for this costume is very comfortable.