Showing posts with label lace. Show all posts

Tuesday, January 7, 2014

Raglin Lace Sleeve Shirt


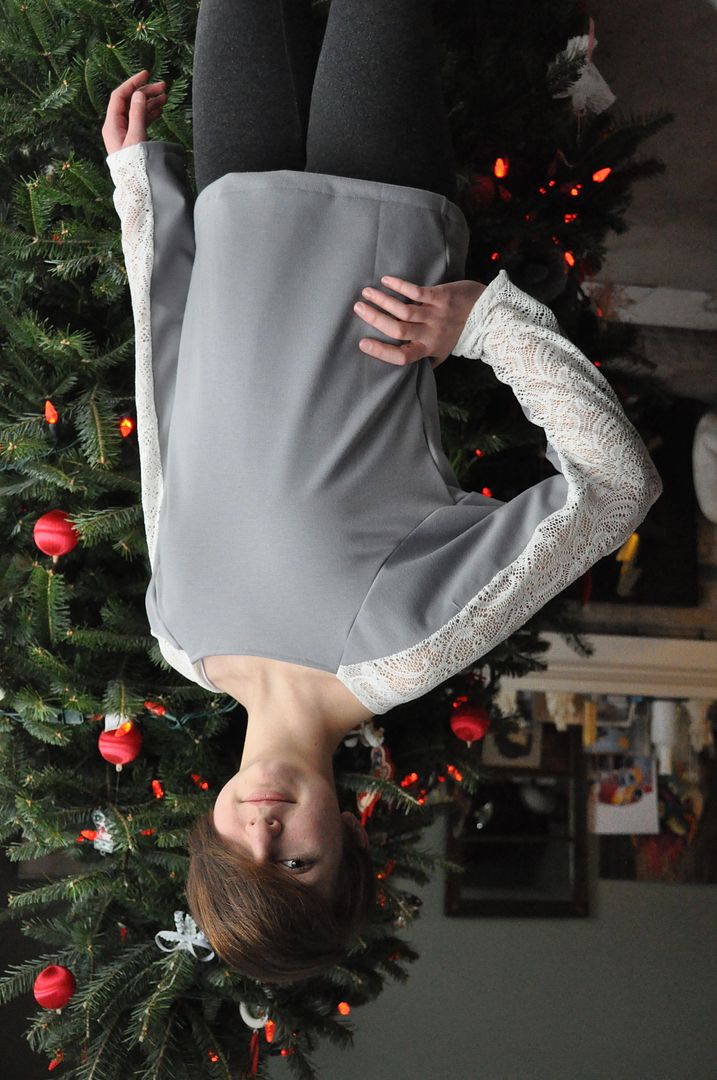
This is a Christmas gift I made for my sister. It is a raglin sleeve shirt, with lacy see-through sections. :D It's made of a soft stretch fabric.
It was patterned off an existing shirt of hers that was also a raglin style sleeve. The sleeve width was simply modified to be wider and also have the lace stripe come down the top.

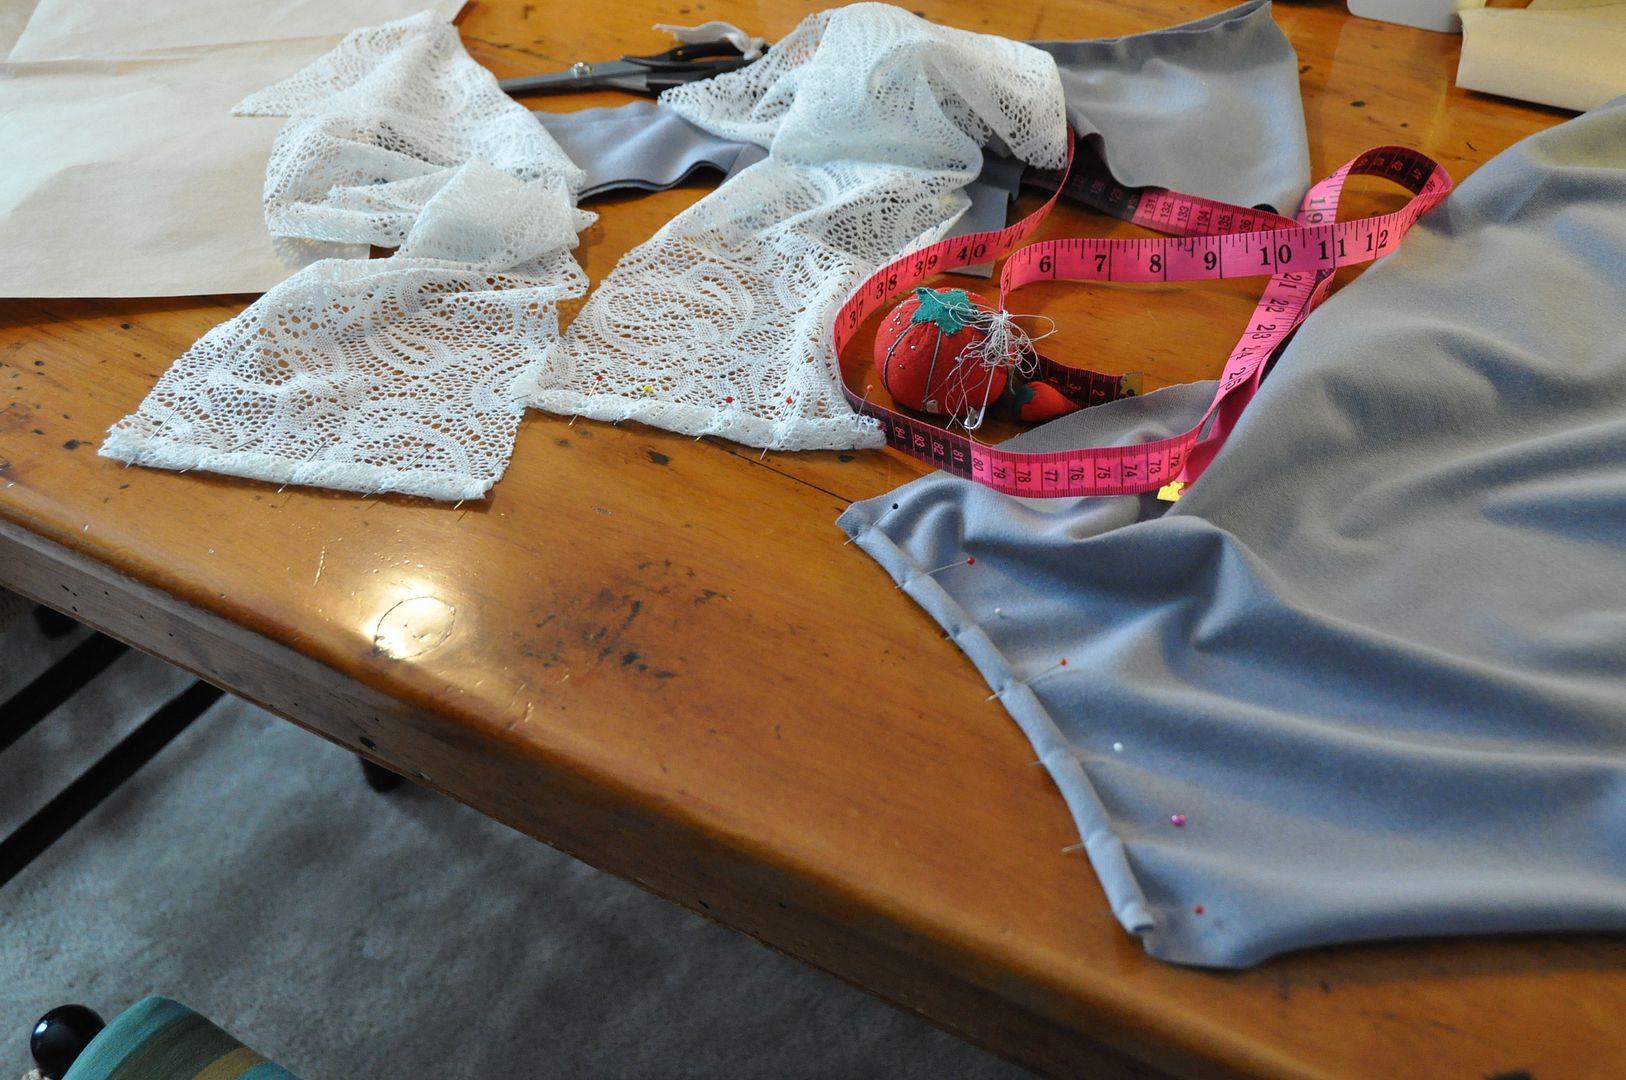
I started by cutting out the pieces. Then I finished the edges around the neck hole. This was done with a simple roll-over.
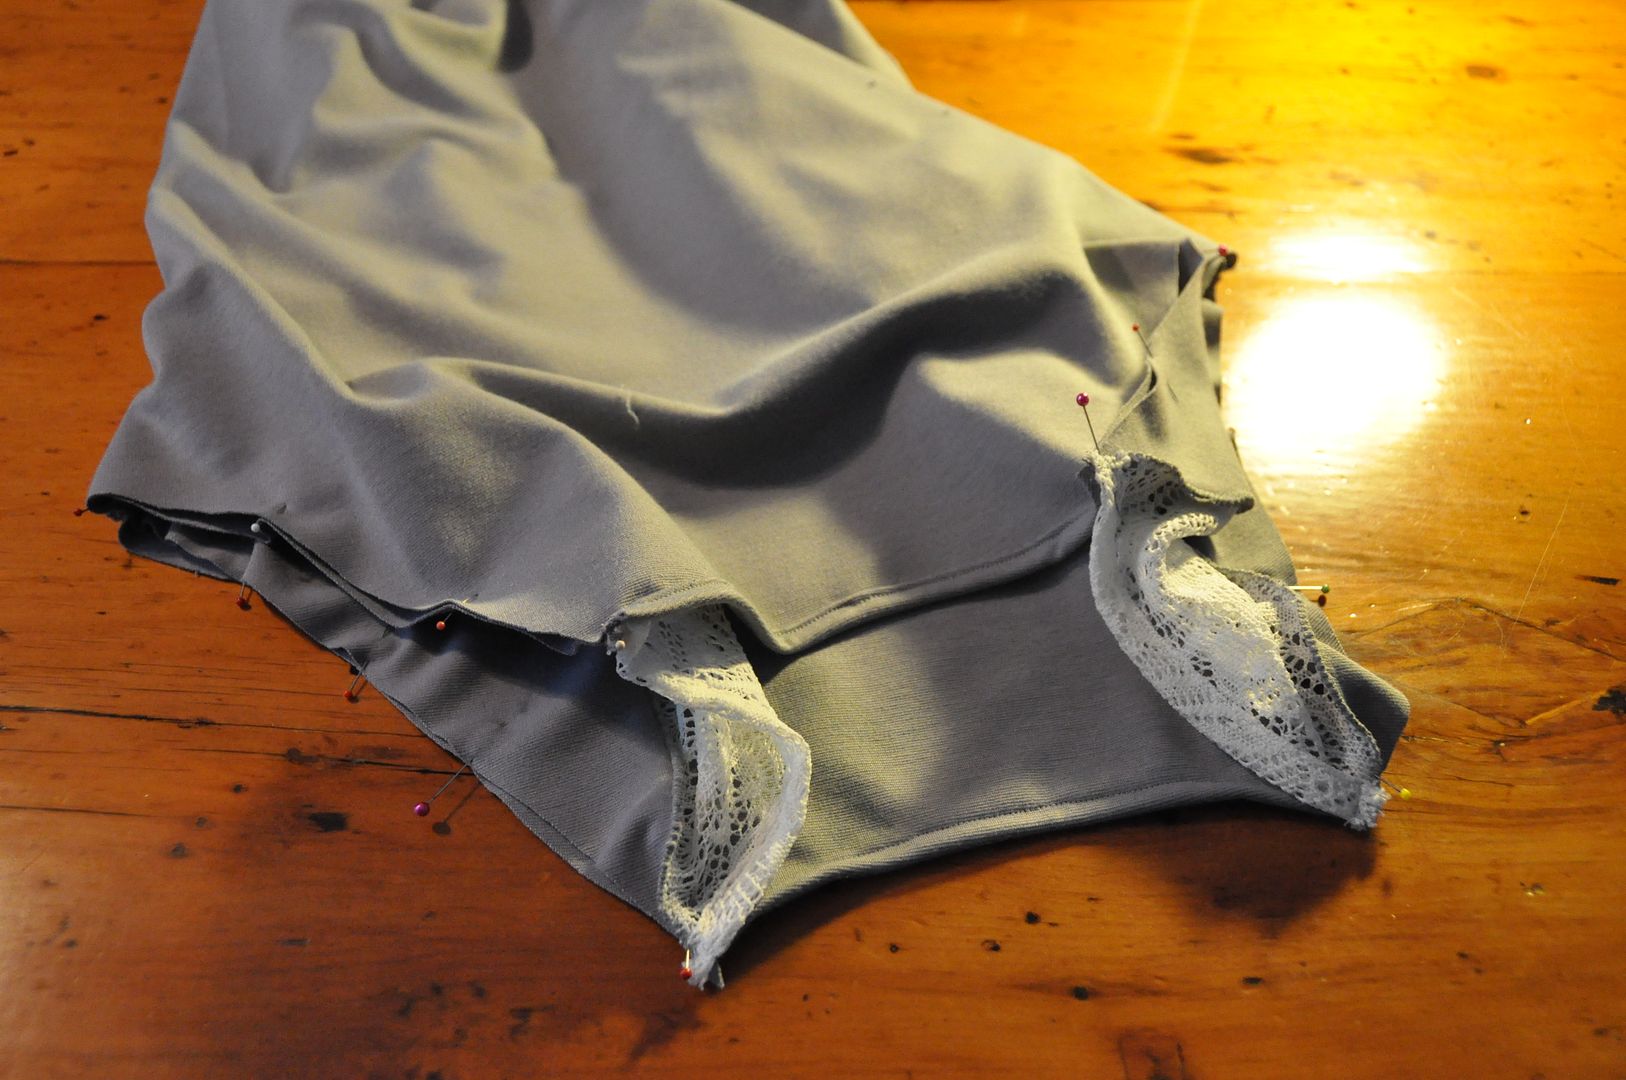
I sewed the sleeve pieces together and attached them to the shirt. Then I finished the inside seams. Lastly I hemmed the bottom of the shirt and the sleeves.

Tuesday, September 18, 2012

Alice in Wonderland - Apron & Accessories

Here's the last post on my Alice in Wonderland costume! ;D

...Which I thought was a perfectly recognizable character, but one or two people asked me if I was some character from an obscure anime's alternate outfit from another dimension... No. I really wish I knew what character and anime they were referring to that I so uncannily resemble. Really.

But making Alice was a good learning experience, and a joy to wear! 

If you want to know how I made the dress go here. If you want to see how I made the petticoats go here.

 Once again, you can see the whole photoshoot here!
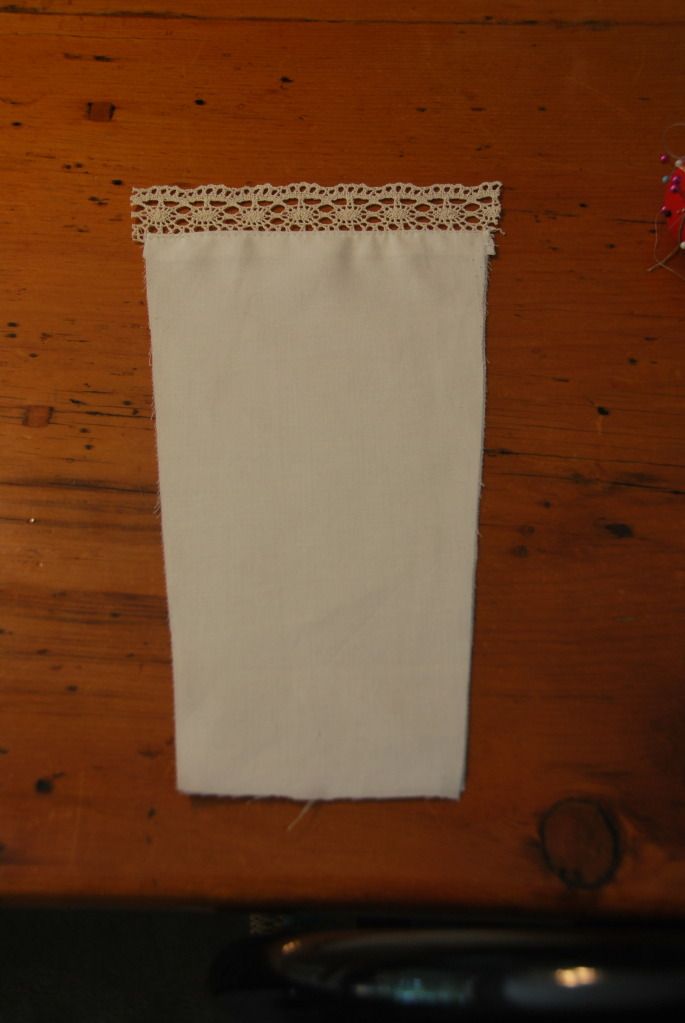
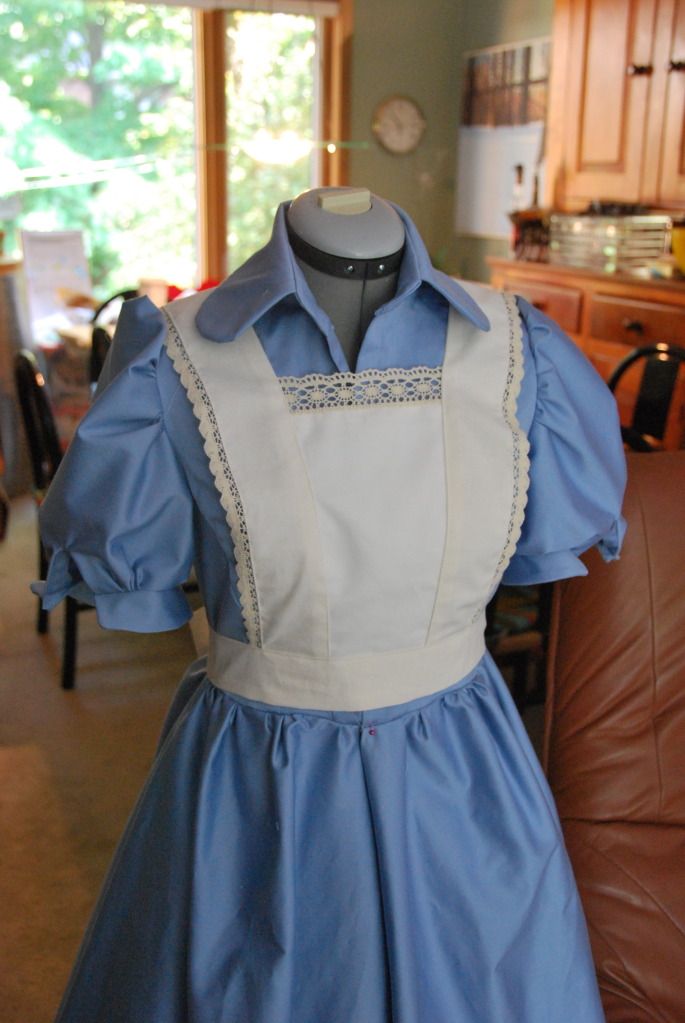
The apron was by far the easiest piece to construct for this whole costume.

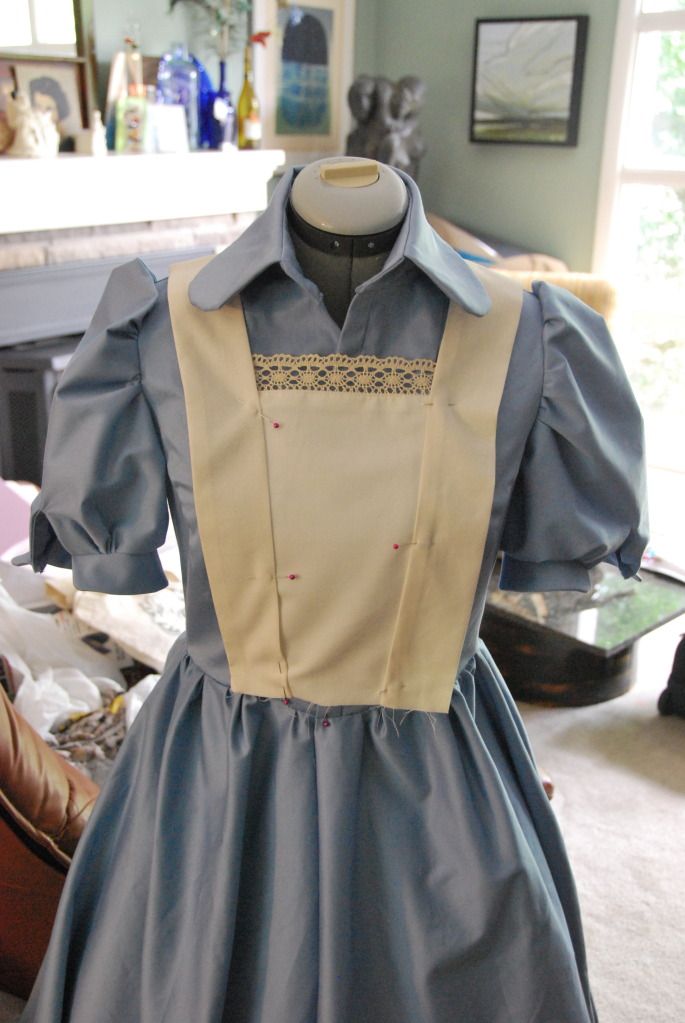
I started with the front panel: a piece of fabric that I double layered--because it was a tad see-through. I attached the the 2 pieces at the top and folded it over to get a nice finished edge. I attached a piece of lace trim to the top edge. I used a zig-zag stitch to finish off the remaining edges.

Then I made 2 straps that would go over the shoulders on a slight angle. These were tubes that were then turned right way out and pressed flat. I had to make sure they would be long enough to go all the way from the waistband at the front to attach to the waistband at the back.


I sewed the straps to the front panel, and then attached a lace trim to the straps.

I made another really long tube and flattened it. This was the waistband  that would tie at the back. I wanted the bow to be nice and long.

This was attached to the front panel first, then I measured and made sure the straps were even before attaching them at the back.

Then I finished off the ends of the bow.

Once the top part was done I set about making the bottom. The bottom piece is 2 rectangles sewed together and turned inside out to finish the edge, to which I attached more lace trim. The top edge of the rectangle was left open to do this. I gathered the top with a basting stitch to create a ruffle effect and sewed it to the waistband.
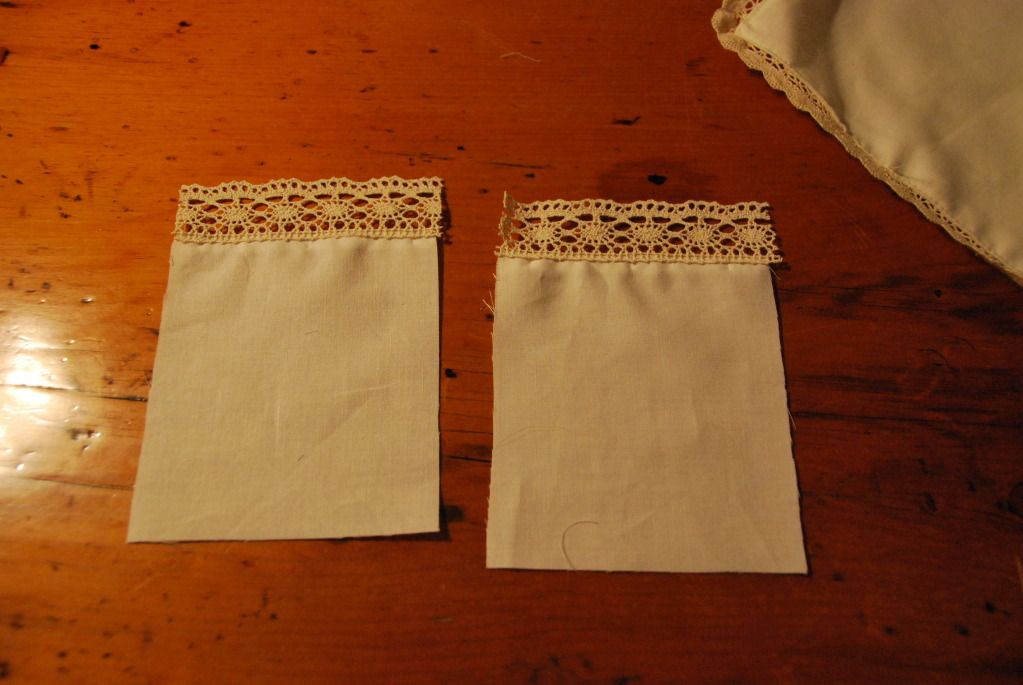
Pockets were added last. They were just rectangles with the edges finished and turned over that were superficially attached to the bottom of the apron. And of course: more lace trim. ;D

Now let's talk accessories! These are of course the last thing on the priority list when making a costume, but help to really complete the overall effect. As you may know, I have an unhealthy obsession with pocket watches, so naturally I equipped my Alice with one from my collection. I picked up the 'drink me' bottle at Otakon. So cute! :D

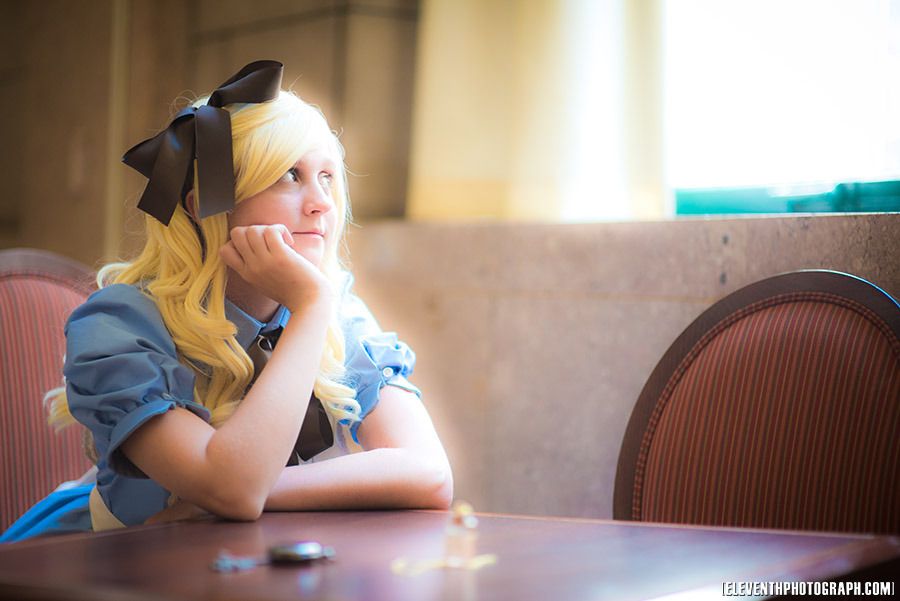
For the ribbons, worn in the hair and at the collar, I chose to go with a dark brown as opposed to black, because I thought it gave a softer, more natural look than a harsh black. I picked those up at Sussman's Bridal Accessories on Queen, which is my favourite place to buy lace trim, ribbon and feathers because they have such a good selection.

The shoes were a last minute purchase. Shoes are always the most difficult part of cosplay. Decent shoes can be pricey, and the perfect shoes can be near impossible to find. I decided to pick up a pair of plain black flats at Ardene. Are they comfortable? No. Are they good quality? Hell no. But do they do their job? Yes.

Ardene has a really good selection of cheap women's shoes (flats, lace-ups, etc.), and if you are looking for something for cosplay that you are either going to destroy, modify or only wear for the weekend it makes sense to your wallet to buy something cheap. If you want something that will last a long time, these probably won't be the best for the job. (Unless you buy multiple back-ups on a two-fer deal). The best location I know of in Toronto is the one on Queen as it has the largest selection of their shoes I've seen, in pretty much every colour.

The tights were also pick up for cheap downtown. But I really need to invest in some better quality ones as I totally put a hole in them on the first wear... :/
The last touch is the wig. After much deliberation I picked this colour of blonde, although it was not my first choice (which was sold out). I also decided on curly as opposed to straight hair because I decided it would look best.

This wig is actually exactly the same as the one I wore for my Steampunk Lolita, the only difference is the colour.

The reason they look different is the styling. I brushed the bangs to the opposite side, and took sections of the hair from the front and pinned them back before tying the ribbon. This made it look like there were more curls higher up at the sides.

Thanks for reading my Alice posts! Overall this costume was fun to make and fun to wear. It was refreshing to do my own take on Alice. I received many compliments. I would say this costume was best received at Otakuthon. ;D Much obliged Quebec! Thanks again to Mike for the awesome photoshoot, you guys should definitely check out his cosplay gallery, the pictures--and of course the costumes--are awesome!

Alice will probably make a few more con appearances next season. ;D

Tuesday, September 11, 2012

Alice in Wonderland - Petticoats

My second part of my Alice in Wonderland costume.

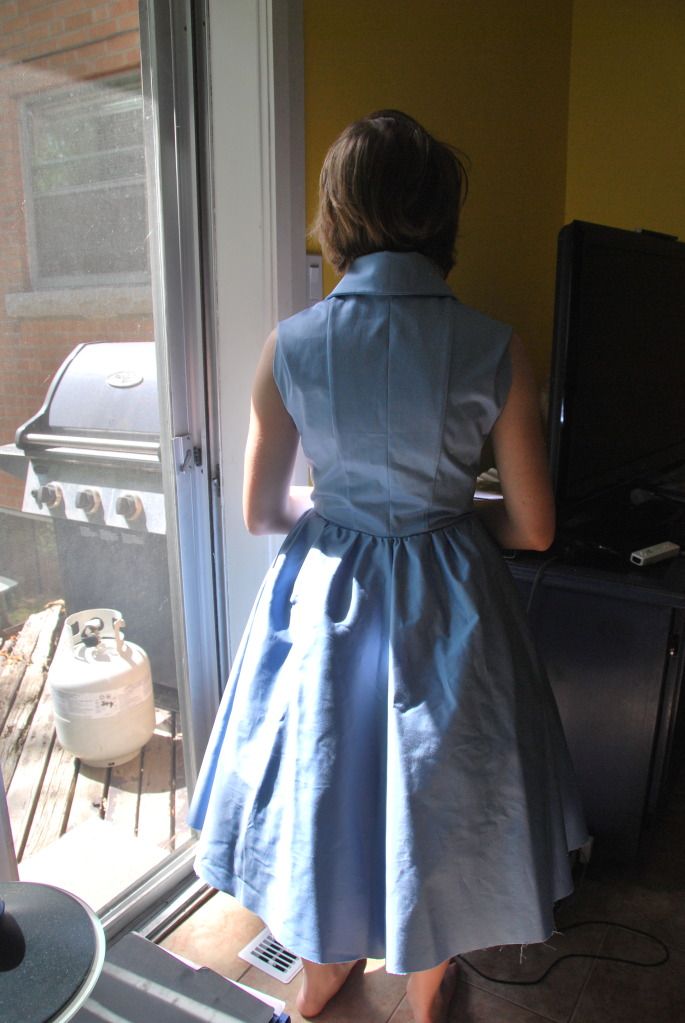
Click here to see how I made the dress.

Go here for the photoshoot. ;D

I knew when I started the project that this dress would require a petticoat in order to achieve the volume I desired for the skirt.

So I looked online for a tutorial on how to make a petticoat. This is the one I found and it was super helpful. :D

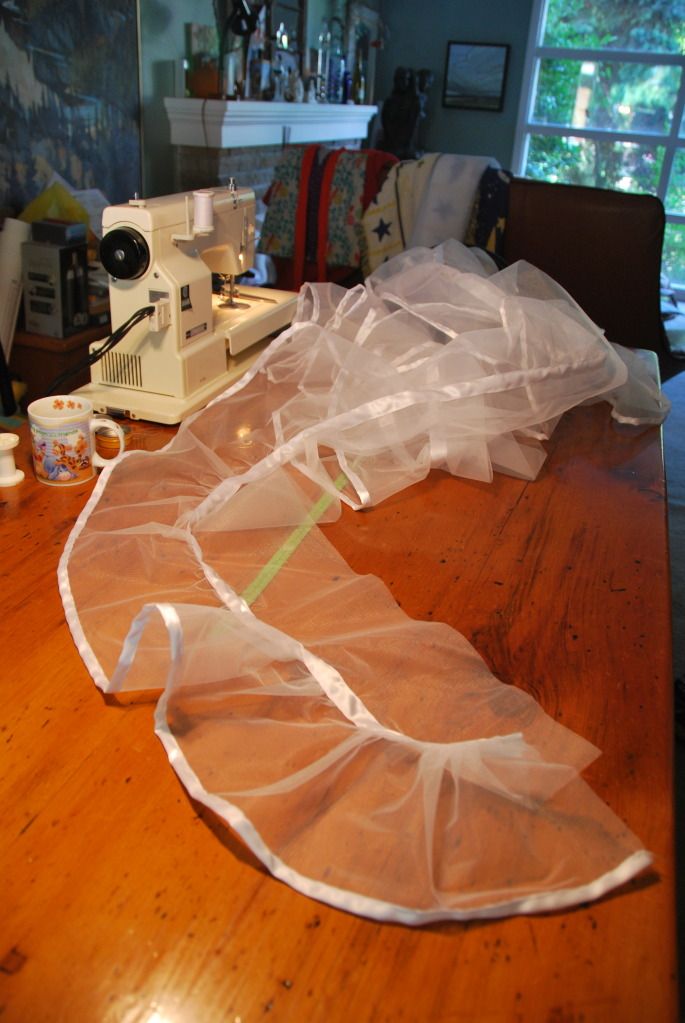
Building a petticoat is like making a layer cake... lots of fluff. :D
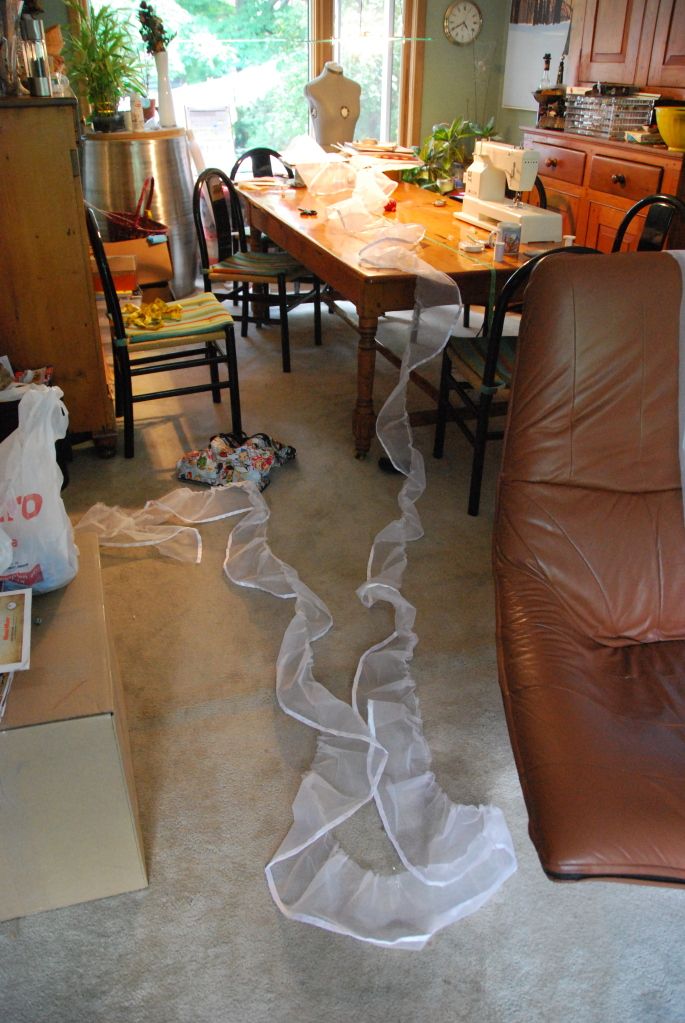
I went to the closing sale of my nearest fabricland and bought their last 8 meters of crinoline. Obviously, I didn't need that much for this particular project, but it was in deep discounts at that point and I do plan on making more costumes with various petticoats in the future. Also, it comes in handy to have that length of fabric when making petticoats as you need to cut several super long strips of fabric.

The other thing you need for this is ribbon. It makes finishing off all the seams way easier. Seriously.


The first thing you need to do is decide how many tiers you want your petticoat to have. I decided on 4. Then you need to decide how long you want it to be. I made mine 23" long so it would fall an inch short of the dress's hem line.

I added 1/2" seam allowance in to attach each tier to one another. Which is a total of 3". In the long run, since the petticoat isn't visible it doesn't really matter if the layers aren't exactly even. The easiest way of adding in the seam allowance  so you can just cut all the layers to the same size is to add your seam allowances to the total length and then divide by the number of layers.

For example: For my 23" petticoat I added the 3" of seam allowance to the total making 26" then divided that by 4 tiers. This means that the strips would be cut to be 6 1/2" wide.

I don't know if there is a scientific way to calculate pouffiness... So I just improvised. From the bottom up the circumference of the tiers were as follows: 12 ft, 9 ft, 6.5 ft and 3 ft. Note: Make sure you separate each set of strips and label them because having to recheck the measurement on a piece that is 12ft long is not exactly preferable.
First finish off the bottom of the petticoat by stitching a folded piece of ribbon over the bottom edge.

Then I used a basting stitch to gather up the tiers so I could sew them to the next layer. You take the tier and evenly gather it to the measurement of the tier you want to sew it to. The unfinished edge of the seam should go on the outside.

I found it easiest to gather it evenly by dividing my fabric strips into equal sections and gathering them all to the same measurement. And also taping a measuring tape to the table.
After that, finish off the seam by sewing a piece of ribbon over the unfinished edge. The ribbon will be on the outside of the petticoat.

It's easiest to finish each seam as you go, as you are less likely to get wrinkles. Once you gather a tier it is more difficult to go back and sew the ribbon on.

Then I sewed the skirt together. I left the top tier open and finished the edge with ribbon.

I made a fold over waistband and sewed it to the top tier, leaving an overlap so I could sew on some velcro.
The dress wasn't as pouffy as I wanted it to be. So I decided to make another, less intense, petticoat to be worn over the first one.
This second one had 2 tiers, and the bottom was made of a quilting cotton finished off with lace trim. It was made long enough so that the lace trim could be seen below the hem of the dress.

Friday, October 28, 2011

High Waisted 'Tree Branch' Skirt

Greetings all! :D Here is my in-depth look for how I made my high-waisted 'tree branch' skirt.

This is an original steampunk-lolita inspired outfit. I tried to make it a bit subtler than some lolitas, less frills, a bit more mature looking. The steampunk elements lie in the jewellery and the colour scheme. Lots of creams and browns.

The skirt I handmade, the top is actually a dress that I bought in London at Lily J. (And I take no credit in making it obviously.)

The wig I bought online for the outfit. It is a very fun wig to wear. Not styled in any way.  I love the curls. :D

I plan on jazzing this costume up a bit for future wears. I plan to add a petticoat to give the skirt more volume and possibly a hat. :D


I started off with the waistband. Taking my measurements and dividing them into 4 equal sections. Then adding the extra inches for seam allowance and dividing the back panel in half, adding enough seam allowance to put in the zipper.

(Notice how I made things easier for myself here: with 5 panels I can have both my zipper not put in on a curve, and no seam in the center front.)

Above are the panels for the skirt sewn together. I wanted to give the skirt volume.

I had limited fabric for this project. Here is my original concept sketch, along with all the math behind this skirt. Because I had such limited amounts of fabric, I had to plan out how I would use the fabric so that I could make the most of it, and not end up short.

I sewed the waist panels together.

I put in a layer of interfacing to stiffen it and allow it to stay up better.

Finishing all my seams...

I did a basting stitch along the wait of the skirt piece, pulling the thread and cinching the fabric until it ruffled. Once it was the right length (matching the bottom of the waistband) I evened it out and tied off the thread.

Because I had the same number of panels on the waistband and skirt pieces, I was able to easily distribute the ruffled fabric by aligning the seams. This helps to ensure symmetry. 

I decided to line the waistband. By creating a matching set of panels in white broadcloth and attaching it to the top.

The backs seam was then closed and a zipper basted into the back before getting machine stitched.

Beauty, eh? >:D

Next the inner lining was tacked down and ditch-stitched into place. 

Neat and tidy! >:D

At the convention, my mum took a few pics. :)


Special thanks to Mike Kowalek of Eleventh Photograph for the awesome photoshoot! Click here for more pics! :D