Showing posts with label ink. Show all posts

Tuesday, November 8, 2016

Leia Rebel Scout - Star Wars VI - Wig

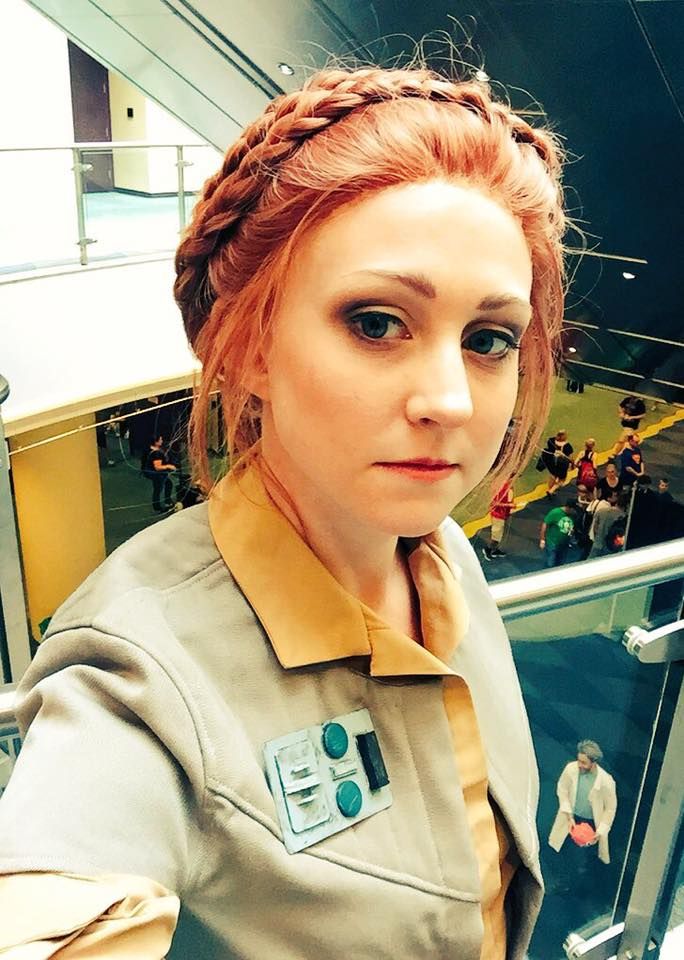
Hey guys! Lets take our first look at my Leia Rebel Scout costume! I won the "Best of Thursday" award at the FanExpo Cosplay Craftsmanship Contest 2016 with this costume.

I've wanted to do something Star Wars for a long time, but I was undecided what costume to do. I was interested in doing Leia, since I enjoy her character a lot (though not as much as my undying love for Han Solo). But as far as costumes go I thought her most iconic outfit is kind of bland and "slave Leia" is really not my kind of costume. I did however find the rebel uniforms pretty neat and really loved those bizarre ponchos they wear in the forest on Endor, so I thought I would do the most un-cosplayed Leia costume there is. Enter, Leia Rebel Scout!

This wig was a bit a leap for me in terms of wig skills--I have never worked with a lace front before this. So I was worried it was going to turn out awfully. My fears were unfounded though! For my first lace-front I thought the application went pretty damn smoothly.  Especially since my boyfriend Blayke was my assistant for the first trial run and we know how he likes to do cosplay (hint it involves using only staples).

But I got quite a few compliments on my wig! Most people were fooled into thinking it was my actual hair and praised my hair braiding wizard skills. If they were fooled, it must have worked? ;D
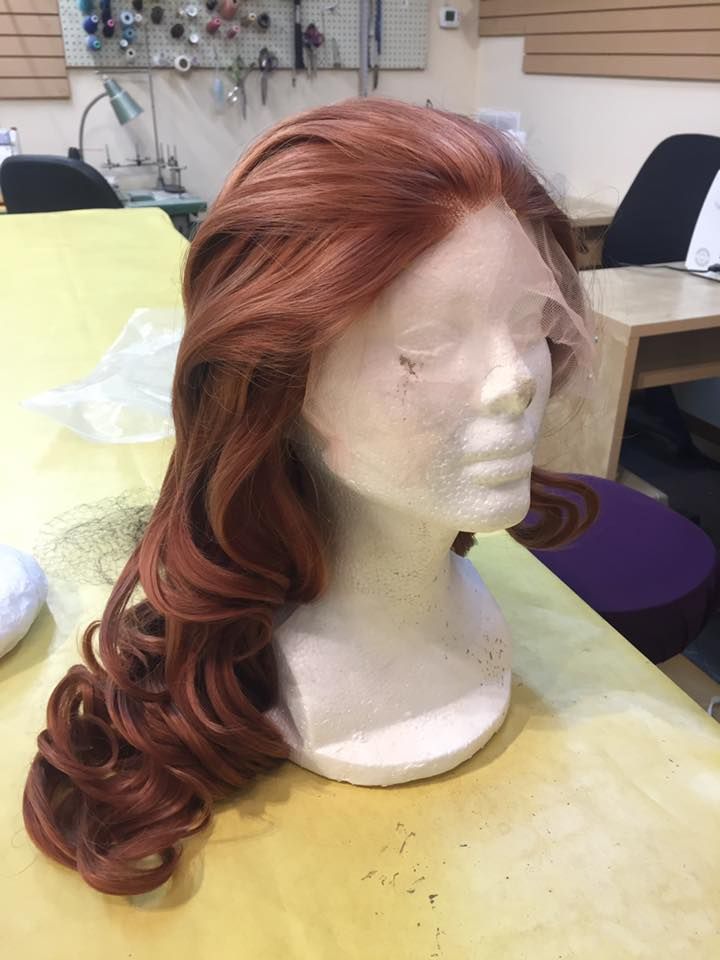
My base wig was from Arda Wigs--because they sell good quality lace-front wigs for cosplay. I got the Matilda in warm light brown. I was a bit disappointed to discover that it looked more ginger than I wanted, so I actually toned down the colour with a brown sharpie before I started styling it. What this means is that I took individual fibers/small bundles and coloured them in, this gave it a more natural look of colour variation that helped to darken it a bit.


This style involved next to no cutting--it was primarily sectioning the hair and braiding it. I sheared off a few strands at the front to create the wisps of hair that hang down at the sides of her face and give a more worn look to the hairstyle--like she has in the Endor scenes.


This style involved next to no cutting--it was primarily sectioning the hair and braiding it. I sheared off a few strands at the front to create the wisps of hair that hang down at the sides of her face and give a more worn look to the hairstyle--like she has in the Endor scenes. I straightened these later because they were a little too curly.

The two braids that come up and over the head start one on each side. As they passed the halfway point hair from the front hairline was french braided in to extend the length. Then they were tucked in and pinned in place.
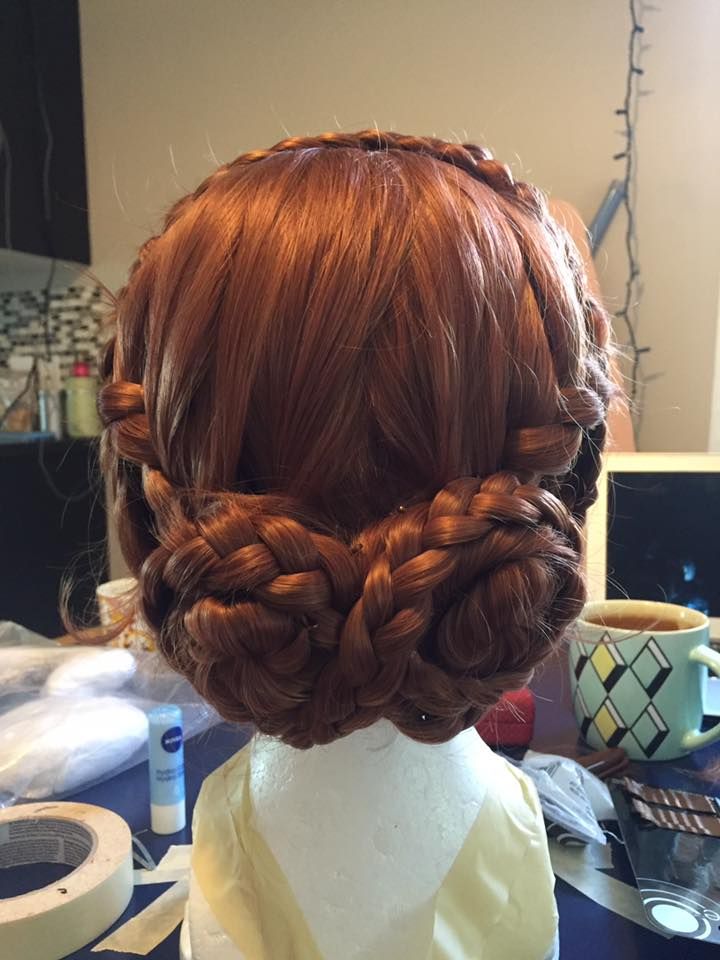
The bun at the back is made up of 6 sections. There are 2 braids that take most of the top section--these were held off to the side at first. I took the next two sections--which are fairly close together at the center back--and twisted them into two small buns. Then I took my next two smaller sections and braided them. 

The first two braids were crossed below the buns and then coiled around the bases. They were pinned in place there. The smaller braids were then coiled around the two buns in a figure eight--turning the two separate buns into one larger bun.

I trimmed the excess lace at the front down to less than 1/4".

The application process went fairly smoothly but took a hell of a long time. The wig actually has a comb clip in the front, which I hooked onto my own hair (I french braid my bangs when I wear wigs) to keep it from sliding. This wig is fairly back heavy.

I started at the center of the hairline and made sure it was sitting in the correct place. Then I moved outwards from the center along the hairline down each side doing small sections and gluing them in place with spirit gum. I used a hairdryer to speed up the drying time (that was Blayke's job) while I held things in the correct place. Once it was done it looked pretty convincing!


Tuesday, February 9, 2016

Vaporeon Gijinka - Wig & Hairpieces - Pokémon


Part 4 of the Vaporeon saga--Wig and Hairpieces. After my initial rocky start, I quite enjoyed creating the decorations for this wig. Though not the most construction heavy wig (like my Presea or Asuna wigs) it required a lot of labour and styling. This wig presented a new challenge for me: dyeing.

Links to Part 1: Bolero, Part 2: Under Layers, and Part 3: Wrap Skirt Tail!

Thanks to Elemental Photography for the great photoshoot! Credit for the original costume design goes to Cowslip!

It's a complaint I have made many times before but I'll say it again: it is really difficult to find a base wig that perfectly matches your character if you need it to be a specific shade of grey, green, blue or purple. And even if you find one that matches you may not be able to find it in the length you need. I had similar problems with finding a wig for Tomoyo and Suppi because they fell into this colour spectrum where there is just not a lot of wig selection.

My problem was that I ordered my wig first, before I went fabric shopping. The wig I picked was a teal wig from Epic Cosplay (though it is really difficult to see here, believe me when I say it is really teal). When I was shopping for fabric I ended up shifting the colour palette to be more blue. When the wig arrived in the mail it really didn't match the costume. Also the wig I picked did not have enough length for the desired style...

(For the record, I don't blame Epic Cosplay for the teal wig, I blame myself for choosing a teal wig and then changing my mind about making the costume blue!)

At the time I was still under the impression that I could meet my original deadline, so I didn't have time to order another a wig--it wouldn't have arrived in time for me to style it.

I went ahead and styled the wig I had, but was super dissatisfied with it. Shown right is the original wig I styled with the original hairpieces I ended up later discarding.

A year later I re-thought my plan for this wig and decided that I really wanted to attempt the slight gradient that is in the original rendering. To do this I needed to order another wig that was longer, and much lighter--so I could dye it to the desired colour.

The second wig I bought was much closer to what I wanted for my base. I ordered a much longer curly wig in "ice blue" from Epic Cosplay.

The first thing I did was trim the bangs to the desired length/style. Then I sectioned off the remaining hair into 4 parts: the two lower pigtails would form the long braids, and the two upper pigtails would form the buns. The lower pigtails I took scissors to and thinned the hair. The bottom needed to be these two wisps rather than the chunky sections you can see in the picture on the left.

I changed the design of the hair a bit, because the upper part was actually supposed to have a lot volume before feeding into the braids, with these spikes of shorter hair sticking out. After the problems I encountered on my first failed styling I decided to add the buns to the top half and use the curls in the wig to create the shorter strands of hair sticking out. This gave me the width/apparent volume without me having to tease it/add it in with hair spray. Suffice to say because the wig was curly I was worried that any attempt to add volume was going to lead to a messy tangled disaster... So the deviation from the actual design was quite intentional.

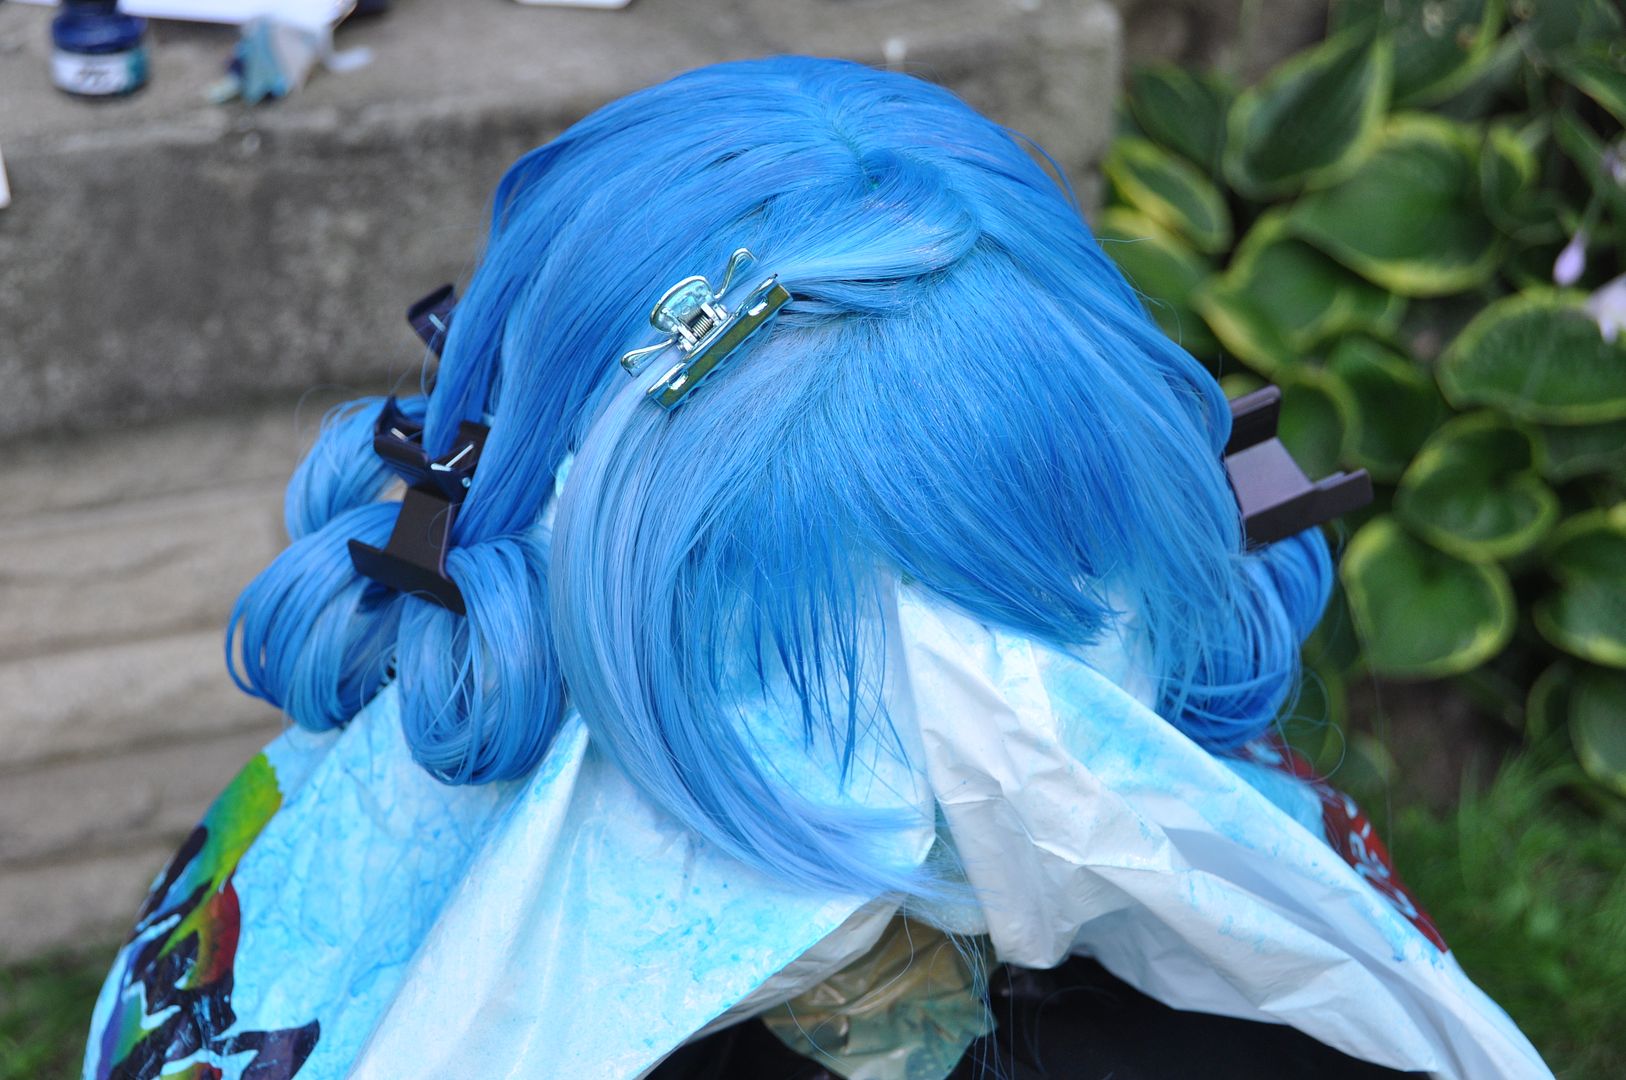
Looking at some tutorials, I began by creating my dyes. I tested them of the off-cut hair from the bangs until I was satisfied with the colour. The dye was made using 99% alcohol and india ink. I created two bottles of dye--one that was blue and one that was more teal. There was no scientific formula for mixing these, I just added drops of ink until the colour was dark enough. Just write down what you did because if it is a long wig like mine was, you will probably have to make more. Which I did.

The bottles of 99% alcohol I bought already had these hand spray nozzles, but if not I would have bought spray bottles at the dollar store and mixed my dye in there. That makes the application easy.

I did this outside, because I didn't want to end up with blue dye residue everywhere. As it was, my fingers were blue for days after. I covered my stool (which is vintage and actually belongs to my mum) with a heavy duty garbage bag to protect it also.

I started with the bangs. To apply it I simply spritzed it with dye and combed it through. The more saturated you make it, the darker the concentration of colour. In the design, the crown of the head is where the darkest tint is, so I did the bangs first so as to give myself a reference point to compare to for the gradient.

I tied the upper layers out of my way and worked on each bottom pigtail next. I would let down the pigtail and carefully comb out the hair. Since I was trying to preserve the curls and keep the wig from tangling, I dyed each curl individually. Once That section was finished, I would carefully roll up the curl and pin it in position, allowing it to dry. If you leave them hanging wet it can straighten the fibers out a bit, leaving the wig more wavy than curly--which can be a good thing, but not what I was going for. To give it the gradient it had to be most saturated at the base, and I would carefully comb it down to pull the dye down through the hair.

You can see at the back that I parted the hair in a sharp zig-zag so as not to reveal the base of the wefts/netting. This was to save me from having to add in wefts to make a proper part. This works fine for this particular project since the lower half of the hair did not have to pull upwards into the high buns.
Using straight pins and plastic bags, I covered the bottom half of the wig while I worked on the top half.

The top half was done to be much darker than the bottom. I simply made it more saturated with dye. Same with the bottom, I did each curl individually and pinned it up to dry.

The finished dye job, before I brushed out the curls again. You can see the gradient best here. It was meant to be subtle, and mostly to match the wig colour to the costume. I think if I would revisit this wig I would make the crown another shade darker.


This is what it looked like once I brushed it out.

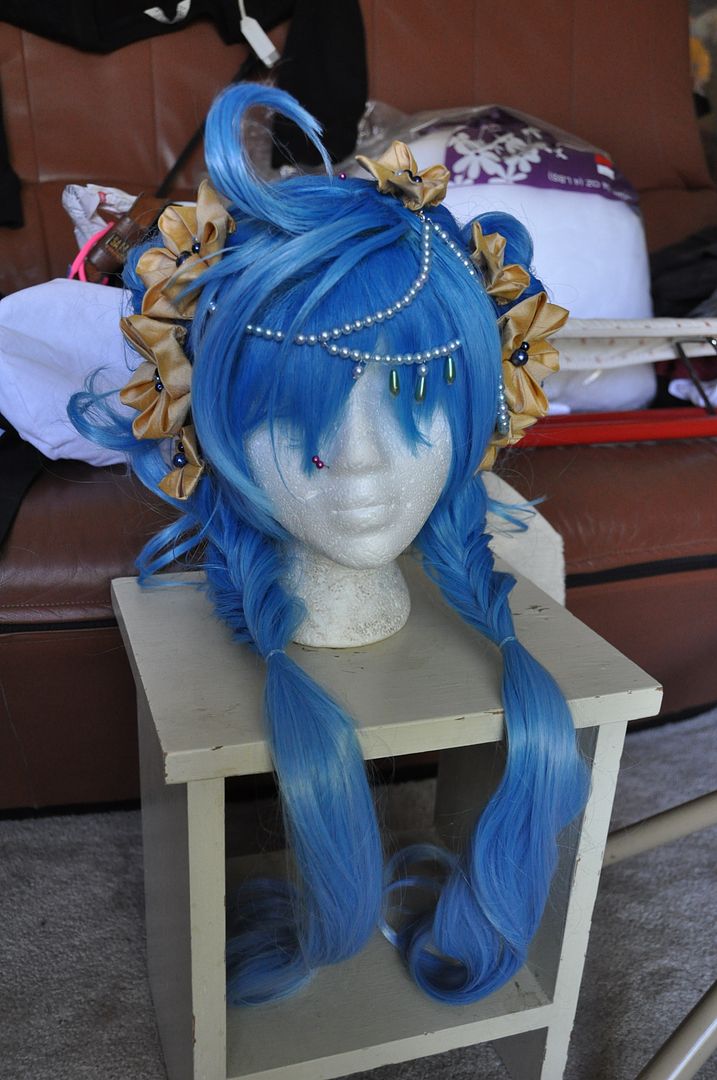
Next I went about styling the sections. I did a quick test style first (pictured left). Many bobby pins were used to create the buns. The lower braids were done in a fishtail braid style. I didn't pull the braiding too tight at the start of the braid, because I wanted it to retain some volume. I sprayed the finished braids and buns with hairspray to keep them looking tidy. I later replaced the black elastics with clear ones.

After doing the back, I moved on to styling the bangs. I used hairspray and a hair dryer to create the big curl and the large section that crossed over.

I decided to take my scissors and thin the ends of the hair even more. Reducing volume, but not length.

I made the silk flowers for the hair in a kanzashi style, like I did with my Cloche Hat last year. A good tutorial for how to make them can be found here! I sewed an assortment of beads into the center of each. The beads on this costume are a range of colours: navy, medium blue, pearly blue and teal. Each flower was hot glued onto a hairclip base. The barrettes I used had a little hole in each end, this came in hand later for attaching the bead strings.

I strung the beads on tiger tail and used claw hooks to attached the ends to my barrettes. This means they are removable.

Overall this wig was super fun to make and looked great. As much as it hurt my pride to do so, I am glad I scrapped the first wig and started again fresh.


Sunday, June 10, 2012

Prince - Dress & Shoes - Katamari


 Here's a quick look at how I made Prince's dress. Essentially it is exactly the same process as I made Cousin Miso's dress, except more streamlined as now I had a pattern to follow.  If you are looking for a more in-depth guide on how to make Prince's (or Miso's) dress look here!

Originally, there was no plan to make Prince until 2 weeks before Anime North, once Alex and I decided wearing the Katamari ball would be too dangerous. (Crazy fans might try a roll up and accidently injure whomever might happen to be wearing it.) We figured Prince is one of the easiest, most recognizable cousins we could do short-notice.


We even had green stretch fabric the perfect colour left over from a Link costume we had done 2 years ago. The catch? There wasn't enough left to do the whole costume, which meant we had to find another perfect green stretch short notice! Oh no! D: Finding the right green in a stretch fabric was a quest that we didn't really have time for... But the sleeves absolutely wouldn't work without a stretch.

To remedy this, we managed to find a slightly stretchy green that was almost a perfect colour match to our insufficient green. Using the 2 fabrics we were able to complete the costume.

This costume was made so the 3 different people of different sizes could wear it.

 Here it is pretty much impossible to see, but the top fabric of the sleeve is a non stretch and the bottom fabric is super stretchy.

The tube was attached last, with much swearing. ;D

 Now about those shoes... If you recall last year, for Miso we luckily had a perfect pair of purple shoes on hand. Well unfortunately we only had 1. Running short on time, our solution was to dye some canvas ballet slippers purple using ink. Certainly not perfect, but much better than running shoes.