Sunday, October 30, 2011

10th Doctor

Hello again! This is an in-depth look at how I made my 10th Doctor costume... Now when I say that, what I really mean is an in-depth look at how I made a blue blouse and altered a women's suit. And was extremely lucky at thrift stores.

Yes.

I was at a thrift store, when I discovered this amazing brown suede long coat. Once I tried it on, I knew I had to buy it and one day do a 10th Doctor costume, perhaps in the far future. Not 2 days later I found a brown and blue pinstriped suit in another thrift store and I thought, "DESTINY!?" So I decided to make the rest of the costume for fanexpo. >:D

Lets take a look. As the doctor would say, "Allons-y, Alonzo!" >:D


So I found a basic blouse pattern in the basement storage with my mum's sewing patterns. But she lost the instructions... So we had to guess how the heck it should be put together. She had actually pinned it to some really 70's looking fabric to make a blouse back in the day, but never did. So I took those pieces too. I will one day make that blouse also.

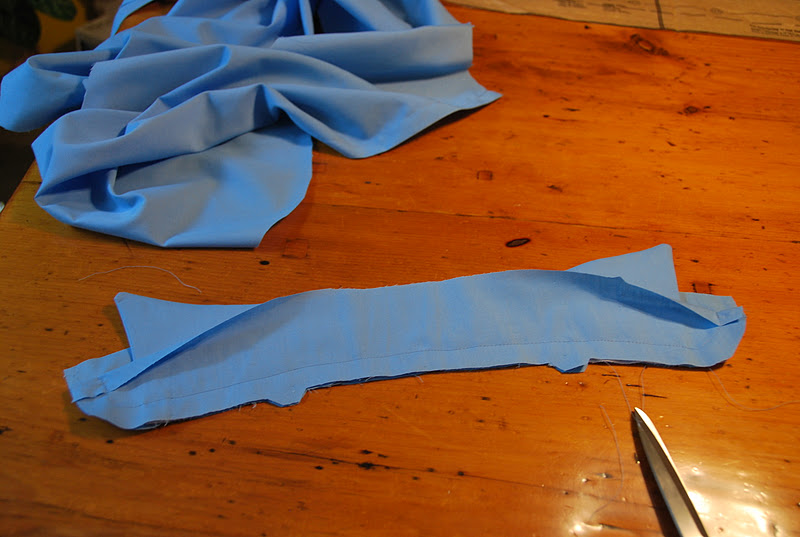
I was originally planning on tea-dying my blue fabric to make it a bit darker, but I ran out of time.

I cut out all the pieces and started by sewing the collar together.

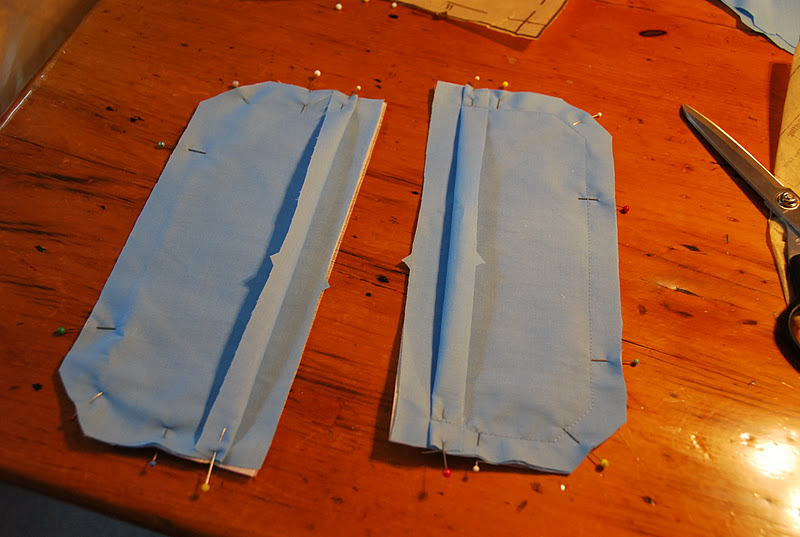
After much confusion, we managed to figure out how the placket at the front was supposed to be sewn together.


Beautiful! :D


The collar was then flipped right side out, corners clipped and pressed. It was then sewn to the other collar piece. 

I sewed the back and front pieces of the shirt together at the shoulder seams only, then finished those seams nicely.


I sewed the cuff pieces, flipped the right way out, and pressed them, same as the collar.

Then I took the pants in. And then I took them in some more. I may still do some more altering to the suit and pants, as I am not entirely satisfied with them at this point. 


Trying to decipher what these marks are supposed to mean...

Some were the pleats and the other was a slit that I put some bias tape around the edges of.

The cuffs were then sewn to the sleeves, and the sleeves were sewn to the shirt.

The buttons were the last thing to add. I got my mum to do the holes for me as I had never done any before and didn't want to wreck the shirt.

And then it was done!!! >:D Brilliant!


I was attacked by a Dalek! D: But he soon realized that my screwdriver was not as sonic as I had originally hoped! "THAT IS NOT A SONIC SCREWDRIVER."

Actually, funny story: I needed a hat stand for my display, and so we bought one at ikea. And we put it together with my screwdriver. MOST USEFUL PROP EVER.

I met like a million more doctors at the con. Lots of 10ths. But I was the only girl. :( And I was way shorter. They called me mini doctor. I was not amused.
Those observant people may have noticed that I actually darkened my eyebrows for this one! It helped make the wig look more realistic. Next in-depth look is at how I achieved styling this amazing wig! >:D


Friday, October 28, 2011

High Waisted 'Tree Branch' Skirt

Greetings all! :D Here is my in-depth look for how I made my high-waisted 'tree branch' skirt.

This is an original steampunk-lolita inspired outfit. I tried to make it a bit subtler than some lolitas, less frills, a bit more mature looking. The steampunk elements lie in the jewellery and the colour scheme. Lots of creams and browns.

The skirt I handmade, the top is actually a dress that I bought in London at Lily J. (And I take no credit in making it obviously.)

The wig I bought online for the outfit. It is a very fun wig to wear. Not styled in any way.  I love the curls. :D

I plan on jazzing this costume up a bit for future wears. I plan to add a petticoat to give the skirt more volume and possibly a hat. :D


I started off with the waistband. Taking my measurements and dividing them into 4 equal sections. Then adding the extra inches for seam allowance and dividing the back panel in half, adding enough seam allowance to put in the zipper.

(Notice how I made things easier for myself here: with 5 panels I can have both my zipper not put in on a curve, and no seam in the center front.)

Above are the panels for the skirt sewn together. I wanted to give the skirt volume.

I had limited fabric for this project. Here is my original concept sketch, along with all the math behind this skirt. Because I had such limited amounts of fabric, I had to plan out how I would use the fabric so that I could make the most of it, and not end up short.

I sewed the waist panels together.

I put in a layer of interfacing to stiffen it and allow it to stay up better.

Finishing all my seams...

I did a basting stitch along the wait of the skirt piece, pulling the thread and cinching the fabric until it ruffled. Once it was the right length (matching the bottom of the waistband) I evened it out and tied off the thread.

Because I had the same number of panels on the waistband and skirt pieces, I was able to easily distribute the ruffled fabric by aligning the seams. This helps to ensure symmetry. 

I decided to line the waistband. By creating a matching set of panels in white broadcloth and attaching it to the top.

The backs seam was then closed and a zipper basted into the back before getting machine stitched.

Beauty, eh? >:D

Next the inner lining was tacked down and ditch-stitched into place. 

Neat and tidy! >:D

At the convention, my mum took a few pics. :)


Special thanks to Mike Kowalek of Eleventh Photograph for the awesome photoshoot! Click here for more pics! :D


Tuesday, October 25, 2011

Steampunk Necklaces & Lolita Hair Clips

Here is my collection of steampunk necklaces that I made and sold at FanExpo. It was my first attempt at jewellery making, so I think I did pretty well considering.the colour is a little flat in these pictures unfortunately.

This first design is by far my favourite. I was sad to see it go... I like the asymmetrical design. :D Really nice in copper. I made a similar one in bronze as well, but I don't have any pictures of it.

This one with the keyhole, also in a nice copper colour, is still for sale. Contact me if you are interested in purchasing it. 20$

My bronze keyhole (above right) and bronze key (below) necklaces are also still for sale. I am willing to modify the ribbon if anyone is interested. (20$ each, but anyone interested in buying 2 I will cut you a deal, 35$ for 2 necklaces.)

I will probably make some more for the next con, perhaps try some more interesting designs.

Next up here are my 'Elegant Mini' lolita hair clips. I'm currently all sold out of these, but will deinitely make more for the next con seeing how they were such a big hit. Fairly easy to make, and I managed to sustain only minimal burns. XD


 These were made with the leftover bits of materials.

Here was my setup at our Sweet Geeks table.

 Sweet Geeks now has a facebook fanpage! Be sure to like us! ;D Look for us at FanExpo 2012~!