Showing posts with label katamari. Show all posts

Wednesday, May 28, 2014

Anime North 2014 Retrospective - 10th Cosplay-versary!

Hey guys! So I've been on a bit of a nostalgia trip recently because this was my 10th year attending Anime North. Easily my favourite convention of the year! I had a really great time this past weekend with friends and family! It was good to see everyone again! I finished 3 costumes for the weekend: Sakura, Isabelle, and Forest Guardian (previously known as Elven Archer). The weather was altogether pretty great (though I was hot and dehydrated on saturday...) and made for a fantastic weekend.

Friday: I got to the con a bit late (though not as late as last year) and hung around for a bit wearing Alice with my sister as Sakura. I looked around the Crafters' Corner for a bit and helped a friend set up her table before heading over to the Doubletree International Plaza for the friday night Workmanship Competition. I entered Sakura for this event, which was new to the convention! You know things are serious when your judges include Merlin, Sailormoon, Catwoman(?) and some sort of were-rabbit? (Competition results were announced sunday!) I had a nice dinner at Swiss Chalet with the family before heading home for the night.
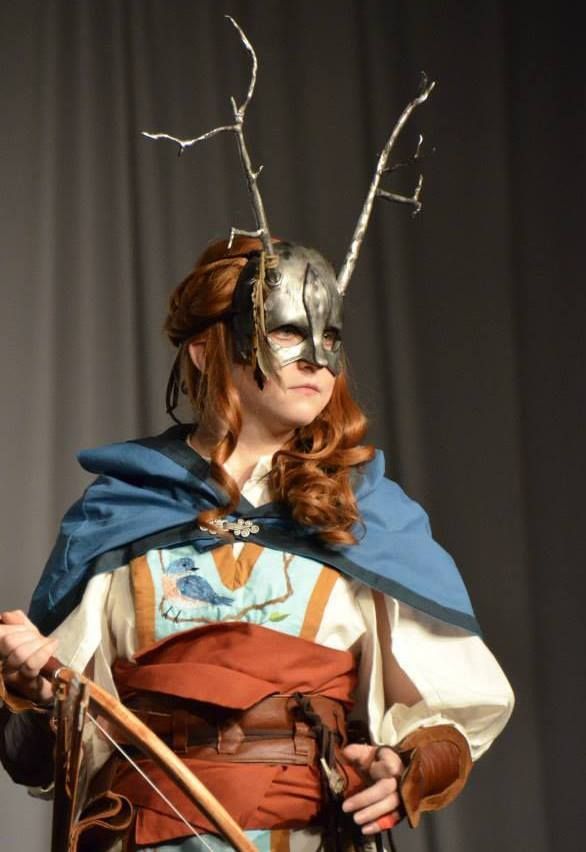
Saturday: After some major disappointment with failed prosthetic ear (the other one worked fine?) I decided that I had worked too damn hard to let that stop me from entering Masq this year. Rather than entering as "Elven Archer" I had impulsively written "Forest Guardian" on my form the night before, which worked beautifully for me! After an initial hiccup with entering the Masq, my mum swung it for me (ex: was very persistent).

It was a bit too hot with the amount of layers I was wearing so saturday was a constant quest for water. Probably my only complaint about the con this year was that they weren't quick enough with refilling the water stations in Artist Alley/Crafters' Corner area so there was a good couple of hours during the hottest part of the day where there was no access to water in that part of the building... Mostly I spent the day walking around and posing for pictures. Though most people were confused and couldn't figure out what show/videogame I was from--answer: none! This is my original design!

After food I went to the green room for the Masq and did my photo and judging portions. My judges were Feather Weight and the were-rabbit. They were most impressed with my embroidery. I was the last entry to present, which you can check out here!

Congratulations to my fellow competitors, your costumes were fantastic and your hard work really showed! I was most impressed by the level of quality in the Novice category and a certain lack of Artisans?! If you have time, I highly suggest also checking out the rest of the entries here, or at the very least take a look at the highlights reel by Dan TheVideoNinja. Special thanks to Alex for doing my audio again this year (I have no idea what I will do next year when you are in Japan??) she found me some great music from Cirque du Soleil's "Totem" CD.

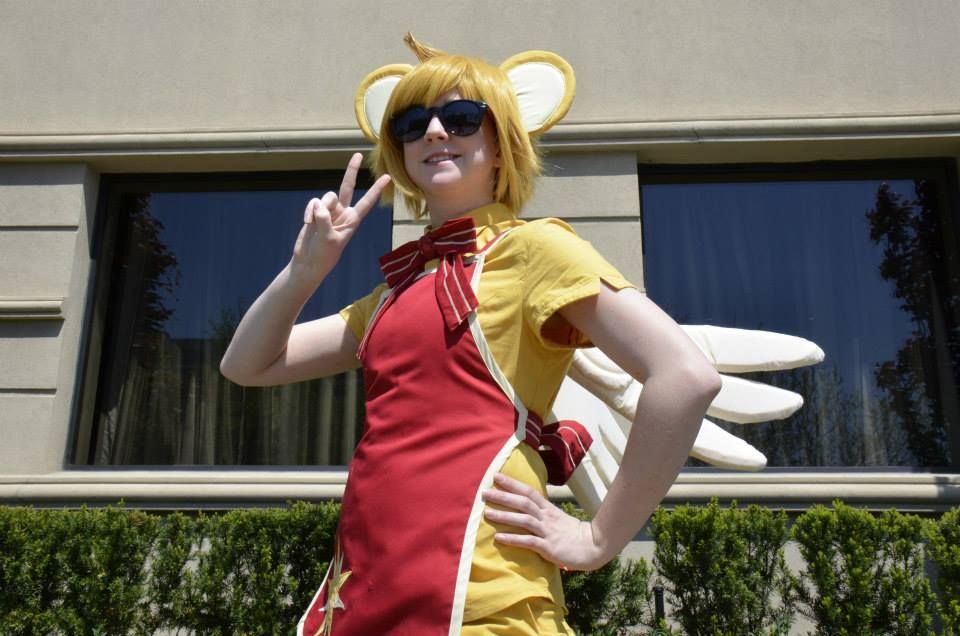
Sunday: Instead of spending my whole sunday trying to rush finish Vaporeon I opted to wear Kero! It was much cooler to wear around (having been originally designed to wear at Otakon), a great casual cosplay that received much love with the AN crowd! The day was mostly spent hanging out with friends and shopping. In the afternoon I attended the Award Ceremony. I won 4 awards this weekend! A Hall Costume award each for Isabelle and Kero. I won "Best Accessories: Master Division" in the friday night Workmanship Competition for Sakura, and "Best Embroidery: Master Division" in the Masquerade for my Forest Guardian. Super happy! Special thanks to Alli Sosnoski for her help on the Sakura costume and Harriet Lee for her work on Vaporeon (even though it didn't get finished).

I saw so many friends this weekend that I couldn't possibly mention them all, but you guys know who you are! (Unless you got amnesia in the last 2 days) You guys rock and made my 10th AN that much more memorable!
10 YEARS OF COSPLAY!

I spent the past couple of days putting together a collection of pictures including all of my Anime North Costumes from the last 10 years. So without further ado lets take a journey back in time! (If you don't want to read my sappy nostalgia commentary, feel free to just look at the pics, which are also posted on facebook.)


So to start, here is a collage of all my Anime North costumes from 2005-2014. (The only one missing is Alice from this past weekend.) If the me from now could talk to the me from 2005, oh what a conversation that would be... Never would I have dreamed that one day would spark a hobby that would change my life! I discovered a talent I never knew I had. ;D And yes, there were at least 6 years of costumes before I started Among Bobbins and Thread!
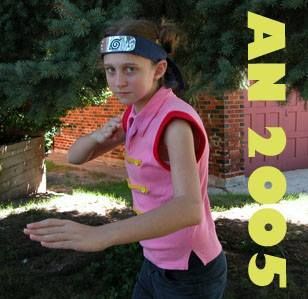
My very first costume my mum made for me! I was Tenten from the popular anime series Naruto. It was made up of modified clothing items. But we splurged on an official headband! I only attended AN for 1 day, but I wore it again to Fanexpo (then known as CNAnime) later that summer. I was accompanied by my older sister who was dressed as Rock Lee. :D So youthful!

Team 8! My favourite team in Naruto-verse (except for perhaps the Sand-squad, which we would be cosplaying later that summer.) I put up with an unbearably itchy low-quality wig for several cons in this costume. My mum is the amazing woman who took the time to craft all these cool costumes! Some pieces were from the closet, others made from scratch.
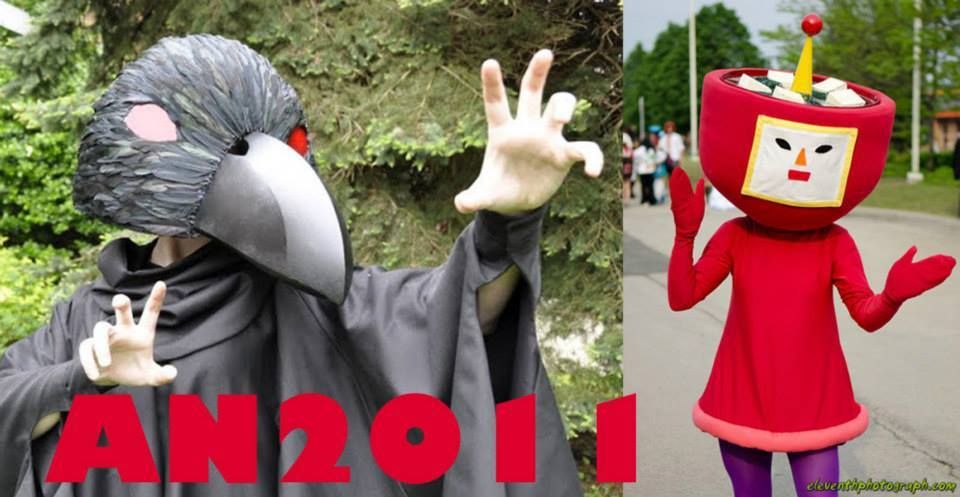
In case you aren't starting to see the pattern, we too started by cosplaying from mainstream anime and kept this up for the first few years doing several different groups from Naruto and Bleach. Our Division 11 group was our first Masquerade entry ever, for which we won a presentation award (the "We <3 Katamari Award" if my memory is correct.) Mike was added to the group as our Kenpachi, which perfectly complimented Elanne's Yachiru. Mum made all of these from scratch with several billion meters of black broadcloth! Power to her! We also wove our very own (very painful) sandals!

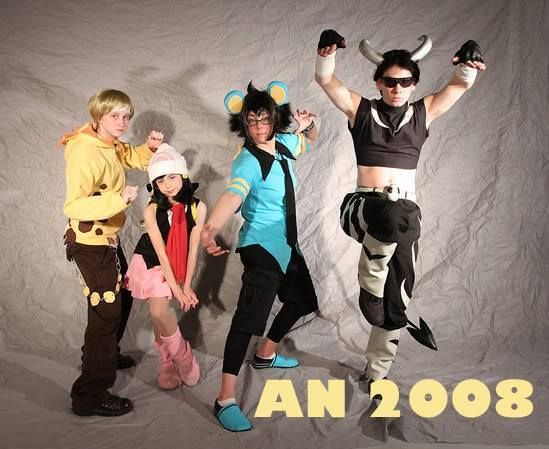
Pokemon Gijinkas (+Pokemon trainer)! I think this costume set was in part decided by Elanne's love of Pokemon. We entered our group in the Masq and won another presentation award for our dance skit (which is amazing because judges typically hate dance skits!) Pokemon on Broadway (or Dawn's Secret Hobby)! Another set of costumes masterfully made by Mum. :)
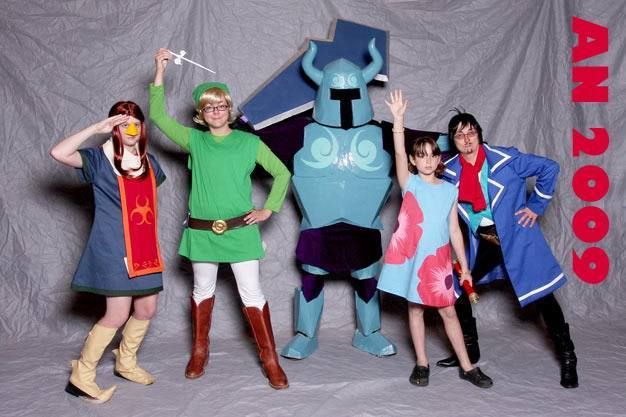
The first and last time we got the full family on stage! My fifth Anime North. We had attempted to finish the King of Red Lions boat for this convention, but did not get it done. On the other hand, Mike's Phantom was pretty darn impressive. We won a workmanship award in the Journeyman Division.

 Alex and I finished the King of Red Lions this year which is probably still the cosplay achievement I am most proud of. That year I also wore my first costume almost entirely by myself, which was Kiki, from Kiki's Delivery Service (first worn to Fanexpo, the previous summer!). :) In the Masq we won a workmanship award for our crazy awesome boat and I got a Props award for my Kiki costume.

My "Crow Soldier" costume from the less well-known series Princess Tutu was fun to make and wear! It was my first experiment in putting lights in costume (dollar store flashlights!) and it was a piece I used in my Ryerson Theatre School application portfolio. I also helped to make Alex's Cousin Miso costume, constructing the outfit while she and Mum made the head. This was the year I began my blog, Among Bobbins and Thread.

Our Katamari group! (minus Jen as Mag) This was a very well received group of costumes. The weather was not particularly kind to us, meaning it was just too darn hot to wear them for more than a day.  I did the majority of the construction on these with assistance from Ian and Alex, while Mum made the Katamari itself. We entered at Master Level due to our 5th member (Mai Sherie Costumes) and won a Technical Achievement award.

Another costume that I am really proud of! I just wish the armour were less heavy and strangulating... The sword was heavy enough that I couldn't lift it properly and it actually became the focus of my skit. Hahaha I won a props/accessories award for this costume, if I recall correctly. I learned how to mold and cast as well as began working with thermoplastics. All I can say is that I will need a long break before I ever attempt a costume with that much bias tape ever again...


My first con where I wore a different costume each day! This was my first year entering solo without any family members also competing in the competition. I entered my first original design costume "Forest Guardian" in the Masquerade and won an award for the Best Embroidery in the Master Division. Several hundred hours of it. I also entered my Sakura costume (made for Elanne) in the Workmanship Competition and won an award for Accessories. I also made an Isabelle (from Animal Crossing) costume for my older sister, which won a hall award, re-wore Kero (also got a hall award) and re-wore Alice. What a whirlwind weekend full of costumes! :D

Hope you enjoyed that as much as I did! Some of those old pics were REALLY hard to find.

Wednesday, August 15, 2012

Nickel - Tube Head - Katamari


Greetings humans! ;D This post shall go into the details of how I constructed the tube head for Nickel. I started exactly the same as I did for Prince and Princess, by creating a hole in the bottom of the tube for my head to go through.


My helmet had this stupid point at the back which needed to be sawed off... :P And so I did.

I added the blocks of foam so  that the helmet, and by extension the entire head, would sit at the right height and angle. This was especially important for Nickel because the head had to clear the shoulders of my box body.

We visually determined the placement, marked it out, and then glued it all in place.

I had my friend Ian do the soldering (and re-soldering) of all my LED circuits for this project. I ran out of time to do it myself. It looks fantastic! I will go into more details of how those were constructed in a later post.

The hubs that the LED's were put into in the red cylinders were made from a disc of foam core and a cylinder of illustration board. And lots of glue. LOTS.

I drilled a hole where each LED would go, evenly spacing the array. Then I farmed them out.

These beauties were returned to me! ;D

I then taped all the exposed wires so I wouldn't get a crossed wire and end up with an electrical fire. That would be very bad.

...Particularly because it is not so easy to get this costume off quickly...

Then I cut 2 foam core discs to go in the end of the tube. These would fit snugly and be glued into place.

Then I cut a ring/disc that I glued around the bottom of each hub, so that they now resembled a top hat crossed with a jellyfish.
Then I cut a thin ring of foam core to act as an inner support for my red cylinders, and a circle of a plastic binder to act as a frosted filter. The black rings were my only gluing surface for this entire cylinder.

Meanwhile, I had Alex add an illustration board outer layer to my head. (The sonotube had obtained numerous dings in the garage.)

Then I worked on the cylinders. Using clear tape, I carefully taped together strips of red acetate  and curled them around.

I had a friend of my mum's--who has access to a laser cutter--cut me 2 perfect circles in red plexiglass. These were glued to the frosting circle and then the foam ring.

Alex then glued the 2 foam discs in the ends of the tube. The eye slot and neck hole were also nicely cut.

Back in the land of plastic, I carefully glued the acetate roll to the black ring along the top edge. The end result is a bit fragile, but looks quite clean and I am very happy with it. Because of the multiple layers to the red acetate, it did not need a frosted filter.

Alex then spackled the joins in the illustration board and sanded them out to achieve a nice, smooth and almost seamless look! ;D


With the 2 red cylinders done I was ready to assemble. The top-hat-jellyfish were carefully inserted through the neck hole. Then the foam core discs--ones on each end of the tube head and their respective jelly-hat--glued together, making sure that the electrical hub was centered in the middle of the hole. The red cylinders--which were made to fit into the hole exactly--were slotted over the hubs and then glued into place.

The border on Nickel's face was finished with a rectangle of craft foam, glued on and painted grey. A fabric piece was attached so that Nickel's face flaps up like the rest of them.

Alex says: I LOVE GLUING!!!! D:<

...Which is her way of protesting against all things sewn. :P
 The antenna was glued on and so were the decorative nuts. ;D

The final step was to solder the switch and battery into my electrical circuit to make everything work!

Beauty!

An in depth look at Nickel's circuitry--including diagrams and calculations-- will be coming up in the next month or so, but I will be taking a bit of a break from all things Katamari for the moment. I am also planning on doing a tutorial on how to put together a simple LED circuit. Those will probably be up in september or october sometime.

Thursday, August 9, 2012

Prince & Princess - Tube Heads - Katamari


Hey-o! So here's a look at how to make your very own Katamari tube head! ;D

First I took a 12" diameter sonotube and cut a piece that was 2ft long for each head. (I drew a guide line all the way around and cut it with a hand saw)

I bought an 8ft sonotube at Home Depot, so in theory with 1 tube I could make 4 heads. This is good news for group cosplays! XD

I compared the size of Miso's face on the tube to see how the size looked. If I remember correctly we determined it to be a tad small and made Prince, Princess and Nickel's faces a tad bigger.

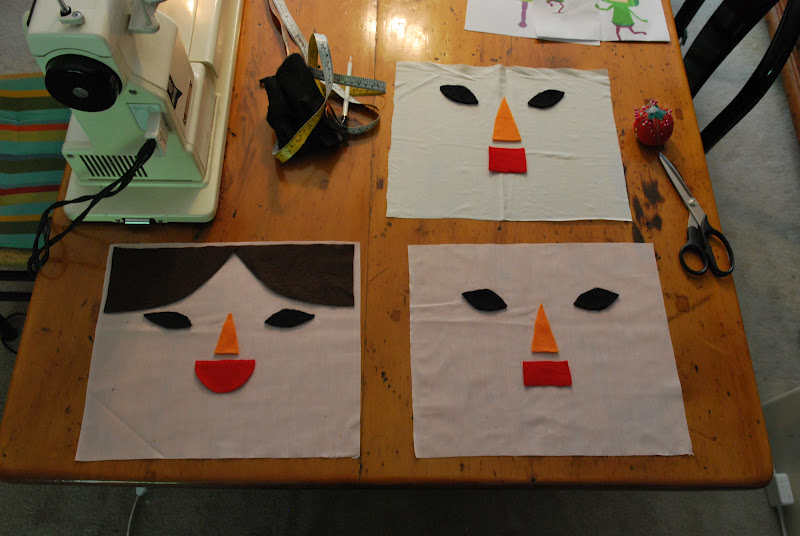
Alex made the expressions for each face and sewed each on. Then she attached the yellow bias tape to the edge of the face to finish it off. Fantastic! :D

I set to work on cutting the neck holes. Using my handy workbench, I clamped the tubes down in preparation for dismemberment cutting holes.

I drew the shape I wanted cut, then drilled a hole big enough to fit my jigsaw blade in. With much caution--or at least as cautious as one can be while using power tools upside-down on a curve--I cut out the neck holes.

Then I had to decide where to glue the helmet. I marked the center on the inside and put the helmet in. Then I used an available human (preferably the one who would be wearing the costume) to determine the spacing for the placement of the helmet. I used blocks of insulation foam (hot glued in) as spacers to have the helmet sit at the right height and angle. I had some problems with this because the glue didn't really want to stick to the waxy inner surface of the tube... solution use MORE glue until it works! But in all seriousness, I should probably find a more reliable adhesive...

Other problems included the fact that Prince was to be worn by 3 different people, all with differing head sizes, neck length, etc. which made it a little tricky to fit it so that it would work for everyone.

Once that was done I cut out an eye slot using the same method I did for cutting the neck holes.

I went to Camp Connection (at Bathurst and Lawrence in Toronto) and bought 2 eggshell bed rolls. Instead of buying upholstery foam at Fabricland, this is much cheaper! It is also the perfect width for covering the 2ft wide tube.

I hot glued the foam--eggshell side in--to the tube.

Once it was glued on, I cut the holes in the foam for the eye hole and the neck hole with a pair of sharp scissors. Always do this after, just in case the holes don't line up.


Testing my fabric colour combos. I think I came pretty close to perfect! >:D

Then I created the pattern pieces for the end of the tubes using the bump pattern from the Katamari ball.The circumference measure for the base of the bump in this case is the circumference of the tube with the foam padding on it. Then you use  rectangle of fabric that spans the 2ft tube, falling a little short so that it pulls tight.

(In hindsight: It is also a good idea to add an extra inch to the end of each c-shape because you will need to tuck and hand stitch this sucker. I learned the hard way that this would indeed be helpful...)

I made these assembly line style. Always make sure to do the relief cuts before you pin it. Also, mark the 1/4 marks so everything lines up alright.

Then attach the next ring. These ones look like green eggs (and ham). :P


Next thing I recommend is to take packing tape to compress the end of the foam. It makes it 50 times easier to get the cover on. I tried it without and managed to rip the top circle on Princess's cover. D:

You leave the tube cover open at the bottom, the open seam going across the neck hole.


Mark where the eye-hole is going to need to be on the cover, and determine the placement of the face making sure it will cover the eye-slot. In the case of the Prince, a white rectangle also needed to be put down  under where the face flap would be so that the rather see-through fabric for the face wouldn't look green. (Obviously an unnecessary step for Princess.)

I took the cover off, sewed on the white rectangle and then remarked the eye-slot on Prince.

Then I stitched the tops of the face flaps on.


Using the markings I made for the eye-slot I sewed a rectangle where I wanted the edges of the hole to be. Then I carefully cut a hole in the center leaving a 1/2" seam allowance.

( In hindsight: Mark and attach the velcro squares to tack down the face now rather than later! You can easily machine stitch them on when the cover is not on. If you wait too long (or forget) you will have to hand stitch them on, which is not fun!)

Then I made a back piece for the slot, same as the front.

By making a relief cut into each corner, I was able to sew a rectangular tube into each hole. I was able to easily feed this through and tuck it into the face, gluing it in place on the inside of the tube. A very clean way to finish the eye-slot.

 Then make 2 foam core discs and stick them in each end. These with be hot glued in place later to help push the stuffing out into the ends of the tubes.

Each cover was then slipped on --more like wrestled, I made them very tight fitting so they wouldn't be loose--and stitched up. The neck hole was cut out leaving extra fabric to pull and hot glue to the inside.

Then the antenna--which had a yellow bias tape trim glue along the bottom--was stitched on. >:D Voila!