Showing posts with label hood. Show all posts

Wednesday, March 22, 2017

Leia Rebel Scout - Star Wars IV - Poncho

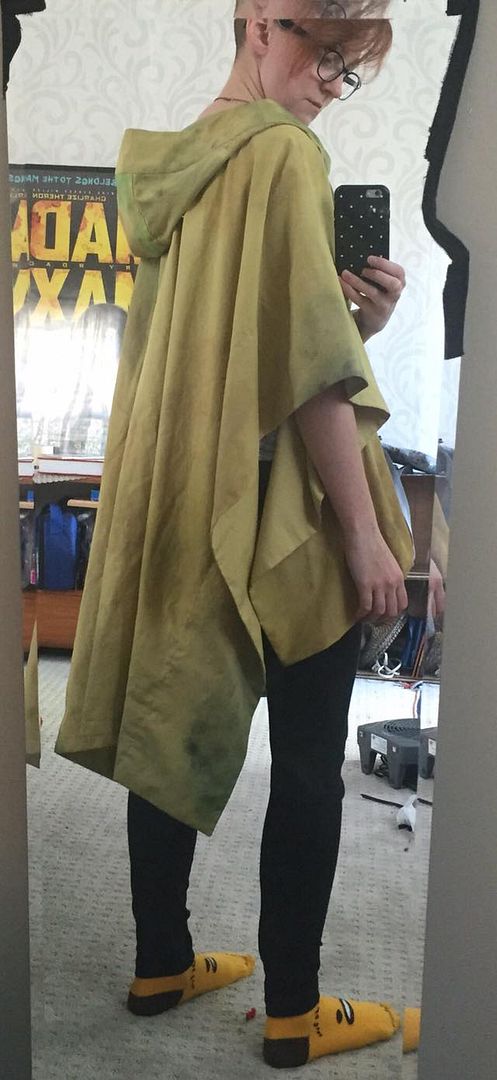
The second part of my Leia costume--let's talk about the poncho! I think this poncho is probably what makes this costume somehow so cool and so dorky all at the same time. I really love the neat cowl neck hood and the free flowing back as design elements. This is perhaps the most underrated Leia costume there is.

I hope to do a photoshoot of this later this spring out in the woods somewhere. For now you will have to settle for crappy mirror pics, as I don't even have convention photos of this costume yet...

To see how I styled the wig, go here!


After patterning and mocking it up, I then cut out the pieces in the real fabric and laid them out. I used watered down fabric paints and splattered and sponged on some different tones in mixed greens and browns. I actually really like how the camo pattern turned out.

You can see below the difference between when it was wet and when it dried.

My one difficulty here was that my brown paint had expired and I was stuck in the middle of nowhere. The paint kept separating and actually added some extra unintentional texture.

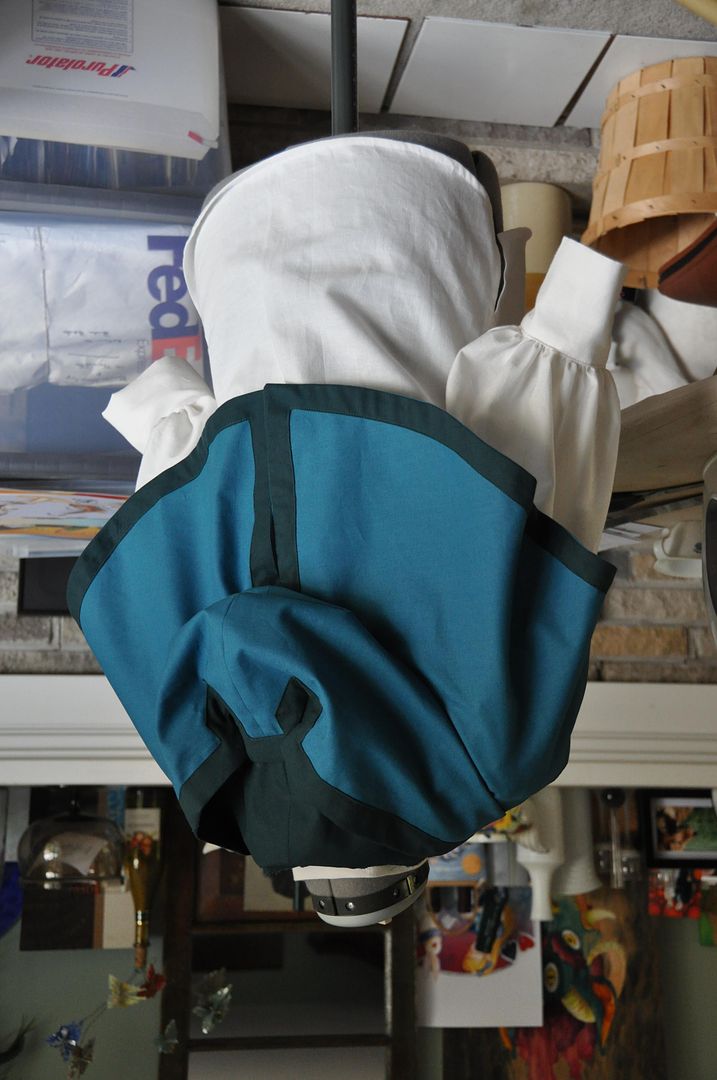
Right you can see the hood pieces laid flat. The hood is made of 4 "C" shapes that make up the outer rim, 2 rectangles (not pictured) that form the centre top of the hood and that one super weird piece the forms the sides of the hood and wraps around the front of the collar. The goal was to not have a seam up the front of the hood because there isn't one in any of my reference pictures. I think I managed to recreate it pretty accurately.

After everything dried, I ironed it to set the fabric paint and then sewed it together. 

The actual construction was super straight-forward--and unfortunately I didn't document it. 

I faced the side edges of the poncho and hemmed the front and back. The hood was first pieced together and then attached to the poncho neck hole. 

Some pictures of the finished poncho. 

The last step was to add the holes for the belt. Which secures the poncho in the front only. I faced and reinforced the hole. The process was similar to starting a welt pocket. 

Thursday, September 4, 2014

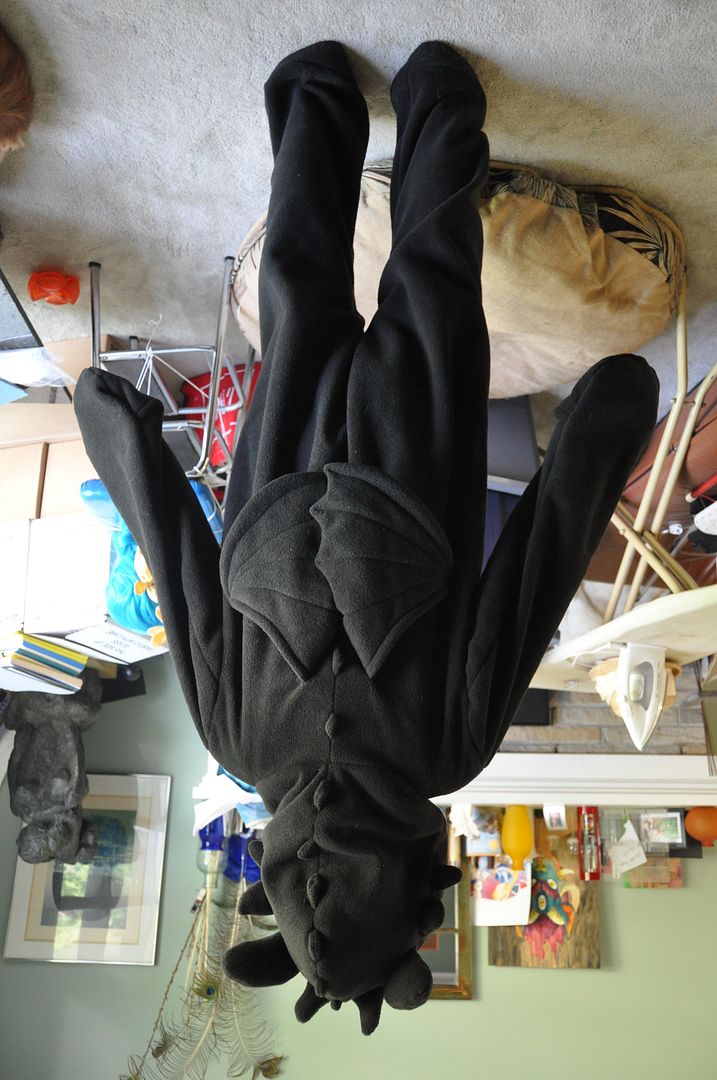
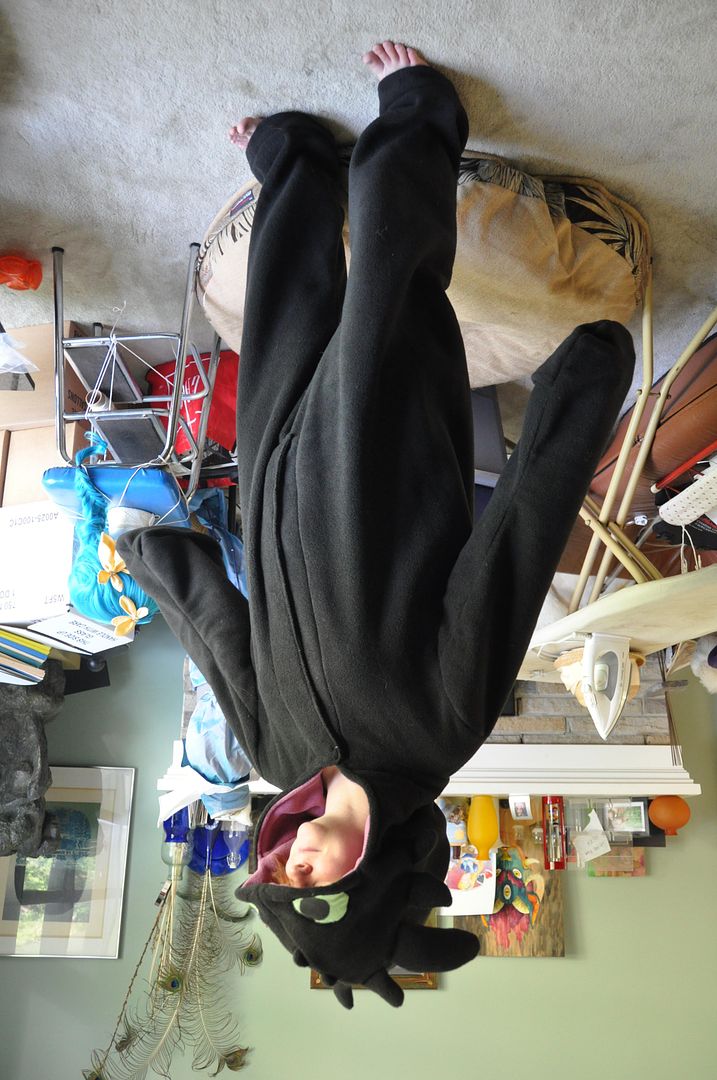
Toothless - Kigurumi - How to Train Your Dragon

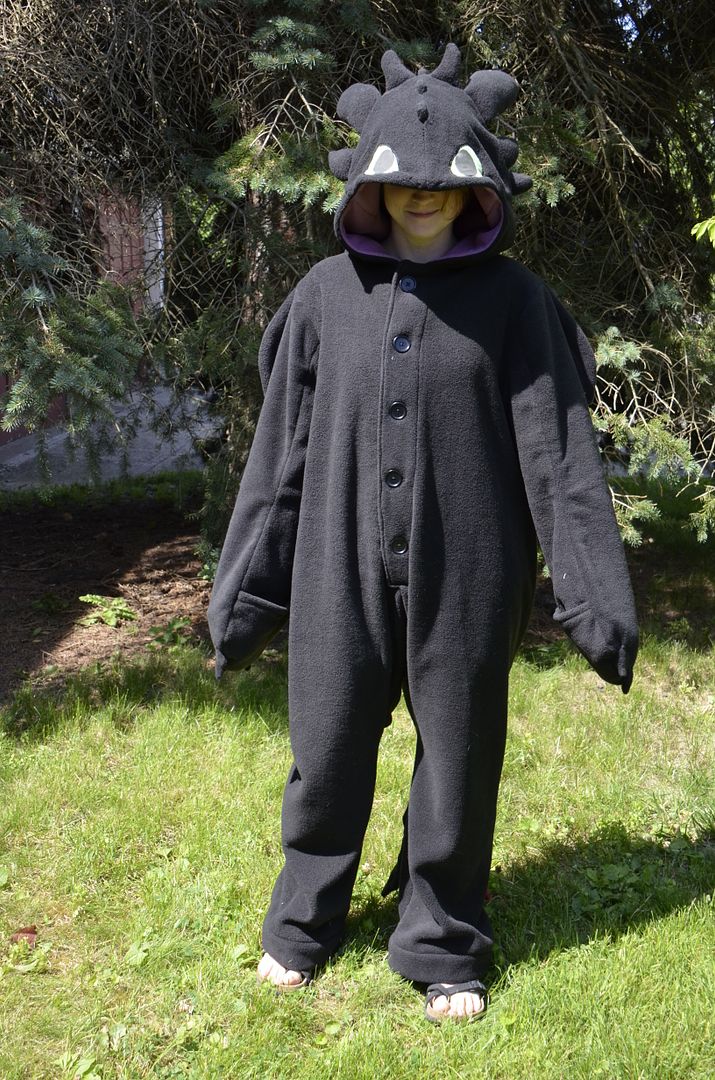
Jumping up the schedule by popular demand: Toothless! I made this Toothless kigurumi (onesie) to wear to Atomic Lollipop this past July. To be honest, I had been contemplating buying a kigu for the longest time, but I had never seen a design that I really loved. So long story short, I decided to make my own. I picked Toothless because I really love the movie How to Train Your Dragon--Toothless is the most adorable dragon ever. Of all time.
An added bonus here is that because it was summer, all this fleece was on sale! Definitely worth it with the amount I had to buy. My recommendation is to never under any circumstance buy fleece in fall/winter. You will pay 3 times as much as you do in summer. For reference, I bought my fleece at Fabricland in July for 6$/meter, now (September) they are selling the exact same product for 17$/meter. Yikes!

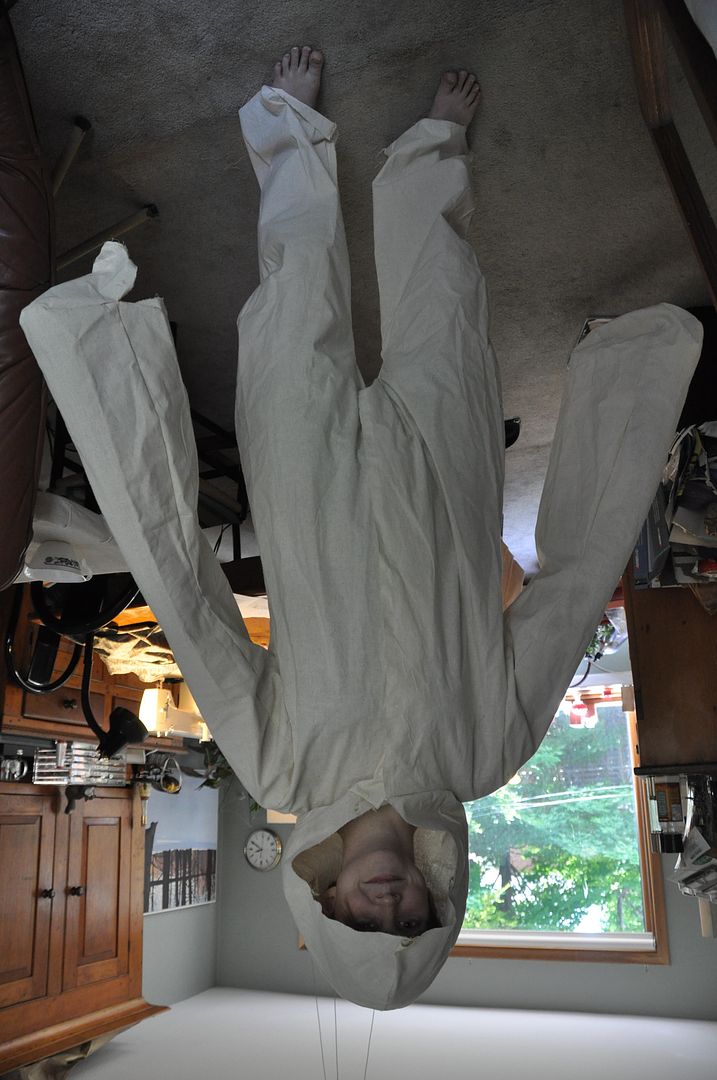
I looked at kigu patterns online, but eventually decided to draft my own from scratch. It took me 2 tries to get the onesie itself looking how I wanted it and 5 tries to get the hood right. Lots and lots of mockups.

Below you can see the onesie version 1 and 2 side by side. The first sleeves totally didn't work, and my hood problems were always that it was too big and floppy.
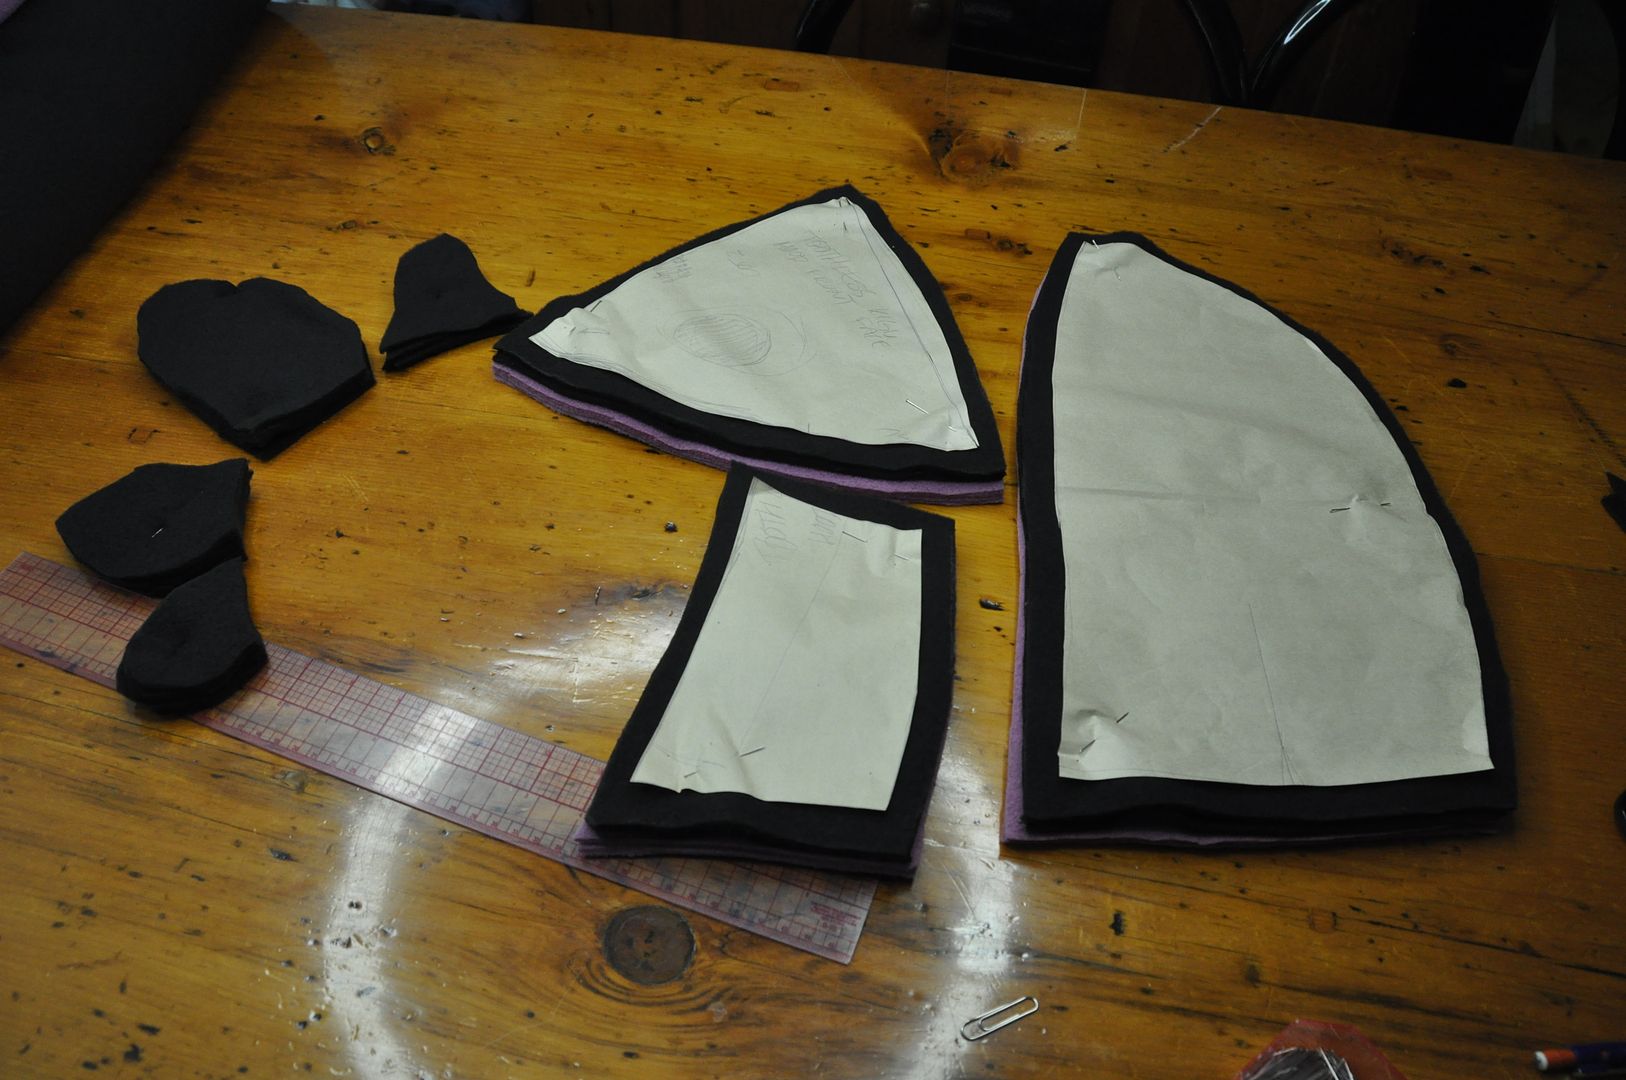
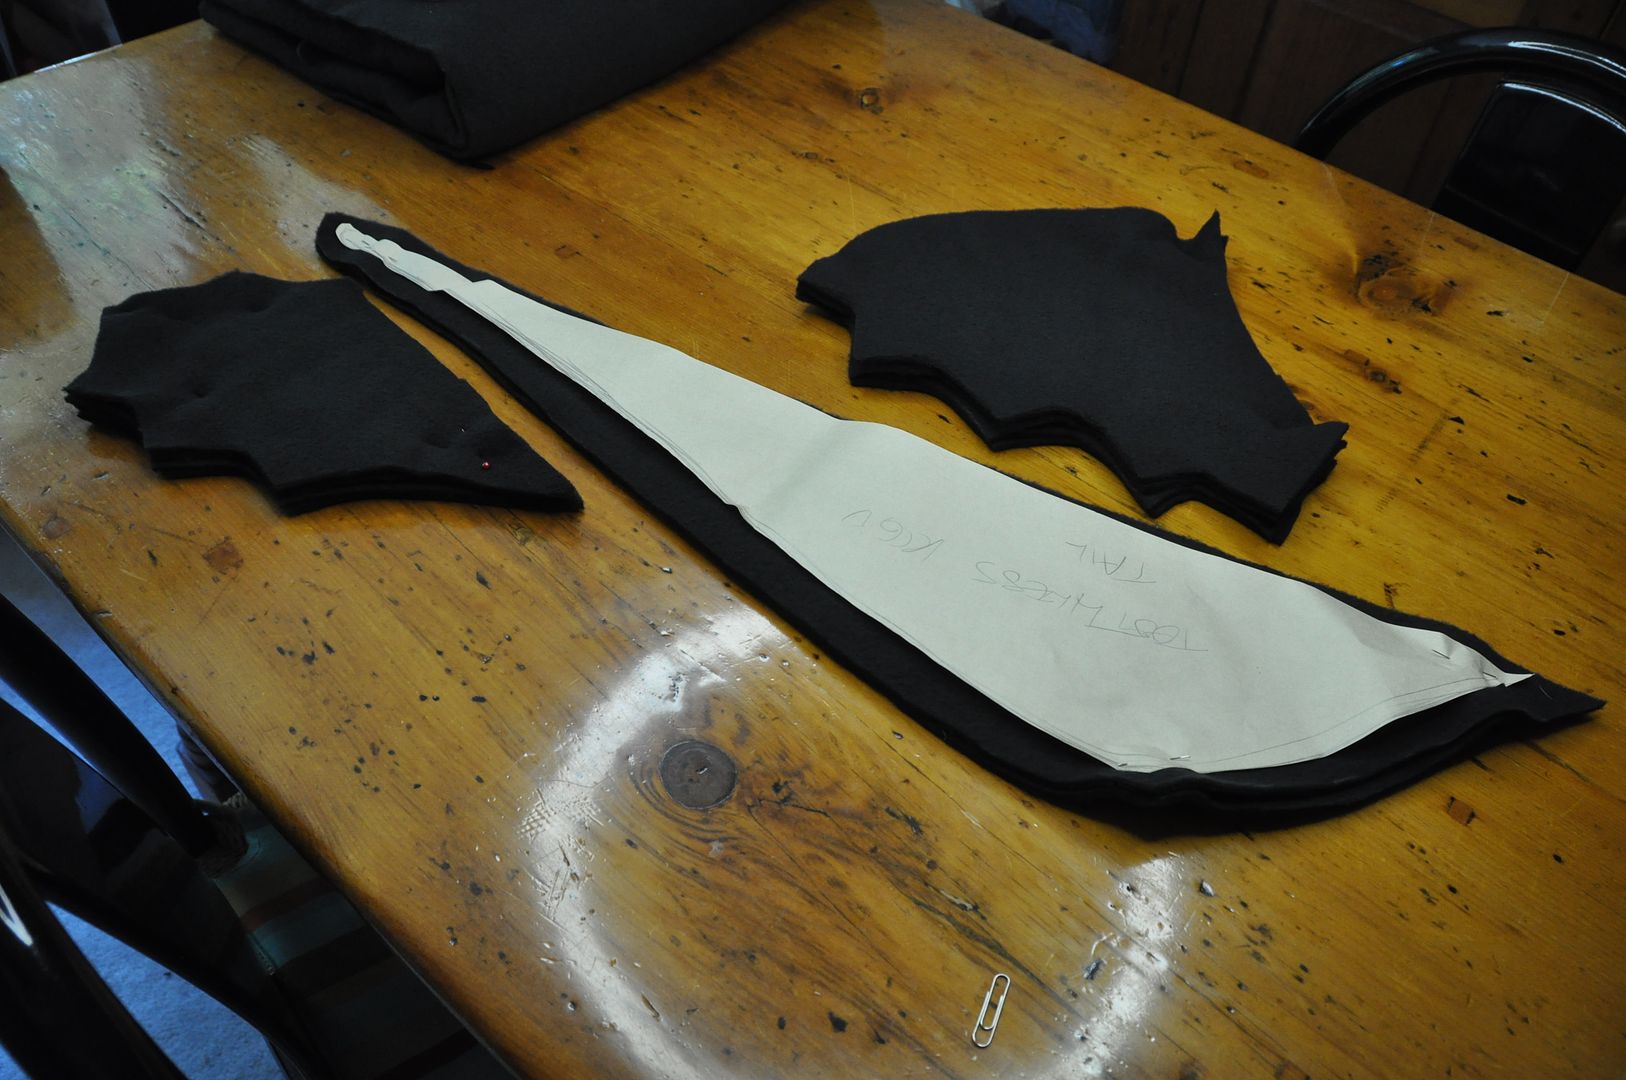
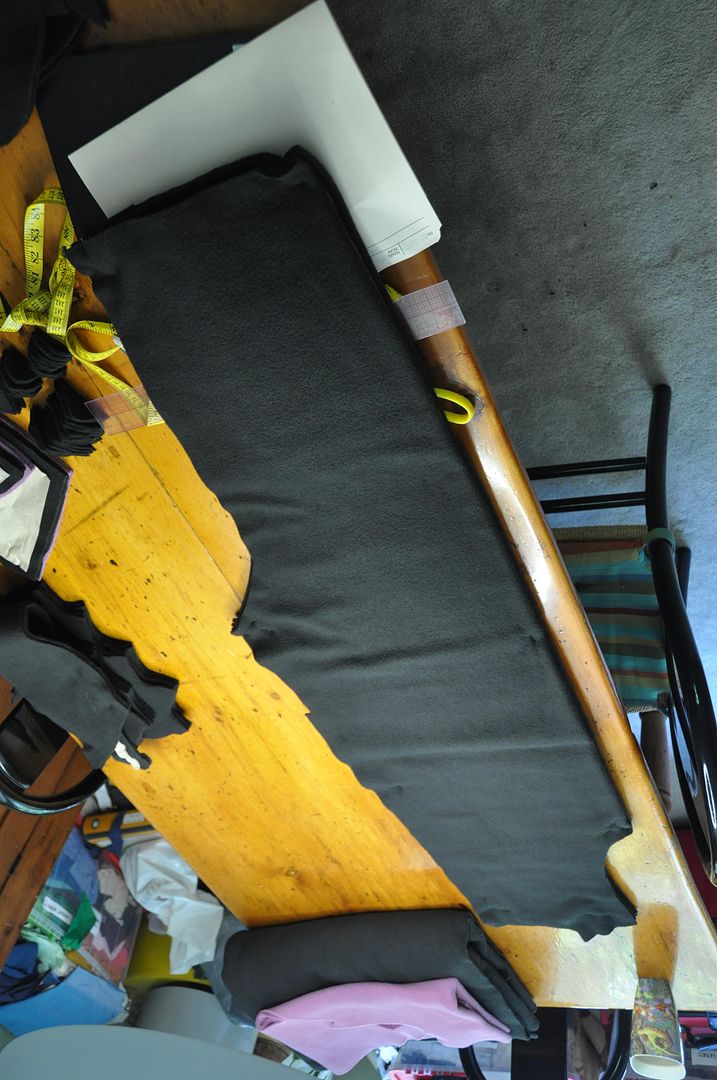
 After finally getting a pattern I was happy with, I moved on to cutting out all the pieces. Here are the hood pieces complete with fins, below you can see the wings and tail.


I changed my initial design for the sleeve, ending up with a sleeve style similar to my Katamari cousin pattern. It is a mitten sleeve with a slit on the underside of the sleeve to slip the hand covers on and off. This means the sleeve top is made of one piece, and the under sleeve is made of 2 pieces.


The bodysuit is in 2 pieces, with each half (right and left) being cut on the fold along the sides. (Meaning there are no side seams on this garment!)

On each of these I first sewed up the leg and shoulder seams, then I basted the center back-crotch-front seam, stopping where the opening for the buttons would go.


I hemmed the edges of the opening, then the sleeve top and bottom pieces were sewed right sides together then flipped right way out. I made sure the hand cover was on the outside.

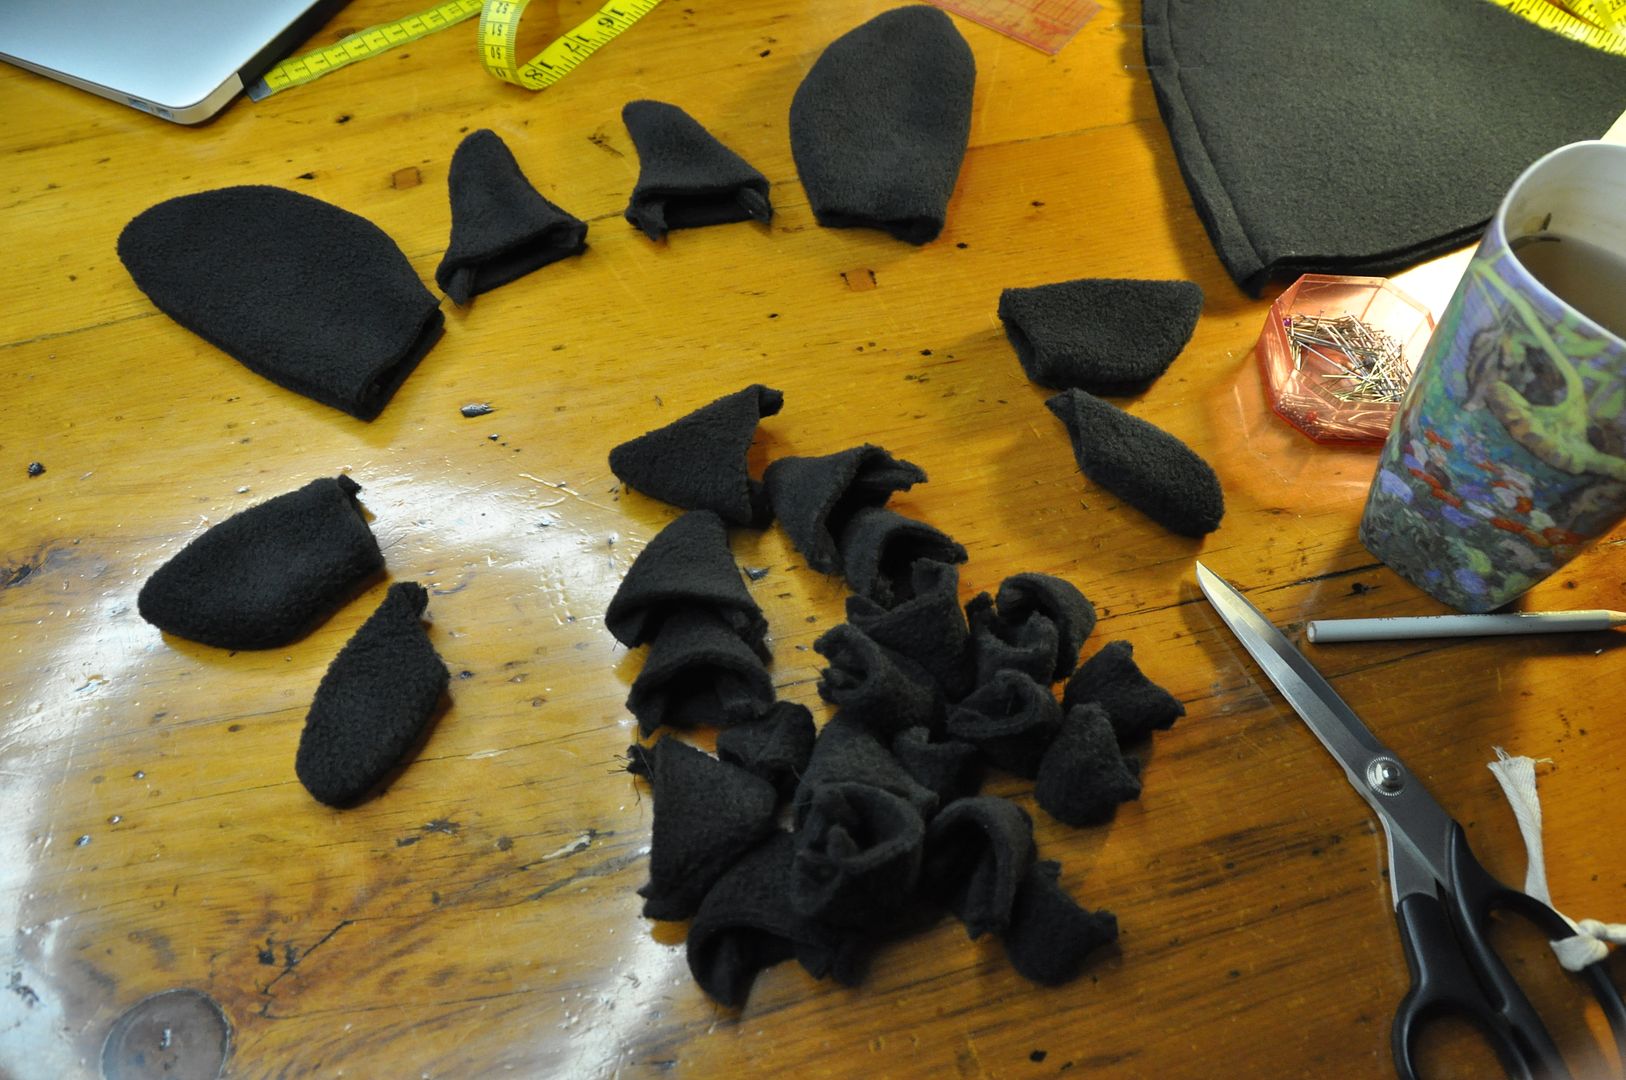
 I sewed the wings and tail fins right sides together, then clipped the excess in the corners and flipped them right way out. I top stitched on the details. (Not pictured here is the red fin!)

It took much deliberation, but I decided to line the hood in pink, to look like the inside of Toothless' mouth, as opposed to making it black to match the rest. I sewed the hood lining together; first I stitched the whole front together, then the back, lastly the side seam that divided the two.


I sewed all of the fins right sides together, then clipped and flipped them right way out. I made a whole bunch of triangle shaped ones in varying sizes that would go up the center back seam. 
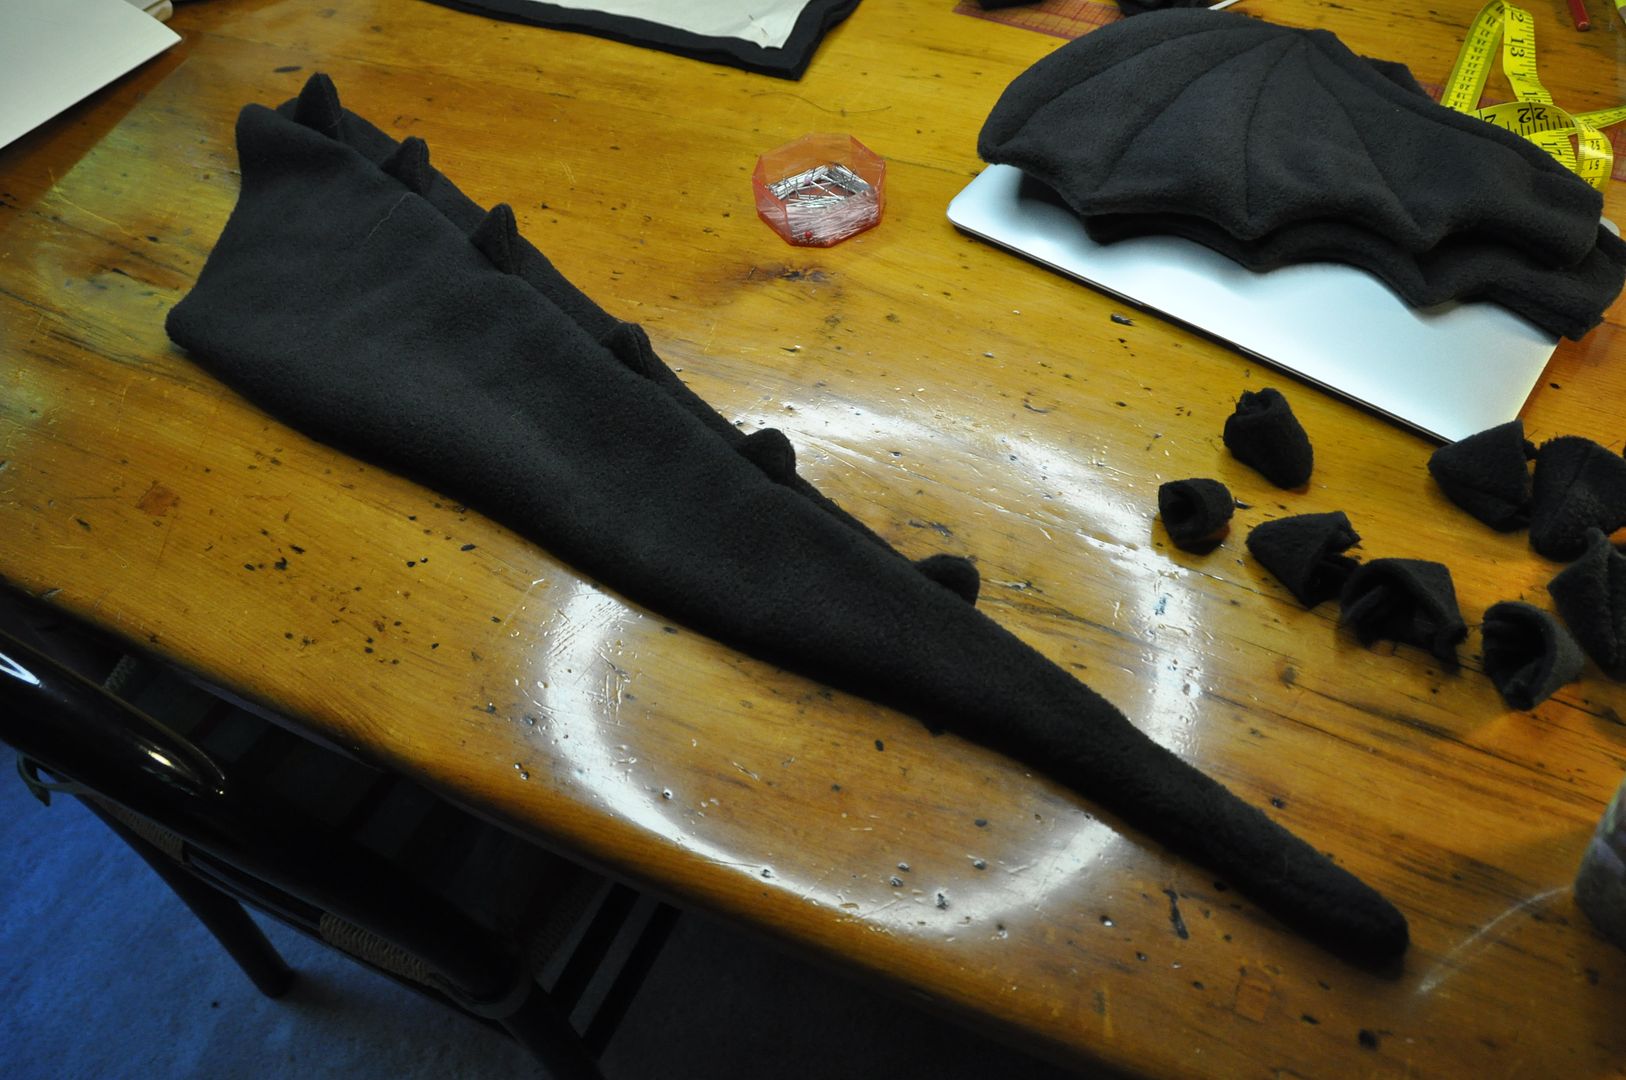
Carefully spacing the spines, I sewed the 2 tail pieces right sides together, then flipped it right way out. (I had to make sure the spines ended up on the correct side during this process.)


 Next I attached the front pieces of the out hood together. While I was at it, I put two small spines on his forehead in the center seam. While looking at reference images I carefully arranged the fins around his face, pinned them in place then sewed the side seam, completing the outer hood. The reason why the hood is made of 6 pieces is partially because it made the shape better, but also because I needed seams that I could easily attach all the fins/spines into.

Next was detailing. Using leftover green fabric from Isabelle, I cut 2 ovals. Using black fabric paint leftover from Vaporeon I painted on the pupils. I pinned the eyes in place and then zig-zag stitched around the edges. This made the fabric ripple a bit, which I am not so happy about. I also zig-zagged on some nostrils while I was at it.
 Right sides together, I attached the hood lining to the outside along the front edge.

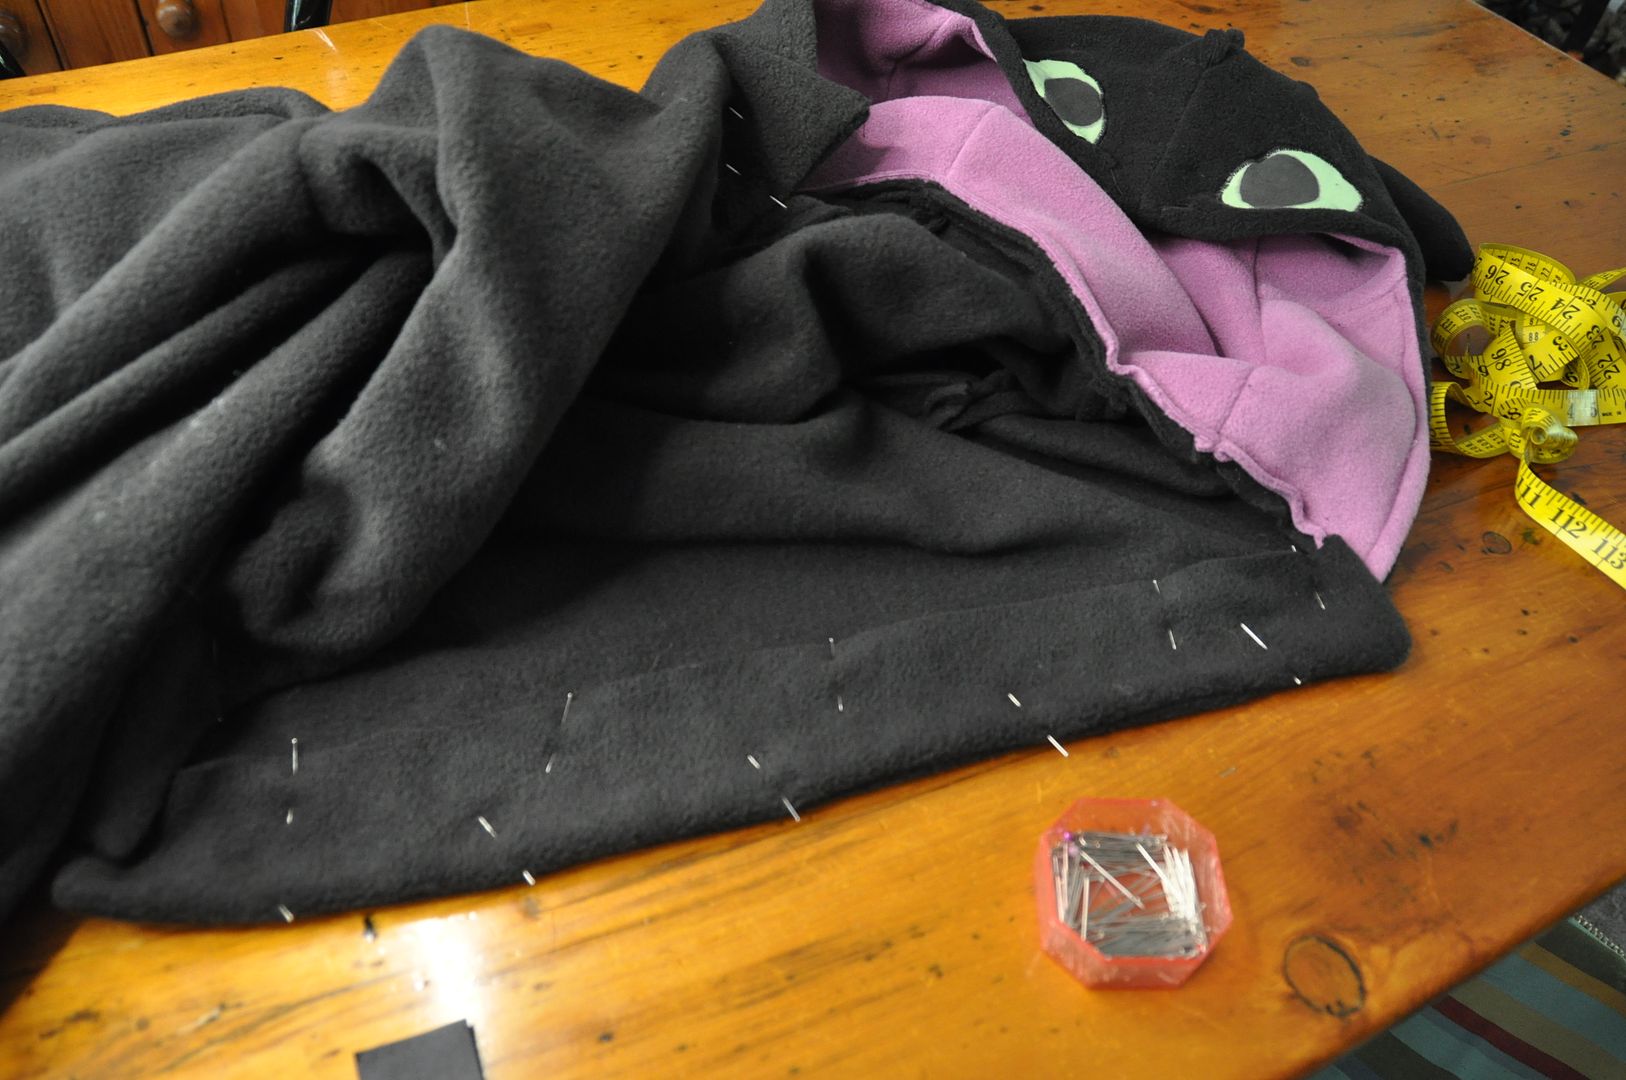
Blarg! What is this monstrosity? Looks like Dr. Finkelstein. D; The hood was not so thrilling at first, it took some cleverly hidden stitching to keep the lining tacked in its proper place, because it wanted to curl outward. Pulling the hood lining back inside the hood so that the outside over-hanged slightly I pinned it in place. Then I stitched the two layers together along the lower edges of the eyes and on the sides of the hood opening. Trust me when I say this helped a lot.


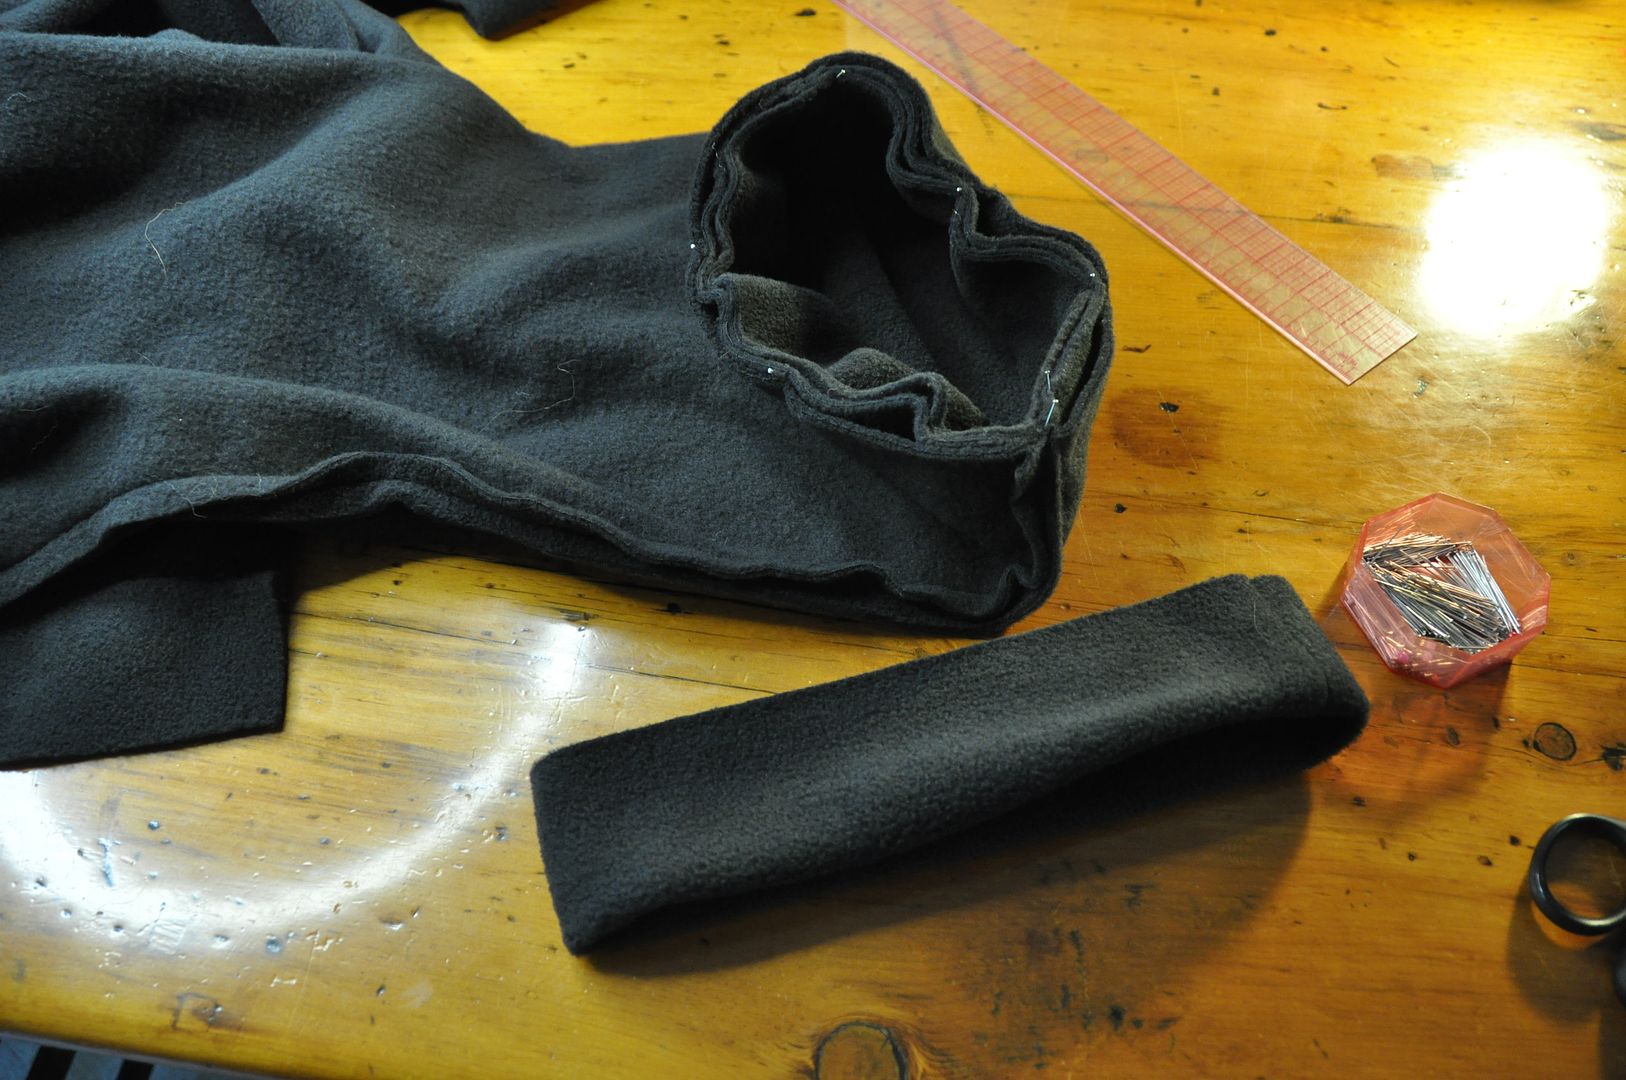
 Next I put cuffs on the pant legs. I also sewed the arms into the armholes at this point.


 With some difficulty I put a rectangle on each side of the opening for the placket.
I painted the viking skull on the red fin with white fabric paint. Way cool! Once this was dry I hand stitched these directly to the tail, which I had stuffed by this point.

Then I marked for the tail placement and spaced the spikes in the back seam according, picking it out to put the spikes in, and then going over the whole thing with a permanent stitch. 
 I measured and attached the wings, which were then tacked up with velcro so that they wouldn't flop down.
I pulled the kigu over an ironing board so that I could pin the tail to the back without accidentally catching the front. Making sure the tail was extra stuffed, I pinned it in place, then stitched around the raw edge with a zig-zag stitch to keep the tail firmly in place.

Lastly I added buttons and button holes to the front!

1 excellent kigu that made everyone at APop jealous. Sorry all! This kigu is one of a kind, but if someone were to commission me, I might consider making a second one. But not right now, because fleece is crazy expensive again!

Saturday, July 5, 2014

Forest Guardian - Pants, Shirt & Cape

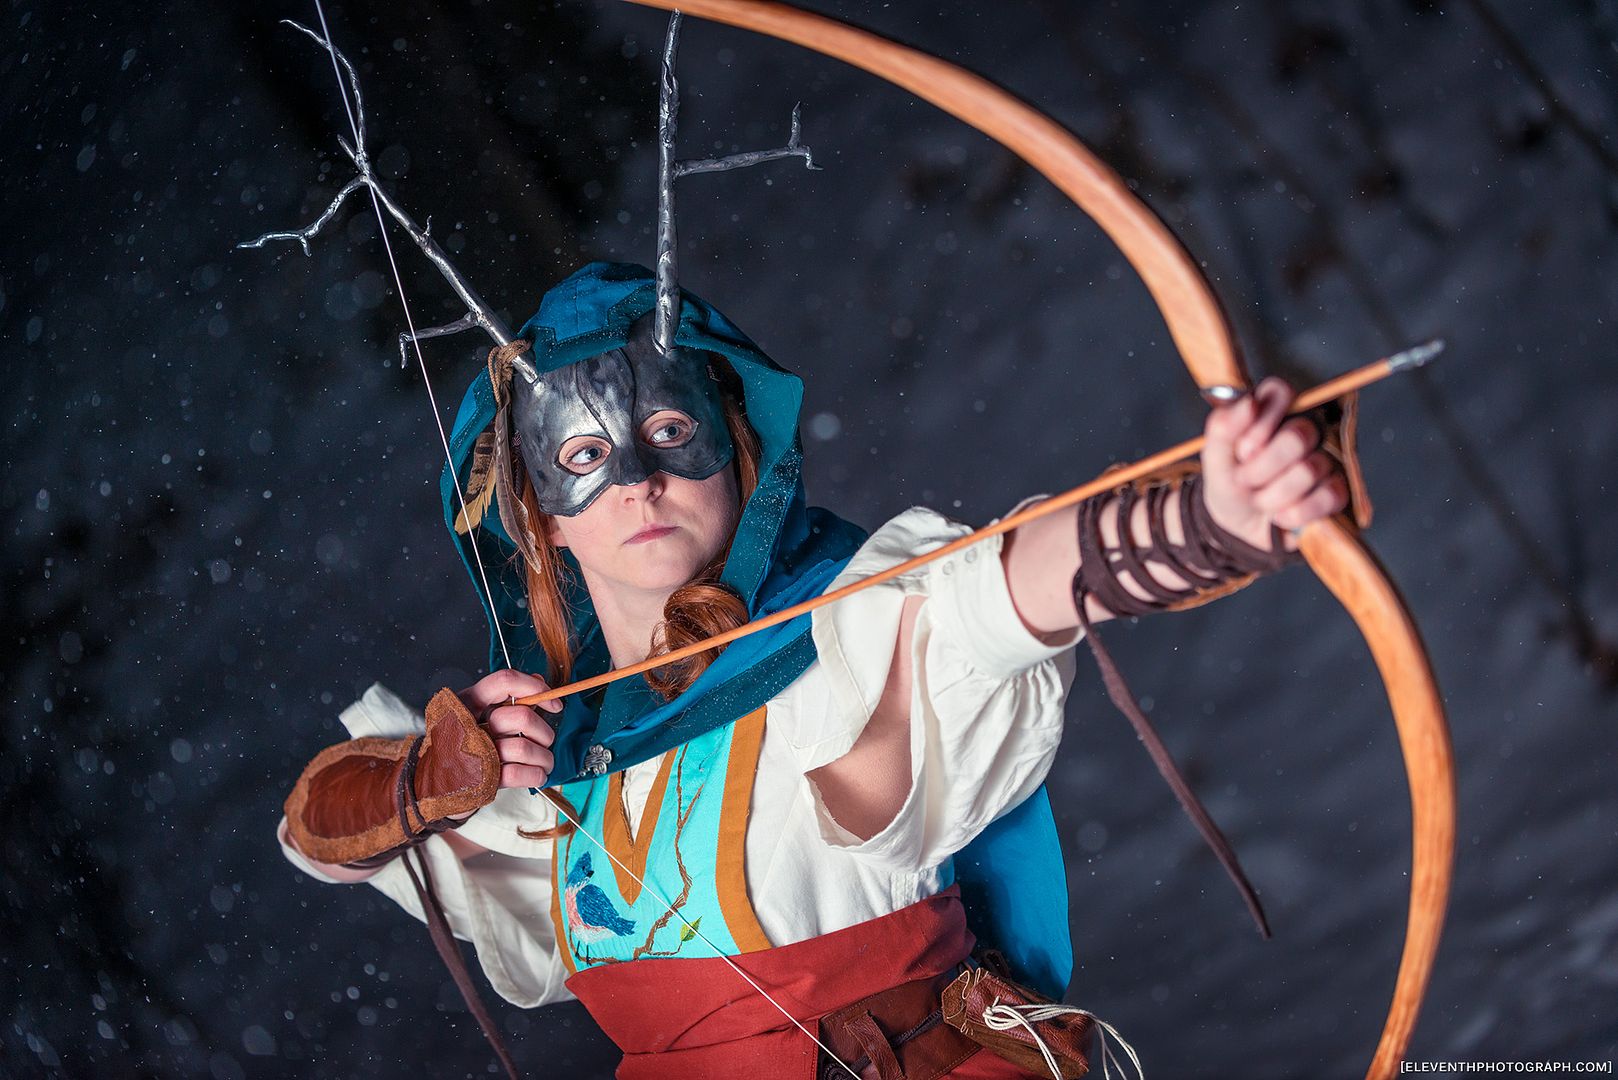
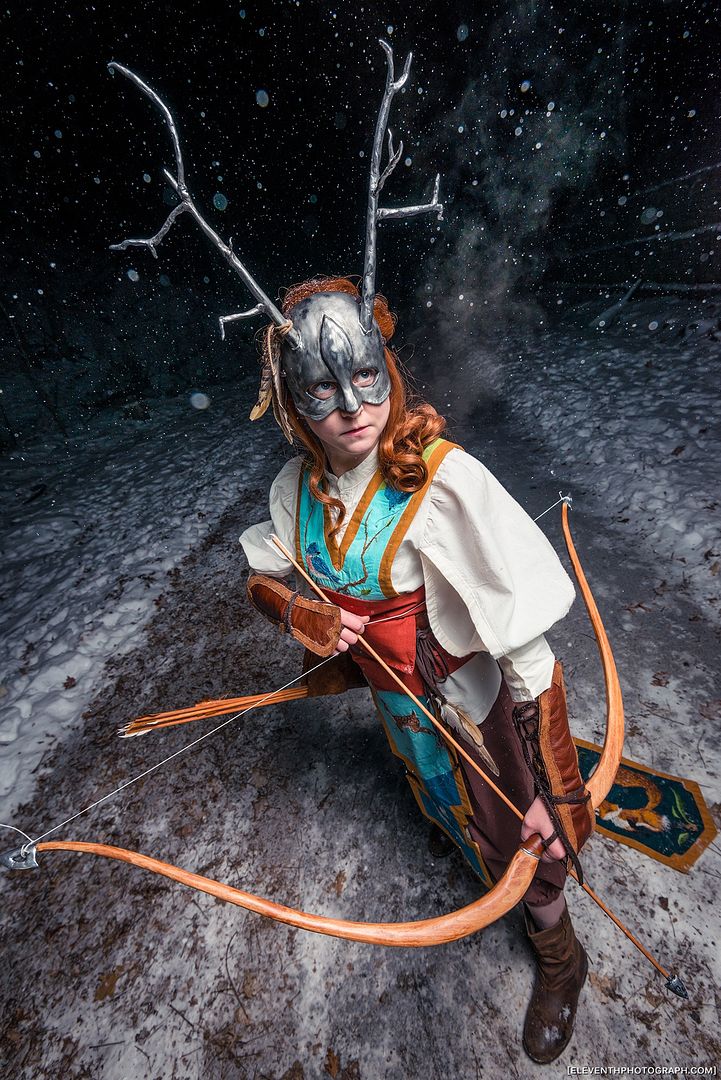
[Edit: New photos added from Feb 2015 shoot with EleventhPhotograph!]

Welcome to my first look at the Forest Guardian! I thought we should start with the pants, shirt and cape because in terms of the actual build of the costume that's where I started. I think at this point it has been a full year since I started the concept sketches for this costume, wow! This is my first real original design costume and I'm pretty proud of it. 
I wore most of the costume to CostumeCon 32, excluding the embroidered panel, which I was sadly unable to finish in time. The costume was completed for Anime North, and I competed it in the Masquerade. I won an award for my embroidery in the Master Division, which I am super proud of! This was my entry.

I still need to do a photoshoot of this costume, hopefully that will happen sometime in the near future. I have been location scouting in the forest behind my house. :P 

I started the design concept of this last summer. I had bought my badge for CostumeCon 32 at Anime North last year, so I knew I wanted to make something original. There were several different designs leading up to this one, several different versions before I arrived at this one. I developed the design over the course of the summer and got started on the project after returning from Otakon. 

 The hardest part once I had the shapes down was colourizing everything. I knew I wanted the character to have auburn hair and that the shirt was going to be off-white but other than that I wasn't sure. I didn't even know if I wanted to make the mask look like metal or clay & bone. There were several different coloured versions before I settled on this one (there was even one where the animals on the embroidered panel were to be done as silver silhouettes). It ended up being quite colourful in the end, I was sort of going for ceremonial garb when I first started drawing it and ultimately I think the colour suits the design. Even then there have been several changes that developed over the course of the build since I did this "final" sketch. I purposefully designed the under clothing for this costume to be quite simple, as I wanted the focus to be on the embroidered panel and accessories. 

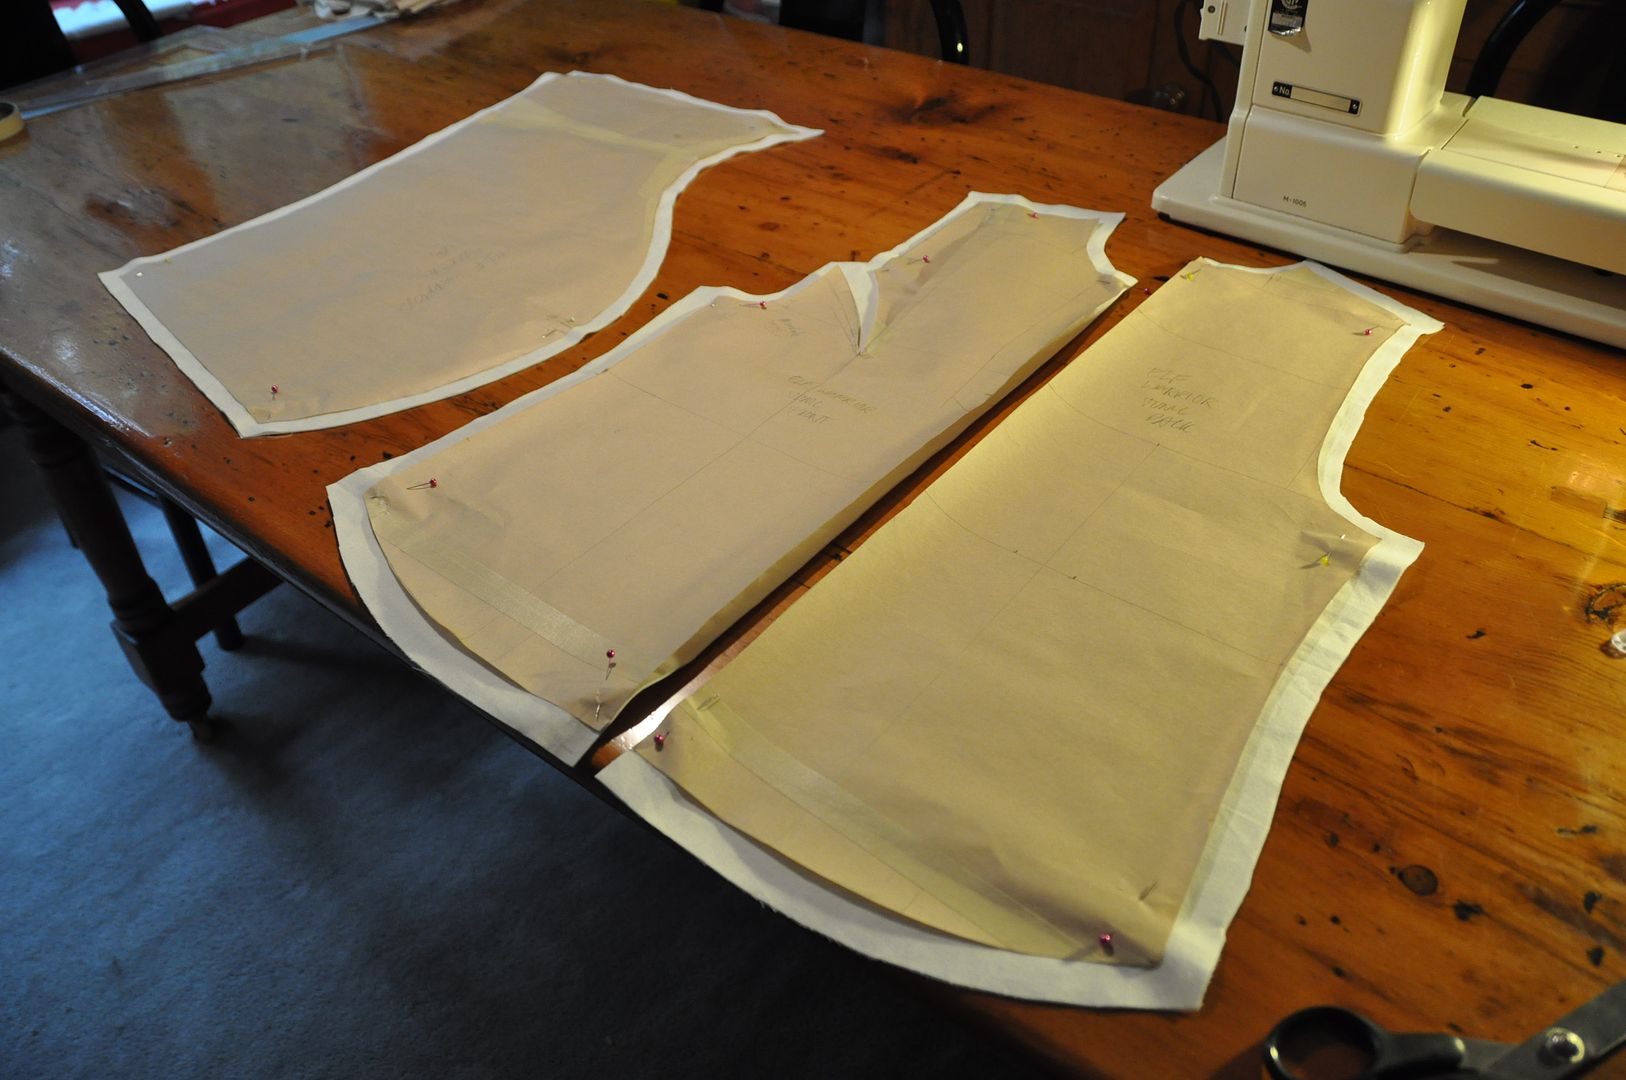
 I started by patterning and mocking up the shirt. The shirt was designed to be a looser fit, with flowy sleeves that would allow easy/unrestricted movement. The shirt itself only has 2 darts at the armhole to the bust, the waist get cinched in by the belt. The sleeve pattern had required some adjustments initially because unlike a regular sleeve this had a slit in the front. So I had to move the seam from the bottom to the front.
 
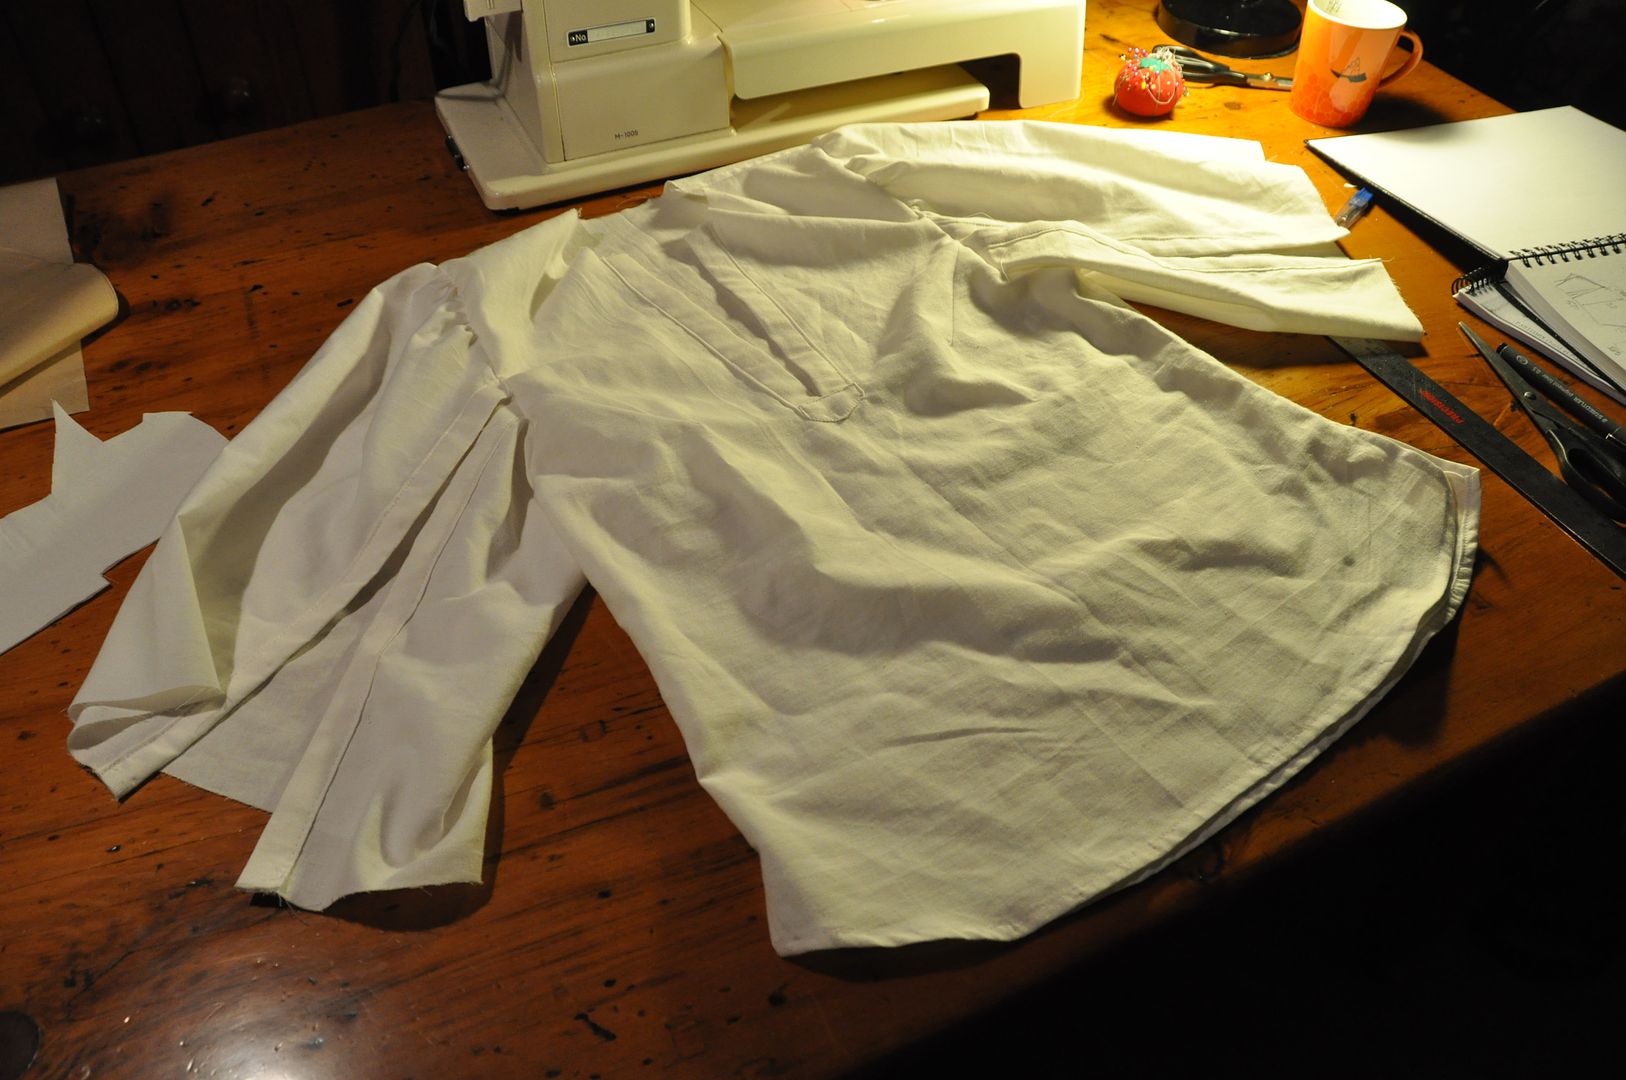
After doing a mockup, I cut and sewed the pieces. I closed the darts and then sewed the front and back pieces together, leaving a little slit open at the bottom of each side seam. I cut the slit open at the front and finished off the edges with a strip I made out of the same fabric. This would reinforce the fabric when I added the laces later.
I then sewed on the collar and gathered the sleeves. Then I finished/reinforced the edges of the sleeve opening. Originally I had intended for the sleeves to be laced shut, but I decided I really liked the look of them open and left them that way.

 I hemmed the bottom of the shirt.
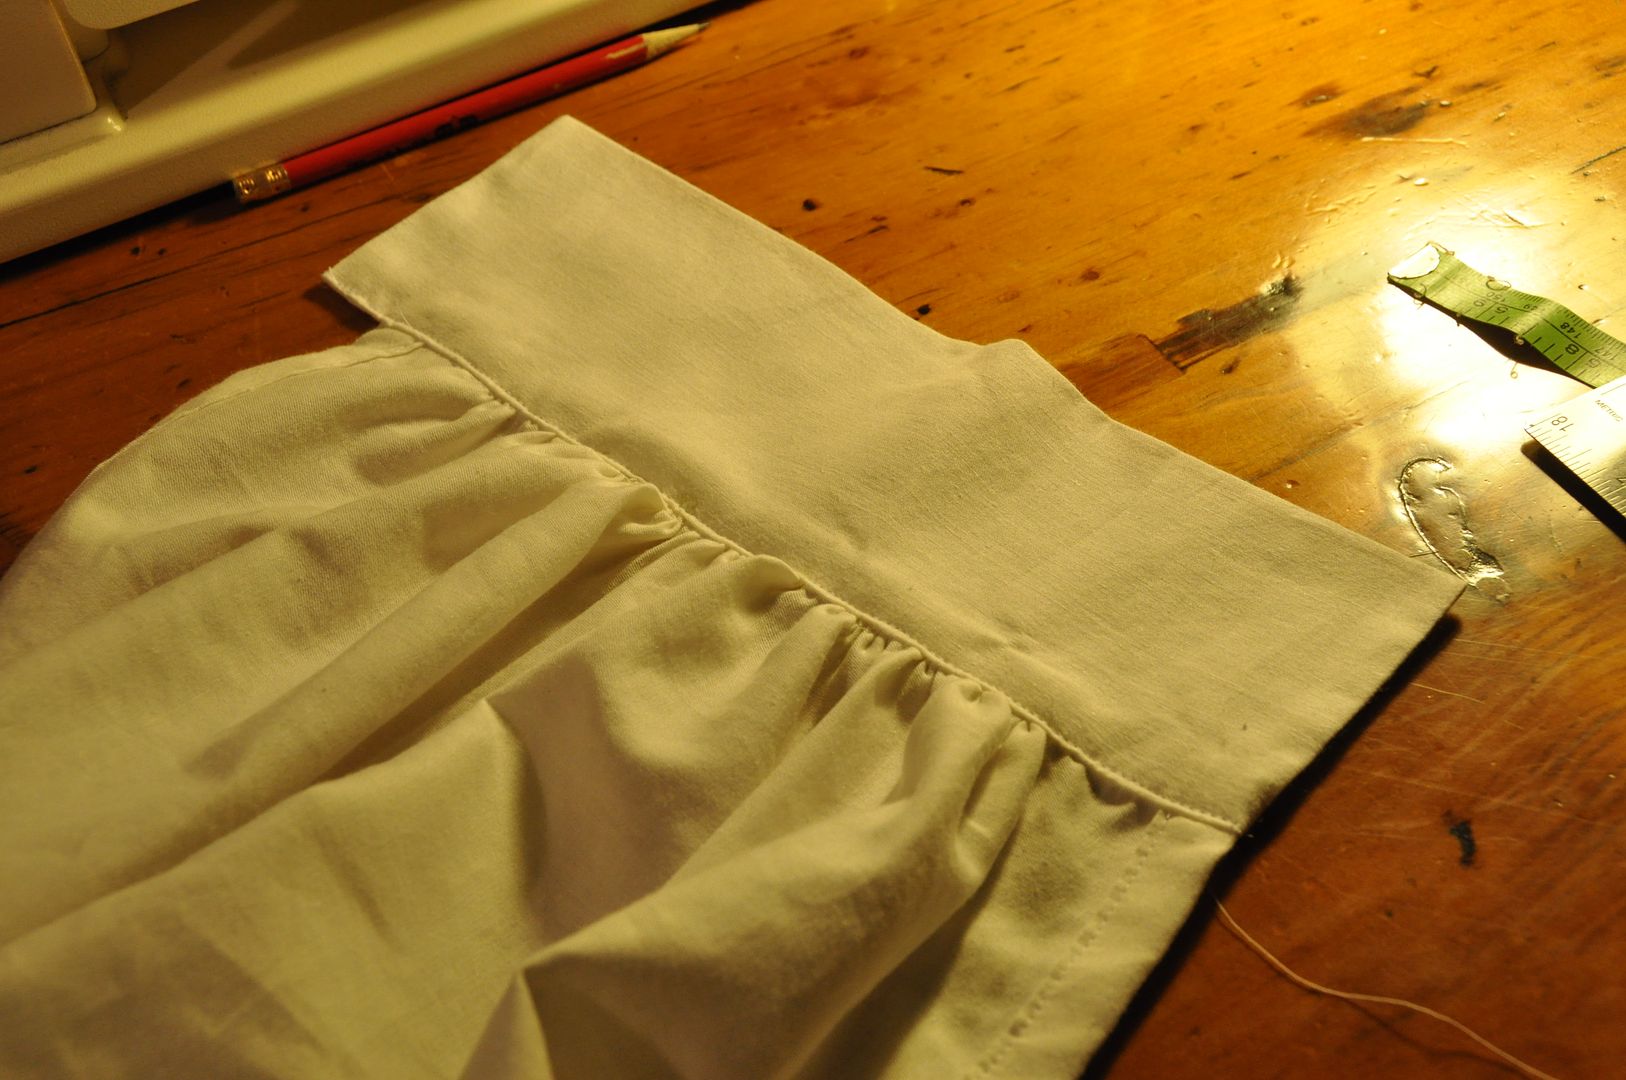
Then I gathered the edge of the sleeve and added the cuffs to the sleeve. Later I put 3 buttons & buttonholes on each to close them.I also added in the holes on the front closure for the laces. These were done in the same way as the button holes rather than with grommets.
 Once the shirt was done I began work on the cape.


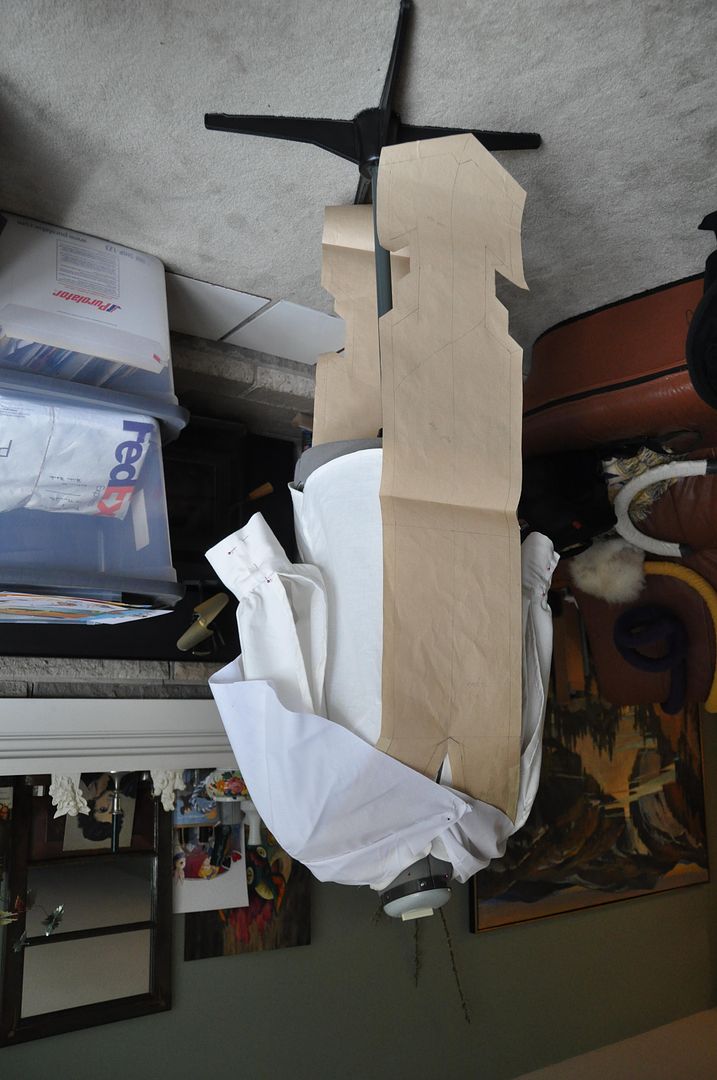
The cape itself had originally been designed to be longer, but after much consideration I felt it would detract from the embroidered panel so I made it a short cape, but still kept the large hood. I am pretty inexperienced patterning hoods, and this was my first cape. It took a few tries to get it to look how I wanted it. The only advice I can give is make a mockup!
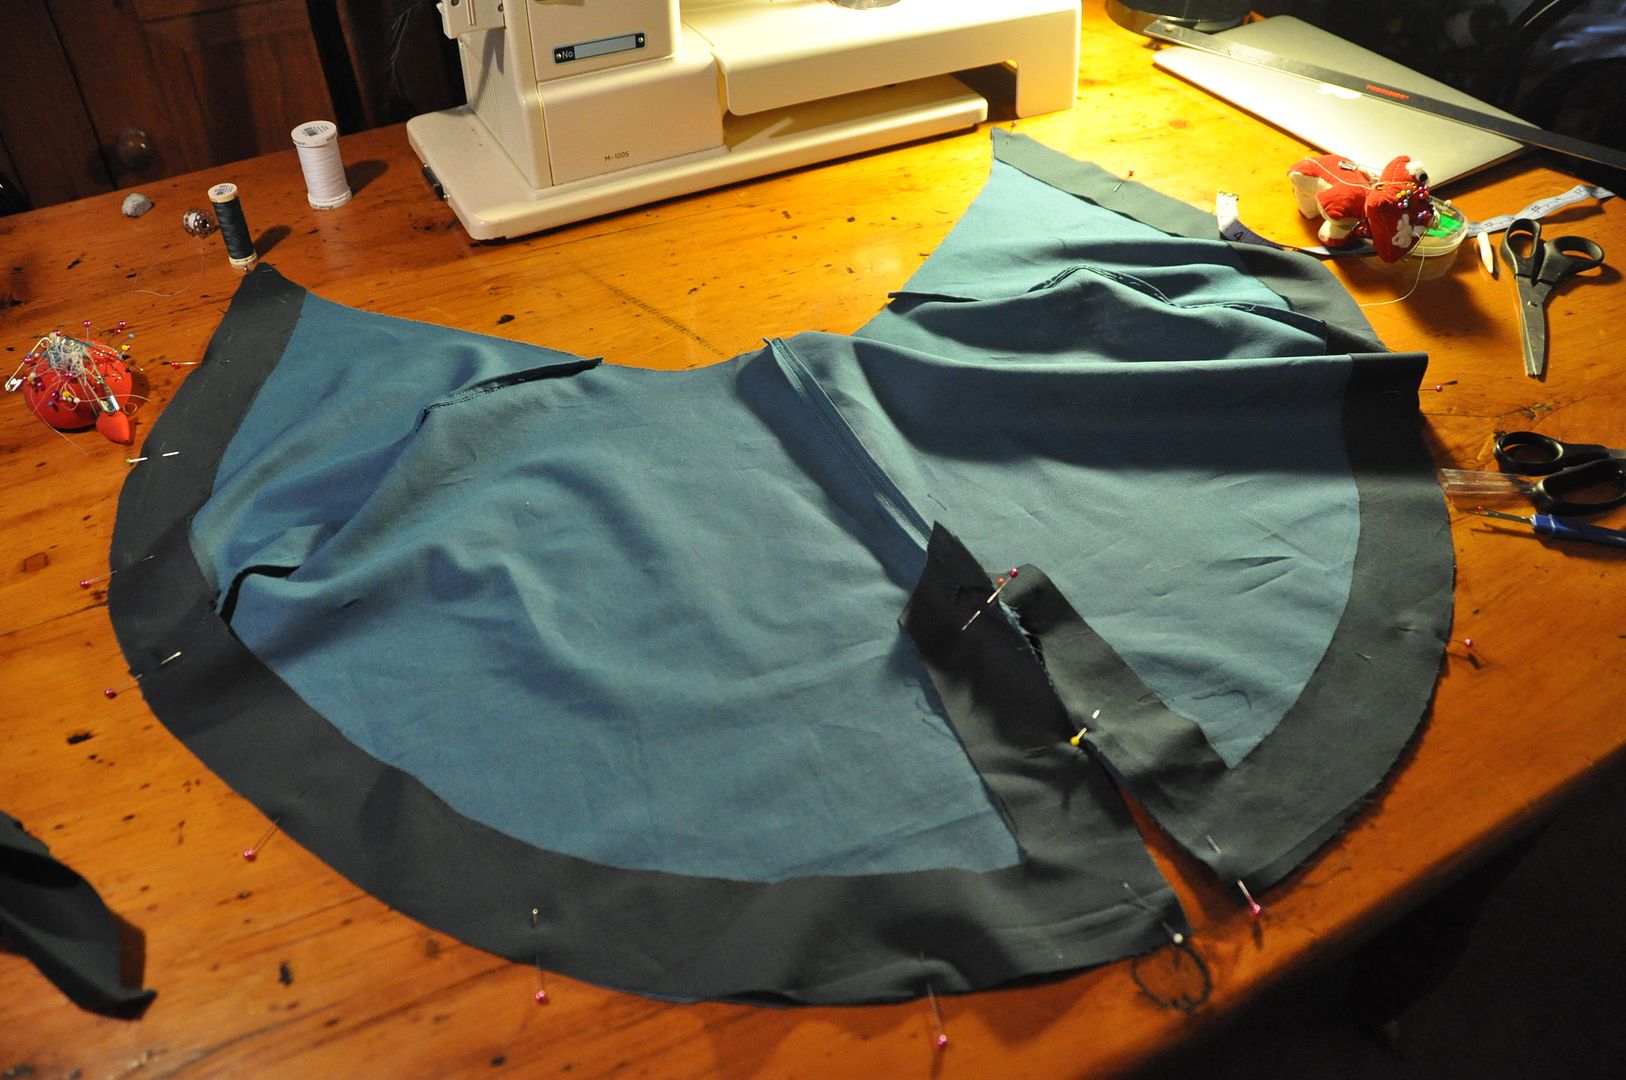
The pattern pieces for this look pretty odd!

My main design feature on the hood was the two slots for the antlers to stick through. It was one of the design elements from the initial concept sketch that came all the way through to the end. I had to make a reinforced edge piece that went all the way around the edge of the hood and the hem of the cape. It had to conform to all the odd angles and contours. It is made of the same fabric as the hood lining.

I started by sewing the sides and center seams on the hood, hood-lining and cape pieces. For the hood I attached the trim piece to the lining and bagged it out. Then I slotted the outer fabric under the trim and pinned it in place. I carefully measured and folded under the raw edges then top stitched the trim in place.


For the main part of the cape I bagged out the trim, having stitched it directly to the inside of the outer fabric. I folded it to the outside and finished the raw edges in the same way, top stitching it all in place. This way the raw edges are all hidden inside the trim, leaving for a clean look on the inside and outside!

You can see how the hood collapses in on itself. Which was frustrating as even when worn over the mask the edges of the antler slots just drooped. I later re-opened the seam and added in a wire to the hood, which kept it rigid and held the desired shape perfectly!

The red wrap around the stomach is simply a long strip of fabric that is wider at the ends (narrower in the middle) bagged out to finish the edges. It has velcro to close it, which is hidden by the belt. (The belt pictured here is actually from my Presea costume, which I was using when trying things on until I made the actual one.)

The pants are actually based on a pattern I had modified for a costume I started but never finished. (Jack Frost) I modified my modified pattern to get the pants I made for this costume. Haha

To make the leg wider I opened up the front of each pant leg and added in a pleat on each. I flared each pant leg out more as well. This way, it still fit nicely at the butt, but the legs would pouffe out a bit.

When I was satisfied with the changes to the pattern I cut and sewed the pieces.  I started with the pleats on the front, then the side seams. Then I partially closed the crotch seam and finished the inner seams.
Next I added my waistband. The pants front closure was a bit tricky. I decided I wanted laces rather than doing a fly-front... even though it isn't even visible, I wanted authenticity. hahaha I had to reinforce the edges where I put the holes, and add a modestly panel so you can't see my underwear through the gaps in the lacing. But in the end it worked well.

Lastly I finished the cuffs by cinching them and then adding on a strip of fabric that I had closed to be a circle.
I can definitely say that the base outfit for this costume is very comfortable.

Tuesday, July 1, 2014

Spliced Hoodie Commission

Happy Canada Day everyone! :D Since it's a holiday (for me anyway!), I thought I would take a small break from posting AN cosplays to show a small commission for my sister back in May. The task she set for me was simple: take 2 sweaters and splice them up the middle making them each one half white and one half black. This commission was a birthday gift for Mike; aka EleventhPhotograph who does 90% of my cosplay photoshoots and always does a fantastic job! :)

This process of splicing hoodies will only really work if the sweaters are the exact same size and brand, as the zipper halves have to work. Always check in the store that the zipper of one half sweater will zip with the opposite. It is also much easier if you can find a sweater where the hood isn't lined, otherwise you have to deal with the lining too.

I measured and cut them in half (first pulling the drawstring out of the hoods!), and unpicked the channel for the drawstring on the hood at the center top. Then I sewed the left and right halves to the opposite coloured hoodies. Then I stitched closed the drawstring channel on the edge of the hood closed and finished the center back seam I had created. I put the drawstrings back in the hoodies. Presto! Two black and white hoodies! ;D

When this was done she took them and machine embroidered his logo and catchphrase on them! Very nice! :D