Showing posts with label asuna. Show all posts

Friday, August 22, 2014

Otakon 2014

Two weeks ago I was in Baltimore for Otakon! This was my 3rd year attending the con and I had a really great time once again. :) Though I must confess it was a little sad for me to have my sister not attend a con with me for pretty much the first time ever. :( (She's moved to Japan, so there will be more cons sans-Alex in the future.) This is so far, the only American con I have attended, but I always enjoy it, so the trek down south is definitely worth it.

Thursday: We made the long drive down, picking up our roomies on the way. Special thanks to Mike, aka EleventhPhotograph for driving us down! (I don't even know how to drive, so I probably would never make it there otherwise, because planes are expensive.) Trivia: How many American flags did we count on our way from border crossing at Niagara Falls to Baltimore? Answer: approximately 886.

Sadly, I didn't get my cosplay lineup completely finished for the weekend, as I ran out of time. I finished my essay for school in the car on the way there, and arrived at the con absolutely exhausted. With some difficulty we got our hotel room sorted out and then went to pick up badges. Unfortunately they had already cut off the line so we didn't get badges that night. Instead, Mike and I had dinner with the lovely ladies of Pro Voltage Cosplay at Kona Grill. :) I finished Sakura's wand in the hotel room that night! XD

Friday: I got up pretty early to get into costume and then go get my badge. I wore Sakura for friday. I did a short photoshoot in the afternoon with Mike before going for lunch. I explored the convention and looked around the Artist Alley. We met Mike's friend Andrea (whose cosplay handle I have subsequently forgotten! D:) and her boyfriend for dinner at PF Chang's.

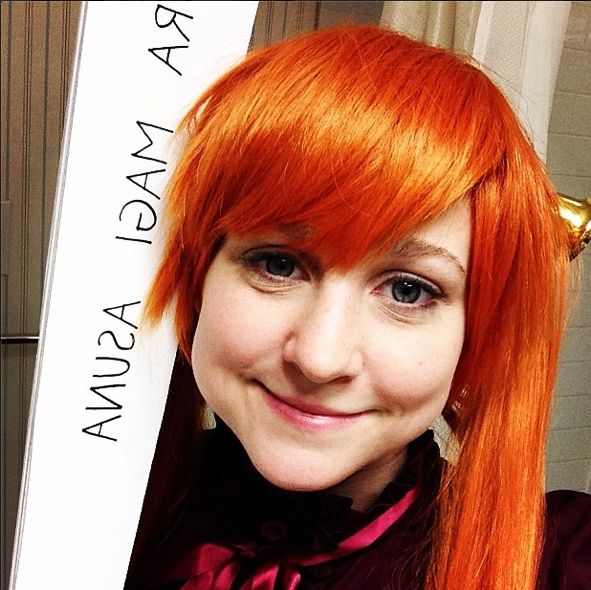
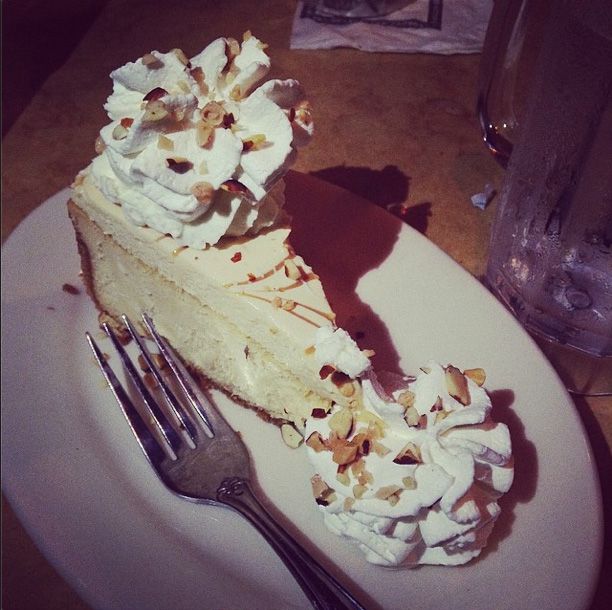
Saturday: I wore my more casual Asuna outfit, complete with harisen (because my sword doesn't fit in the car). Funny enough, because I was in the same hotel again this year I made my way over to the same café for breakfast and bumped into the same gentleman that my sister and I had become acquainted with the year before. I was pleasantly surprised! :D And also amazed that he recognized me in a completely different costume, without my sister. Apparently he's a regular, so who knows, we might meet again next Otakon? Hahaha We chatted for a bit before I went off to enjoy the con. I finished the Dealers Room and wandered around the con before going for lunch. I made the trek to Chipotle in honour of Alex! And also because its delicious. I spent some time in the games room that afternoon. We met with Andrea and friends again for dinner, this time at Cheescake Factory. Mmm Cheesecake <3

Sunday: I attended a panel on Cosplay and Identity that was fairly interesting before heading out to get lunch (Chipotle again!). Did some last minute shopping before helping our roomies pack up their Artist Alley table. The drive home was fairly uneventful; only some minor detours due to construction (and no trips to Best Buy). We got to see some fireworks and the super moon on the way home, while singing along to Mike's crazy playlist.
My one serious issue with Otakon this year is that they didn't provide a paper schedule, instead they wanted you to download an app that I couldn't find. I went to the information desk for help on the saturday afternoon and they gave me a paper schedule, only for me to discover that I had missed pretty much all the panels/videos that I wanted to see. I wish they could have given us a paper copy in the first place, for people without smart devices, as the intermittent access to wifi would have meant I wouldn't have had much luck accessing it anyway. >:(

Other than that, the weather was much nicer this year (less hot and not rainy!). Definitely planning to attend again next year (providing nothing unexpected happens to me in the meantime).

[Can you believe I forgot what day of the week it was and only realized now that I missed my Thursday post? hahaha]

Tuesday, June 10, 2014

3D Printing Collaboration with Crowtrees Studio

Hey all! This is something I've been excited to share for a while! A couple of months ago I collaborated with Crowtrees Studio to create a miniature 3D figure of my Asuna costume.

I say "collaboration" in the loosest sense of the word because all I really had to do was get in costume hold a pose for about 10 minutes! Hahaha :D Special thanks to James and Rui for making this happen! And another thanks goes to my friend Harriet for coming with me and acting as my squire for the day!

This project has been a long time in the running; I was actually contacted before Christmas about potentially being a cosplay model for 3D scanning. We set up a date in March to do the scans. I took 3 costumes with me that weekend: Asuna, Alice, and Kero. We did 5 scans that day (2 Asuna, 2 Alice, 1 Kero), but Asuna is the one they went ahead with to create the final 3D model.
Though they are now starting into doing cosplay figures, Crowtrees actually started out doing wedding cake toppers!

The thing about cosplay is that you encounter a whole lot of crazy challenges in the scanning process because of all the different complicated bits. For example, on Asuna the golden bells on her hair didn't get picked up by the scanners at all because they are highly reflective! Those had to be added in in post. Similarly when we scanned Kero's candy the cellophane wrapping totally messed with the scan. Another issue on Asuna was getting the back of the legs to scan, so we had to do a second pass with the scanner of just the legs while the skirt was held out of the way.

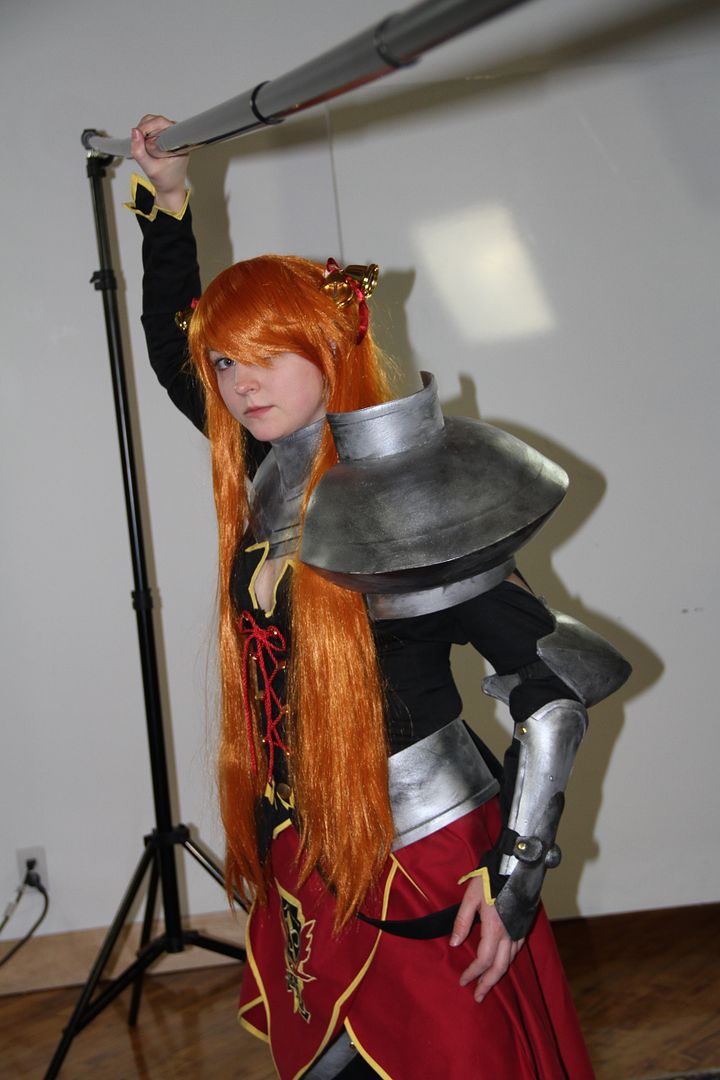
In terms of pose, I had jokingly mentioned that my one issue with this costume was that the sword was too heavy to wield and was very limiting on my posing capabilities. When they told me they could scan the sword separately and add it in later I was thrilled! Finally I would get to hold the sword in the air! Hahaha So they rigged a pole to be stationary above my head that I could hold onto at the right angle so they could scan my body with my arm raised. (Because if I just held my arm in the air it would move around a lot during the scan!) Long story short, I finally got my wish to hold the sword above my head like the character does in the manga. :P
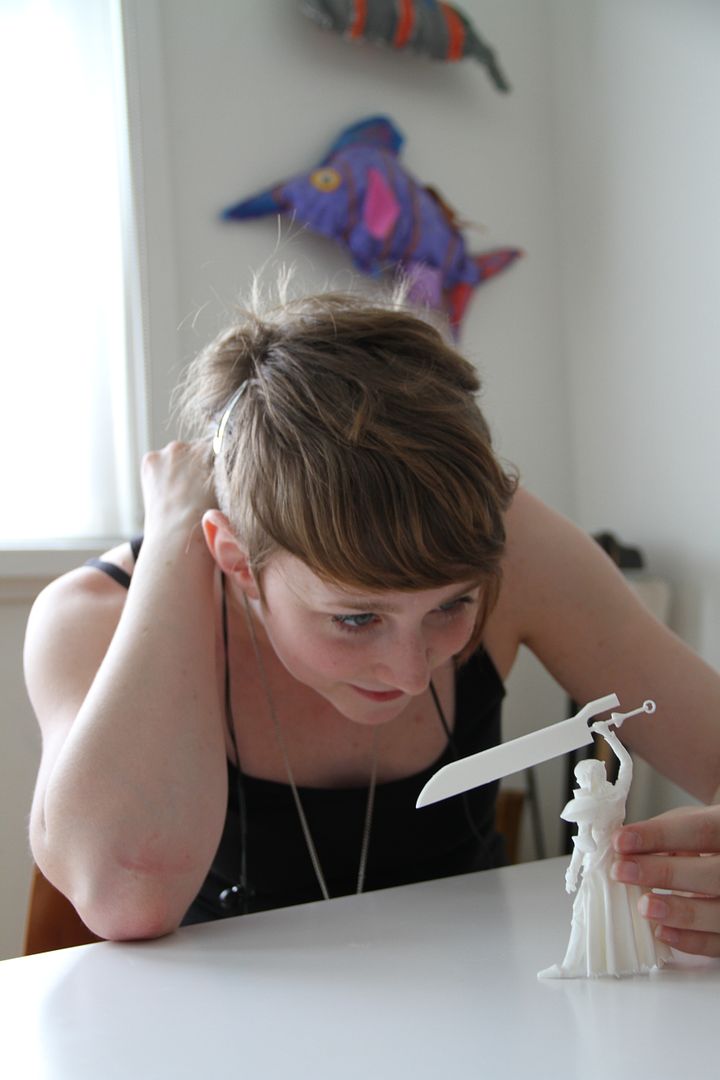
I went to pick up my mini me last week! What a surreal experience! It is one thing to see a figurine of the same character as you, it is another thing to see a miniature version of your costume!

I am always really impressed with technology, so suffice to say that 3D scanning blew my mind! You could see the image forming in real time as the sensors picked up the figure with a surprising level of detail. The scans also picked up colour data as well! I especially love the way it picked up the drape of the fabric. :D

They printed it in 2 pieces, so the sword hand is detachable. Mini sword is much lighter and easier to deal with than the 6' version! Hahaha
Overall this was a really fun project to be involved with! I totally love my figurine! Really glad I got this opportunity. :)

Excited to see what these guys do in the future as the technology gets even better! :D

Monday, February 10, 2014

February Update - 3rd Blogiversary!

Cheers to 3 years of blogging! Holy smokes! I can't believe it's been 3 years since I started this blog. Thanks for all the support guys, it really means a lot.

This year has been really eventful, and full of a lot of great costumes. My costumes for this year were Asuna (Knight), Presea, Asuna (alternate outfit), Kero & Suppi. I also constructed a lot of cool garments of my own design. I learned some new things this year, most importantly molding/casting, working with thermoplastics, how to rig tails and wings, and even special effects makeup! I have a few projects already on the go for next year. :D
Lots of great stuff to look forward to this year. Those who are following me on facebook have seen some of the work I have been doing on my original design costume, which I have been madly working away at for Costume Con this April.I have a variety of things planned for the rest of the summer cosplay season, but I won't give away any surprises yet. :P

Year 4 is bound to be epic! And once again, thank you to all who've stuck by me this long and helped me along the way. :)


For anyone interested in the stats: Among Bobbins & Thread now has more than 20,000 pageviews. The record for most pageview in 1 month is 2341! (It's always October!) My top 5 viewing countries are now as follows: USA (7930 pageviews), Canada (6026 pageviews), Germany (906 pageviews), UK (880 pageviews) and Russia (544 pageviews). My Cosmo Wig & Crown has snagged the spot as my most viewed post, followed by my Cosmo Blouse & Wings and my 10th Doctor Wig.

Tuesday, November 5, 2013

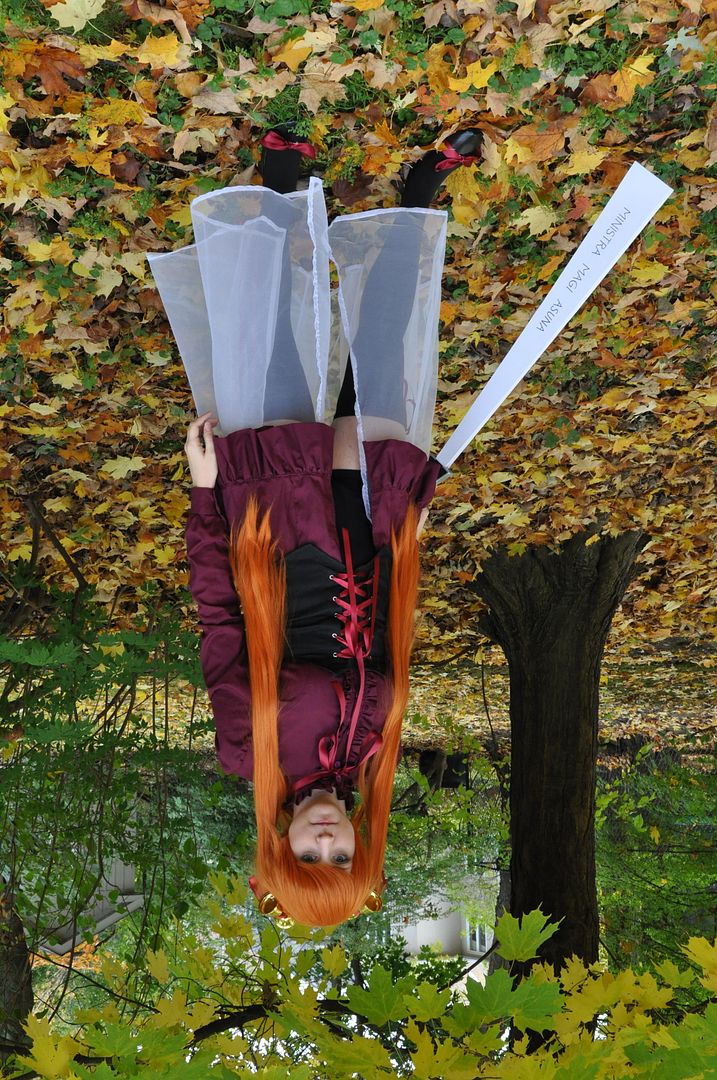
Asuna Kagurazaka - Harisen (Paper Fan) - Negima

The much more compact and travel worthy version of her giant sword! This prop was made in record breaking time with whatever leftover materials I had on hand as a sort of last minute prop idea. The weapon really helps make the character more recognizable.

I had been debating whether or not to bother making it at all, seeing how I already had a weapon for this character. However as much as I love the sword form, it's really heavy and I couldn't take it to the States because it is just too large to fit in the car. So I made this the day before I left, entirely from scrap materials. Not bad for a rush job, eh? ;D

For anyone who doesn't have the confidence, time or materials to make her sword, I highly suggest making the harisen (fan) as it is a great beginner level prop, and it doesn't cost much to make!

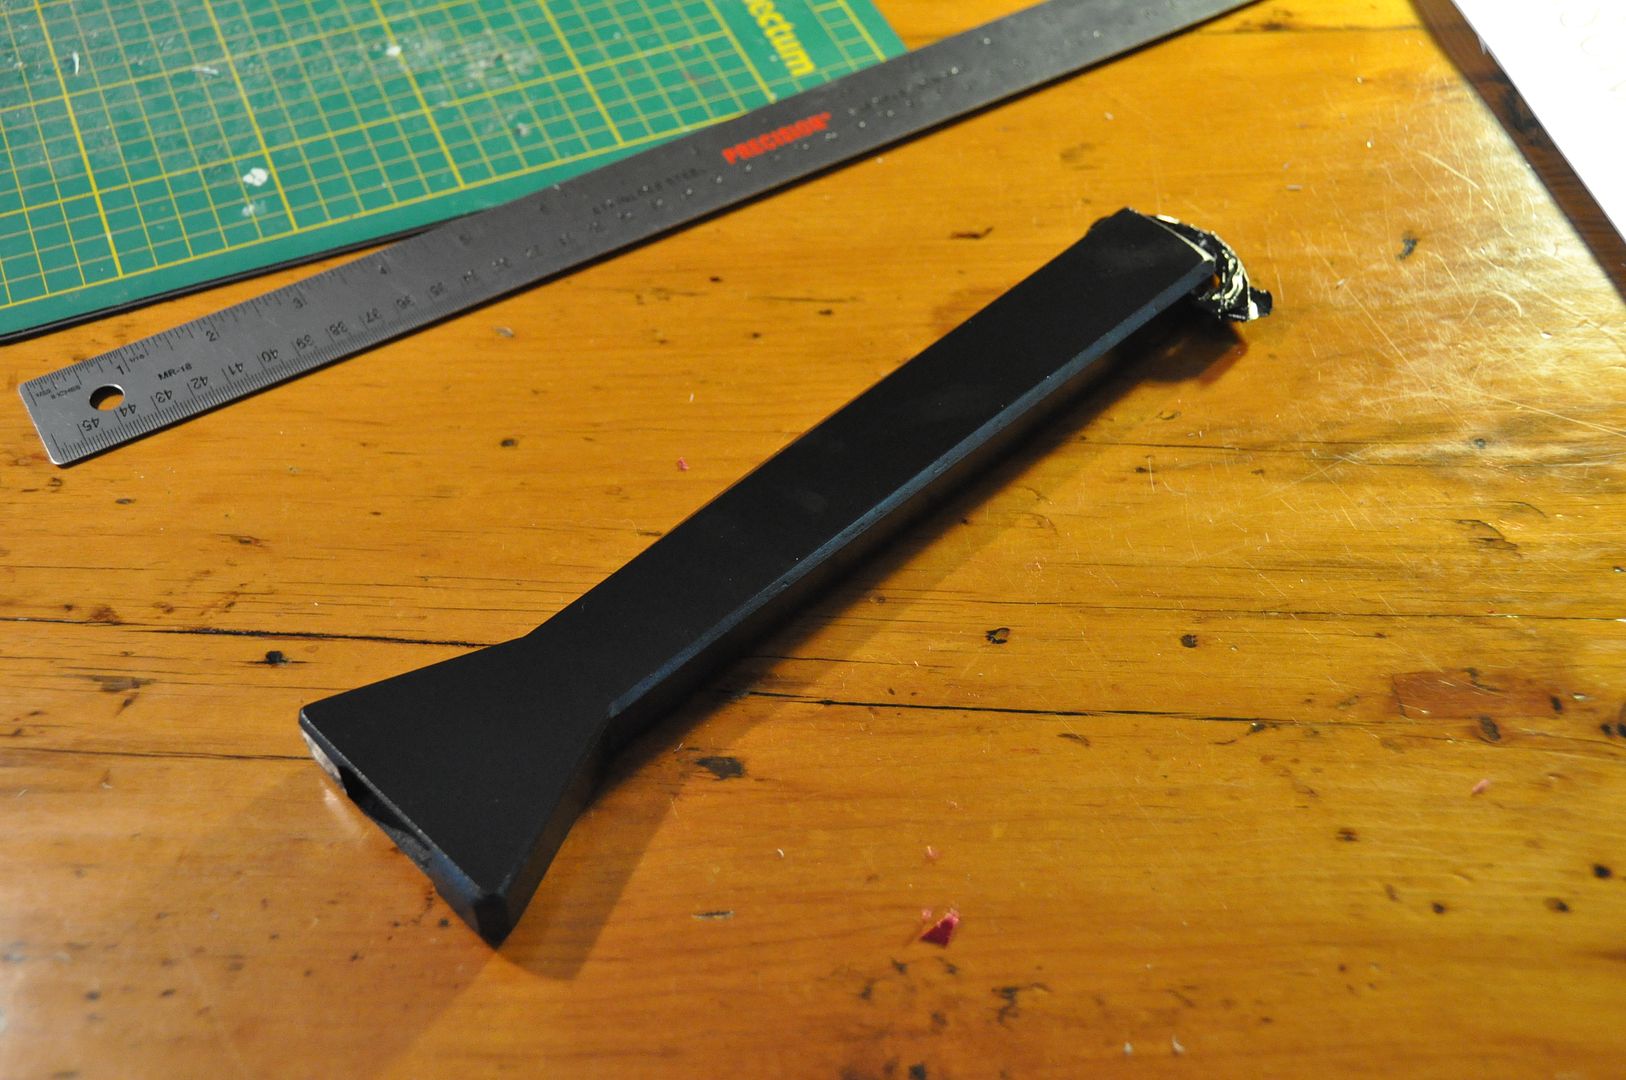
I cut out 4 pieces of illustration board that would be the fan. (Ideally I would have liked to have more, but I only had this much board left.

I taped them together in an accordian pattern. Using a marker I neatly wrote the inscription "Ministra Magi Asuna" on the outward faces.
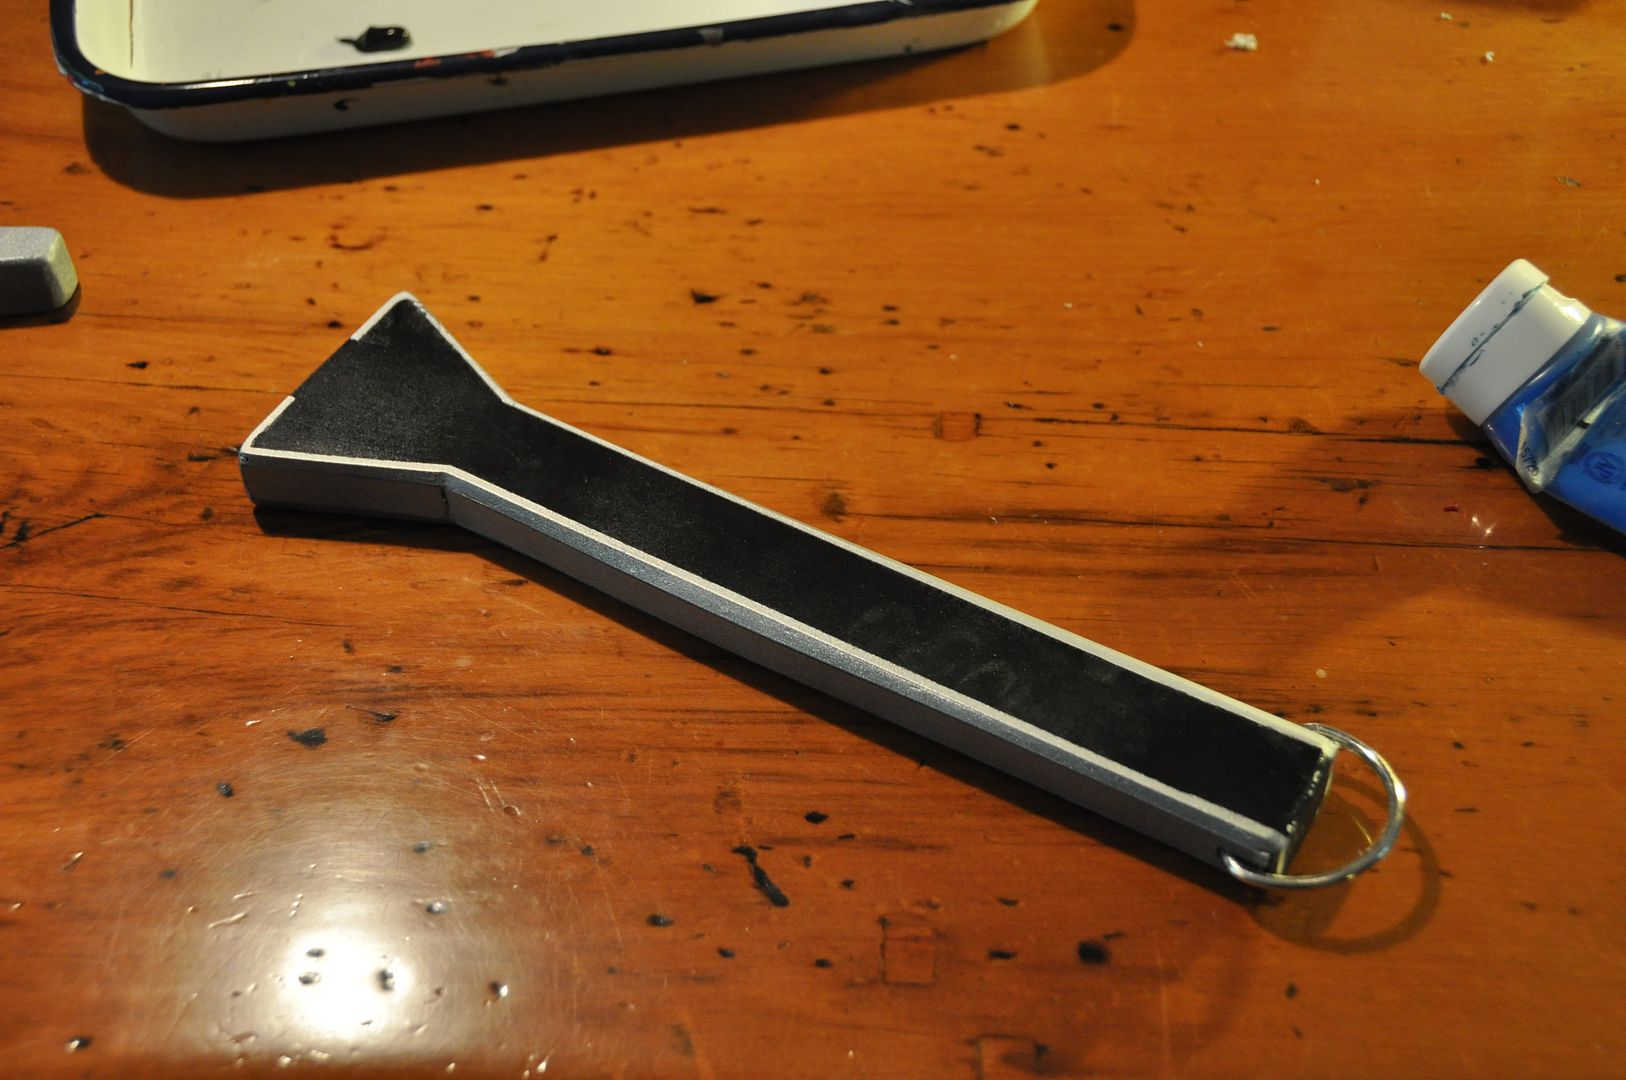
I made the handle in the same way as the large sword, minus the sculpted piece. I left a socket in the end where the fan pieces would attach.

Then I hot glued the fan accordian in place. I put some small wedge pieces to keep the fan slightly open, so it didn't look like flat slats sticking out of the handle.
I must have had this in mind (somewhere in my subconscious) when I was making the sword, because I made the ribbon detachable by using a carabiner instead of an actual chain link. This means I only need 1 ribbon, which I can attach to my weapon of choice, instead of making 2.

The fan part is very bendy, and doesn't stay rigid, but I rather like it that way, seeing how it is kind of the "fail" version of her sword. Hahaha

Tuesday, October 29, 2013

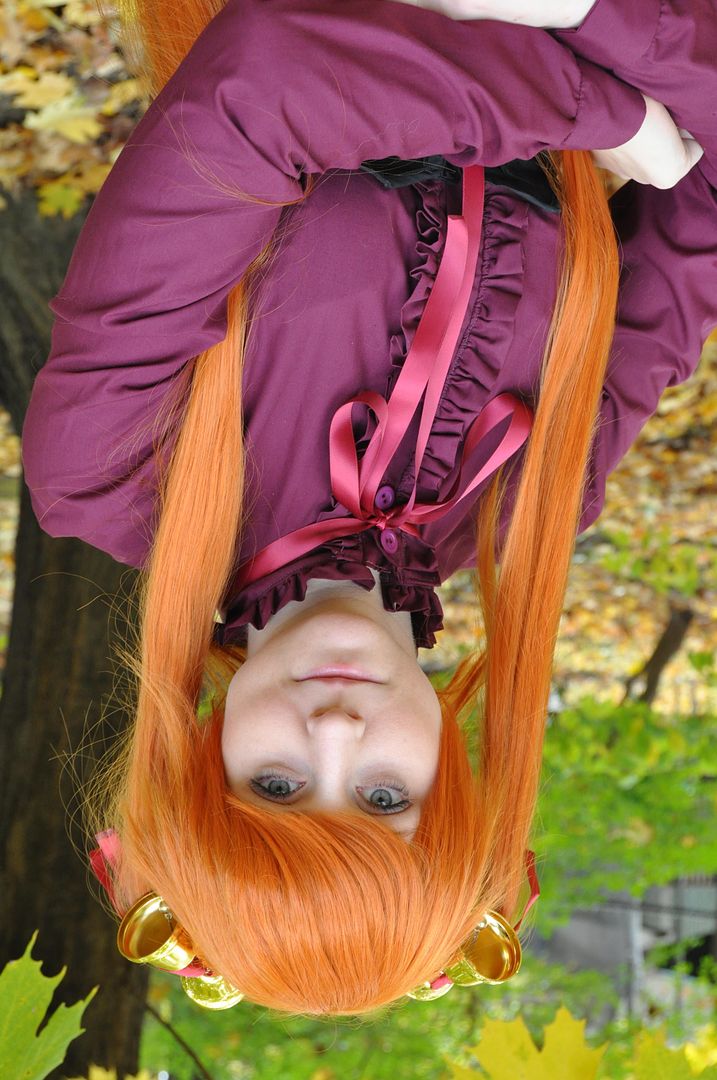
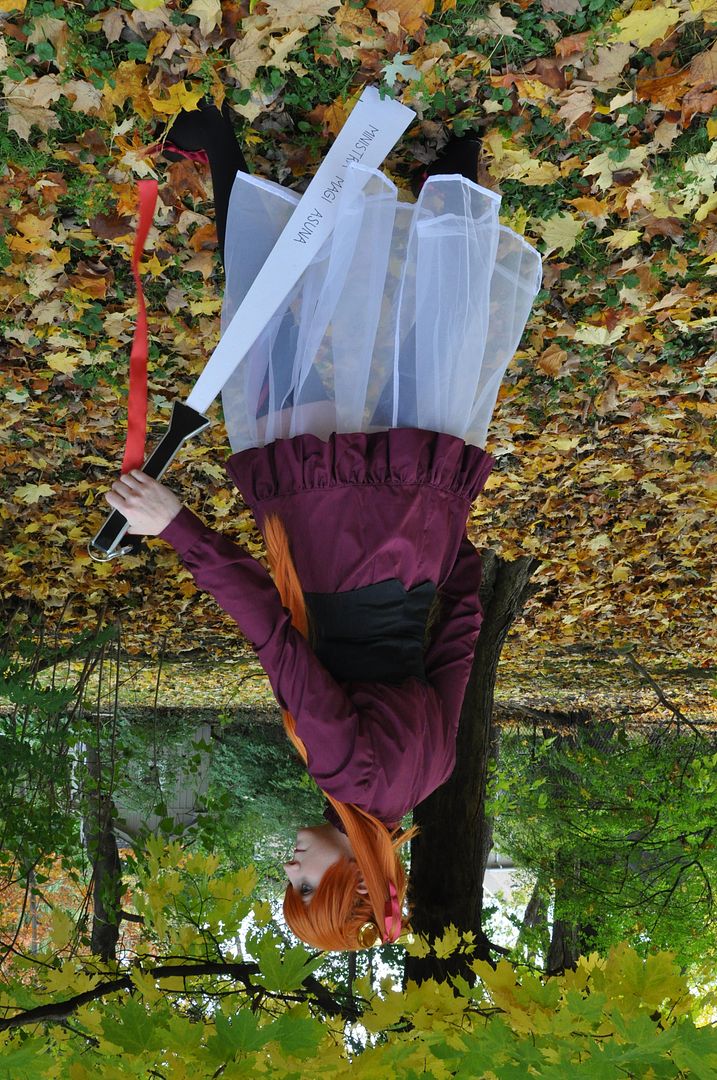
Asuna Kagurazaka (V.2) - Outfit - Negima

As my 3rd costume for Otakon I decided to make an alternate outfit of Asuna's. I already had a wig, and Asuna has many, many outfits in the manga, so I thought I would make one of my favourites.

Special thanks to my mum for doing an impromptu fall photoshoot in the backyard!

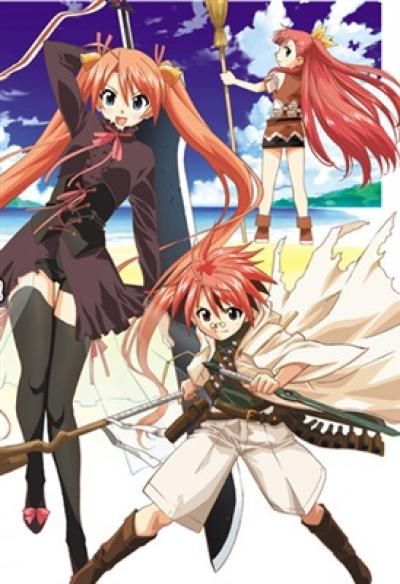
I picked this one (pictured left) particularly so I could re-purpose the sheer under skirt I had originally made for her other costume! This outfit is worn during the training arc prior to their trip to Mundus Magicus, for anyone who actually knows the series.

I really like the deep burgundy colour of the blouse (dress?), but I went more saturated with my colour choice.

(There sure are a lot of orange-haired characters in this manga...)

I drafted a basic block, with a princess seam that I extended to be longer and go outward in an a-line style at the sides.

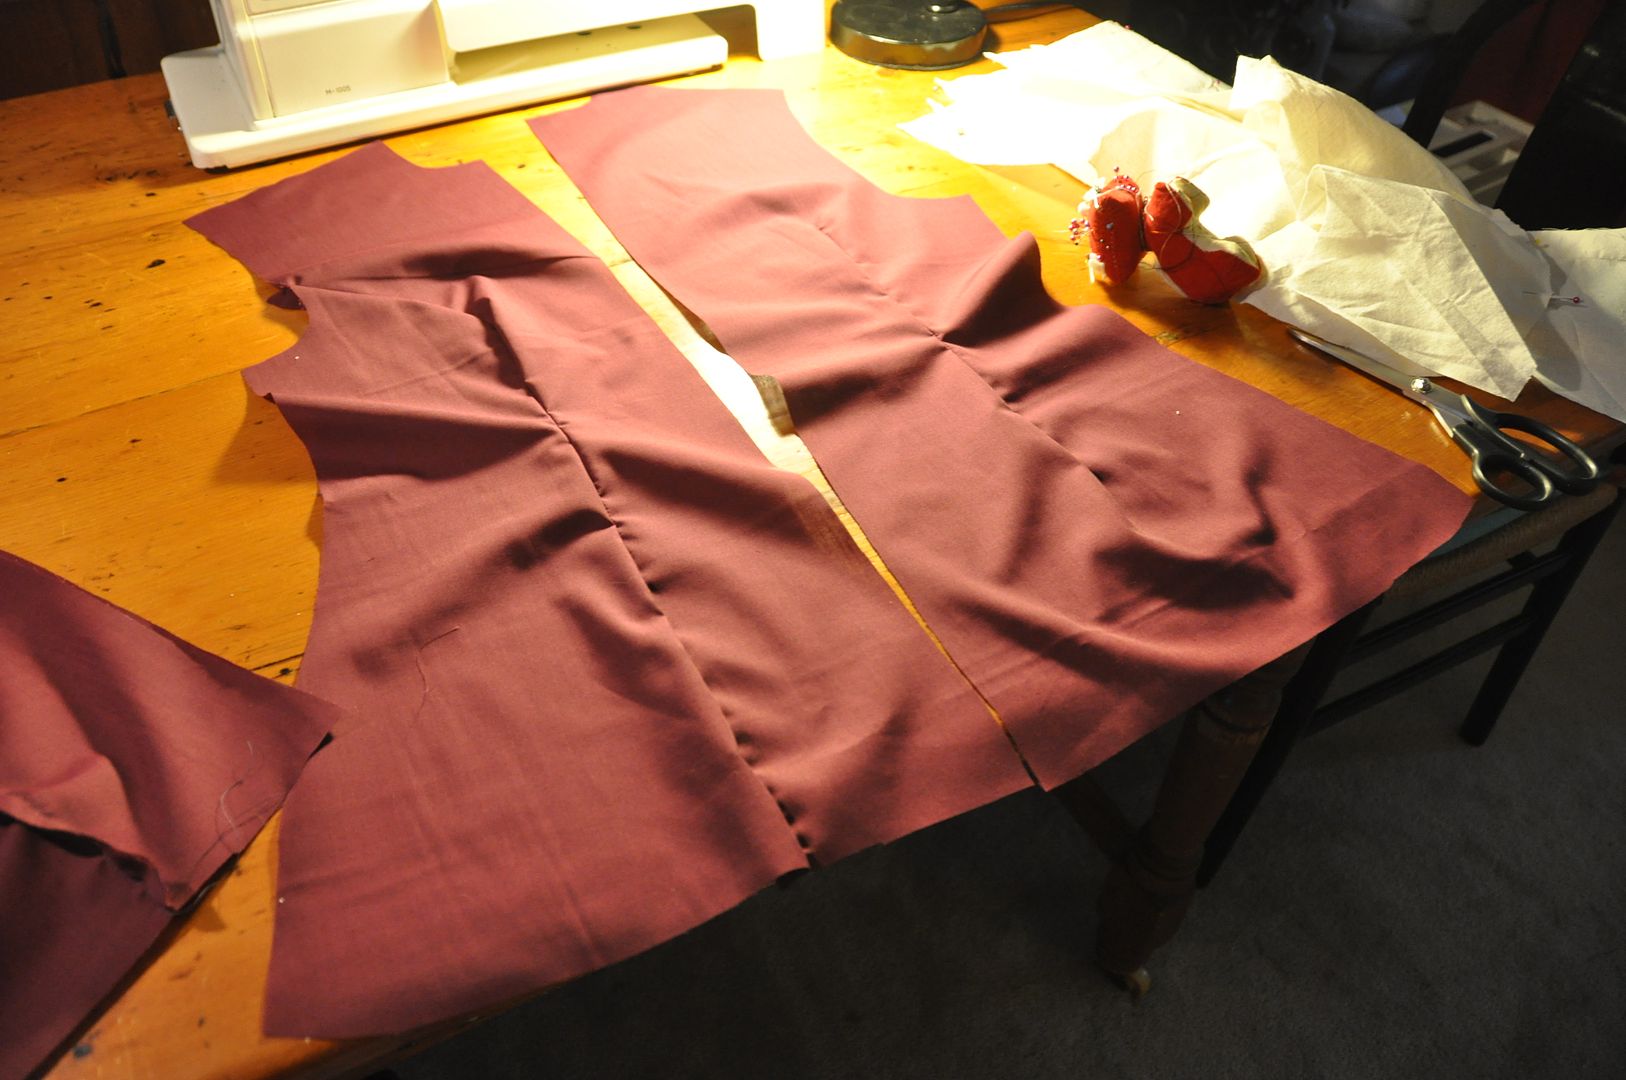
I cut out all my pieces (2 center front panels, 2 center back panels, 2 side front panels). Then I sewed up the darts, then side, back and shoulder seams. 

When this was done I finished the inner seams.
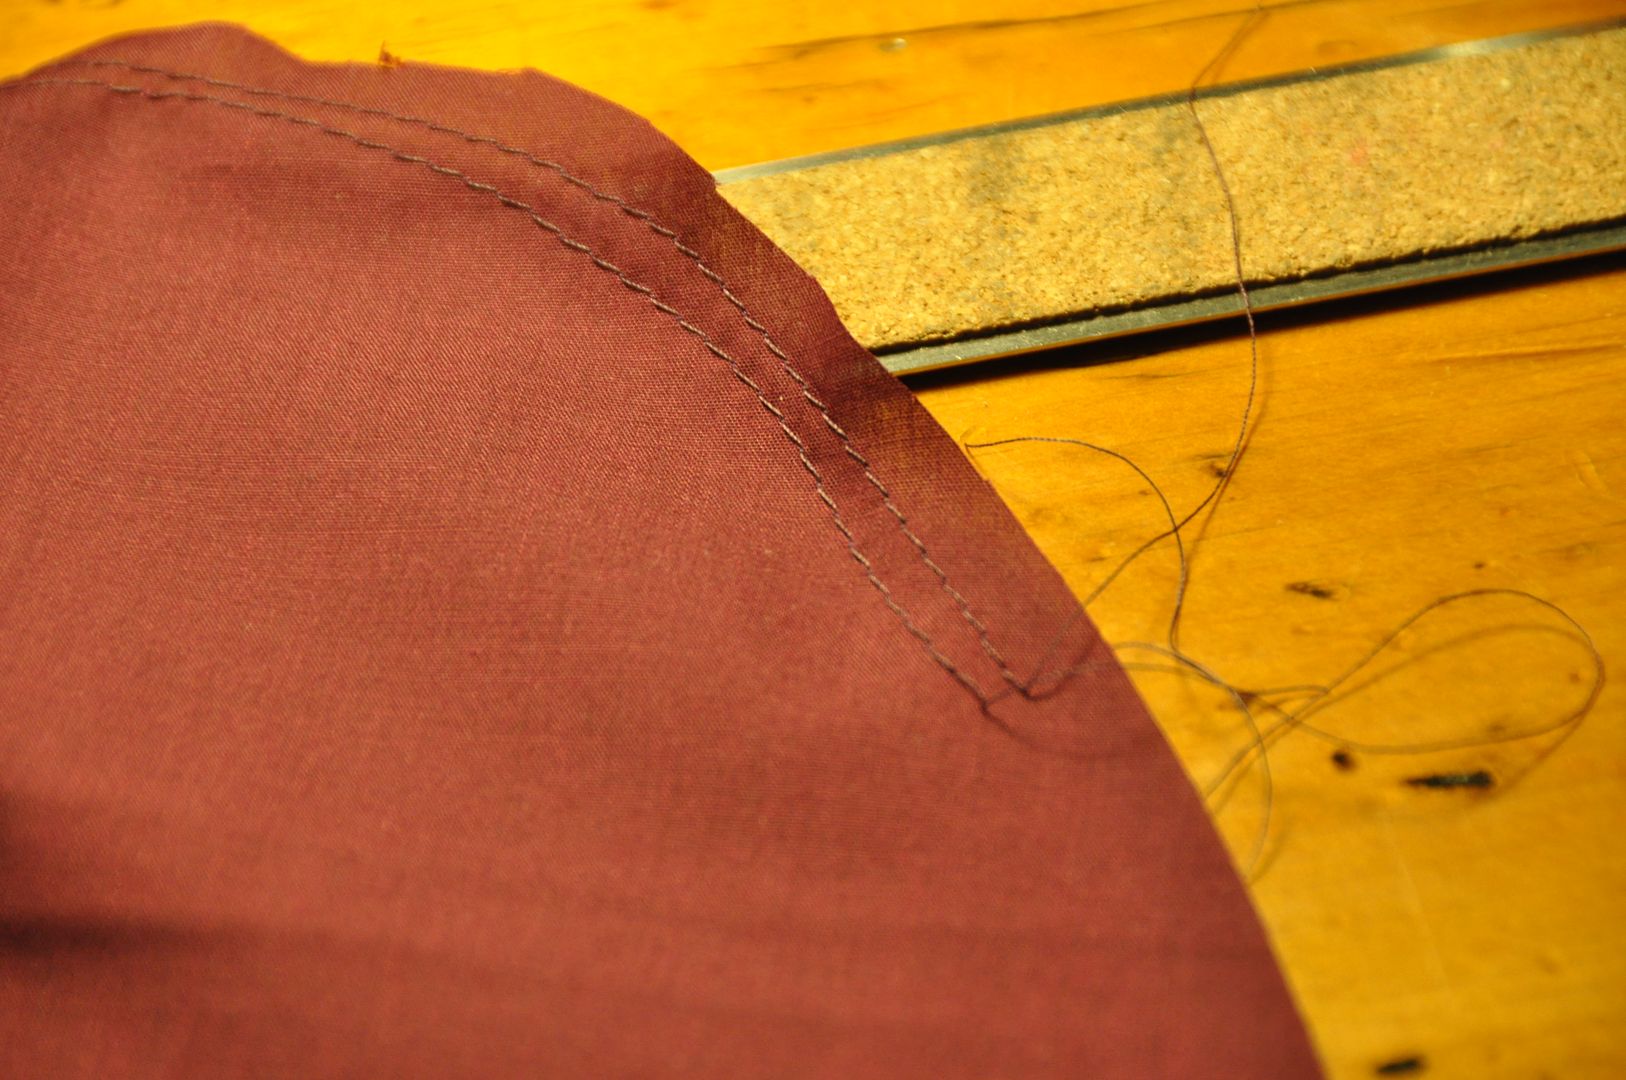
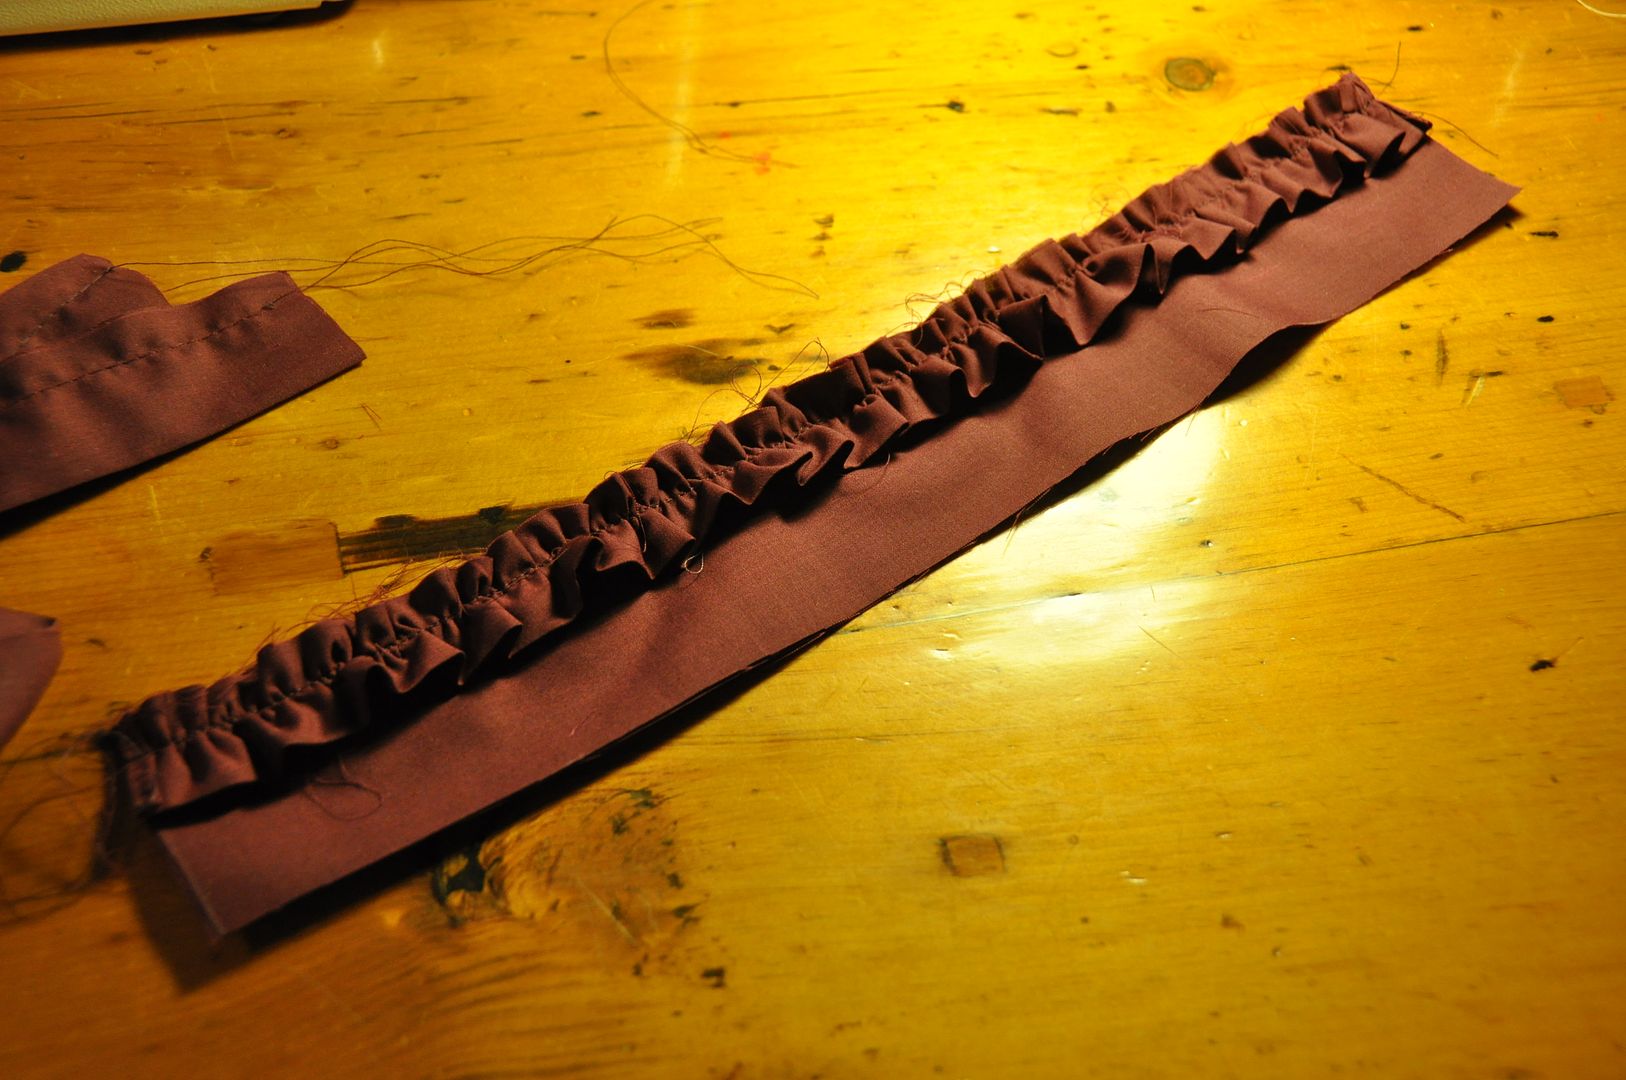
I drafted the sleeve to have a slight pouffe at the shoulder. I cinched the ruffle with a double row of basting stitches (leaving the thread ends long so I could pull on them). 


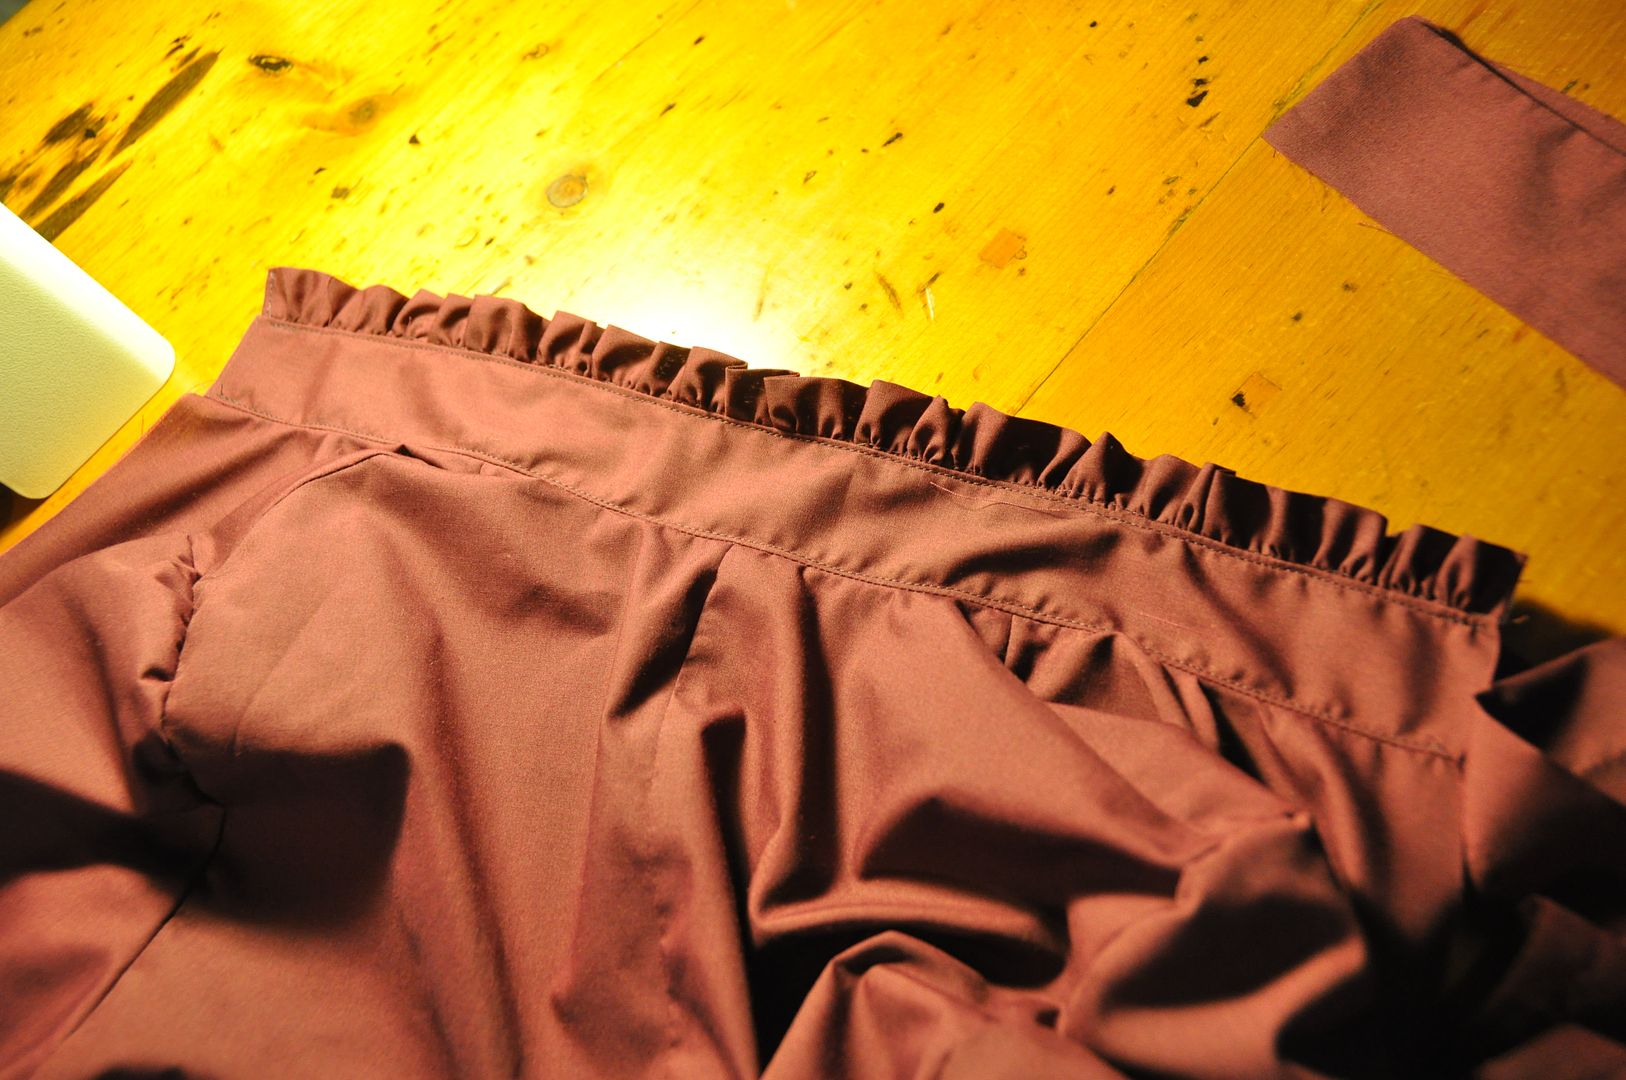
I made the collar ruffle, which was sandwiched inside the collar pieces and turned right way out. This was then attached to the neckline. 
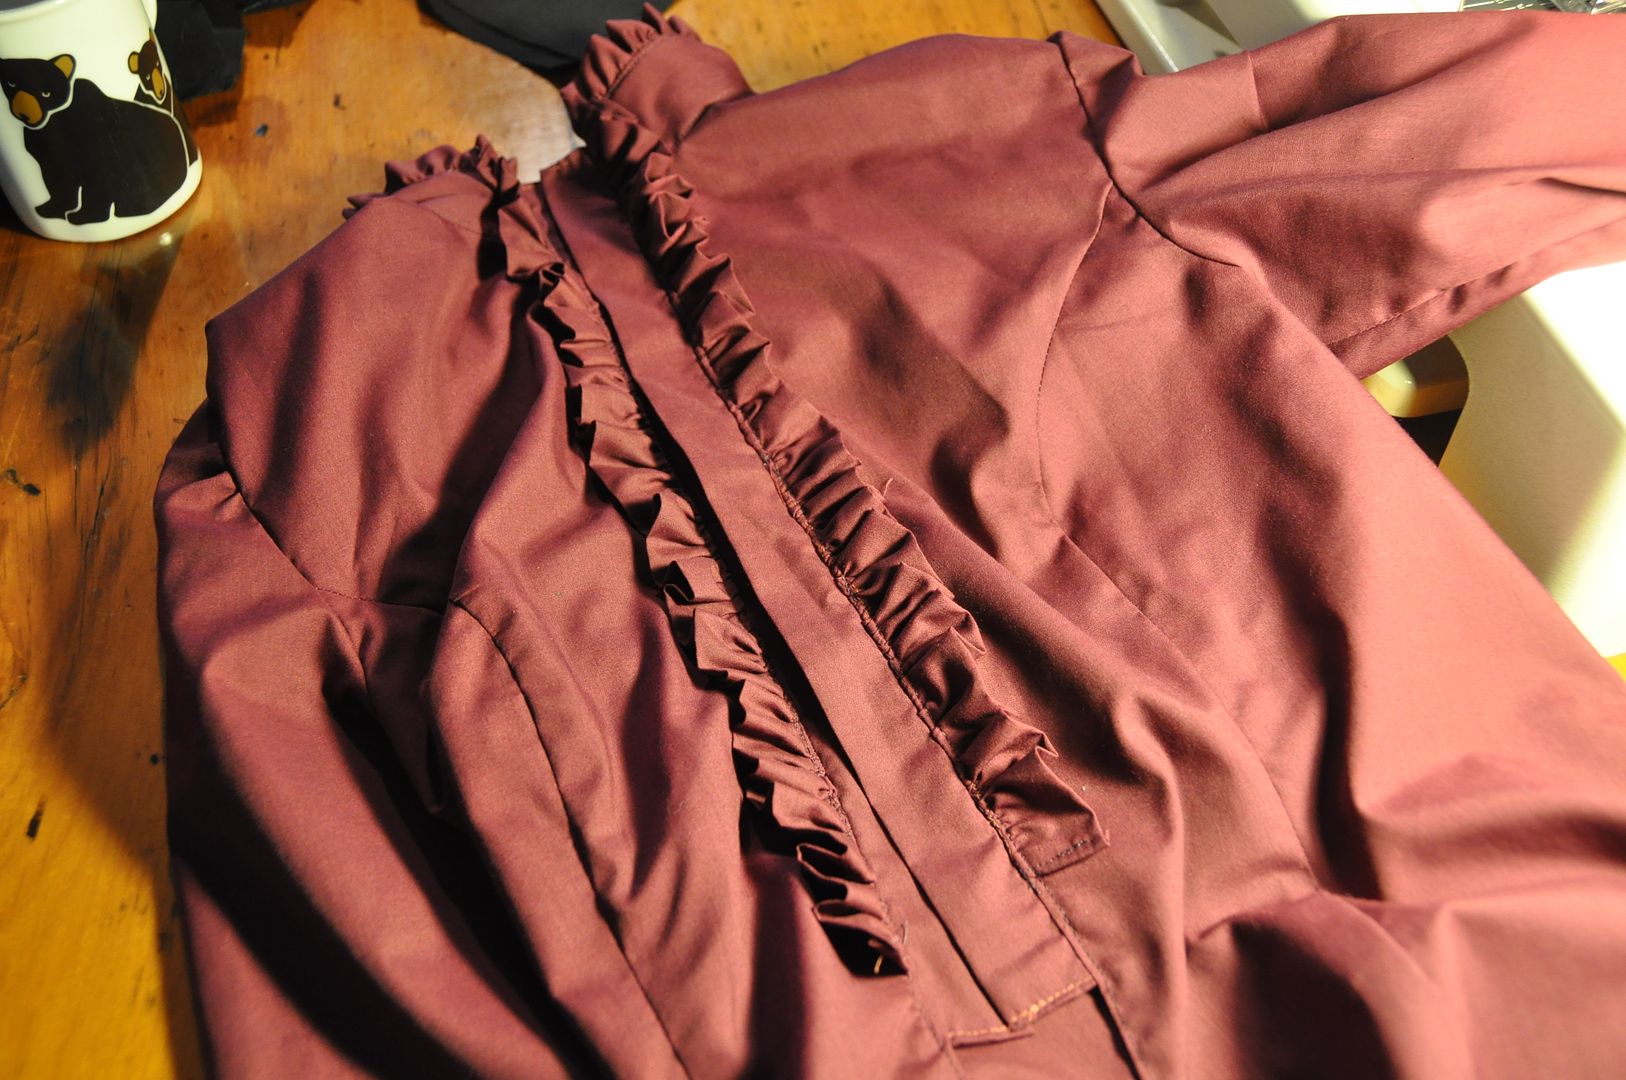
I made the 2 front ruffles, which I stitched down to the front opening.

Then I attached the placket and finished off the opening edge and armhole seams.

Then I made a bias tape to finish off the sleeve slit, before I attached the cuffs. The sleeve pouffed just a touch at the cuffs as well.

The last thing I did was attach the bottom ruffle and do all the button holes.
Then I made the "corset". Now I say "corset" instead of corset, because this is just designed to look like an underbust corset, but does not have any of the structuring a corst would have (like boning). For all intents and purposes it is a glorified belt. Hahaha
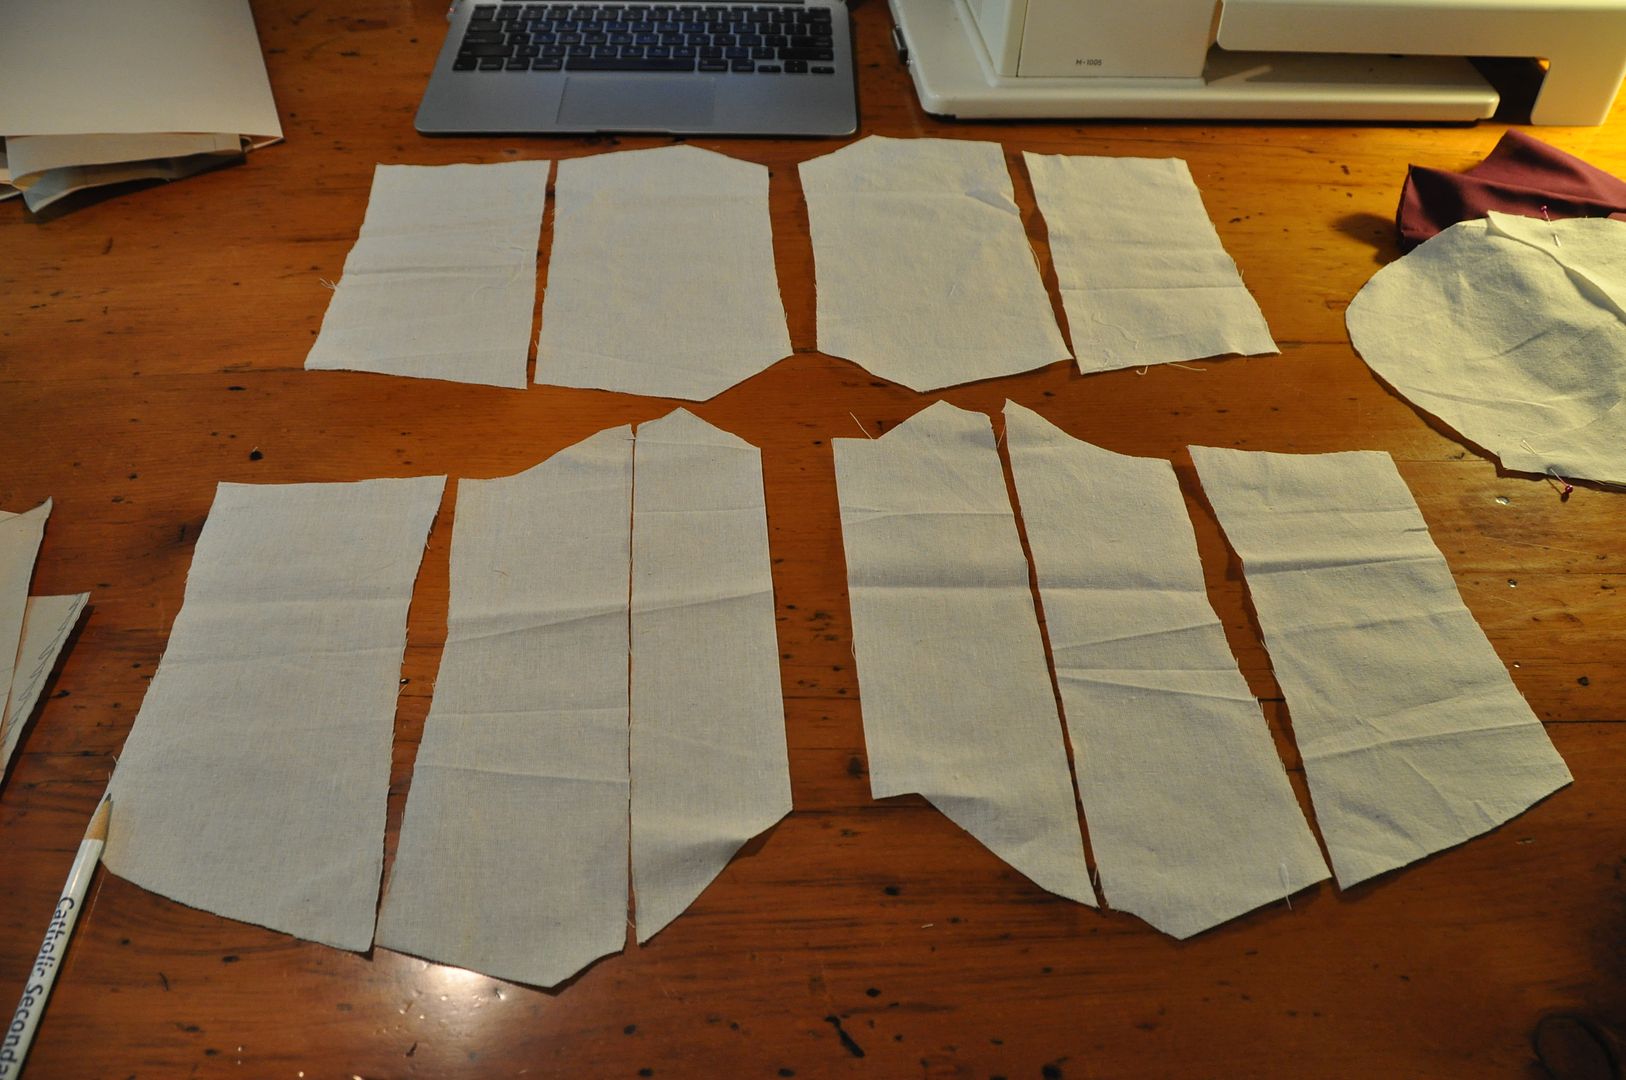
I figured out how long I wanted ti to be, my underbust measurement, my waist measurement and natural waist measurement (where a modern pair of pants would sit). From there I was able to pattern this. Using my widest measurement I could then divide and calculate my darts.

The result was these 10 pieces (pictured left: top row is the back panels, bottom row is the front panels). 

I made a mockup, then a good version.

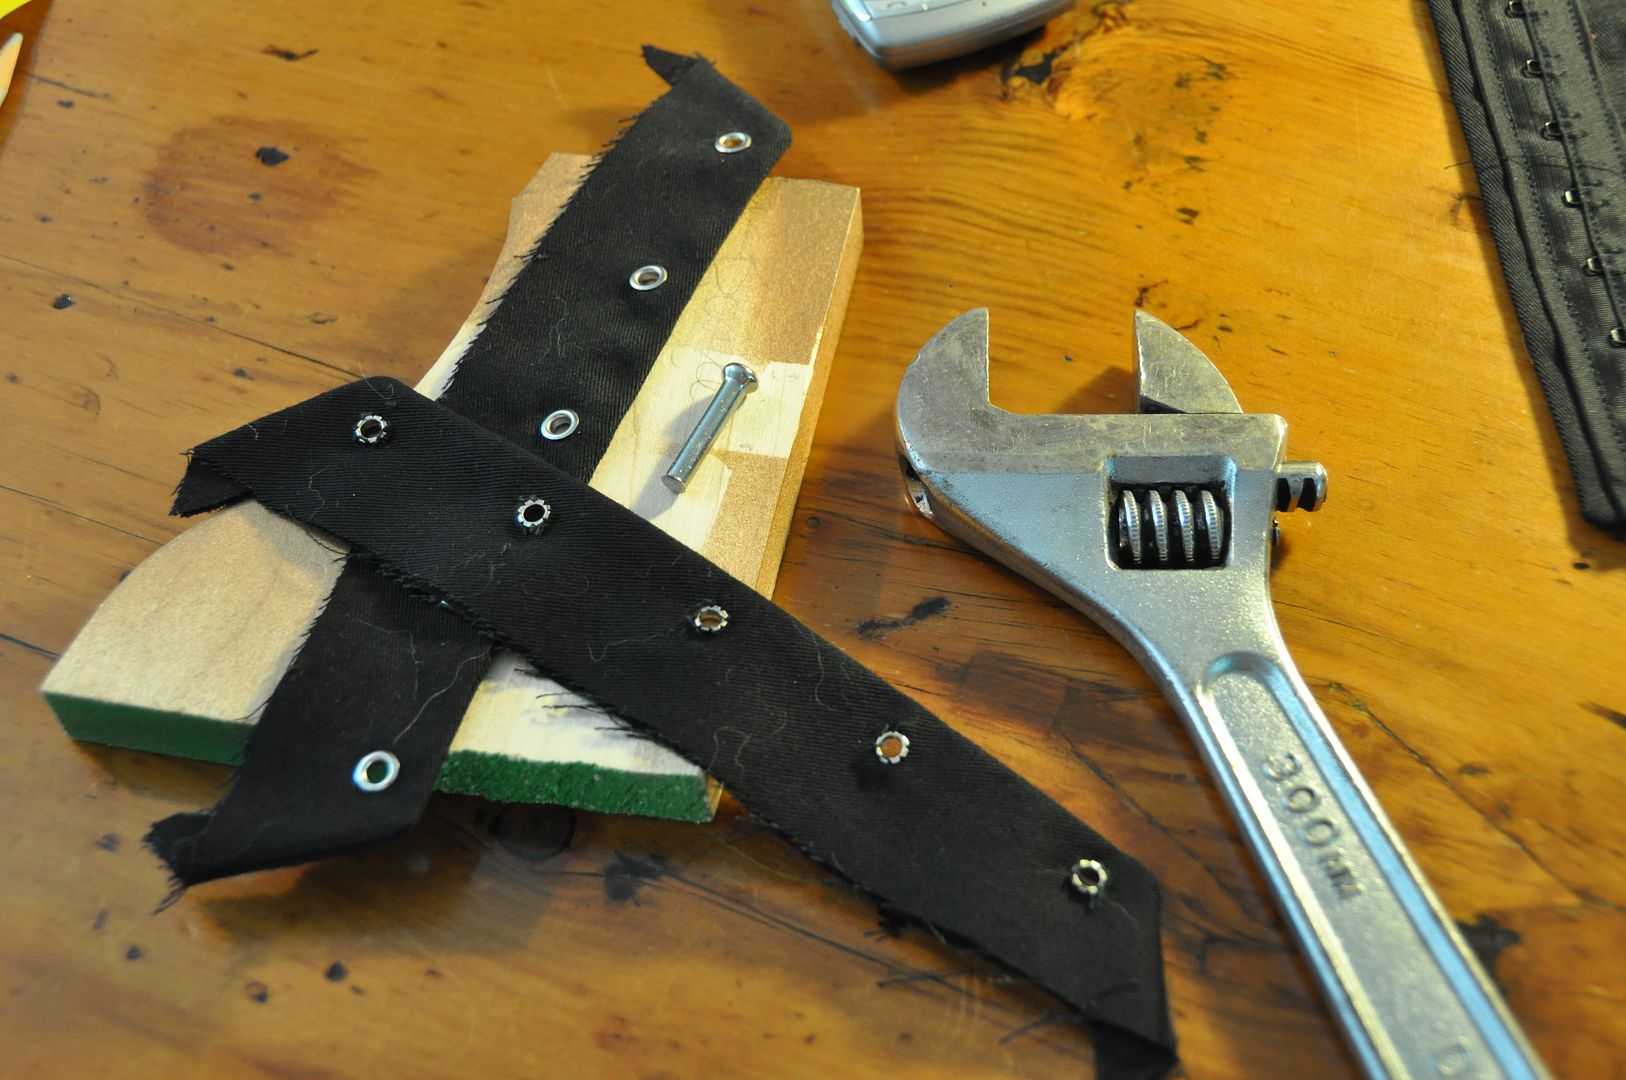
Then I hammered in the grommets. I couldn't find a hammer, so I used a wrench instead (my shop professor would be crying right now). It is always recommended to have a scrap piece of wood handy when hammering grommets, otherwise you will end up with dents in your table...
The grommets and lacing are just for show though, the actual closure is a row of hook and eye tape. Because it is way more secure.  Lastly I finished up the edges with bias tape! Woo!

I bought the thigh-high socks and ribbons for the costume. All of the bows on the socks were attached with safety pins, so I can use the socks for other things (and real life). The black flats are the same ones from my Alice costume.

Tuesday, August 13, 2013

Asuna Kagurazaka (Knight) - Armour (Cast) - Negima

The last post from my Asuna set, then I am officially done Anime North 2013 stuff! Hahaha

Go here for my Heat Molded Armour, Wig, Bodice, Skirt, and Sword. And you can find the rest of my photoshoot with EleventhPhotograph here! The armour looks particularly stunning in these photos, the paint job on the shoulder piece really reflected light well.

So here we go with the second part of my armour tutorials, except this time we get to talk about casting. Probably one of the more finicky aspects of the whole project, and in spite of all its faults it turned out really well (particularly since this is my first time casting anything myself!) Before I get into the technical talk of this post, I would like to thank my friend Ian (aka Elephutan) for taking the time to walk me through the whole process! It would not have been possible without him!


The shoulder piece I am the most proud of, of the entire costume, while the elbow piece I am the least proud of (in terms of shape, size, rigging, etc. it just didn't fulfill my expectations.)

First I would like to say that it was an executive decision to change the design of the elbow armour to be something more physically possible. On real armour there are no metal bits on the inside of your joints so that you can actually bend your limbs. On the original design however the elbow piece encircles the entire elbow (see picture on the left). This would have made it a) more difficult to cast, b) more expensive to cast, and c) physically impossible to bend my arm. That being said I was so mobility impaired anyway that I doubt it would have mattered, but I didn't want to hamper myself from the get go. So I modified it to go only halfway around the arm.

While the heat molded armour is quite economical, the cast pieces are quite pricey. However, with the styrene plastic it would not have been physically possible to achieve the shapes I wanted. I could have carved it out of foam also, but I would have had my constant dilemma of foam being easily dinged, and carving the inside cleanly would have been nigh impossible. The hollow cast shell was what I was looking for in this project.

...And now for something completely different: The first thing I cast for this project was actually my legs to use as a base for heat molding. This was done with a plaster bandage mold.

First we covered the front half of my leg in plaster bandage, then after that set we covered the area of overlap in a generous layer of vaseline. Then Ian covered the back half in the plaster bandage. Obviously I could not do this by myself as it had to be done while I was standing, and I had to stand still so it didn't set in the wrong position.

These were then peeled away. We coated the inside in vaseline and then sealed the side seams and bottom. Using elastic bands to hold everything in place.

Following the instructions on the package we mixed the correct proportions of plaster and water. This was then poured into the molds. It wasn't a perfect replica, as the side seams were rough, and one leg didn't turn out as well as the other, but it made an excellent base to heat mold my calf and knee pieces around. 

Now on to the real reason we are here! I actually started this process by taking detailed measurements analysing my proportions and those of the reference pictures, mocking up my plans in autocad. This ensured I was on the right track before I started carving.
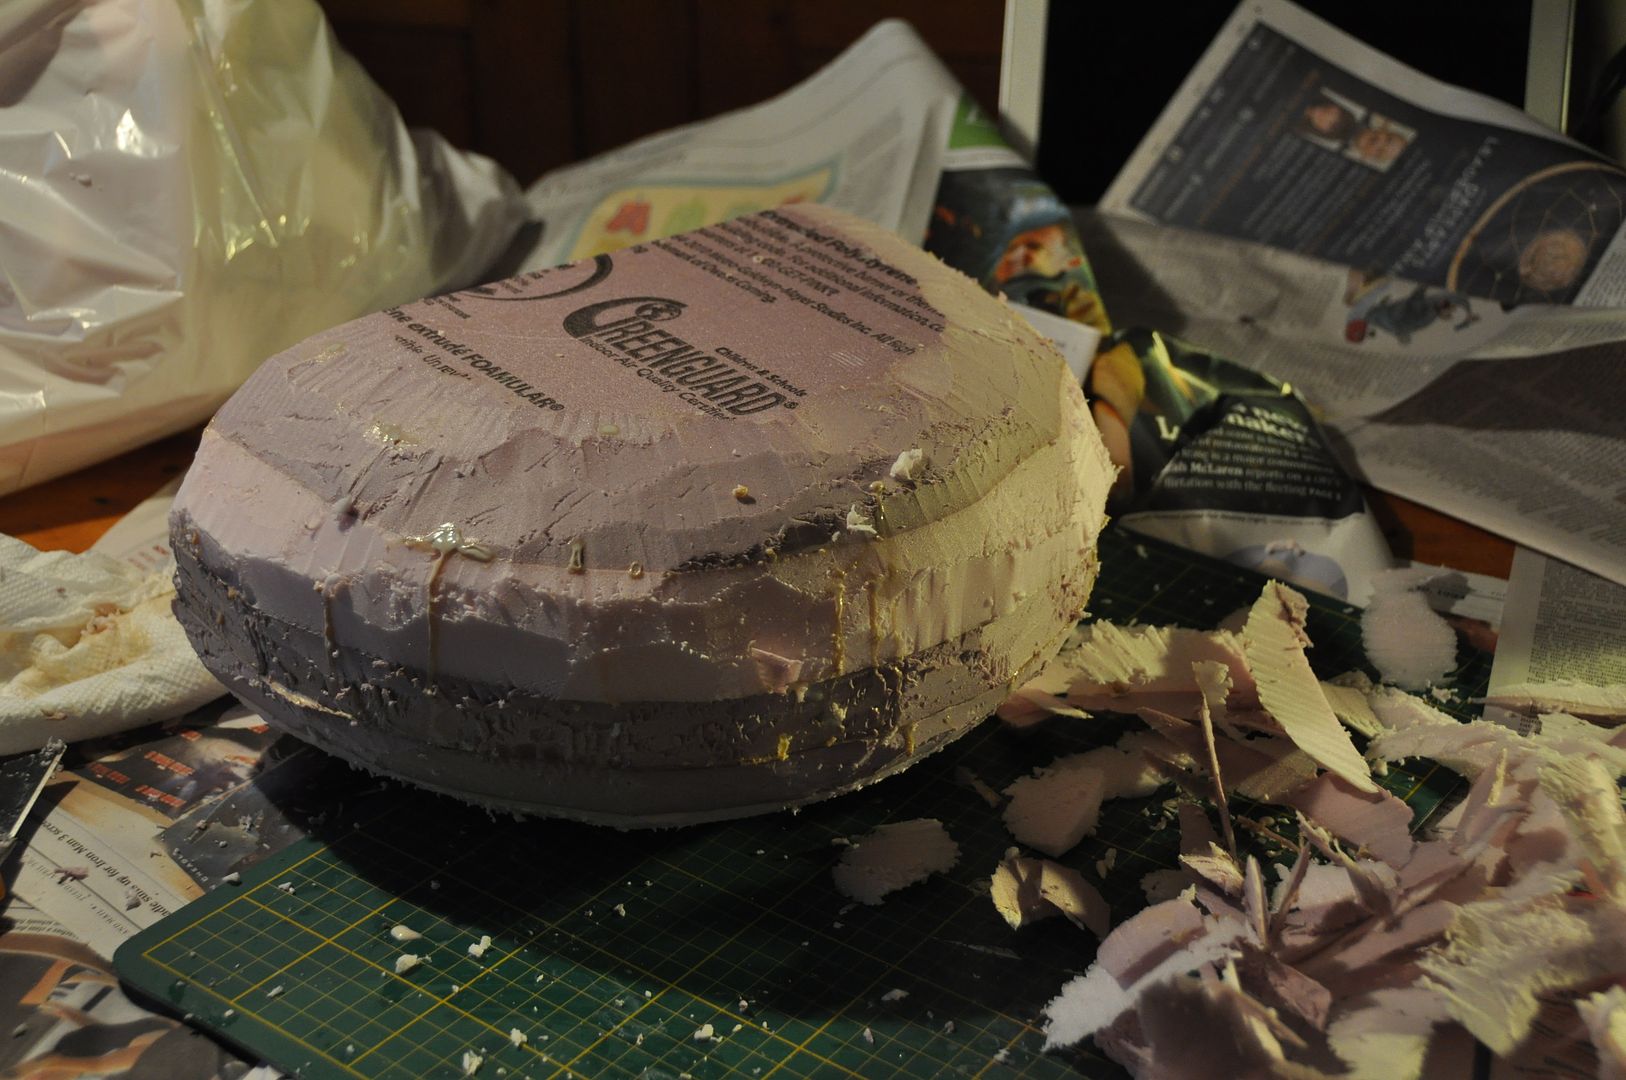
Using contact cement I glued 5 semicircle layers of foam together to create my starting shape. I drew on the semi circle cut outs on the top and bottom as reference points. The radius of the semicircles here were the same as the widest point of the piece. 

I carved down to the rough shape before switching to sandpaper.
I drew up my imagined elbow piece to scale. Unfortunately I was working under the assumption that the cast would be thicker than it was and as a result the piece wound up being very loose fitting.

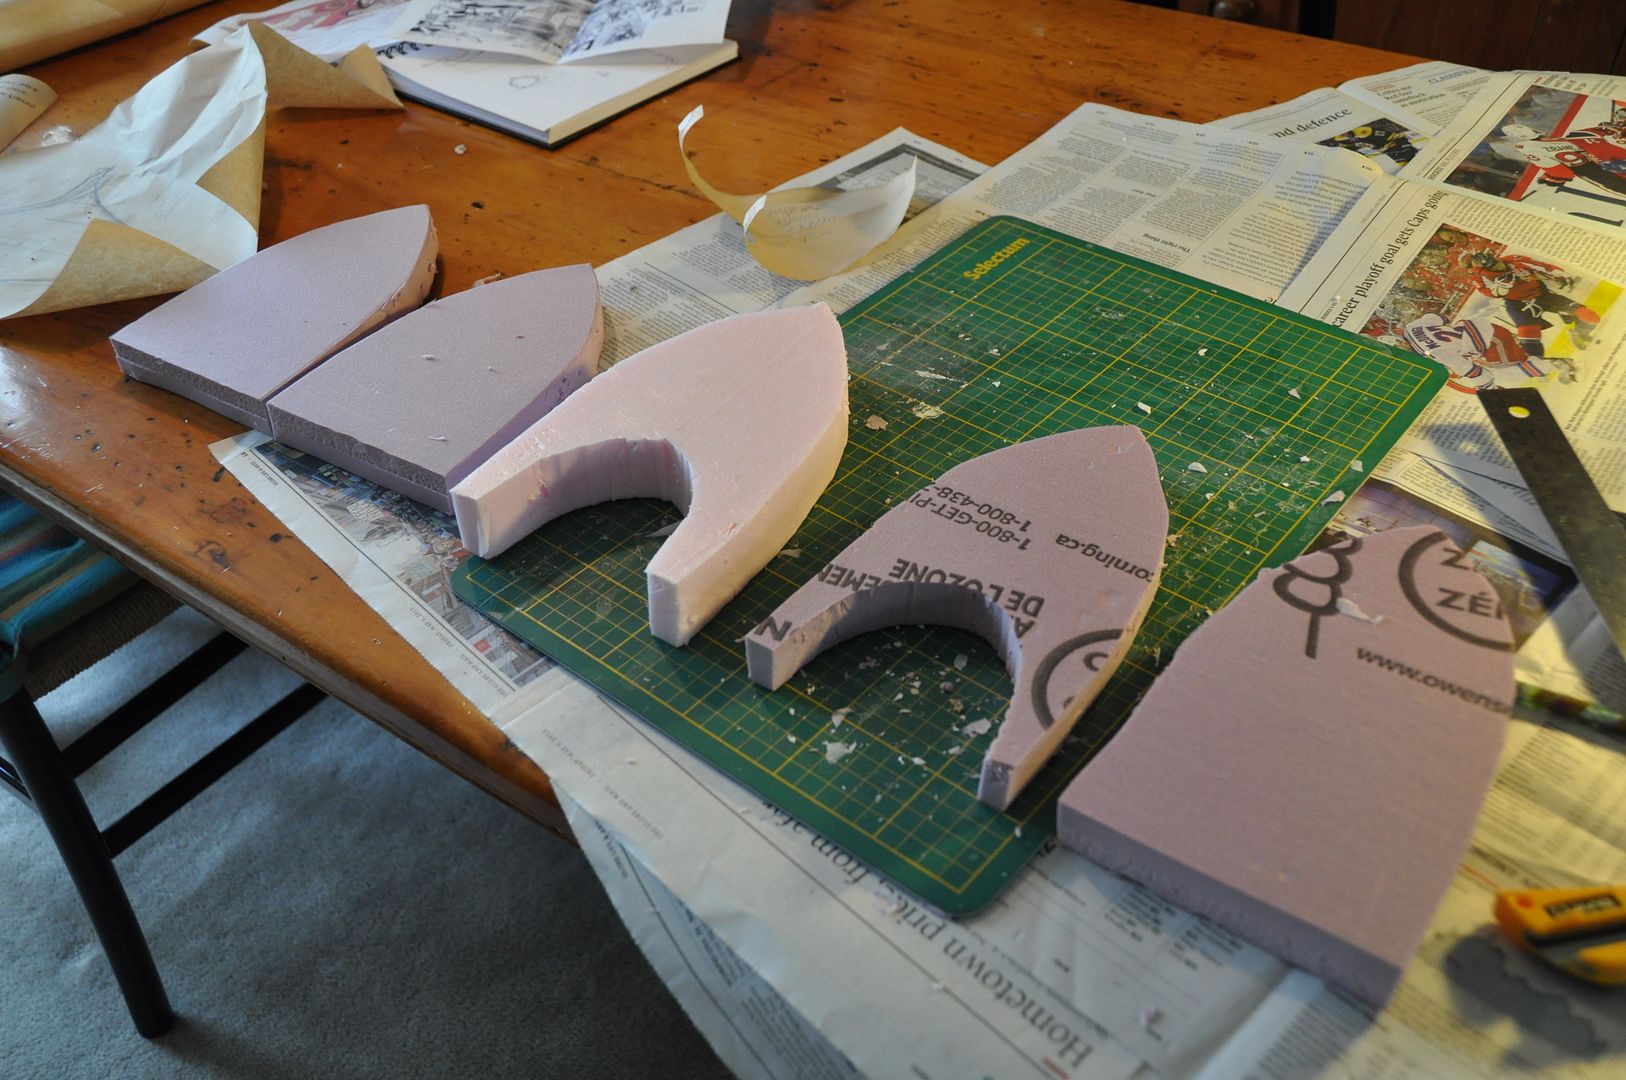
I traced out pieces of my top view and cut out the layers.
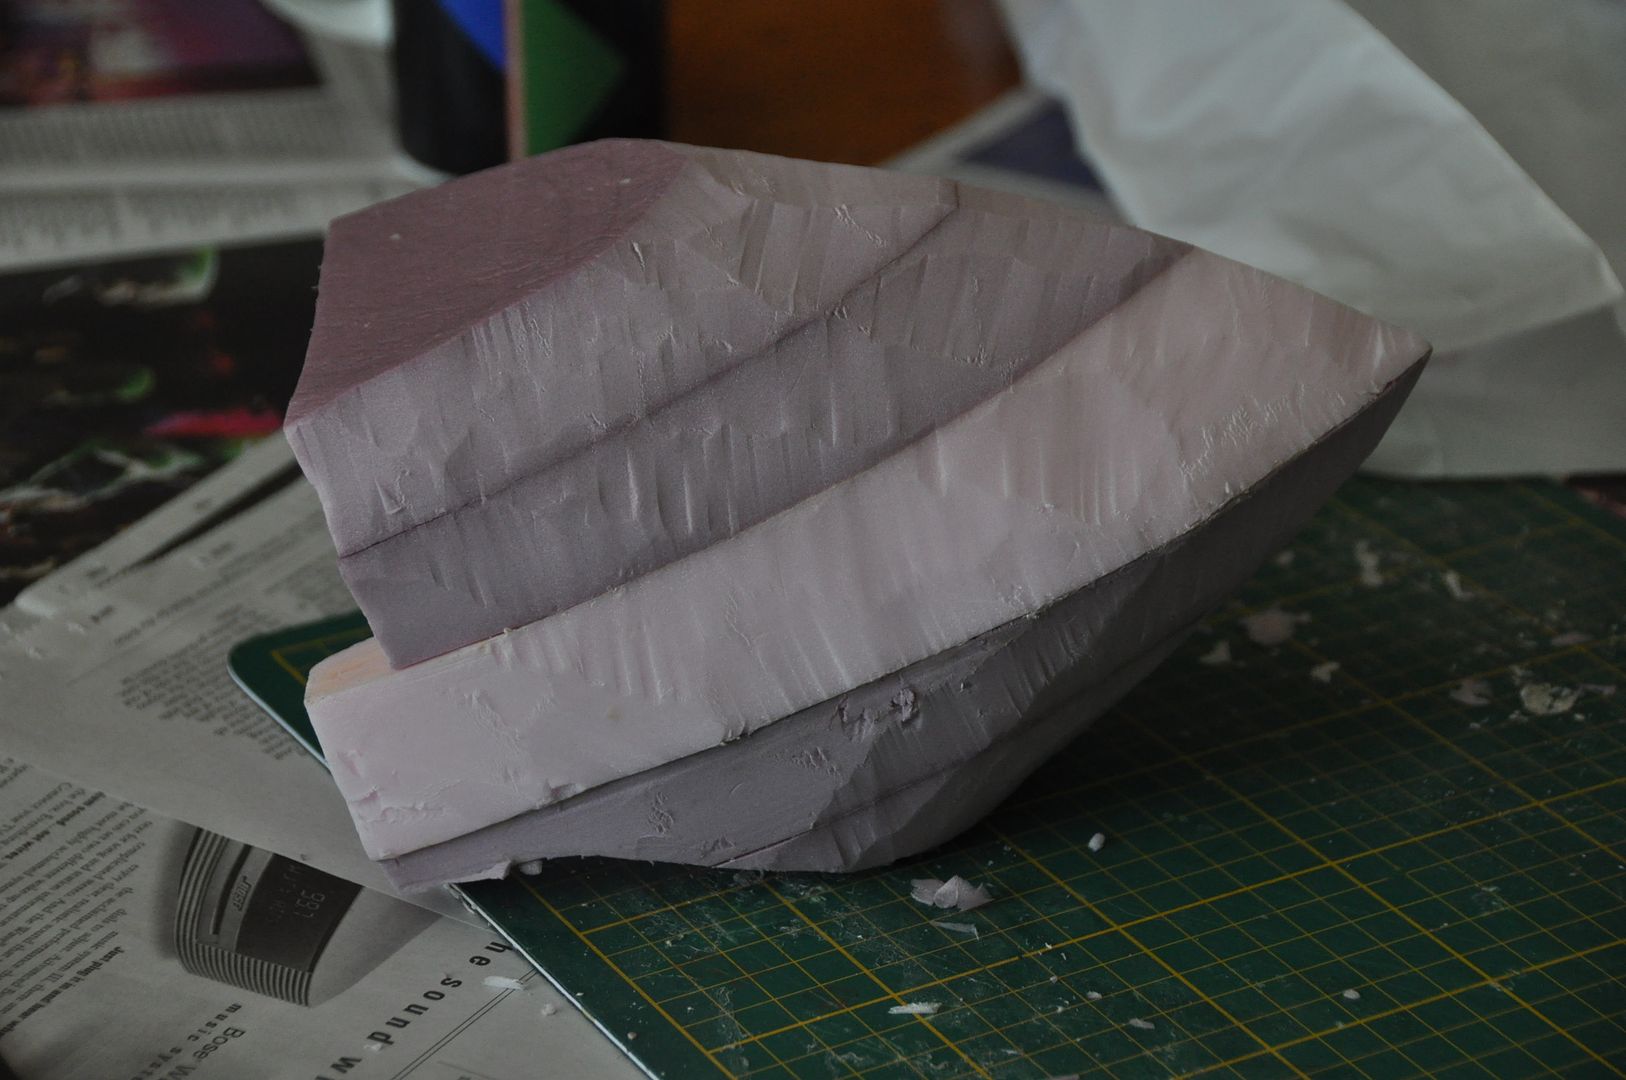
I glued these together and began carving.
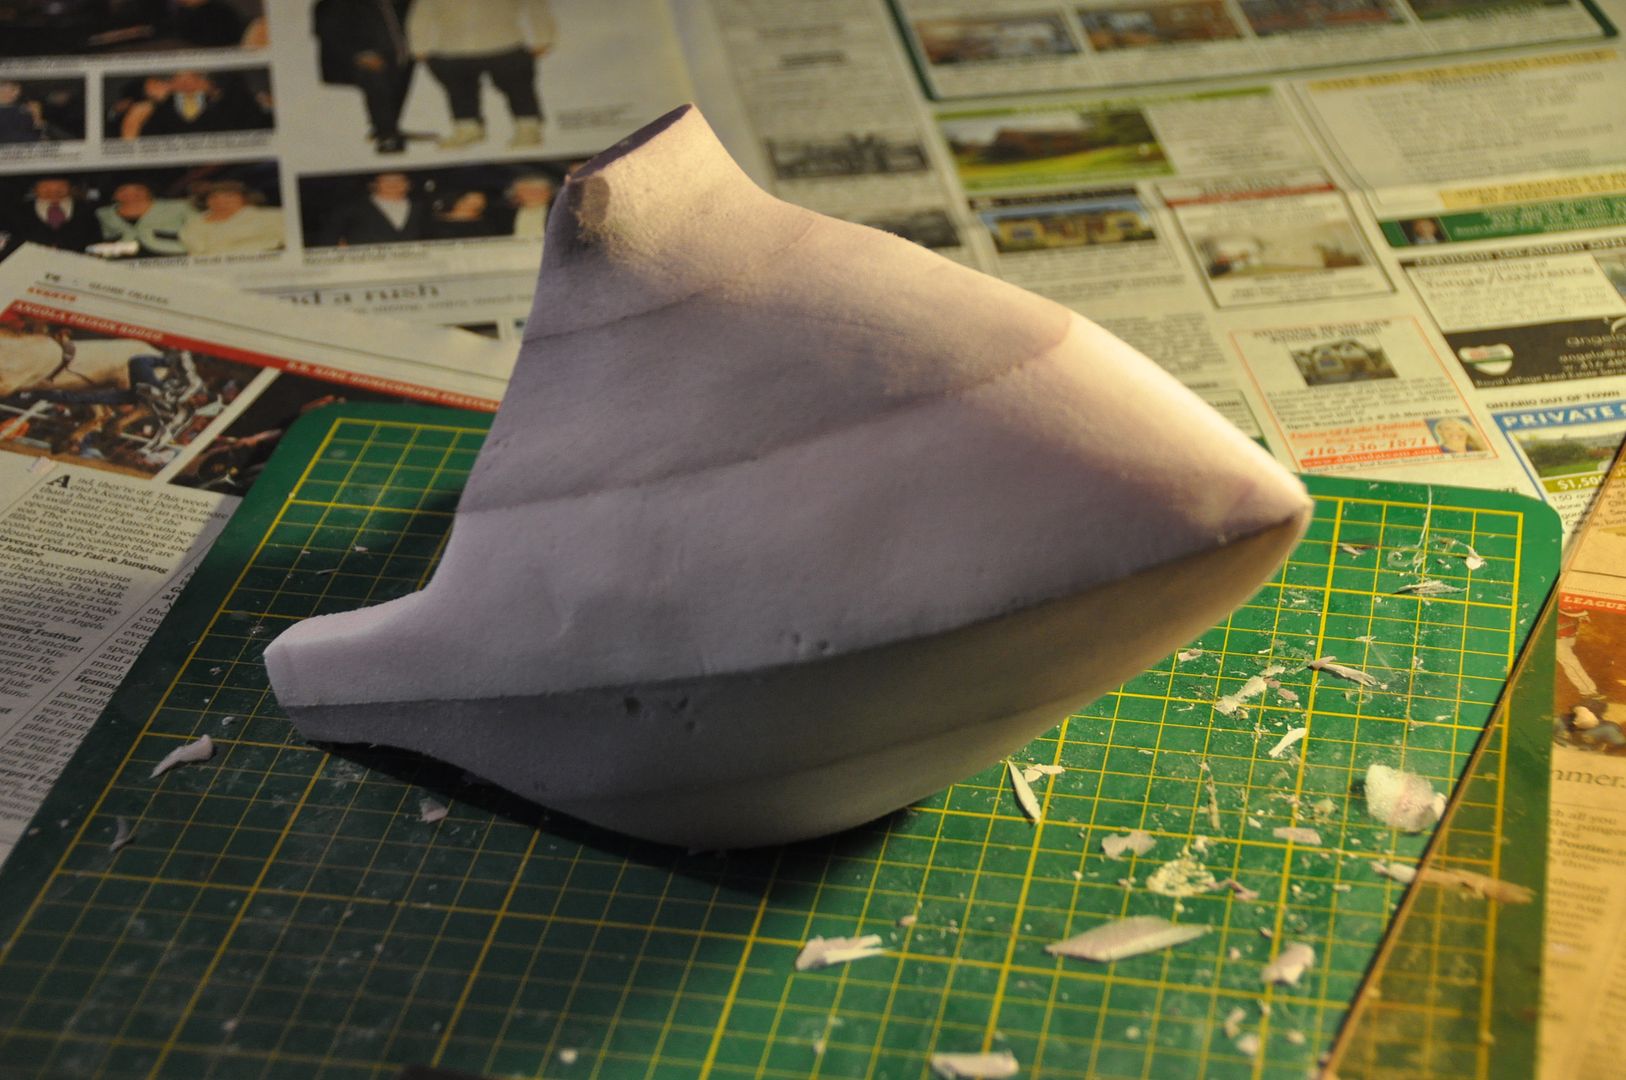
I then fine tuned these pieces. I filled in any divots or dents and sanded it smooth. This was repeated multiple times, keeping in mind that any mistakes on the master would be duplicated in all the replicas.

Then it was time to begin the casting process. I went out to Sculpture Supply Canada and they set me up with everything I needed! I brought both pieces with me so that they could ensure I had the right materials for the job in the right quantities.
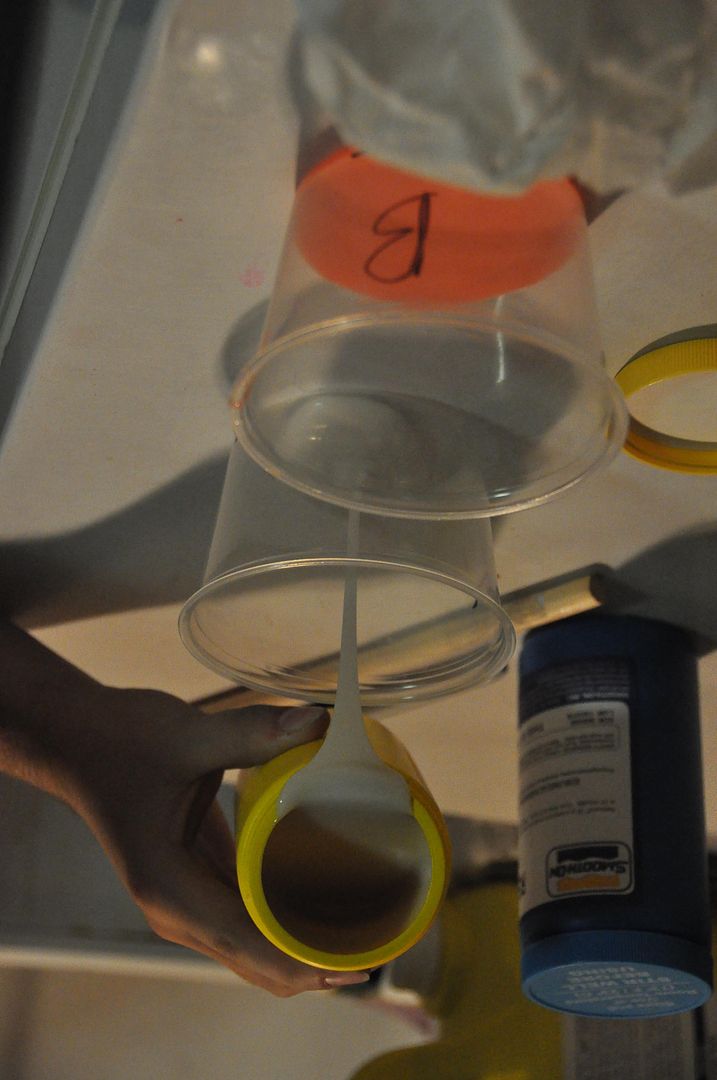
We started by making the silicone mold. This is a brush on mold, that would be open on one side. The open side was tacked down to a scrap piece of foam so that it wouldn't make a mess and was easily moveable. In several layers we made a silicone shell that was about 1/8" thick. (Tip: always have like a million disposable paint brushes on hand for this, every time you use one it becomes garbage.)
We took extra care to ensure there was a thick layer of silicone on the tip and the ridge so it wouldn't tear.

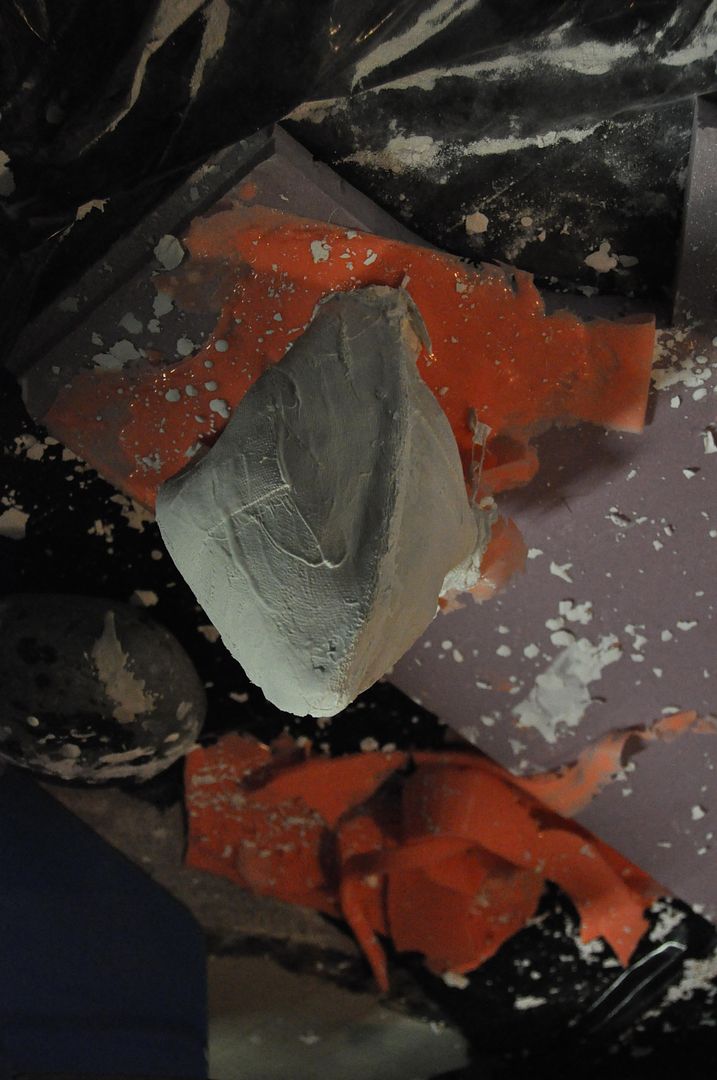
Then we made a plaster bandage mother shell. Again this was done in a few layers. Like the leg molds I did earlier we first did one half, then put a coating of vaseline on the area of overlap, then did the other half. This ensured that we could take it apart and line it up easily when putting it back together.

Then we de-molded the pieces, meaning we took the foam originals out of the silicone casings.
The mold and mother shell were then put back together, ready for casting.

Following the instructions on the package we mixed the proportions of part A and B accordingly.

The cast was brushed in so it would be a hollow shell. This means I needed a resin with a short work time so it would stay on the vertical walls and not slosh back down before it was done curing. (Lots more disposable brushes were used.) I should have done more thin layers on this part, instead of fewer thicker layers as this resulted in a buildup of resin in the bottom of the mold, making the tip a lot heavier than I had anticipated.
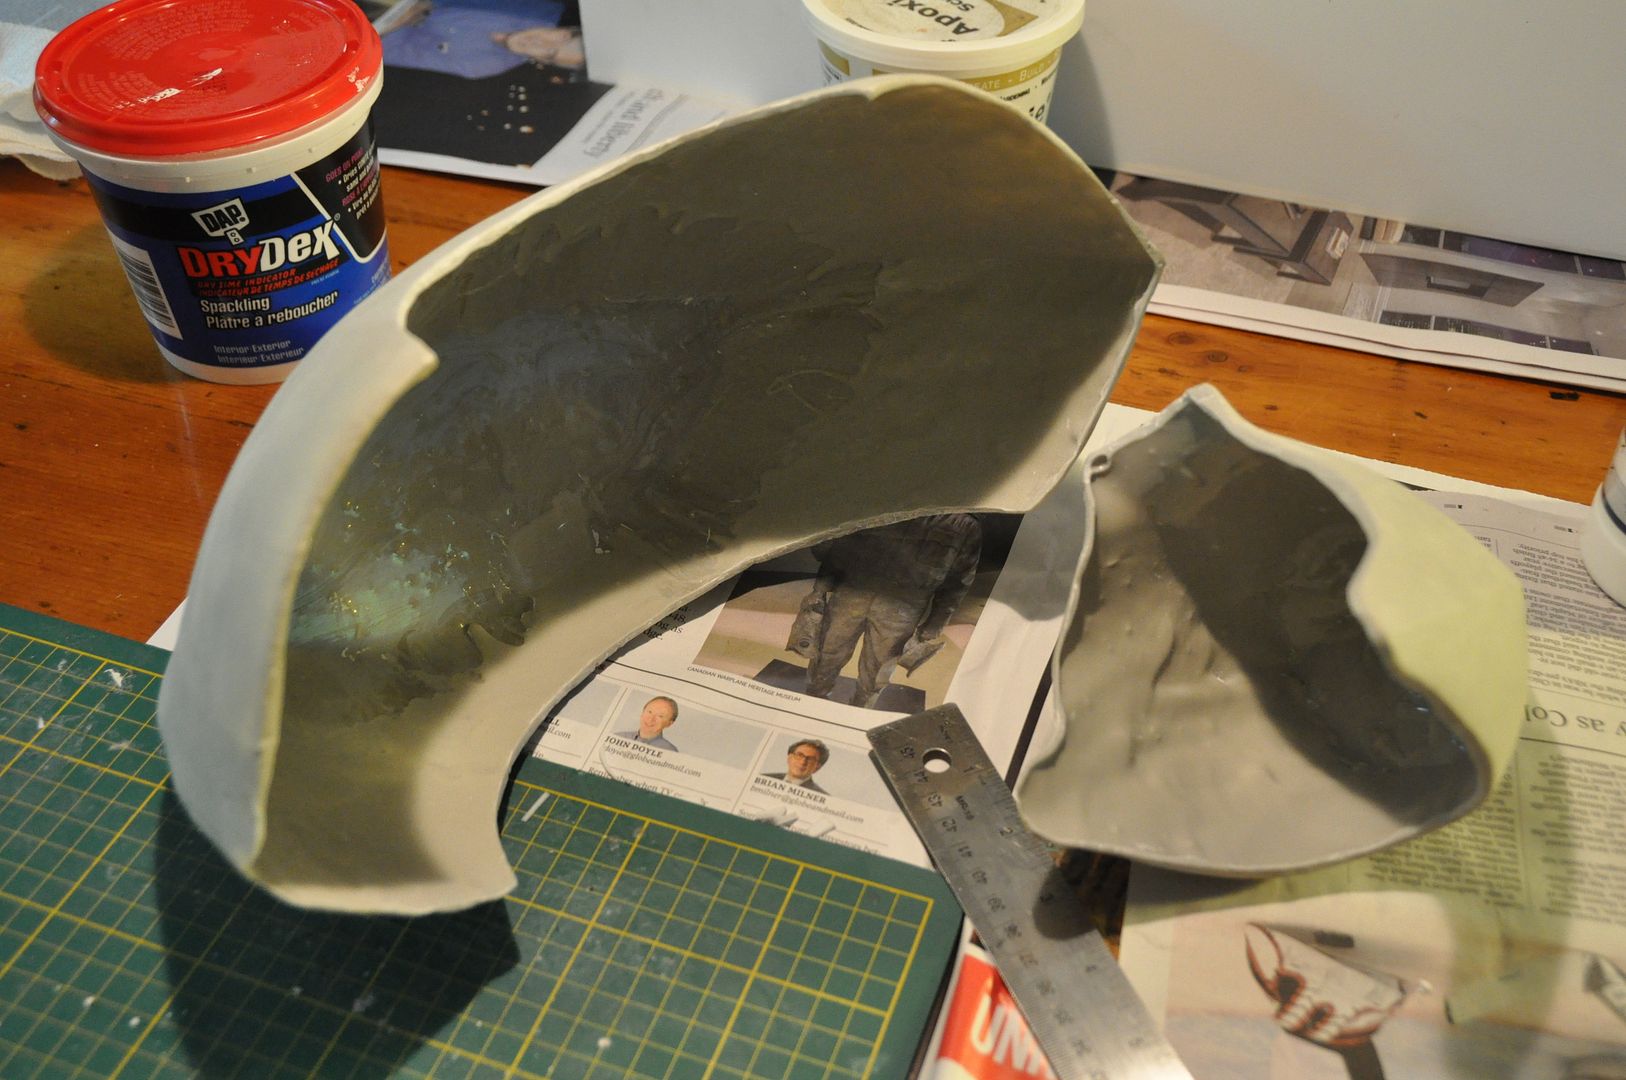
Using my dremel I cleaned up the edges and cut out the two semicircles on the shoulder piece.

Then I heat molded two strips of styrene to nest into the curved sections. These were hot glued in place.
The last thing I did before paints was to drill some screw into the thick buildup of solid resin in the bottom. These were used as anchoring points for my rigging, which was much more secure than trying to adhere anything as the pieces are quite heavy. Unfortunately on the last screw we managed to crack the elbow piece. With no time to recast it, I filled the fracture with duradex.

All the pieces were then sanded to be even smoother than the foam originals. Then I painted them the same as the heat molded pieces.

The rigging for these was very complicated and resulted in me needing a squire to dress me for battle. I made the straps out of leather so they wouldn't chafe my skin (like pleather/vinyl would have) and they hooked around my anchor points on the inside. I used buckles to cinch everything in place. Unfortunately the straps stretched over the course of the day, meaning that things started to shift, hanging in the wrong place and slowly strangling me. This was remedied by boring more holes in the straps, although they continued to stretch and be a problem.

Final notes for casting: Unless you have someone to help you along every step of the way like I did, start small! Don't cast anything crazy large or complicated as your first project! Also, always read the instructions like 8 times before starting and ensure you have everything you need laid out before you start.

Overall I was super happy with the costume as a whole, and it was very well received at the convention. I hope to pull it out again next year, perhaps I can fix some of the rigging issues in the mean time!

Hope you enjoyed the Asuna tutorials, I had a lot of fun making it! We will be taking a short break from cosplay things before looking at Otakon costumes!