Tuesday, June 24, 2014

Isabelle - Outfit - Animal Crossing


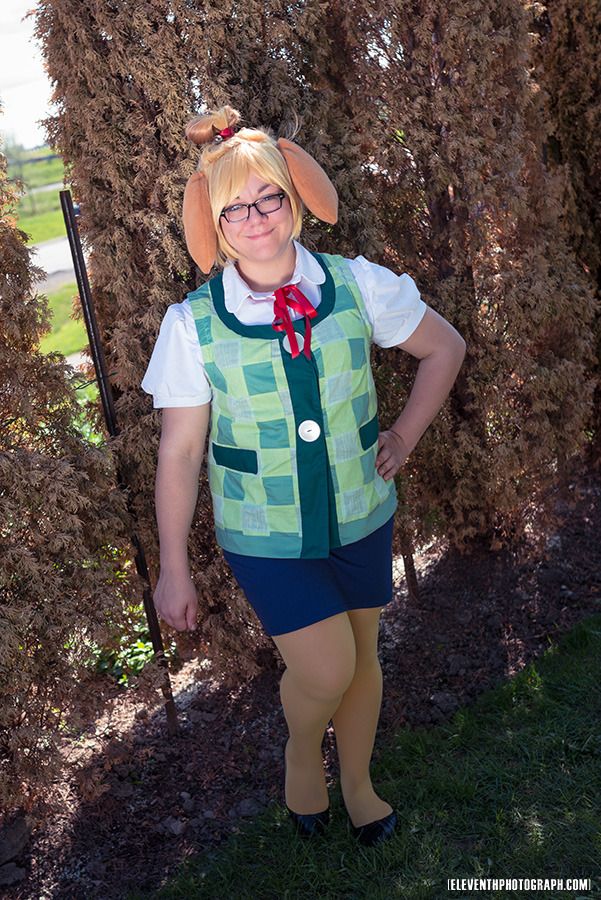
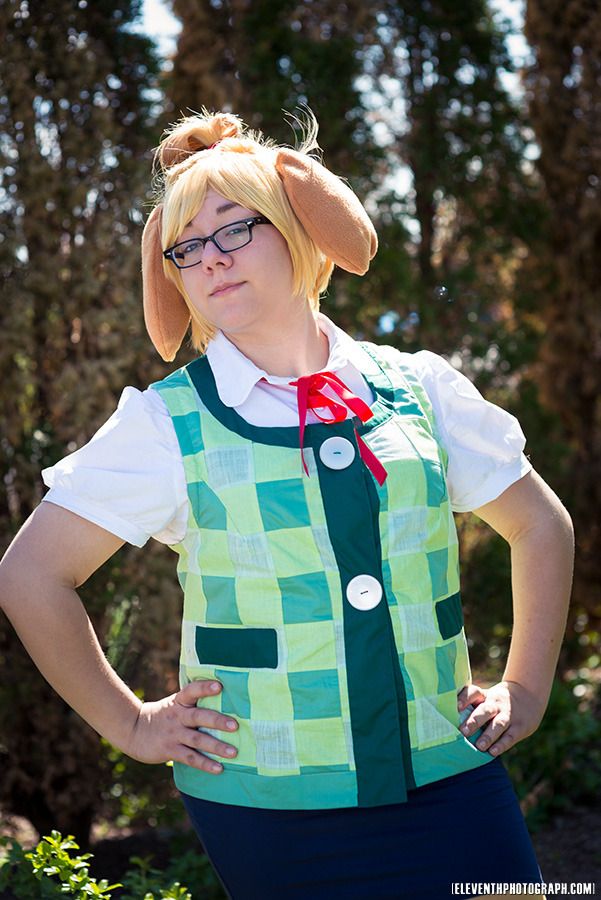
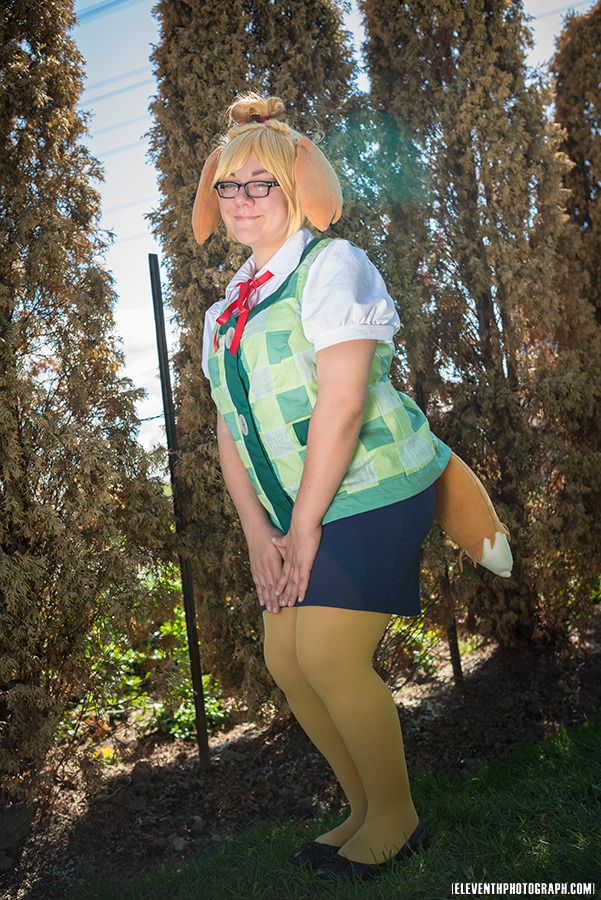
Hey all! This is the second (and last) post on my Isabelle costume I made for my sister Alex! Isn't she adorable!? :D The outfit itself is pretty simple, but presented its own challenge: making checkered fabric!

Go here to look at how I made the Wig, Ears & Tail!

Thanks again to EleventhPhotograph for the cute pics! :D Be sure to check out his con gallery!


Let's talk about the easy stuff first: namely the purchased items. The blue skirt we got at H&M on sale for $7! Not bad! We both agreed it wasn't necessary to spend the money on fabric and/or the time on making something that could be easily purchased and worn as is. (Especially when it is perfect.)

The tights are from American Apparel, who have a decent selection of colours, but are on the pricier side. Sadly my favourite tights/socks store at Queen&Spadina seems to have gone out of business. (This was the place we got all of our insanely purple tights for the Katamari costumes...) I'm a bit sad about this, because I would rather not pay the iron American Apparel price for wacky coloured tights... So if anyone knows another good local GTA store to buy coloured tights, let me know!

The shoes are from her wardrobe (though technically the character doesn't wear shoes, we were both in agreement that shoes were necessary for wandering around a convention). The red ribbon was from Sussman's Bridal Supplies!

For the blouse I used the same pattern I created for her Suppi costume, but modified it: I made the collar rounded, and the sleeves pouffy. The pouffe sleeves were really just trial and error, I took the original pattern piece, made it a bit wider and taller and then gathered it along the top and bottom edge. Then I just added a rectangle to make the cuff. If you want to see how I put the original blouse together, go here!
To make the checkered fabric I started off with 3 different colours of green: light, mid and darker. I had a heck of a time finding 3 colours of green that looked good in combination that were close to the reference image. I eventually ended up with this combo, which is not 100% accurate, but I like it. :)

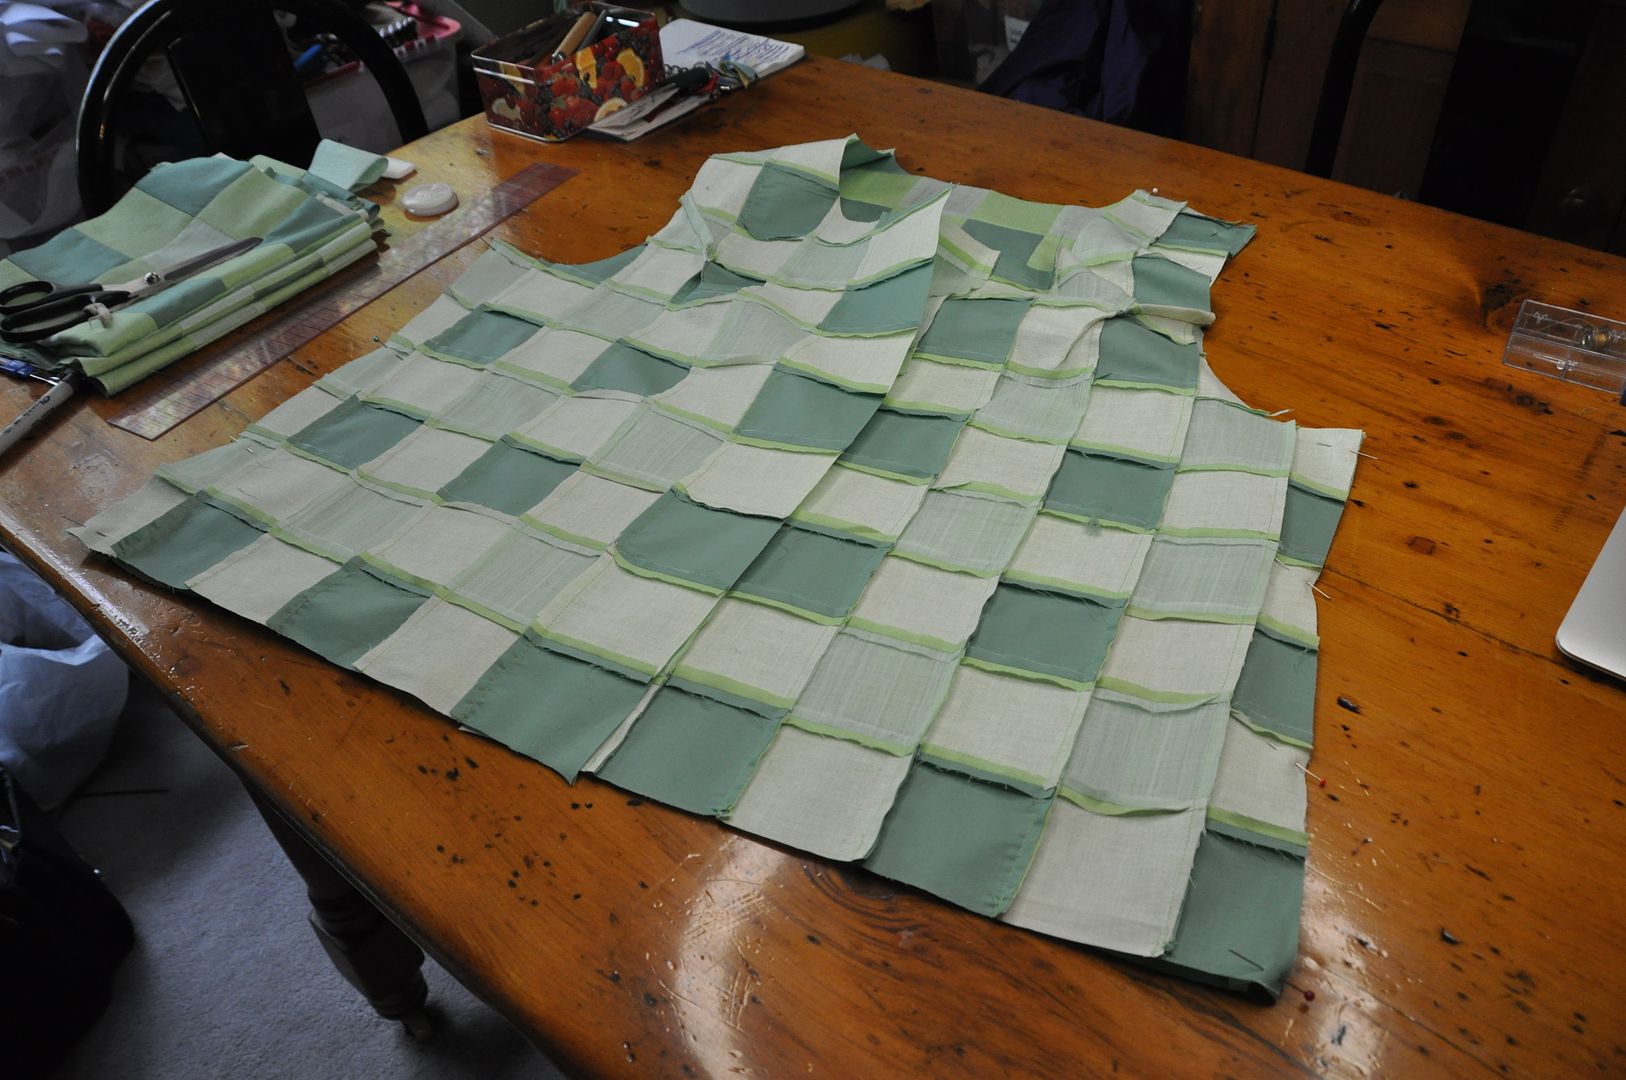
I started by cutting strips of fabric 3" wide. This included a 1/4" seam allowance on each side--meaning my finished squares would be 2 1/2" wide. I cut twice as many of the mid green fabric. Then I sewed my strips together lengthwise. The goal was to make 2 separate striped fabrics: one in light and mid green, one in mid and darker green. Make sure when you hold them up to each other the mid green stripes are offset, like in the picture above. This is important for the next step.

(You can also use this technique to make regular checked fabric--like a chessboard--you will just only need to make 1 striped fabric with an even number of each colour stripes.)
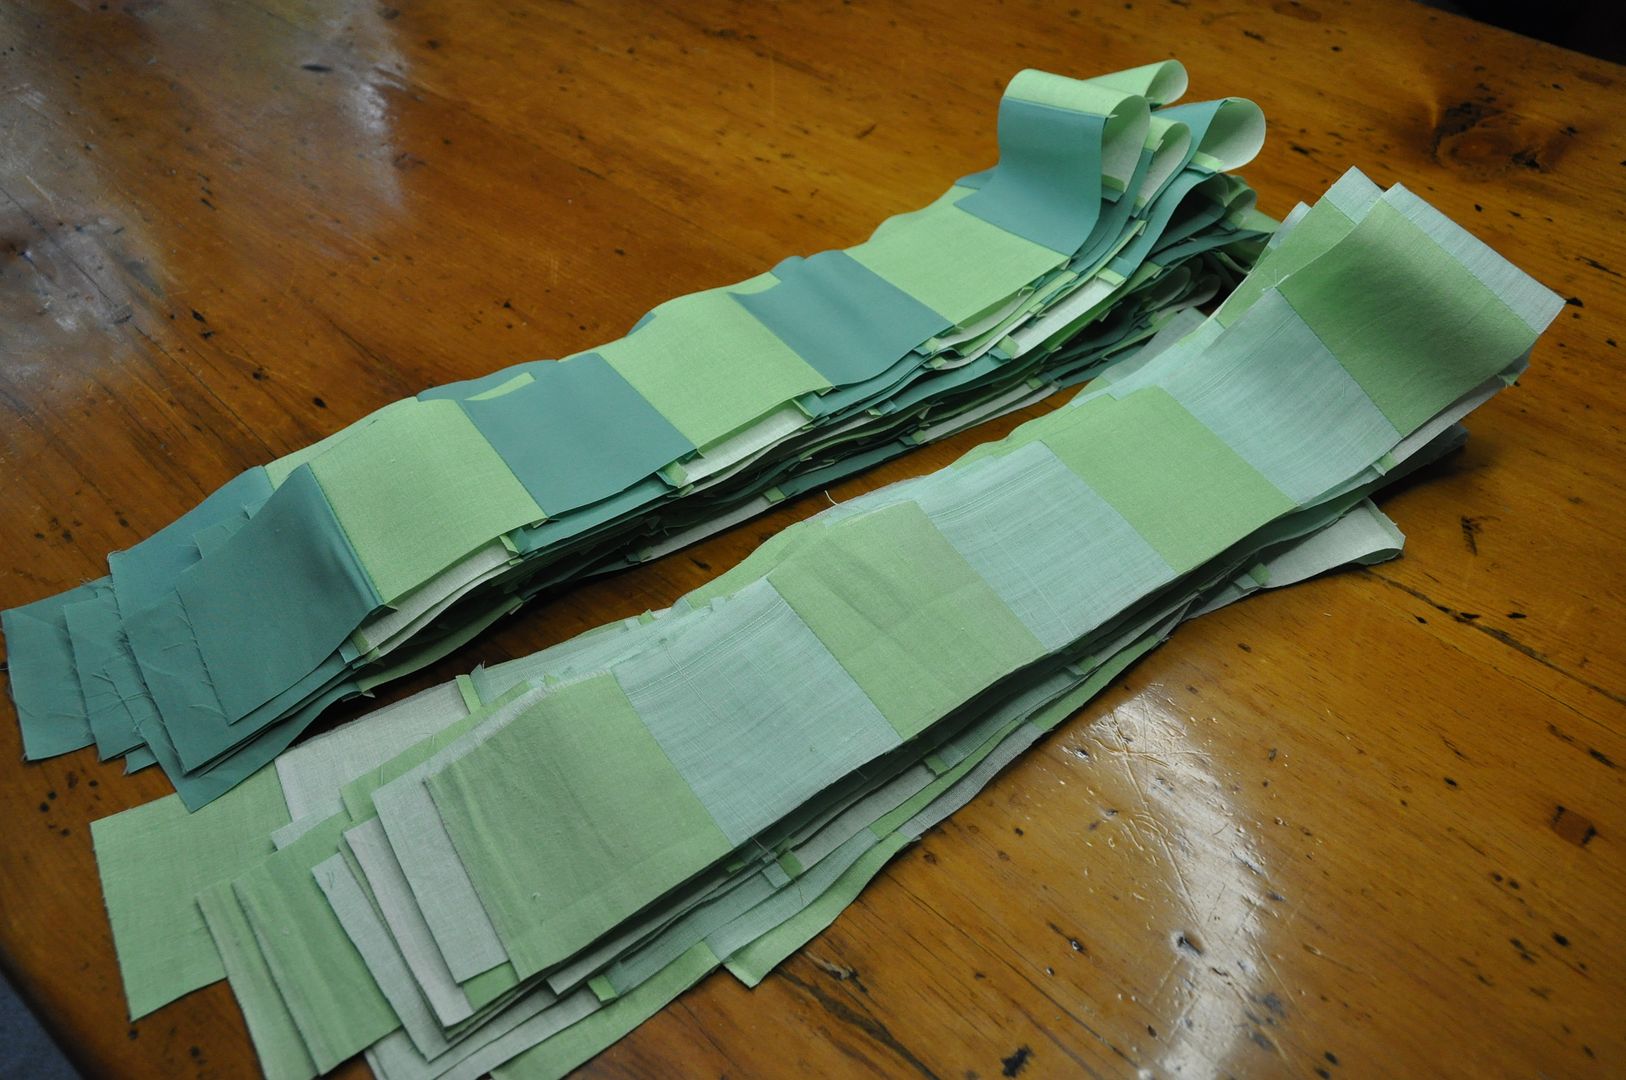
You then press your seams flat on your striped fabrics. Then you can begin cutting again. Cut 3" strips of your striped fabric perpendicularly to your stripes. You should end up with strips like pictured above.

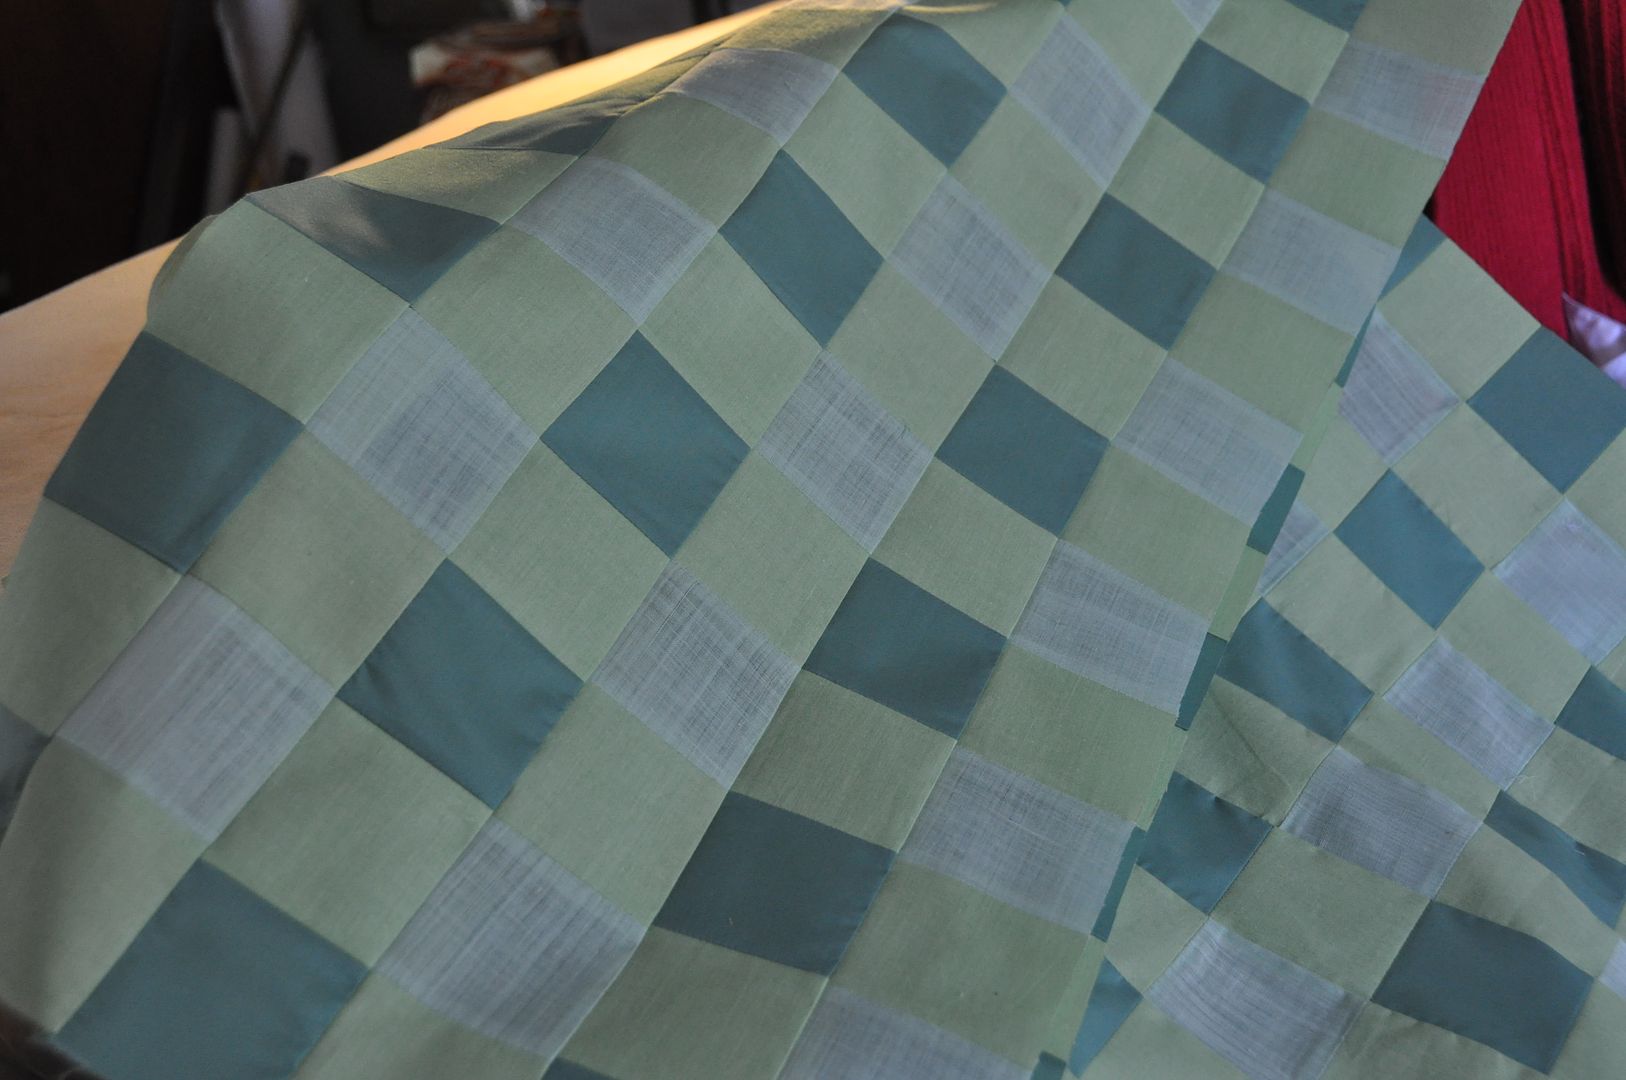
Then you sew those strips together alternating the light stripe fabric with the darker stripe fabric. Press seams flat again. The result should look like the picture on the left.

It's difficult to gauge exactly how much fabric you are making, but as a rule of thumb I think it is better to have too much than too little.
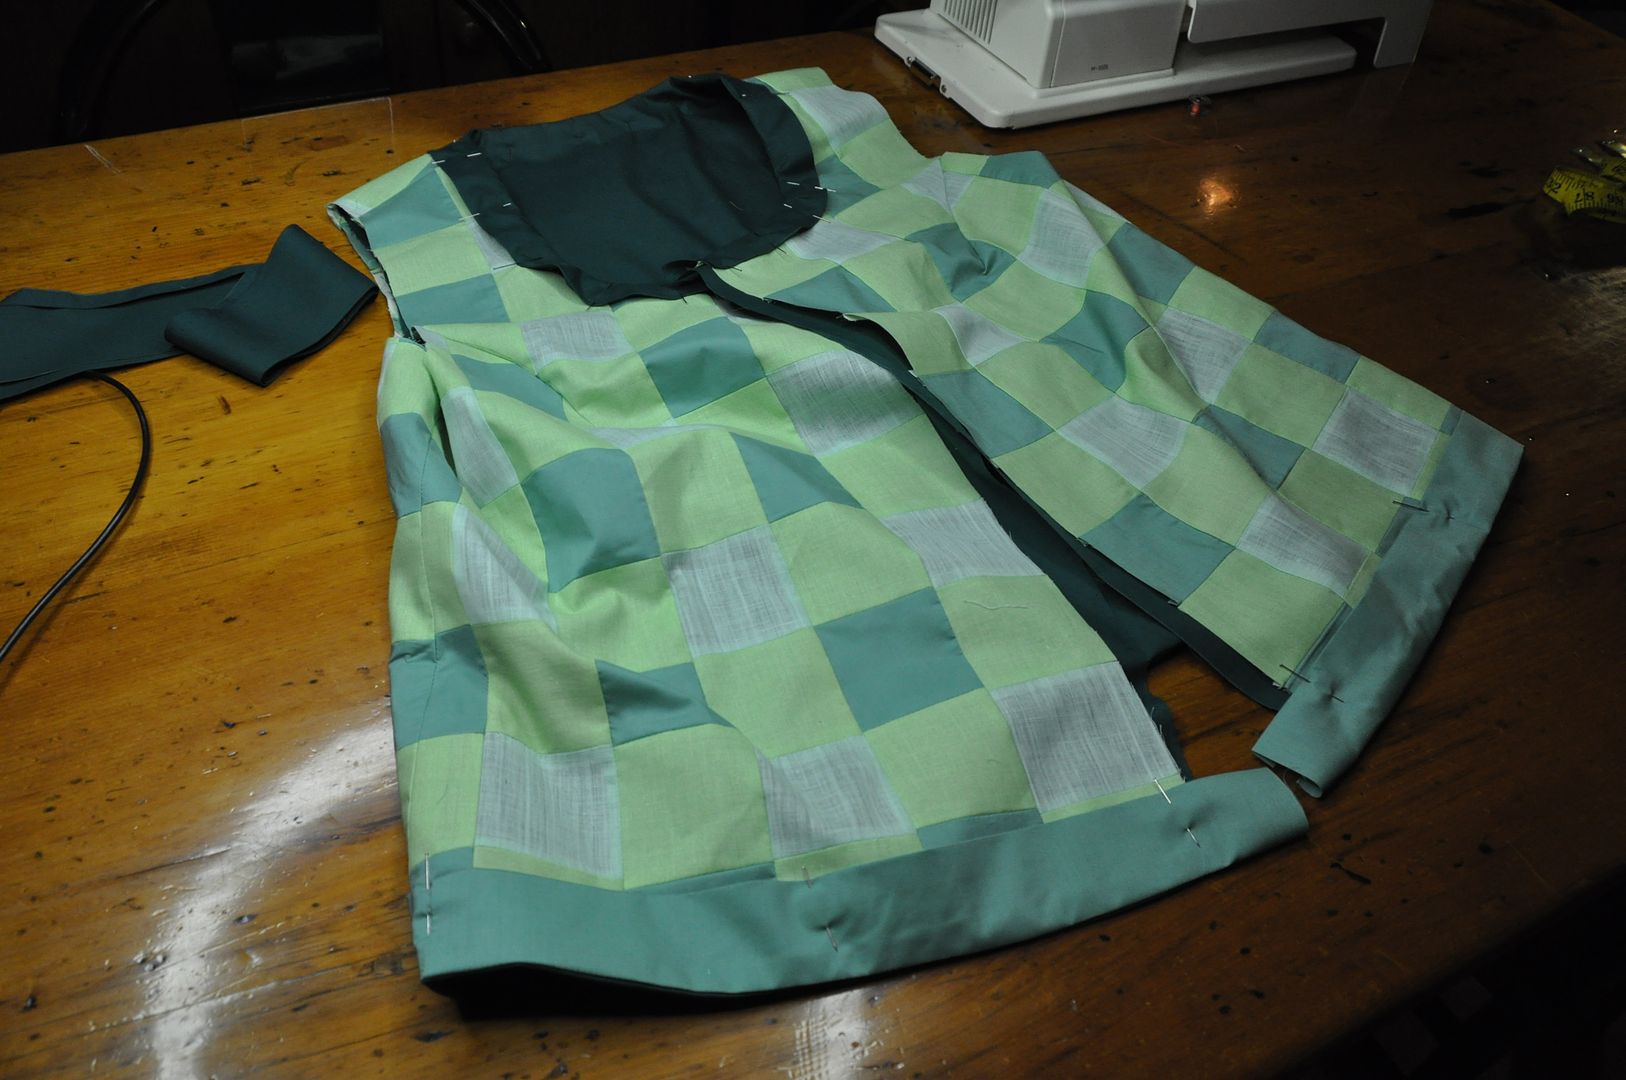
I laid my pattern pieces down on my fabric and cut out the shapes. (I had already done a mockup at this point) I had to be mindful of the checker pattern, to ensure it lined up at the center front.) I sewed the vest together at the side seams, shoulders and closed the darts at the armholes. I opted to leave this garment less fitted because a) the character's body is essentially a sausage shape and b) too many darts really mess with the checker pattern particularly when the squares are this big.
I made an identical vest in the darkest green fabric to line the vest with, otherwise all the seams from the checked fabric will be exposed and fraying on the inside. I made the front placket and collar facing in this fabric also. I finished the bottom edge with a stripe of my darker green (the one I used in the checker fabric).  This finished those raw edges. The darkest green accent fabric is actually leftover from the Prince costume!

 I added 2 strips of velcro to close the jacket. The 2 large buttons added on top were just decoration.
Using the darkest green I made 4 rectangles. 2 were top stitched onto the front as fake pockets the other two had velcro to cinch in the waist at the back. This was instead of putting darts, which would have looked weird on the checkered fabric.

Lastly I attached a bias tape to the inside to finish off the armholes.

Tuesday, June 17, 2014

Isabelle - Wig, Ears & Tail - Animal Crossing


 The first of my Anime North posts! Lets look at Isabelle! This was made for my older sister Alex. This past Christmas I didn't really have enough time to make a whole bunch of gifts at the end of term, so instead I made a "gift certificate" for my sisters for 1 costume each. Elanne picked Sakura, and Alex picked Isabelle.


Isabelle is a character from the popular game series Animal Crossing. (Called Shizue / しずえ in the original Japanese version.) She is the secretary to the Mayor (the player). I don't play it, but my sister is very much a fan! As you can see, this is a gijinka version of the character, but since the characters in this game are already pretty much humanoid already, there wasn't much redesign necessary to create a gijinka version. This is really just a wig with ears instead of a full mascot head.

She wore this costume on the Saturday of Anime North, while running her Crafters' Corner table, which had her tied up for the majority of the weekend. She did manage to escape for a little bit and did a mini shoot of the costume with Mike of EleventhPhotograph . We got some really cute pics! :D Be sure to check out his con gallery!

The base wig we started with was this one from Epic Cosplay. I really liked this colour of blonde, we chose to go with a colour palette that was a little less yellow than the character is normally. I think it is technically listed as a Vocaloid wig, and it required a large amount of styling to get it to work as an Isabelle wig. First I put it on my sister's head and determined what part I wanted up in the ponytail. I tied that out of the way while I worked on hiding the part at the back. 
The problem with wigs it that when you pull the hair in pretty much any direction it reveals the gaps between the wefts. In order to prevent this you have to add in extra wefts to mask the part. Now, if they had had them in stock I would have bought extra wefts when I bought the wig, because I knew I had to pull the top of the wig into a ponytail, which would leave a gap about 1/2" wide. Unfortunately they did not have any in the colour I needed, so I resigned myself to some serious MacGyver-ing.

I selected 3 separate rows of wefts from the back of the wig--far enough down that they wouldn't be noticeable, and far enough apart that they wouldn't leave a bare patch--and I carefully picked them out with a seam ripper. I sewed this into a mega-weft (3 rows of wefts stacked on top of each other). That was then hand stitched onto the wig along the bottom of the gap. Using a pin I parted the wefts, making 2 go up into the ponytail and 1 go down into the back. Had I had more wefts at my disposal, I probably would have done 4 wefts, with 2 going down as the area under the part is a little bare. But it was still much better than when I started, so I considered it good enough!

At this point I tried it on my sister and gave the bangs, sides and back a little trim.
Then I was ready to permanently secure the ponytail--I double checked on my sister first and foremost, because her head is a different size from the wig head, so if the ponytail was pulled too tight it would look weird on her! Ensuring it was in the position I wanted, I then carefully dabbed/mashed some white glue in around the base of the ponytail. It dries clear, but I was still careful to not be messy during this process. (This is similar to the process of stubbing a wig except that this ponytail was not getting cut off!)

Normal white school glue is good for styling wigs, it dries clear and is washable; if you make a mistake, you can wash it out and try again.

Then my sister dyed the gradient into the ponytail. She did the colour to match the ears I made. She used a combination of brown india ink and rubbing alcohol (70%) to dilute it. She also apparently didn't look up any instructions before doing it. :/ This is the approximate method if you are interested!

After letting that dry sufficiently I artfully arranged the bun the way I wanted it, securing it with another hair elastic. The I hair-sprayed the bejeezuz out of it. (This is a technical term of course! ;D) I let it sit and air dry for several hours. Occasionally spraying it a bit more. Once it was fairly solid I added a touch more glue around the base to hold the ends of the bun in place.
The hair accessory is a piece or red ribbon folded in half length-wise, with 2 silver bells attached. These were simply hand stitched on, and the ribbon was fixed around the bun with a hand stitch. I got the bells downtown and they have little hearts on them, which I think suits the character so nicely. :)

The ears are fleece which was bagged out and lightly stuffed. I closed the stuffing hole with a hand stitch and then stitched them to the wig.


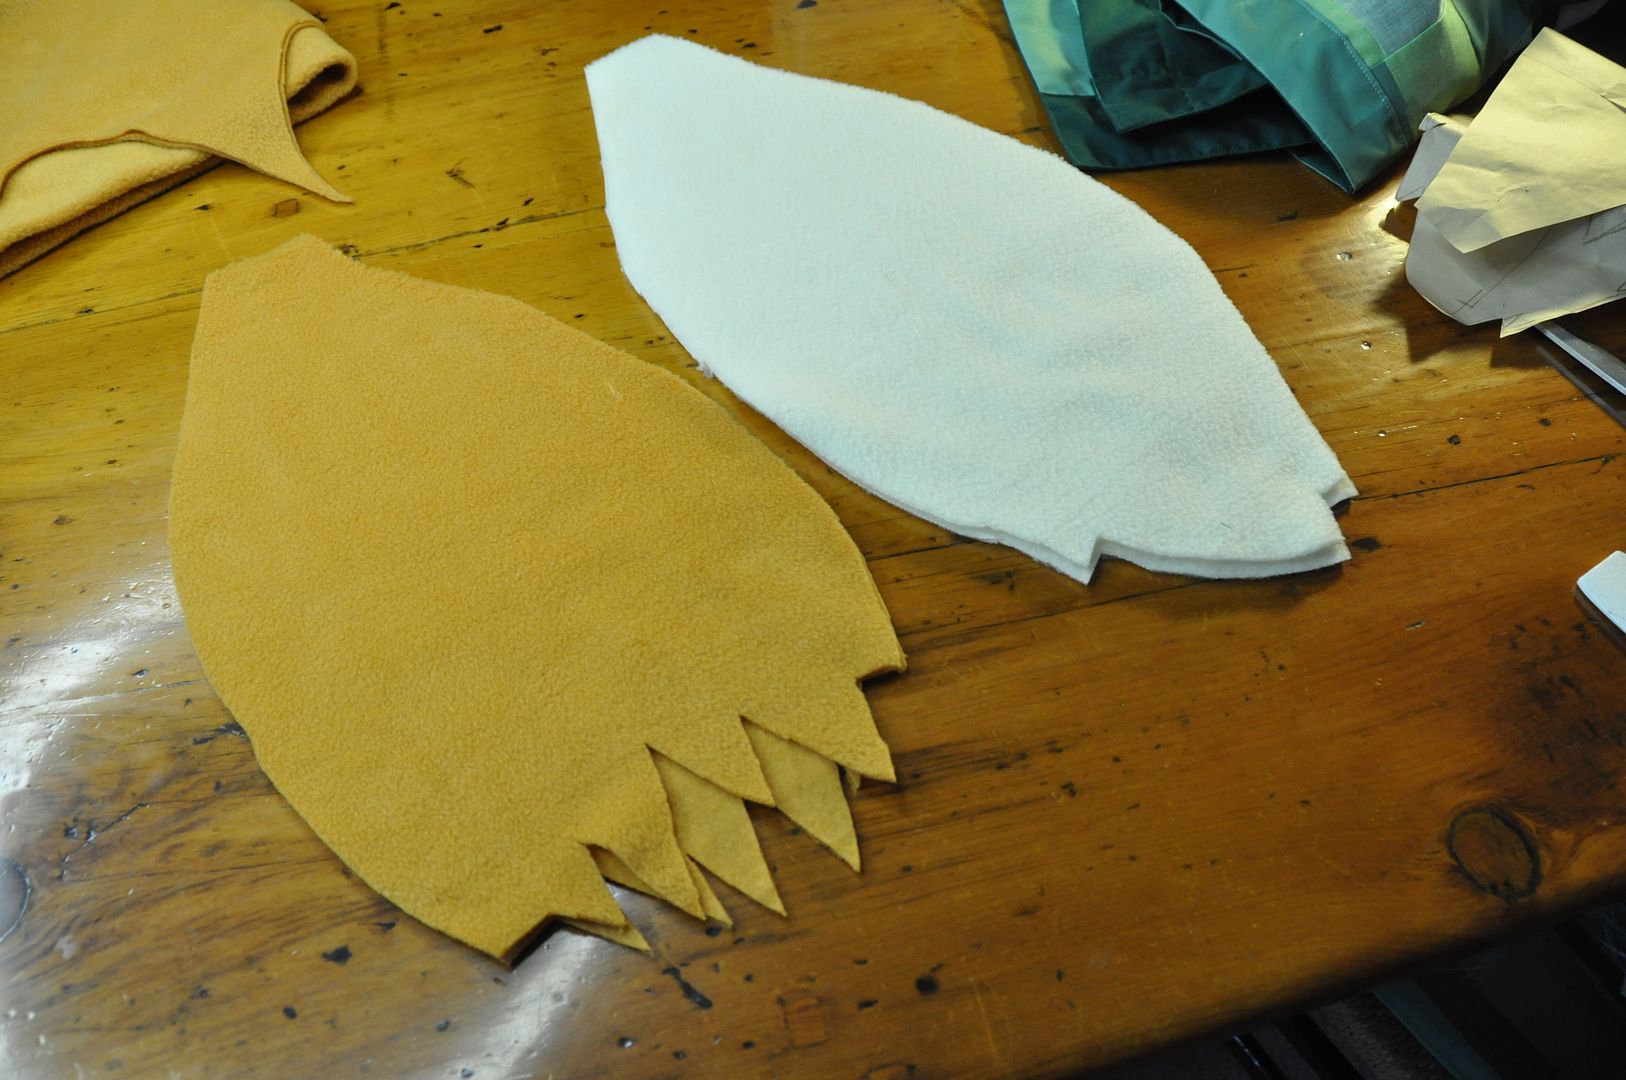
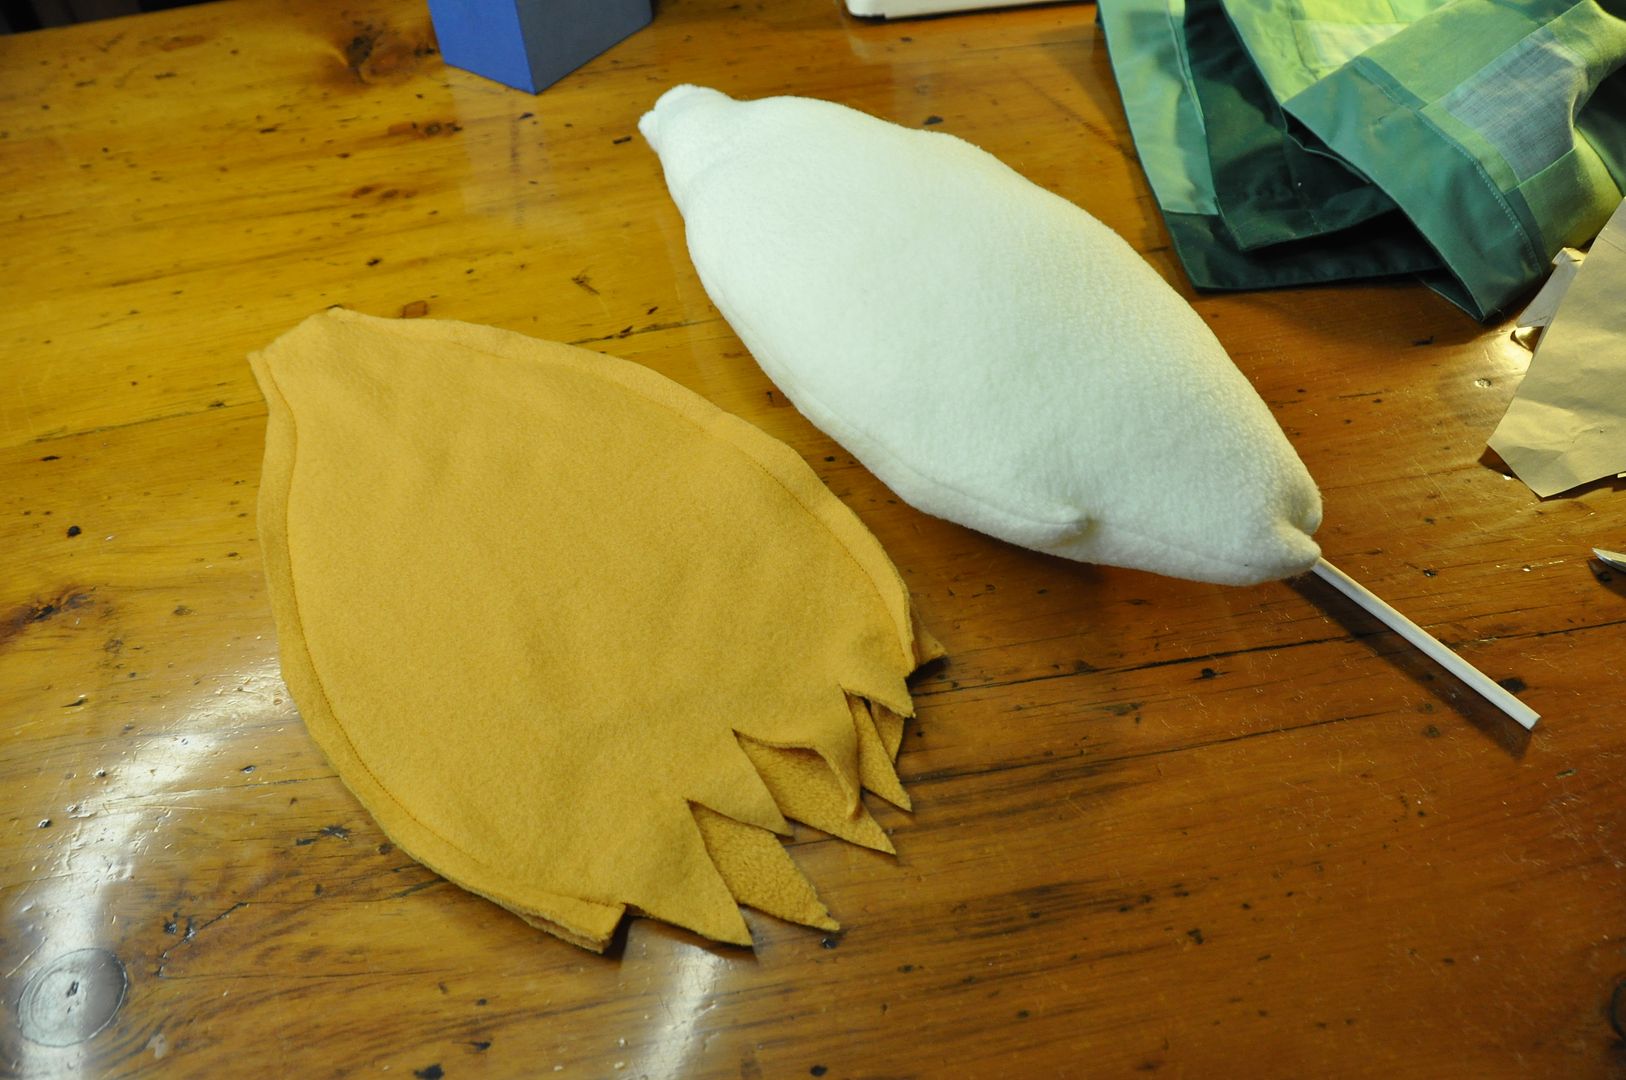
For the tail I made a paper pattern of the approximate shape I wanted and cut out a piece that was a lot wider at the widest point. This was so it would be nice and round I made an inner tail piece in a cream colour, and an outer tail piece in my yellow/gold. The yellow one ends in an open spiky end, which is different on each side. The nice thing about fleece is it isn't neccessary to finish the edges because it doesn't fray.
I bagged each of them out and stuffed the inner tail to be nice and round.

The gold/yellow colour matches the blonde wig and the tights, and the brown ears match the bun gradient like on the character. It was a bit of a challenge finding 2 complimenting colours that both matched the wig, and tights that would match the tail. But we managed it!

Then I slotted the outer tail over the inner tail and sewed them together at the tail base.

This piece was then attached to an elastic waistband, which was just slipped on over the skirt, under the vest. And presto! A cute tail!

Tuesday, June 10, 2014

3D Printing Collaboration with Crowtrees Studio

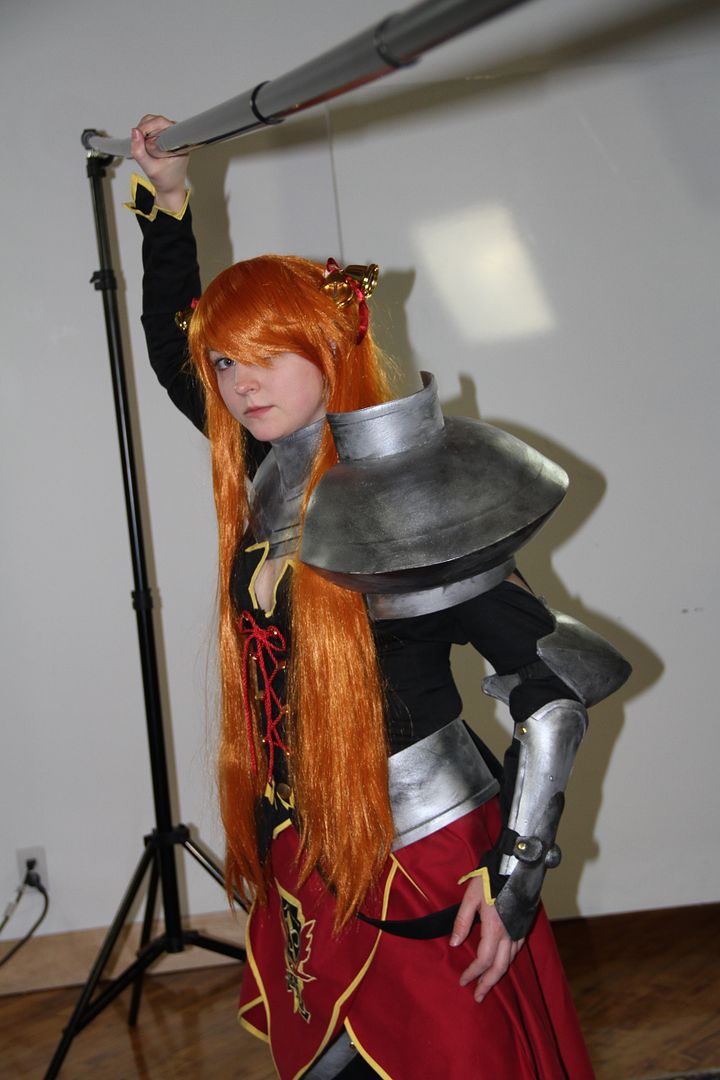
Hey all! This is something I've been excited to share for a while! A couple of months ago I collaborated with Crowtrees Studio to create a miniature 3D figure of my Asuna costume.

I say "collaboration" in the loosest sense of the word because all I really had to do was get in costume hold a pose for about 10 minutes! Hahaha :D Special thanks to James and Rui for making this happen! And another thanks goes to my friend Harriet for coming with me and acting as my squire for the day!

This project has been a long time in the running; I was actually contacted before Christmas about potentially being a cosplay model for 3D scanning. We set up a date in March to do the scans. I took 3 costumes with me that weekend: Asuna, Alice, and Kero. We did 5 scans that day (2 Asuna, 2 Alice, 1 Kero), but Asuna is the one they went ahead with to create the final 3D model.
Though they are now starting into doing cosplay figures, Crowtrees actually started out doing wedding cake toppers!

The thing about cosplay is that you encounter a whole lot of crazy challenges in the scanning process because of all the different complicated bits. For example, on Asuna the golden bells on her hair didn't get picked up by the scanners at all because they are highly reflective! Those had to be added in in post. Similarly when we scanned Kero's candy the cellophane wrapping totally messed with the scan. Another issue on Asuna was getting the back of the legs to scan, so we had to do a second pass with the scanner of just the legs while the skirt was held out of the way.

In terms of pose, I had jokingly mentioned that my one issue with this costume was that the sword was too heavy to wield and was very limiting on my posing capabilities. When they told me they could scan the sword separately and add it in later I was thrilled! Finally I would get to hold the sword in the air! Hahaha So they rigged a pole to be stationary above my head that I could hold onto at the right angle so they could scan my body with my arm raised. (Because if I just held my arm in the air it would move around a lot during the scan!) Long story short, I finally got my wish to hold the sword above my head like the character does in the manga. :P
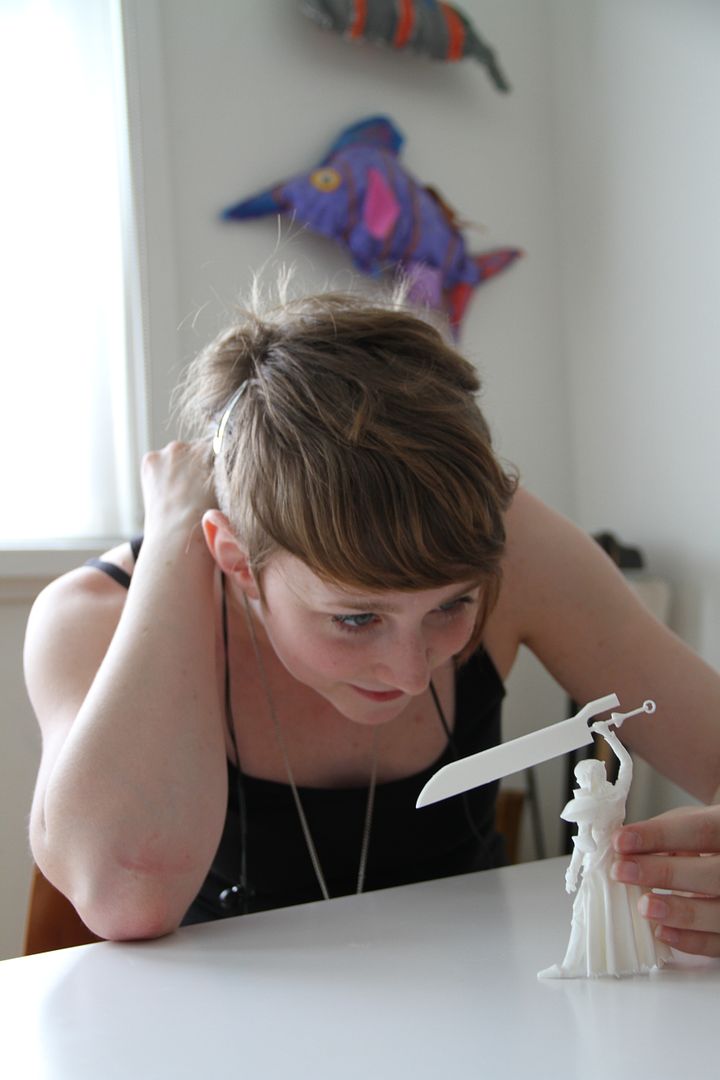
I went to pick up my mini me last week! What a surreal experience! It is one thing to see a figurine of the same character as you, it is another thing to see a miniature version of your costume!

I am always really impressed with technology, so suffice to say that 3D scanning blew my mind! You could see the image forming in real time as the sensors picked up the figure with a surprising level of detail. The scans also picked up colour data as well! I especially love the way it picked up the drape of the fabric. :D

They printed it in 2 pieces, so the sword hand is detachable. Mini sword is much lighter and easier to deal with than the 6' version! Hahaha
Overall this was a really fun project to be involved with! I totally love my figurine! Really glad I got this opportunity. :)

Excited to see what these guys do in the future as the technology gets even better! :D

Saturday, June 7, 2014

11th Doctor - Jacket - Doctor Who


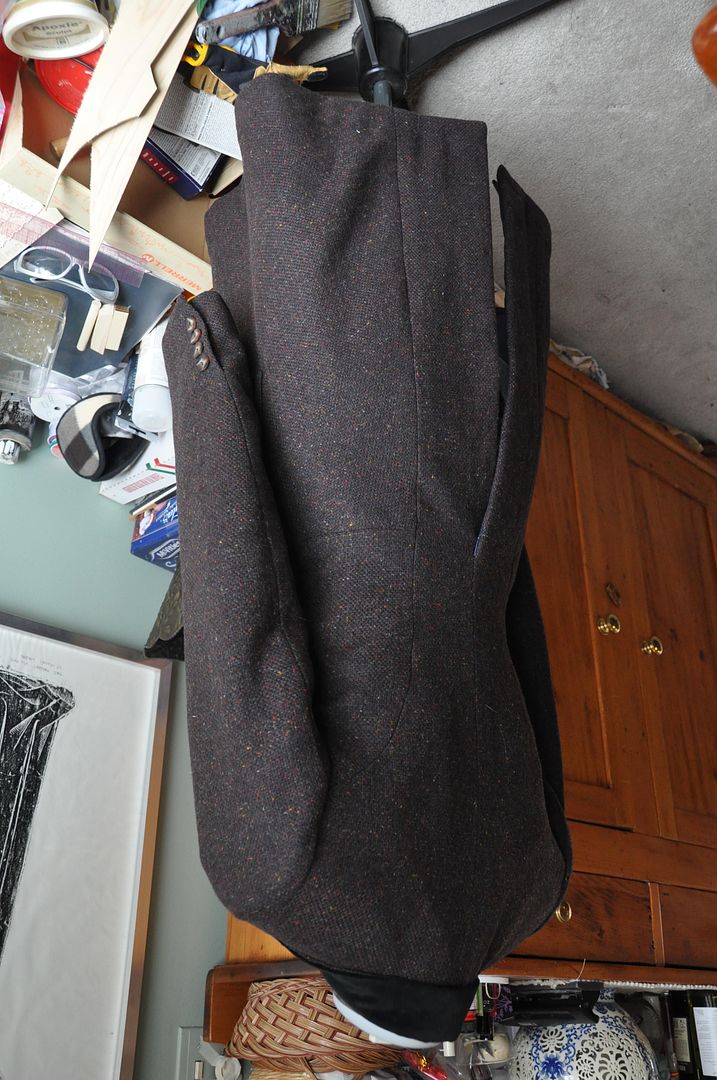
Lets take a look into how I made my 11th Doctor jacket! It's modeled after the one 11 wears in the anniversary special, except I have tailored it to be a more feminine fit (ex: for a woman. aka: me). This is my take on a female version of 11. Except for the fit at the bust, it's intended to be pretty much the same as the original. (Plus pockets, because seriously: why does this jacket not have pockets??) I have no real plans at the present moment to make the rest of this costume, but I do plan to wear this jacket on a regular basis in fall/winter/spring!

I had to look at many reference pictures before drawing out what I wanted to make. Proportions on Matt Smith would look different on me, particularly in terms of lapel, waistline and length. Accuracy is great, but I wanted the jacket to suit me first and foremost. As for colour/texture, I did my absolute best to match the fabrics on the Doctor's coat. My colour combo is a little less purple than 11's, but pretty close! I used a brown tweed, with a black velvet for the collar accent and a blue kasha lining. 11's lining is technically more of an indigo colour, but I couldn't find that, so I opted for blue.

To be honest, I rather dislike "Fem!Doctor" cosplay in which the Doctor is wearing a miniskirt. Don't get me wrong, I think it would be awesome if the doctor were a woman! Just, in my head-canon if the Doctor were a woman she would dress exactly the same. Meaning very cool and suave, as opposed to sexy. I just don't think miniskirts are very practical for adventuring throughout all of time and space...

Without further ado, lets turn to tailoring! I would describe this as my first official project that has been 100% properly tailored. Tailoring is a long and complicated process that includes a lot of hand stitching, but when done correctly the results are beautiful! I wouldn't pretend to be an expert here, so this will be more of an overview of the process than anything else.

If you are a beginner at sewing, a jacket may be a very difficult project for you to tackle. (I've been sewing for over 5 years now and I still found it a bit of a challenge.) I might suggest first attempting a tailored vest as first tailoring project. My best advice is to take a class (that's what I did). Also, the textbook I had for this course was insanely helpful. Really thorough, very detailed, lots of pictures with step-by-step instructions. It's called Tailoring: The Classic Guide to Sewing the Perfect Jacket. I bought the newest version on amazon for about 15$ CDN (the older edition that is out of print--but the content is exactly the same--is crazy expensive, don't buy that one!). Covers everything from pockets to lining, lapels to cuffs. (Aren't I a good salesperson? Hahaha)
The pattern was quite tricky to make. I drafted it from scratch based off of my measurements after looking at reference of both 11's coat and 19th century frock coat patterns. Pictured left is the final version of the pattern, after much slicing, dicing and re-tracing!

The top part of the coat is in 4 pieces, with a seam a couple inches below the waist connecting to a lower panel. The waist seam actually slants down towards the center front by about 3/4", which looks more flattering that cutting it straight across. The center back panel is where the vent is and actually runs the full length of the jacket uninterrupted.

It took a couple tries to get the pattern together, but once that was done I moved on to the mockup.
Using the mockup helped me to determine any adjustments I needed to make to the fit, and also how the lapel would lie on the body. This enabled me to determine the break line (or roll line.
Based on that I was able to pattern the sleeve, which I mocked up and fit successfully on the first try, no adjustments needed! Woo!
Following the welt pocket instructions in the Classic Guide to Tailoring I made a mockup pocket, ensuring I had the process correct before trying to do one on my garment.
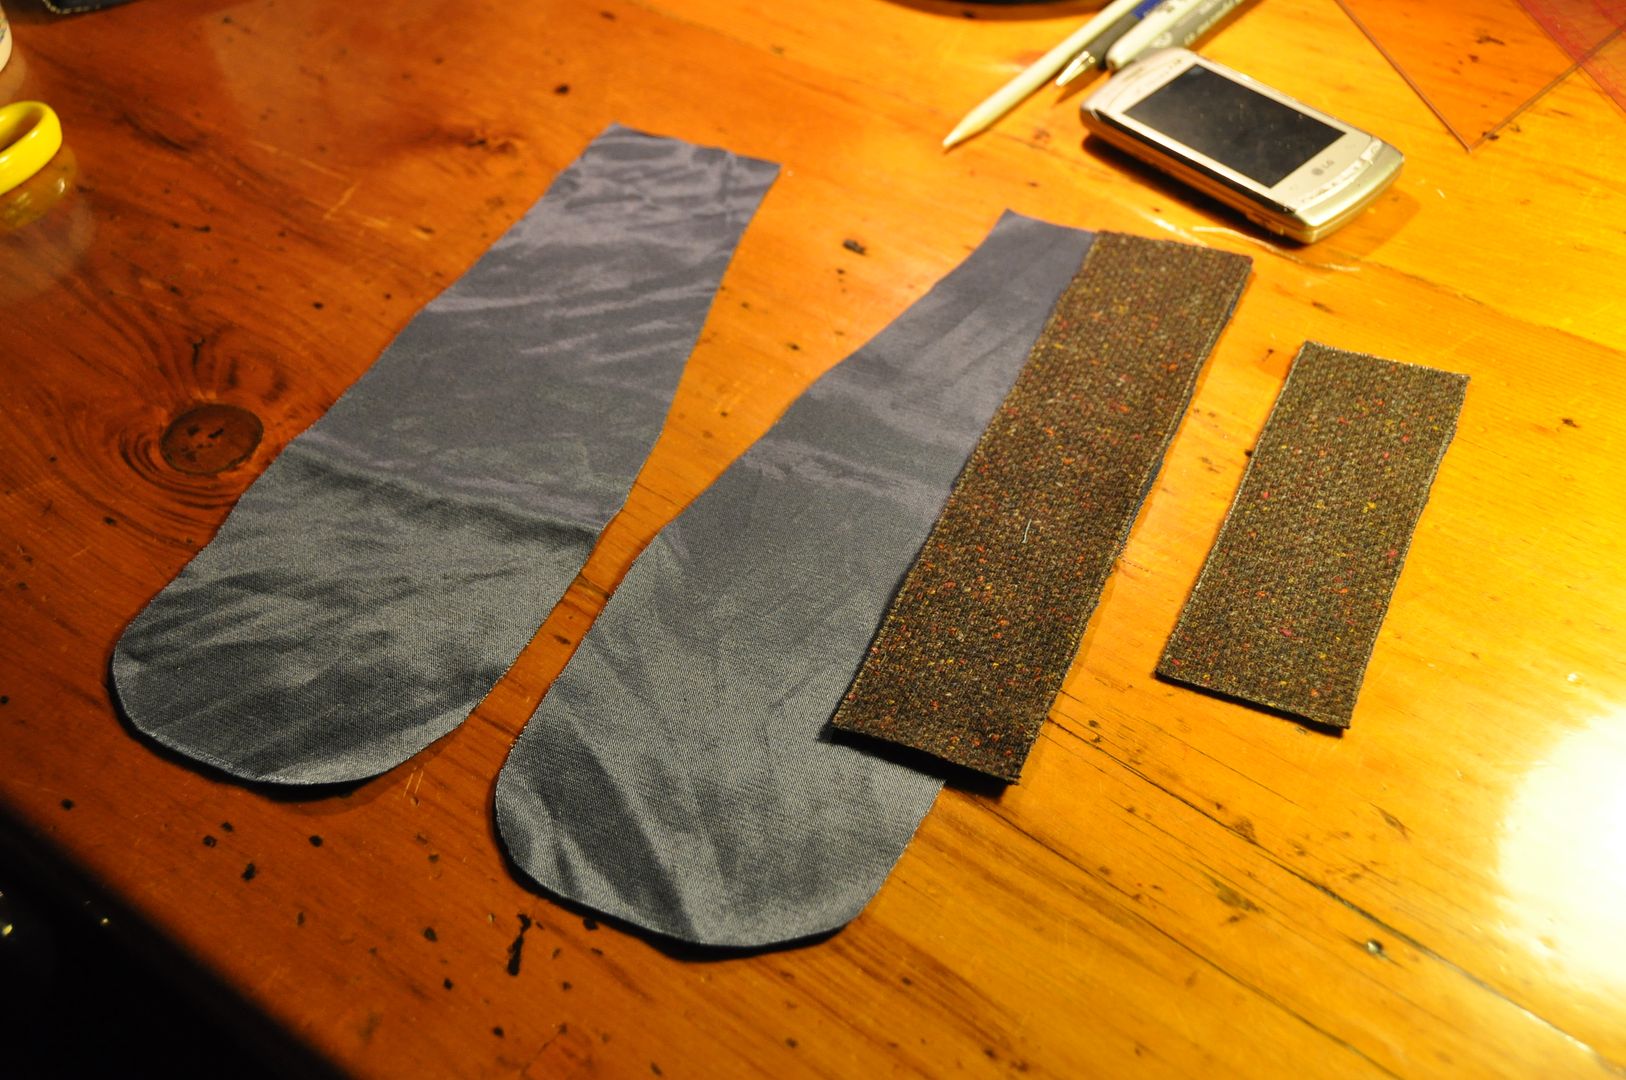
I then patterned and cut out my pocket pieces. My one regret here is that although I made the pockets deep, I didn't make them very wide. If I were to go back and fix one thing on this project, it would definitely be the pockets. The inside of the pockets are made of my lining fabric, which is a kasha lining. Kasha feels like flannel on one side, but looks like a shiny lining fabric on the other. It's a sturdy fabric, warmer than most linings that will last longer.
I also patterned and mocked up my top collar piece, which took a couple tries to get right. I also made a pattern piece for the front facing.
Once I had gotten my mockups and patterned approved I went ahead and cut my pieces out of my fabric. I left myself lots of seam allowance.


For the jacket construction I started by putting the top pieces together. Then I pressed the seams open. One thing I can say about wool: it irons reeeally nicely. ;D
I put the pockets into the lower panels, then attached them to the upper panels. I was not necessary to finish my seams, because I was lining the jacket later.
Then I began to build up the structure within the front of the jacket. This was done with a horse hair canvas. This piece was basted to the inside of each front panel. You can see that it extends from the shoulder, down the armhole to where the princess seam is, and down the center front all the way to the hem. (Mine actually goes down too far into my hem allowance and I had to cut it by 1 1/2" later.) The piece is attached with a long diagonal basting stitch in a contrasting colour thread, which is later removed (it's easier to see it to remove it if it contrasts with the outer fabric.)
Inside the lapel there are rows of permanent diagonal basting stitches that help the lapel to roll and and fold over in the right spot. First I used a twill tape and marked the break line (where the lapel folds over). This was securely basted in (permanent stitch). After I filled in the triangle of the lapel with thee rows of stitching, parallel to the break line. These are all permanent so I used a brown thread that matched my outer fabric. My advantage here is that my tweed was a thick fabric, so it was very easy for me to do my basting stitches so they didn't show through. My one mistake here is that I accidentally overshot into my seam allowance when doing my stitching, which made the next step more challenging.

Then next step of course is to baste the stitch line to mark where the seam allowance is on the outer fabric and trim the hair canvas just short of that. This was a challenge for me because I had basted the two layers together and had to pick out the stitches.

Then I used another twill tape to mark the front edge of the lapel/jacket opening.

Then I bagged out the front edge by attaching the front facing.
The next step was to clip and flip the front facing, pressing it flat. Then basting in place so it wouldn't flap about. Again, more temporary basting stitching. I secured the raw edge with a permanent basting stitch.


Once both lapels were put together, I assembled the back of the jacket. I attached the 2 pieces, stitching down the center back to the vent, which I left open. Then I attached the back panels to the rest of the jacket and checked the fit. All good! :)


I used more hair canvas to reinforce the edge of the back vent. Then I measured and permanently cross stitched the hem up.

I also stitched up the shoulder seams at this time. I made sure the inside of the jacket was ready for the jacket lining.
The jacket lining was made using the same pattern and process as the outer shell, excluding the canvas reinforcement and pockets. I also left the shoulder seams open, so I could add in the shoulder pads later. This was then carefully pinned and basted in place along the vertical seams. One thing I should have done was added in a extra fabric for a pleat at center back, this would have made the jacket have more movement across the shoulders.

I measured the bottom and front edges and then basted them into the finished position before slip-stitching the edges down.

I then worked on the sleeves, which were done similarly to the back vent. First they were reinforced, then I cross-stitched the hem. However, I made the sleeve vents "fake", so at this point I permanently basted them closed and added the buttons. Then I lined up and slip stitched in the lining around the cuff.

Then the sleeves were eased and attached to the garment on the outer shell by machine. Then, I permanently stitched in the shoulder pads along the top of the sleeve and in the ditch of the shoulder sleeve. Then I turned the garment inside out and pinned, basted and slip-stitched the sleeve lining to the rest of the lining. This closed and finished the lining.
Next was the top collar. The collar pieces were all cut on a bias (the 45 degree angle from the grain) so they would stretch around the neck nicely. The under collar matched the rest of the jacket and was done in 2 pieces, the top collar was one piece of velvet to contrast.

There was 2 pieces of collar canvas attached to the under collar, both lined up to the center back, attached with a piece of twill tape. More rows of parallel stitching were done along the collar to help it roll properly too.
After carefully lining it up, I basted the under collar in place. Then I cross stitched it down, this was a permanent stitch, so I made it look nice. Then I removed the basting.
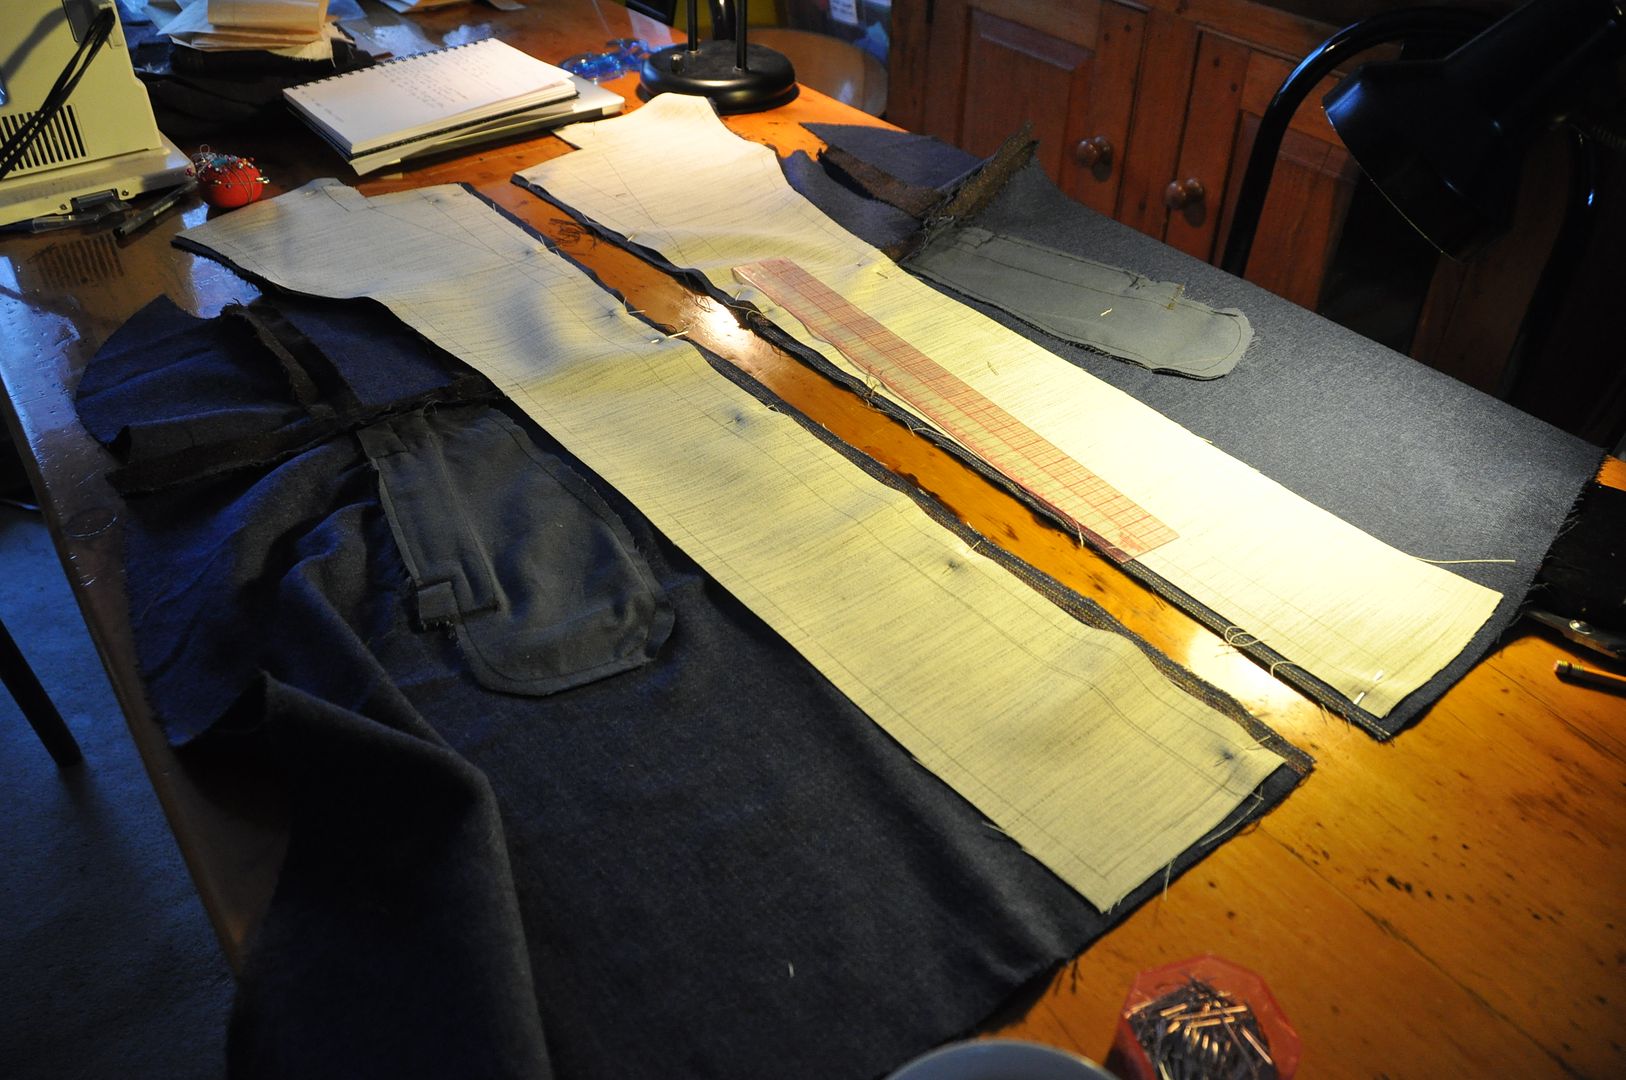
Then I pinned and basted on the velvet top collar. I slip stitched it down around all the edges.

Lastly I had to do the buttons and button holes.

As you can see, in the final stages of this project it was mostly hand stitching, which is what makes tailoring so time-consuming, however the effort pays off in the end! I now have a lovely wool long coat to wear!