Hey all! This is the second (and last) post on my Isabelle costume I made for my sister
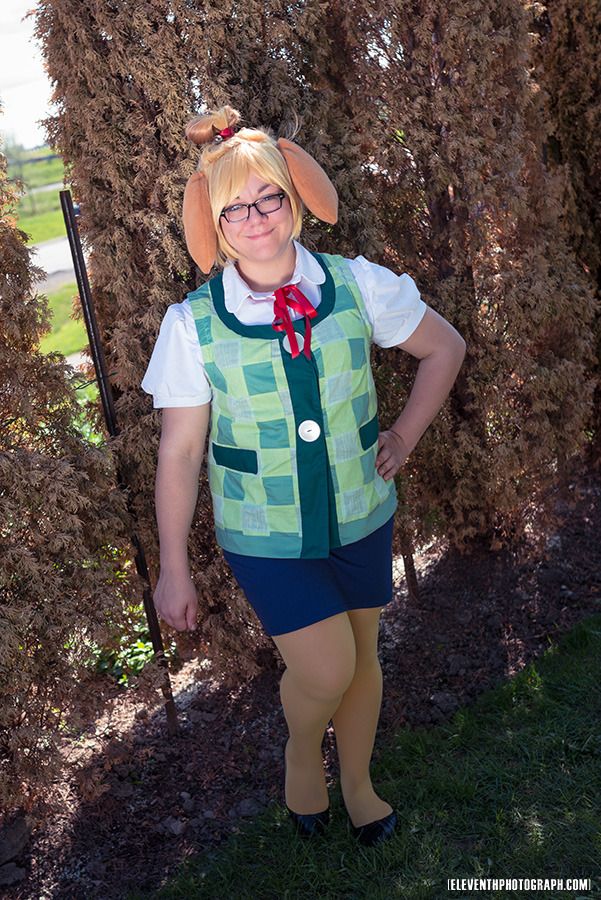
Alex! Isn't she adorable!? :D The outfit itself is pretty simple, but presented its own challenge: making checkered fabric!
Go here to look at how I made the
Wig, Ears & Tail!
Thanks again to
EleventhPhotograph for the cute pics! :D Be sure to check out his
con gallery!
Let's talk about the easy stuff first: namely the purchased items. The blue skirt we got at H&M on sale for $7! Not bad! We both agreed it wasn't necessary to spend the money on fabric and/or the time on making something that could be easily purchased and worn as is. (Especially when it is perfect.)
The tights are from American Apparel, who have a decent selection of colours, but are on the pricier side. Sadly my favourite tights/socks store at Queen&Spadina seems to have gone out of business. (This was the place we got all of our insanely purple tights for the
Katamari costumes...) I'm a bit sad about this, because I would rather not pay the
iron American Apparel price for wacky coloured tights... So if anyone knows another good local GTA store to buy coloured tights, let me know!
The shoes are from her wardrobe (though technically the character doesn't wear shoes, we were both in agreement that shoes were necessary for wandering around a convention). The red ribbon was from
Sussman's Bridal Supplies!
For the blouse I used the same pattern I created for her Suppi costume, but modified it: I made the collar rounded, and the sleeves pouffy. The pouffe sleeves were really just trial and error, I took the original pattern piece, made it a bit wider and taller and then gathered it along the top and bottom edge. Then I just added a rectangle to make the cuff. If you want to see how I put the original blouse together,
go here!
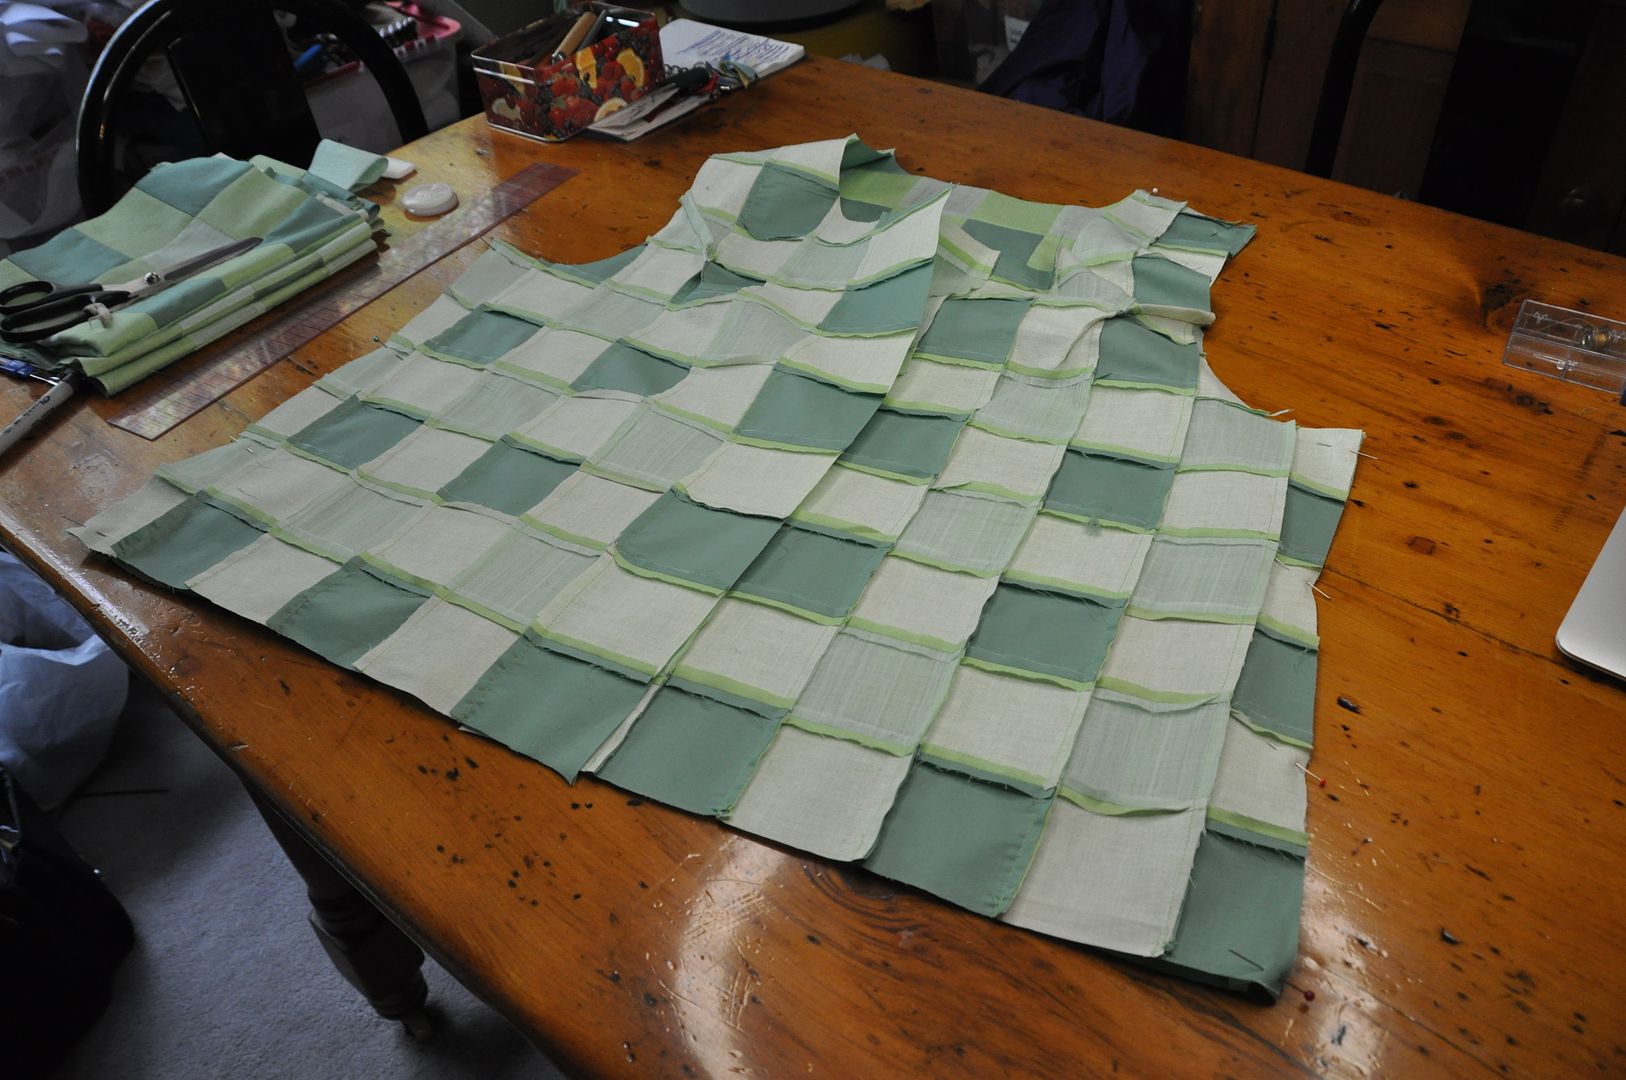
To make the checkered fabric I started off with 3 different colours of green: light, mid and darker. I had a heck of a time finding 3 colours of green that looked good in combination that were close to the reference image. I eventually ended up with this combo, which is not 100% accurate, but I like it. :)
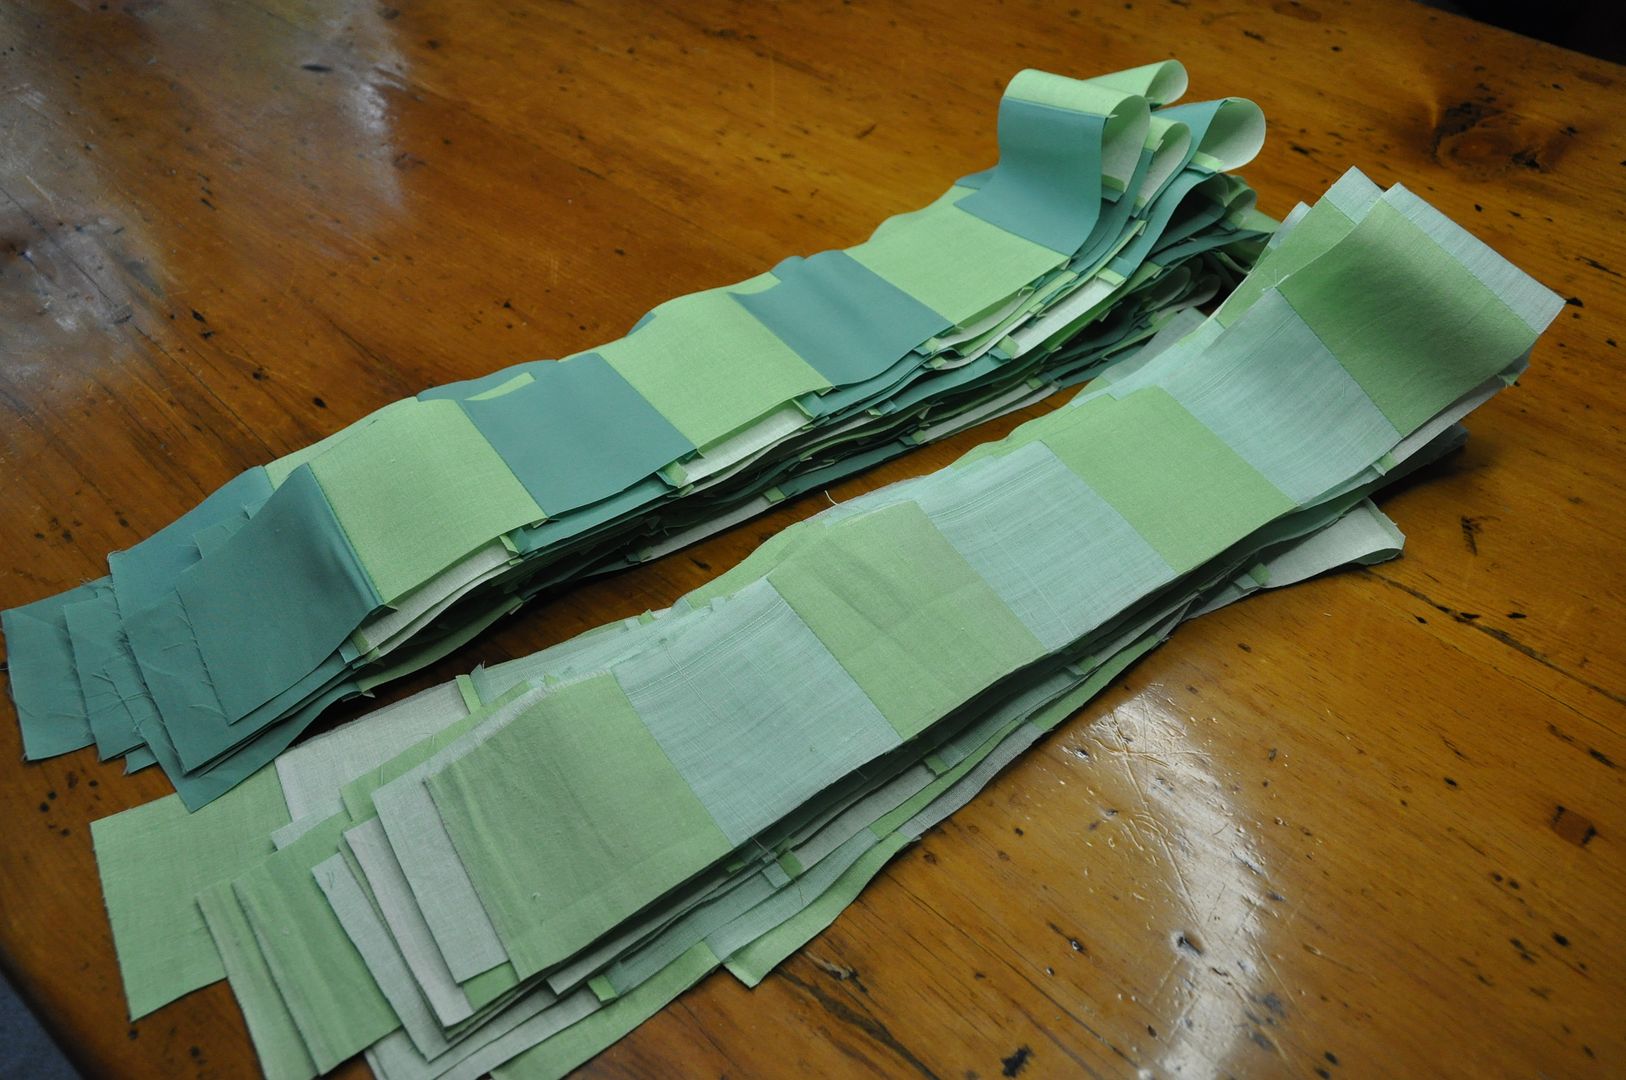
I started by cutting strips of fabric 3" wide. This included a 1/4" seam allowance on each side--meaning my finished squares would be 2 1/2" wide. I cut twice as many of the mid green fabric. Then I sewed my strips together lengthwise. The goal was to make 2 separate striped fabrics: one in light and mid green, one in mid and darker green. Make sure when you hold them up to each other the mid green stripes are offset, like in the picture above. This is important for the next step.
(You can also use this technique to make regular checked fabric--like a chessboard--you will just only need to make 1 striped fabric with an even number of each colour stripes.)
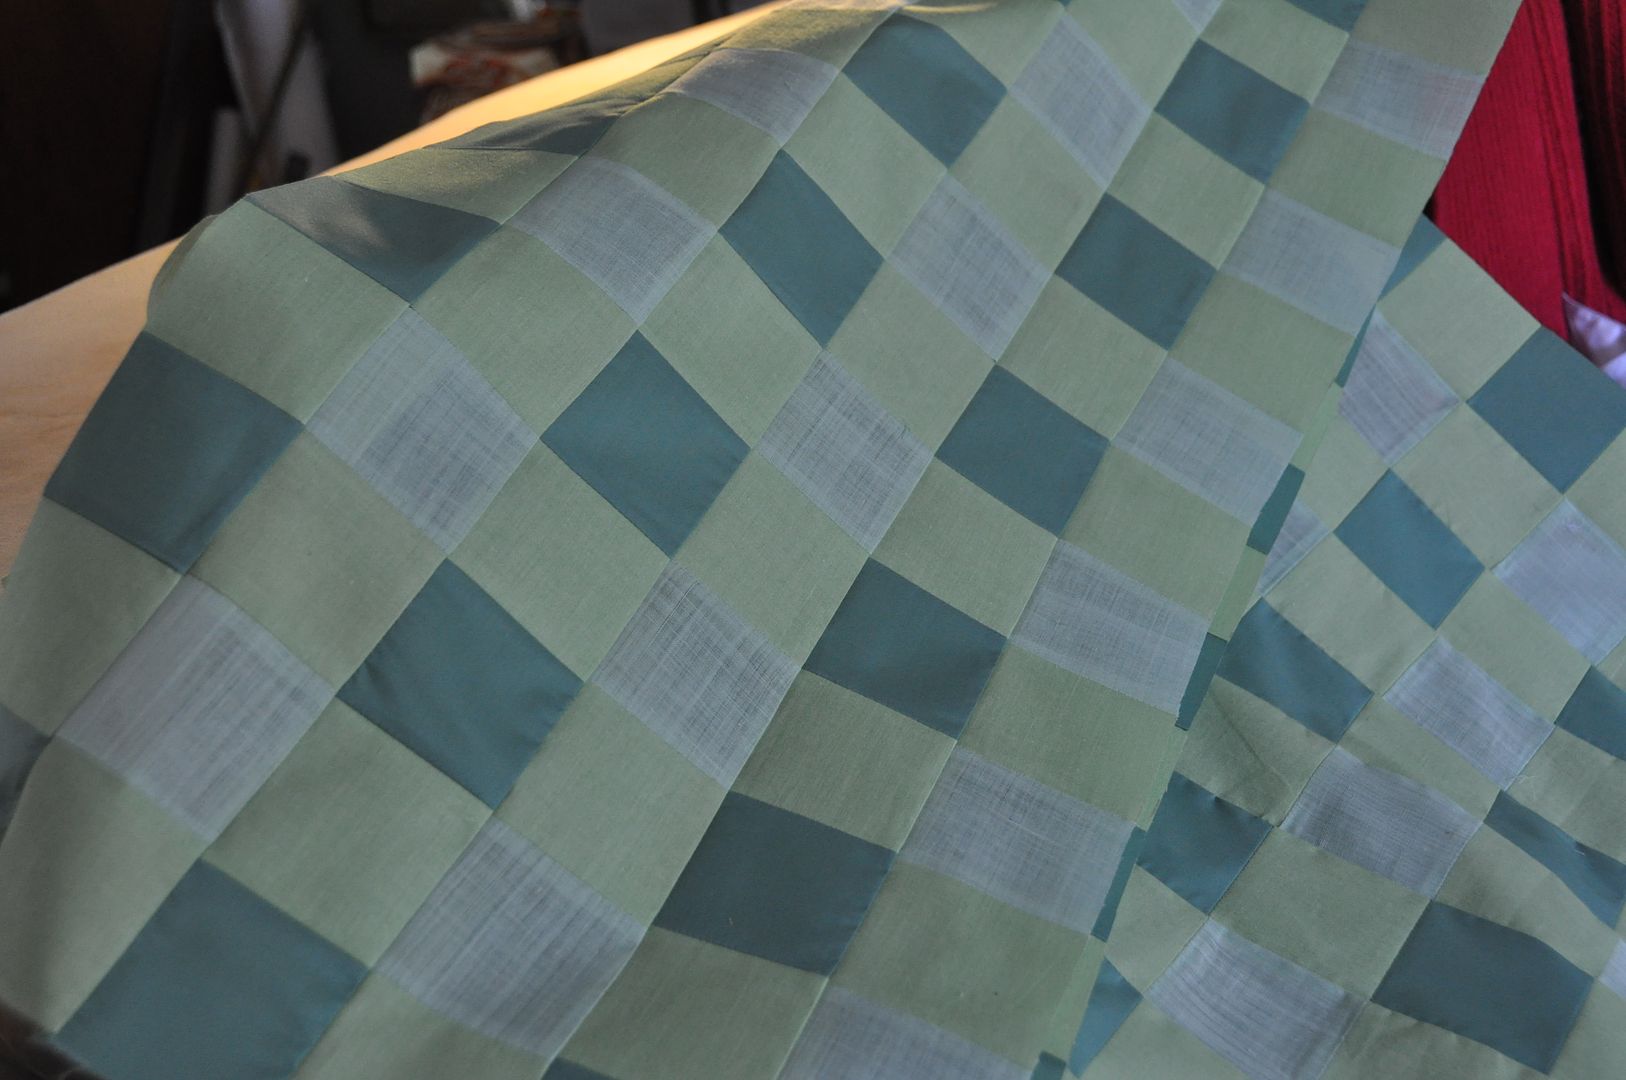
You then press your seams flat on your striped fabrics. Then you can begin cutting again. Cut 3" strips of your striped fabric perpendicularly to your stripes. You should end up with strips like pictured above.
Then you sew those strips together alternating the light stripe fabric with the darker stripe fabric. Press seams flat again. The result should look like the picture on the left.
It's difficult to gauge exactly how much fabric you are making, but as a rule of thumb I think it is better to have too much than too little.
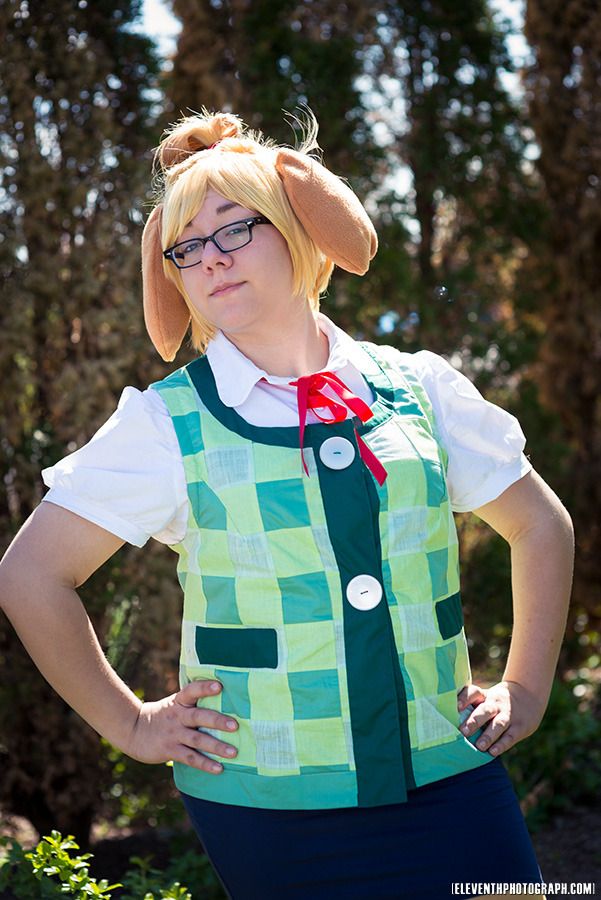
I laid my pattern pieces down on my fabric and cut out the shapes. (I had already done a mockup at this point) I had to be mindful of the checker pattern, to ensure it lined up at the center front.) I sewed the vest together at the side seams, shoulders and closed the darts at the armholes. I opted to leave this garment less fitted because a) the character's body is essentially a sausage shape and b) too many darts really mess with the checker pattern particularly when the squares are this big.
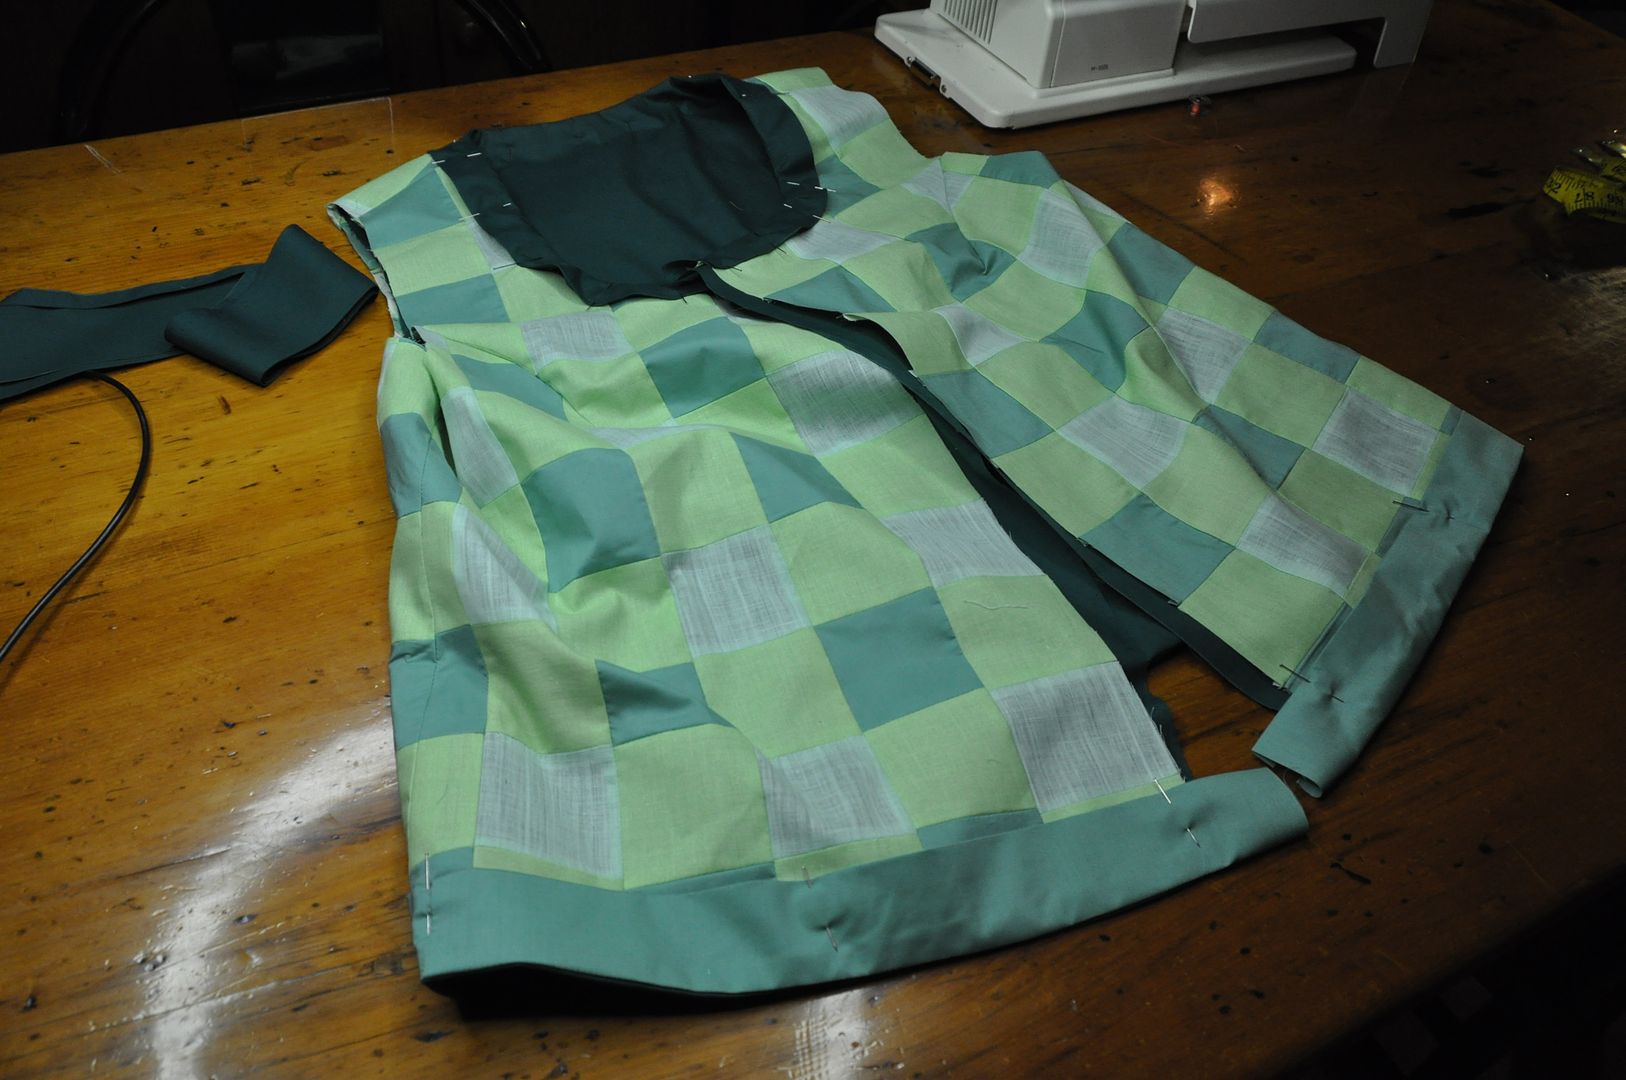
I made an identical vest in the darkest green fabric to line the vest with, otherwise all the seams from the checked fabric will be exposed and fraying on the inside. I made the front placket and collar facing in this fabric also. I finished the bottom edge with a stripe of my darker green (the one I used in the checker fabric). This finished those raw edges. The darkest green accent fabric is actually leftover from the
Prince costume!
I added 2 strips of velcro to close the jacket. The 2 large buttons added on top were just decoration.
Using the darkest green I made 4 rectangles. 2 were top stitched onto the front as fake pockets the other two had velcro to cinch in the waist at the back. This was instead of putting darts, which would have looked weird on the checkered fabric.
Lastly I attached a bias tape to the inside to finish off the armholes.


No comments:
Post a Comment