Showing posts with label hook and eye. Show all posts

Tuesday, January 26, 2016

Vaporeon Gijinka - Wrap Skirt "Tail" - Pokémon


This is the third part of my Vaporeon Gijinka costume. If you want to see how I made the Bolero, go here! If you want to see how I made the under layers, go here!

Thanks to Elemental Photography for the great photoshoot! Credit for the original costume design goes to Cowslip!

One thing I loved about this design was the way that the tail was incorporated into this wrap skirt.

The "tail" was made from the same blue silk as the bolero jacket. It has a really nice shine to it--without being overly shiny. The fabric itself actually has a salmon-y pinkish colour woven in, which you can see in the shine. It helps to break up a bit of the blue overload.

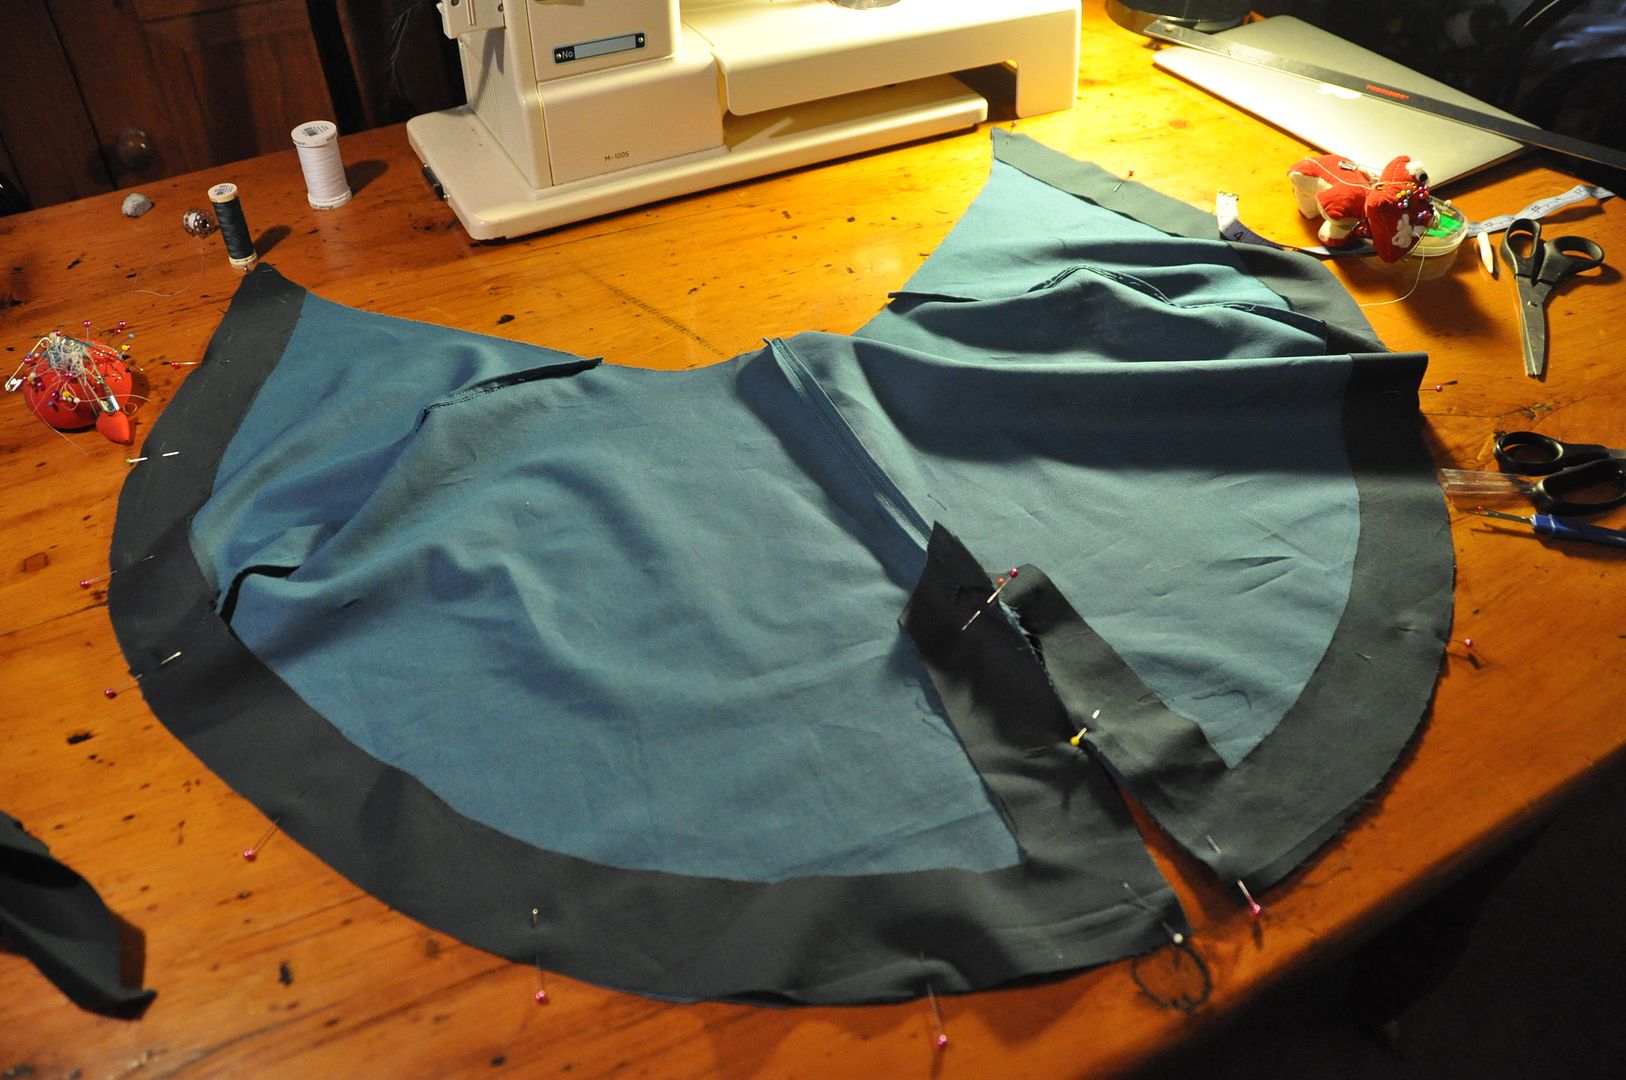
This piece took a bit of adjustment before I was satisfied. It was first draped and pinned in muslin to create the pattern--a much less scientific method than I am used to.

The tail itself ended up being over 5ft long. It was a bit cumbersome, so I pinned it up to walk about the con.
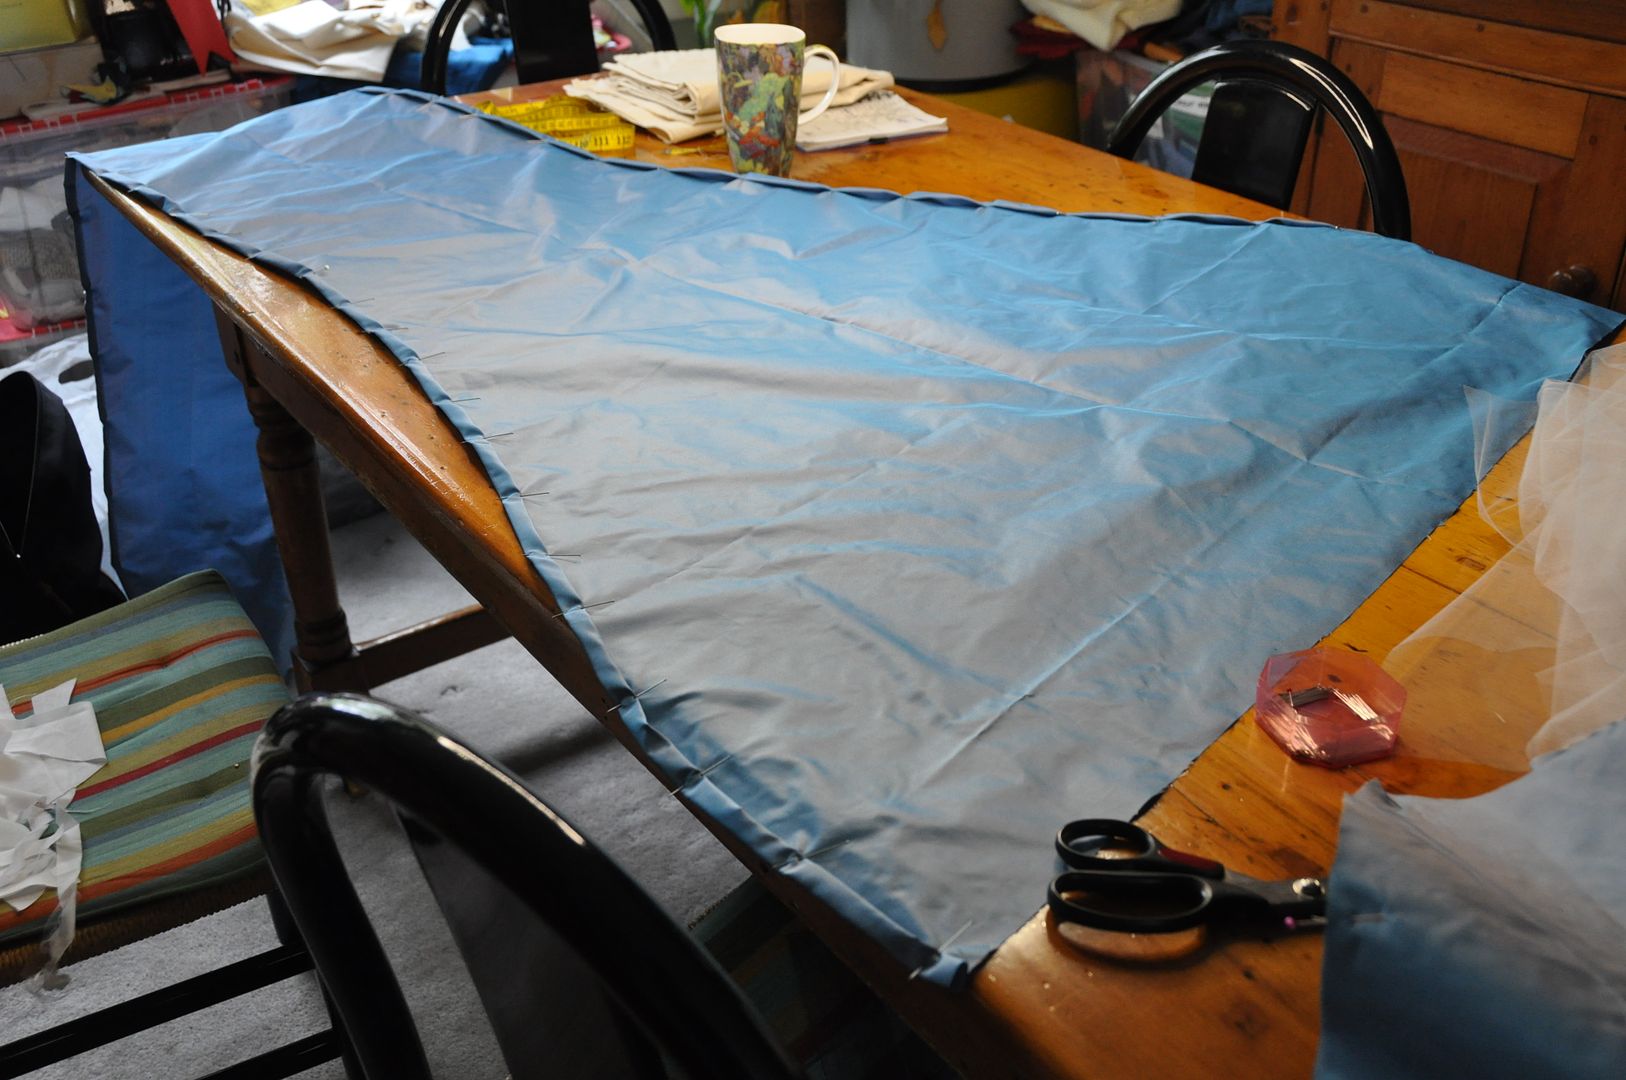
You can see how it tapers from the waistband down.

The next step was to finish off the edges. I neatly rolled them over and top stitched it. I wanted to make sure it looked neat from both sides, as the inside would be quite visible. Also, this fabric frayed like nobody's business. I wanted to make sure the edges wouldn't get destroyed.

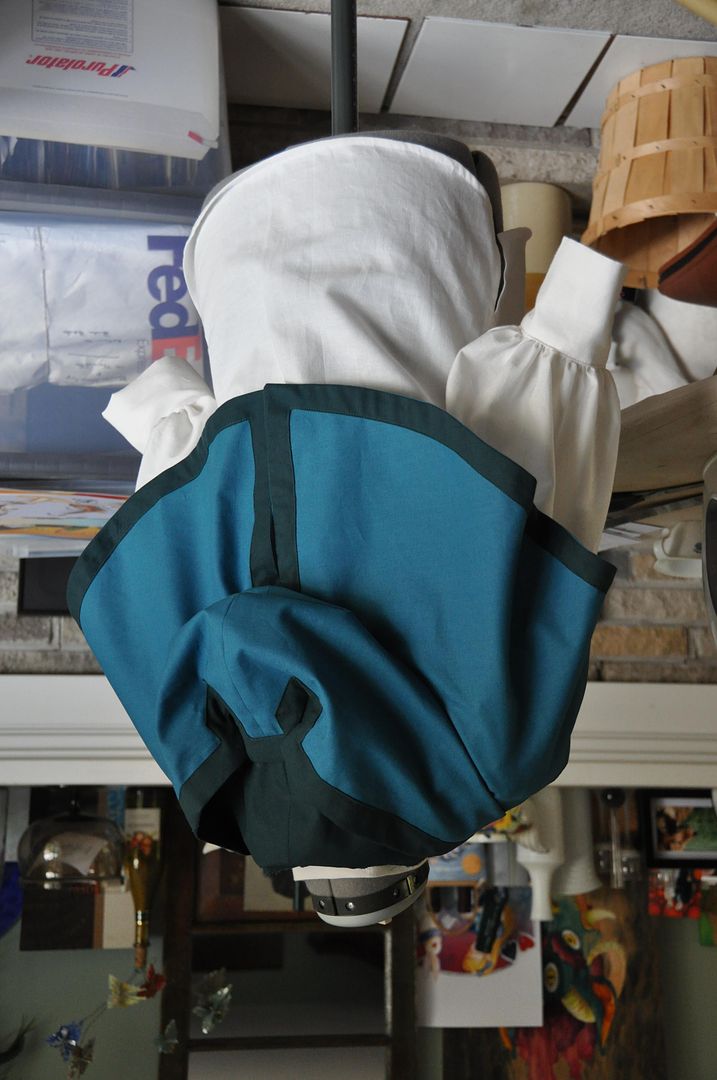
I gathered it to the desired size and attached it to the waistband. The waistband was a simple rectangle of beige cotton that had a hook and eye closure. I would later reinforce the waistband with nylon webbing I had leftover from my Splatoon Inkling harness rig. This reinforcement was necessary, as later the leg wrapping rigging would be sewn into the waistband.

The tail fin pieces and decorative waistband ruffle were sewn right sides together, clipped, turned right way out and then top stitched to finished them off.
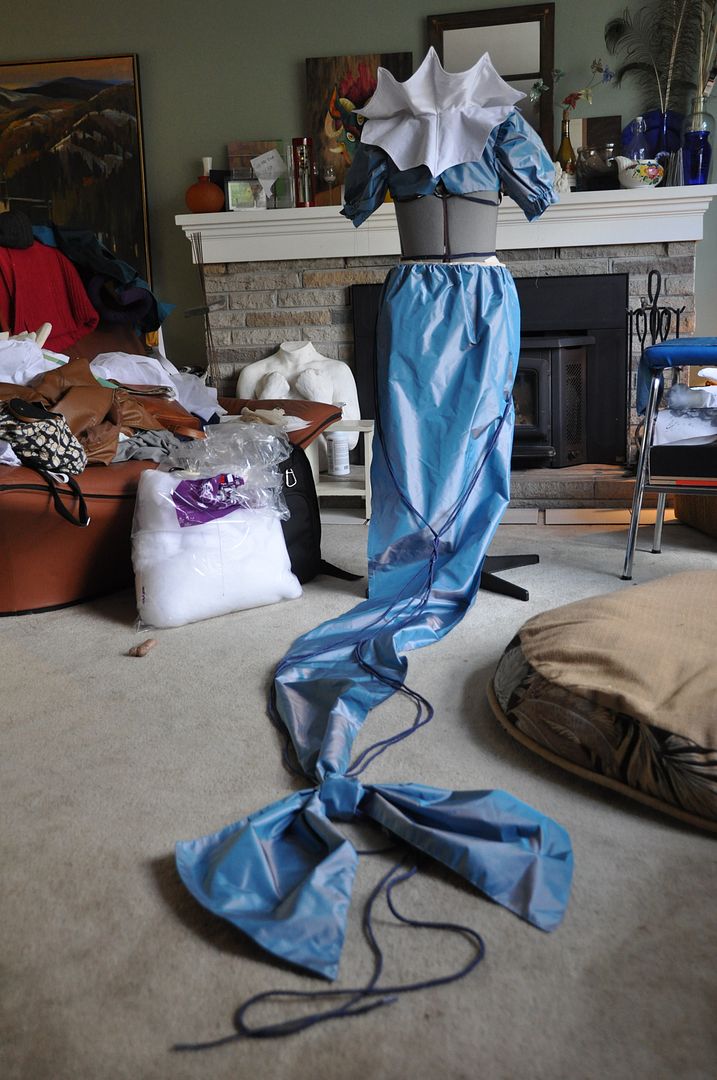
I used 4 long pieces of navy cording as my detailing on the train. I hand stitched them on at the top and tacked them at various points as they wrapped around the tail. There is easily over 12 yds of cording on this costume (including all the lacing on the bracers).

I pinned the tail fin to the end of the tail, arranging the ruffled look how I wanted it and then tacked it on with my most invisible hand-stitching. It's basically like a giant bow.

It was around this point that I realized I would not be meeting my original deadline (AN 2014) and gracefully admitted defeat. I took a year-long break from this costume.
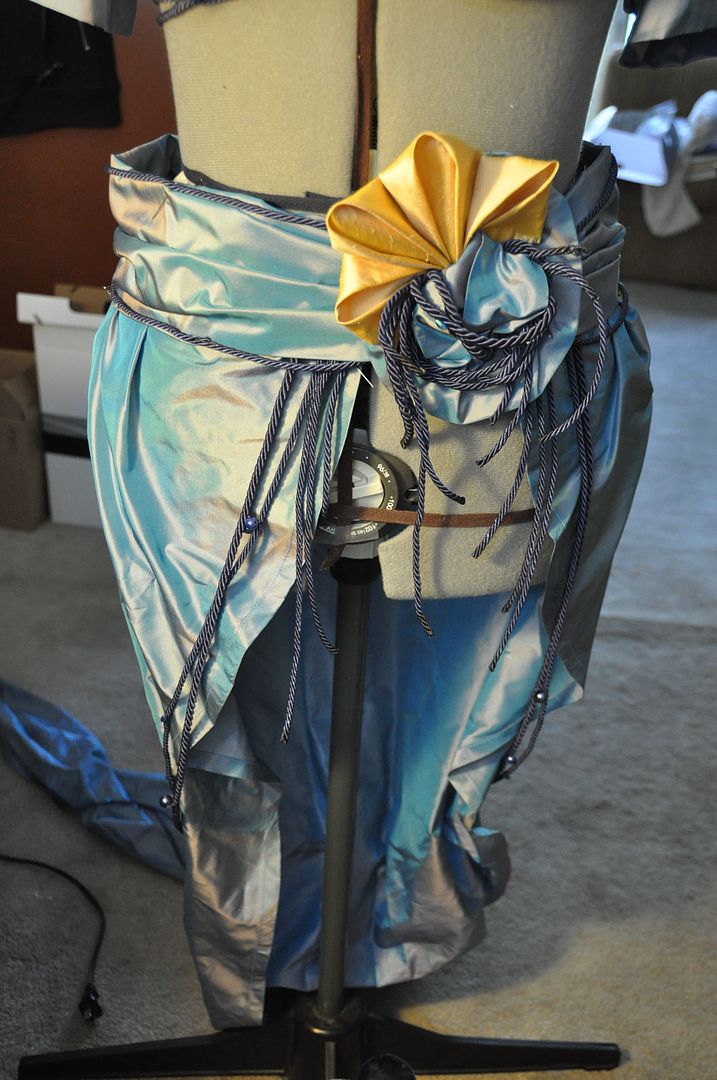
The next step was to attach the decorative waistband ruffle. I arranged it and pinned it in place until I was satisfied with the look then tacked it on with hand stitching.

Then I went about creating the brooch that attaches to the waistband, covering the clasp. It was all made of scrap materials--leftover cording, fabric, beads, etc. I used some of the yellow silk from the hairpiece flowers to create a matching kanzashi style detail for the petals (I will go into more detail on my wig and hairpiece post for this costume.). The entire thing was sewn to a felt backing that was glued to a brooch pin.

Extra cording was used to decorate the waistband and create more dangling bits near the opening at the front.

Then I had my friend Harriet (the official Bead-Dazzler) sew on tons of beads. Props to her for her hours of hard work (in exchange for food)--I certainly have the skills to sew beads myself, but I definitely lacked the time.

The detailing is what really makes the design. There is such richness and embellishments, and I had a lot of fun realizing those little details.

Next I had to create the leaf detail that sticks up from the waistband of the skirt. The problem was, it need to be rigid, but also sheer. The fabric I had was nice and sheer, but super flimsy. 

On the Splatoon project I was introduced to this magical stuff called "heat n bond".  I essentially used it to fuse my fabrics together around a central support structure made of leftover corset bones. I have to say--I had no idea if my crazy idea would work, but it did, so YAY! 

First I traced out the shape I wanted on the paper side of the heat n bond. I cut this out and then ironed it to my first layer of silk. Then I used fray check and applied it all around the outline of the leaf shape and let it dry before cutting it out--this way, when I cut it out it would not fray. 

Then I laid the leaf shape heat n bond side down on the second layer of silk. I carefully lined up my corset bones where I wanted them and pinned them in place. I carefully sewed around them using the machine's zipper foot. The bones were now sandwiched between the two layers of silk. 

Then I ironed the whole thing, fusing my layers together.  

The next step was to apply more fray check, around the edge of layer two, allow that to dry and then cut it out.

The finished leaf feels completely different than the fabric I started with.

To create the veins on the leaf I used a similar process. 

First I traced out the desired shape in heat n bond. I then cut that out and used an iron to apply it to the first layer.

Then I fused it to the second side. I fray checked the outline, allowed it to dry and then cut it out.
This was then tacked on the leaf by hand in a few key spots.

The leaf was simply tucked into the waistband when I wore the costume.


Tuesday, January 12, 2016

Vaporeon Gijinka - Under Layers - Pokémon


Let's talk about under layers!  This includes the front drape--with its built-in bra--and the navy booty shorts I constructed. If you want to see how I made the Bolero Jacket, go here!

Once again many thanks to Elemental Photography for the great photoshoot! I love this reflection shot. :) Credit for the original costume design goes to Cowslip!

Since the design only shows how the front looked I had to design a suitable back for the costume. I decided to make a second drape at the back, since it seemed logical and would cover more skin. Also, the design itself was originally designated as one of her "male" designs. I made a slight alteration to the design of the drape at the front for the purposes of female modesty--I changed the proportion of how the drape sat across the chest so it came further back towards my armpits at the top and would therefore properly cover my bust. This is one of the few minor changes I made to make the design work for me.
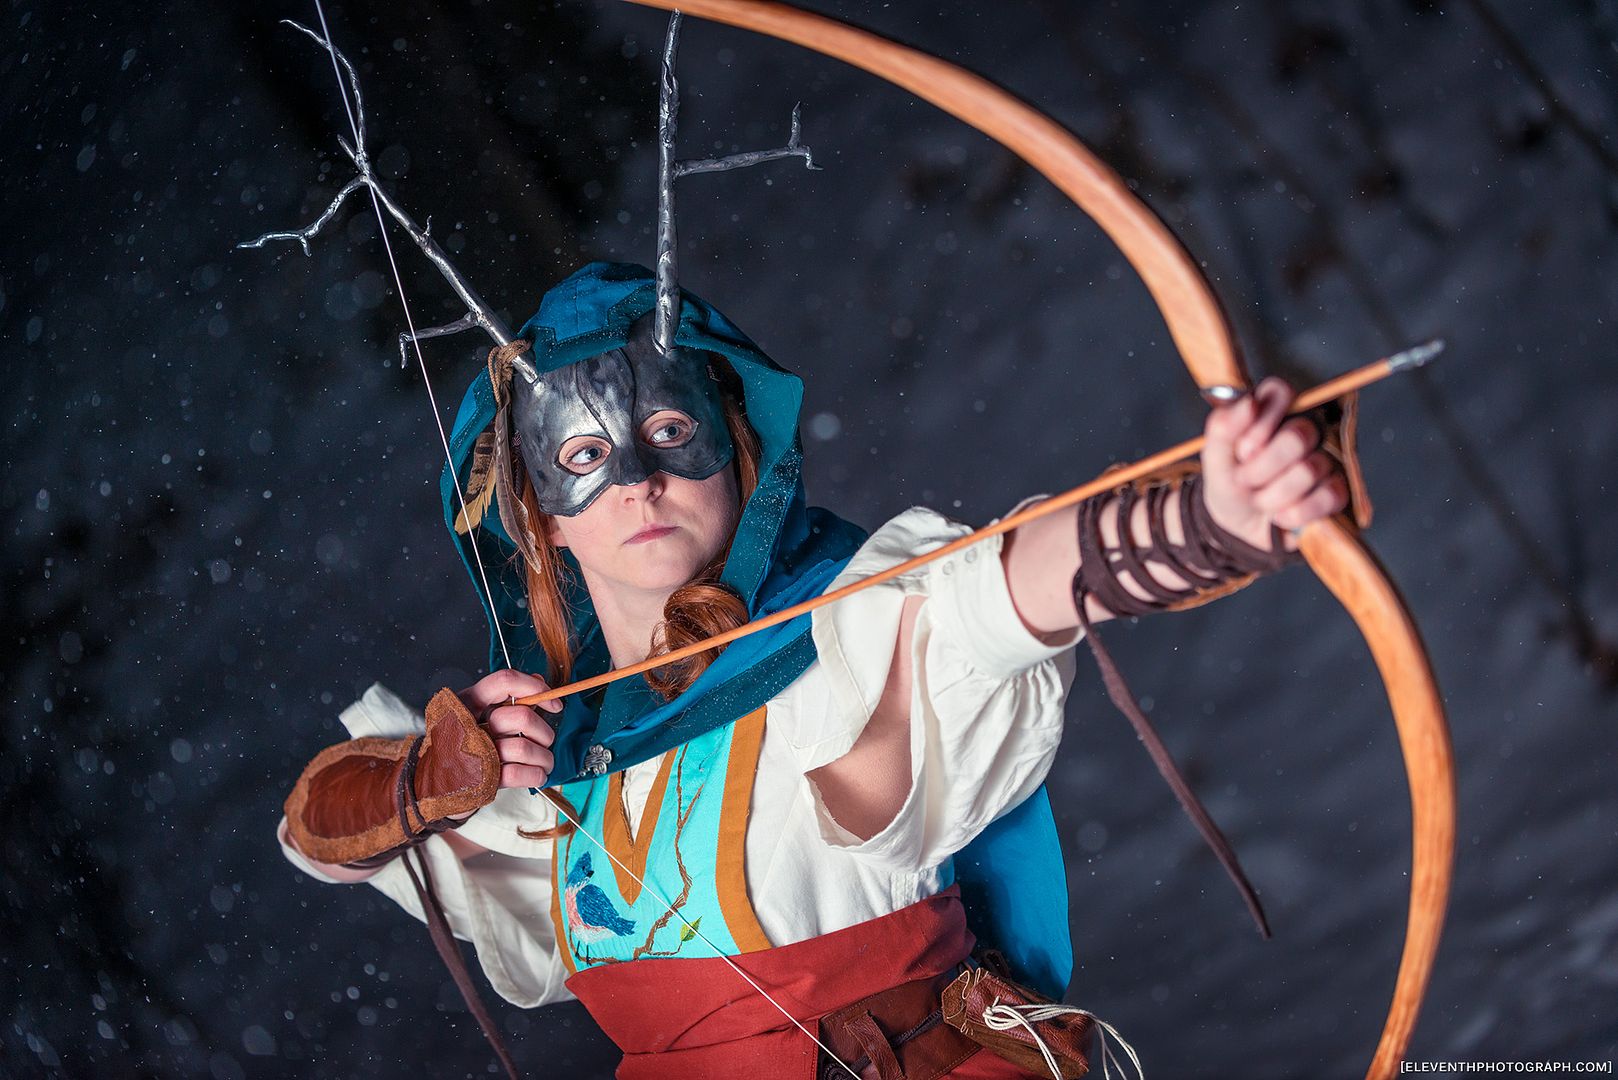
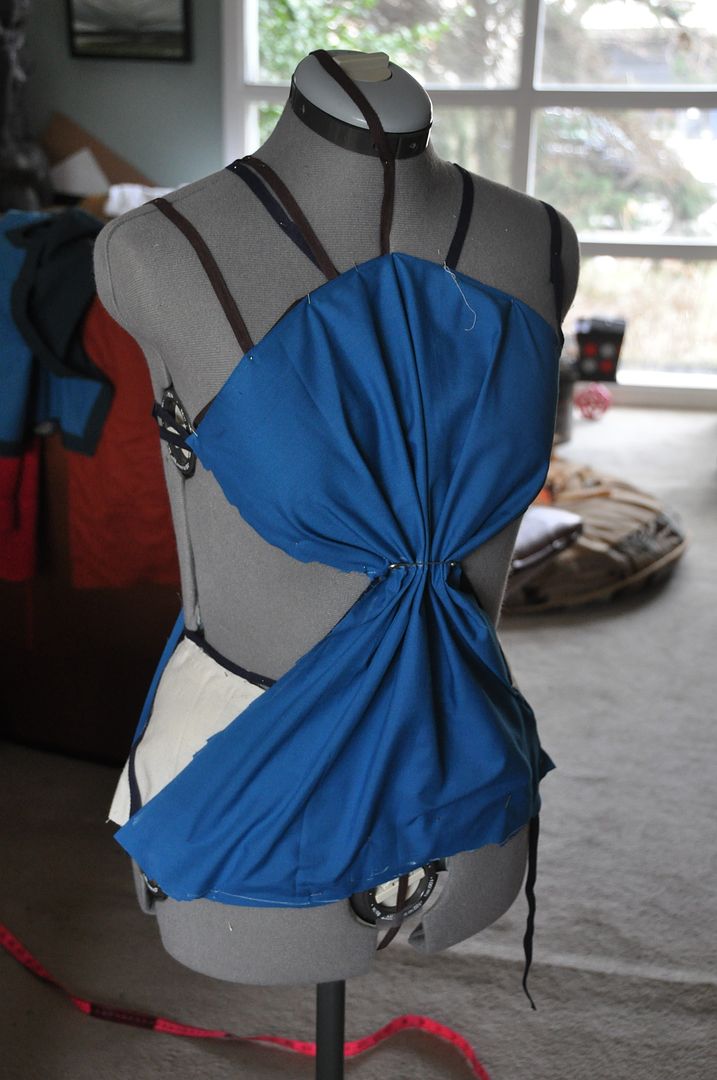
I started by using twill tape to outline on Molly where I wanted the gaps at the sides to be. I used some cheap broadcloth to drape the pieces.
I pinned and trimmed the fabric until I was satisfied with the way it gathered. I used these to create my pattern pieces.

The fabric I bought was pretty see through, so I double layered both sides. Each piece was sewn rights sides together along the side edges and turned right way out. Then I top stitched those edges to keep them from shifting about. This fabric was fairly uncooperative...


I created shoulder straps for the drape piece in the same beige cotton. The close using velcro to make them a bit more adjustable.

The bottom edge of the drape was finished with a band of beige cotton. On both sides where it overlaps it has velcro to adjust the size around the hips and allow me easy on/off.
 
I had to build a bra of sorts into this costume. I bought nude coloured bra cups in the right size. Awkward shopping moments include me trying to find the right size by holding them up to my body and comparing. Hahaha

Using beige cotton fabric and elastic I made the bra layer to fit comfortably. It opens at the back of the band with hook and eyes. I tacked the bra into the draped piece at the front so it would shift and be revealed. The band at the side peeks out a bit when I lift my arms, but it is not the end of the world.

The bra itself provides moderate support--I am not super busty, so I don't need that much support. Mostly it needed to be something that I could a) sew into the costume, and b) choose the placement of the straps so they wouldn't stick out too much and look weird. Had I used a regular bra bought in a store, the band would be clearly visible at the sides. This one I made comes up higher in the sides and back than a typical store bought bra--which is why it doesn't give maximum support. Also I didn't give it an underwire. Because I didn't think it would be super necessary.

The last detail was the cording. I bought tons and tons of navy blue cording for this costume. It wrapped around the gather at the center front and looped to the back. It's tacked in place so it doesn't move. The ends of the cord were dipped in clear nail polish so they wouldn't fray.
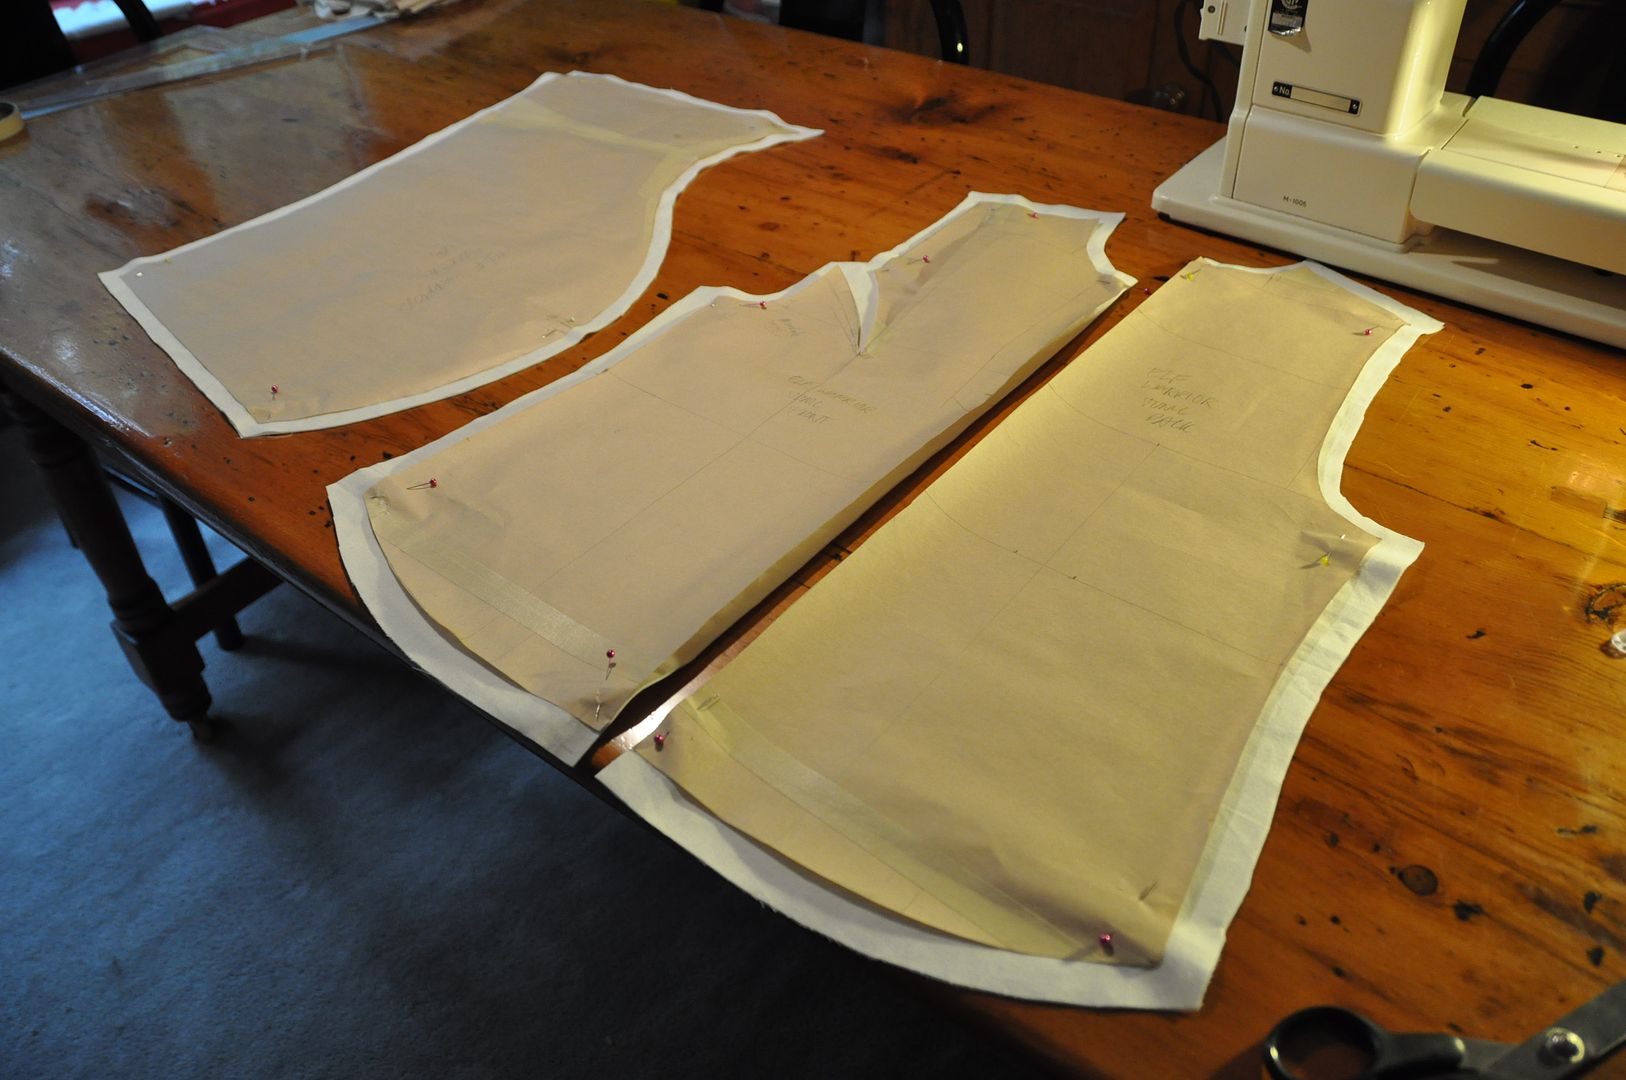
The other under-layer for this costume was a pair of booty shorts. Somehow I didn't clue in until the very last minute that the wrap-skirt did not actually cover all at the front and I didn't have anything suitable to wear underneath. Hence, I decided to make a very simple but unobtrusive pair of matching shorts.

They were made of some navy blue jersey I picked up at the last minute. I patterned them based off some leggings I own. I pieced them together at a friend's house so I could use a serger.

The hem was done with a zig-zag stitch on my own machine. The waistband had a roll-over where I inserted an elastic band.

I think this is one thing that convinced me I needed to get a serger of my own... I have been avoiding stretch fabrics for so long because I lacked the equipment to work with them.

Thursday, October 22, 2015

Sakura - Wings - CardCaptor Sakura


Part 2 of my Sakura (1st Opening outfit) posts: lets talk about wings! If you want to see how I made the outfit, go here!

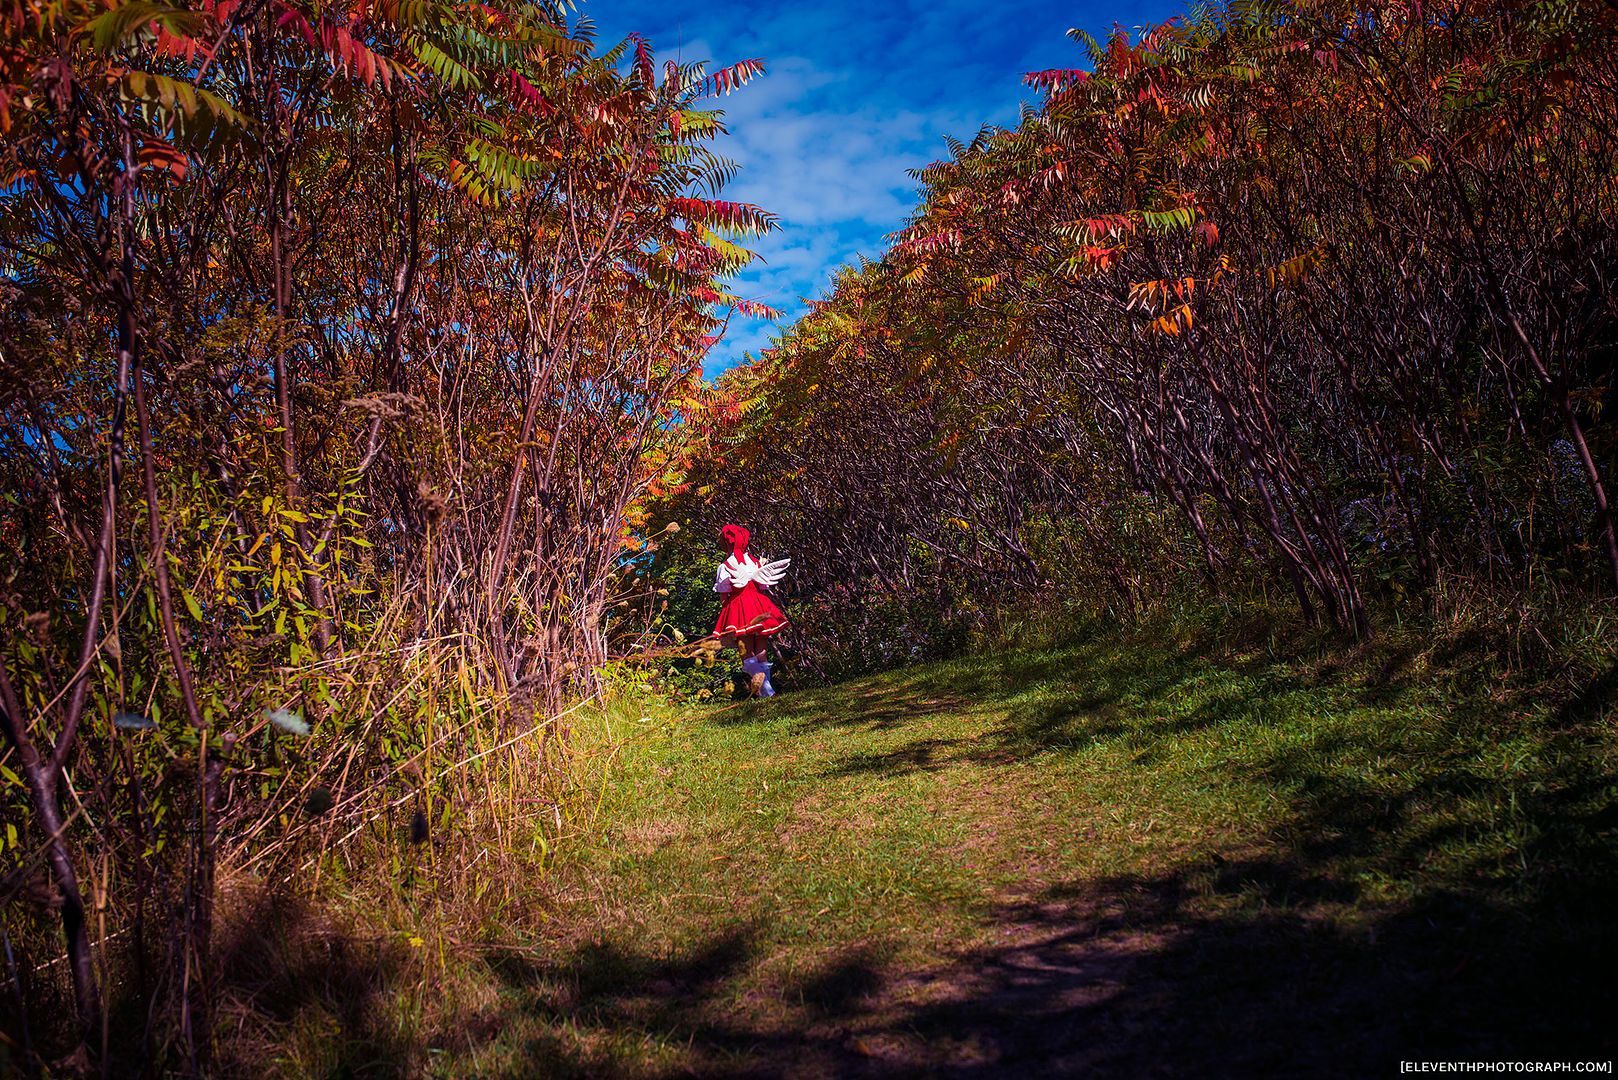
Once again thanks to EleventhPhotograph for the photoshoot. I really love the above shot! It reminds me of Alice in Wonderland.

This was an exercise in perfecting the foam wing style I had used for the Kero and Suppi gijinka costumes. Since I already knew what I was doing, this time around involved a lot less trial and error.

I like making foam wings this way because they are sturdy, and they aren't likely to get too damaged in crowded convention spaces. They are also fairly light and not horribly uncomfortable. I like the cartoon-y style of them as well. 

I traced out 4 wing shapes on the foam--2 for each wing. I cut these out with a pair of scissors.

Pairing them up I cut off the corners so they would be more rounded along the edges. This will help them fit into the cases better.

Using the same pattern as the wings I cut out my four pieces of white fabric. I made these about 1/4" bigger all around (+ seam allowance) to account for the depth of the foam.

I sewed the wing cases right sides together, trimmed the excess seam allowance and then flipped them right way out. I left a large gap along the base that extended up along the top edge--this is so I could get the foam wing inside the casing. Because of the friction, the foam really doesn't like to go into the case easily, so it takes a lot of patience and just a touch of brute force.

Using a heavy gauge wire, I created a wire base for each. You can see each wing has a wire base that is made of one continuous piece. The two "antennas" support the wing, the u-shape at the bottom is where the wing is attached to the base. Note how I bent the cut ends of the wire into little loops--this is so it wouldn't stab through the foam or fabric.

After taking some measurements and figuring out the spacing I began to pattern the harness. This was a bit tricky, because it had to fit under the pink dress, but sit high enough on the back so that the wings would sit above the dress' neckline. It also had to be tight fitting so that the wings wouldn't be droopy (a problem I encountered with Kero).

I cut a base plate out of styrene plastic. It was simply a rectangle with rounded corners--again so it wouldn't stab through the fabric cover later. The wires were attached to the base plate with copious amounts of hot glue. The nice thing about styrene is that hot glue bonds really well to it.

On the fabric covering I carefully measured and marked where the holes needed to be for the wires. Before sewing anything together I used the buttonhole function on my sewing machine to create small openings with finished edges for the wires to stick through. Then I sewed the styrene base plate into the fabric covering.

Once the back plate was finished I added a waistband and shoulder straps. I fit it on her so the shoulder straps would be tight, and allow the back plate to sit at the proper height. The straps were made to be a fixed length. The closure was a set of bra hooks on the front of the waistband, so it is easy to remove the wings for important daily tasks--like sitting.

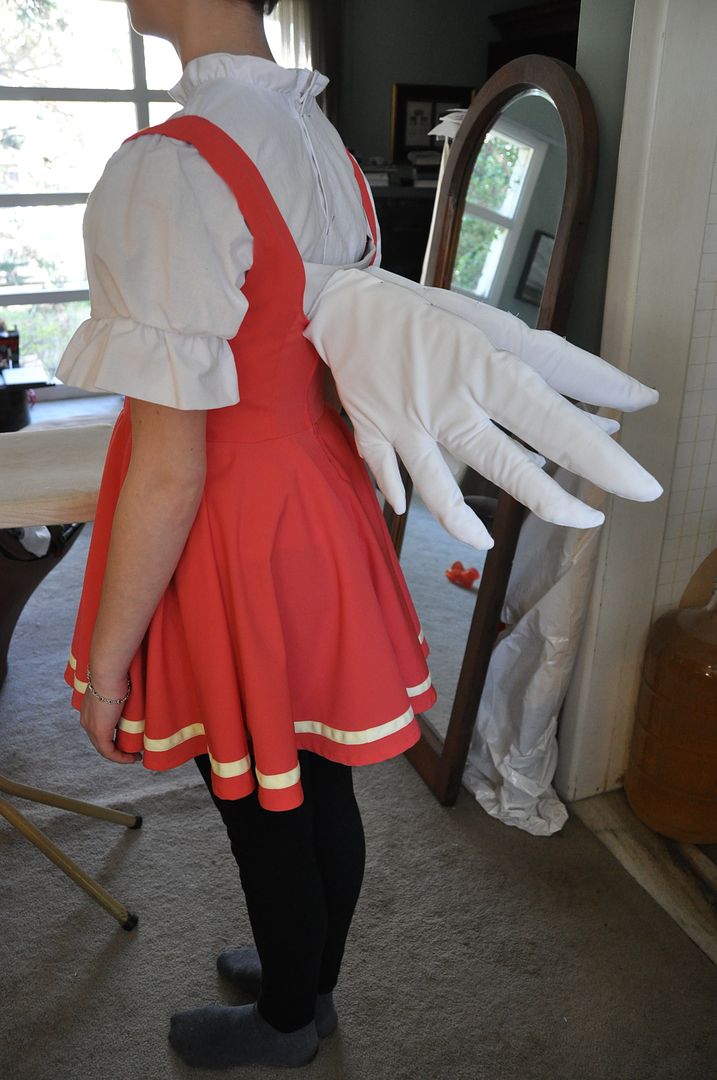
We tested the wings with the dress. You can see here they are really droopy. Once I was satisfied with the fit I used hot glue to attach the foam wings to the wires on the inside.

Once the wings were actually attached to the base I could adjust the height that the wings sat by bending the wire at the base. Because the wings have weight that is sticking out from the body, even though they are really light science & gravity mean that they will be heavier the further distance the weight is from the base. As such, when you put them on, gravity causes them to pull and tilt the base plate slightly, which makes them look droopy and sad. You can see in the picture on the right how the base plate is pulling away from the back ever so slightly, but it is more than enough to make the wings droop.

While this problem is partially solved by making a tight fitting harness (minimizing the amount the base plate will tilt), to counteract this you simply have to overcompensate and position the wings pointing extra up to counteract the downward pull of gravity. This is so that when they fall to the position they want to sit at, it will be the position you want. Note the difference between the pictures above and below--in the second picture I have glued them internally and positioned the wings to point extra up. Now they don't look so sad.
The reason why I love making wings like this is because they are adjustable. You can bend the wires to suit your needs--whether that means you want to make the wings more open or closed, up or down.

My friend Alli (who helped me on my Asuna costume the previous year) helped to finish them off by neatly hand stitching the casings closed.

And then they were done! >:D


Wednesday, August 26, 2015

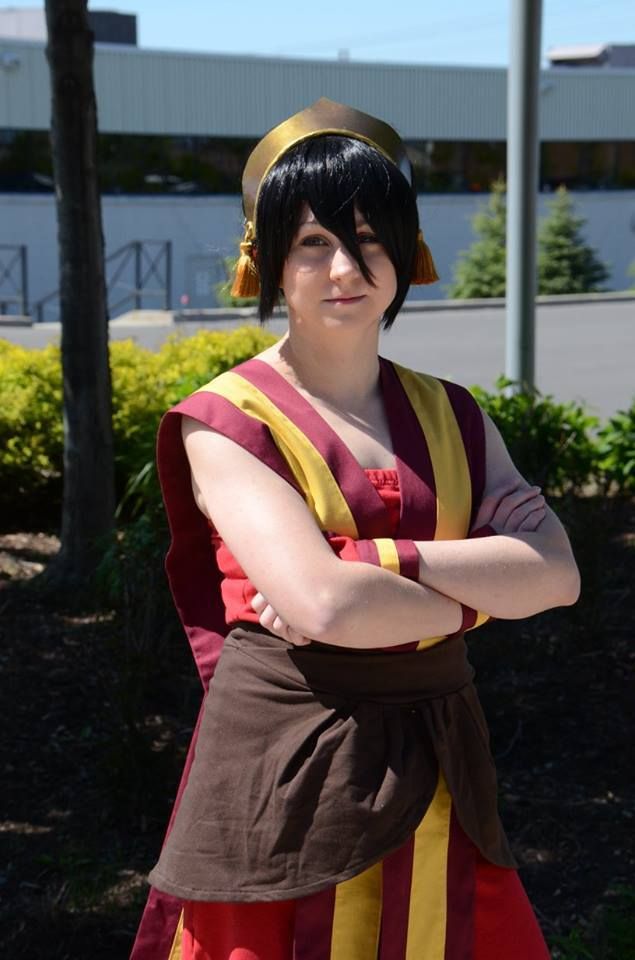
Toph (Fire Nation Disguise) - Outfit - Avatar: The Last Airbender

The second installment in my series of posts on my Toph costume. If you want to see how I created the wig, go here!

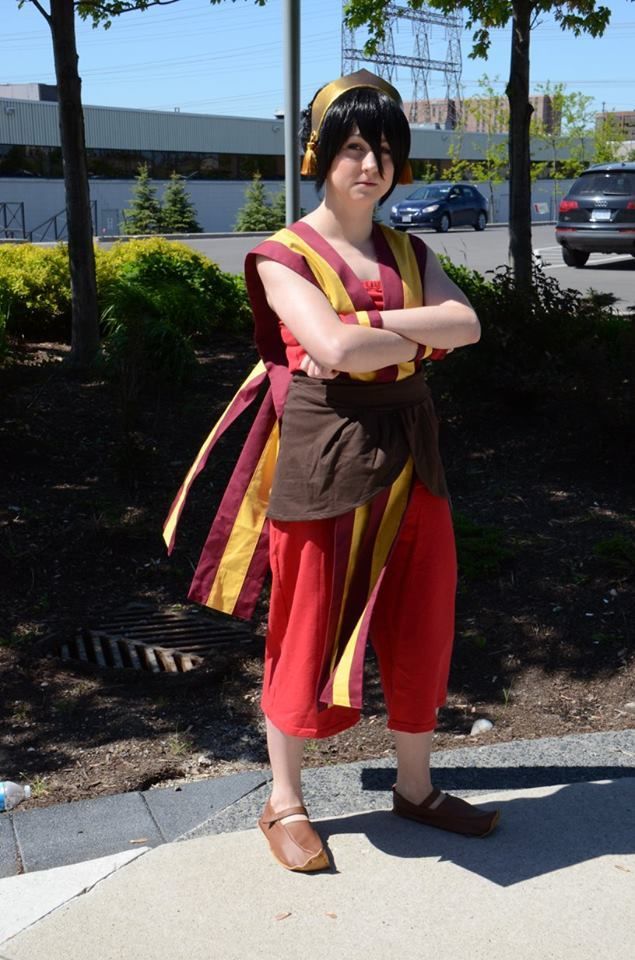
Toph Beifong is one of my favourite characters from The Last Airbender. She is so very sarcastic and a genuine tough-guy. A welcome addition to the group dynamic in season 2. I've always wanted to do a costume from this series, but I had never made time for it. I really love the Fire Nation outifts the best aesthetically, though I've always had my eye on doing either one of the Kiyoshi warriors or Ba Sing Se costumes... So many good choices. Perhaps someday...

As I said in my previous post, I actually started this costume last summer, but after many difficulties with the wig I didn't finish it. This is the part of the costume that I constructed and finished last year for Otakon.

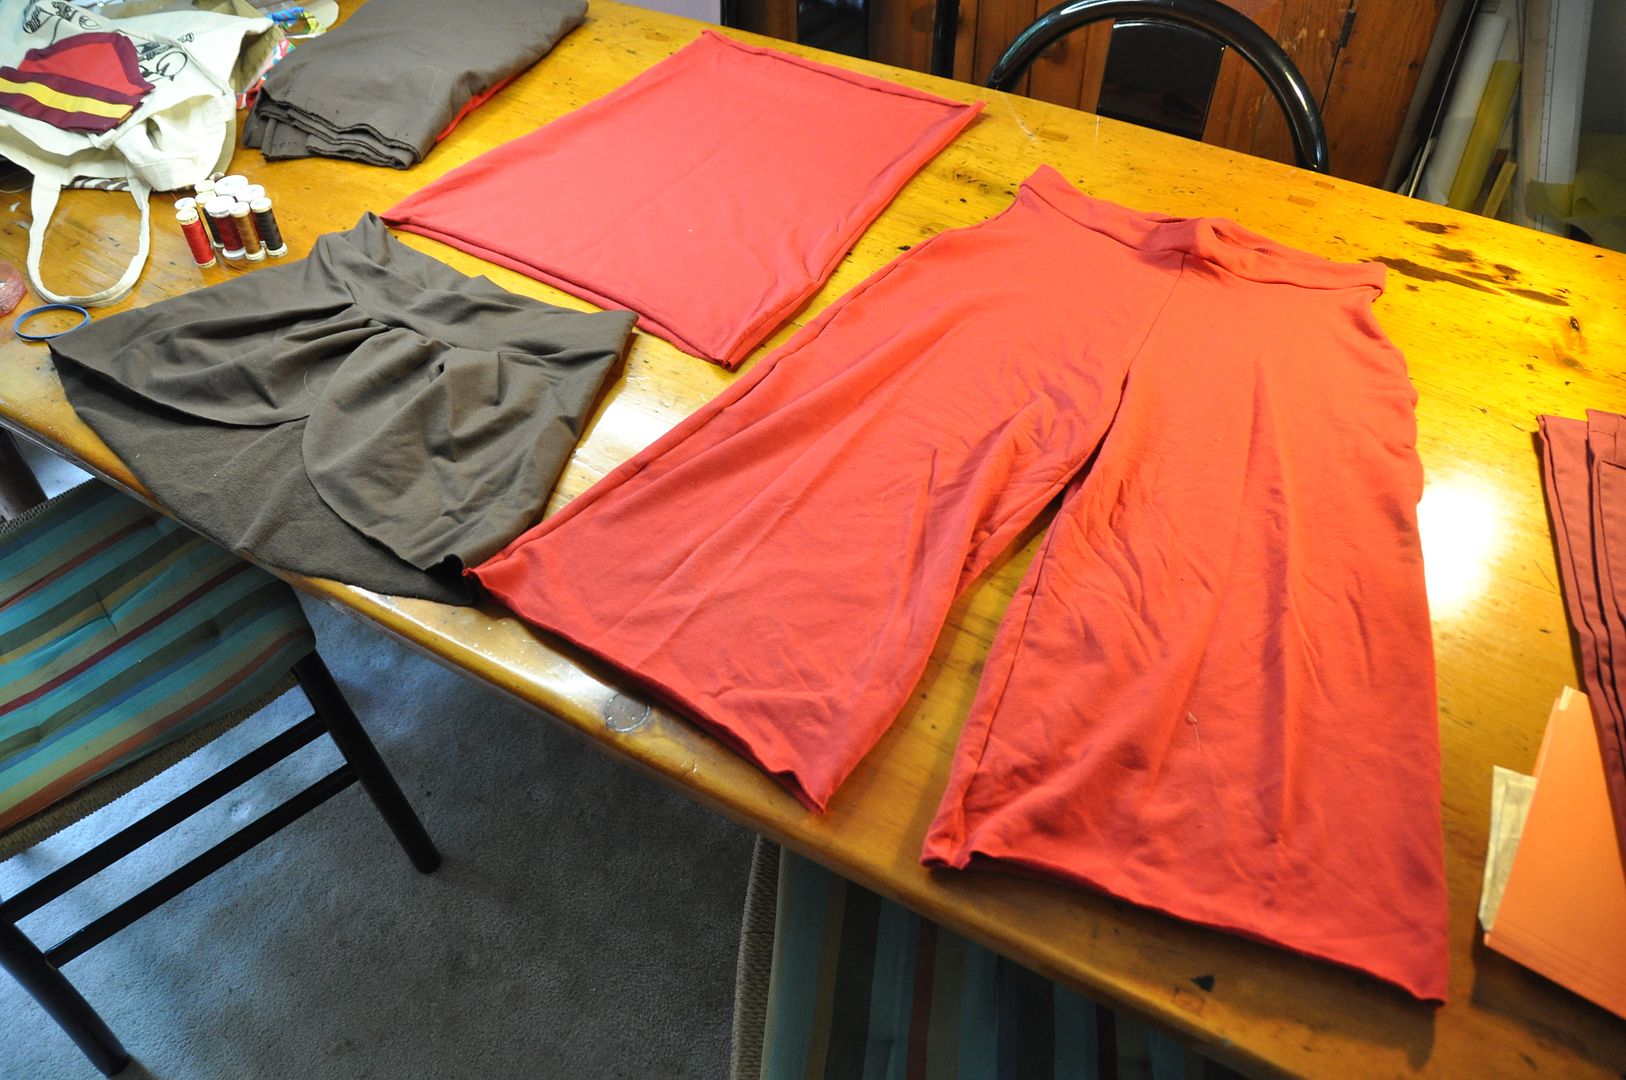
Aside from the extremely heavy wig, the rest of this costume is super comfy. I decided to make it primarily out of stretch fabrics.
The pattern for the pants is based off of a pair of old yoga pants I have. I traced that onto a piece of paper and used it as my pattern. They only needed some slight adjustments to account for the difference in fabric.

The tube top was made from two pieces--a front and back--that were narrower at the waist.

The waist wrap I draped to created the pattern. I pleated the fabric along the front overlap. The waistband for it was folded in half and tapered to a point at each end.

Because I lack a serger, after cutting out all my pieces I went to visit my friends Jen and Amanda--AKA Mai Sheri and Elemental--who were kind enough to let me use theirs! (I paid them in homemade cookies.) I assembled the pants, and tube top with relative ease. Pinning the waistband to the wrap this was serged together in a circle on the inside. Then using a zig-zag stitch I hemmed all the garments.

I inserted an elastic in the waistband of the pants and the top of the tube top. All of these pieces stretch to fit and have no closures.

For the striped pieces draped over the shoulders, they are simply long rectangles. I was using up leftover fabric from another project. The yellow stripe was aligned with the center of one half, then top stitched down. Then I folded them right sides together and sewed along the open edge. Then I flipped them right way out and finished the ends. I tacked them together at the front and back where they overlap so they would stay in place. 

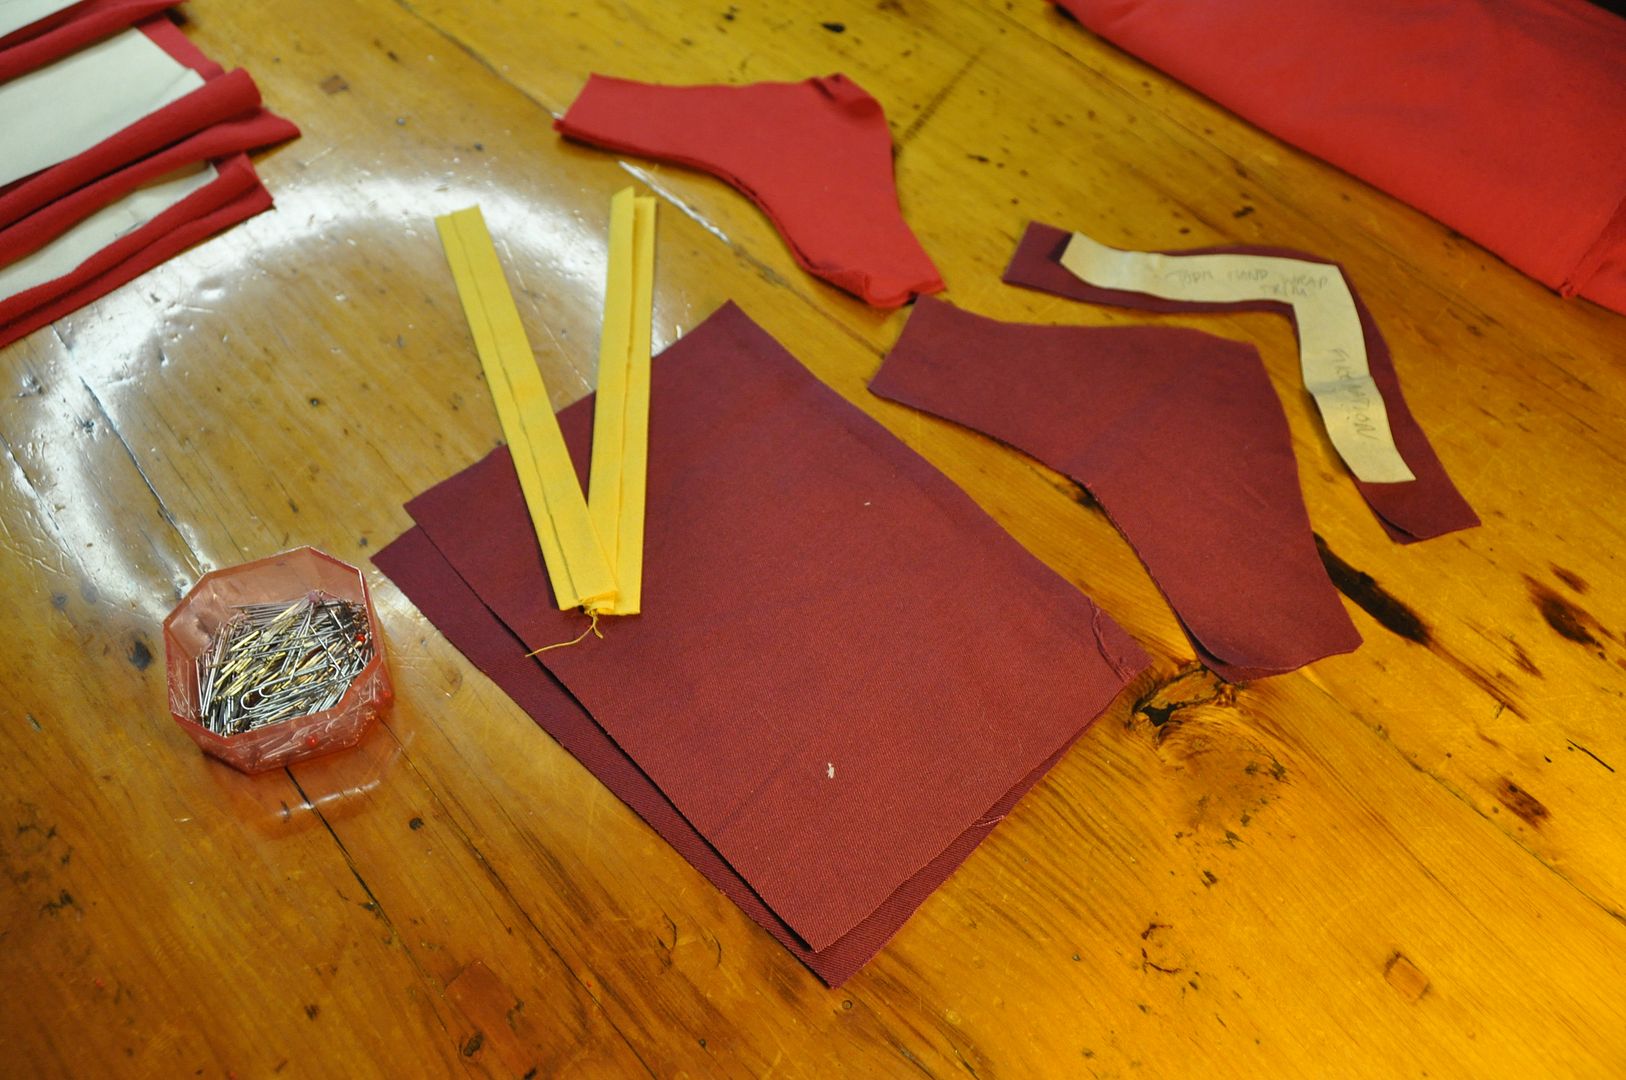
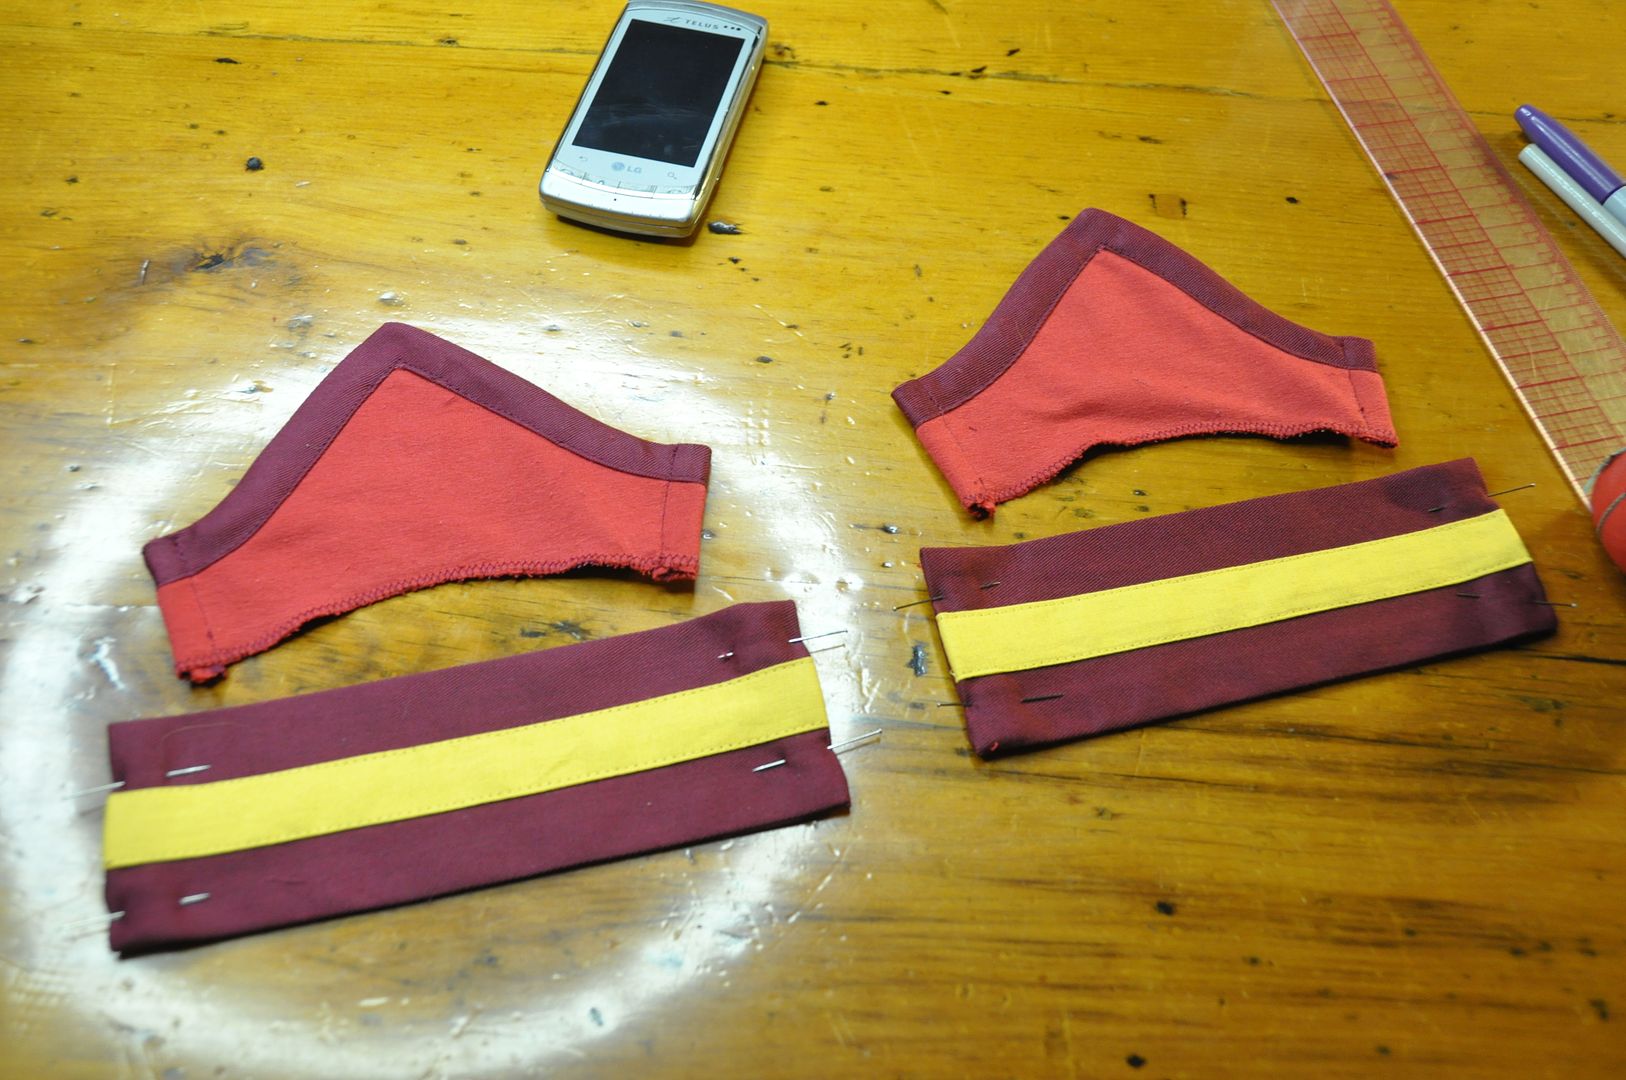
The last piece to create was the cuffs. I used paper to mock up a pattern. Then cut out pieces in the various colours.
I sewed the yellow stripes to the wristbands in the exact same way as I did the draped pieces--just on a smaller scale.

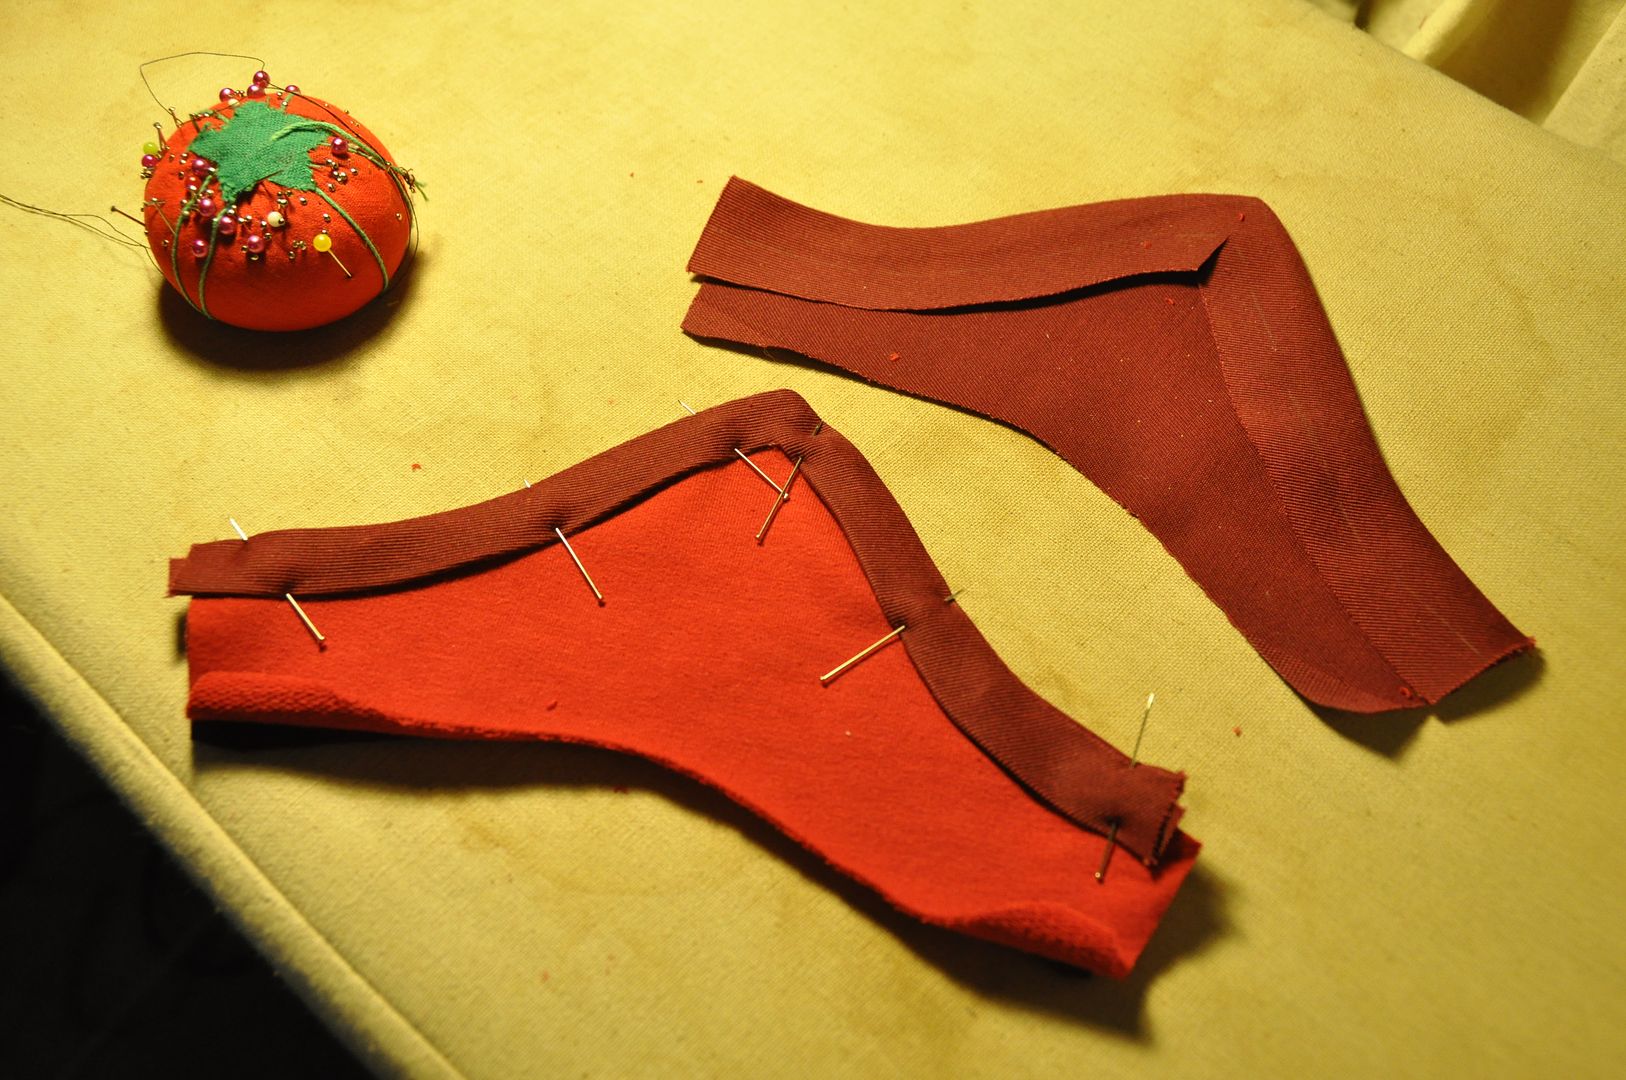
For the pointed piece I sewed the backing and the top edge piece right sides together.

The next step was to clip the excess seam allowance and flip the top edge piece to the front. I ironed it flat. Then I inlaid the red piece, tucking the raw edges of the burgundy piece underneath the trim and top stitching it in place.


After finishing the edges I sewed the pointed piece to the wristband. Then I added some hooks and bars as closures.

Stay tuned for part 3!

Saturday, July 5, 2014

Forest Guardian - Pants, Shirt & Cape

[Edit: New photos added from Feb 2015 shoot with EleventhPhotograph!]

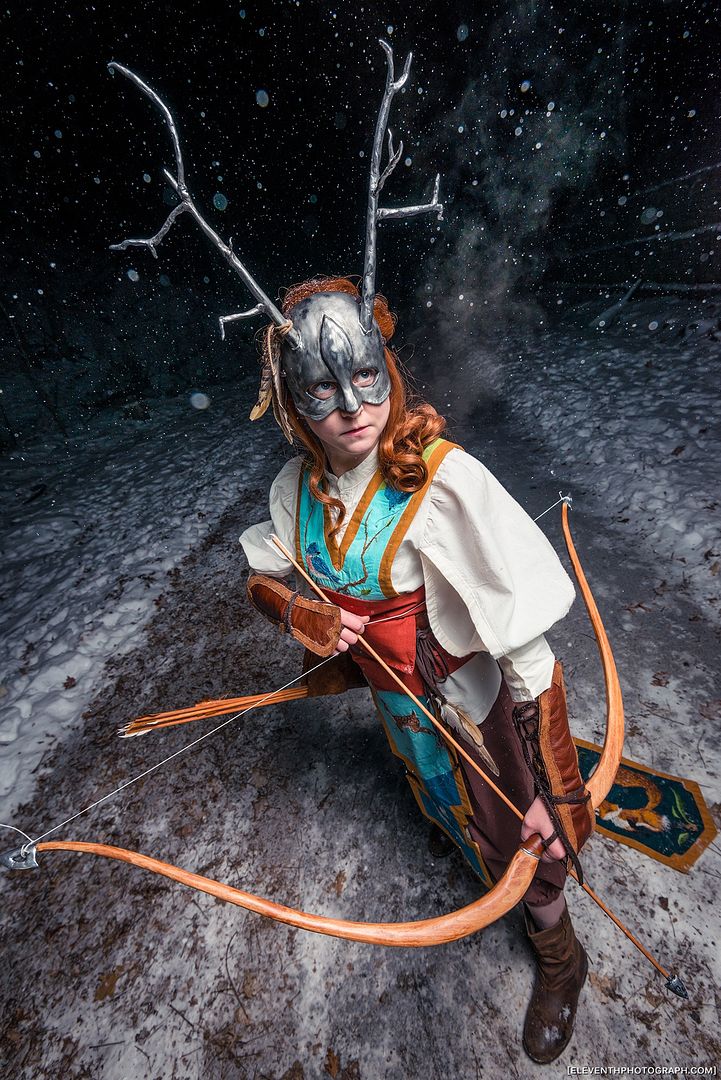
Welcome to my first look at the Forest Guardian! I thought we should start with the pants, shirt and cape because in terms of the actual build of the costume that's where I started. I think at this point it has been a full year since I started the concept sketches for this costume, wow! This is my first real original design costume and I'm pretty proud of it. 
I wore most of the costume to CostumeCon 32, excluding the embroidered panel, which I was sadly unable to finish in time. The costume was completed for Anime North, and I competed it in the Masquerade. I won an award for my embroidery in the Master Division, which I am super proud of! This was my entry.

I still need to do a photoshoot of this costume, hopefully that will happen sometime in the near future. I have been location scouting in the forest behind my house. :P 

I started the design concept of this last summer. I had bought my badge for CostumeCon 32 at Anime North last year, so I knew I wanted to make something original. There were several different designs leading up to this one, several different versions before I arrived at this one. I developed the design over the course of the summer and got started on the project after returning from Otakon. 

 The hardest part once I had the shapes down was colourizing everything. I knew I wanted the character to have auburn hair and that the shirt was going to be off-white but other than that I wasn't sure. I didn't even know if I wanted to make the mask look like metal or clay & bone. There were several different coloured versions before I settled on this one (there was even one where the animals on the embroidered panel were to be done as silver silhouettes). It ended up being quite colourful in the end, I was sort of going for ceremonial garb when I first started drawing it and ultimately I think the colour suits the design. Even then there have been several changes that developed over the course of the build since I did this "final" sketch. I purposefully designed the under clothing for this costume to be quite simple, as I wanted the focus to be on the embroidered panel and accessories. 

 I started by patterning and mocking up the shirt. The shirt was designed to be a looser fit, with flowy sleeves that would allow easy/unrestricted movement. The shirt itself only has 2 darts at the armhole to the bust, the waist get cinched in by the belt. The sleeve pattern had required some adjustments initially because unlike a regular sleeve this had a slit in the front. So I had to move the seam from the bottom to the front.
 
After doing a mockup, I cut and sewed the pieces. I closed the darts and then sewed the front and back pieces together, leaving a little slit open at the bottom of each side seam. I cut the slit open at the front and finished off the edges with a strip I made out of the same fabric. This would reinforce the fabric when I added the laces later.
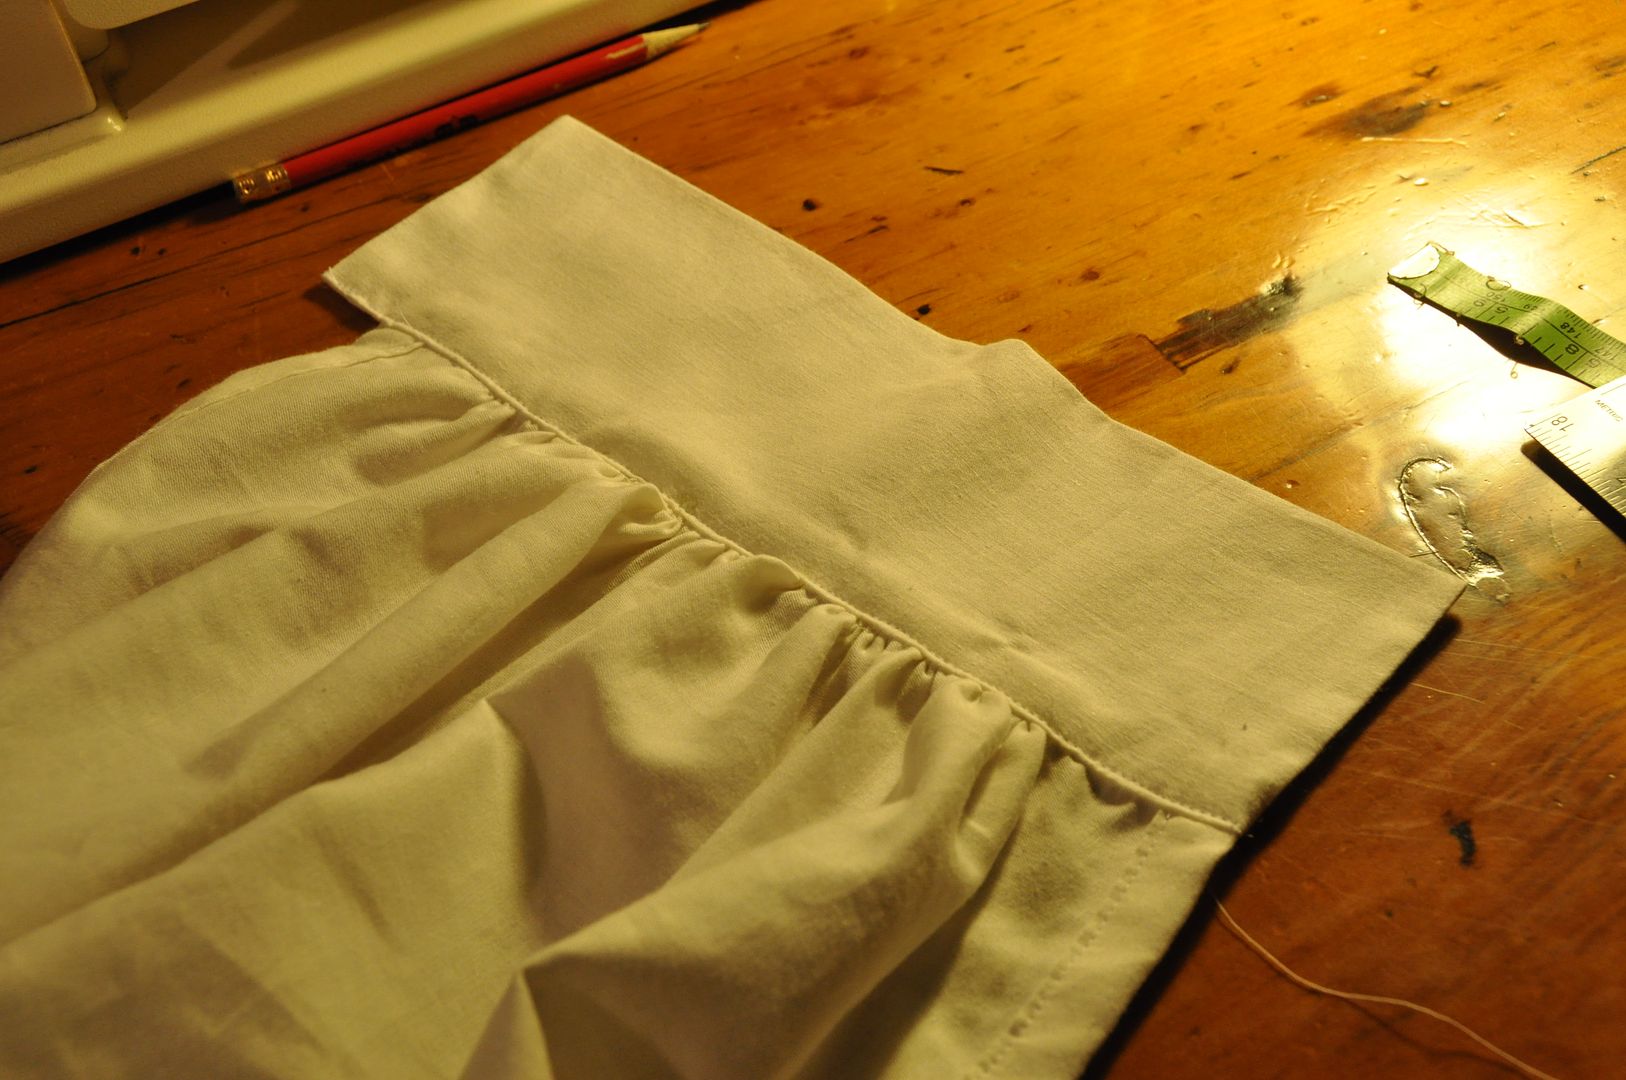
I then sewed on the collar and gathered the sleeves. Then I finished/reinforced the edges of the sleeve opening. Originally I had intended for the sleeves to be laced shut, but I decided I really liked the look of them open and left them that way.

 I hemmed the bottom of the shirt.
Then I gathered the edge of the sleeve and added the cuffs to the sleeve. Later I put 3 buttons & buttonholes on each to close them.I also added in the holes on the front closure for the laces. These were done in the same way as the button holes rather than with grommets.
 Once the shirt was done I began work on the cape.


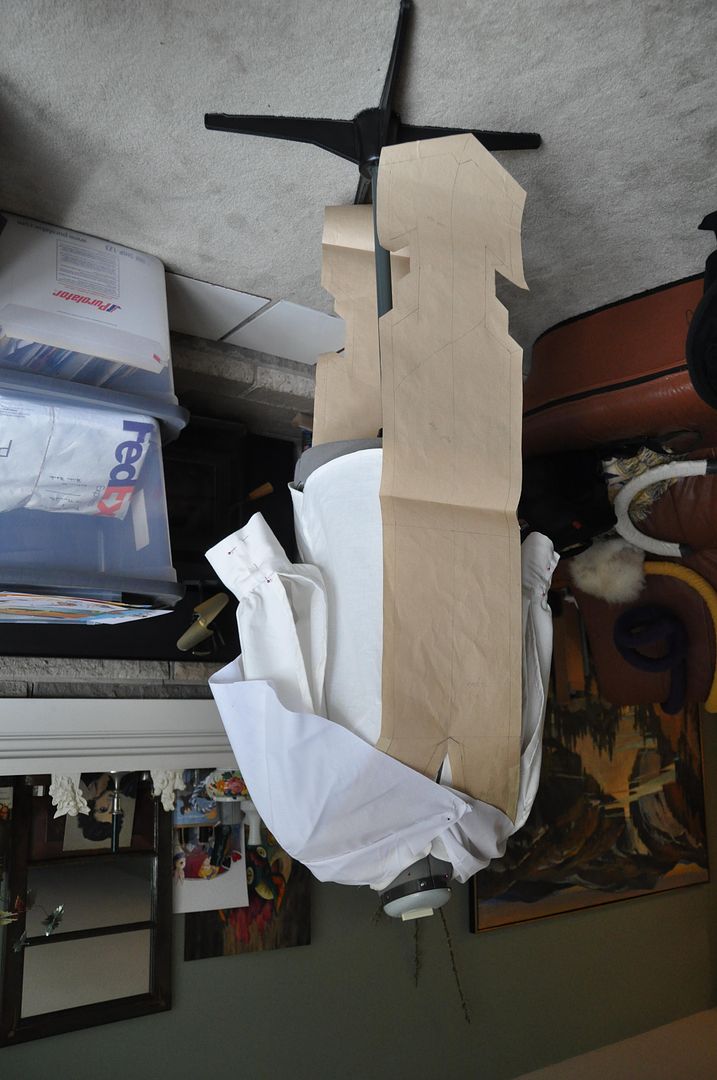
The cape itself had originally been designed to be longer, but after much consideration I felt it would detract from the embroidered panel so I made it a short cape, but still kept the large hood. I am pretty inexperienced patterning hoods, and this was my first cape. It took a few tries to get it to look how I wanted it. The only advice I can give is make a mockup!
The pattern pieces for this look pretty odd!

My main design feature on the hood was the two slots for the antlers to stick through. It was one of the design elements from the initial concept sketch that came all the way through to the end. I had to make a reinforced edge piece that went all the way around the edge of the hood and the hem of the cape. It had to conform to all the odd angles and contours. It is made of the same fabric as the hood lining.

I started by sewing the sides and center seams on the hood, hood-lining and cape pieces. For the hood I attached the trim piece to the lining and bagged it out. Then I slotted the outer fabric under the trim and pinned it in place. I carefully measured and folded under the raw edges then top stitched the trim in place.


For the main part of the cape I bagged out the trim, having stitched it directly to the inside of the outer fabric. I folded it to the outside and finished the raw edges in the same way, top stitching it all in place. This way the raw edges are all hidden inside the trim, leaving for a clean look on the inside and outside!

You can see how the hood collapses in on itself. Which was frustrating as even when worn over the mask the edges of the antler slots just drooped. I later re-opened the seam and added in a wire to the hood, which kept it rigid and held the desired shape perfectly!

The red wrap around the stomach is simply a long strip of fabric that is wider at the ends (narrower in the middle) bagged out to finish the edges. It has velcro to close it, which is hidden by the belt. (The belt pictured here is actually from my Presea costume, which I was using when trying things on until I made the actual one.)

The pants are actually based on a pattern I had modified for a costume I started but never finished. (Jack Frost) I modified my modified pattern to get the pants I made for this costume. Haha
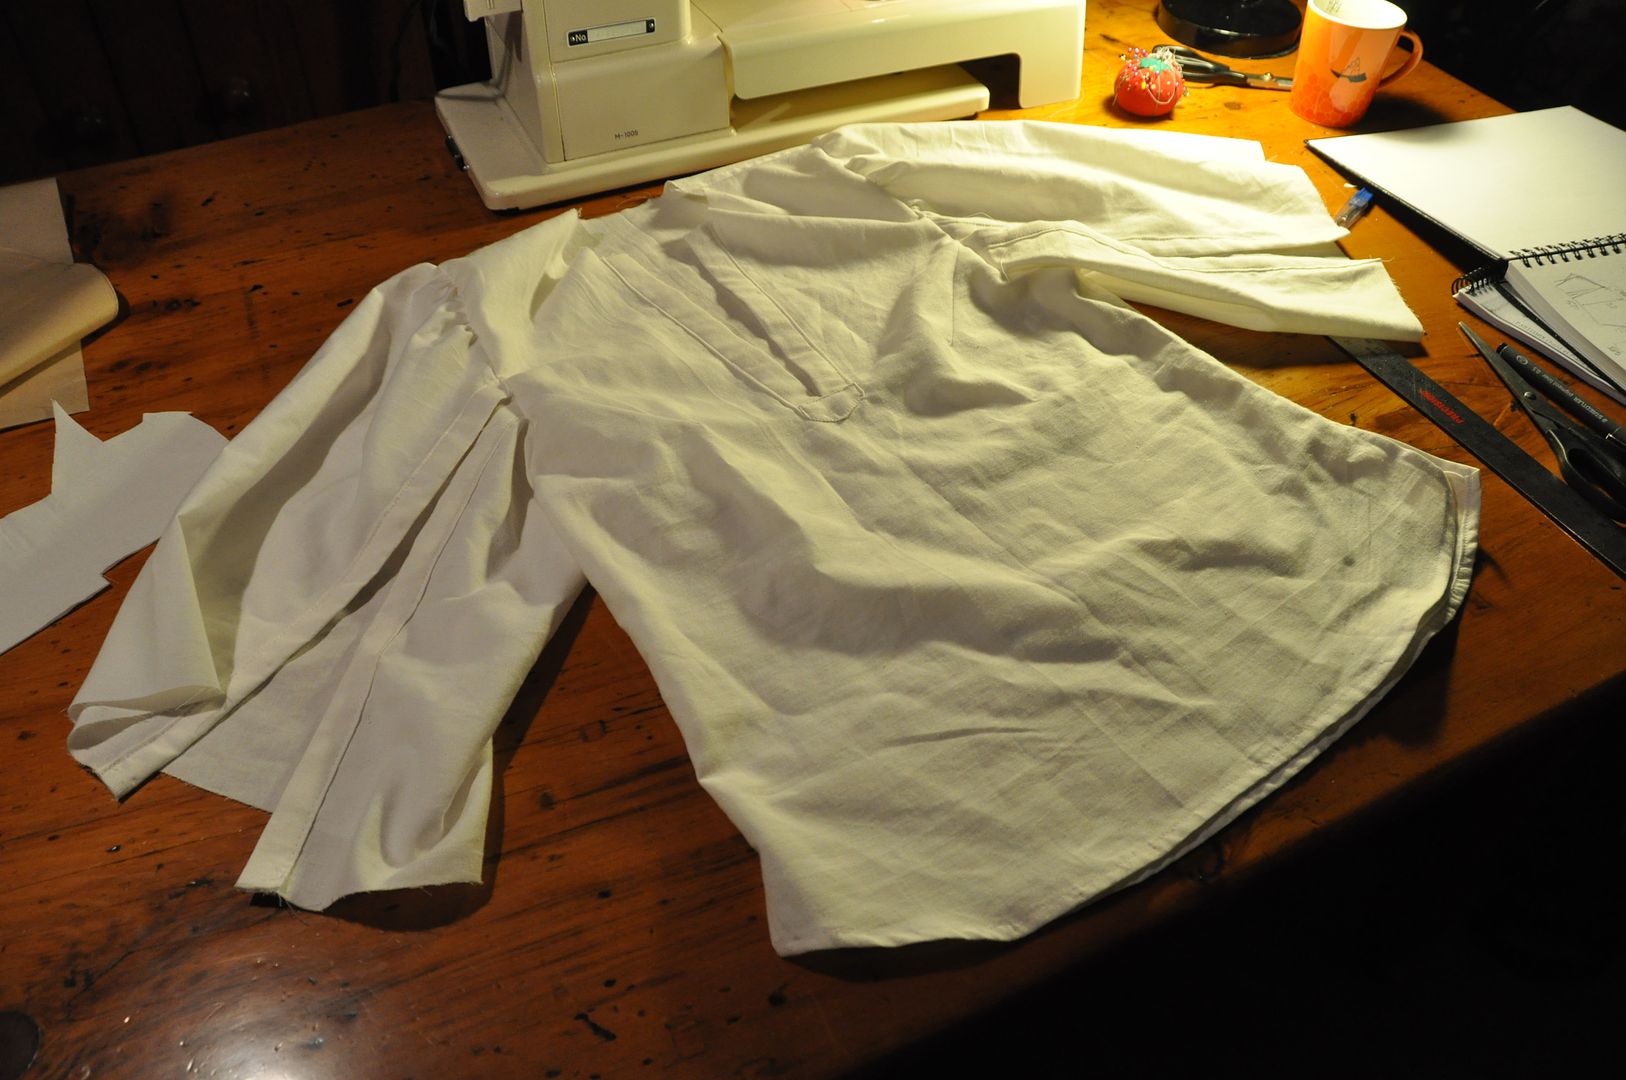
To make the leg wider I opened up the front of each pant leg and added in a pleat on each. I flared each pant leg out more as well. This way, it still fit nicely at the butt, but the legs would pouffe out a bit.

When I was satisfied with the changes to the pattern I cut and sewed the pieces.  I started with the pleats on the front, then the side seams. Then I partially closed the crotch seam and finished the inner seams.
Next I added my waistband. The pants front closure was a bit tricky. I decided I wanted laces rather than doing a fly-front... even though it isn't even visible, I wanted authenticity. hahaha I had to reinforce the edges where I put the holes, and add a modestly panel so you can't see my underwear through the gaps in the lacing. But in the end it worked well.

Lastly I finished the cuffs by cinching them and then adding on a strip of fabric that I had closed to be a circle.
I can definitely say that the base outfit for this costume is very comfortable.