Showing posts with label award. Show all posts

Friday, October 30, 2015

Sakura - Wig, Hat & Accessories - Cardcaptor Sakura

Part 3 of Sakura (1st Opening outfit)--lets talk accessories! The details are really what make this costume. If you want to see how I made the wings, go here! If you want to see the rest of the outfit, go here!

I entered this costume in the Friday night Workmanship Competition at Anime North in 2014 and won an award for Best Accessories in my category. That was pretty cool. It was my first (and so far only) time entering in a competition without a stage presentation component.

Once again, thanks to EleventhPhotograph for the photoshoot. I really love this black and white shot.

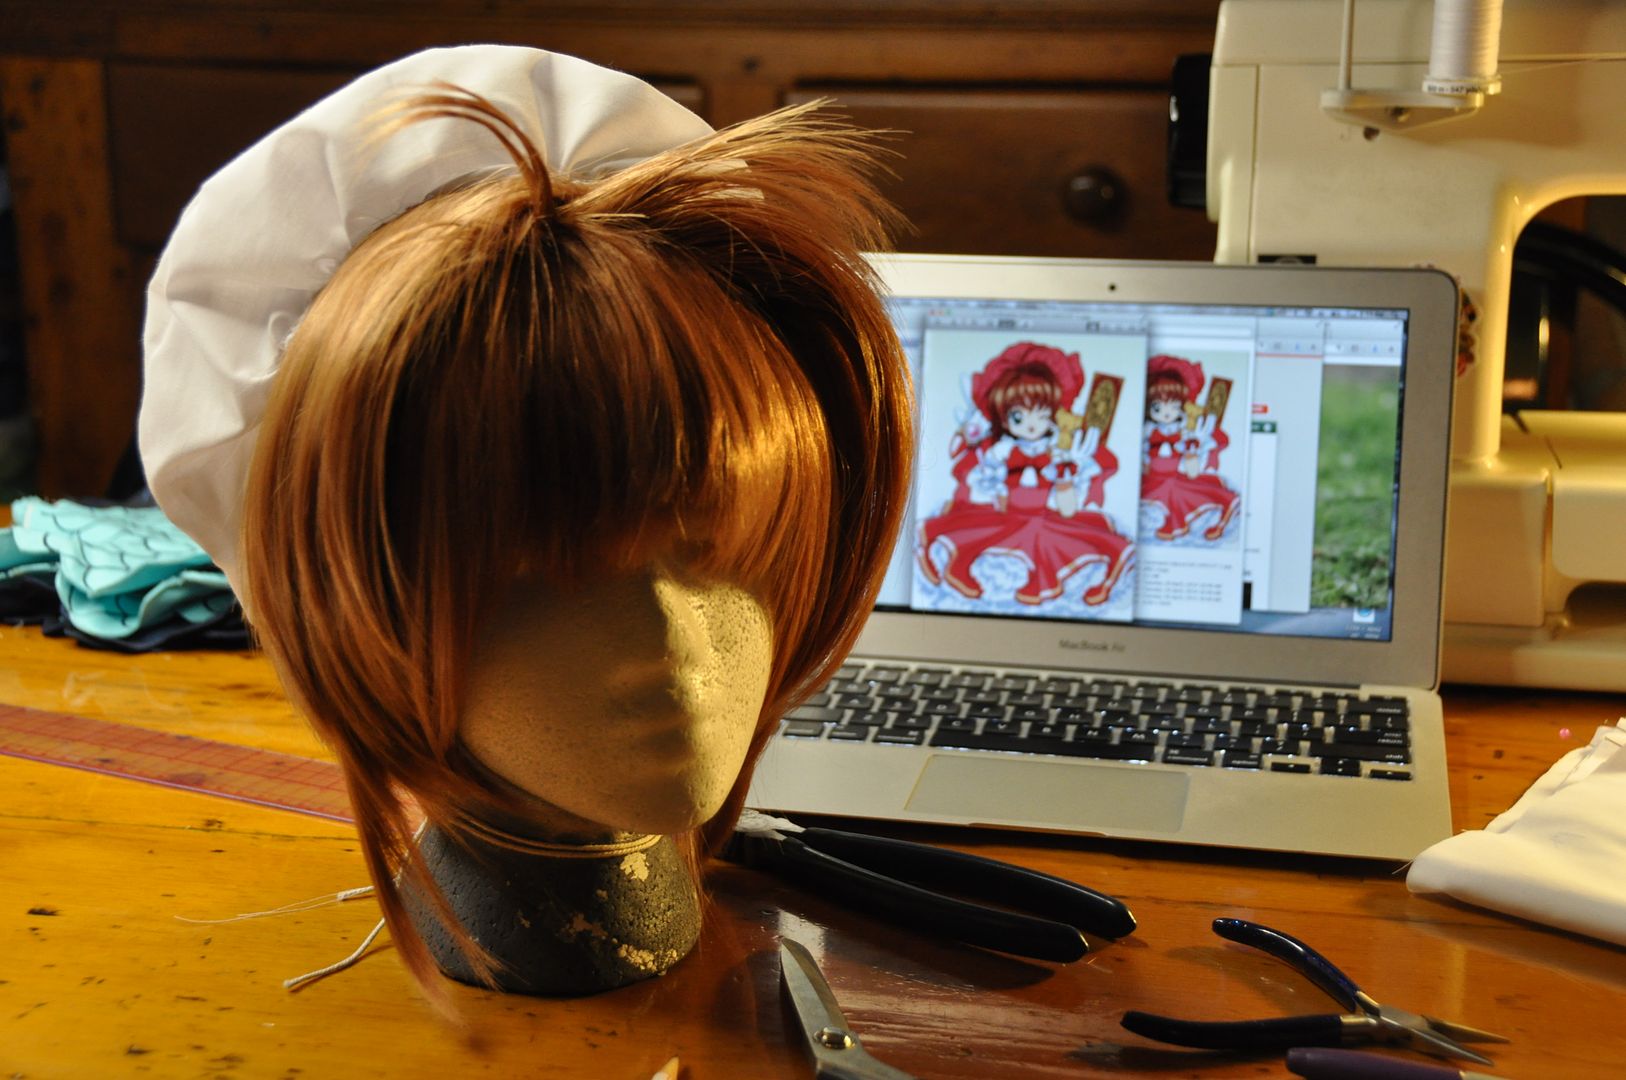
First we'll talk about the wig. I started with EpicCosplay's Aura in cocoa brown. I think this colour works really well for Sakura, it's not too brown or too blonde. It's almost a bit reddish. I think the colour works well on both my sister and myself.

Since I was doing a costume of hers with a hat, I didn't bother to add her iconic pigtails that she normally wears, because they wouldn't be visible. This has influenced my costume choices for my subsequent Sakura costumes to only be ones where Sakura is wearing a hat. Because this means I don't have to go back and fix the wig. And also because her costumes with hats are ridiculously cute.

As you can see the wig was pretty long. I purposefully picked a longer wig because she has those two small sections of longer hair in front of her ears. It is much easier to cut a wig shorter than it is to add in longer wefts.


I started by trimming the bangs. Using clips I separated off the different sections of the hair. The longer pieces were separated from the sides and the bangs. I left the long wisps at the original length, and simply thinned them out a bit. The sides were thinned and layered and trimmed to length. Then I trimmed the back of the wig.

The last step was to style the front of the wig to give the top that volume. I pulled sections of the hair up and hair sprayed them at the base. Then I used a blow dryer to set it. I made some shorter bits stick up while the rest parted and fell to each side. This created the look of her cute bob at the front.

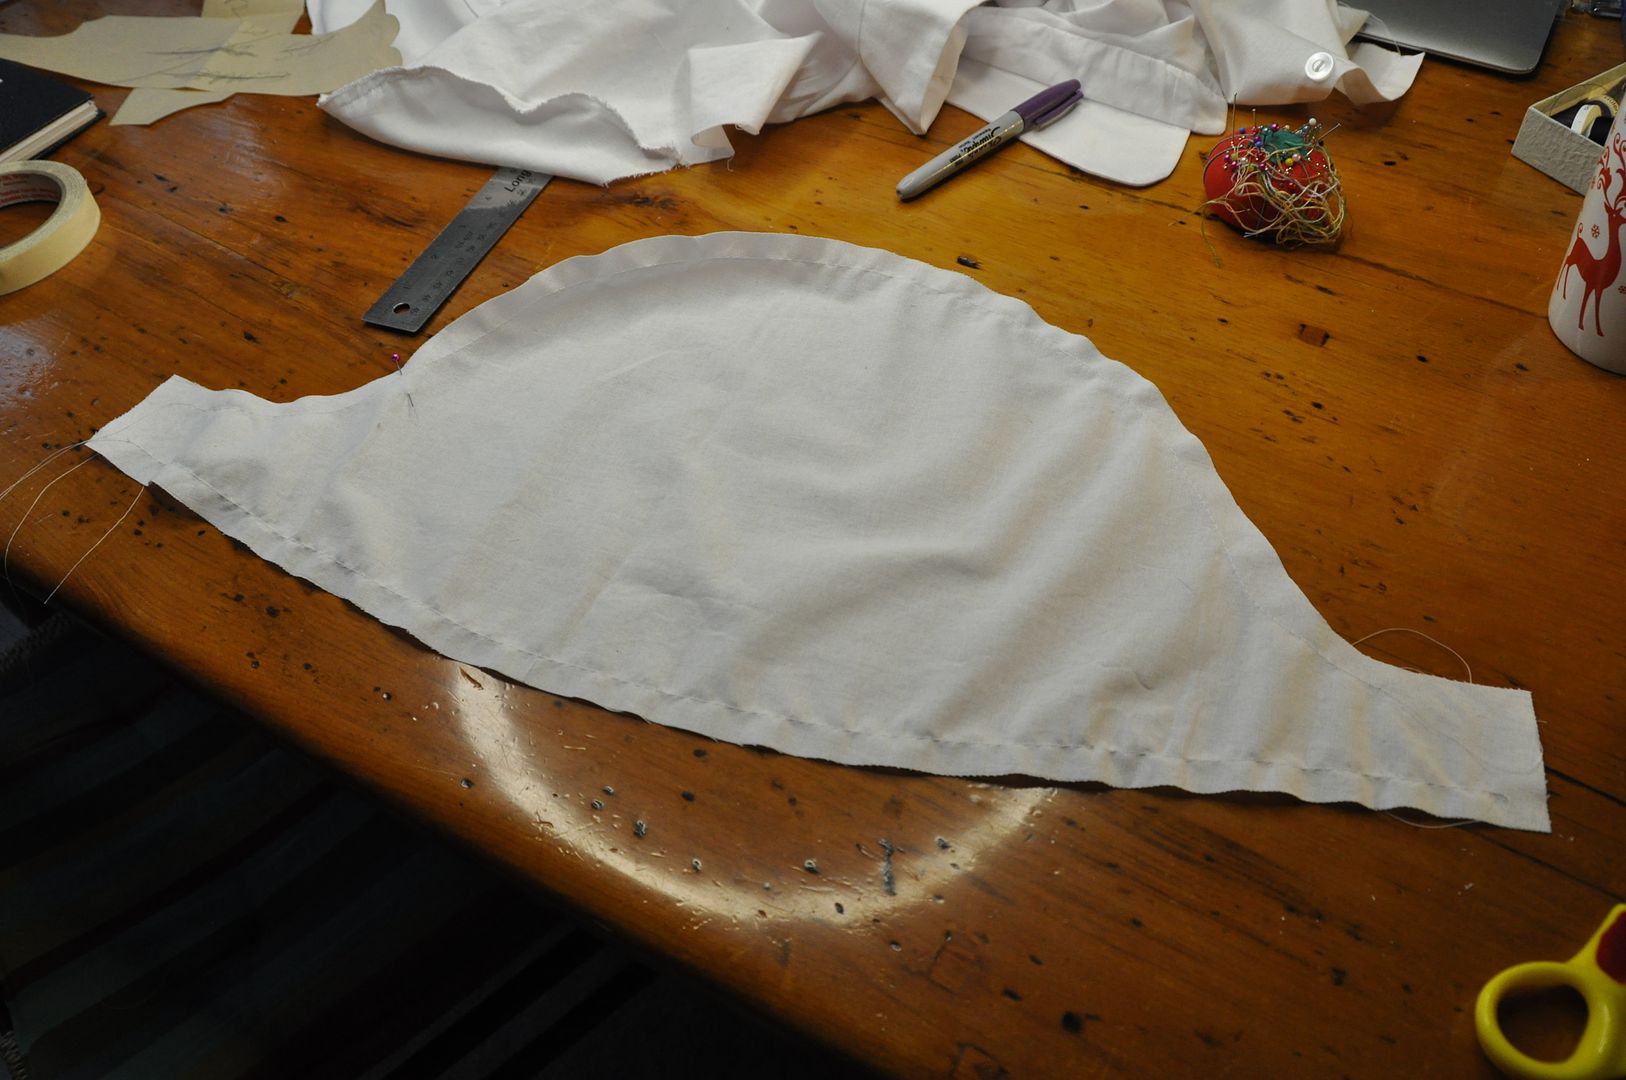
Next I started work on the hat. Since I had very limited pink fabric left, I made a mockup. The hat's construction was pretty simple. The pattern consisted of a circle and a rectangle. The rectangle was the length of the circle's circumference.

First I rolled over the channel where the elastic would go later and ironed that. I didn't stitch it down yet, but pre-ironing saved me a ton of headaches later.

The next step was to sew the rectangle to the top of the hat, right sides together. Then I sewed the two ends of the rectangle together and then top stitched the channel for the elastic. I left an opening in the channel so I could feed the elastic through. The elastic both gathered the hat and helped it to stay on. When I was satisfied with the fit, I sewed the elastic ends together and closed the channel opening.

Lastly the bow was attached to the hat. Credit for completing the finishing touches goes to my friend Alli who handcrafted all the bows and hand stitched them on.

Instead of constructing socks and gloves I bought them, and made ruffles to add to them to help them match the rest of the costume.

Like the hat band, the ruffles are simply rectangles with a channel on on side for an elastic, which cinches them to fit and gathers them into a ruffle. These were tacked on to the gloves and socks.

Little red bows were also added to the gloves.

The shoes were an extremely lucky find. I managed to find flats at Ardene's in the perfect shade of red. They matched my red fabric perfectly. I added the bows to the toe. This is not 100% accurate to the design, but I didn't feel like adding straps to the shoe--I was worried it would make them uncomfortable. The bows were hot glued on.

I paid attention to the details so that everything would match perfectly. I wanted to do Sakura justice, and I think I achieved that. :)

Thursday, October 22, 2015

Sakura - Wings - CardCaptor Sakura


Part 2 of my Sakura (1st Opening outfit) posts: lets talk about wings! If you want to see how I made the outfit, go here!

Once again thanks to EleventhPhotograph for the photoshoot. I really love the above shot! It reminds me of Alice in Wonderland.

This was an exercise in perfecting the foam wing style I had used for the Kero and Suppi gijinka costumes. Since I already knew what I was doing, this time around involved a lot less trial and error.

I like making foam wings this way because they are sturdy, and they aren't likely to get too damaged in crowded convention spaces. They are also fairly light and not horribly uncomfortable. I like the cartoon-y style of them as well. 

I traced out 4 wing shapes on the foam--2 for each wing. I cut these out with a pair of scissors.

Pairing them up I cut off the corners so they would be more rounded along the edges. This will help them fit into the cases better.

Using the same pattern as the wings I cut out my four pieces of white fabric. I made these about 1/4" bigger all around (+ seam allowance) to account for the depth of the foam.

I sewed the wing cases right sides together, trimmed the excess seam allowance and then flipped them right way out. I left a large gap along the base that extended up along the top edge--this is so I could get the foam wing inside the casing. Because of the friction, the foam really doesn't like to go into the case easily, so it takes a lot of patience and just a touch of brute force.

Using a heavy gauge wire, I created a wire base for each. You can see each wing has a wire base that is made of one continuous piece. The two "antennas" support the wing, the u-shape at the bottom is where the wing is attached to the base. Note how I bent the cut ends of the wire into little loops--this is so it wouldn't stab through the foam or fabric.

After taking some measurements and figuring out the spacing I began to pattern the harness. This was a bit tricky, because it had to fit under the pink dress, but sit high enough on the back so that the wings would sit above the dress' neckline. It also had to be tight fitting so that the wings wouldn't be droopy (a problem I encountered with Kero).

I cut a base plate out of styrene plastic. It was simply a rectangle with rounded corners--again so it wouldn't stab through the fabric cover later. The wires were attached to the base plate with copious amounts of hot glue. The nice thing about styrene is that hot glue bonds really well to it.

On the fabric covering I carefully measured and marked where the holes needed to be for the wires. Before sewing anything together I used the buttonhole function on my sewing machine to create small openings with finished edges for the wires to stick through. Then I sewed the styrene base plate into the fabric covering.

Once the back plate was finished I added a waistband and shoulder straps. I fit it on her so the shoulder straps would be tight, and allow the back plate to sit at the proper height. The straps were made to be a fixed length. The closure was a set of bra hooks on the front of the waistband, so it is easy to remove the wings for important daily tasks--like sitting.

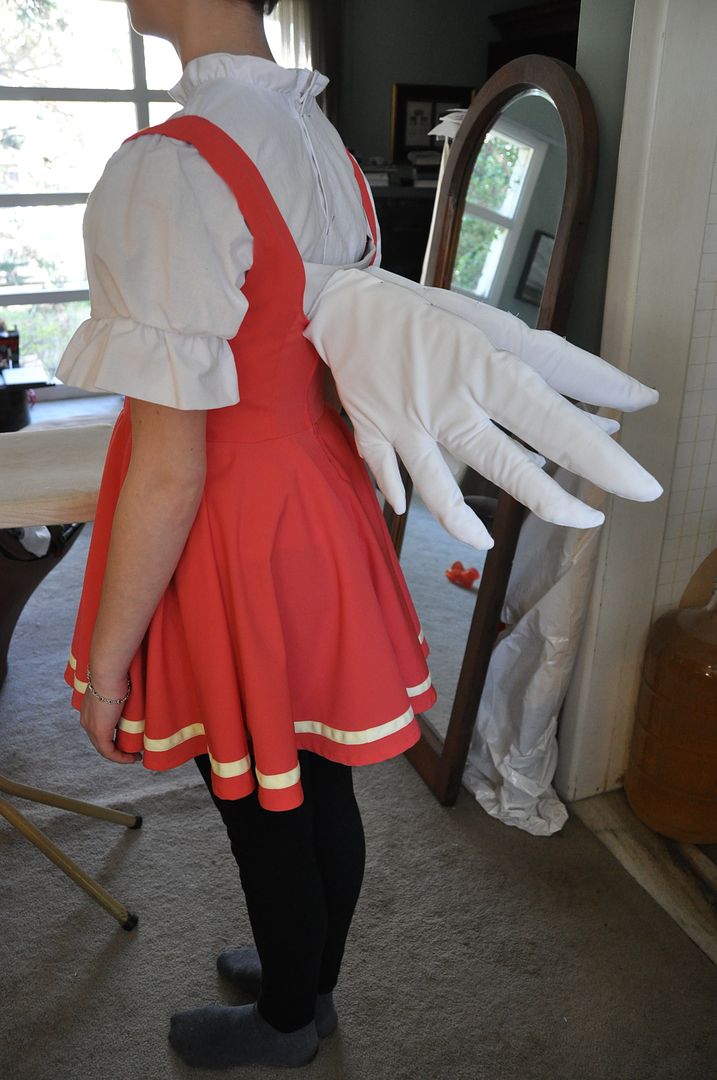
We tested the wings with the dress. You can see here they are really droopy. Once I was satisfied with the fit I used hot glue to attach the foam wings to the wires on the inside.

Once the wings were actually attached to the base I could adjust the height that the wings sat by bending the wire at the base. Because the wings have weight that is sticking out from the body, even though they are really light science & gravity mean that they will be heavier the further distance the weight is from the base. As such, when you put them on, gravity causes them to pull and tilt the base plate slightly, which makes them look droopy and sad. You can see in the picture on the right how the base plate is pulling away from the back ever so slightly, but it is more than enough to make the wings droop.

While this problem is partially solved by making a tight fitting harness (minimizing the amount the base plate will tilt), to counteract this you simply have to overcompensate and position the wings pointing extra up to counteract the downward pull of gravity. This is so that when they fall to the position they want to sit at, it will be the position you want. Note the difference between the pictures above and below--in the second picture I have glued them internally and positioned the wings to point extra up. Now they don't look so sad.
The reason why I love making wings like this is because they are adjustable. You can bend the wires to suit your needs--whether that means you want to make the wings more open or closed, up or down.

My friend Alli (who helped me on my Asuna costume the previous year) helped to finish them off by neatly hand stitching the casings closed.

And then they were done! >:D


Wednesday, October 14, 2015

Sakura - Dress, Blouse & Petticoat - Cardcaptor Sakura

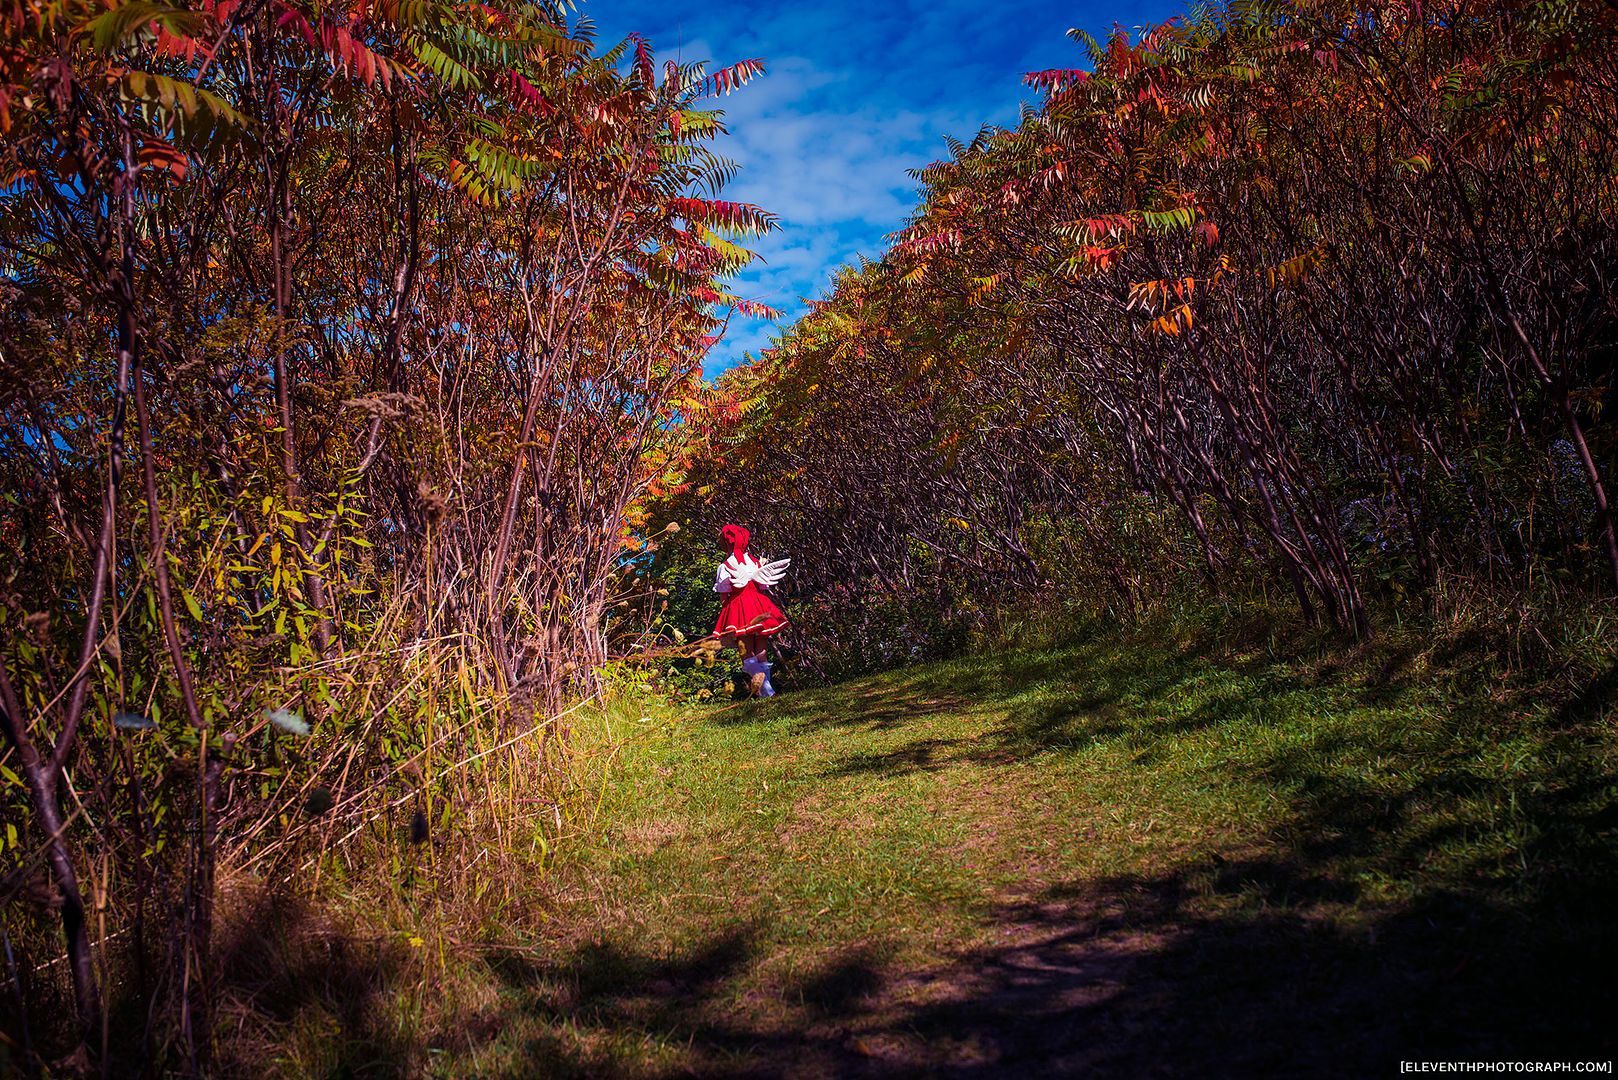
So guys, it finally happened: I finally got some finished shots of this costume. Special thanks to EleventhPhotograph for the amazing fall shoot! I loved the use of colour gels in the trees to pump up the colour even more!

You may have already guessed that I have a slight obsession with the 90s series CardCaptor Sakura. It was the first anime I ever watched in Japanese with subtitles. The numerous other CCS costumes should have clued you in to my obsession at this point.

I've already made Suppi & Kero, Sakura's sailor suit, and Tomoyo. Adding this one and the one I am currently working on, that brings my total up to 6 costumes from the same series. Which is kind of crazy. Although, not all of these costumes are for me. Suppi was for my older sister Alex, and this iconic Sakura outfit was made for my lovely sister Elanne.

It may not be totally apparent that my sister is actually 7 years younger than me (we have been told on numerous occasions that we look like twins...), but this means that she was not old enough/actually alive to watch the series with me in the 90s. She only watched it for the first time about 3 years ago when Alex and I were having a nostalgia trip. And she quickly became a fan. She hadn't cosplayed in a few years, but asked me if I would consider making something CCS for her. How could I refuse? And behold, the cutest Sakura I know!

So lets get started talking about how I made the dress, blouse and petticoat!

This is definitely one of the most iconic Sakura outfits, this one is featured in the season 1 opening theme. Fabric shopping proved a bit of a challenge for this costume, as I had difficulty finding the correct colour of pink. Because the dress is pink, not red, as some people make it--though that may be to better match one of the manga illustrations? I don't know. It's a reddish/salmon-y/flamingo-ish pink depending on which reference picture you look at. The fabric I found was a medium salmon-y pink colour. When compared to the red fabric I already had on hand for the bow details it had a nice contrast and the colours looked good together. Which is an important part of colour matching any costume.

The most difficult thing about CLAMP is that the way they draw their CCS designs is so simple. They look simple. But they aren't. My main issue is that they don't typically draw seams onto the clothes. This can make it extraordinarily difficult to determine how exactly the clothes should be constructed.

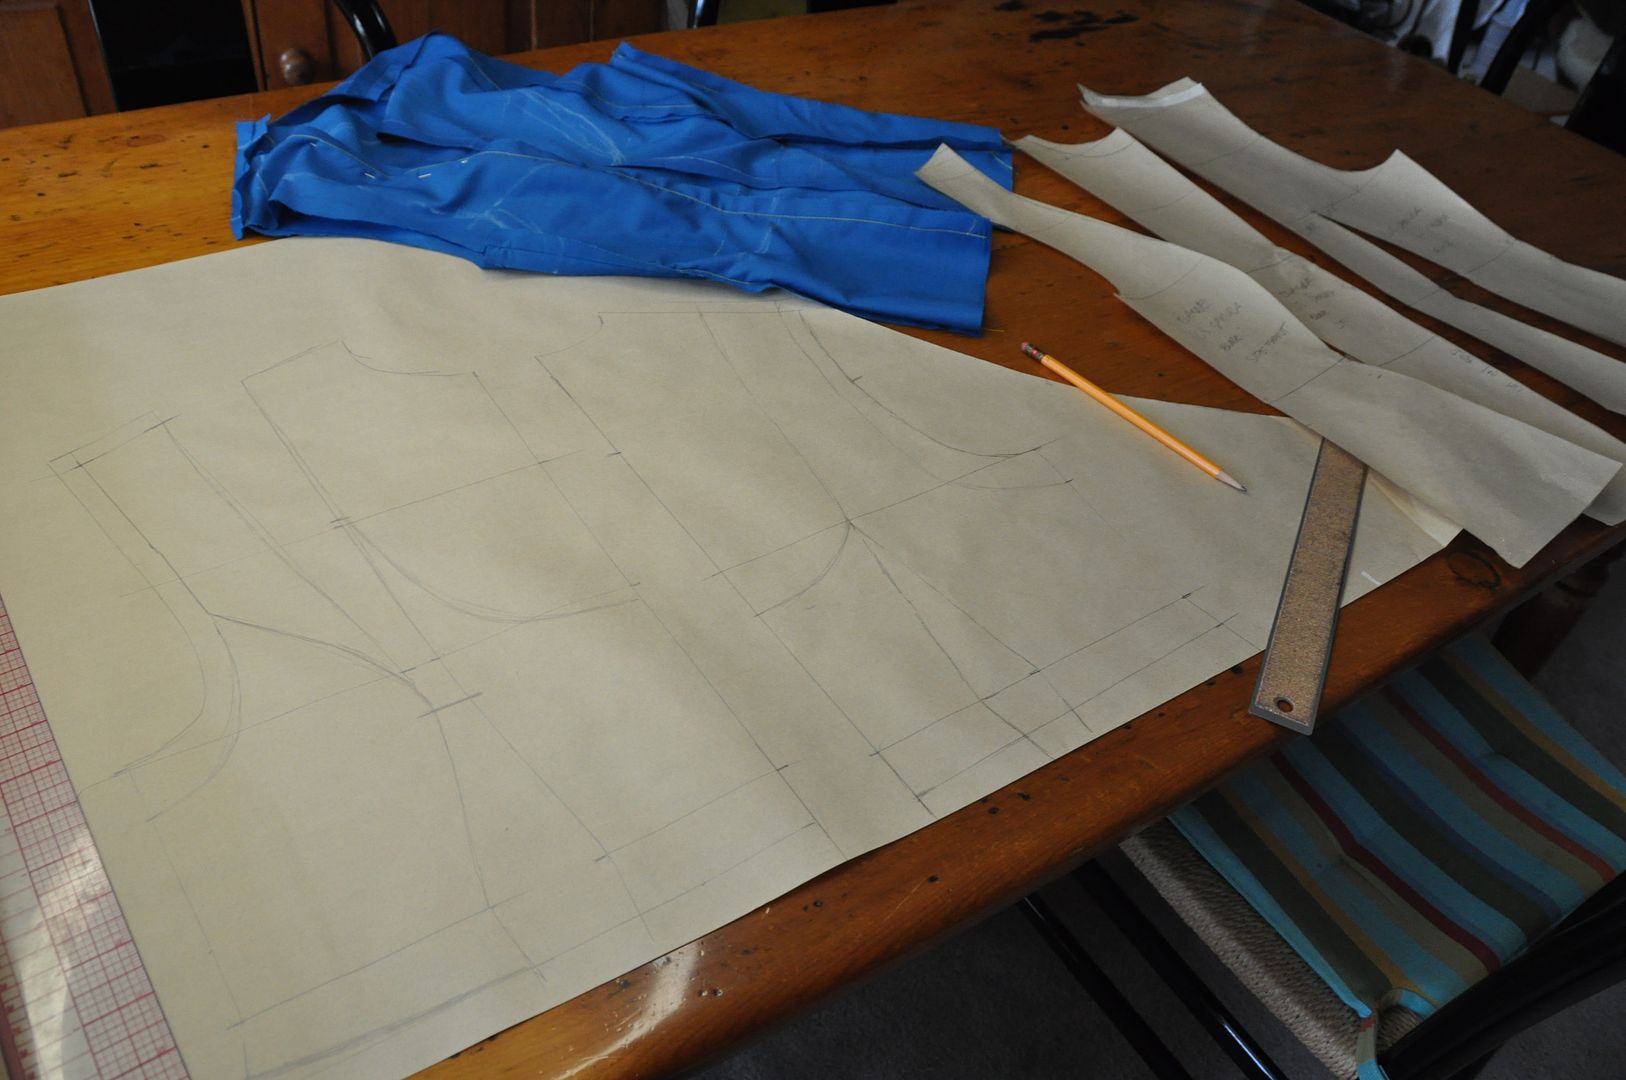
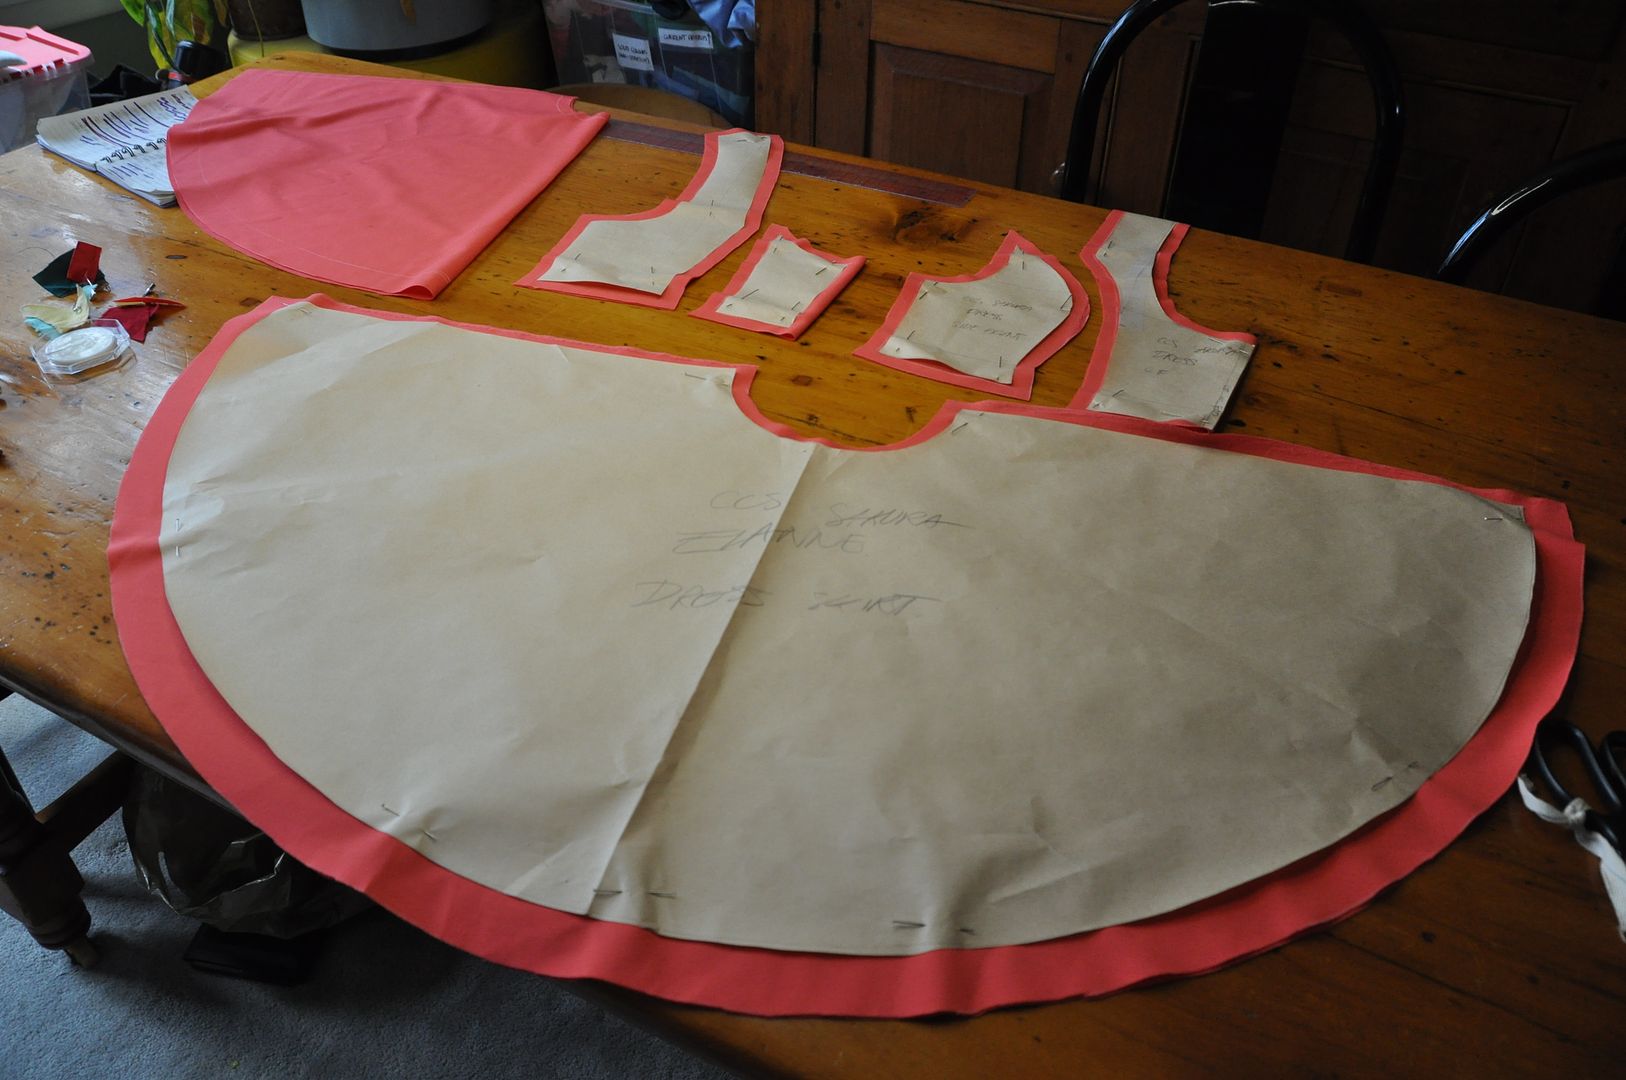
I started off by patterning a basic block, which I heavily modified to create the pattern for the bodice.

The skirt is a full circle and a half. It has been too long since for me to explain the mathematics of how I did that. It consists of 3 panels which are 1/2 of a circle each. This is so I can have a seam down the center back for the zipper, but not one down the center front (which I think looks bad).


I cut out my pieces and then began assembling it.

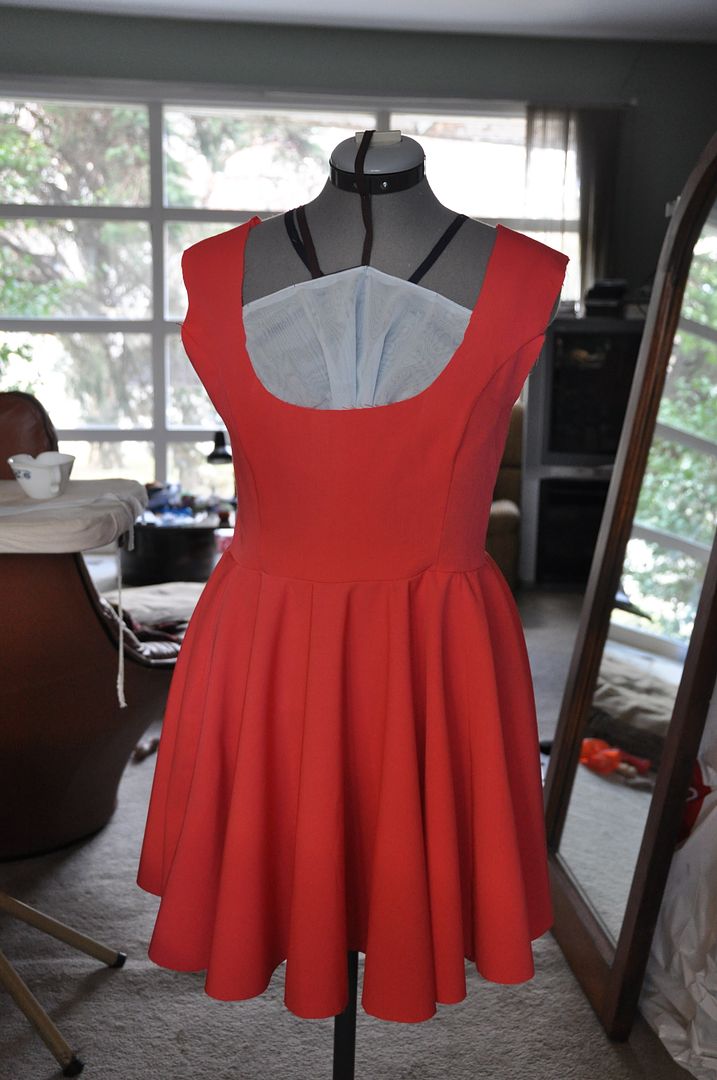
The bodice was designed not to be super fitted to her curves in spite of having a princess seam--Sakura is supposed to be like 10, so emphasizing curves does not really emulate the character accurately. But not having the seam would have made the bodice gape weirdly at the armholes. Also, it couldn't be too fitted, because there were several layers going underneath: the wing rig being the bulkiest, but also the blouse and the petticoat waistband. If it was super fitted she would look lumpy. Sakura is not lumpy.

I finished the seams on the inside.

You can see how full the skirt is as it hangs. This is what the skirt looks like without the petticoat underneath. Pretty sad and not floofy. I always think it looks so sad when a character is supposed to have a giant floofy skirt and cosplayers aren't wearing a petticoat. :( Sometimes it's understructure that can make or break a costume.
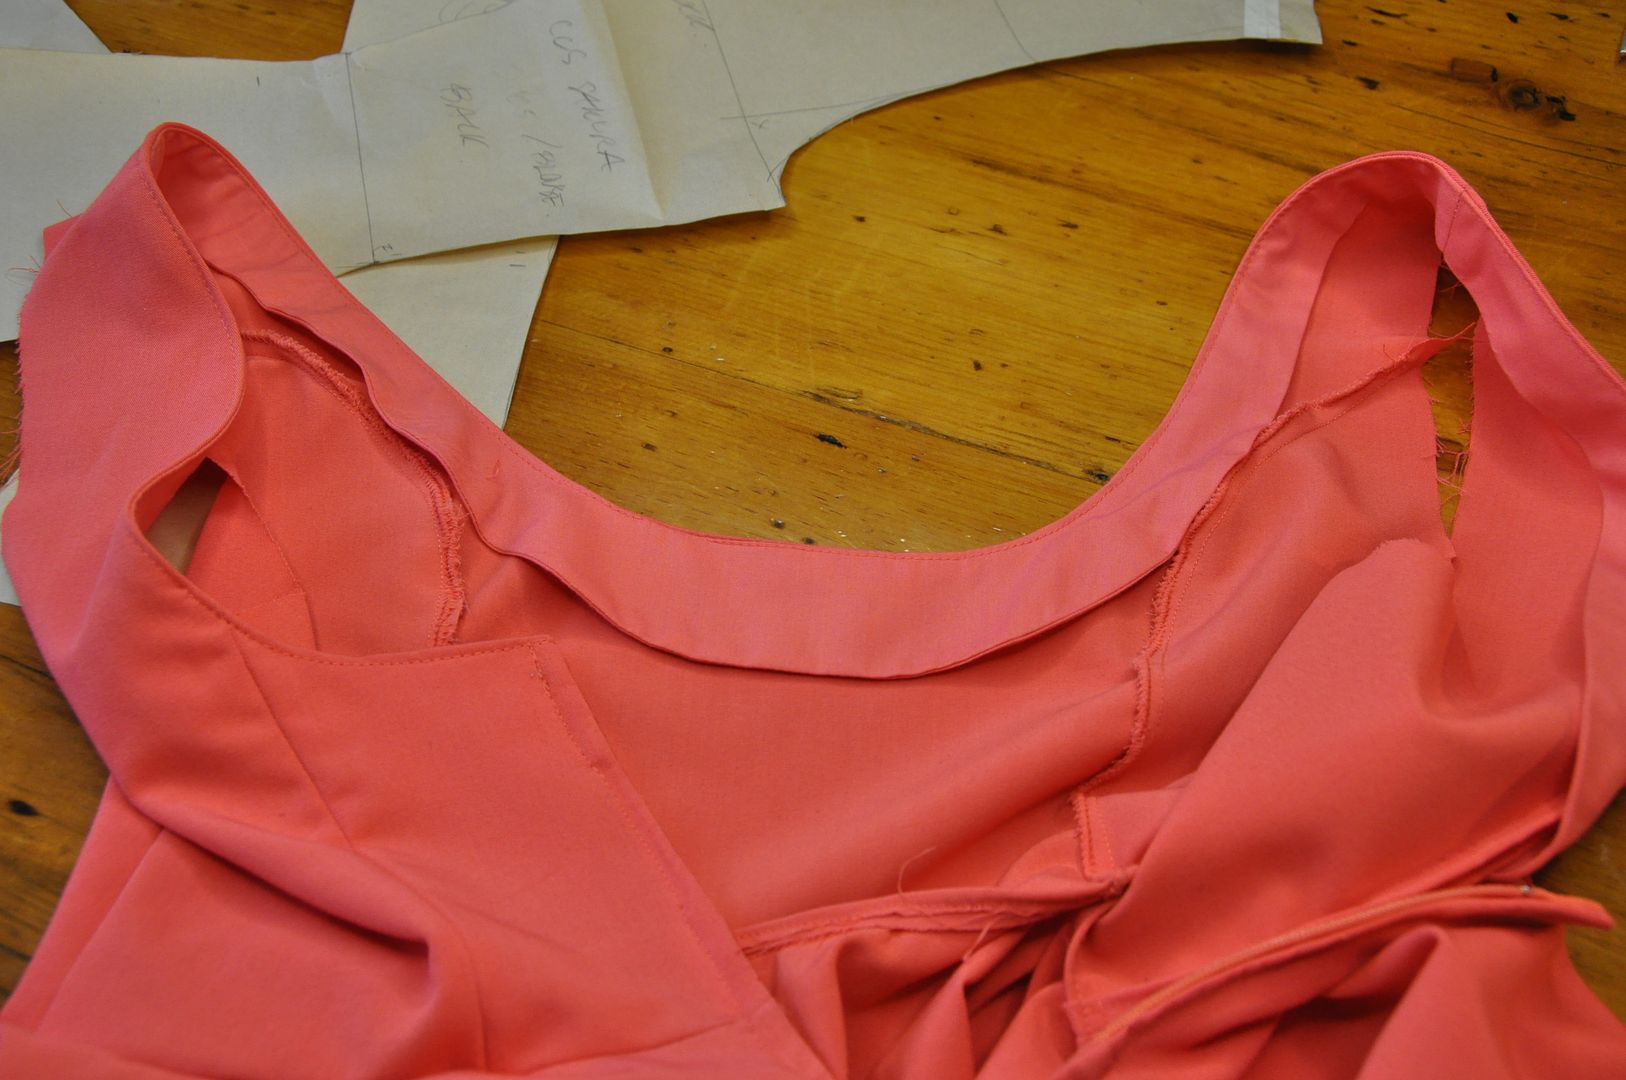
Next I added a zipper into the center back seam. Next I finished the edge of the neckline with a facing. This was tacked down on the inside to keep it from flapping about.


Next I made a facing for the armholes. This was also tacked to the inside.

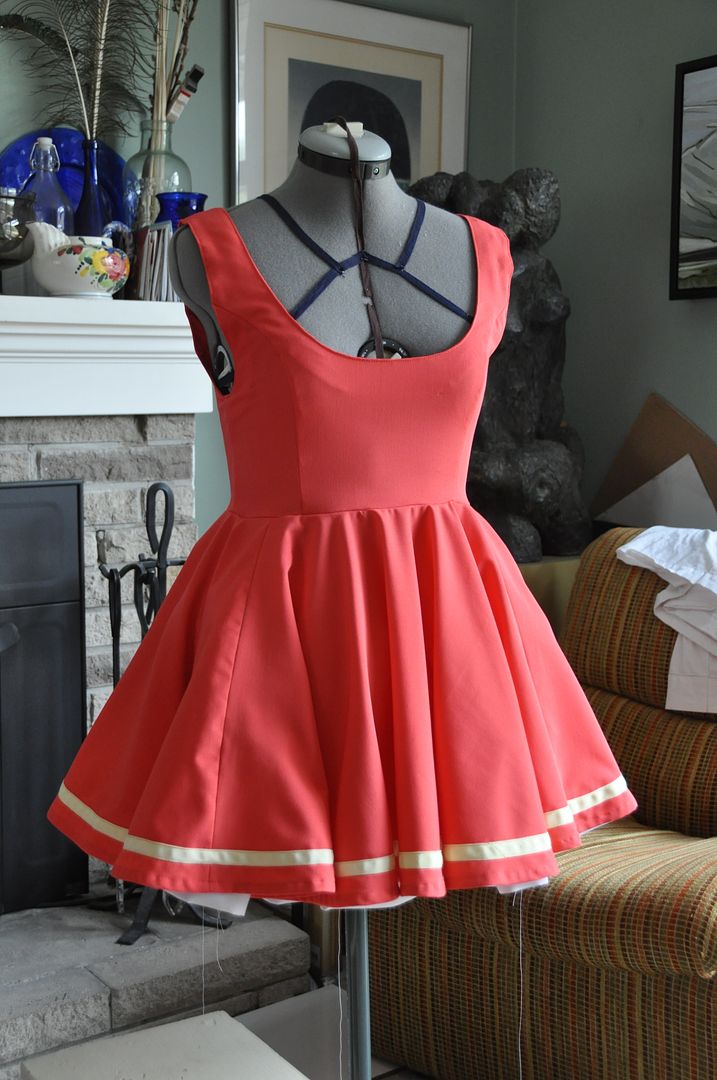
Next the stripe was added to the bottom of the dress with a pale yellow bias tape, and the dress was hemmed.

Special thanks must go to my wardrobe gnome Alli, who helped me with finishing up this dress. She did 99% of the hand stitching on this costume. Which included hand basting the yellow bias tape stripe along the bottom edge and the hem (as well as making and attaching all of the bows!). This was so I could machine stitch it with absolute precision (and no wrinkles later. Hand basting is one of those tasks I loathe doing, even though it can be super helpful.

Here you can see I have tested out the dress with 1 layer of the petticoat. Even then I decided I would need almost 3 times as much floof. And even still, I feel I could have done 1 more layer.

Simultaneously I was making the blouse. It started off as the same basic block, but the similarities end there. For the top front portion of the blouse (that would be revealed by the neckline of the pink dress) I created a panel that was wider than the center front piece below by about 2 inches. I gathered  this panel along the bottom edge and neckline so that it would appear ruffled along the center front. The rest of the blouse was fitted, so there wouldn't be too much added bulk under the dress.

The collar is simply a long rectangle of fabric folded in half lengthwise. It was made long and gathered to fit the neck hole. Again, this costume is nothing but ruffles, ruffles, and more ruffles.

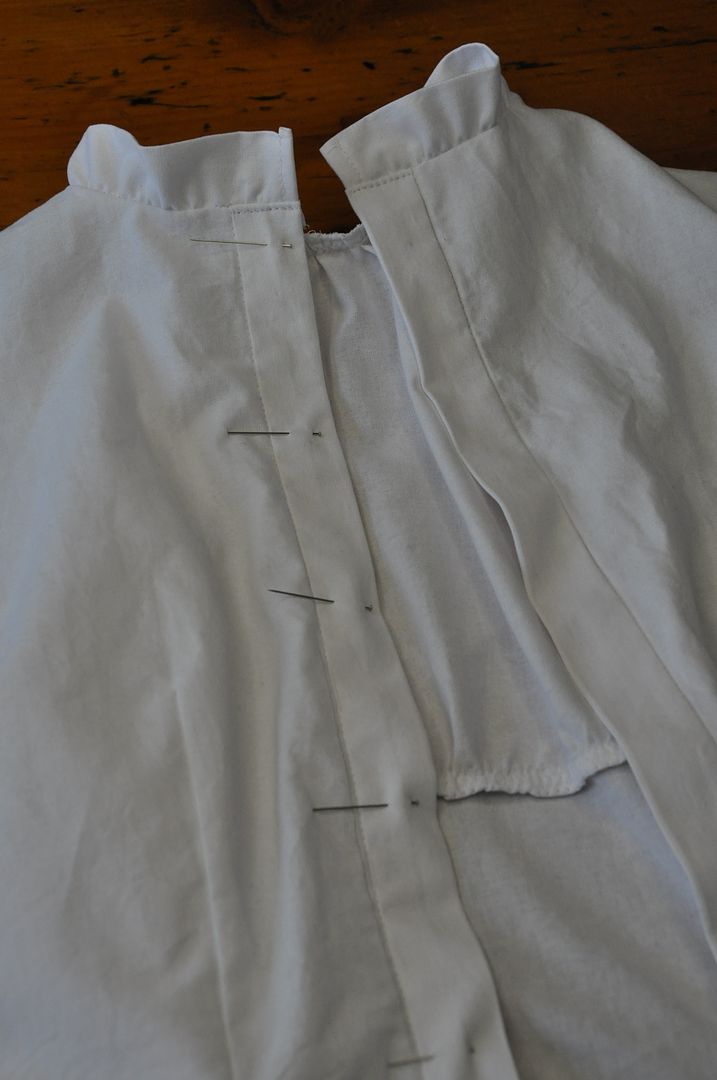
For the back closure I decided to make it button up, because it looked adorable. Although it was a bit of a challenge for her to take on and off, she managed!

The sleeve took a few tries to get the correct proportion of poof. They are larger than the sleeve hole and gathered to fit.

The sleeve cuffs were done in the same way as the collar.
The last step in the project was the petticoat. It is surprisingly labour intensive to make one. With this I used up all the crinoline I had left from when I bought it for my Alice petticoat.

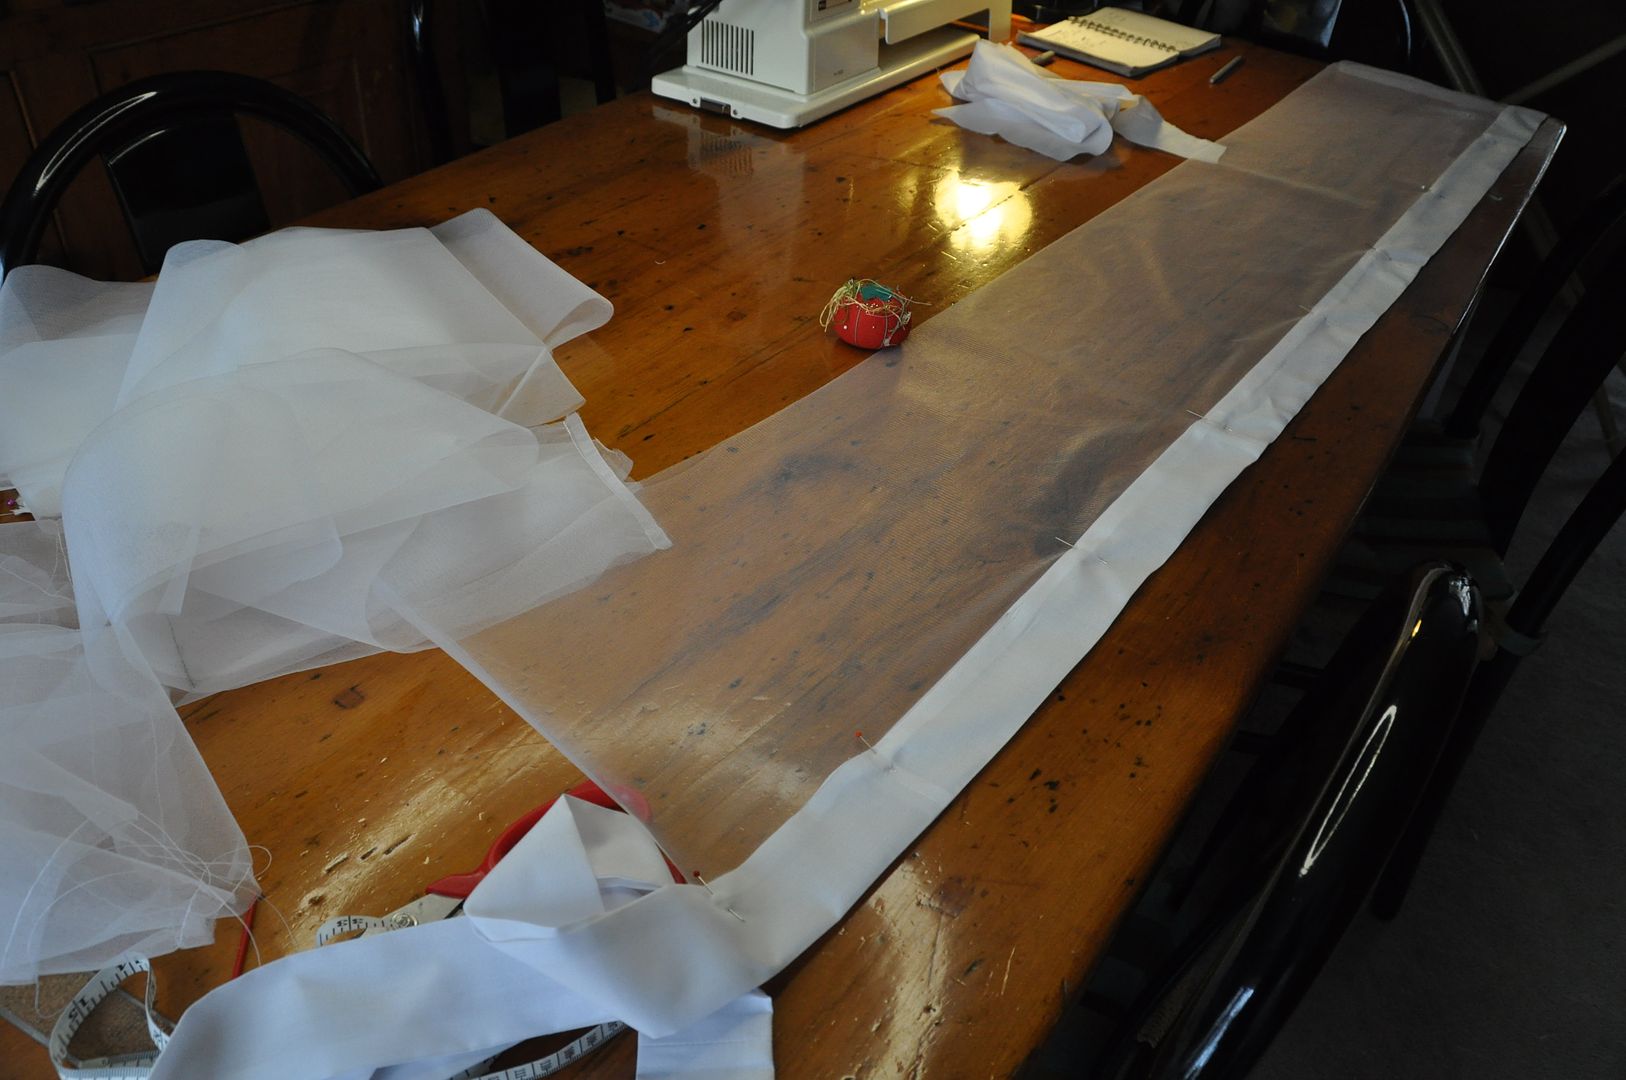
After determining how long I wanted it to be, I cut as many strips as I could of crinoline in each width I needed. I sewed these together, with french seams.

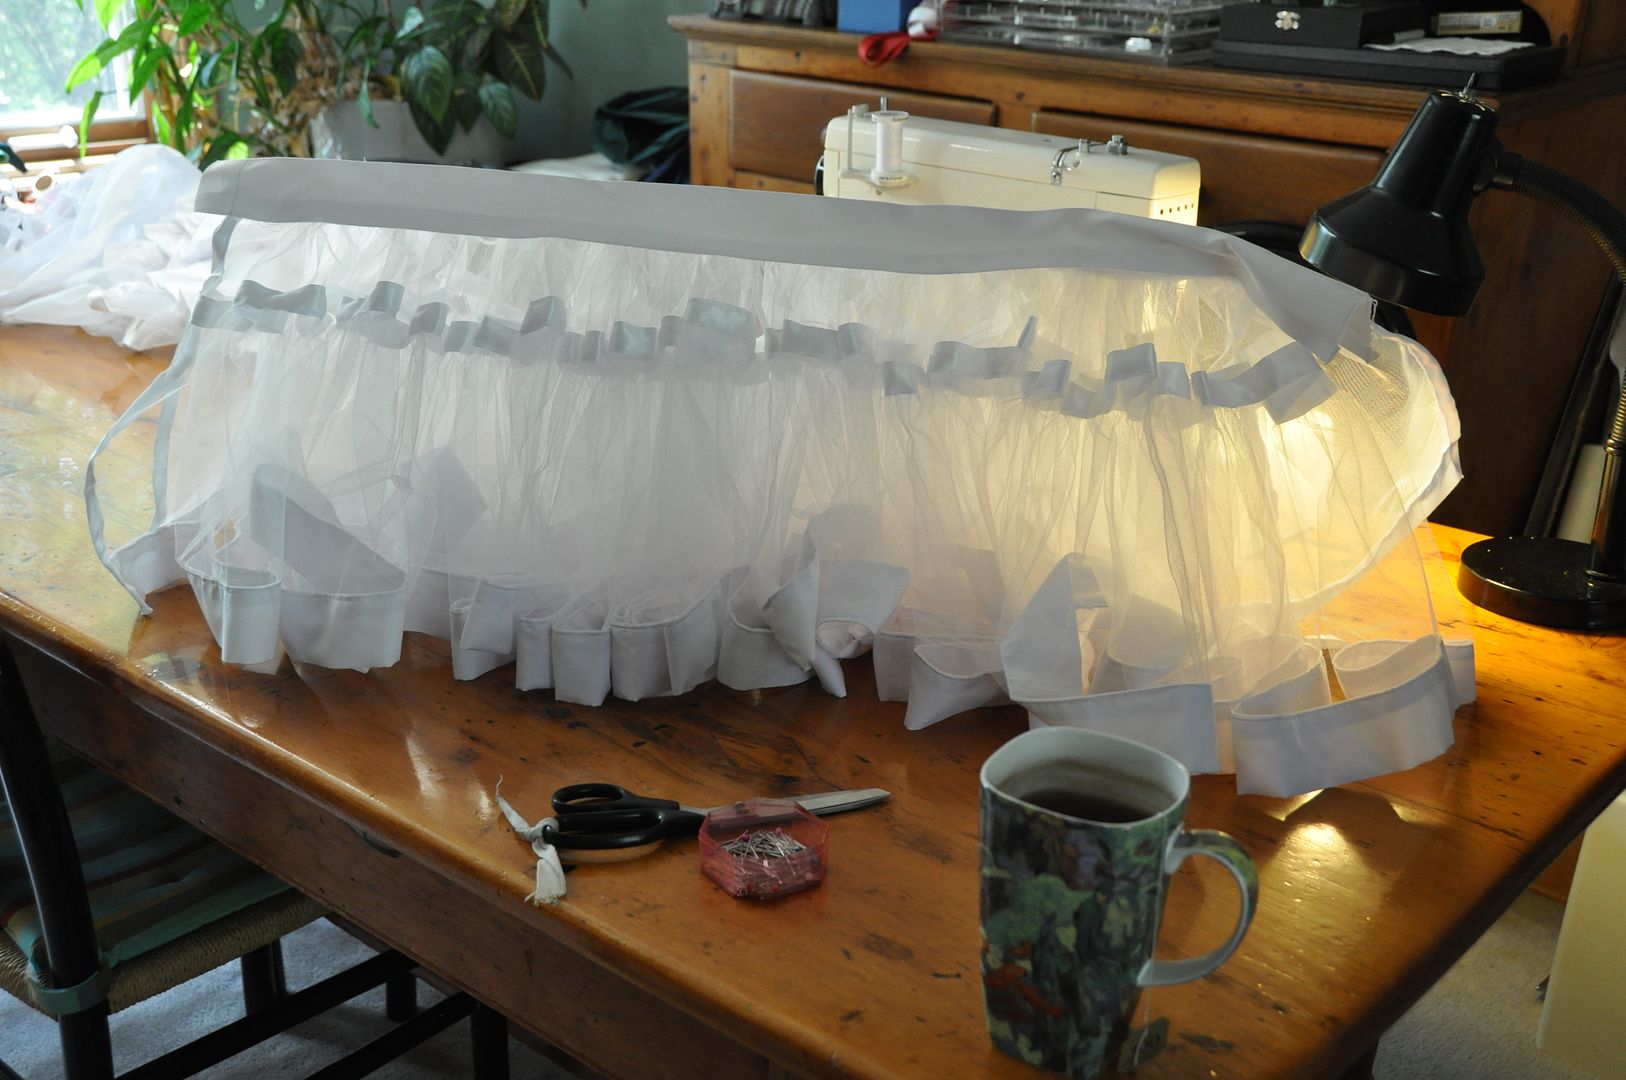
Much like layer cakes, petticoats are easiest to construct from the bottom up. You make the bottom tier first--finish the hem, ruffle it along the top edge--then attach it to the tier above and repeat until you get to the waistband. You make each layer separately.

You can see that each layer in this petticoat has 2 tiers of crinoline--a small one at the waistband. This was to cut down on the already substantial bulk that would have to be sewn into the waistband.

To finish the bottom hem, I created a strip of broadcloth to fold over the bottom edge. This created the look I wanted for the bottom visible edge. While still having the structure that crinoline provided. Making the petticoat entirely out of broadcloth would have been far too flimsy.

To give you an idea of just how much fabric this is: the petticoat can stand on its own. This is only 2 layers, this is before I decided to make a third.


After making layer number 3, I also made a simple white circle skirt (1 full circle) to go over top of it. Like the blouse I made a ruffle to add along the bottom edge. This was long enough so it would be visible below the edge of the skirt.
To give you some perspective, this is how much petticoat I put into this costume. And I could have done more. I would probably have used a stiffer crinoline layer.

This one is 3 layers of crinoline, plus a white circle skirt with a ruffle along the edge over top.


The completed dress looked pretty good!

Wednesday, December 3, 2014

December Update

In the middle of my crazy exam week (3 exams back to back!?), but providing I emerge unscathed I should have some new content for you all in the near future! (Meaning next week.) Switching to a 1 post every 2 weeks schedule for the next 2 months as I am running out of new content--the content I have right now won't last me until April. hahaha New content coming next tuesday!

Today I finished and presented my set model for the play My Fair Lady in my set design class. That project took a long time, but I am glad  I got it done and I was able to present a piece I am proud enough of to put in my portfolio. I will do a more in-depth look at my model soon.

After I finish exams I have about 2 weeks to work on my design for my independent study project. Excited to have some solid time to sit down and work on that.

I am leaving for a 2 week vacation in Japan on the 20th of this month! Super excited to visit my sister and check out all the sites in Toyko and Kyoto! I will be buying many cute things. And maybe some fabric. ;D Be sure to follow me on instagram if you want to follow my crazy shenanigans on the other side of the world.

But since I am going on vacation, I will not be making my Christmas gifts this year, so I will not be generating much new content over this break. 

In other news, this past month I was presented with a scholarship award: The Harry and Jean Malabar Costume Award from the Ryerson Theatre School. I am so thrilled! It is an award for a student who has shown skill in costume design and construction. The funds from that will be going towards financing my independent study, as well as some future costumes.

That's all for now folks! Look forward to new content coming this tuesday. :)

Thursday, August 14, 2014

Forest Guardian - Wig, Mask, Bow & Arrows

[Sometimes life gets in the way of fun, most notably when writing a final essay for school takes several days longer than expected... Finally posting last Thursday's blog post. :P I will be carrying on as normal from here on out!]
Now, on to the fourth and final part of my Forest Guardian costume: Wig, Mask, Bow & Arrows. (Not necessarily in that order.) If you are interested in the other sections, including my design process, accessories, and embroidery, check out parts one, two and three respectively!

The mask was actually the first piece I started on. I began this part of the project almost a year ago now (after I returned from Otakon 2013!). I knew I wanted to make it close fitting to the face, like I had designed it, meaning I knew I wanted to cast the piece from the very beginning.

I started by getting a friend of mine to do a life cast of my face. (Ian, who has helped me out on many other projects before, most notably: Nickel and Asuna's cast armour pieces). I didn't do this myself because a) it is impossible to cast your own face, and b) I didn't know how to do it last year. (But now I am wiser!) I will not go into explaining the details of life casting in this post, and will simply skip ahead to when I actually began on the mask itself.

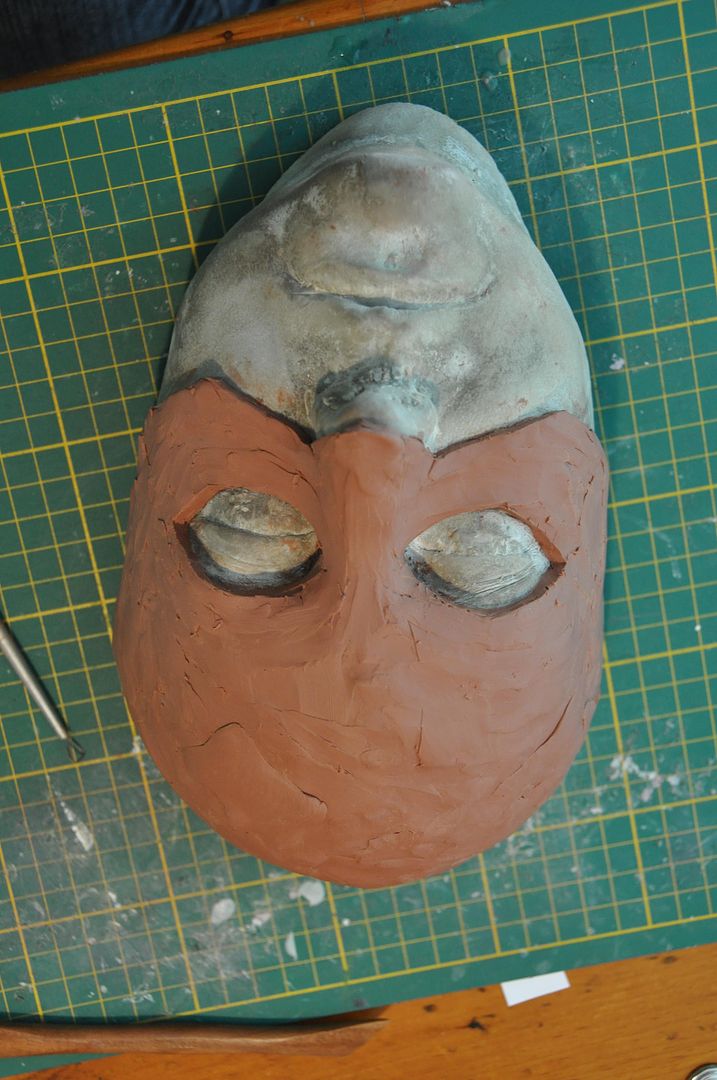
After I was handed a concrete replica of my head, I began sculpting my mask piece. I started by marking out the outline of the mask itself in pencil, ensuring I had the eyeholes and bottom edge looking more or less symmetrical. Then I laid down a layer of clay about 1/4" thick over the marked area. Note: If you are casting, always make sure you are using a sulfur-free clay!!!
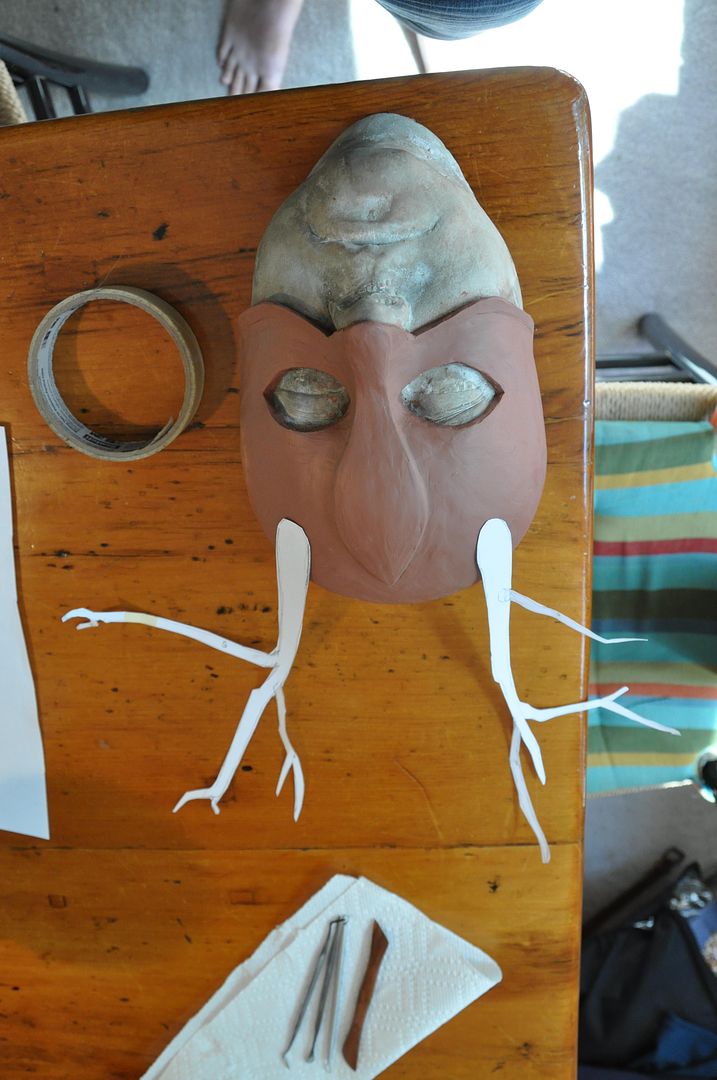
Then I began to smooth out the clay and add in the raised details. The smoothing was aided by 99% alcohol, which worked pretty well.

Then I drew an approximation of what I wanted for the antlers. Using these as a guide I sculpted my antlers out of a hardening clay (called apoxie sculpt) over a wire frame for stability.

The antlers were sculpted separately from the mask piece because casting the mask and antlers as a singular entity would be next to impossible.

Most of the materials used here were left over from my Asuna costume, which I had purchased with this project also in mind.
Once the antlers had cured completely, I sculpted 2 sockets which they would slot into on the mask itself. This would ensure they would bond well with the mask and not be at risk of falling off later under their own weight.

Then I created the negative mold for my mask. I used a product called "Rebound 25" which is a silicone rubber. I mixed the 2 parts together according to the box instructions and slathered it over my mask piece. It took about 2 layers. Once that cured, I made a plaster bandage 'mother shell' for support. Then I de-molded it.

Next, I made the final pull of my cast out of a product called "Shell Shock", which is a plastic. Instead of using the life cast of my face as the 2nd part of the mold, I chose to instead 'slosh cast' the piece. Since my product had a short work/cure time, this was acceptable choice. I painted in my splash coat (first layer) carefully, making sure it went into all the nooks and crannies, and making double sure there were no air bubbles. Then I added a second and third layer as necessary.

I used paperclips to hold the mold and shell together at the edges. Admittedly, I made a bit of an undercut when I made the mother shell and had to break the edges to get it off the initial sculpt. It still worked for this cast, but in future I will try not to do that...

Pictured below are the three parts: the sculpt, the negative mold with mother shell and the positive cast.
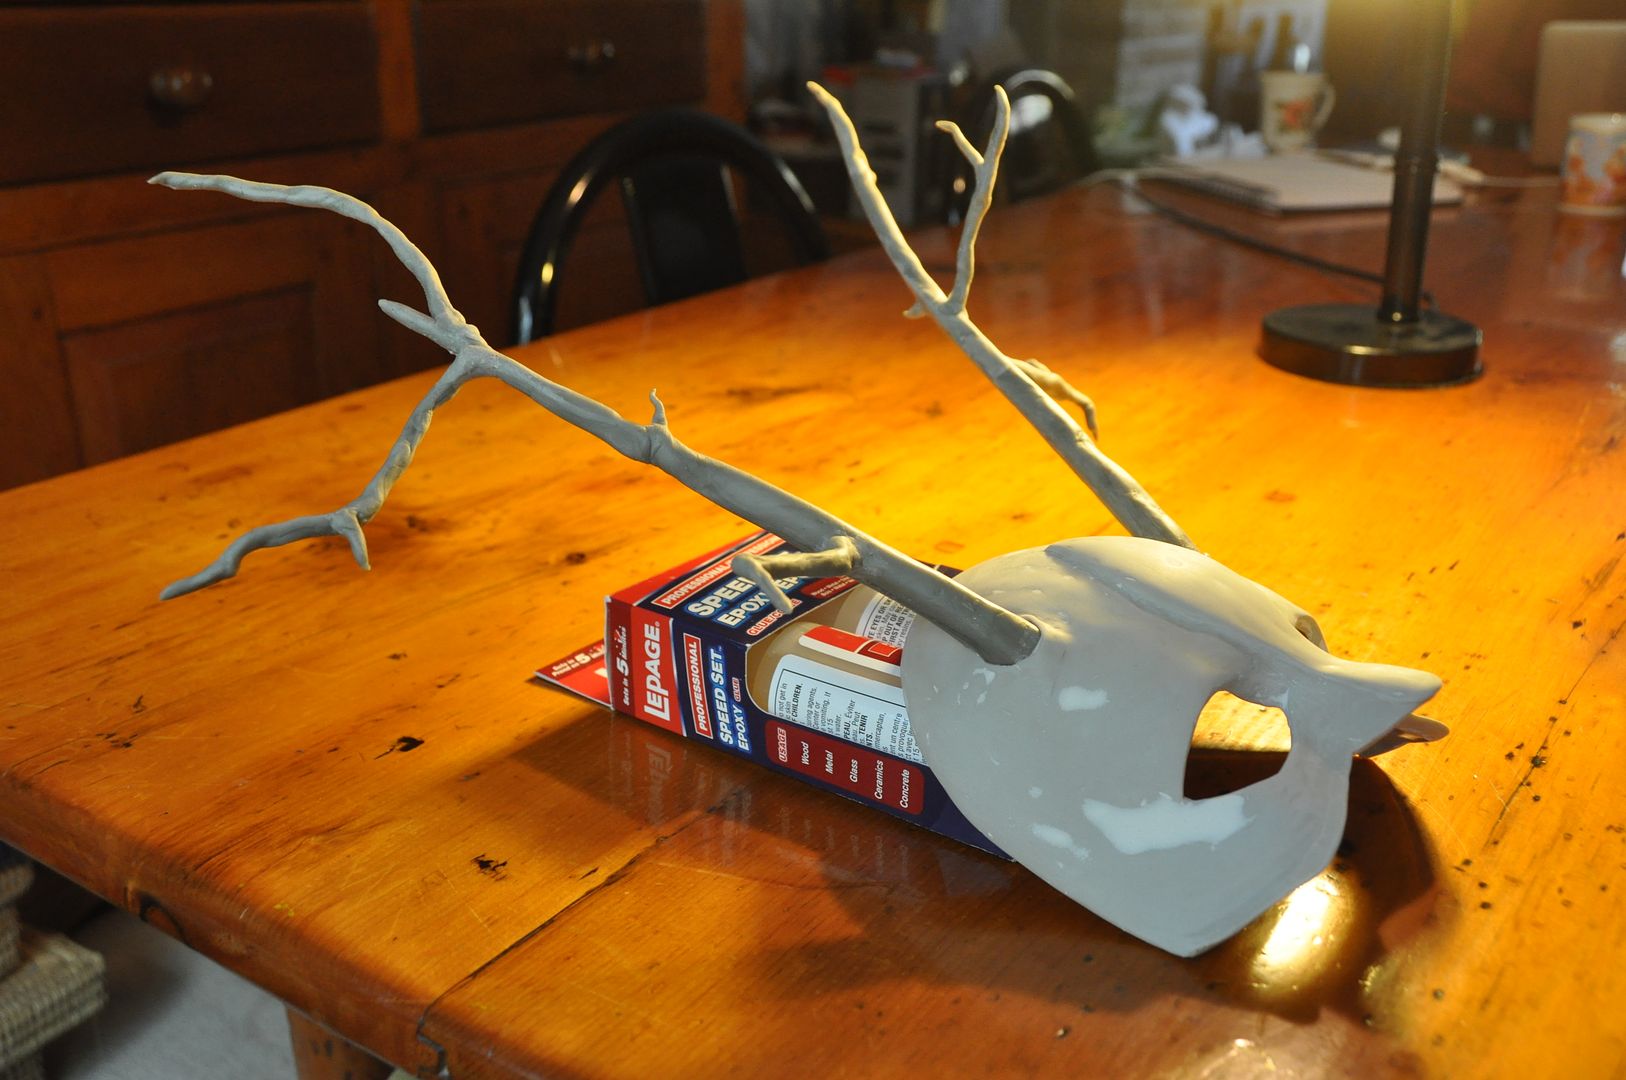


Then I cleaned up the cast using a dremmel. I had to round out all the edges, making sure there were no sharp points against my face--particularly in the eyeholes. I also had to thin down the forehead area in the back of the mask, as it was a bit thicker than the rest of the mask, making it not sit snugly on my face.
I filled any air bubbles and sanded the whole piece to be even smoother. Using a really strong epoxy I glued the antlers into the sockets. I later drilled 4 holes in the mask to add on the ties.

Fast forward several months to the next piece of this project, the bow and arrows.  When I started this part of the project this past March I knew there was going to be a slight problem: I knew approximately how I wanted to make this piece, but I didn't have the proper tools to do it at home. 

I was taking a scenic carpentry course at the time and brought the draft of my bow to my prof, asking his opinion on how best to make it, while also requesting to use the shop outside of class for this personal project. Since a) I was well ahead of the class on my furniture project, and b) we are such bros, he let me use both the tools I needed and found me a piece of hardwood to make it out of! :D

The bow itself is constructed from 3 pieces: 2 arcs made of poplar and a dowel for the center hand grip. t was important that I make the pieces out of hardwood, because although the bow itself would not be under tension, a softwood would splinter when being cut/sanded or would break very easily later. I didn't want this piece to be too fragile!
Using my full scale draft, I traced the 2 arcs onto the wood. These were carefully cut out using the bandsaw. Then using a spin sander I rounded out the corners and tapered the bow into the final shape. This took quite a bit of time, but I am very happy with the result! To get it extra smooth, I used a fine grit sandpaper and finished the job by hand.

To attach these pieces at the center, I drilled a pair of holes into each of the joining surfaces and placed dowels into them. Using epoxy, I glued the whole thing together. The dowels in the joint would strengthen it much more than gluing 2 flat surfaces together would. Also by having 2 dowels in each join this meant I wouldn't have the pieces rotating in place.


Next I used apoxie sculpt to make the detailed bits on the end of the bow.
For the arrowheads I was initially going to sculpt them out of apoxie sculpt too, but it wasn't achieving the desired look so I switched to clay. Then I molded the arrowhead and cast 7 arrows. (I was too lazy to make more.) I feel I need to improve my arrowhead casting method, as they didn't turn out as clean as desired. (For those who know casting: it was a 1 part box mold with a slit in it.)


Next I started the paint job. The mask, arrows and bow were done all at the same time. Any areas I didn't want silver were covered in painters' tape. I primered black, then sprayed silver in several coats, then sanded the pieces to age them.

The wooden part of the bow and arrows was then stained with a "cherry" colour and finished with a clear coat. I sanded and coated it a second time to make it extra smooth.

Then I hand stitched a piece of leather over the hand grip to match the rest of the costume.


The last detail was to add feathers to match the rest of the costume. The ones on the mask were tied on, the ones on the arrows were glued into slits that I had carefully cut with an exacto knife.

I measured and added the ties to the mask, finishing off the ends with clear nail polish so they wouldn't fray.

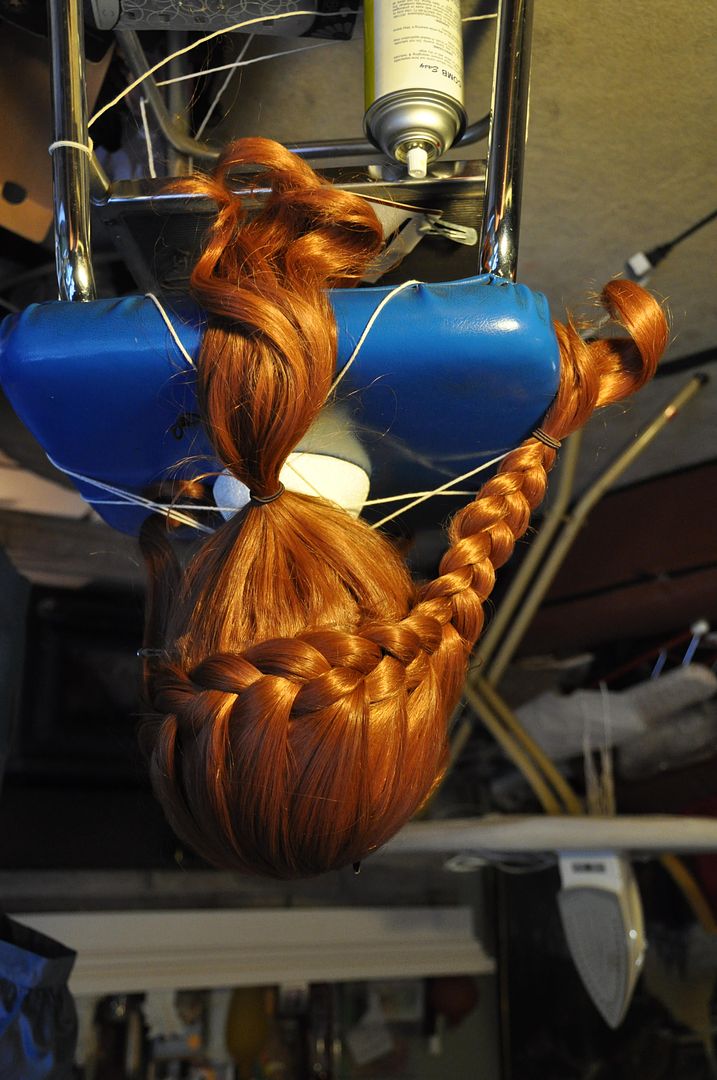
Now lets talk wigs! The wig was actually an "Amy Pond" wig I ordered off of Five Wits. (As a side note, I love the names these guys give their wigs!) I picked it because it didn't have bangs, which would get in the way of the mask. It had arrived before Costume Con, but I had no time to style it, so I didn't end up wearing it to that event.


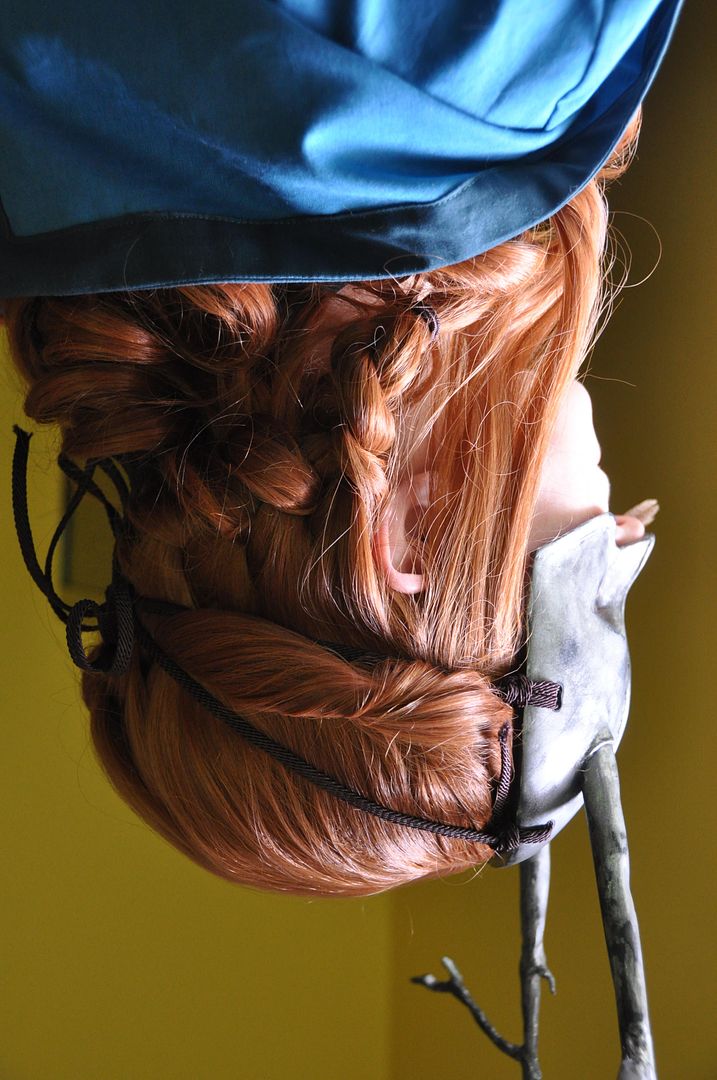
The style I eventually decided upon was relatively simple. I french braided horizontally across the back of the wig, only taking hair from the top. I left the 'sideburn' sections to hang freely at the front, but the rest of the hair was pulled away from the face to reduce bulk under the mask. From the opposite side of where I started my braid I created a twist with the front bunch of hair, which was pinned and threaded through the braid at the center back. I stuck a feather in the end of the braid for good measure.

This style worked well because it helped both keep the hair away from the face and also provided an 'anchor to tie the mask to at the back. Having the 4 ties meet at the center back under the braid kept the mask from sliding down my face as much as it did without the wig.

Overall I really love the finished look with the wig.

I hope to do a full photoshoot of this costume in the forest sometime soon, just need to find time (that also coincides with good weather and a photographer)... Also my bow will be making the trip to Otakuthon without me! I am lending it to a friend for his costume, which is some kind of mouse archer from a game I am not familiar with.

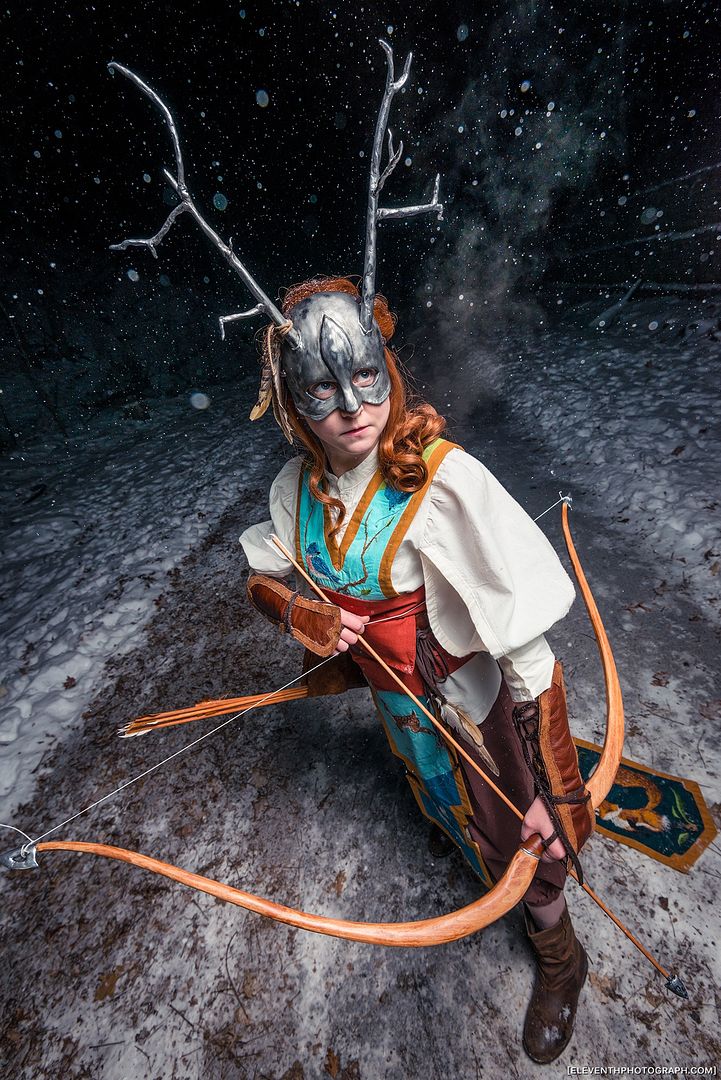
[Edit: The new snowy photos are from my winter photoshoot I did with EleventhPhotograph! Many thanks!]