Happy Halloween everybody!
Halloween is one of my favourite events because it gives me an excuse to wear costumes in public between the convention seasons! Hahaha This year I will most likely be wearing my Alice costume, provided that the horrible weather doesn't ruin my dreams. I was going to wear Nickel out and terrorize the neighbourhood (because the glowing lights look fantastic in the dark!), but with the impending bad weather we are going to have this week I don't really think it's going to be a happening thing... which is too bad.
In other news: in this month alone I have surpassed 1K hits on my blog! WOW. Thanks for all the support guys! Most surprisingly, almost half of these views have come from the USA!
I have at this point finished the posts on my summer costumes. Now getting really back into school. There will be some more posts coming over the next month detailing some of my personal sewing projects, so look forward to those! ;D
In other rather unrelated news: last month I saw the 25th Anniversary ZELDA Symphony, which was bloody amazing!!!
That's all for now! Mischief Managed!
PS: Don't overdose on candy, dudes!

Tuesday, October 30, 2012
Tuesday, October 23, 2012
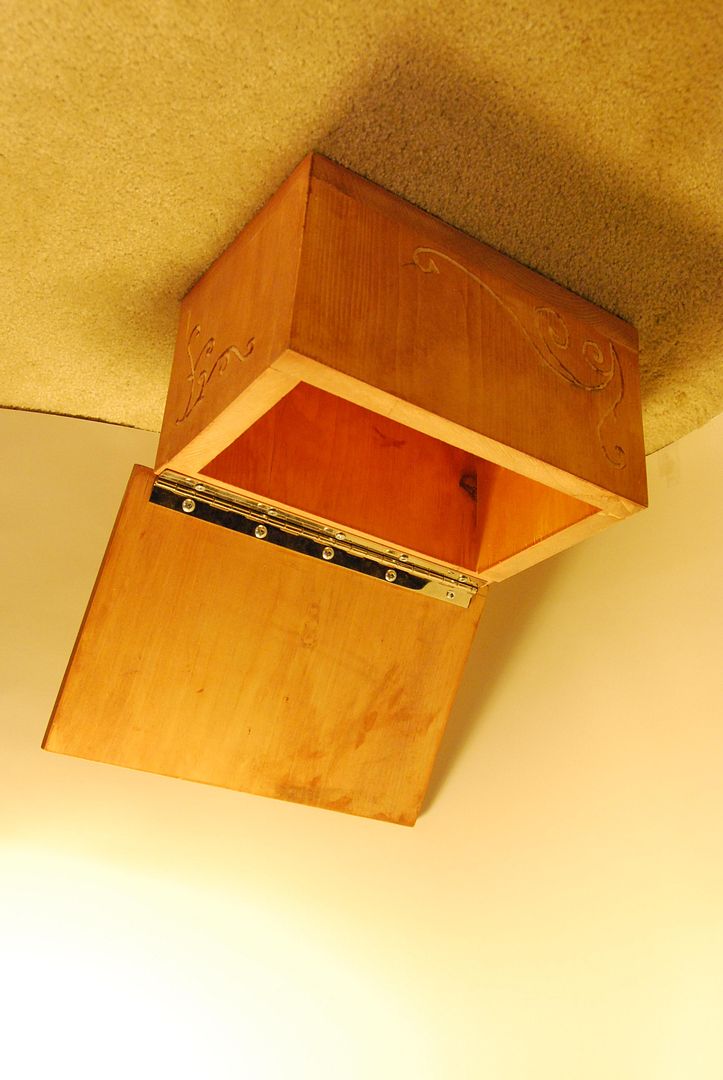
Engraved Wooden Box

 Hey all! Here's a quick look at the box I made for my prop project at school!
 I used 3/4" pine, cut with a chop saw to ensure all the angles were nice and square. For the detailed edge on the lid I used a fancy router to carve that nice detailing!
The box itself was knocked together with wood glue and brad nails. The holes were filled with spackle and then sanded smooth.
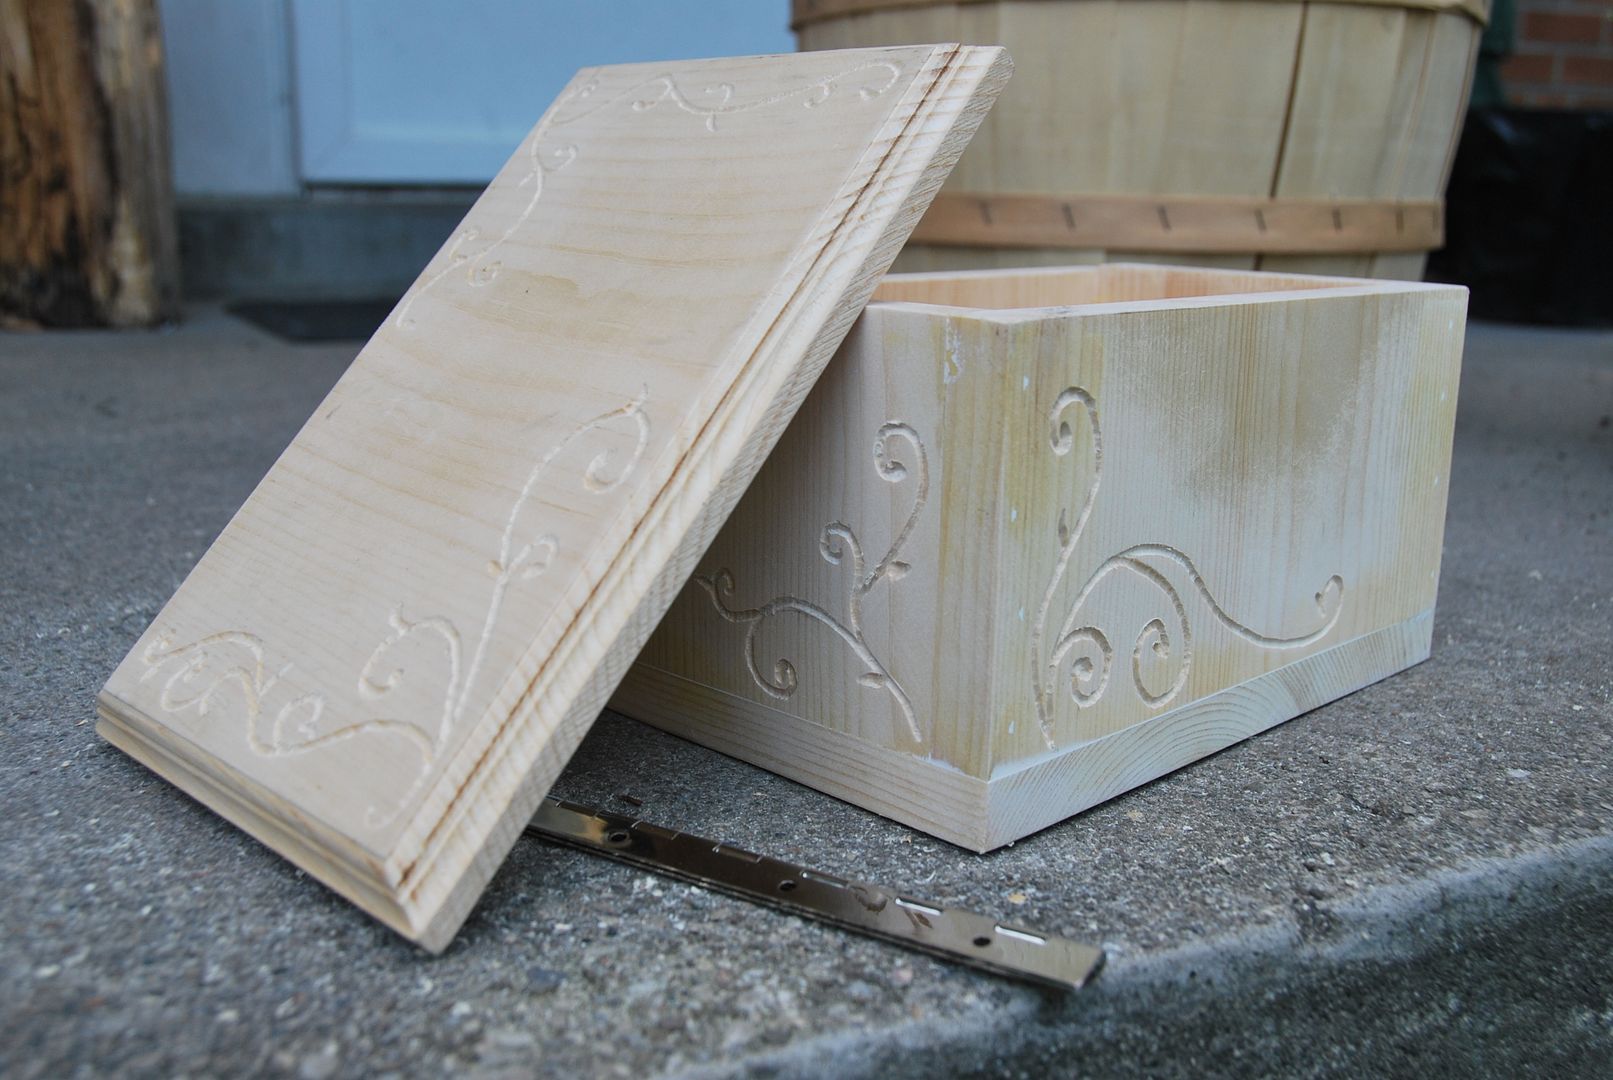

My main goal with this project was to learn how to use my dremel tool for engraving. The vine detail was my own design, engraved with the dremel.
The lid is attached with a hinge.


I am going to use it as a new box to hold sewing tools!
Tuesday, October 16, 2012
Cosmo - Wand - Fairly Odd Parents
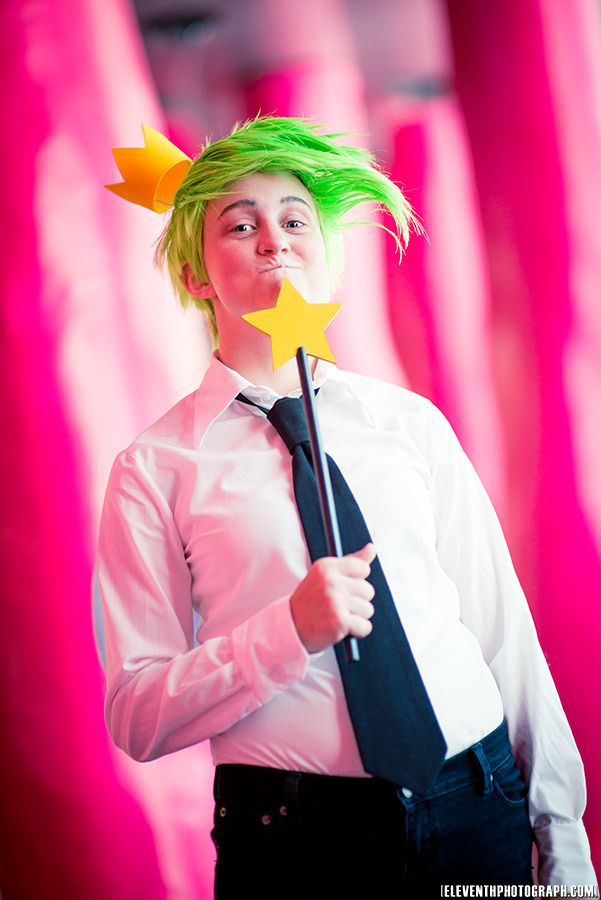 For the last bit of my Cosmo costume: here's a quick look at how I made my magic wand. It was really simple.
For the photoshoot, go here. ;D For the wig tutorial go here, and for the wings and blouse go here!
Probably the hardest part of the whole process was making the trace of a symmetrical 5 pointed star. I made this piece out of 1/4" masonite. I used a protractor and marked every 36 degrees around a central point (that gives us 10 marks equal distance apart. Because 360 degrees divided by 10 is 36. For those of you who cared about the math.) Then I drew a line from each mark to the center. 5 marks were the points and the 5 in between those were the 'valleys'. I made the distance from center to tip the same for all points. Then I did the same for each valley. By doing this achieved a perfectly symmetrical shape that I could cut out.

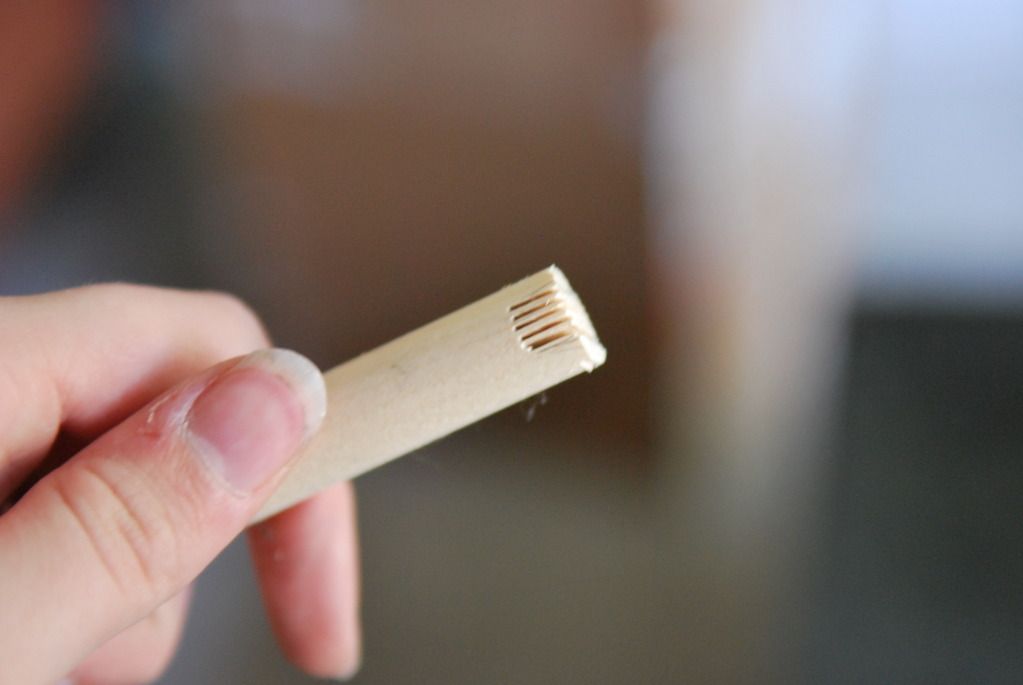
Then using my bandsaw I cut into the end of a wooden dowel, creating a groove that I could stick the star into. I rounded out the end of the dowel using some sand paper.
I cut the star out on my bandsaw and sanded the edges a bit so it wasn't so lethal.
I sanded down the handle to smooth it out a bit, so the wood grain would be less apparent when painted.

Tuesday, October 9, 2012
Cosmo - Wig & Crown - Fairly Odd Parents
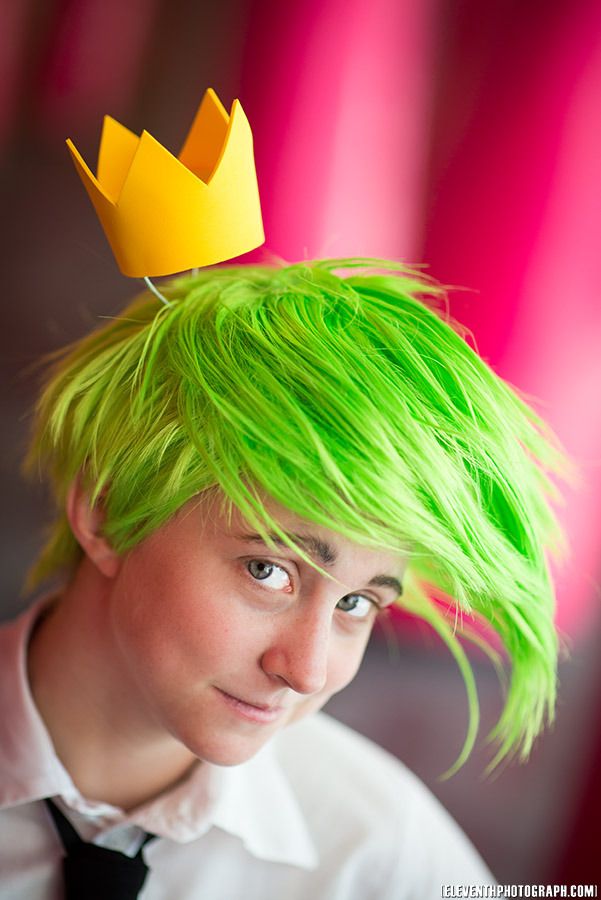
Let's take a look at how I constructed my Cosmo wig!
To see how I made the wings and blouse, go here!
For the photoshoot, go here!
Cosmo's wig is probably one of the most difficult I have attempted in quite a long time, but I think it is one of my best works. I am very satisfied with this wig.
In this process I learned how to make wefts, spikes, and how to wash a wig.
 The problem with Cosmo's hair is that it only ever shown at 3/4 view, and that whenever he turns his head his hair flops. In short, Cosmo is a 2-dimensional figure, so how does one translate that into 3D?
My logical decision was to make the hair flop to one side. I picked the right side arbitrarily. One problem with this is that it doesn't look good from every angle, but it is the only way to really achieve this look.


I got the wig off of e-bay. I figured that this would be a good length to style from, as I needed the length in the front for the hair-flop. I did not take into account the fact that the hair flop starts at the back of the top of the head...
On this wig--like most wigs of this style and quality--the hair fibers start from a central spot on the top of the wig, with rings of wefts surrounding that spot spreading out from the center. If you pull the wefts up, you expose the the netting of the wig, which looks awful, but in order to achieve the look I wanted I needed to pull hair from the very back of the top into the hair-flop...
I realized that in order to do this I needed to create extra wefts to sew in and cover the gap that would be created. But on such a short wig, the problem was where to pull the hair from.


Under circumstances that aren't limited by money or time, perhaps I could have bought a second wig that I could have butchered for the extra wefts. However, I had neither luxury. This would also leave me with a lot of leftover hair in a colour I was not likely to re-use. Additionally, I had not realized this beforehand and was unsure if I would even be able to find my exact ebay seller to acquire another bright green wig... I had a difficult enough time finding this wig in the first place.
My solution was to save all the hair as I trimmed the back, so I could accumulate enough to make the wefts. This meant that I had to be careful when making my cuts at the back, because the clumps I took out needed to have enough length and substance to for wefts, while still trying to not destroy the back of the wig with a terrible haircut.

 I take the section I wanted to incorporate to the hair-flop (which was being very uncooperative) and clipped it into place, spraying it a bit to help it stay.
I had to buy a new bottle of my Got 2B Glued, as we had run out of our last bottle which had lasted quite a few wig stylings.

 While the top was drying, I evened out the back and started to work on trimming the sides. I wanted it to be close cut to the ears.


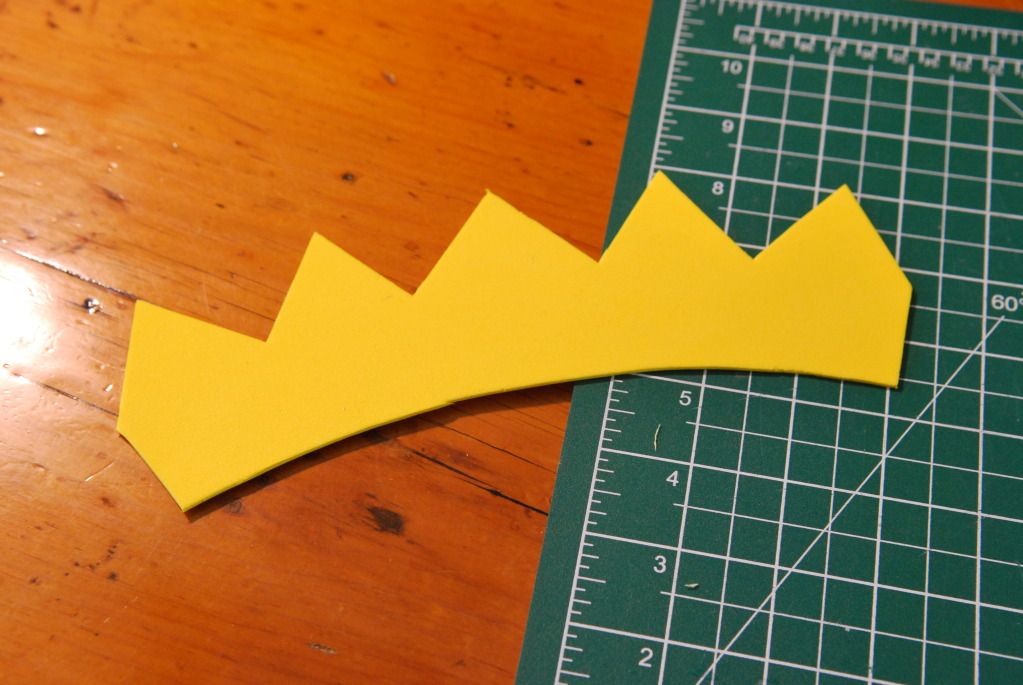 I made the crown out of craft foam! I used weldbond to glue it into a circle, using tape to hold it in shape while it dried.
That was the end result of my first attempt at cutting and styling this wig. I wasn't completely satisfied at this point, but I knew that it was going to get messed up when I sewed in the wefts anyway.
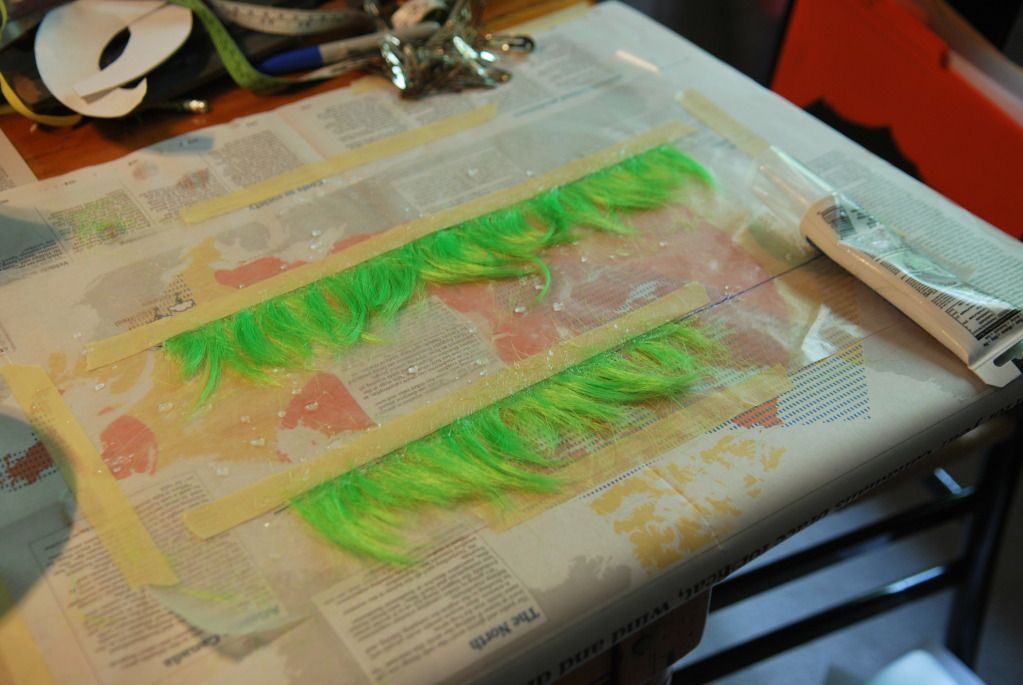
I looked up this tutorial online on how to make wefts. The easy way.
What you do is take a piece of wax paper and tape it down as your work surface. Then you draw a straight line and spread out your loose hair, lining up all the ends with the straight line you drew. Then tape them down with some masking tape. Then you take clear caulking and spread it out along the taped edge. Mash it in with your finger. It will be sticky, so have some water handy to keep your fingers wet--it will help lessen the sticky. Leave that to dry. Once it is dry, flip it over and mash in some caulking on the other side. When that is dry you can remove the tape and presto! Wefts!

 I cut open the netting where I wanted to insert the wefts and painstakingly hand-stitched them in. Then I clipped back the new hair and hand-stitched the hole closed.
 At this point the styling had been messed up quite a bit by the man-handling while I did the hand-stitching, and it hadn't been the best spiking job in the first place, so I decided to wash out my original styling job and do it again.
I filled the sink with water and added a bit of shampoo. I put the wig in and left it to soak for about 20 min. Using my fingers I gently worked apart the spikes. I rinsed it out to remove all the hairspray.

 I patted the wig dry with a towel and the hung it to dry.
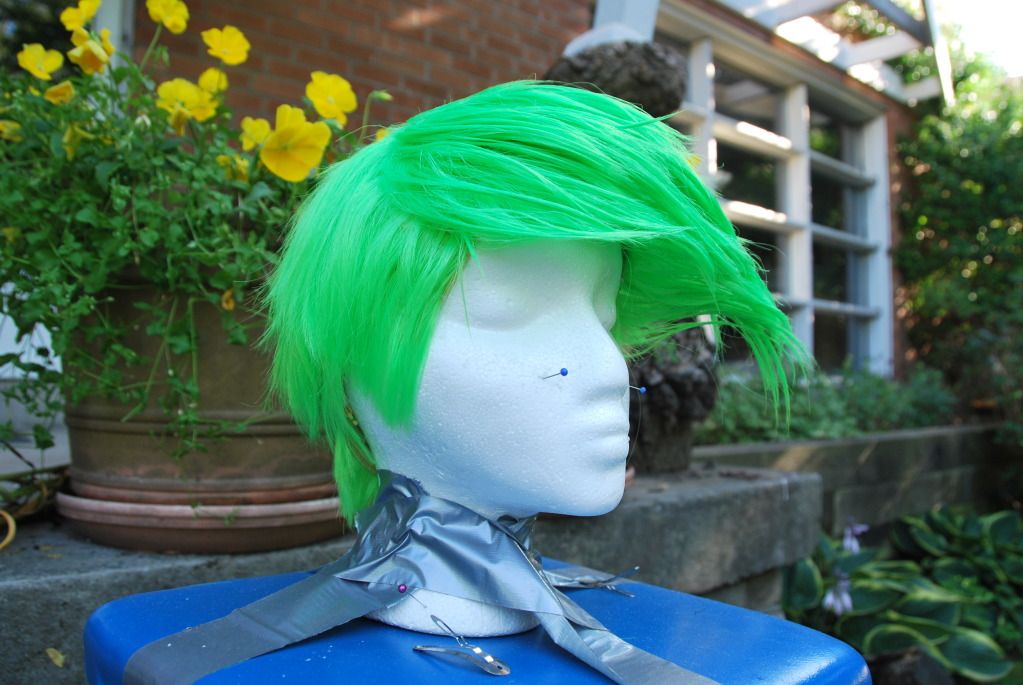
 Once it was dry I pinned it back to the wig head and set up for styling again. One thing that I didn't have for the first attempt was a hairdryer, and I can tell you that it makes a huge difference!!!
I split the hair evenly where I inserted the wefts and sprayed the hair into position.

 Then I began taking sections of hair and spraying them, making sure the hairspray really penetrates the base of the spike so it has a good foundation.
 I kept adding more and more sections, using the hair dryer to set the spikes.
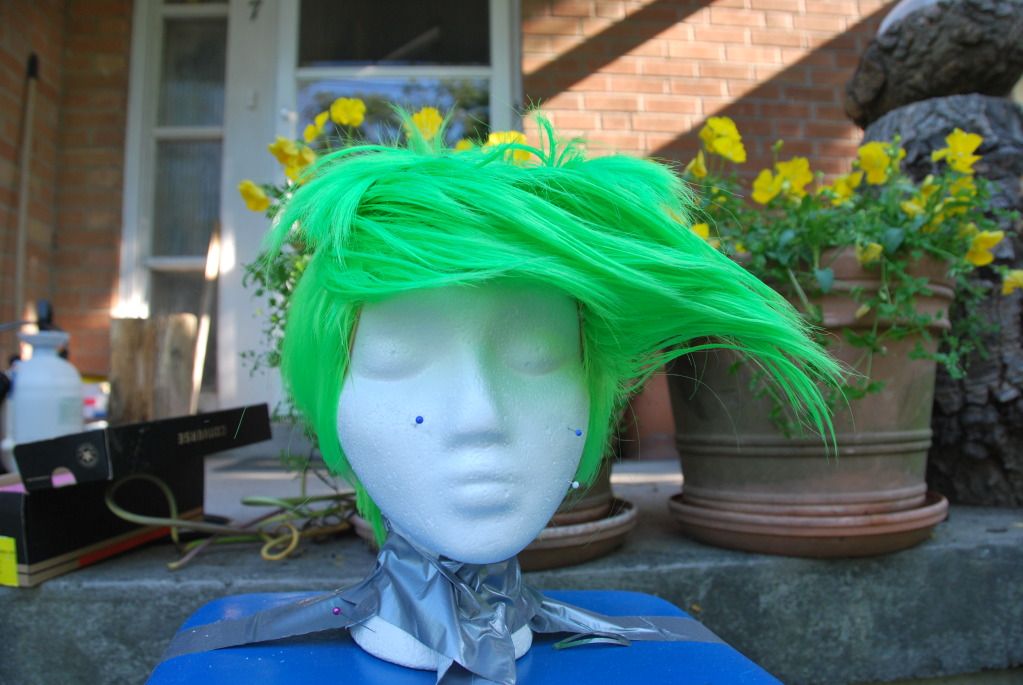
 Then the styling was done!
So fabulous!

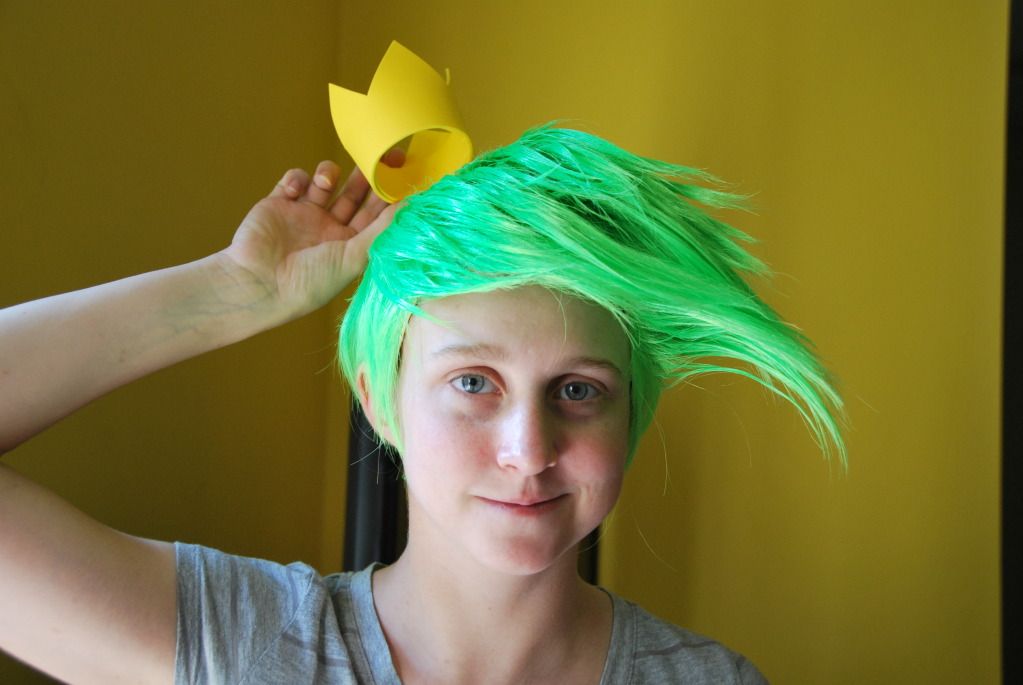


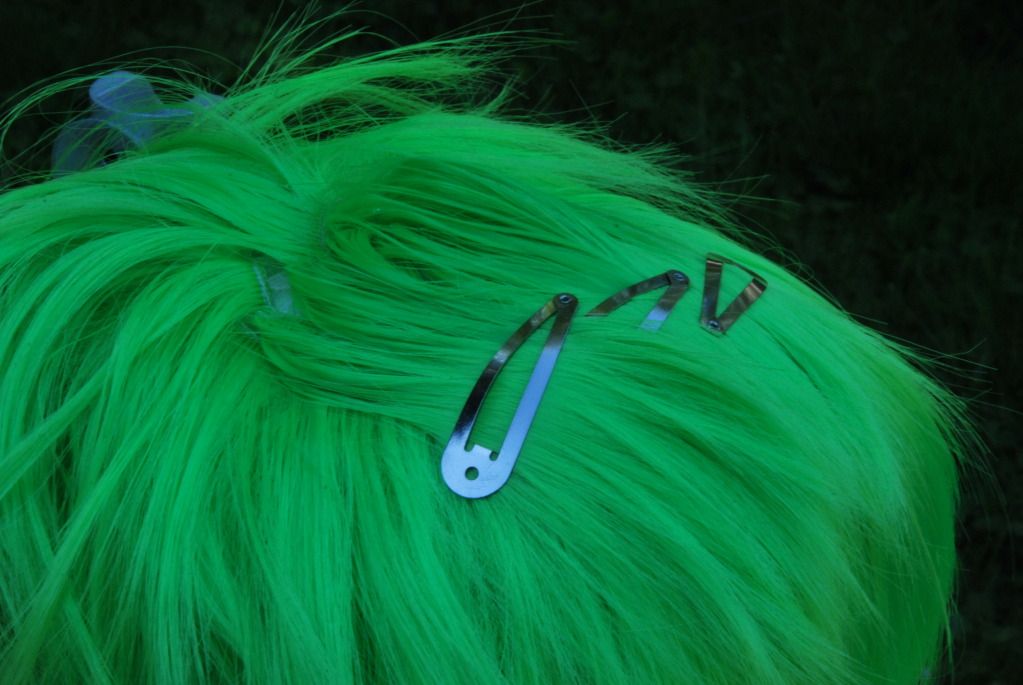
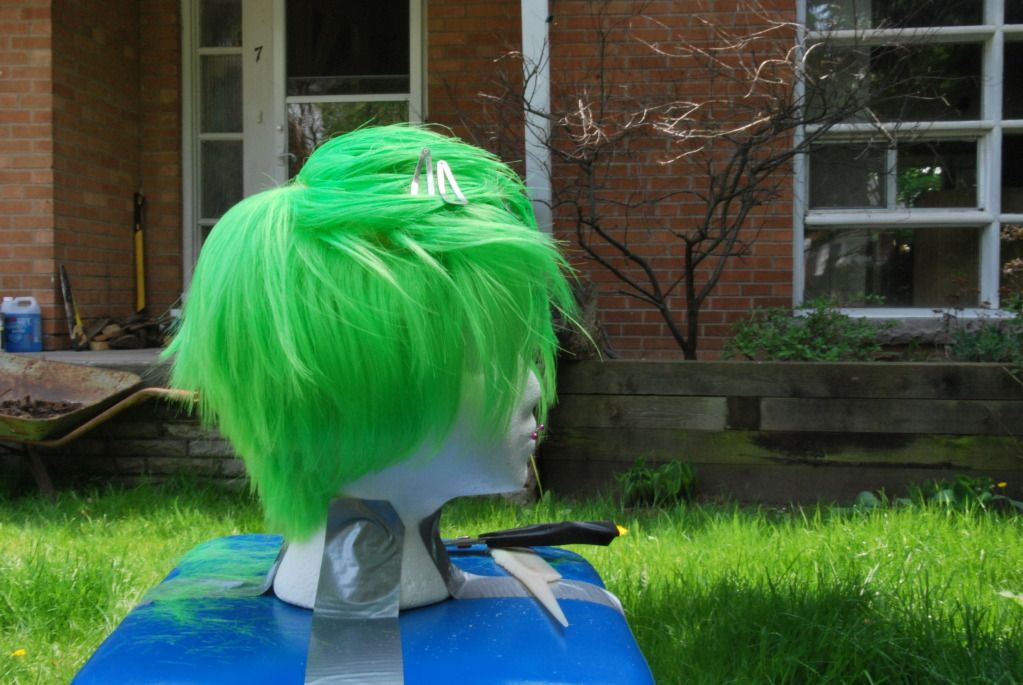
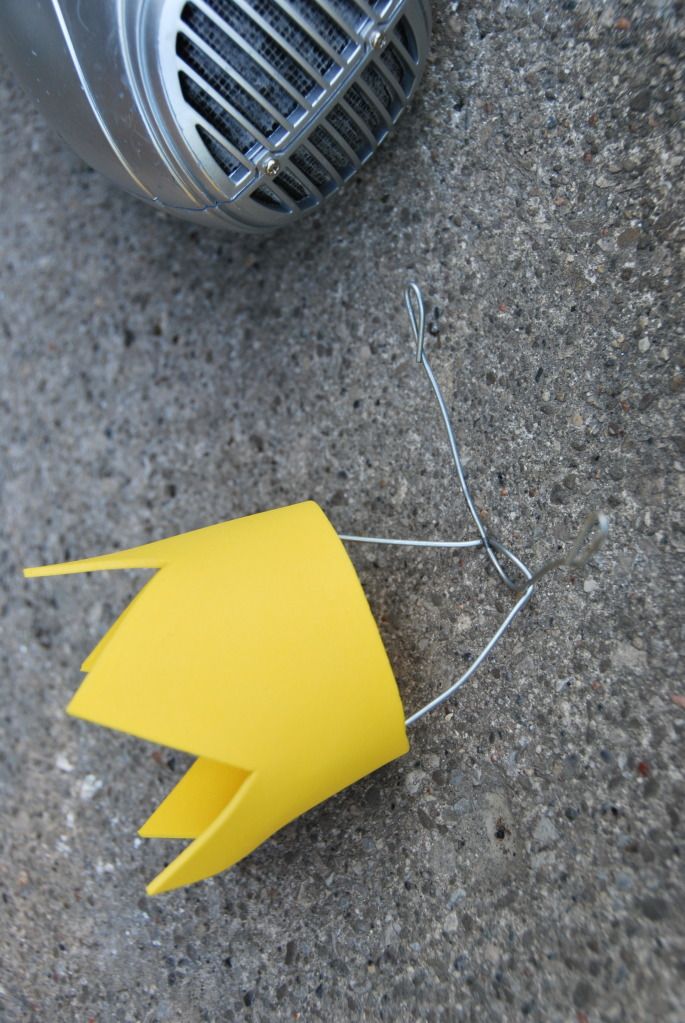 Then I attached my floating crown. The wire was shaped into an X, with the wires bent over at the middle. I bent over the ends so they wouldn't scratch my scalp. Two of the tines were bent upwards, then the X was inserted into the wig. The two tines were stuck out between the wefts, making sure a weft covered the middle of the X. The tines inside the wig were given a slight curve so that they would fit to my head snugly.
An inner ring of craft foam was attached to the crown to hide where the tines attach to the inside. The crown was simply friction fit on.
The way this is attached, the snugness of the wig is what holds it in place, and it is so comfortable I don't even notice it's there. ;D
With that, the crown is done, and so is the wig! :D
Tuesday, October 2, 2012
Cosmo - Blouse & Wings - Fairly Odd Parents
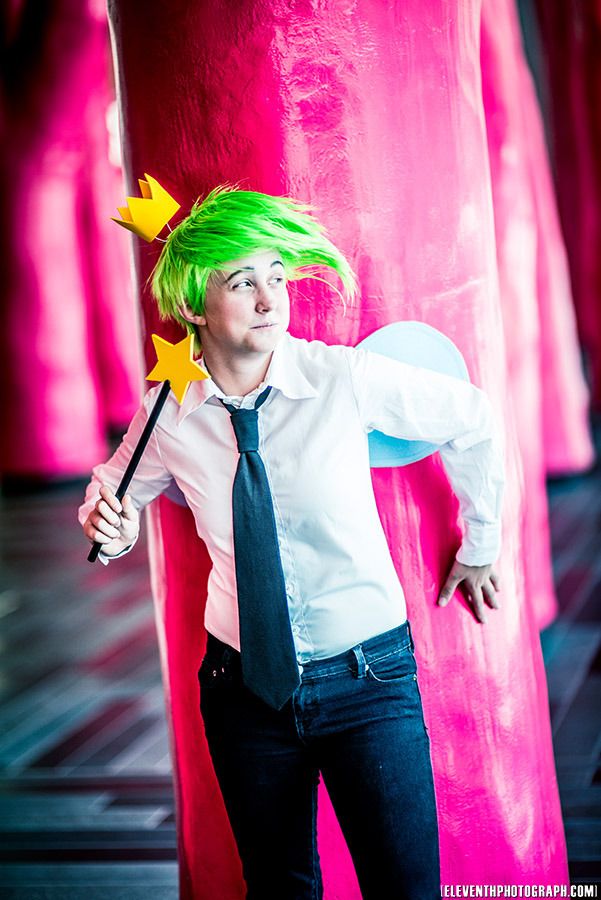 Here's our first look at my Cosmo costume! This costume debuted at Otakuthon this past summer in Montreal. I also wore it to Fanexpo. :D
As a kid, I loved the show Fairly Odd Parents, and of course my favourite character was the ever wacky Cosmo. ;D Such a ridiculous character, it reminds me of the hunt! Haha!
I've seen this costume done before, but I've never seen it done well, so I made it my mission to do Cosmo justice.
Once again Mike did a fantastic photoshoot with me. This one was at the cool pink installation at the Palais du Congres. It's Wanda's colour. ;D Go here to check out the full photoshoot! I obviously take no credit for these fabulous pictures. :P
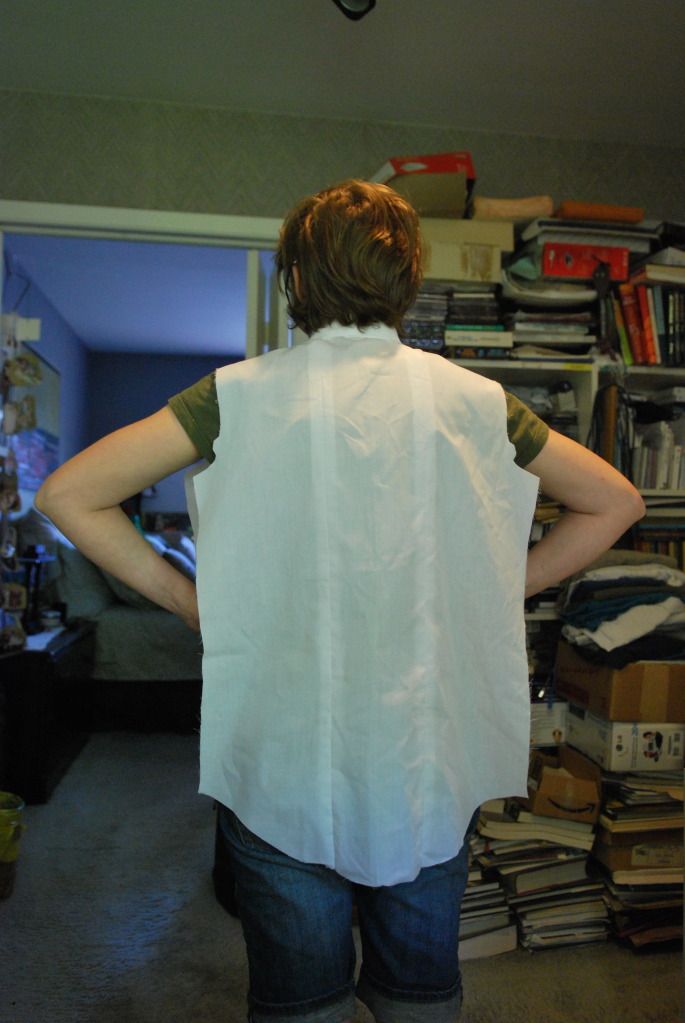
 I based this shirt off the blouse pattern I used for my 10th Doctor costume. (If you want a more detailed look at how to make a blouse, you should check that one out.) My main goal behind this part of the costume is that I wanted the wings to stick out of the shirt, not be worn on top of it, but still be removable so they could be washed.
 My solution here was 2 slits in the back that the wings would stick through. I decided that the wings would be 4" apart. Then I modified the pattern so that the back of the shirt was made of three panels, one a rectangle that was 4" apart between the seams. With this in place, I could finish the shirt and re-open the seams later.
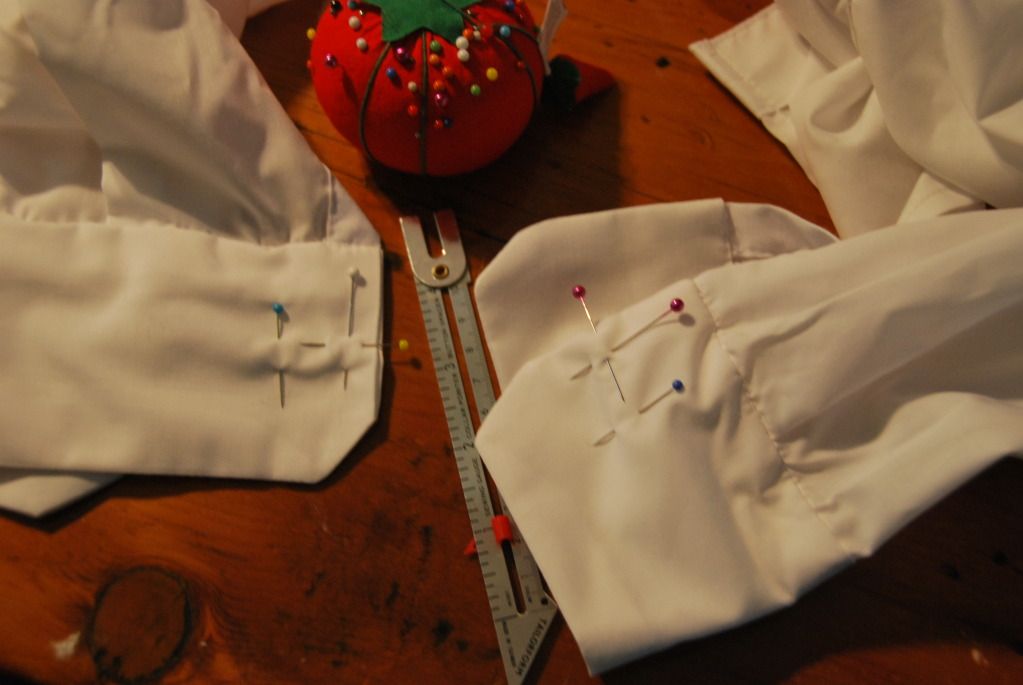
 I sewed up the shoulder seams, finished those, as well as a top of the two back-slit seams.
Then I attached the collar.


Just kidding.
I sewed up the side seams, attached the sleeves and cuffs. Then I measured, put the button holes in, and sewed on the buttons.
At this point I also made some adjustments to the fit of the blouse at the back. Taking it in a bit at the back seams so it wasn't so wide at the lower back.


Instead I decided to scrap that and make them out of felt. I cut 4 pieces of felt to the shape I wanted and then sewed the pairs together. I took a piece of wire that was still attached to the coil and stuck it in to the first wing, pushing it to the very outer edge. Then I sewed around the wire to keep it in place.

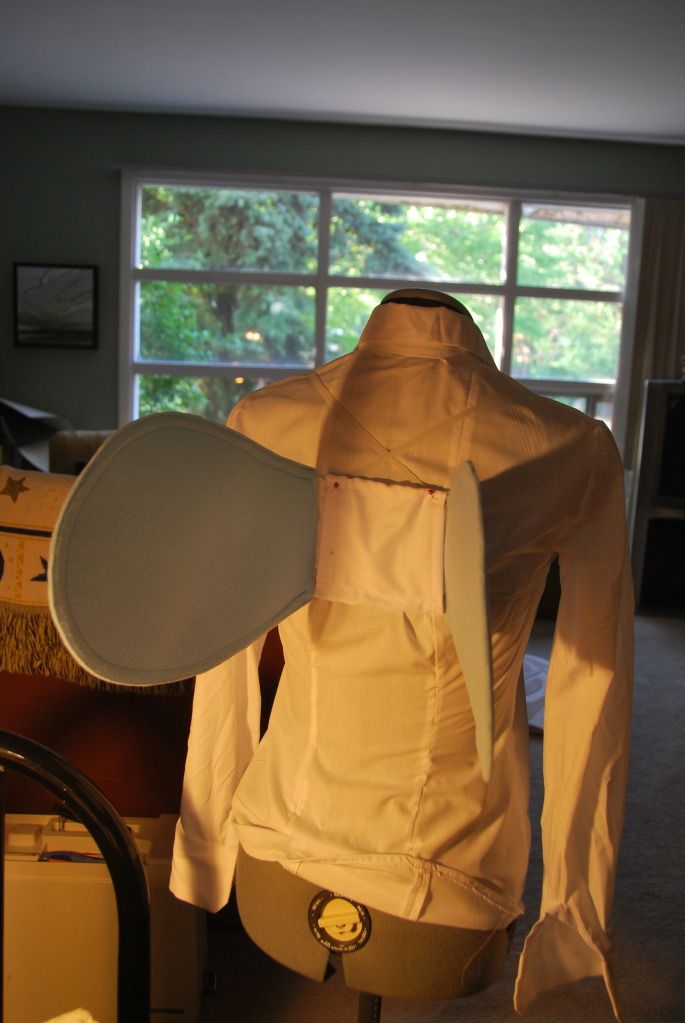
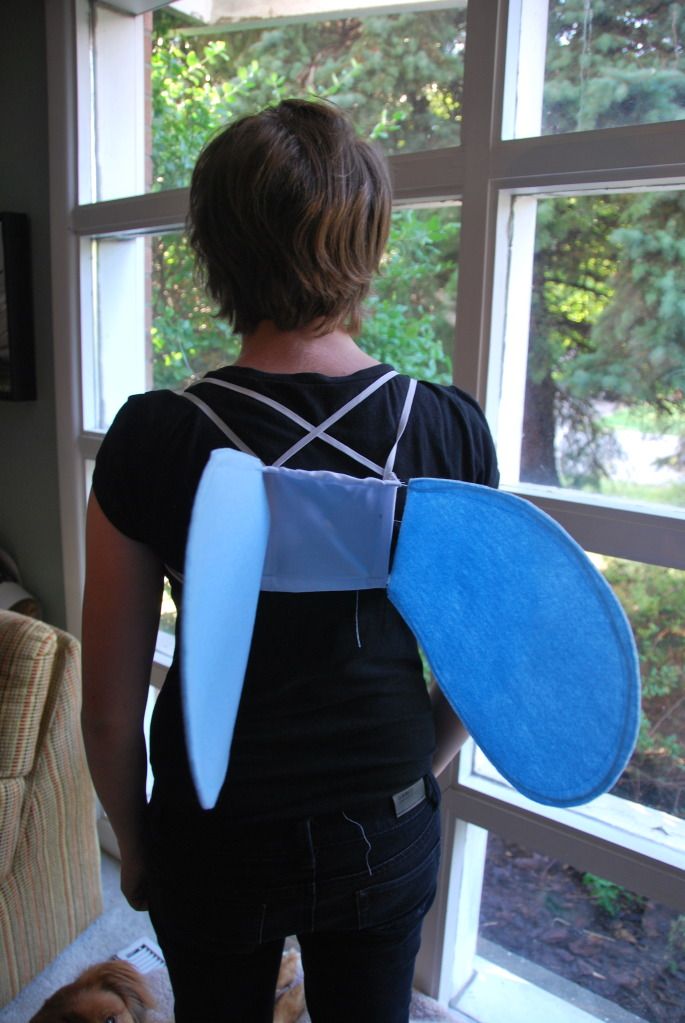

I re-opened the back seams where I wanted the wings to be. Then I finished off the holes, making sure they were long enough to fit the wings through. I carefully stitched in some white hook & eye tape, making sure that the hooks would not bump into the wires where the wings poke out.

 The hook & eye tape closes up the gap under and around the wings.
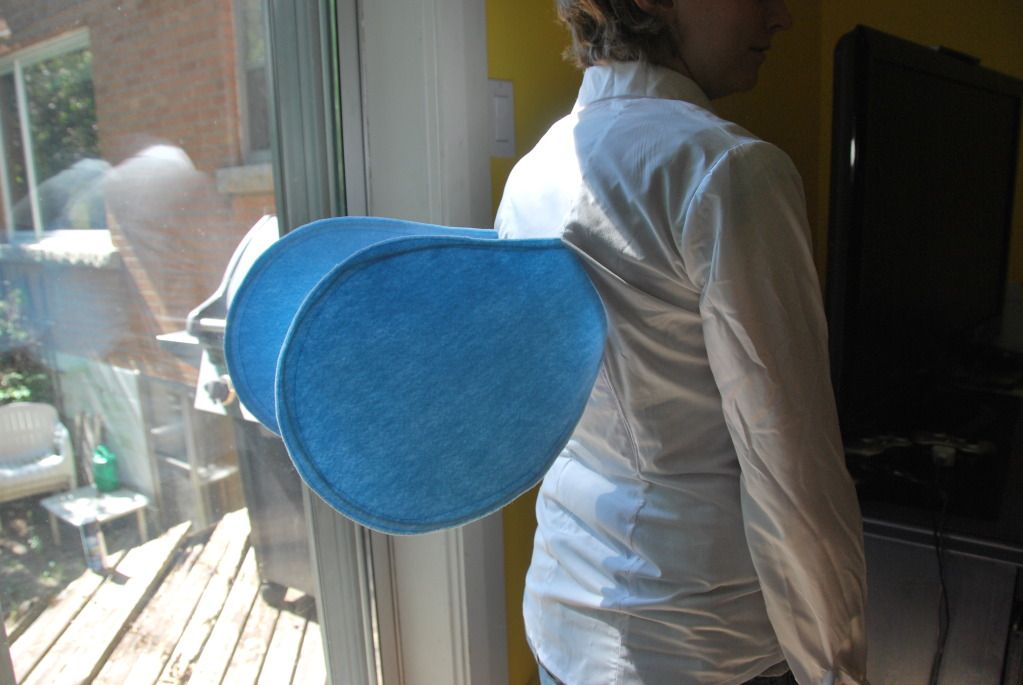 This is a clean way of having wings, without having the straps and rig fully visible over your costume.
 Lastly I finished the cuffs of the shirt by adding buttons. ;D And then it was done!
I think that making the wings both detachable and not over the costume was a small detail that made a big difference for this costume.
Subscribe to:
Posts (Atom)