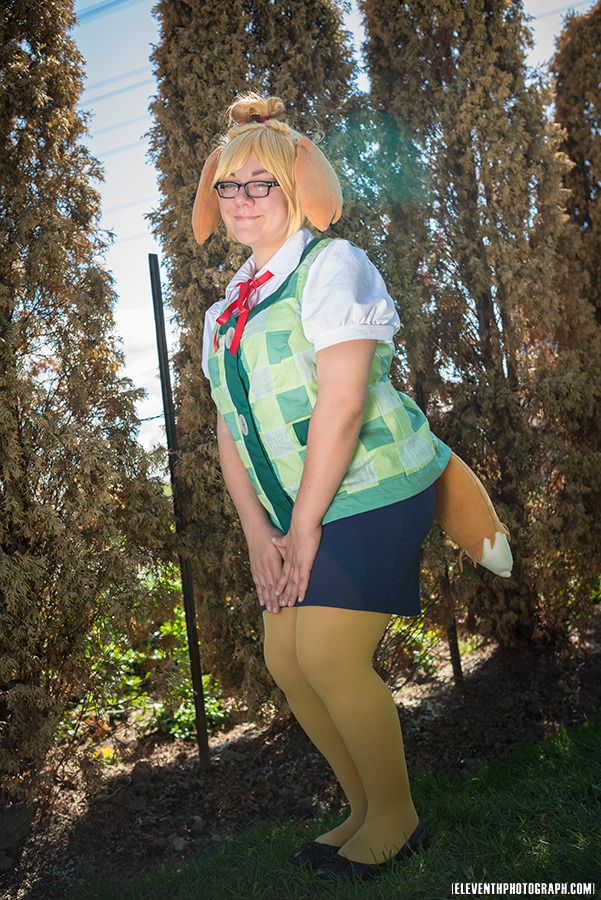
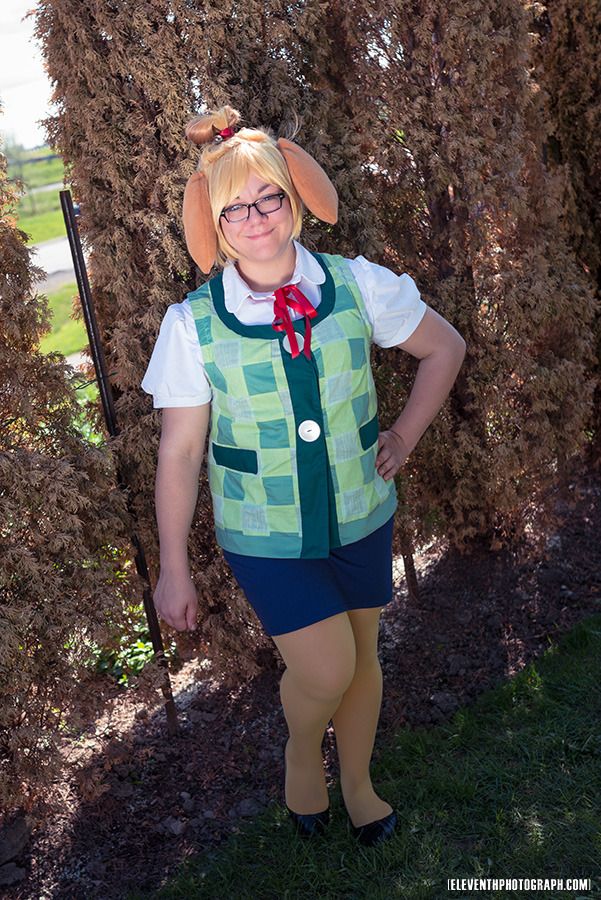
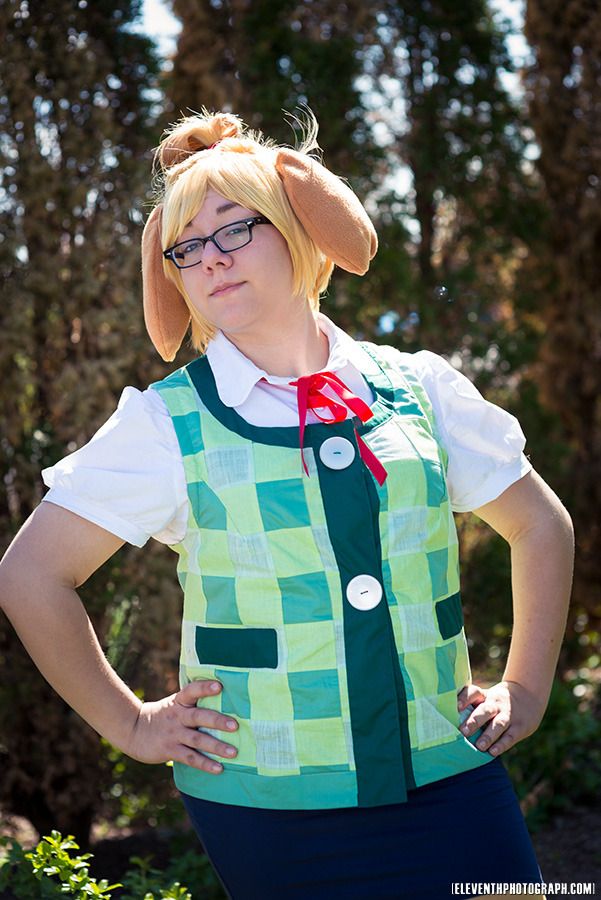
Hey all! This is the second (and last) post on my Isabelle costume I made for my sister Alex! Isn't she adorable!? :D The outfit itself is pretty simple, but presented its own challenge: making checkered fabric!
Let's talk about the easy stuff first: namely the purchased items. The blue skirt we got at H&M on sale for $7! Not bad! We both agreed it wasn't necessary to spend the money on fabric and/or the time on making something that could be easily purchased and worn as is. (Especially when it is perfect.)
The tights are from American Apparel, who have a decent selection of colours, but are on the pricier side. Sadly my favourite tights/socks store at Queen&Spadina seems to have gone out of business. (This was the place we got all of our insanely purple tights for the Katamari costumes...) I'm a bit sad about this, because I would rather not pay the iron American Apparel price for wacky coloured tights... So if anyone knows another good local GTA store to buy coloured tights, let me know!
The shoes are from her wardrobe (though technically the character doesn't wear shoes, we were both in agreement that shoes were necessary for wandering around a convention). The red ribbon was from Sussman's Bridal Supplies!
For the blouse I used the same pattern I created for her Suppi costume, but modified it: I made the collar rounded, and the sleeves pouffy. The pouffe sleeves were really just trial and error, I took the original pattern piece, made it a bit wider and taller and then gathered it along the top and bottom edge. Then I just added a rectangle to make the cuff. If you want to see how I put the original blouse together, go here!
To make the checkered fabric I started off with 3 different colours of green: light, mid and darker. I had a heck of a time finding 3 colours of green that looked good in combination that were close to the reference image. I eventually ended up with this combo, which is not 100% accurate, but I like it. :)
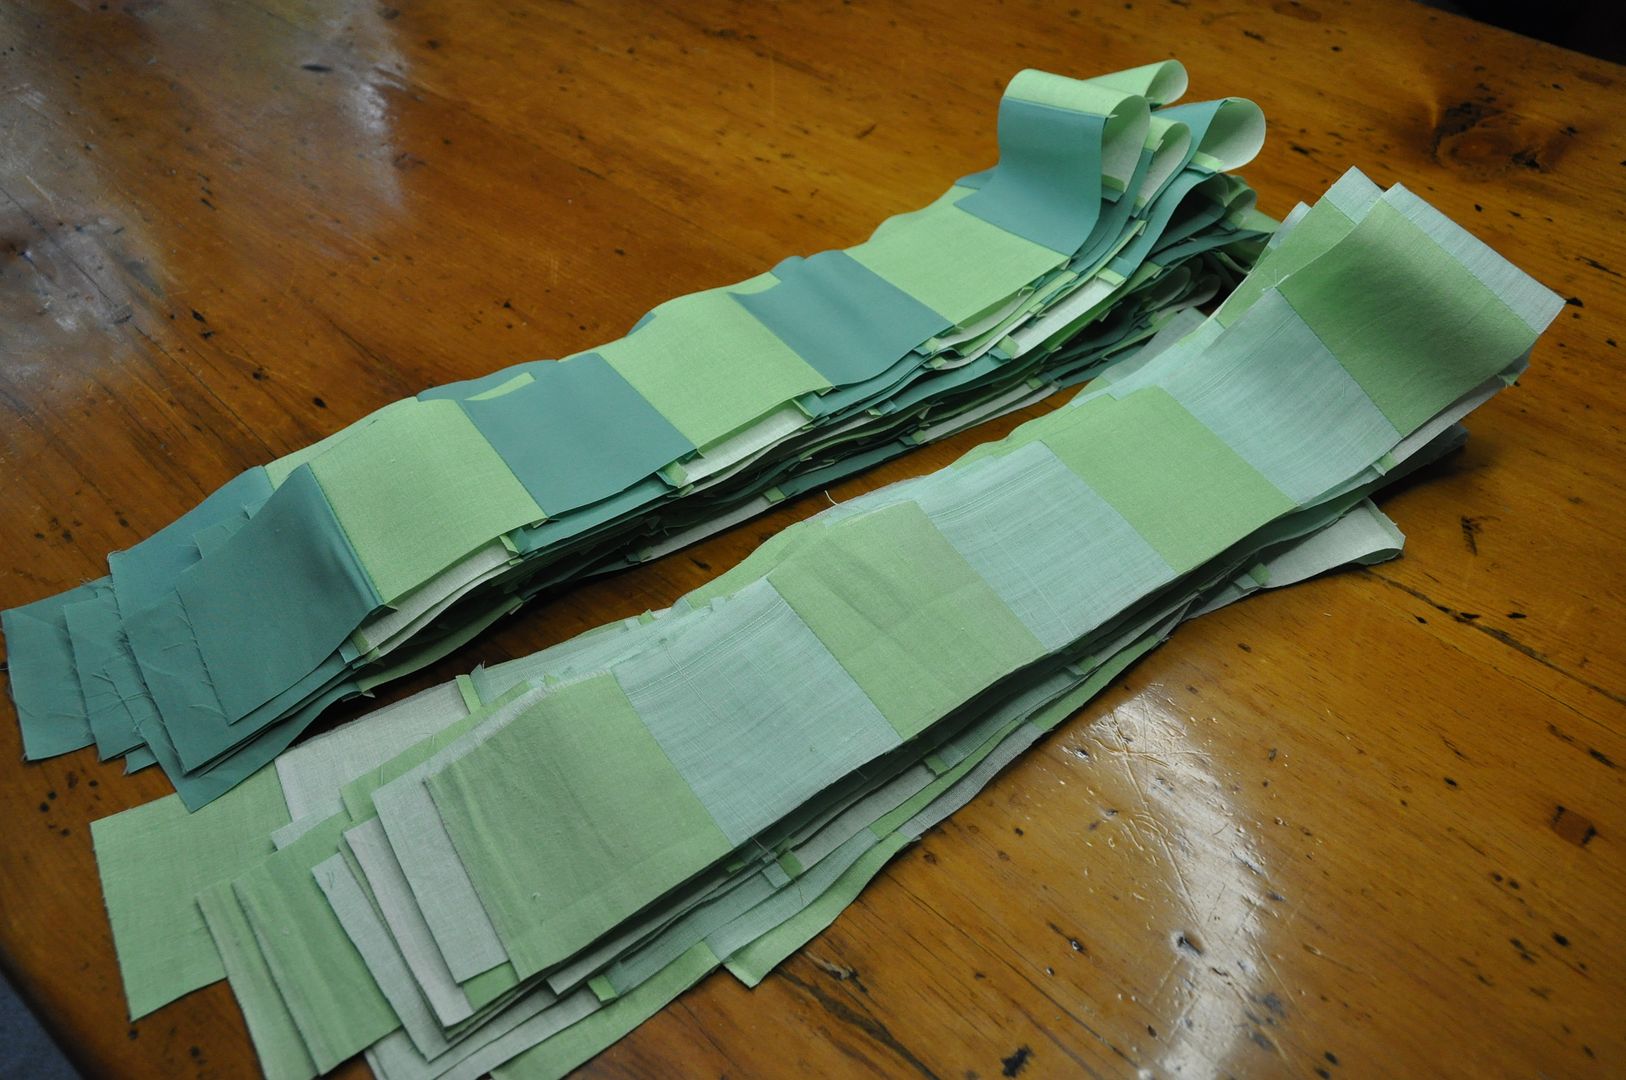
I started by cutting strips of fabric 3" wide. This included a 1/4" seam allowance on each side--meaning my finished squares would be 2 1/2" wide. I cut twice as many of the mid green fabric. Then I sewed my strips together lengthwise. The goal was to make 2 separate striped fabrics: one in light and mid green, one in mid and darker green. Make sure when you hold them up to each other the mid green stripes are offset, like in the picture above. This is important for the next step.
(You can also use this technique to make regular checked fabric--like a chessboard--you will just only need to make 1 striped fabric with an even number of each colour stripes.)
You then press your seams flat on your striped fabrics. Then you can begin cutting again. Cut 3" strips of your striped fabric perpendicularly to your stripes. You should end up with strips like pictured above.
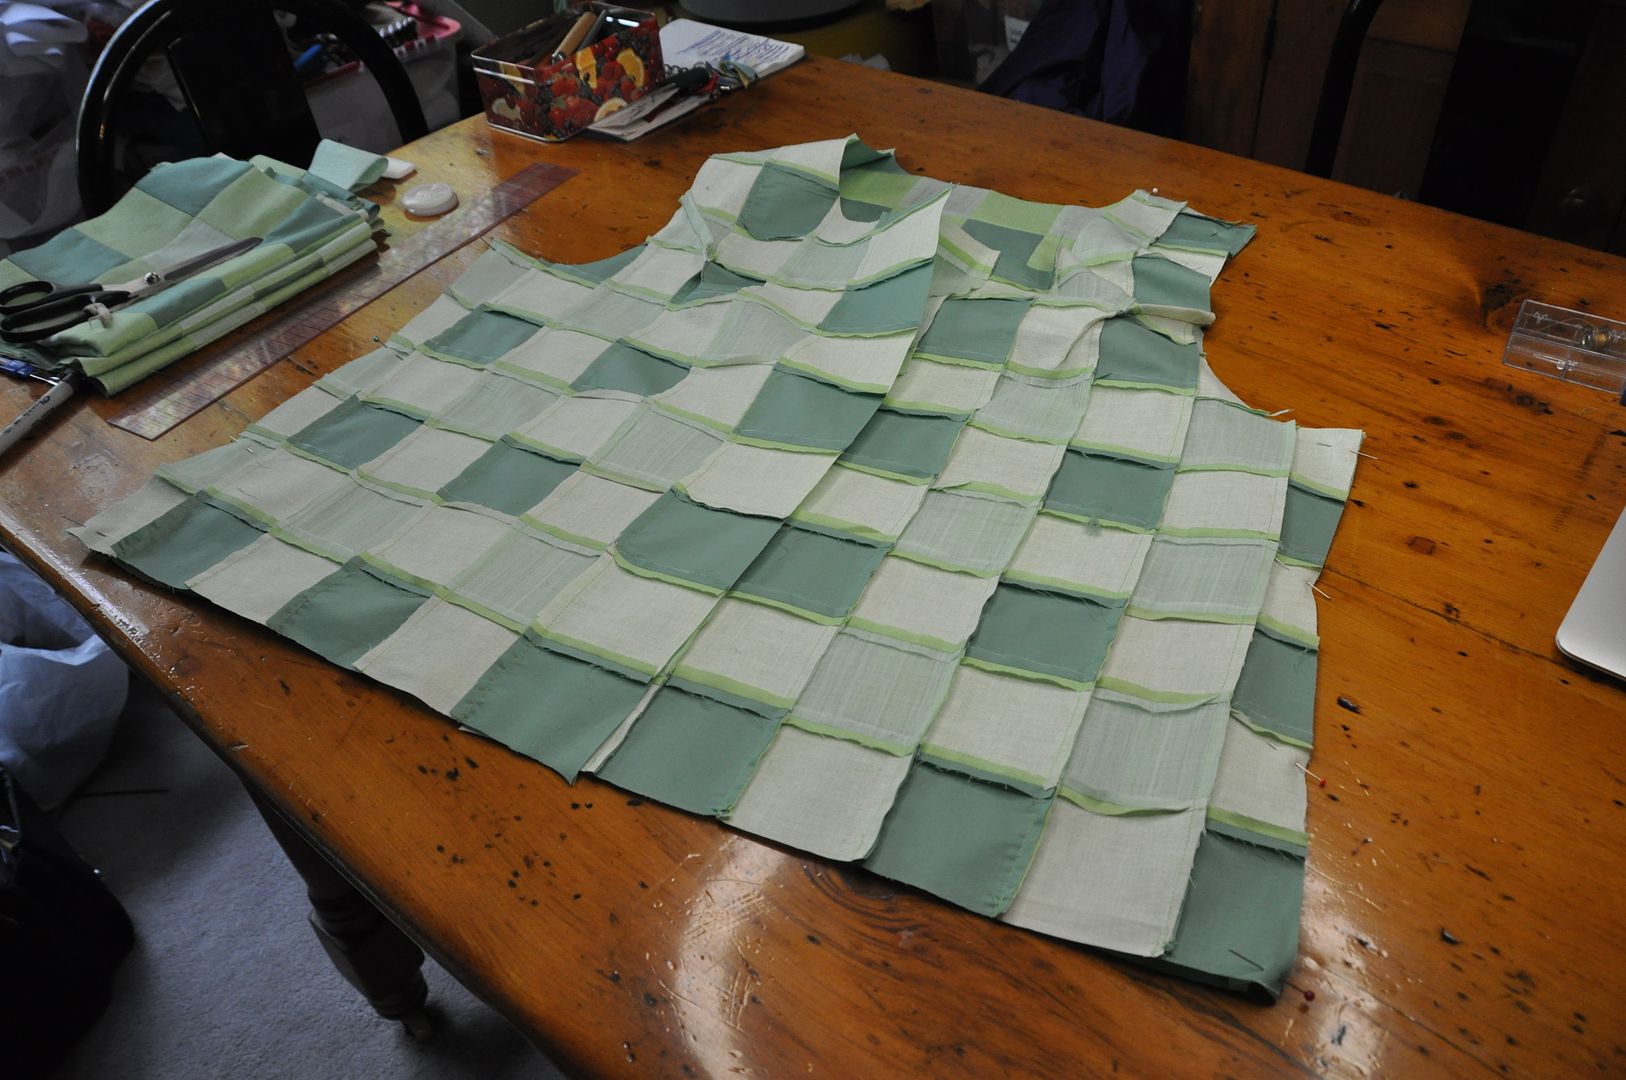
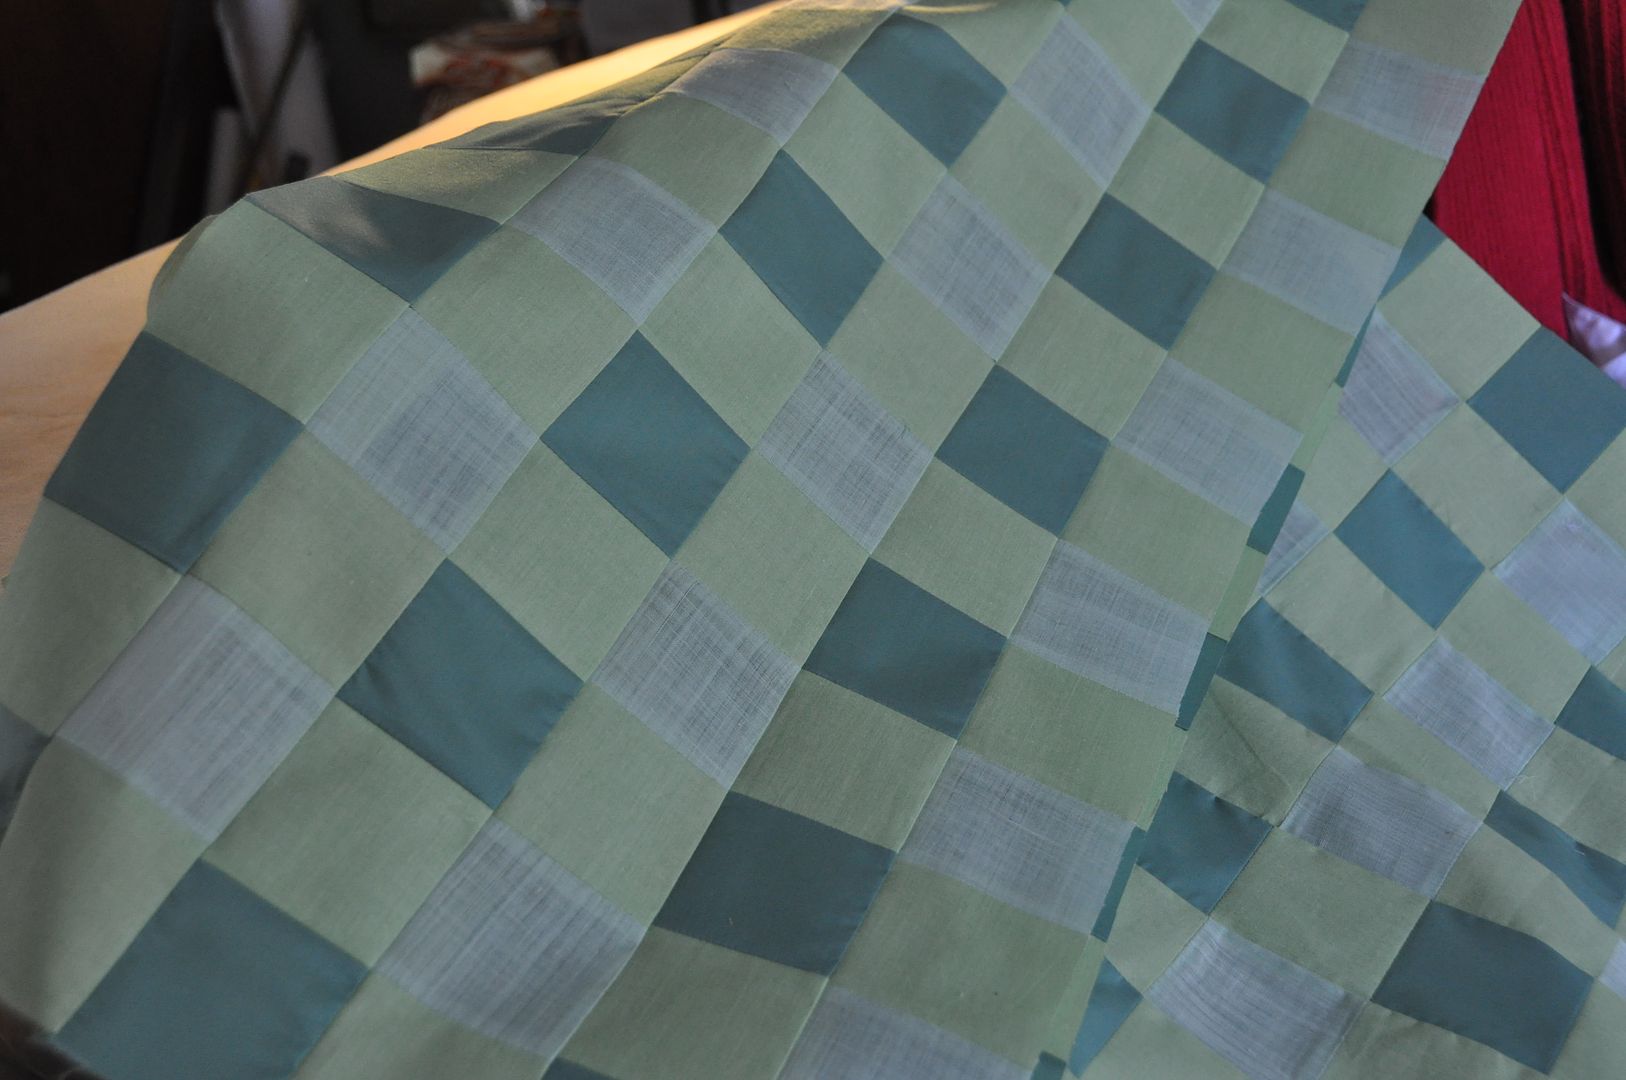
Then you sew those strips together alternating the light stripe fabric with the darker stripe fabric. Press seams flat again. The result should look like the picture on the left.
It's difficult to gauge exactly how much fabric you are making, but as a rule of thumb I think it is better to have too much than too little.
I laid my pattern pieces down on my fabric and cut out the shapes. (I had already done a mockup at this point) I had to be mindful of the checker pattern, to ensure it lined up at the center front.) I sewed the vest together at the side seams, shoulders and closed the darts at the armholes. I opted to leave this garment less fitted because a) the character's body is essentially a sausage shape and b) too many darts really mess with the checker pattern particularly when the squares are this big.
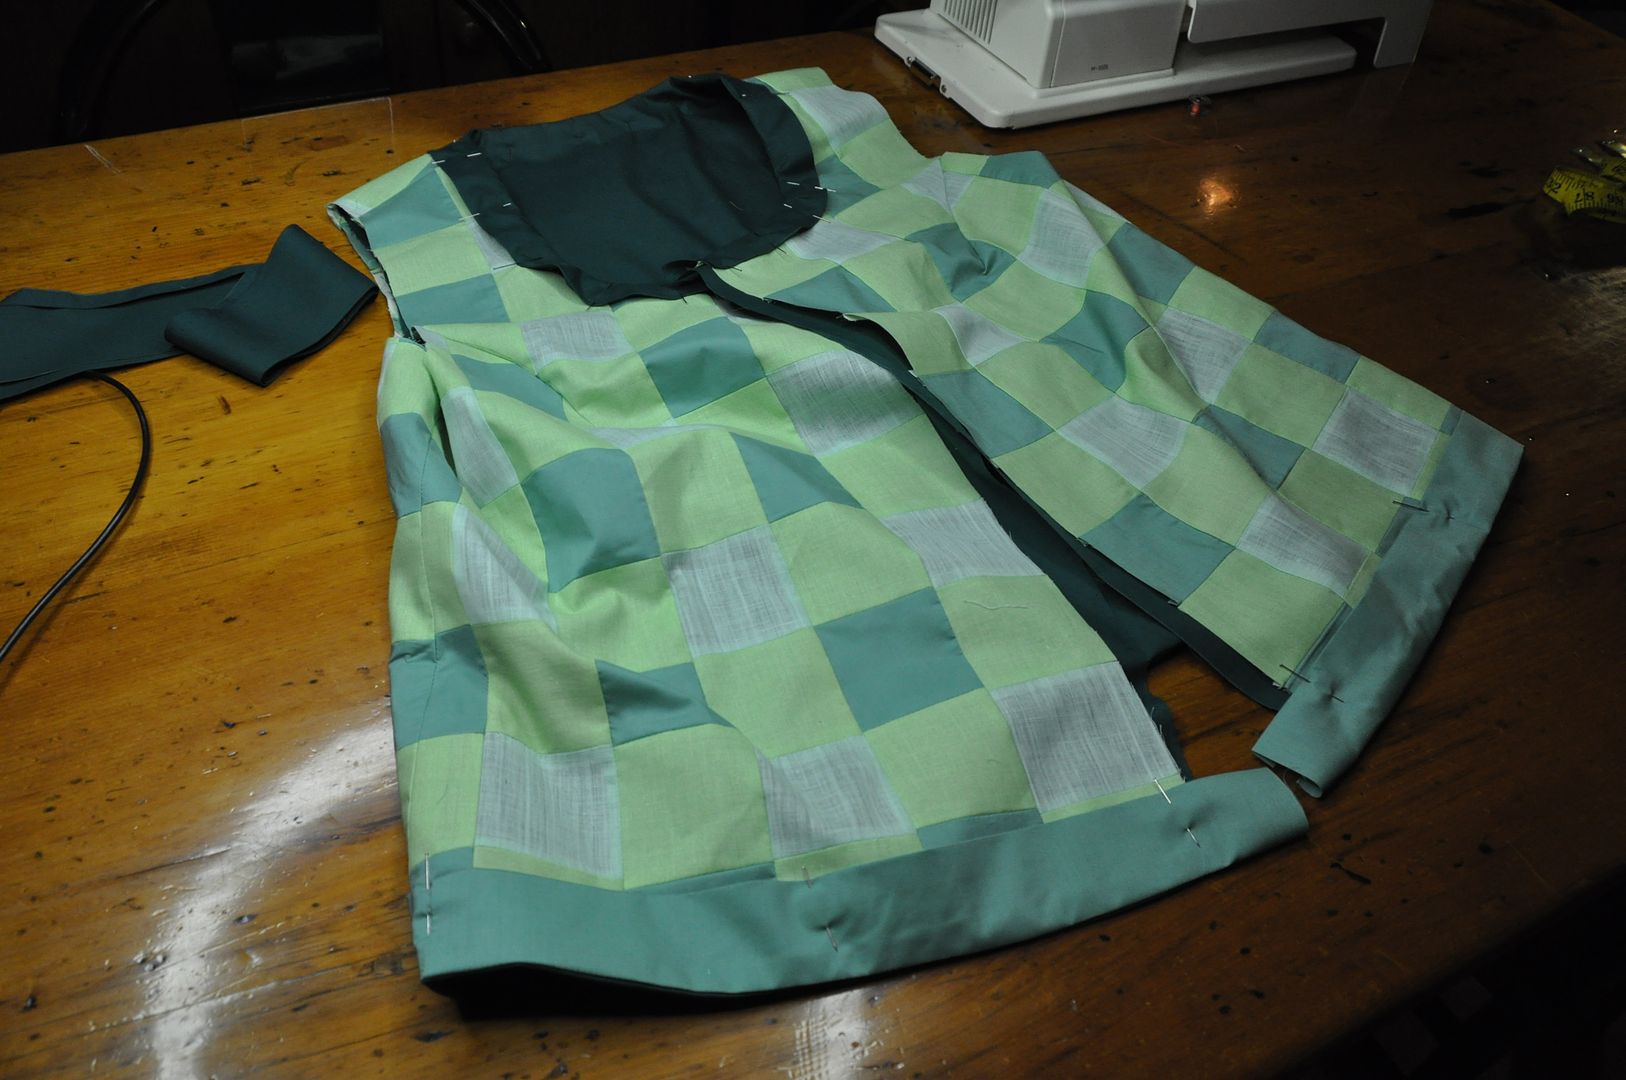
I made an identical vest in the darkest green fabric to line the vest with, otherwise all the seams from the checked fabric will be exposed and fraying on the inside. I made the front placket and collar facing in this fabric also. I finished the bottom edge with a stripe of my darker green (the one I used in the checker fabric). This finished those raw edges. The darkest green accent fabric is actually leftover from the Prince costume!
I added 2 strips of velcro to close the jacket. The 2 large buttons added on top were just decoration.
Using the darkest green I made 4 rectangles. 2 were top stitched onto the front as fake pockets the other two had velcro to cinch in the waist at the back. This was instead of putting darts, which would have looked weird on the checkered fabric.
Lastly I attached a bias tape to the inside to finish off the armholes.
The first of my Anime North posts! Lets look at Isabelle! This was made for my older sister Alex. This past Christmas I didn't really have enough time to make a whole bunch of gifts at the end of term, so instead I made a "gift certificate" for my sisters for 1 costume each. Elanne picked Sakura, and Alex picked Isabelle.
Isabelle is a character from the popular game series Animal Crossing. (Called Shizue / しずえin the original Japanese version.) She is the secretary to the Mayor (the player). I don't play it, but my sister is very much a fan! As you can see, this is a gijinka version of the character, but since the characters in this game are already pretty much humanoid already, there wasn't much redesign necessary to create a gijinka version. This is really just a wig with ears instead of a full mascot head.
She wore this costume on the Saturday of Anime North, while running her Crafters' Corner table, which had her tied up for the majority of the weekend. She did manage to escape for a little bit and did a mini shoot of the costume with Mike of EleventhPhotograph . We got some really cute pics! :D Be sure to check out his con gallery!
The base wig we started with was this one from Epic Cosplay. I really liked this colour of blonde, we chose to go with a colour palette that was a little less yellow than the character is normally. I think it is technically listed as a Vocaloid wig, and it required a large amount of styling to get it to work as an Isabelle wig. First I put it on my sister's head and determined what part I wanted up in the ponytail. I tied that out of the way while I worked on hiding the part at the back.
The problem with wigs it that when you pull the hair in pretty much any direction it reveals the gaps between the wefts. In order to prevent this you have to add in extra wefts to mask the part. Now, if they had had them in stock I would have bought extra wefts when I bought the wig, because I knew I had to pull the top of the wig into a ponytail, which would leave a gap about 1/2" wide. Unfortunately they did not have any in the colour I needed, so I resigned myself to some serious MacGyver-ing.
I selected 3 separate rows of wefts from the back of the wig--far enough down that they wouldn't be noticeable, and far enough apart that they wouldn't leave a bare patch--and I carefully picked them out with a seam ripper. I sewed this into a mega-weft (3 rows of wefts stacked on top of each other). That was then hand stitched onto the wig along the bottom of the gap. Using a pin I parted the wefts, making 2 go up into the ponytail and 1 go down into the back. Had I had more wefts at my disposal, I probably would have done 4 wefts, with 2 going down as the area under the part is a little bare. But it was still much better than when I started, so I considered it good enough!
At this point I tried it on my sister and gave the bangs, sides and back a little trim.
Then I was ready to permanently secure the ponytail--I double checked on my sister first and foremost, because her head is a different size from the wig head, so if the ponytail was pulled too tight it would look weird on her! Ensuring it was in the position I wanted, I then carefully dabbed/mashed some white glue in around the base of the ponytail. It dries clear, but I was still careful to not be messy during this process. (This is similar to the process of stubbing a wig except that this ponytail was not getting cut off!)
Normal white school glue is good for styling wigs, it dries clear and is washable; if you make a mistake, you can wash it out and try again.
Then my sister dyed the gradient into the ponytail. She did the colour to match the ears I made. She used a combination of brown india ink and rubbing alcohol (70%) to dilute it. She also apparently didn't look up any instructions before doing it. :/ This is the approximate method if you are interested!
After letting that dry sufficiently I artfully arranged the bun the way I wanted it, securing it with another hair elastic. The I hair-sprayed the bejeezuz out of it. (This is a technical term of course! ;D) I let it sit and air dry for several hours. Occasionally spraying it a bit more. Once it was fairly solid I added a touch more glue around the base to hold the ends of the bun in place.
The hair accessory is a piece or red ribbon folded in half length-wise, with 2 silver bells attached. These were simply hand stitched on, and the ribbon was fixed around the bun with a hand stitch. I got the bells downtown and they have little hearts on them, which I think suits the character so nicely. :)
The ears are fleece which was bagged out and lightly stuffed. I closed the stuffing hole with a hand stitch and then stitched them to the wig.
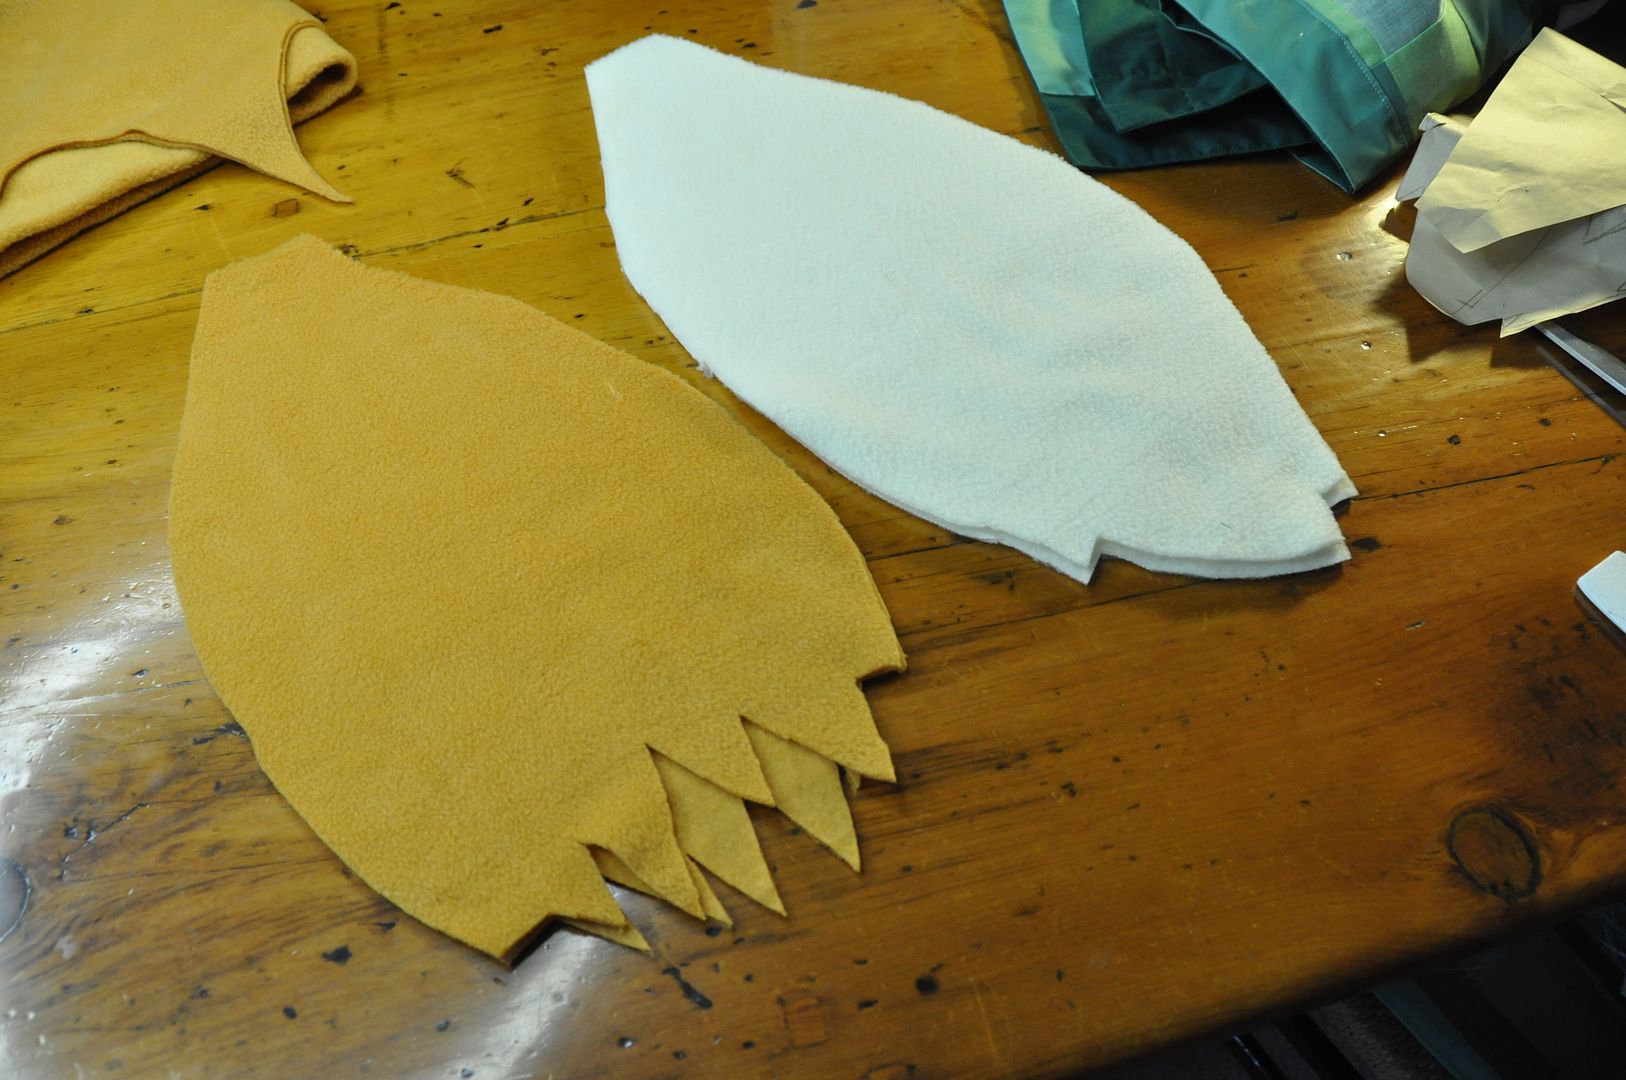
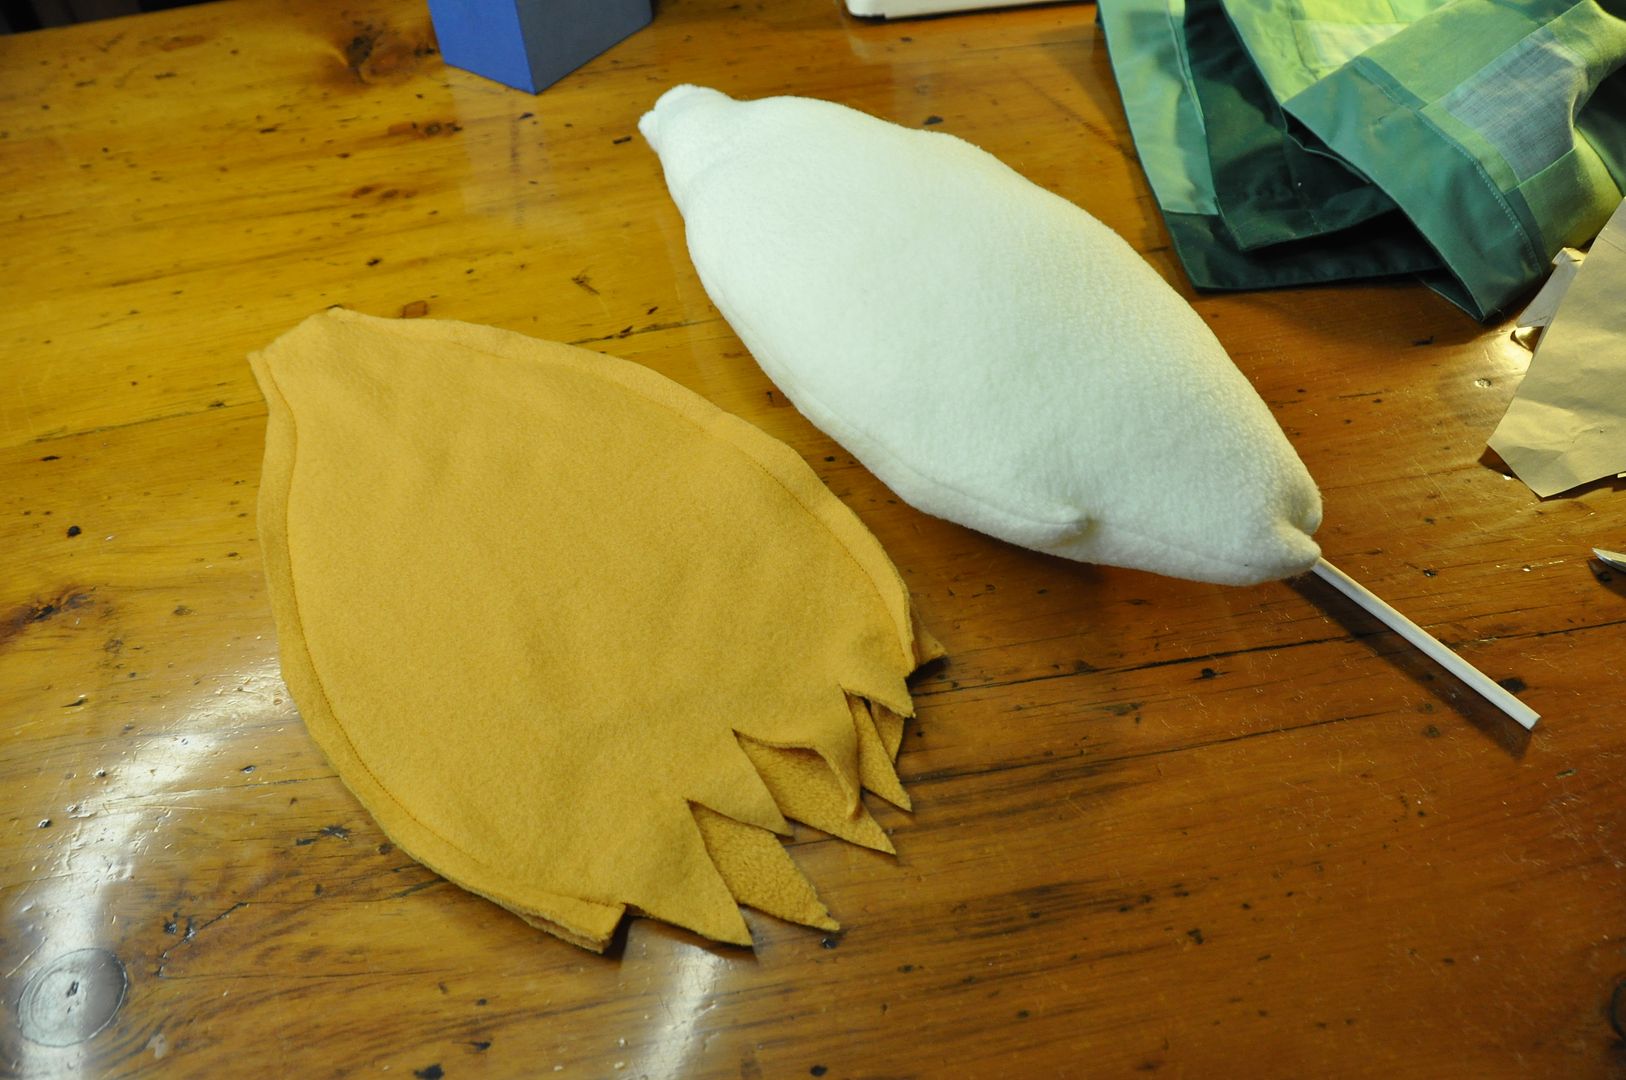
For the tail I made a paper pattern of the approximate shape I wanted and cut out a piece that was a lot wider at the widest point. This was so it would be nice and round I made an inner tail piece in a cream colour, and an outer tail piece in my yellow/gold. The yellow one ends in an open spiky end, which is different on each side. The nice thing about fleece is it isn't neccessary to finish the edges because it doesn't fray.
I bagged each of them out and stuffed the inner tail to be nice and round.
The gold/yellow colour matches the blonde wig and the tights, and the brown ears match the bun gradient like on the character. It was a bit of a challenge finding 2 complimenting colours that both matched the wig, and tights that would match the tail. But we managed it!
Then I slotted the outer tail over the inner tail and sewed them together at the tail base.
This piece was then attached to an elastic waistband, which was just slipped on over the skirt, under the vest. And presto! A cute tail!
Hey guys! So I've been on a bit of a nostalgia trip recently because this was my 10th year attending Anime North. Easily my favourite convention of the year! I had a really great time this past weekend with friends and family! It was good to see everyone again! I finished 3 costumes for the weekend: Sakura, Isabelle, and Forest Guardian (previously known as Elven Archer). The weather was altogether pretty great (though I was hot and dehydrated on saturday...) and made for a fantastic weekend.
Friday: I got to the con a bit late (though not as late as last year) and hung around for a bit wearing Alice with my sister as Sakura. I looked around the Crafters' Corner for a bit and helped a friend set up her table before heading over to the DoubletreeInternational Plaza for the friday night Workmanship Competition. I entered Sakura for this event, which was new to the convention! You know things are serious when your judges include Merlin, Sailormoon, Catwoman(?) and some sort of were-rabbit? (Competition results were announced sunday!) I had a nice dinner at Swiss Chalet with the family before heading home for the night.
Saturday: After some major disappointment with failed prosthetic ear
(the other one worked fine?) I decided that I had worked too damn hard
to let that stop me from entering Masq this year. Rather than entering
as "Elven Archer" I had impulsively written "Forest Guardian" on my form
the night before, which worked beautifully for me! After an initial
hiccup with entering the Masq, my mum swung it for
me (ex: was very persistent).
It was a bit too hot with the amount of layers I was wearing so saturday was a constant quest for water. Probably my only complaint about the con this year was that they weren't quick enough with refilling the water stations in Artist Alley/Crafters' Corner area so there was a good couple of hours during the hottest part of the day where there was no access to water in that part of the building... Mostly I spent the day walking around and posing for pictures. Though most people were confused and couldn't figure out what show/videogame I was from--answer: none! This is my original design!
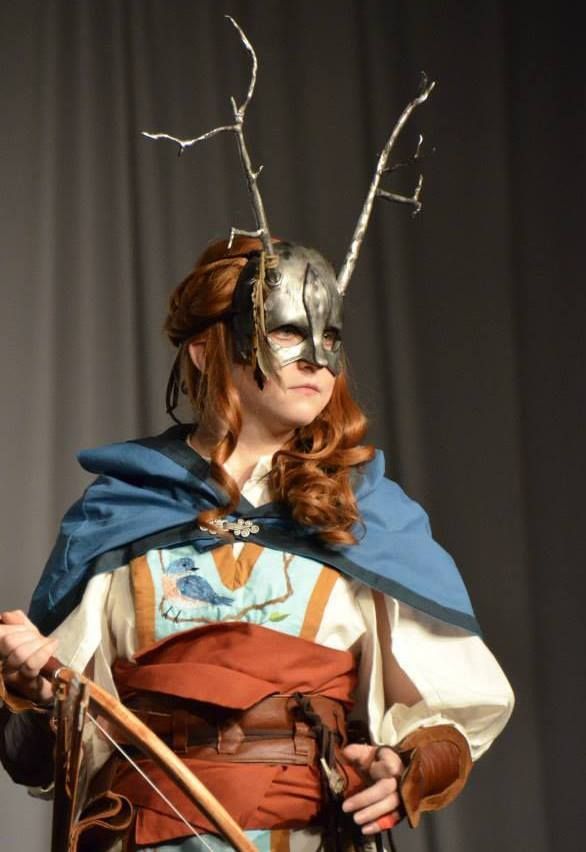
After food I went to the green room for the Masq and did my photo and judging portions. My judges were Feather Weight and the were-rabbit. They were most impressed with my embroidery. I was the last entry to present, which you can check out here!
Congratulations to my fellow competitors, your costumes were fantastic and your hard work really showed! I was most impressed by the level of quality in the Novice category and a certain lack of Artisans?! If you have time, I highly suggest also checking out the rest of the entries here, or at the very least take a look at the highlights reel by Dan TheVideoNinja. Special thanks to Alex for doing my audio again this year (I have no idea what I will do next year when you are in Japan??) she found me some great music from Cirque du Soleil's "Totem" CD.
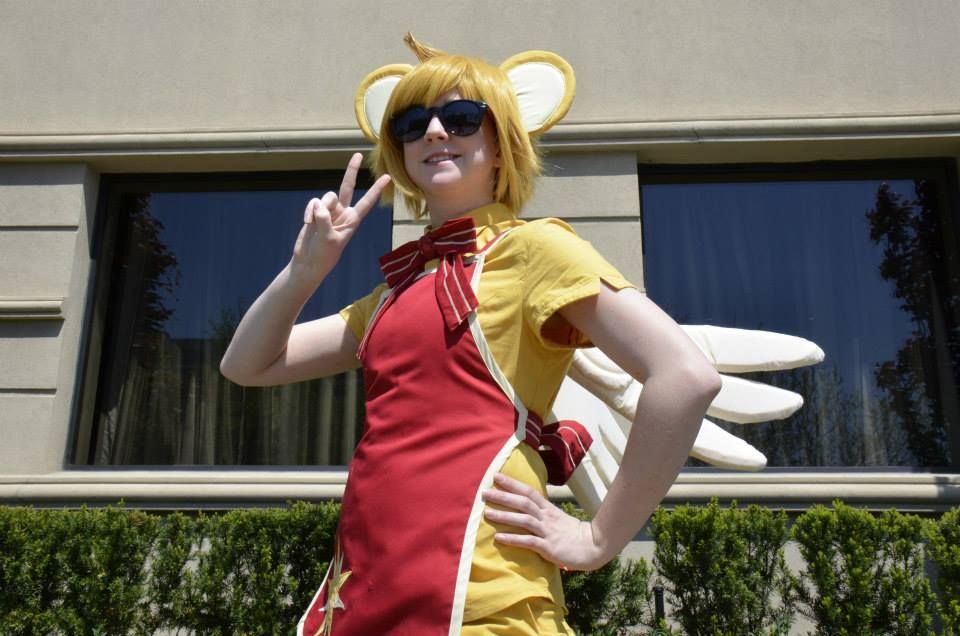
Sunday: Instead of spending my whole sunday trying to rush finish Vaporeon I opted to wear Kero! It was much cooler to wear around (having been originally designed to wear at Otakon), a great casual cosplay that received much love with the AN crowd! The day was mostly spent hanging out with friends and shopping. In the afternoon I attended the Award Ceremony. I won 4 awards this weekend! A Hall Costume award each for Isabelle and Kero. I won "Best Accessories: Master Division" in the friday night Workmanship Competition for Sakura, and "Best Embroidery: Master Division" in the Masquerade for my Forest Guardian. Super happy! Special thanks to Alli Sosnoski for her help on the Sakura costume and
Harriet Lee for her work on Vaporeon (even though it didn't get
finished).
I saw so many friends this weekend that I couldn't possibly mention them all, but you guys know who you are! (Unless you got amnesia in the last 2 days) You guys rock and made my 10th AN that much more memorable!
10 YEARS OF COSPLAY!
I spent the past couple of days putting together a collection of
pictures including all of my Anime North Costumes from the last 10
years. So without further ado lets take a journey back in time! (If you don't want to read my sappy nostalgia commentary, feel free to just look at the pics, which are also posted on facebook.)
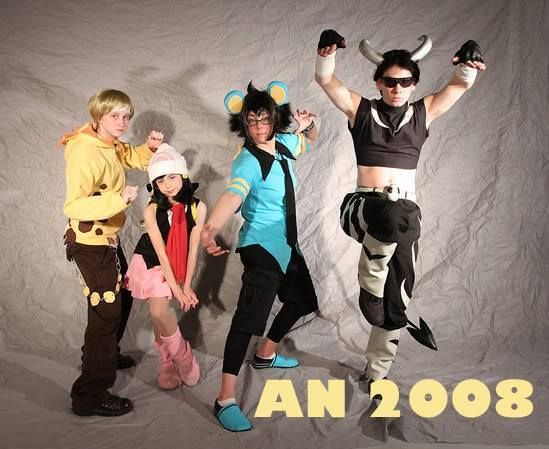
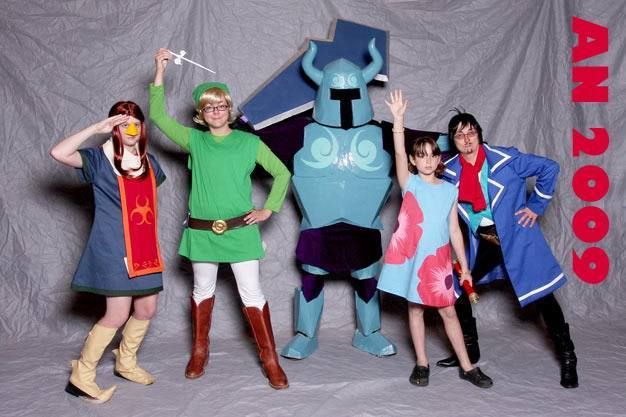
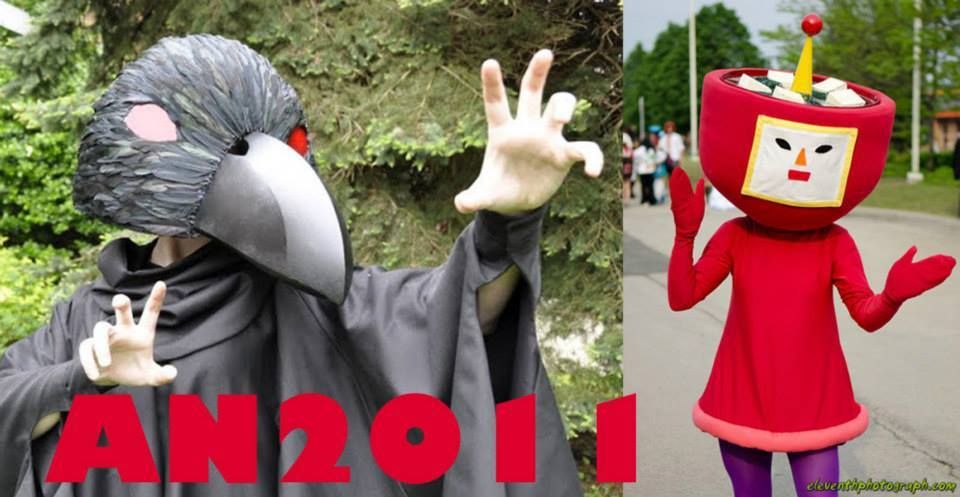
So to start, here is a collage of all my Anime North costumes from 2005-2014.
(The only one missing is Alice from this past weekend.) If the me from now could
talk to the me from 2005, oh what a conversation that would be... Never would I
have dreamed that one day would spark a hobby that would change my life! I
discovered a talent I never knew I had. ;D And yes, there were at least 6 years of costumes before I started Among Bobbins and Thread!
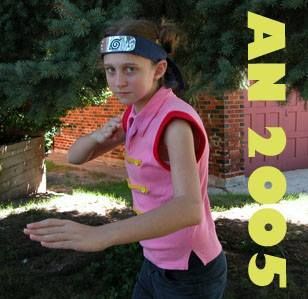
My very first costume my mum made for me! I was Tenten from
the popular anime series Naruto. It was made up of modified clothing items. But
we splurged on an official headband! I only attended AN for 1 day, but I wore
it again to Fanexpo (then known as CNAnime) later that summer. I was
accompanied by my older sister who was dressed as Rock Lee. :D So youthful!
Team 8! My favourite team in Naruto-verse (except for
perhaps the Sand-squad, which we would be cosplaying later that summer.) I put
up with an unbearably itchy low-quality wig for several cons in this costume.
My mum is the amazing woman who took the time to craft all these cool costumes!
Some pieces were from the closet, others made from scratch.
In case you aren't starting to see the pattern, we too
started by cosplaying from mainstream anime and kept this up for the first few
years doing several different groups from Naruto and Bleach. Our Division 11
group was our first Masquerade entry ever, for which we won a presentation
award (the "We <3 Katamari Award" if my memory is correct.) Mike
was added to the group as our Kenpachi, which perfectly complimented Elanne's
Yachiru. Mum made all of these from scratch with several billion meters of
black broadcloth! Power to her! We also wove our very own (very painful)
sandals!
Pokemon Gijinkas (+Pokemon trainer)! I think this costume
set was in part decided by Elanne's love of Pokemon. We entered our group in
the Masq and won another presentation award for our dance skit (which is
amazing because judges typically hate dance skits!) Pokemon on Broadway (or
Dawn's Secret Hobby)! Another set of costumes masterfully made by Mum. :)
The first and last time we got the full family on stage! My
fifth Anime North. We had attempted to finish the King of Red Lions boat for
this convention, but did not get it done. On the other hand, Mike's Phantom was
pretty darn impressive. We won a workmanship award in the Journeyman Division.
Alex and I finished the King of Red Lions this year which is
probably still the cosplay achievement I am most proud of. That year I also wore my first costume almost entirely by myself, which was Kiki, from Kiki's
Delivery Service (first worn to Fanexpo, the previous summer!). :) In the Masq we won a workmanship award for our crazy
awesome boat and I got a Props award for my Kiki costume.
My "Crow Soldier" costume from the less well-known
series Princess Tutu was fun to make and wear! It was my first experiment in
putting lights in costume (dollar store flashlights!) and it was a piece I used
in my Ryerson Theatre School application portfolio. I also helped to make
Alex's Cousin Miso costume, constructing the outfit while she and Mum made the
head. This was the year I began my blog, Among Bobbins and Thread.
Our Katamari group! (minus Jen as Mag) This was a very well
received group of costumes. The weather was not particularly kind to us,
meaning it was just too darn hot to wear them for more than a day.I did the majority of the construction
on these with assistance from Ian and Alex, while Mum made the Katamari itself.
We entered at Master Level due to our 5th member (Mai Sherie Costumes) and won a Technical
Achievement award.
Another
costume that I am really proud of! I just wish the armour were less
heavy and strangulating... The sword was heavy enough that I couldn't
lift it properly and it actually became the focus of my skit. Hahaha I
won a props/accessories award for this costume, if I recall correctly. I
learned how to mold and cast as well as began working with
thermoplastics. All I can say is that I will need a long break before I
ever attempt a costume with that much bias tape ever again...
My first con where I wore a different costume each day! This
was my first year entering solo without any family members also competing in
the competition. I entered my first original design costume "Forest
Guardian" in the Masquerade and won an award for the Best Embroidery in
the Master Division. Several hundred hours of it. I also entered my Sakura
costume (made for Elanne) in the Workmanship Competition and won an award for
Accessories. I also made an Isabelle (from Animal Crossing) costume for my
older sister, which won a hall award, re-wore Kero (also got a hall award) and
re-wore Alice. What a whirlwind weekend full of costumes! :D
Hope you enjoyed that as much as I did! Some of those old pics were REALLY hard to find.



 You then press your seams flat on your striped fabrics. Then you can begin cutting again. Cut 3" strips of your striped fabric perpendicularly to your stripes. You should end up with strips like pictured above.