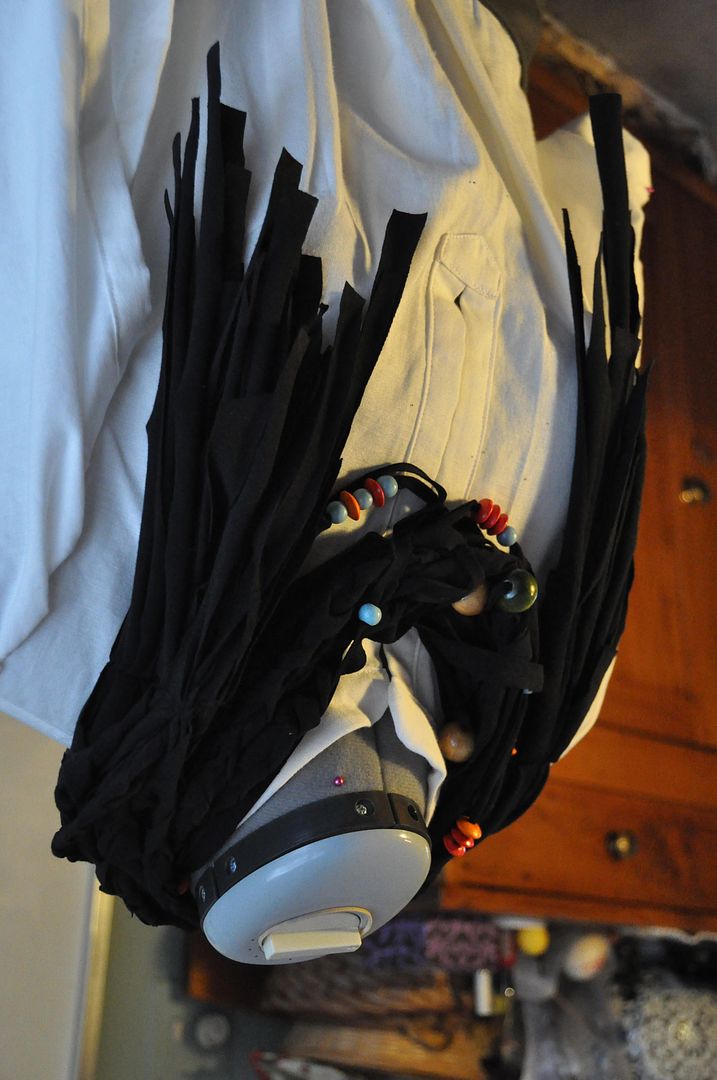
This was a gift I made for my older sister. It's a cross between a scarf and a necklace (a scarflace?).
It was fairly easy to make: I cut black jersey into long strips, some of which I braided, some of which I added a few coloured wooden beads to. The most difficult part was getting the beads on the jersey. This was done with straight pin, a needle and needle-nose pliers. It was therefore important that I picked beads with sizeable holes.
I twisted the fabric strips together and put a line of stitching on each end to hold the bundle together.
Tuesday, December 31, 2013
Sunday, December 29, 2013
December Update
Hello all, and Happy Holidays! :D
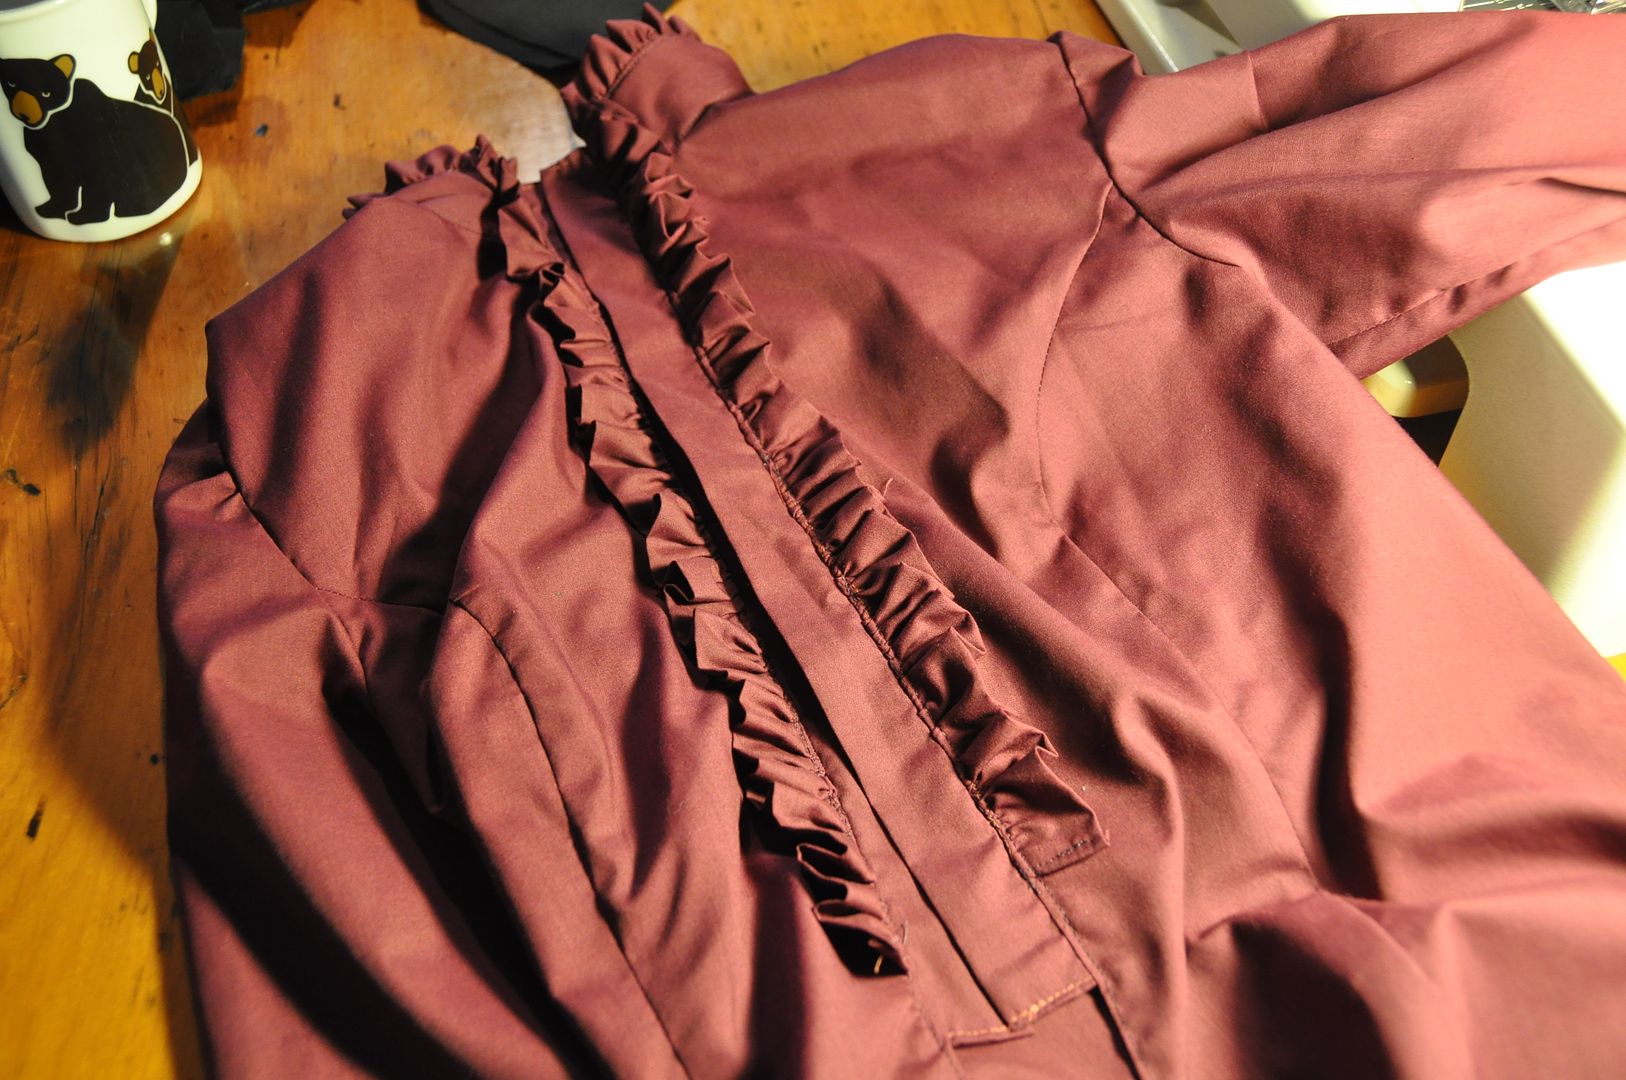
It's been a crazy Christmas so far, what with the ice storm and power outages on top of the usual Christmas mayhem. (It got to the point where I was using my backup battery from my computer to run my sewing machine so I could finish my Christmas presents in time...) Now I can actually post some pics of what I've been working on, since before it was top-secret elf work.
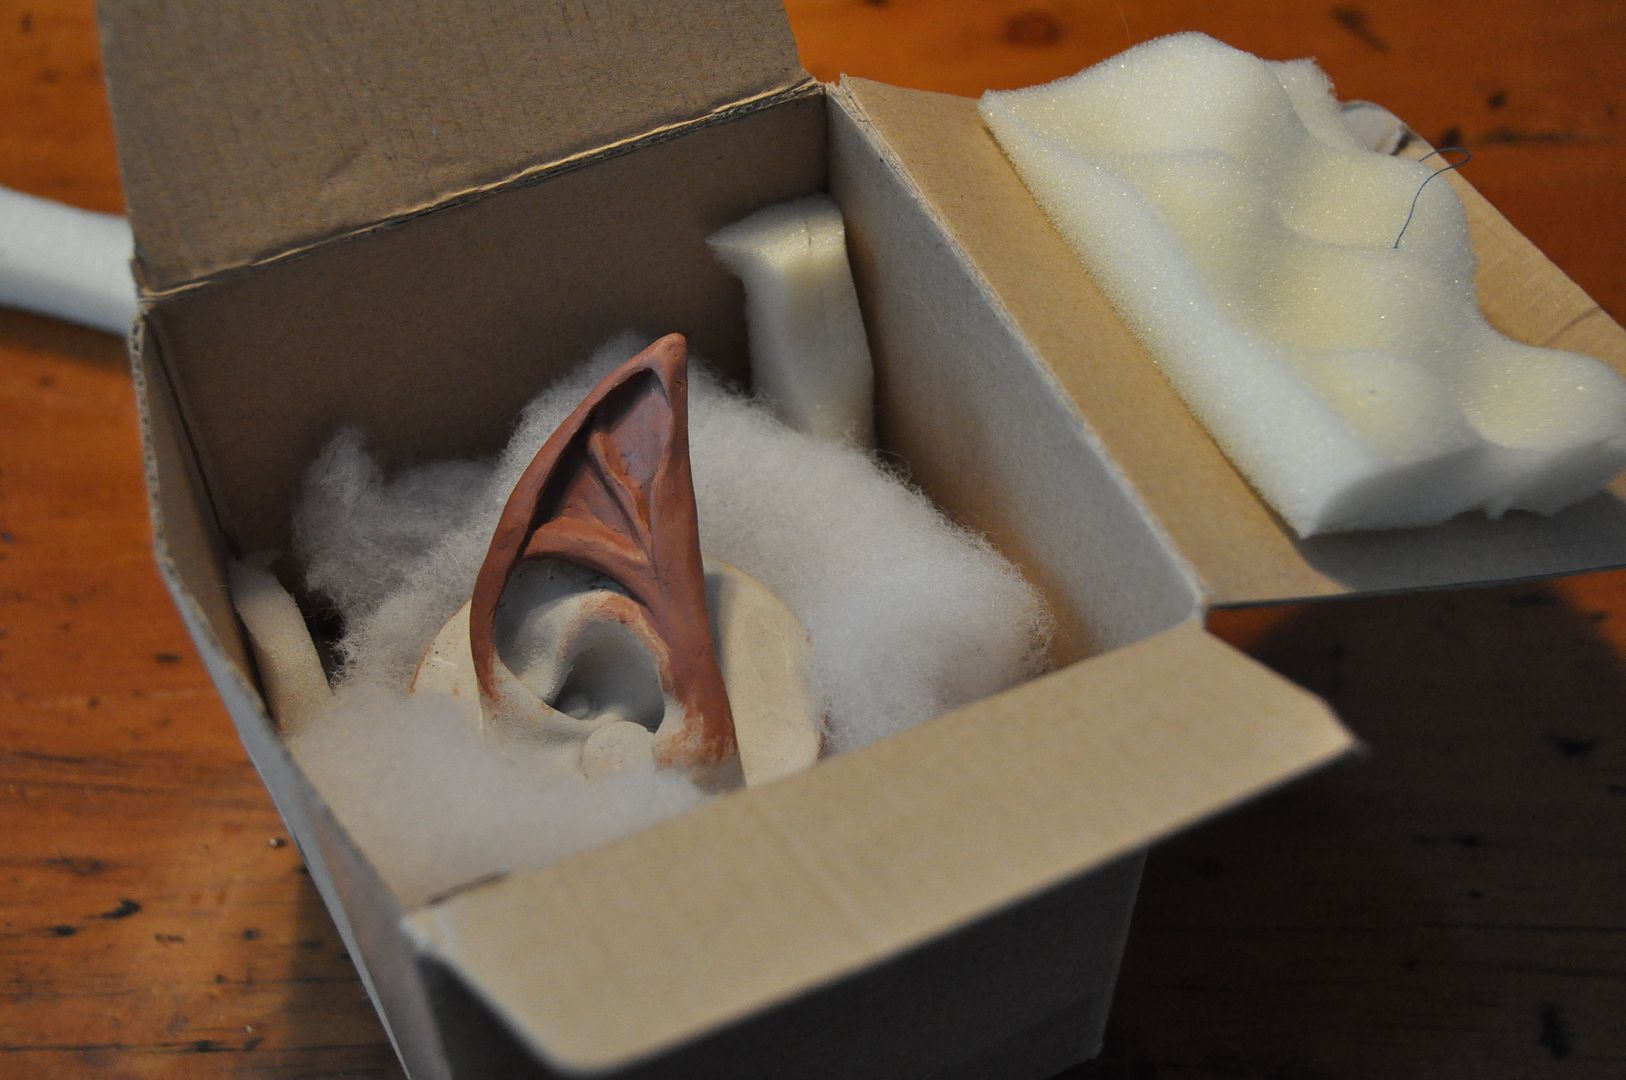 There shall be more progress shots up on facebook this week, as I have some time to work on things before I am back to school, and I will be finishing the blog posts for my Christmas gifts and my Presea costume (once I fix up my axe and take some finished shots). Have some serious work to do on my original costume for costume-con, which has been on the back-burner for months. (But I have sent my ear-sculpts off to be turned into prosthetics, so I am excited to see how those turn out!) Hoping to finish the bulk of the sewing this week, leaving the details to work on over then next few months.
I received some cool new fabrics from my sister this Christmas and I am very excited to make some new things with it! (Though exactly what I am not sure yet...)
That's all for now folks!
It's been a crazy Christmas so far, what with the ice storm and power outages on top of the usual Christmas mayhem. (It got to the point where I was using my backup battery from my computer to run my sewing machine so I could finish my Christmas presents in time...) Now I can actually post some pics of what I've been working on, since before it was top-secret elf work.
 There shall be more progress shots up on facebook this week, as I have some time to work on things before I am back to school, and I will be finishing the blog posts for my Christmas gifts and my Presea costume (once I fix up my axe and take some finished shots). Have some serious work to do on my original costume for costume-con, which has been on the back-burner for months. (But I have sent my ear-sculpts off to be turned into prosthetics, so I am excited to see how those turn out!) Hoping to finish the bulk of the sewing this week, leaving the details to work on over then next few months.
I received some cool new fabrics from my sister this Christmas and I am very excited to make some new things with it! (Though exactly what I am not sure yet...)
That's all for now folks!
Sunday, December 15, 2013
Bean Bag Warmer
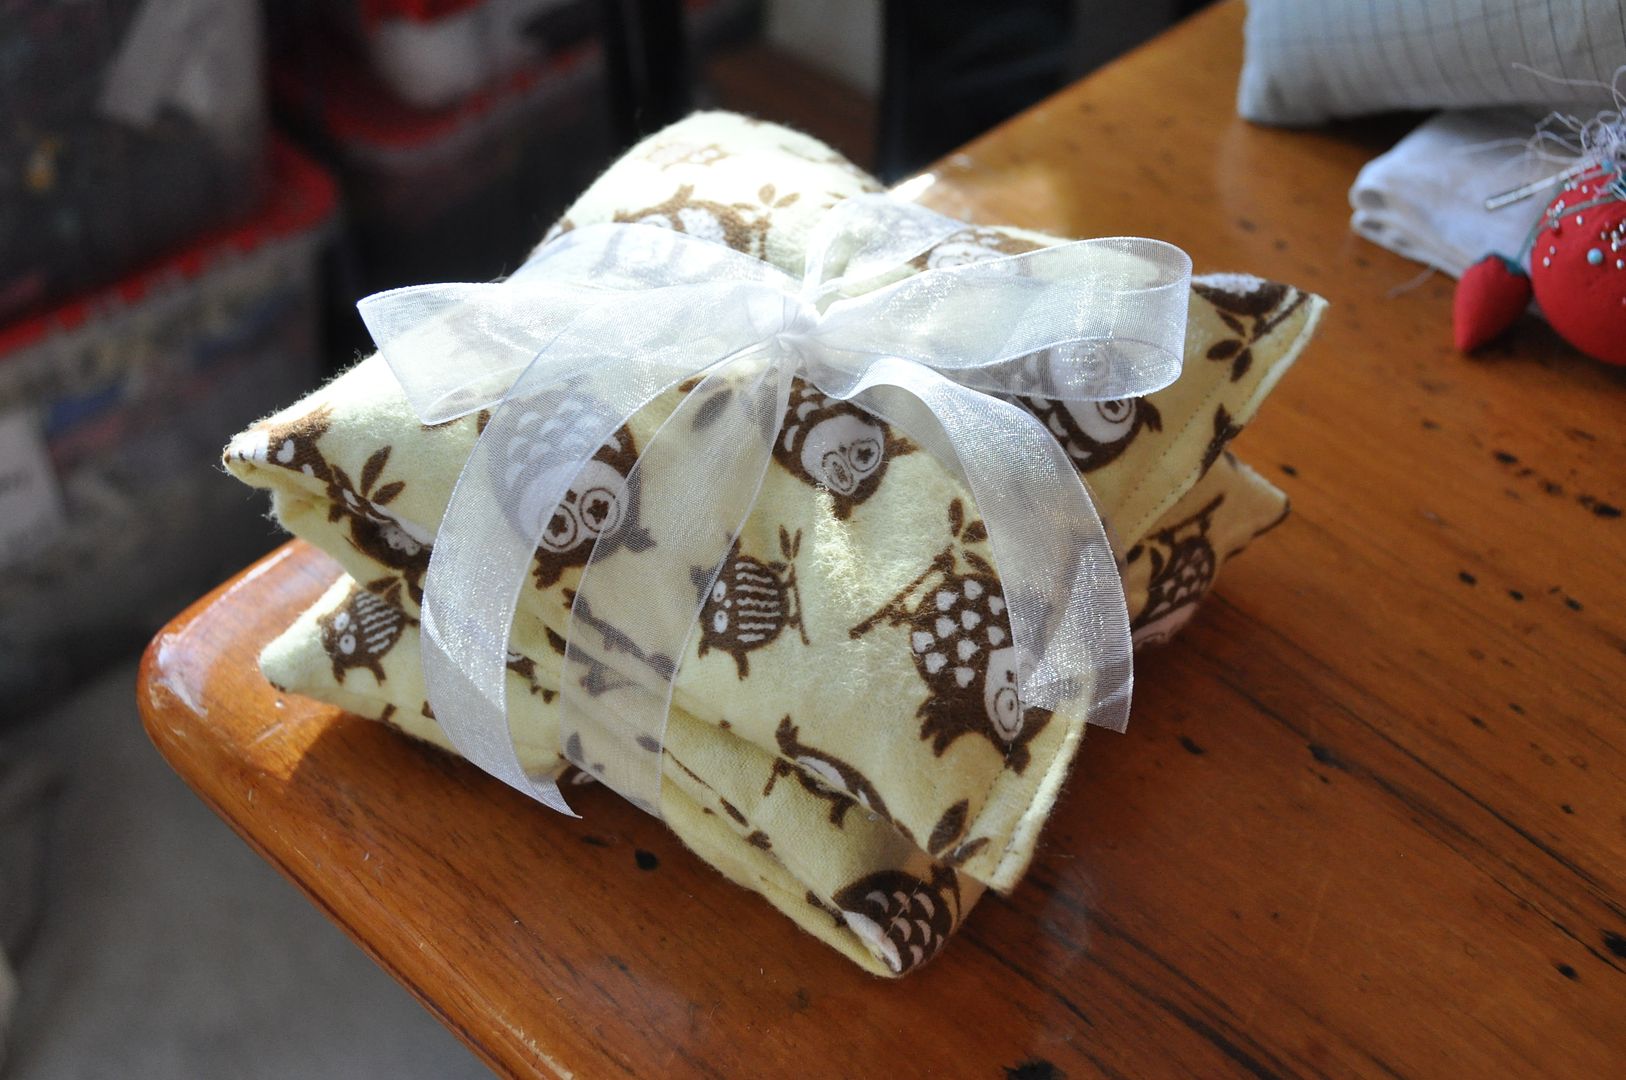 Need an idea for a quick, easy, and practical homemade gift? This was my gift for a Secret Santa exchange this year. A microwaveable bean bag warmer. It is great for muscle pain and cold toes. ;D All you need is cotton fabric and some rice!
I made a 3-sectioned one that sits well on the neck. With cute owls. Hahaha
Remember to pick a cotton fabric, as synthetics should not be put in the microwave. Flannels are a good choice as they are soft! I used a little less than 6 cups of rice for this project. There are other things you can fill them with, there are lots of good suggestions floating around online. I would recommend putting dried lavender in them if you can find it, it makes them smell really good when you warm it up. Just remember: dried ingredients only!
 First I cut a rectangle of flannel that was 13"x22". I folded it in half lengthwise (patterned side together) and lined up the edges, pinning them in place. Then I stitched around 2 sides leaving one end open.
  Then I clipped the excess fabric in the corners and turned it right way out. I poured in a little less than 2 cups of rice, then did a line of stitching about 1/3 of the way down the rectangle. This ensures that the rice doesn't just all slide to one end of the bag. I repeated the process with the middle section. I poured my last 2 cups of rice in the final section and then folded the unfinished edge inside, top-stitching it closed neatly.
 Tuesday, November 12, 2013
November Update
Hey all! Haven't done an update in a while...
This month has been super busy, school is taking over my life. But I thought I would let you all know what I've been doing in the meantime. I am currently working on the rehearsal wardrobe for a production at school, which means I have spent a lot of time altering the corsets to better fit the actresses. This involves a lot of disassembling and reassembly. It's been a pretty amazing learning experience, and I have a much better insight of how corsets are patterned and constructed, even if I didn't get to make any myself from scratch. I hope to incorporate what I have learned into a future costume at some point... but what costume I am not sure yet.
Sadly I have run out of pre-prepared blog posts, so content may be pretty slim for the next few weeks. I'm also sad to say I did not carve a pumpkin this year...
In other news, for those of you that don't follow me on facebook I have been hard at work on my original design costume for CostumeCon, which is coming up in April 2014. It's an elven archer. I have been posting progress shots so be sure to check those out! ;D It's going to be pretty rad.
As soon as term is done I will be madly working on Christmas presents.
That's all for now! ;D
Tuesday, November 5, 2013
Asuna Kagurazaka - Harisen (Paper Fan) - Negima
The much more compact and travel worthy version of her giant sword! This prop was made in record breaking time with whatever leftover materials I had on hand as a sort of last minute prop idea. The weapon really helps make the character more recognizable.
I had been debating whether or not to bother making it at all, seeing how I already had a weapon for this character. However as much as I love the sword form, it's really heavy and I couldn't take it to the States because it is just too large to fit in the car. So I made this the day before I left, entirely from scrap materials. Not bad for a rush job, eh? ;D
For anyone who doesn't have the confidence, time or materials to make her sword, I highly suggest making the harisen (fan) as it is a great beginner level prop, and it doesn't cost much to make!
I cut out 4 pieces of illustration board that would be the fan. (Ideally I would have liked to have more, but I only had this much board left.
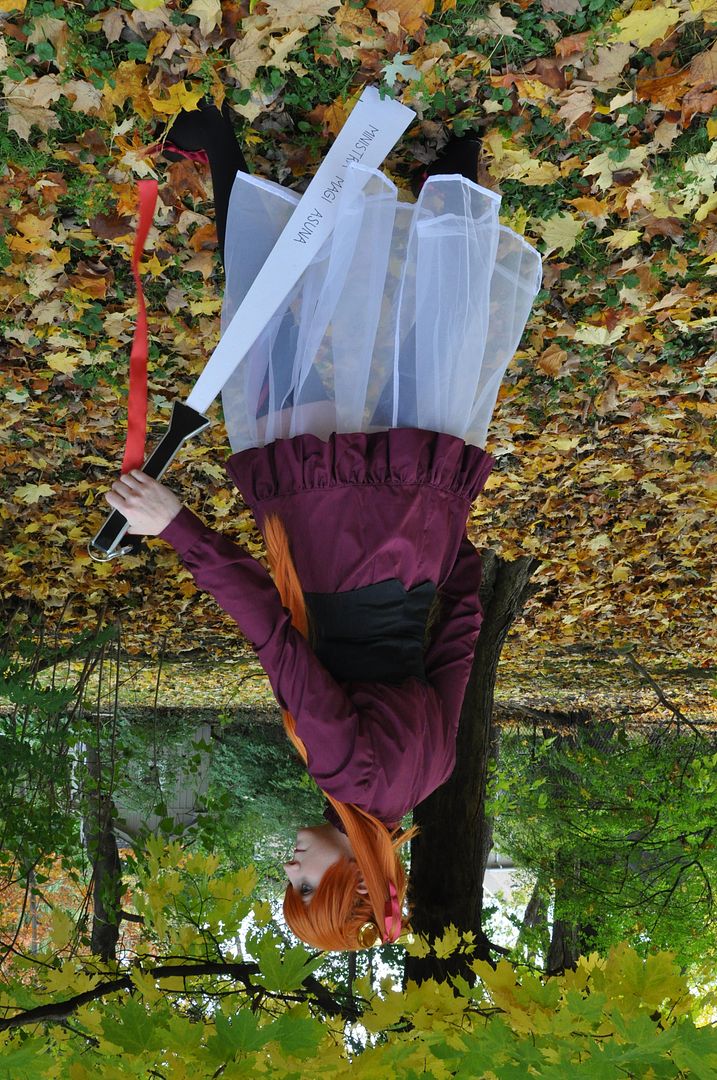
I taped them together in an accordian pattern. Using a marker I neatly wrote the inscription "Ministra Magi Asuna" on the outward faces.
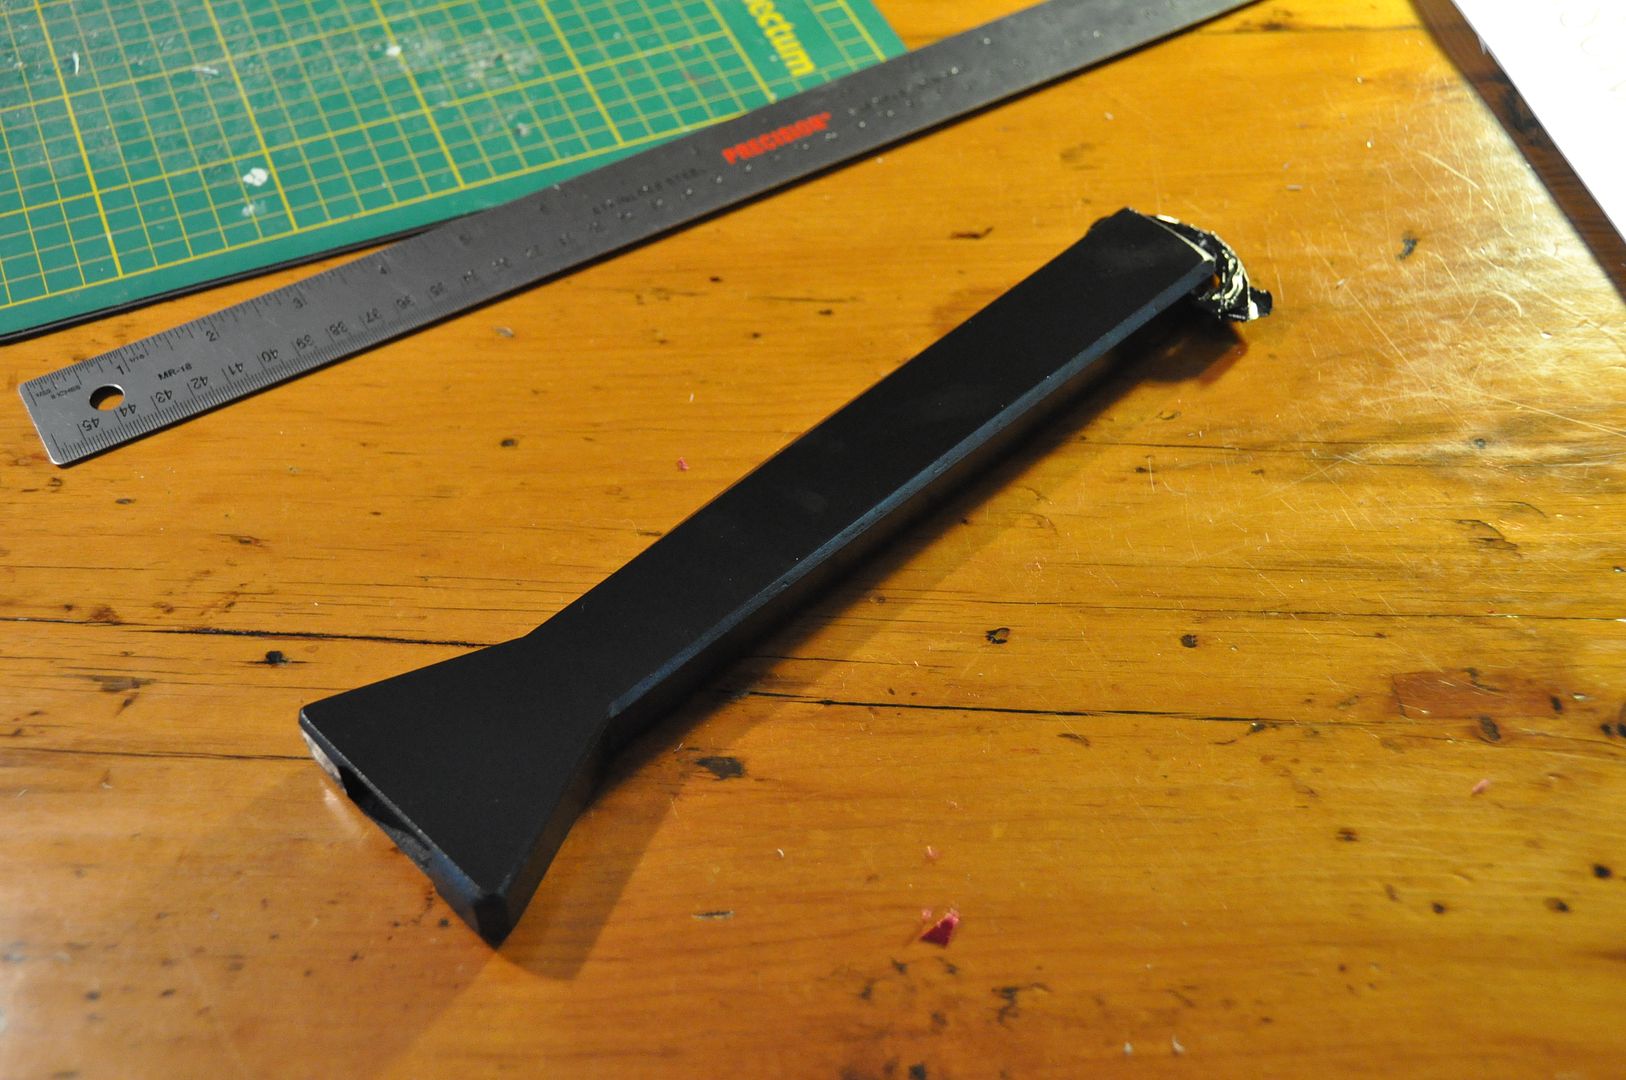
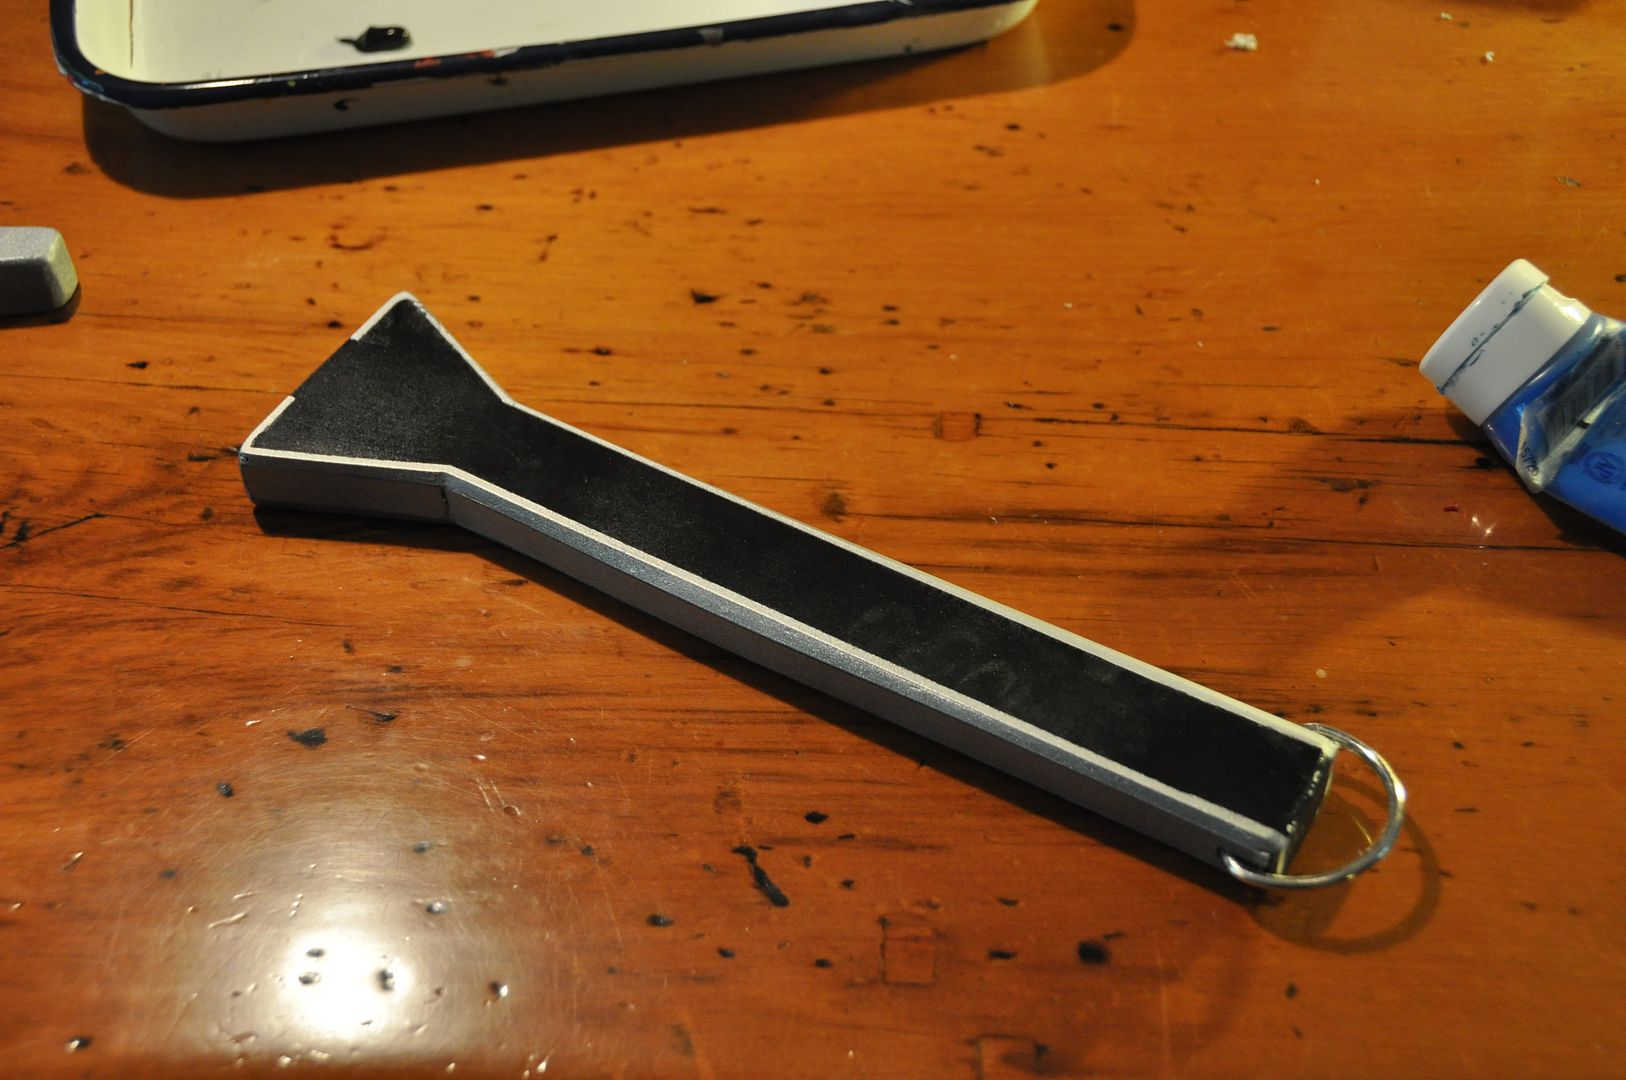
I made the handle in the same way as the large sword, minus the sculpted piece. I left a socket in the end where the fan pieces would attach.
Then I hot glued the fan accordian in place. I put some small wedge pieces to keep the fan slightly open, so it didn't look like flat slats sticking out of the handle.
I must have had this in mind (somewhere in my subconscious) when I was making the sword, because I made the ribbon detachable by using a carabiner instead of an actual chain link. This means I only need 1 ribbon, which I can attach to my weapon of choice, instead of making 2.
The fan part is very bendy, and doesn't stay rigid, but I rather like it that way, seeing how it is kind of the "fail" version of her sword. Hahaha
I had been debating whether or not to bother making it at all, seeing how I already had a weapon for this character. However as much as I love the sword form, it's really heavy and I couldn't take it to the States because it is just too large to fit in the car. So I made this the day before I left, entirely from scrap materials. Not bad for a rush job, eh? ;D
For anyone who doesn't have the confidence, time or materials to make her sword, I highly suggest making the harisen (fan) as it is a great beginner level prop, and it doesn't cost much to make!
I cut out 4 pieces of illustration board that would be the fan. (Ideally I would have liked to have more, but I only had this much board left.
I taped them together in an accordian pattern. Using a marker I neatly wrote the inscription "Ministra Magi Asuna" on the outward faces.
Then I hot glued the fan accordian in place. I put some small wedge pieces to keep the fan slightly open, so it didn't look like flat slats sticking out of the handle.
I must have had this in mind (somewhere in my subconscious) when I was making the sword, because I made the ribbon detachable by using a carabiner instead of an actual chain link. This means I only need 1 ribbon, which I can attach to my weapon of choice, instead of making 2.
The fan part is very bendy, and doesn't stay rigid, but I rather like it that way, seeing how it is kind of the "fail" version of her sword. Hahaha
Tuesday, October 29, 2013
Asuna Kagurazaka (V.2) - Outfit - Negima
As my 3rd costume for Otakon I decided to make an alternate outfit of
Asuna's. I already had a wig, and Asuna has many, many outfits in the
manga, so I thought I would make one of my favourites.
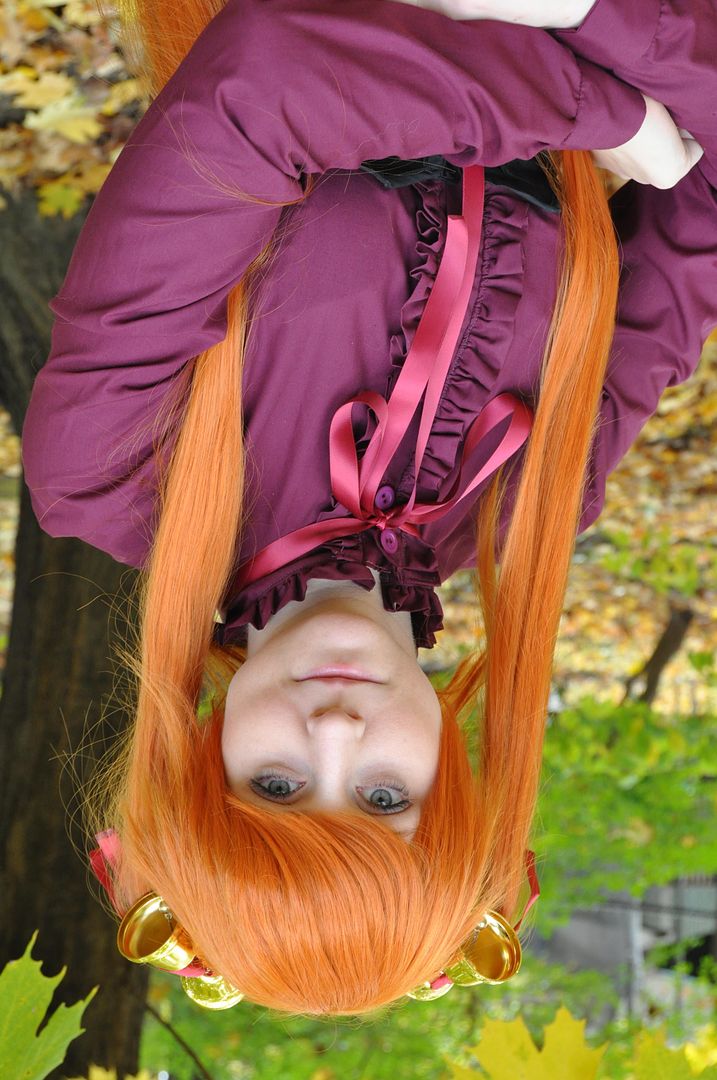
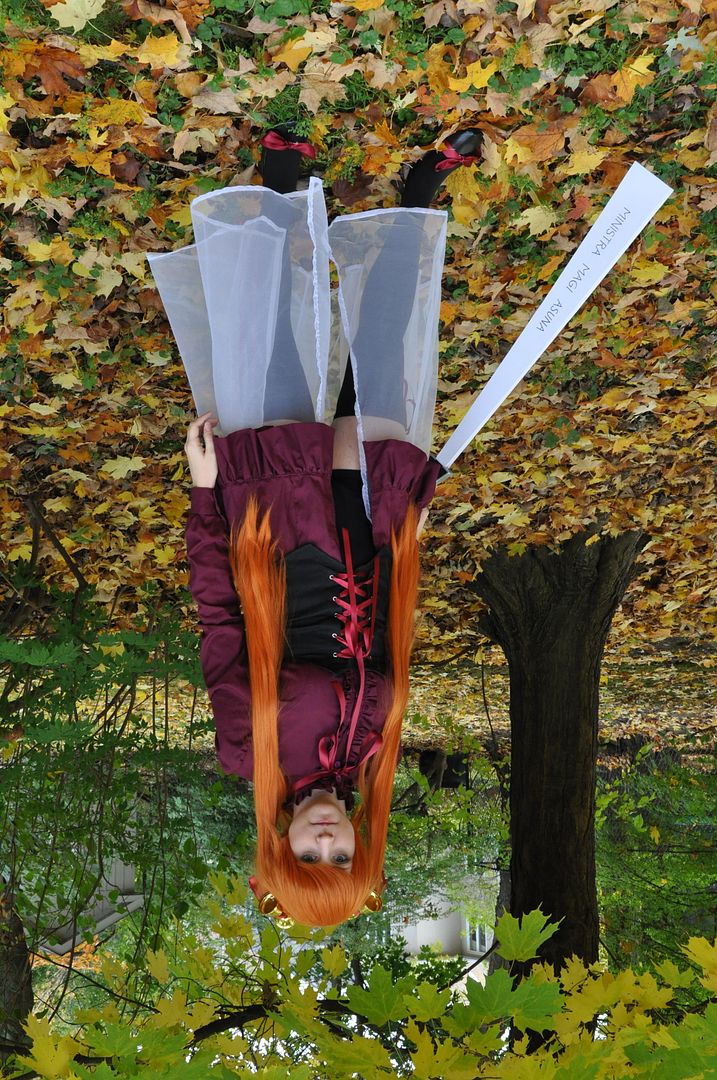
Special thanks to my mum for doing an impromptu fall photoshoot in the backyard!
 I picked this one (pictured left) particularly so I could re-purpose the sheer under skirt I had originally made for her other costume! This outfit is worn during the training arc prior to their trip to Mundus Magicus, for anyone who actually knows the series.
I really like the deep burgundy colour of the blouse (dress?), but I went more saturated with my colour choice.
(There sure are a lot of orange-haired characters in this manga...)
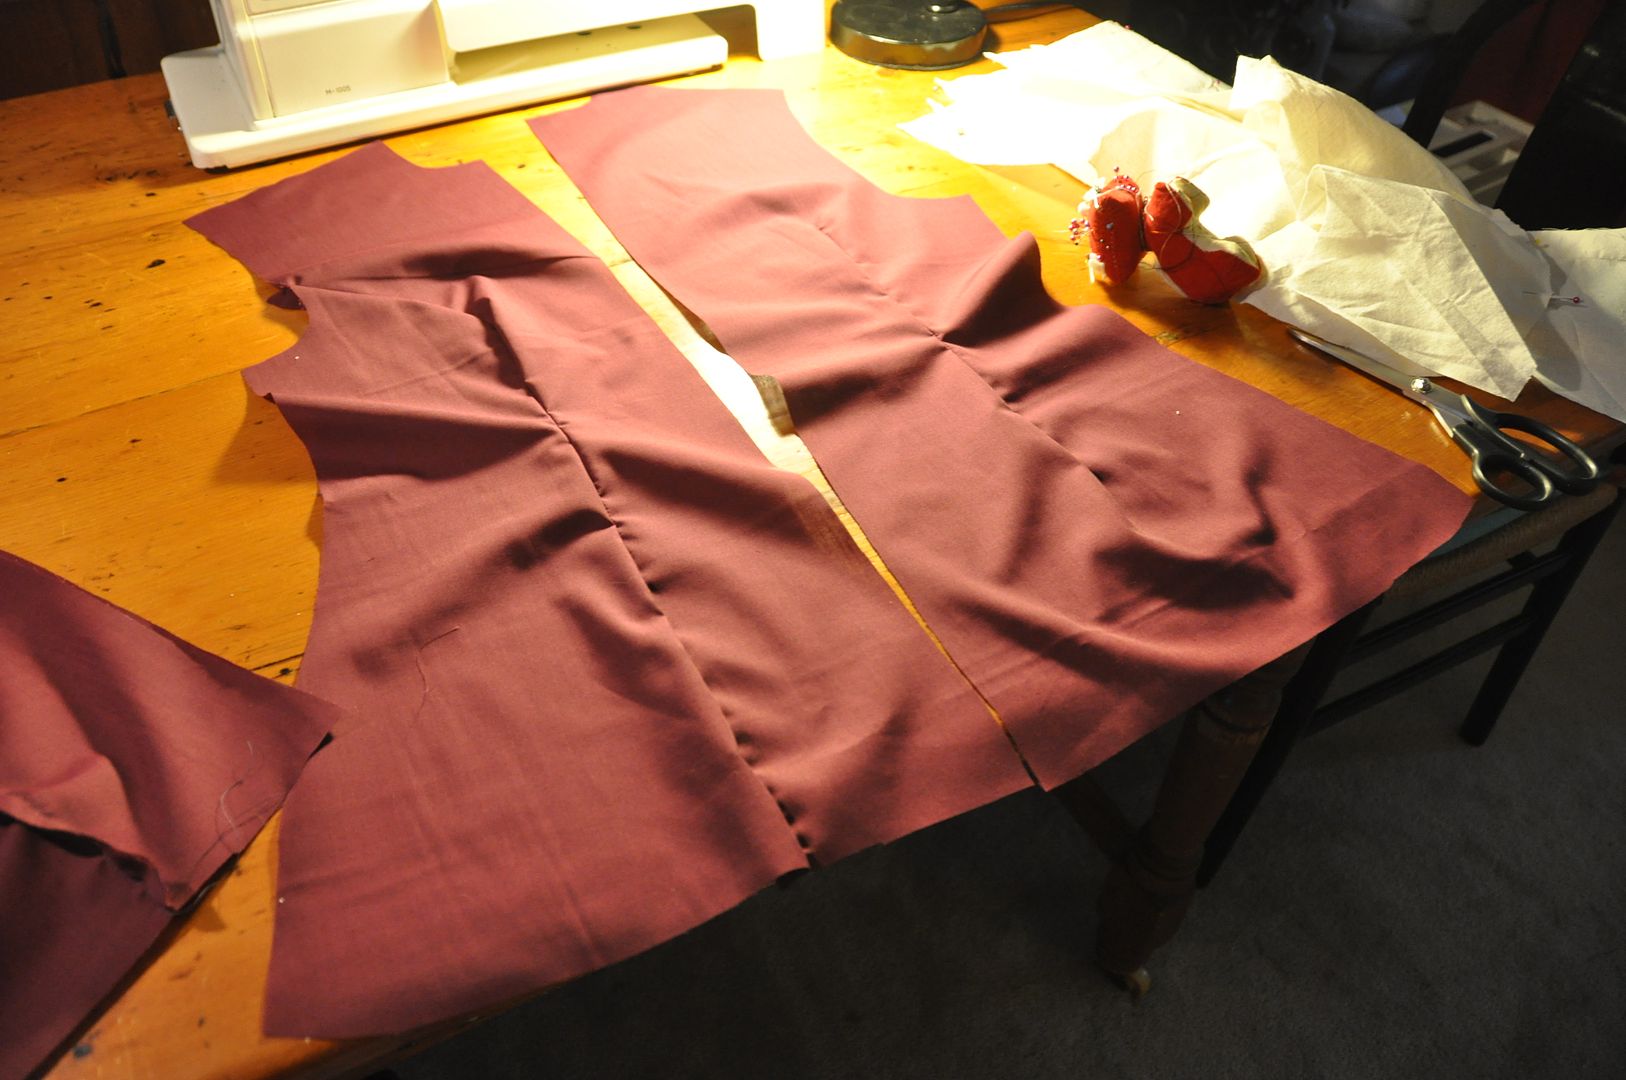 I drafted a basic block, with a princess seam that I extended to be longer and go outward in an a-line style at the sides.
I cut out all my pieces (2 center front panels, 2 center back panels, 2 side front panels). Then I sewed up the darts, then side, back and shoulder seams.
When this was done I finished the inner seams.
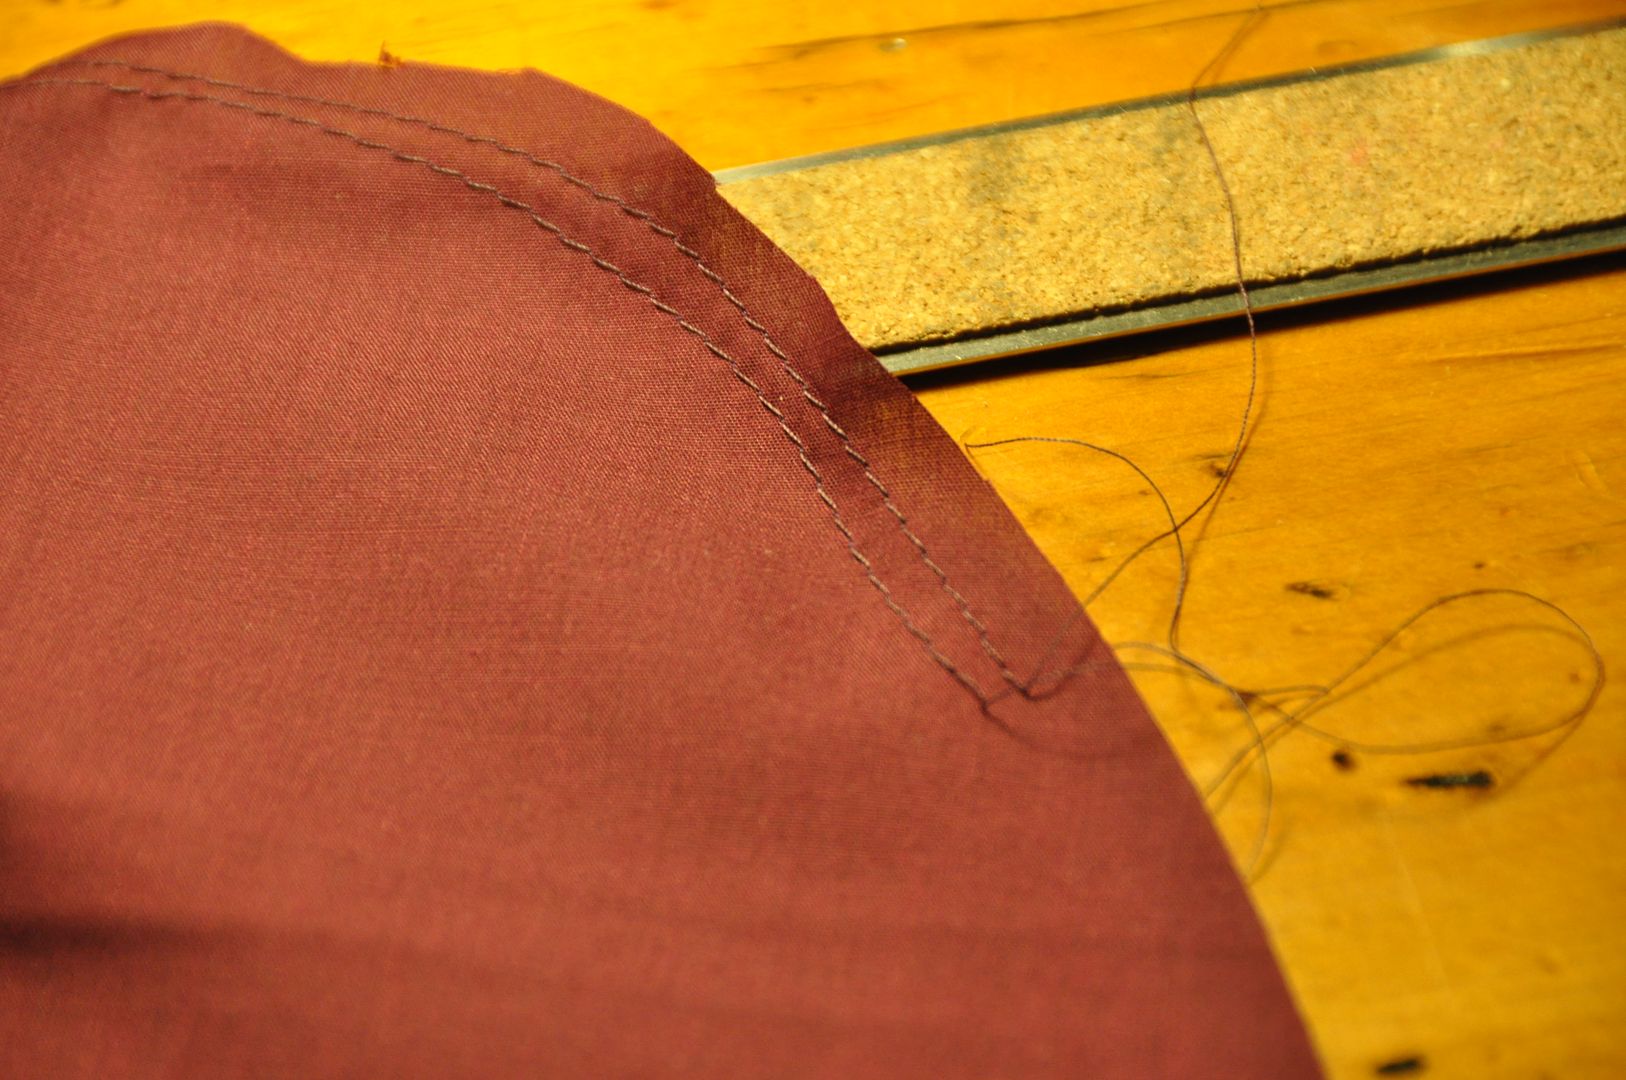
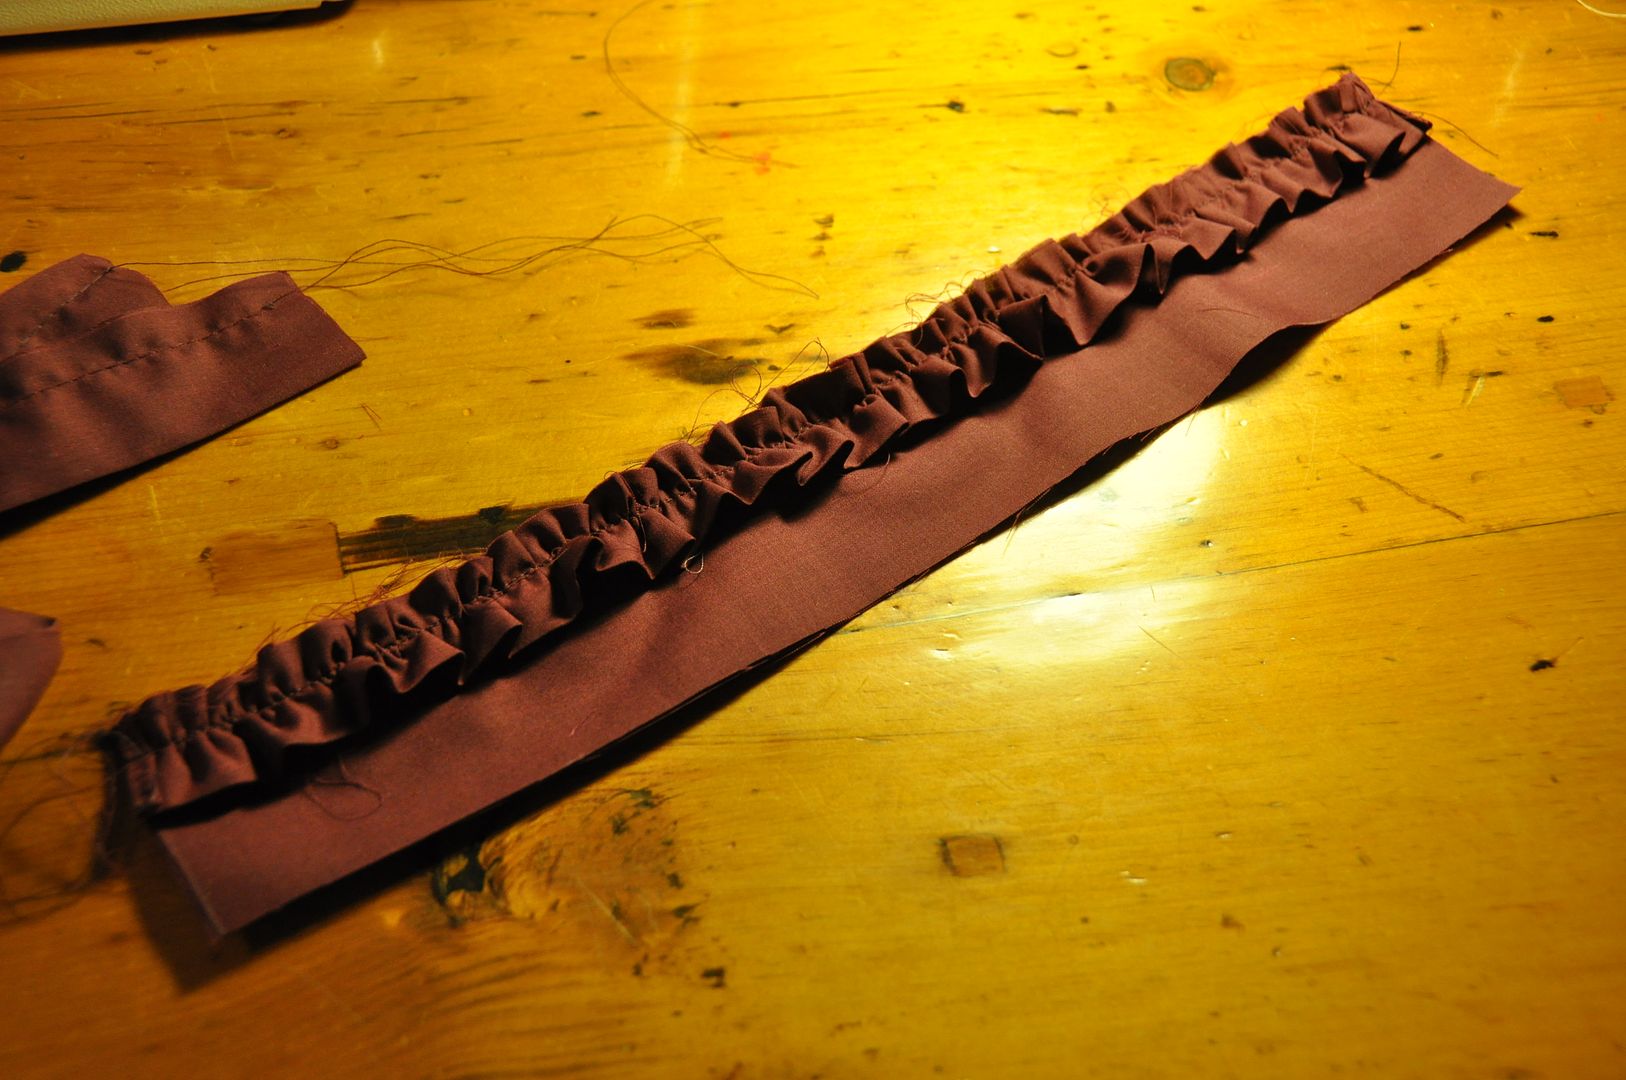 I drafted the sleeve to have a slight pouffe at the shoulder. I cinched the ruffle with a double row of basting stitches (leaving the thread ends long so I could pull on them).
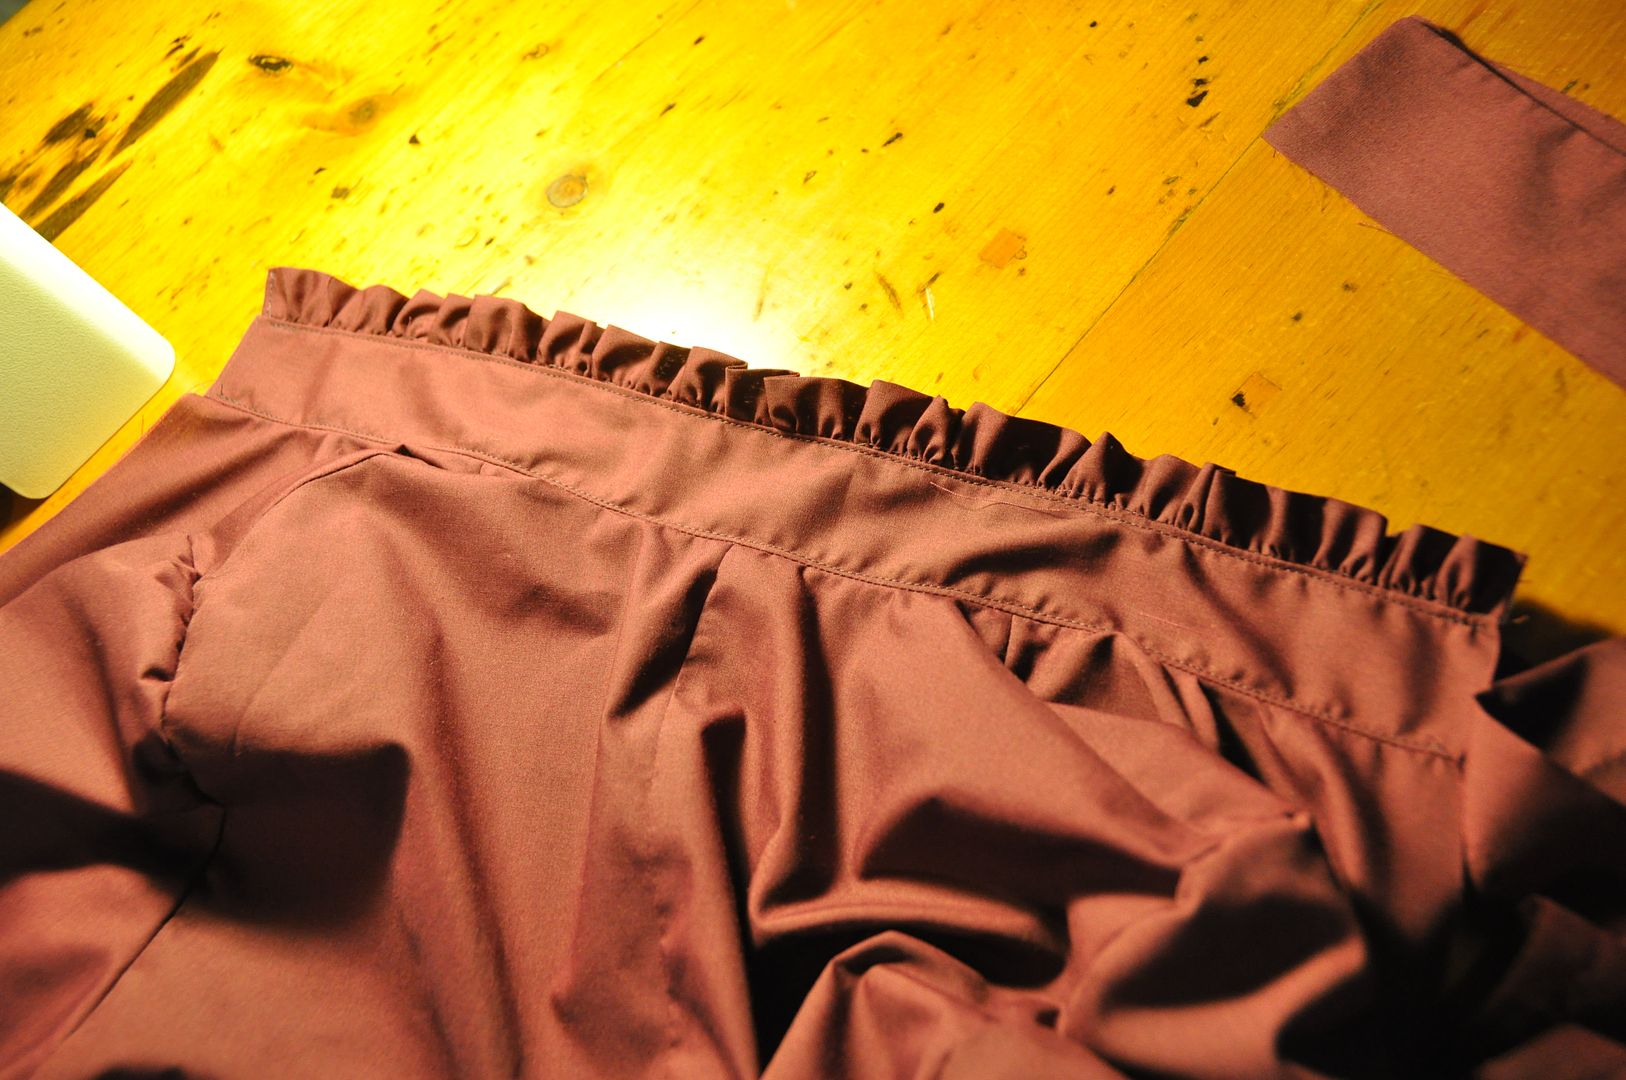
I made the collar ruffle, which was sandwiched inside the collar pieces and turned right way out. This was then attached to the neckline.
I made the 2 front ruffles, which I stitched down to the front opening.
Then I attached the placket and finished off the opening edge and armhole seams.
 Then I made a bias tape to finish off the sleeve slit, before I attached the cuffs. The sleeve pouffed just a touch at the cuffs as well.
The last thing I did was attach the bottom ruffle and do all the button holes.
Then I made the "corset". Now I say "corset" instead of corset, because this is just designed to look like an underbust corset, but does not have any of the structuring a corst would have (like boning). For all intents and purposes it is a glorified belt. Hahaha
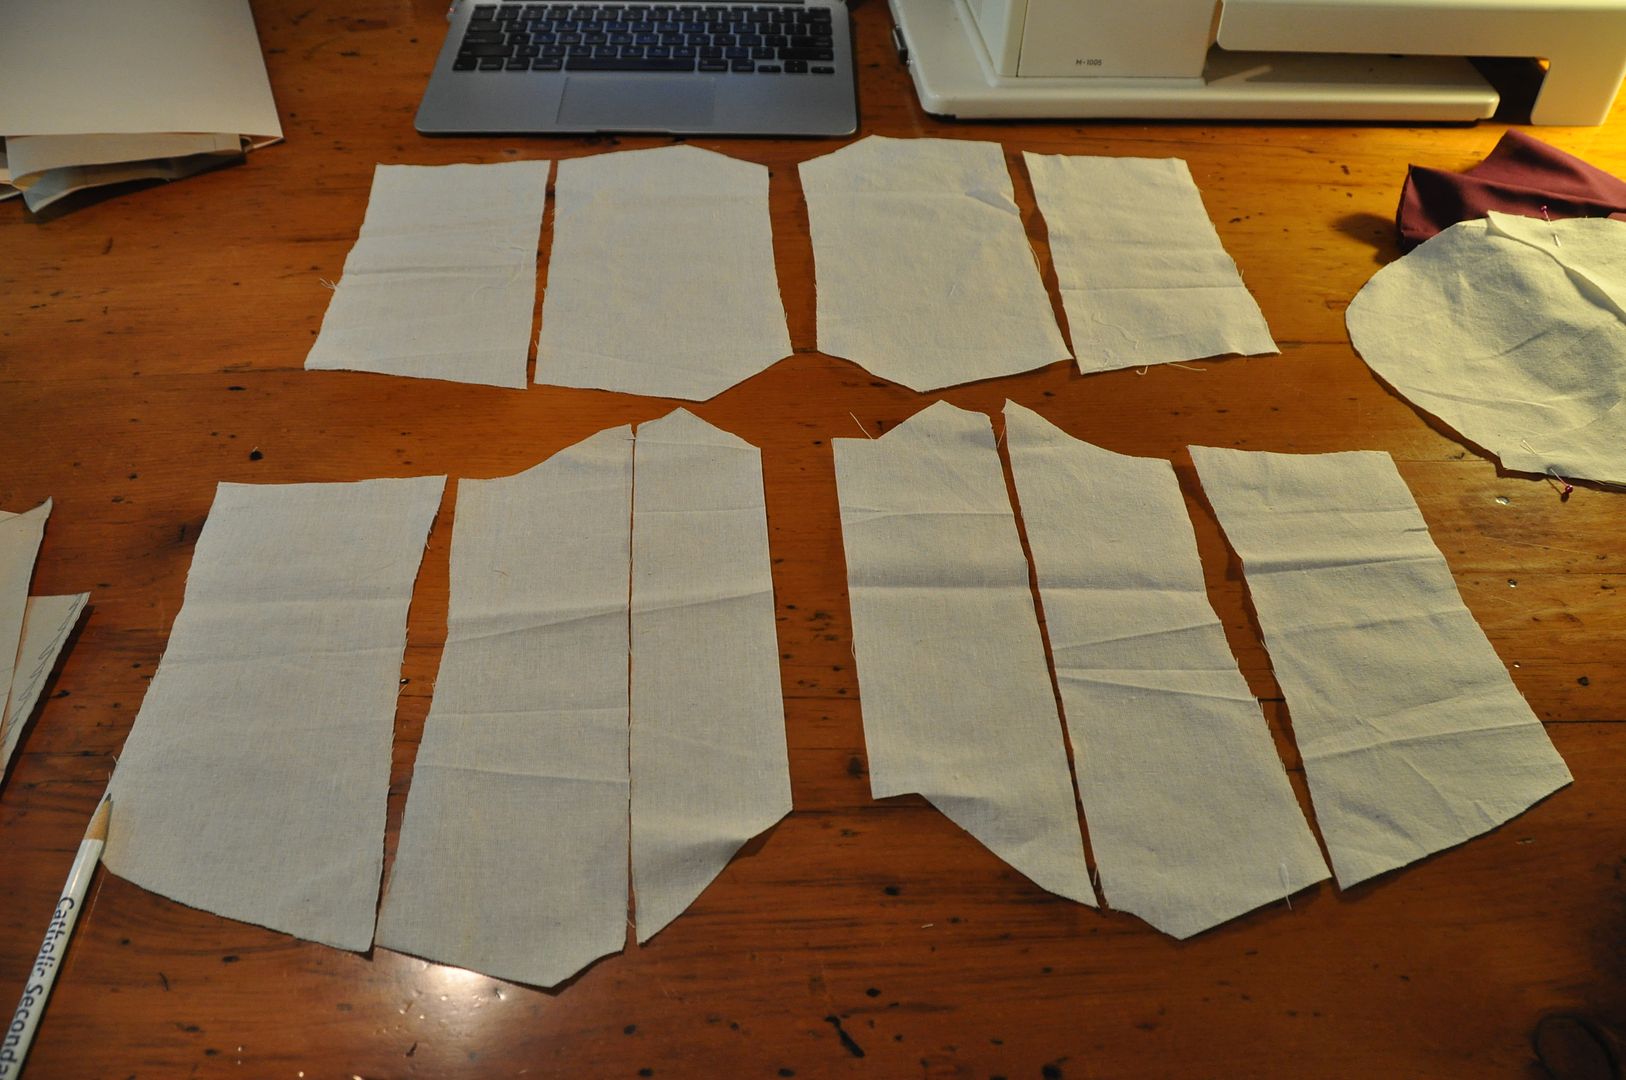 I figured out how long I wanted ti to be, my underbust measurement, my waist measurement and natural waist measurement (where a modern pair of pants would sit). From there I was able to pattern this. Using my widest measurement I could then divide and calculate my darts.
The result was these 10 pieces (pictured left: top row is the back panels, bottom row is the front panels).
 I made a mockup, then a good version.
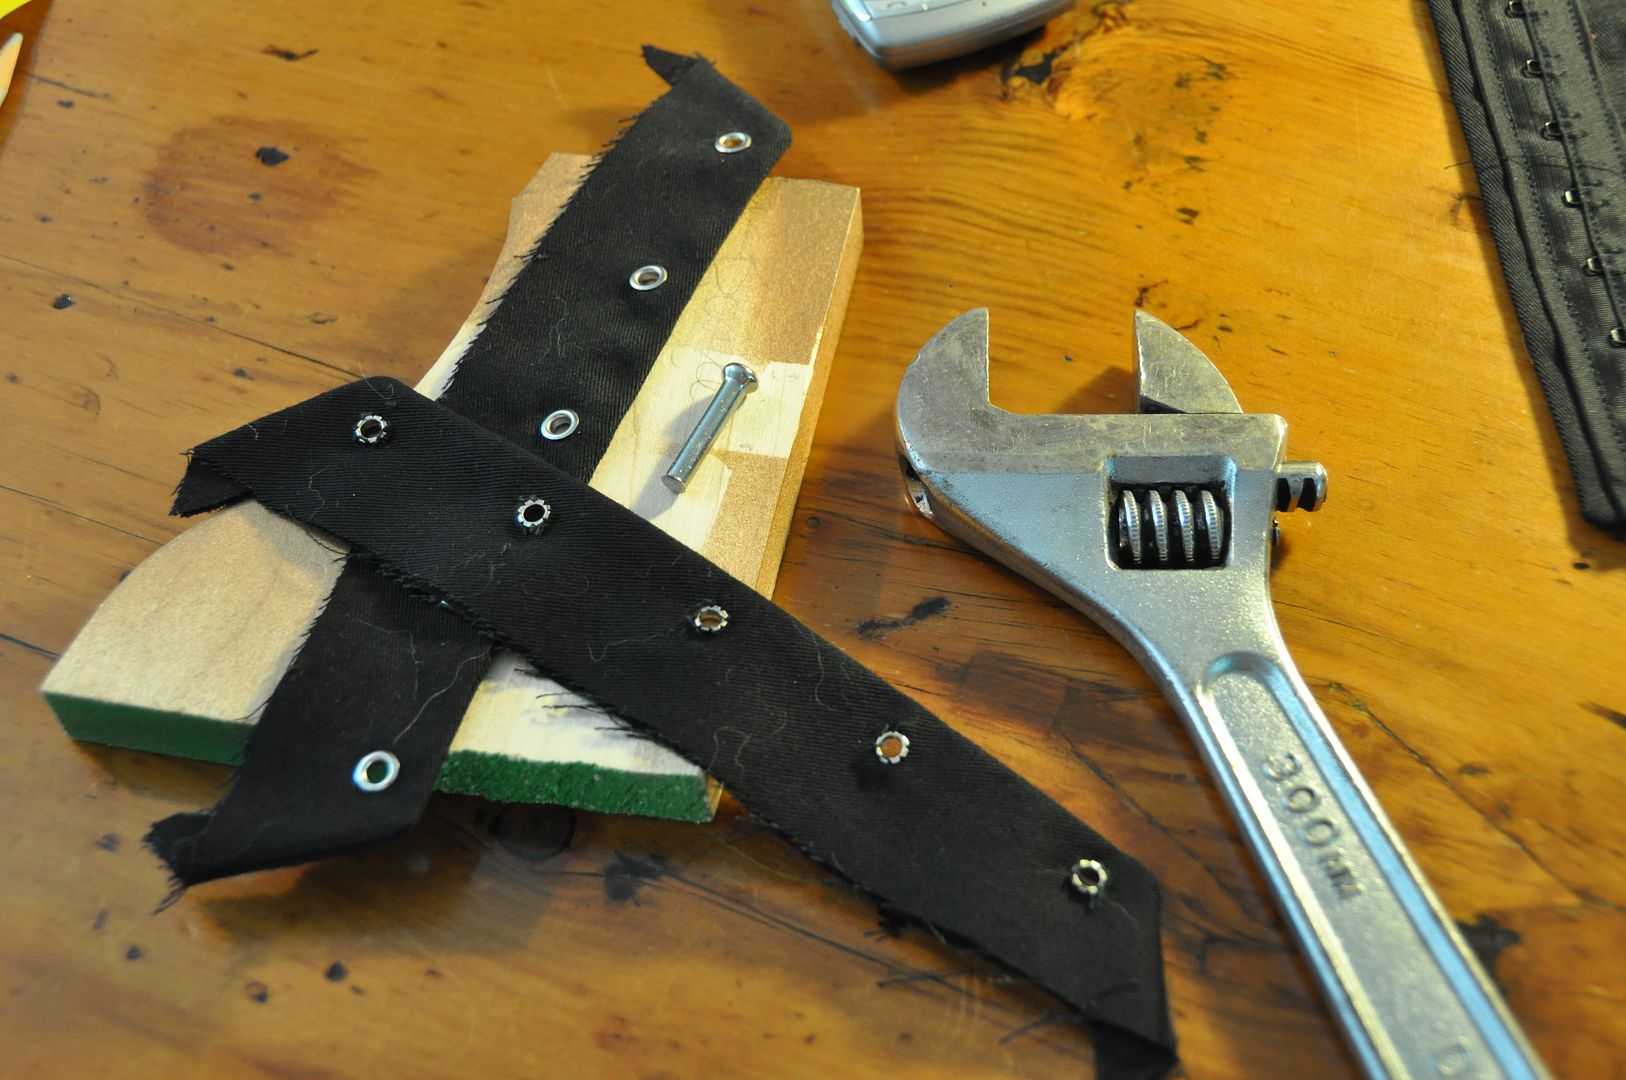
Then I hammered in the grommets. I couldn't find a hammer, so I used a wrench instead (my shop professor would be crying right now). It is always recommended to have a scrap piece of wood handy when hammering grommets, otherwise you will end up with dents in your table...
The grommets and lacing are just for show though, the actual closure is a row of hook and eye tape. Because it is way more secure. Lastly I finished up the edges with bias tape! Woo!
I bought the thigh-high socks and ribbons for the costume. All of the bows on the socks were attached with safety pins, so I can use the socks for other things (and real life). The black flats are the same ones from my Alice costume.
Special thanks to my mum for doing an impromptu fall photoshoot in the backyard!
 I picked this one (pictured left) particularly so I could re-purpose the sheer under skirt I had originally made for her other costume! This outfit is worn during the training arc prior to their trip to Mundus Magicus, for anyone who actually knows the series.
I really like the deep burgundy colour of the blouse (dress?), but I went more saturated with my colour choice.
(There sure are a lot of orange-haired characters in this manga...)
 I drafted a basic block, with a princess seam that I extended to be longer and go outward in an a-line style at the sides.
 I cut out all my pieces (2 center front panels, 2 center back panels, 2 side front panels). Then I sewed up the darts, then side, back and shoulder seams.
When this was done I finished the inner seams.
 I drafted the sleeve to have a slight pouffe at the shoulder. I cinched the ruffle with a double row of basting stitches (leaving the thread ends long so I could pull on them).
 I made the collar ruffle, which was sandwiched inside the collar pieces and turned right way out. This was then attached to the neckline.
I made the 2 front ruffles, which I stitched down to the front opening.
Then I attached the placket and finished off the opening edge and armhole seams.
 Then I made a bias tape to finish off the sleeve slit, before I attached the cuffs. The sleeve pouffed just a touch at the cuffs as well.
The last thing I did was attach the bottom ruffle and do all the button holes.
Then I made the "corset". Now I say "corset" instead of corset, because this is just designed to look like an underbust corset, but does not have any of the structuring a corst would have (like boning). For all intents and purposes it is a glorified belt. Hahaha
 I figured out how long I wanted ti to be, my underbust measurement, my waist measurement and natural waist measurement (where a modern pair of pants would sit). From there I was able to pattern this. Using my widest measurement I could then divide and calculate my darts.
The result was these 10 pieces (pictured left: top row is the back panels, bottom row is the front panels).
 I made a mockup, then a good version.
Then I hammered in the grommets. I couldn't find a hammer, so I used a wrench instead (my shop professor would be crying right now). It is always recommended to have a scrap piece of wood handy when hammering grommets, otherwise you will end up with dents in your table...
The grommets and lacing are just for show though, the actual closure is a row of hook and eye tape. Because it is way more secure. Lastly I finished up the edges with bias tape! Woo!
I bought the thigh-high socks and ribbons for the costume. All of the bows on the socks were attached with safety pins, so I can use the socks for other things (and real life). The black flats are the same ones from my Alice costume.
Wednesday, October 23, 2013
Presea - Wig - Tales of Symphonia
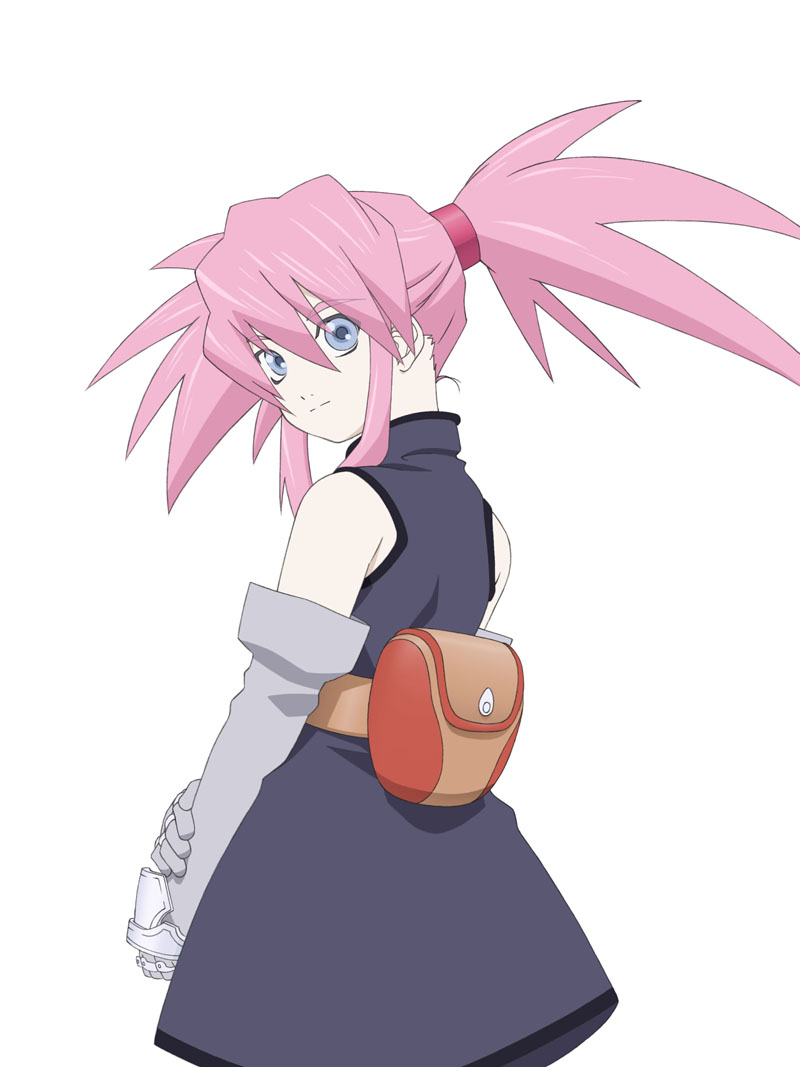
(Edit: Now with completed photos!)
This was my first time doing a pigtail wig. This method is more difficult, and far more time consuming, but less expensive than the method I used for Asuna's wig. For Asuna I bought a second wig and used the wefts from that to cover the netting at the back, but for Presea I chopped off the bottom half of the wig and used the leftover hair to make the wefts for the back. This only worked because Presea's pigtails only had to be longer than her shoulders (as opposed to Asuna's, which are supposed to be almost down to her knees).
In order to do this with one wig, I bought a 50" pink wig from Epic Cosplay.
(To see how I made the Dress, go here.)
For Presea's pigtails, I chose to go a little less extreme, I wanted them to have volume, but not be crazy/ gravity defying.
To start, I divided what I wanted to be the front part of my wig (bangs and side burns). I made the bangs a bit choppy, making sure they covered some of the wefts that would be pulled into the pigtail underneath. I started with a lot of hair at the side, but thinned it out, and transformed about half of it into bangs.
 I carefully parted the back of the hair along the center back of the netting. Pulling the hair into pigtails I could see how much netting would be exposed. Also you can see how little volume is in those pigtails. (Some of it was added simply by adding all that extra hair in the back, the rest was done later with lots of hair spray.)
At this point I tried the wig on and figured out exactly how long I wanted the pigtails. I marked this point and chopped off the bottom of the wig, keeping all the loose hair carefully bundled.
Then I set about adding in the wefts. I took a large embroidery needle and would take small bundles of hair fibers lick the ends and thread them through. I would pull them about halfway through the needle. Then I would stitch the needle in and then out of the wig (from the outside). I would then pull one side of the bundle all the we through the wig. I would do this several times, then I would take caulking and smear it around the inside of the wig, sealing the fibers in place. Then I would wait for it to dry, then repeat.
(I totally marathoned "Murder, She Wrote", while making this wig. As the process is long, tedious, and does not require much brain power.)
This was a messy process, and in the end it made the wig a bit lumpy. I cut out some of the excess lumpiness.
I had bought a heat sealer for this process, but it didn't work. It got hot, but wouldn't melt the fibers. We tried to contact the seller, but they ignored all our emails, so I was quite peeved that I spent 40$ (+shipping) on a useless piece of equipment.
With all the loose hair around it was much easier to braid all the sections I wasn't working on so the wig wouldn't become hopelessly tangled.
Then carefully, using a comb, I parted the back. Now it looked much better than when I started!
 First I thinned out the bottom of the pigtail, so it would look so straight cut. The layers helped make it look more spiky/punkish.
The next step was to add some volume to those pigtails. I tied the pigtails with elastic bands (normal hair ties slip too easily). I pulled the pigtail apart at the base and used a liberal amount of hair spray, using a hair dryer to help it dry faster. (The brand of hair spray I use it Got 2B Glued, in combination with a hair dryer it works wonders.) I would then pull sections and spray them individually, trying to make the pigtail as wide as possible. (Look a the picture on the left to see the pigtail without hairspray, and the one with.)
Then this wig was ready to be worn! Unfortunately the costume was not! This wig had to wait a whole year for it's debut!
I am not 100% satisfied with the full finished costume, and I plan to do some major touch ups on the battle axe, which got damaged during the trip to Baltimore. Then I will do a photoshoot so you guys can all see pictures of the finished costume!
Tuesday, October 15, 2013
Presea - Dress - Tales of Symphonia
(Edit: photos finally added many years later!)
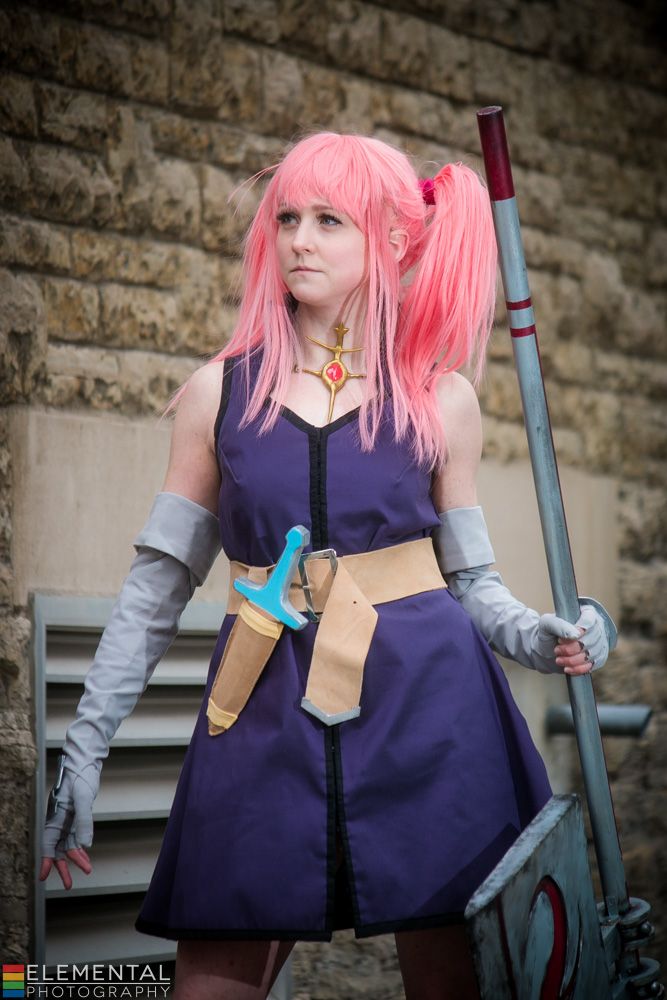
This is the first part of my in-depth look at how I made my Presea costume from Tales of Symphonia. (Attn: I currently have no pictures of the finished costume, as I need to make some major repairs to my axe before doing a photoshoot. I will post photos of the finished costume sometime soon!)
This costume had been in the works on and off for over a year. Originally meant to debut at Otakon in 2012, I encountered a lot of set-backs in the initial build that made it impossible to get it done for that con. Instead, I set it aside, to be finished for the following year. It was received quite well at Otakon 2013! Though I am a little sad I missed the Tales photoshoot.
Presea Combattir is a character from the Gamecube game Tales of Symphonia, released in 2004. This game, although being primarily single player, had the option of setting one of the computer controlled party members to player controlled during combat. So, I spent a great deal of time playing this game with my older sister. Originally, the party is quite small, and there are not too many characters to choose from, but later on there are about 9 characters and Presea was always one of my favourites. She was a silent badass, wielding a mighty axe, hefting trees, fighting off the bad guys. Also a very cute character. (Much preferable to Colette, as far as the main cast goes.)
It's interesting for me to compare how I made things 1 year ago to now. There is a lot I have learned over the past year, and there are many things I would have done differently on this costume had I made it now instead of then. The dress was the piece I finished first when I first began making the costume, so when I returned to the costume a year later I decided to leave it as it was, rather than improving it.
Like Suppi, this is another costume where colour is debatable because every reference picture is different. This dress ranges from blue to grey to purple. I decided to go with purple, because a) I like purple, b) I found purple fabric, c) I like purple on this character, and d) that is the colour the dress is in actual gameplay. Haha
Finding the correct colour of purple fabric was not so easy however. The only purple I found was in the drapery section, so yes, my dress is made out of drapery fabric.
 I started by tracing a shirt to get the width and armholes I wanted. I made the dress a wide a-line with no darts. All the cinching at the waist would be done with the belt. From there I made a broadcloth mockup. I drew my desired diamond neckline onto the mockup, then transfered it onto the paper pattern.
 I then cut out my pieces from my purple fabric. I cut out double, making the dress double thickness to make it stiffer.
I sewed the side seams, and shoulder seams, then finished the inside edges.
Then I made the collar, which was 2 pieces of my purple fabric, with 1 layer of interfacing to keep it stiff. The collar is slightly shorter in the back than in the front. These pieces were basted together, then attached to the neckline.
I then added a black modesty panel, and a long row of hook and eye tape down the front.
 Next step was to finish the bottom edge with black bias tape.
Then I added a dart coming in from the armhole. This stopped it from gaping weirdly at the front. The armholes were also finished with bias tape.
 The last step was to finish the collar with black bias-tape. This was the first time I had done sharp corners with bias tape. I put the corners into the bias tape before sewing it on.
This is the first part of my in-depth look at how I made my Presea costume from Tales of Symphonia. (Attn: I currently have no pictures of the finished costume, as I need to make some major repairs to my axe before doing a photoshoot. I will post photos of the finished costume sometime soon!)
This costume had been in the works on and off for over a year. Originally meant to debut at Otakon in 2012, I encountered a lot of set-backs in the initial build that made it impossible to get it done for that con. Instead, I set it aside, to be finished for the following year. It was received quite well at Otakon 2013! Though I am a little sad I missed the Tales photoshoot.
Presea Combattir is a character from the Gamecube game Tales of Symphonia, released in 2004. This game, although being primarily single player, had the option of setting one of the computer controlled party members to player controlled during combat. So, I spent a great deal of time playing this game with my older sister. Originally, the party is quite small, and there are not too many characters to choose from, but later on there are about 9 characters and Presea was always one of my favourites. She was a silent badass, wielding a mighty axe, hefting trees, fighting off the bad guys. Also a very cute character. (Much preferable to Colette, as far as the main cast goes.)
Like Suppi, this is another costume where colour is debatable because every reference picture is different. This dress ranges from blue to grey to purple. I decided to go with purple, because a) I like purple, b) I found purple fabric, c) I like purple on this character, and d) that is the colour the dress is in actual gameplay. Haha
Finding the correct colour of purple fabric was not so easy however. The only purple I found was in the drapery section, so yes, my dress is made out of drapery fabric.
 I started by tracing a shirt to get the width and armholes I wanted. I made the dress a wide a-line with no darts. All the cinching at the waist would be done with the belt. From there I made a broadcloth mockup. I drew my desired diamond neckline onto the mockup, then transfered it onto the paper pattern.
 I then cut out my pieces from my purple fabric. I cut out double, making the dress double thickness to make it stiffer.
I sewed the side seams, and shoulder seams, then finished the inside edges.
Then I made the collar, which was 2 pieces of my purple fabric, with 1 layer of interfacing to keep it stiff. The collar is slightly shorter in the back than in the front. These pieces were basted together, then attached to the neckline.
I then added a black modesty panel, and a long row of hook and eye tape down the front.
 Next step was to finish the bottom edge with black bias tape.
 Then I added a dart coming in from the armhole. This stopped it from gaping weirdly at the front. The armholes were also finished with bias tape.
 The last step was to finish the collar with black bias-tape. This was the first time I had done sharp corners with bias tape. I put the corners into the bias tape before sewing it on.
Subscribe to:
Posts (Atom)

