Tuesday, November 8, 2016

Leia Rebel Scout - Star Wars VI - Wig

Hey guys! Lets take our first look at my Leia Rebel Scout costume! I won the "Best of Thursday" award at the FanExpo Cosplay Craftsmanship Contest 2016 with this costume.

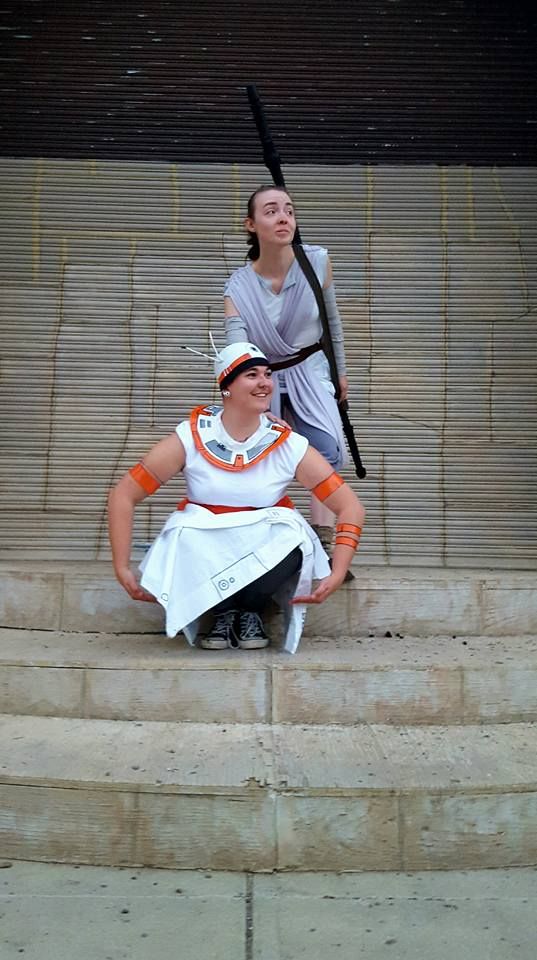
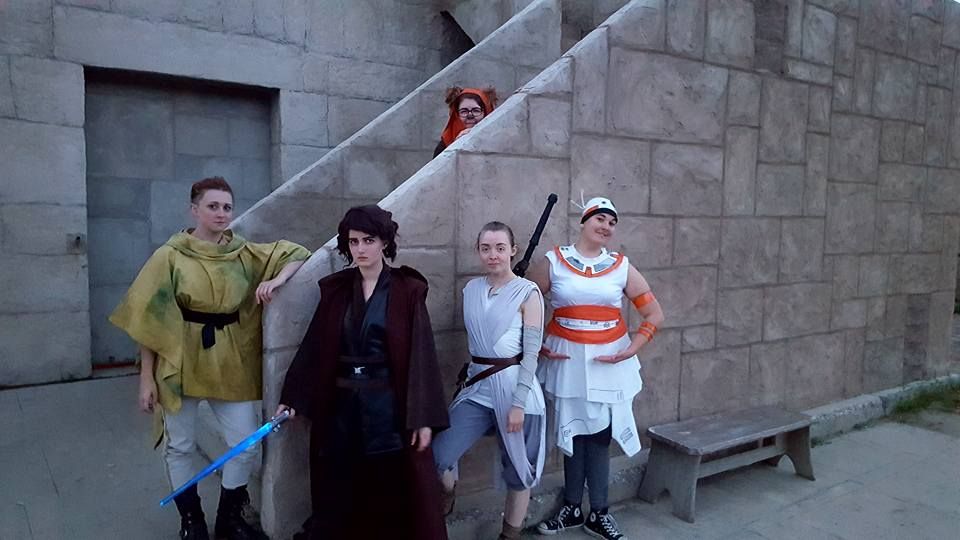
I've wanted to do something Star Wars for a long time, but I was undecided what costume to do. I was interested in doing Leia, since I enjoy her character a lot (though not as much as my undying love for Han Solo). But as far as costumes go I thought her most iconic outfit is kind of bland and "slave Leia" is really not my kind of costume. I did however find the rebel uniforms pretty neat and really loved those bizarre ponchos they wear in the forest on Endor, so I thought I would do the most un-cosplayed Leia costume there is. Enter, Leia Rebel Scout!

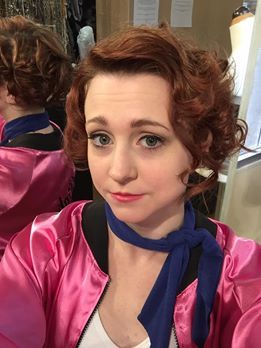
This wig was a bit a leap for me in terms of wig skills--I have never worked with a lace front before this. So I was worried it was going to turn out awfully. My fears were unfounded though! For my first lace-front I thought the application went pretty damn smoothly.  Especially since my boyfriend Blayke was my assistant for the first trial run and we know how he likes to do cosplay (hint it involves using only staples).

But I got quite a few compliments on my wig! Most people were fooled into thinking it was my actual hair and praised my hair braiding wizard skills. If they were fooled, it must have worked? ;D
My base wig was from Arda Wigs--because they sell good quality lace-front wigs for cosplay. I got the Matilda in warm light brown. I was a bit disappointed to discover that it looked more ginger than I wanted, so I actually toned down the colour with a brown sharpie before I started styling it. What this means is that I took individual fibers/small bundles and coloured them in, this gave it a more natural look of colour variation that helped to darken it a bit.


This style involved next to no cutting--it was primarily sectioning the hair and braiding it. I sheared off a few strands at the front to create the wisps of hair that hang down at the sides of her face and give a more worn look to the hairstyle--like she has in the Endor scenes.


This style involved next to no cutting--it was primarily sectioning the hair and braiding it. I sheared off a few strands at the front to create the wisps of hair that hang down at the sides of her face and give a more worn look to the hairstyle--like she has in the Endor scenes. I straightened these later because they were a little too curly.

The two braids that come up and over the head start one on each side. As they passed the halfway point hair from the front hairline was french braided in to extend the length. Then they were tucked in and pinned in place.

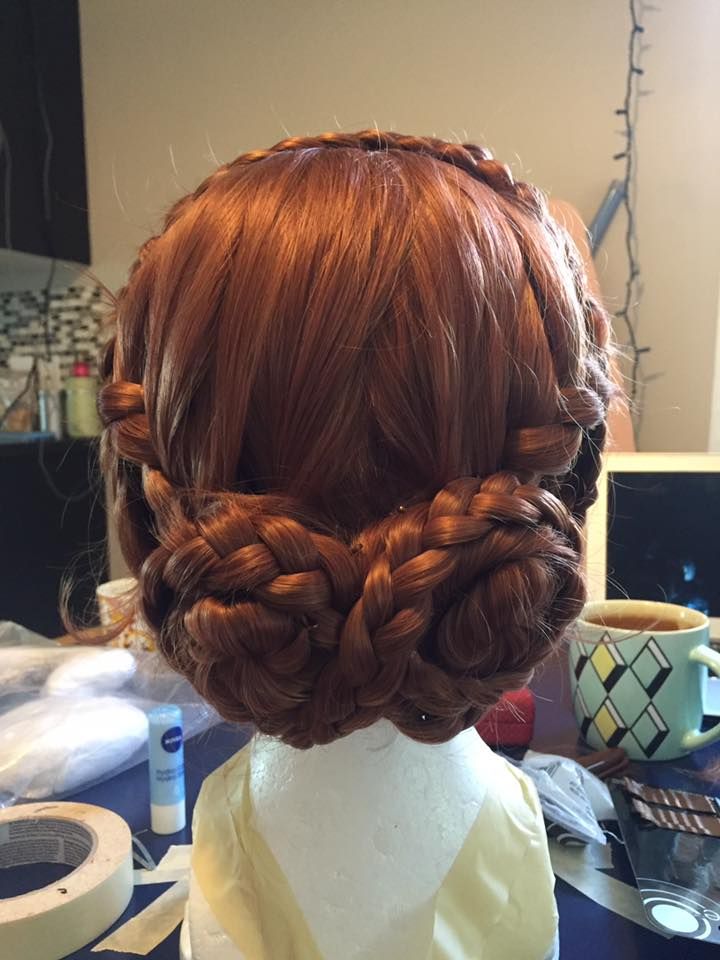
The bun at the back is made up of 6 sections. There are 2 braids that take most of the top section--these were held off to the side at first. I took the next two sections--which are fairly close together at the center back--and twisted them into two small buns. Then I took my next two smaller sections and braided them. 

The first two braids were crossed below the buns and then coiled around the bases. They were pinned in place there. The smaller braids were then coiled around the two buns in a figure eight--turning the two separate buns into one larger bun.

I trimmed the excess lace at the front down to less than 1/4".

The application process went fairly smoothly but took a hell of a long time. The wig actually has a comb clip in the front, which I hooked onto my own hair (I french braid my bangs when I wear wigs) to keep it from sliding. This wig is fairly back heavy.

I started at the center of the hairline and made sure it was sitting in the correct place. Then I moved outwards from the center along the hairline down each side doing small sections and gluing them in place with spirit gum. I used a hairdryer to speed up the drying time (that was Blayke's job) while I held things in the correct place. Once it was done it looked pretty convincing!


Sunday, November 6, 2016

November Update

It's November? This year is going way too fast for me...

In other news I decided to stop being a caveman, catch up with the times and get a Tumblr account. I'm going to use it very similarly to my facebook page--posting progress shots and links to my blog. Be sure to check it out! Click here to go to the adventuresome wilds of the tumblr!

Rest assured, I will still continue posting my detailed blog posts and longer tutorials here. Because that's how I roll. (I'm clearly making myself sound ancient.)

Halloween was pretty casual. But I did go out this year as the weather was actually not horrible. And in unexpected news I brought not one, but TWO costumes out of retirement for the event.

I am of course speaking of my Gryffindor robes--which I lent to Blayke--and my Crow Soldier mask. If you want to take a trip down memory lane, follow those links all the way back to 2011. When times were simpler and I had no idea what I was doing.

Things are going pretty slowly, but my projects are coming along. Fingers crossed I can keep motivated and get it all done!

That's all for now folks!

Tuesday, October 25, 2016

Taking Orders for Splatoon Commissions!

Taking orders for Splatoon hats and tentacles!

- 30$ for full "boy" hats 
- 25$ for just the "girl" tentacles

All are made of spandex and hand painted. Team colour on request!

**Shipping is extra, determined by location

***All squid headgear must be sewn down to a wig in order to stay on (including boy hats). This is not included.

Shoot me a facebook message if you're interested!

Photo credit to Elemental Photography!


Friday, October 21, 2016

The Thrifty Costume Challenge

So, as those of you who follow me on facebook know, this past summer at my job we engaged in competition of sorts.

The rules were: Using only things you find at the thrift store, the dollar store, your closet, and as a last resort, Walmart, you must create a costume to fit the weekly theme. Try to keep your budget under 20$. The sub-goal is to google the costume and find the crappiest costume someone else on the internet has come up with and see if you can beat that--thats how you set the bar for your standards! >;D

I think it's fitting that I saved this post for October, because contrary to my normal costume-making projects, the goal of the costume challenge was to create costumes as cheap and quick as possible--perfect for Halloween! Terrible = Great!

Hope maybe some of you find some Halloween inspiration here! >:D Without further ado I present the results of the Weekly Wardrobe Dress-up Challenge!

Week 1: Scooby Doo

Started off with a bang as the Mystery Gang! Pretty easy costumes to throw together for our first week, and a solid recognizable group.  Winner for the cheapest costume goes to Sarah, who spent a total of 3$ on her Shaggy outfit! Talk about a ham sandwich! Points for outstanding accuracy go to Devon for her Velma! You beat all the "sexy Velmas" that came up in our google search. Seriously--why is that a thing? Points to Frances as Scooby for being the most popular with children!

Daphne
Purple dress: 7$ (heavily altered)
Purple skirt: 3$ (cut up to use as trim & headband)
Green scarf: 1$
Shoes: from closet

Total: 11$
Sewing time: 3hrs

Week 2: Grease

We cheated a little bit--one of our cast members owns a costume rental place and hooked us up with the Pink Ladies jackets for free. But the rest was all thanks to us and the trusty local thrift store. We made a night out of pin-curling our hair while watching the movie!

Cheapest costume award again goes to Sarah for her 2$ Frenchie costume. And the 2$ was spent on prop lollipops. Seriously, who owns a poodle skirt?? Creativity points to Melissa for turning a mens plaid shirt into a plaid skirt! Points to Devon for reusing her shoes from Velma.

Marty
Jacket: FREE
Navy skirt: 7$
White shirt: 2$ (altered to fit)
Blue shirt: 1.50$ (turned into neckerchief)
Shoes: from closet

Total: 10.50$
Sewing time: 30min
Hair prep: 1hr


Week 3: Powerful Women / Game of Thrones

The theme was powerful women, but several of us wanted to do Game of Thrones characters. Hence the bizarre theme name. Nothing is as surreal as being driven to work by Furiosa.

I think I got a little too over-ambitious that week... We all did. Creativity points the Game of Thrones gals for using duvets, bedsheets, table cloths and chair covers to recreate the stunning GoT costumes on a budget.

I actually don't know whose costume was the cheapest that week, but I have a feeling it was either Devon or Sarah. Extra bonus points for Frances for wearing every belt in existence and for her robot arm that was so shiny and chrome (despite being made primarily of cardboard).

Arya
Beige fabric: 10$
Gold chair cover: 5$
Green circular tablecloth: 3$
Shoes: from closet
Total: 18$
Sewing time: 12hrs
Hair prep: 40min

Week 4: Jurassic Park
Jurassic park week--because really, we were in Drumheller. It would be silly to waste a perfect opportunity to take pictures with dinos. Probably the easiest costume I made for this whole thing, since our thrift store was predominantly 80s-90s clothes.

Special shoutout to Sarah for putting up with our teasing all day and us forcing her to wear the padding. She was actually the highlight of the group as Dennis Nedry. Points to Devon for stealing tacky amulets from the wardrobe to wear with her Jeff Goldblum costume.

Extra bonus points to Sarah for finding actual Barbasol brand shaving cream to use as a prop. And then tweeting them pics of her costume. And they tweeted back! Why do they have a twitter? I don't know.

Lex
Elsa hat: 13$ (with attached blonde braid. Seriously wtf)
Purple shirt: 2$
90s jeans: 3$
Purple paint: 1$
Shoes: from closet

Total: 19$
Sewing & painting time: 1hr

DOUBLE BONUS POINTS TO DEVON & SARAH FOR MY FAVOURITE PHOTO EVER.


Week 5: Sound of Music

This was a stupid idea that I came up with. The original joke was that we needed to find terrible curtains at the thrift store and turn them into clothes for the Von Trapp kids like Maria does to the curtains in the movie. We ended up finding super cheap fabric on sale at Fabricland and got like 12m to split between the 6 of us. Everyone's a winner, we all spent the same amount! We managed to recruit 6/7 Von Trapps. Not bad! Not featured are the extra bandanas that were distributed to the other departments so everyone could match.

Friedrich
Fabric: 5$
Wig: courtesy of Sarah's closet
Shirt: from closet
Shoes: from closet

Total: 5$
Sewing time: 3.5hrs

Week 6: Cult Classics
One of those weeks where we picked a broader theme and kind of all did our own thing. Featuring Melissa as John from the 80s classic The Breakfast Club, Sarah as Ace Ventura: Pet Detective, Devon as Princess Aura from Flash Gordon, and myself as The Black Knight from Monty Python's The Holy Grail.

Creativity points to Sarah for using hockey tape to make striped pants!? My mind is still exploding over this. Effort points to Devon for that wicked jacket. Smart points go to Melissa for the most functional yet still recognizable costume in a workplace environment. I get points for being a paint wizard.

I had to buy a lot of stuff to make this that I wouldn't normally have if I lived at home where I have a stock of basic craft supplies--like paint.

The Black Knight:
Black dress: 8$
Black shirt: from closet
Black leggings: from closet
Shoes: from closet
Bucket: 2$
Bristol board: 1$ (for stencil)
Red paint: 1$
Black paint: 1$
Silver paint: 1$
Gold paint: free
Killer rabbit: 2$
Holy hand grenade: 2$
Gems: 1.50$
Red fabric scraps: free (for fake bleeding stump arm)

Total: 19.50$
Painting time: 2hrs


Week 7: Star Wars
Sarah and I blatantly cheated. I already had a Leia costume in the works and Sarah's obsession with Anakin fueled her to screw the budget and make the costume for real.

Double bonus points for creativity go to Frances. Her BB8 was on point! Take note of the neckpiece, which is the brim of a sunhat. And the orange electrical tape. Points to Devon for her amazing McGyvered staff. Made of a pole, a flashlight and solo cups... or are they HAN SOLO CUPS?

Also--bonus points to Devon who bought hair extensions from the dollar store and literally nobody noticed because they perfectly matched her hair. No one thought it was odd that she suddenly had 10 extra inches of hair.

Leia
I'M A CHEATER.
This was the first wear test for my Leia Rebel scout.
The pieces of which were lying around in my workshop.
For free.
Totally.

Total: $$$

Week 8: Gender-Bent Disney Princes (Men)
Philip! I had been looking forward to this since we were deciding themes at the very beginning. Originally we were going to do this one earlier, but it ended up being at the end. The joke was that all I really wanted was to make Philip's hat and then wear it with every costume. Originally it was just supposed to be Disney princes, but Devon wanted to be Gaston.

Congrats to Melissa for being the most easily recognizable as Prince Eric and tying the group together nicely! Bonus points to Devon for continuing to freak people out with her hair extensions.

Philip
Red felt: 10$ (made into hat, tons of leftover)
Red sheets: 5$ (shared with the Red Woman from GoT week, made into cape)
Off-white fabric: 5$ (made into dress)
Belt: courtesy of Furiosa
Black shirt: from closet
Shoes: from closet

Total: 20$
Sewing time: 8hrs


ARE YOU INSPIRED YET? There's still over a week until Halloween--you've got time! Make something super awesome with 20$ and whatever's lying around!

Wednesday, October 19, 2016

October Update


October is here! The spookiest of all months! And we passed 100,000 views! WOW DUDES!

I'm back in school again--I'm taking the 2nd part of the millinery course. Look forward to more cool hat projects! Also learning how do use Adobe Illustrator.

Fanexpo Cosplay Workmanship Competition results: I won the Best of Thursday award for my Leia costume. It was nice to compete in something for the first time in 2 years. I'm hoping to compete in more things this coming year, but we'll see.

Working on finishing up my posts on Presea. The last one left is on that battle axe...

I've been on a bit of a hiatus lately, I've felt a bit creatively drained. Looking to be inspired again... Got to start working on my hat projects soon though, so hopefully that will give me some motivation--at the very least to meet my project deadlines. Started working on my 1st hat project. It's going to be pretty epic.

It's going to be a pretty crazy month or two!

Later dudes! >:D

Thursday, October 13, 2016

Presea - Accessories - Tales of Symphonia

Welcome to Presea Part 4: Accessories! Feel free to venture back and check out the Gloves & Boots, Dress, and Wig. Many thanks to the ever fabulous Elemental for the amazing photos! We braved the cold and pulled it off!

This costume had a lot of smaller pieces involved. This post covers the belt, pouch, dagger, and Exsphere (necklace).

For this project I actually bought a piece of real leather to work with. I used the suede-like side as the outside (as opposed to the shiny side), because I thought it was more true to the character.

The first piece I cut was the long strip for the belt. Later I went back and reinforced this strip by sewing a second layer to it. I used scissors and carefully cut out the holes. The buckle was found in an store on Queen street after much searching.

Then I patterned the pouch.
The pouch consists of one curvy strip of leather that folds over on itself to be the front, bottom, back and flap of the pouch.
Then there are the 2 panels that form the two orange curved sides of the bag.


These were stitched together, then all the edges were finished.

These were then marked and very carefully hand stitched to the leather. At this time I was unsure if my sewing machine could handle leather, so I hand stitched all the leather on this costume. Turns out it can, with the right needle, which I found 1 year later when I returned to finish the project. Unfortunately I finished all the leather work before then...
I made a matching bias tape and stitched that on as well. The last step was to cut 2 slits in the back so the belt could be fed through the pouch.

I had intended for this bag to be functional, but unfortunately it was too floppy to hold it's shape with anything inside...
Next up is the dagger! The dagger is also attached to the belt, but the character never uses it, it seems purely part of the design.

I made the dagger out of wood, cutting it out with a jigsaw.

I had my friend Ian dremel out the blade edges because at the time the sanding bit on my dremel was not working. When I received it back I hand sanded it even smoother.
I created a sheath and loop to attach to the belt. The loop was on an angle so the dagger would be angled like it is on the character.

I started the paint treatment with grey primer, then silver and finally a light blue acrylic for the face of the blade.

The last detail was the Exsphere. I started by drawing out the piece full scale, then making a wire frame for it. I bought a large red bead for the gem in the center. I sculpted the piece with apoxie sculpt, which is great for this kind of thing as it dries super solid. Later I went back and broke the two side arms and bent them further back to better contour the neck. I filled in any divots with more apoxie sculpt and sanded it smooth.
 

I masked off the gem with painter's tape and then sprayed the piece a matte black. Then I painted over that with a gold acrylic paint. Lastly I created a short chain so it could be worn. The actual character has this gold piece built around the gem, which is fused into her skin, I didn't think that was necessary for me! Hahaha I just had to be careful not to look down suddenly, otherwise I would be jabbed in the neck.