Showing posts with label gold. Show all posts

Wednesday, May 18, 2016

White Rabbit - Wire Frame Mini Tophat

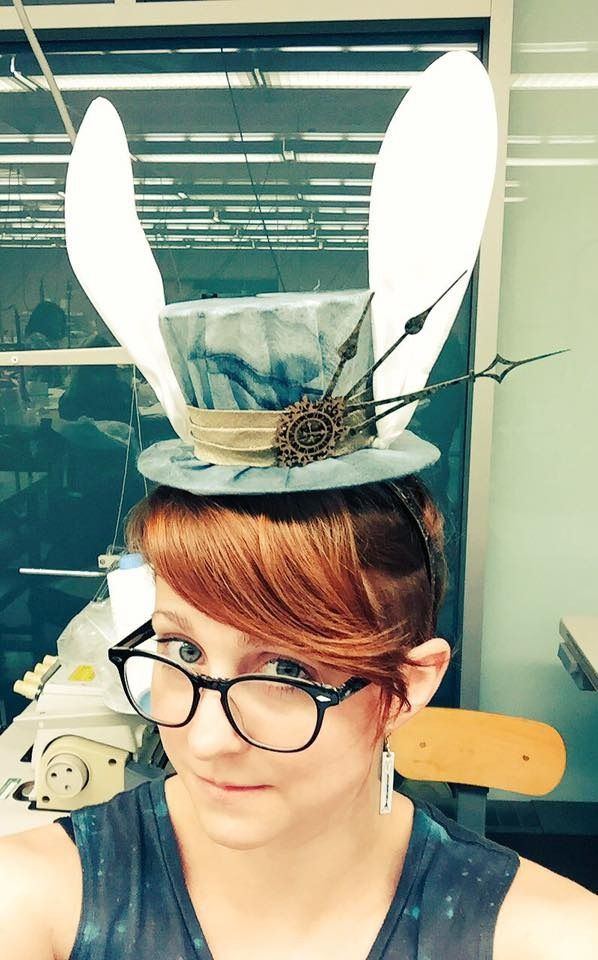
The second project from my millinery class--my White Rabbit top hat!

So the project outline was really open-ended: you had to make a wire frame hat, cover it with sheer fabric and decorate it to represent a theme/character. We were given the option of doing a mini top hat or boater that she had patterns for, or we could design our own hat shape. I picked the mini top hat because I didn't have time to pattern a new shape.

After going fabric shopping to get ideas, I found this really cool sheer blue-grey fabric. It had almost a paper-like quality to it. I thought it might make an interesting take on the White Rabbit. Since I have learned from theatre--stage lights wash out fabrics and make them look whiter, perhaps I could design a white rabbit while hardly using any white?
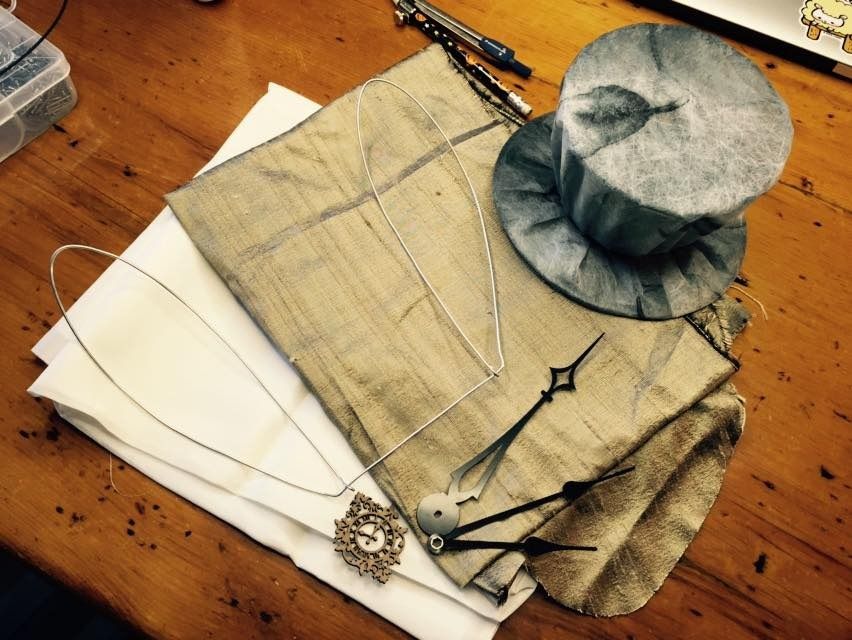
Here's a picture of the finished hat frame on top of the fabric. It shifts from blue to grey depending on lighting and instagram filters. Haha

I won't go into too much detail on how the frame was constructed. All the pieces of wire were carefully cut to length and bent into shape. I used quilting thread to tightly wrap the joints and then strengthened the bond with a mixture of white glue and water.

The brim and crown were not attached until after I covered it. It makes covering the pieces way easier.
I covered the crown and brim using 2 layers of my fabric. It was fairly sheer with just a single layer and I was worried it would rip. I like that with the double layer you get a ghost of the leaf pattern coming through.

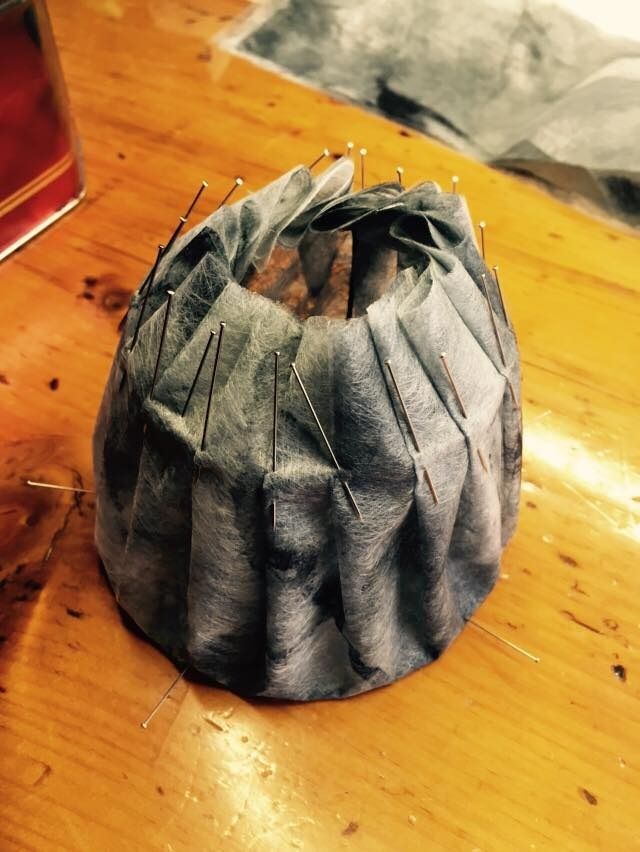
For the crown I cut 2 circles overlayed, I draped these over the top holding them in place with pins. Then I pleated the fabric along the bottom edge to conform it to the shape of the crown. I basted this in place, attaching it to the frame. I cut off some of the excess fabric, but the rest would be tucked into the inside.

The brim was done in a similar way. I cut 2 long rectangles that measured the same as the outer circumference of the brim. These were each sewn into a long loop and folded in half over the edge. Then I pleated and basted them to the frame.
Next I created my ear shape. As you can see here, both ears are made out of one piece of wire. It would sit between the crown and brim and make them much stronger overall. I covered them with a white silk leftover from the painting and dye class I took last summer.

All of my cool accent pieces--laser cut clock, clock hands--were picked up from Michael's art store. It has a great selection of weird crafting bits. I got the clock hands in the DIY clock section, for example.

The gold fabric I used to make a hat band was leftover from my Steampunk Corset (I really did buy way too much fabric for that).
I sewed the ears to the brim base, then sewed my brim to the crown. Then I carefully tacked the side of the ears to the top of the top hat--I sewed the wire frame to the wire frame, not just the fabrics.

Next was the hat band and decoration. I sewed the hat band on, the sewed the decorations on. Before attaching the clock hands I sponged on some gold acrylic paint and sprayed them with a gloss finish sealer. This was to help them match the costume better.

Lastly, I sewed a felt circle to the bottom to cover the hole and seal it shut. Then I sewed a headband to it (which I also painted gold). I think later I will swap out the headband for alligator clips, but for now (and for handing it it) it was fine.

I'm really happy with how the hat turned out and I am in the process of completing a full design for the costume. I'm thinking I would really like to complete the outfit in the future...

Wednesday, August 19, 2015

Toph (Fire Nation Disguise) - Wig - Avatar: The Last Airbender

This is my first post on Toph. Rather than the traditional green outfit, I decided to make her Fire Nation disguise outfit from season 3. Of all the nations, I really thought the Fire Nation had the nicest designs in the series, but Toph is one of my favorite characters--so this seemed like a good compromise.

This costume was originally supposed to debut at Otakon last summer, and I had managed to get everything finished except the wig and shoes. But without the wig, the costume isn't really wearable, so the costume went on the backburner for a while as I worked on the wig.

I really need to make time to do a real photoshoot of this costume. Perhaps next year...

I thought I would start by talking about the wig--easily the most difficult piece of the costume. This wig took me 3 attempts until I was satisfied with the end result.

It was a nightmare to construct, partially because the reference is so vague. All you can see is that she has a large black blob of hair at the back of her head--which is presumably a bun? I've seen people achieve this in different ways, some opting for a small bun (a bit of a cop-out, and not very accurate), others choosing to do an intricately braided style to create the mass. I wanted to create a smooth rounded "bun" that was as accurate as possible.

My main issue I encountered--which carries over to many costumes--is that I have a small head and not an abundance of hair. This means that 99% of all the wigs I ever bought are loose on me. Back in the day I had waist-length hair which I had difficulty stuffing under a wig, and this would keep it from slipping. But these days, any wig that is remotely back heavy slides out of position like nobody's business. It is a problem I have noticed since I have started to do more elaborate styled wigs (Asuna was a problem in particular because of the heavy metal bells).

To counteract this problem I have found the best way to keep a wig from sliding to to sew a small comb into the front of the wig and then french braid my actual bangs. The comb hooks into the braid and prevents it from sliding out of position. (I did the same thing on my Tomoyo wig.)

Black is such an easy colour of wigs to find, so I was not worried about finding a wig (for once!). To save myself some time, I ordered a ponytail wig from Epic Cosplay, this meant that I wouldn't have to also make my base wig into a ponytail wig first to cover the gaps in the wefts. Their ponytail wig is a short wig that comes with an extension you can wrap around the ponytail base to make it a long wig. This was great for my purposes, as the large extension would be put to use later in creating the bun.

I started by taking out some of the wefts from the middle of the back of the wig. This was done very carefully with a seam ripper. This was to remove bulk under the bun while also procuring more hair to make the bun with.

Out of some back fabric I made the base of the bun and loosely stuffed it. I hand stitched the wefts around the edge. I cut a hole in the middle of the fabric to stick the loose ends of the wefts in.

This is the point where I realized I wasn't going to finish the wig before Otakon, and put it on hold for a while. The next steps were done over the next couple of months before going on hold while I finished my degree and then finally finishing in the weeks leading up to AN.

After that I attached the bun at the top of the wig with a strong hand stitch. I tied the hair that would later be the bangs out of the way.

At this point I also made the wig slightly smaller smaller along the back with some darts that I stitched in to the netting. This helped it fit better. I also hand stitched the small comb into the front of the hairline.

Next I pulled the wig under the bun into a ponytail and stubbed it using regular white glue. Then I cut off the excess hair. 


I also stubbed the bottom of the hair that was draped over the top of the bun.


Next I cut and styled the bangs. The wig was quite thick at the front, so I had to thin it out a fair bit. Because although Toph's hair is supposed to fall into her eyes (which isn't a problem because the character is blind), I kind of needed to be able to see.

To finish off the wig I used some heavy duty hair pins to affix the bun in place.

Next I paper patterned the tiara/headband. Once I was happy with the pattern I cut out 2 pieces of worbla and laminated them together with a heat gun. This was to make it sturdier.

This part of the costume was done after I had finished my independent study on worbla, so I used some of the leftover materials to make this tiara/headband.

I molded some scrap bits of worbla into a long roll and used that to make the raised detail along the edge. Then I heated the whole piece and gently curved it into the desired shape.

Using a dremel with a drill bit, I drilled a hole through the center of the raised loops at each end.

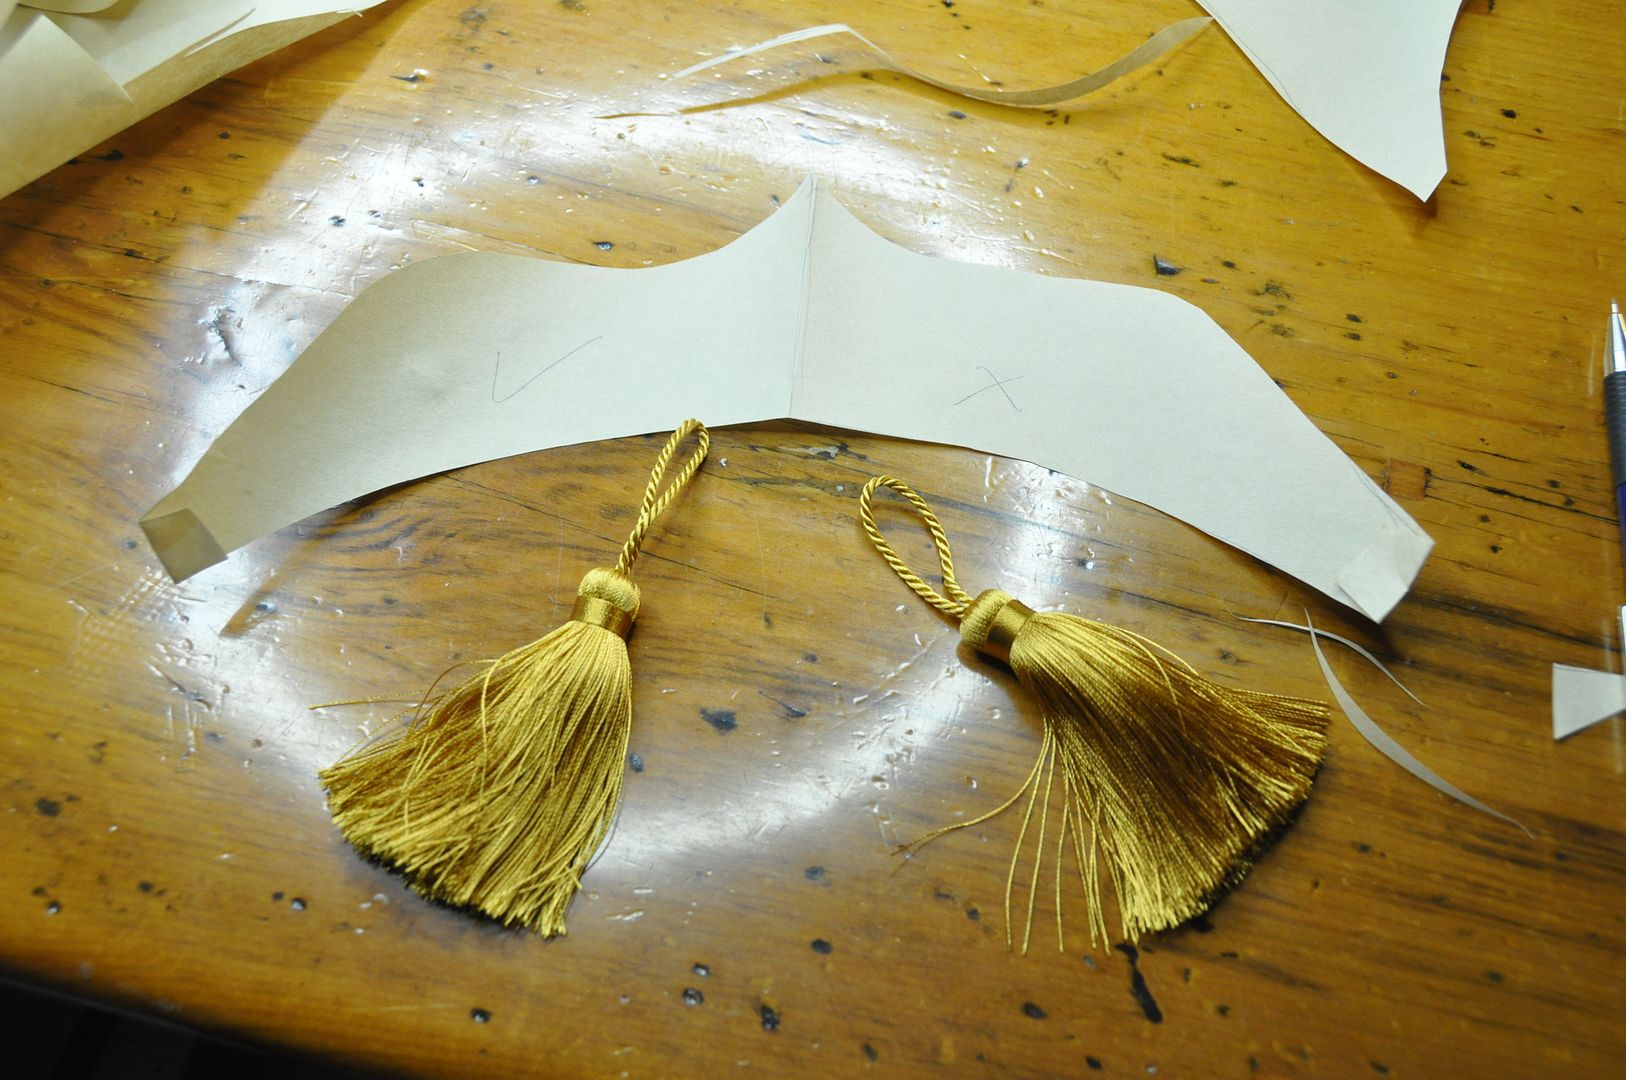
I made the tassels shorter to be more accurate.

Here you can also see how the finished wig looks from the side. The bun is a little smaller than the actual character's hair, but I think this is a more manageable size. It is already insanely back-heavy!


Next was priming the surface for painting. Worbla tends to have a slight bumpy texture to it, so I used a couple of coats of gesso and gorilla glue as a filler.

I primered it with a red spraypaint. The red colour underneath helps to counteract the green-ness that is common in most gold paints. I gave it a light sanding, before doing a second coat of red.

I painted it using a bronze acrylic paint as my main colour and then a gold for the raised detail. It required a few coats.

Then I used a clear gloss spraypaint as my final layer, to seal it and give it some shine. "Metallic" acrylic paints tend to be more sparkly than glossy.

I looped the tassels through the holes I created earlier and hot glued them in place.

To attach the headband to the wig I hot glued a small metal comb and two ties to the inside of the tiara. The metal comb would hook into the wig and then the ties were tied under the bun at the back. This made it secure, but also easily removable.

And in a nutshell, that's how I made the wig. Hopefully I can get some more side shots of the wig at another con.

Friday, July 10, 2015

Floral Cream Underbust Corset

Hey all! I made another corset this past winter. This is not an obsession I swear... This one is an underbust corset that is going to act as a waist cincher/posture modifier, to be worn under my Phoenix costume (which is currently on hiatus). I also made it with another future steampunk outfit in mind... 

Showcasing here the new pistol prop I bought in Austria last month. Also worn with my Long Pleated Skirt.


I like how the shape of this one turned out much better than my black corset. Instead of using a fashion fabric on the outside, I just used the coutil. Except this time my coutil has a cool floral pattern on it! I picked up this fabric from the Farthingales booth at CostumeCon32 last year. It's super strong and super pretty.


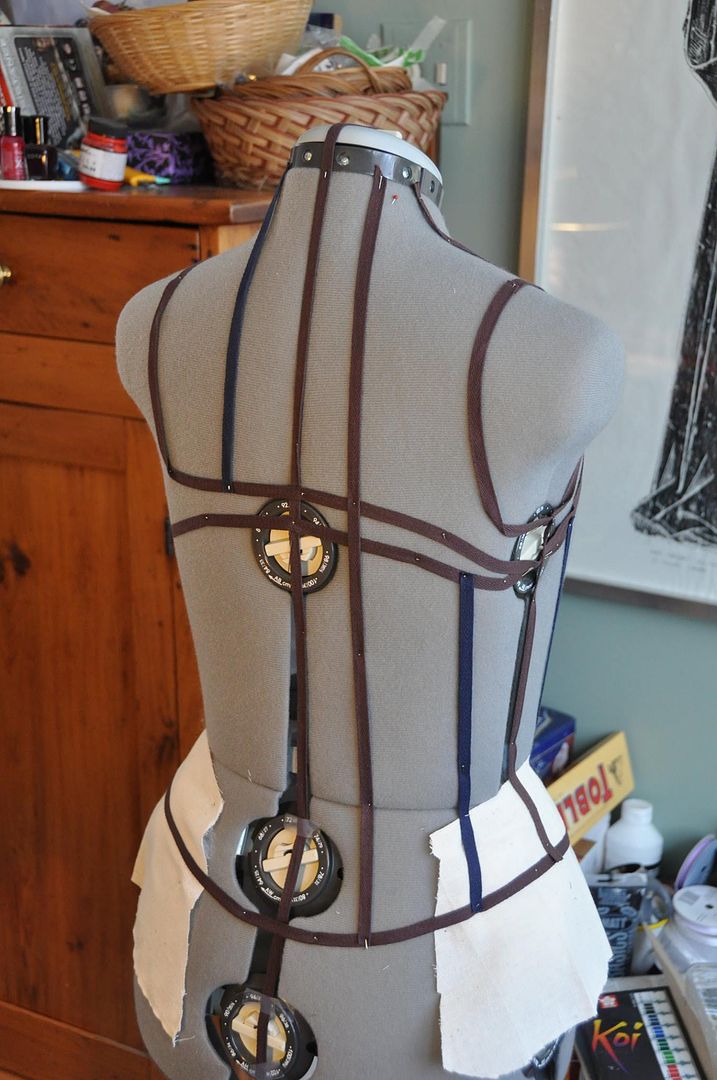
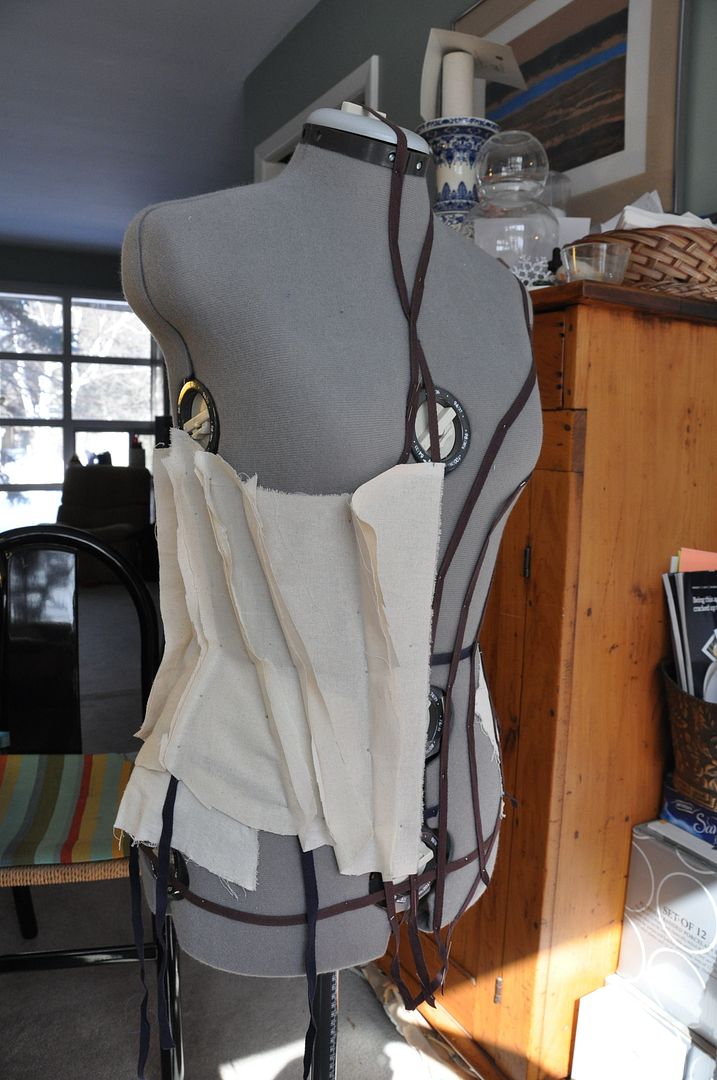
 First I used twill tape to mark out my seam lines on my judy. Then I draped muslin over those sections to get my pattern piece shapes. I used a pen to draw the shapes on the fabric, unpinned the pieces and then cut along the lines I drew.

The pattern I ended up with looked like this. I numbered my pieces from 1-7 (center front to center back).

After making a mockup and tweaking the pattern to reflect the changes I made, I reduced the pattern so that it would have a 2" gap at the back. This means that I divided 2" into 7 parts and shaved off that amount from every seam. I shaved off just slightly more at the waist so that part could cinch even tighter. 
Then I cut my pieces out of my coutil. Remember you need 4 of every piece, a pair for each side.
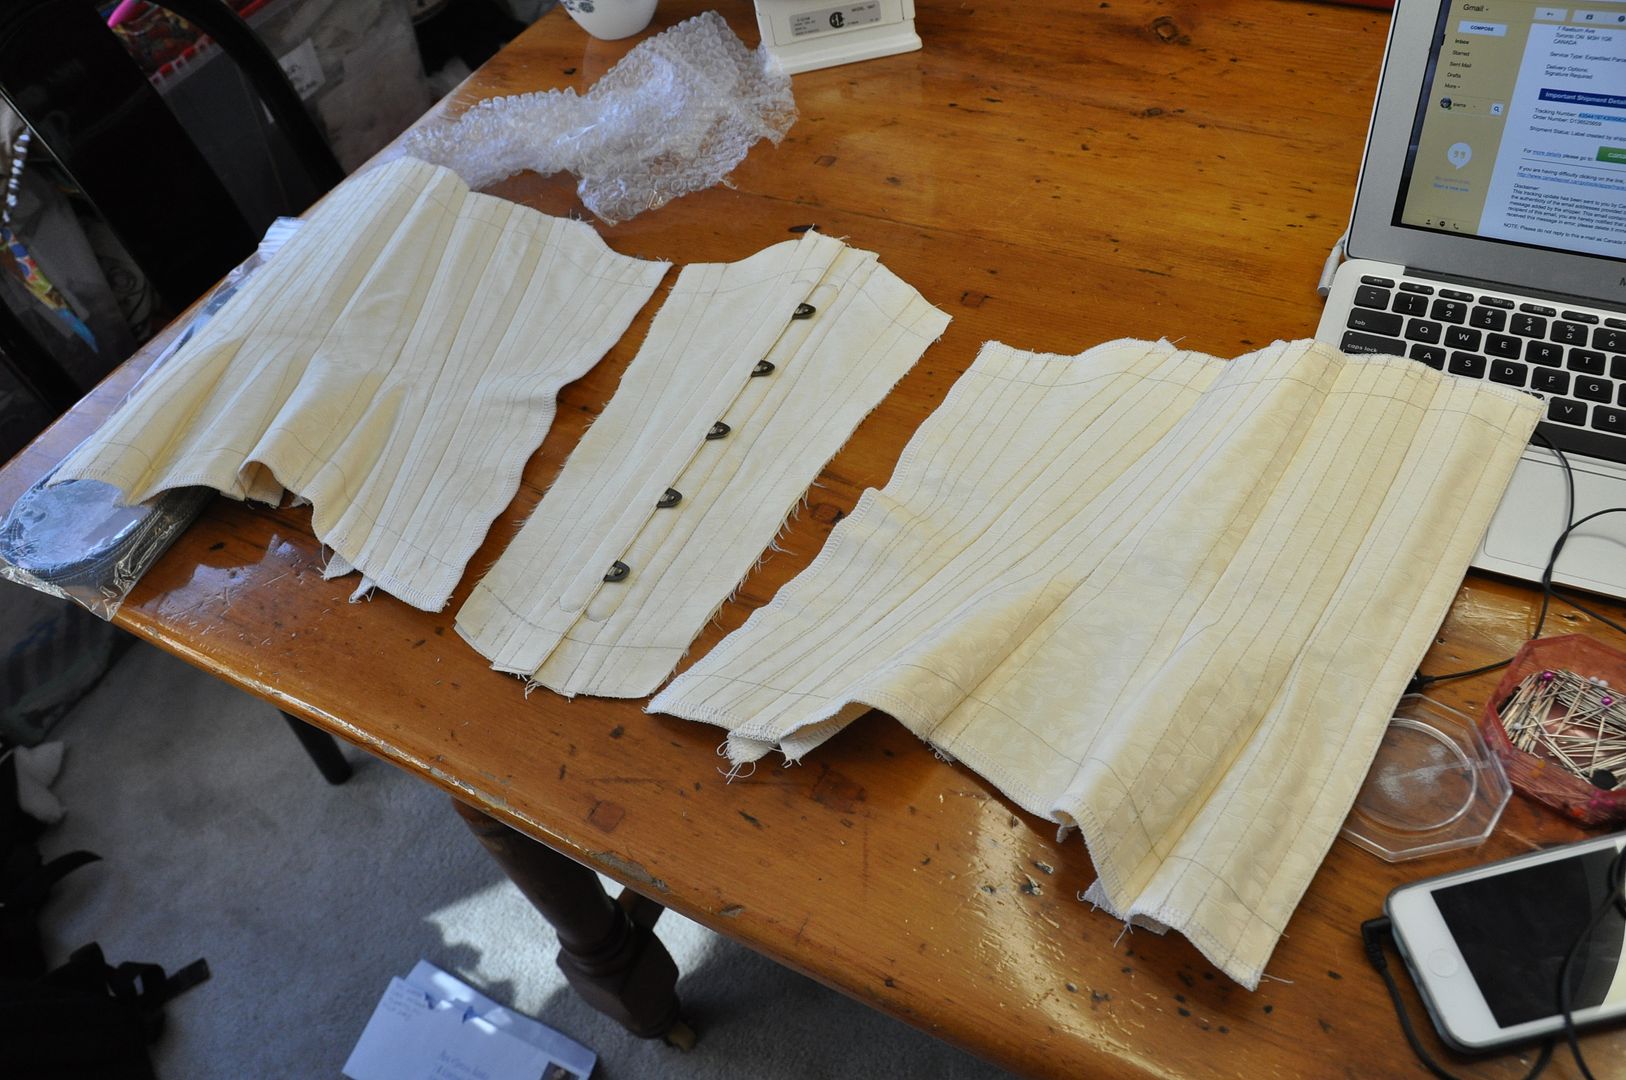
For the center back panels I first sewed the pairs right sides together along the CB edge, then turned them right way out and pressed them. I flat basted all my pairs together (excluding the center front panels) and top stitched all the boning channels. The 14 panels looked like this.


I added in the busk to the center front, then flat basted it and added the last boning channels. If you want a tutorial on how to insert a busk, go here!

Then I began to sew the panels together. This is done very carefully, lining up the flat basted lines and the waist line. Accuracy is your friend.
Then I cut my spiral bones to length and inserted them.


I made my own piping trim from leftover fabric from my Steampunk Corset. If you want a tutorial on how I make piping trim, go here!

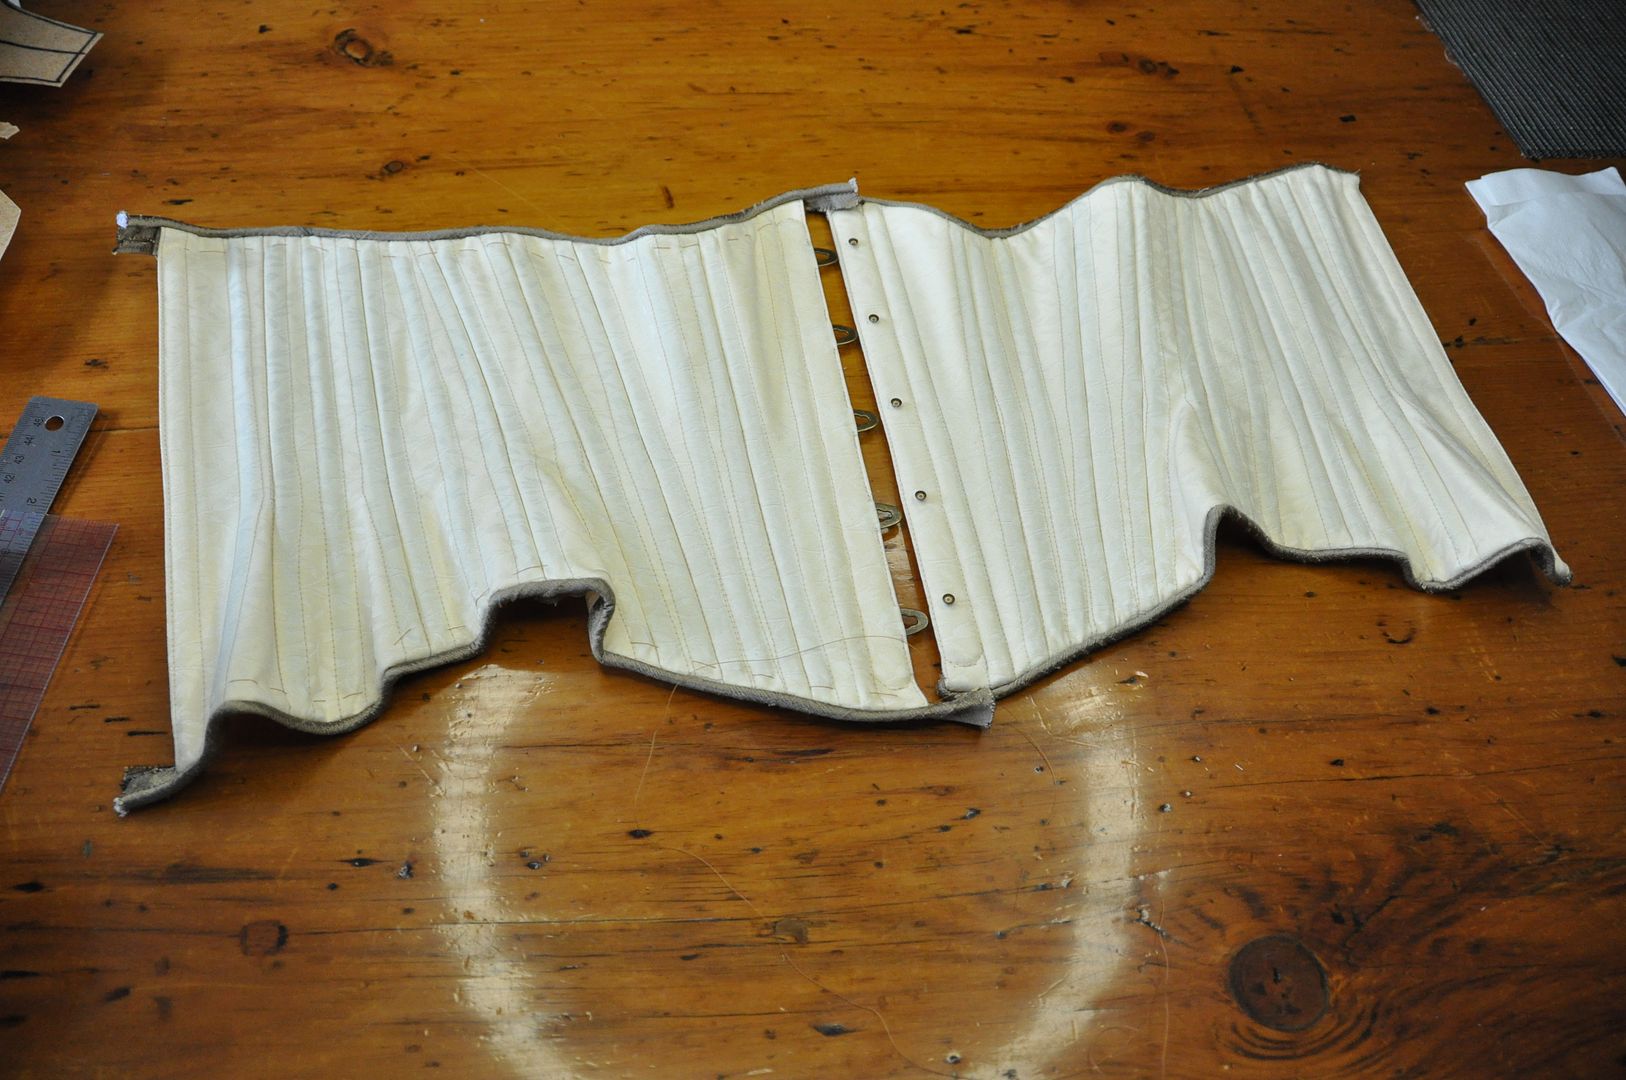
I attached the piping, then hand stitched down all the seams on the inside. Then I put the eyelets/grommets in the center back and added some cord to lace it.

Presto! Another corset! ;D


Friday, May 1, 2015

Cloche Hat with Kanzashi

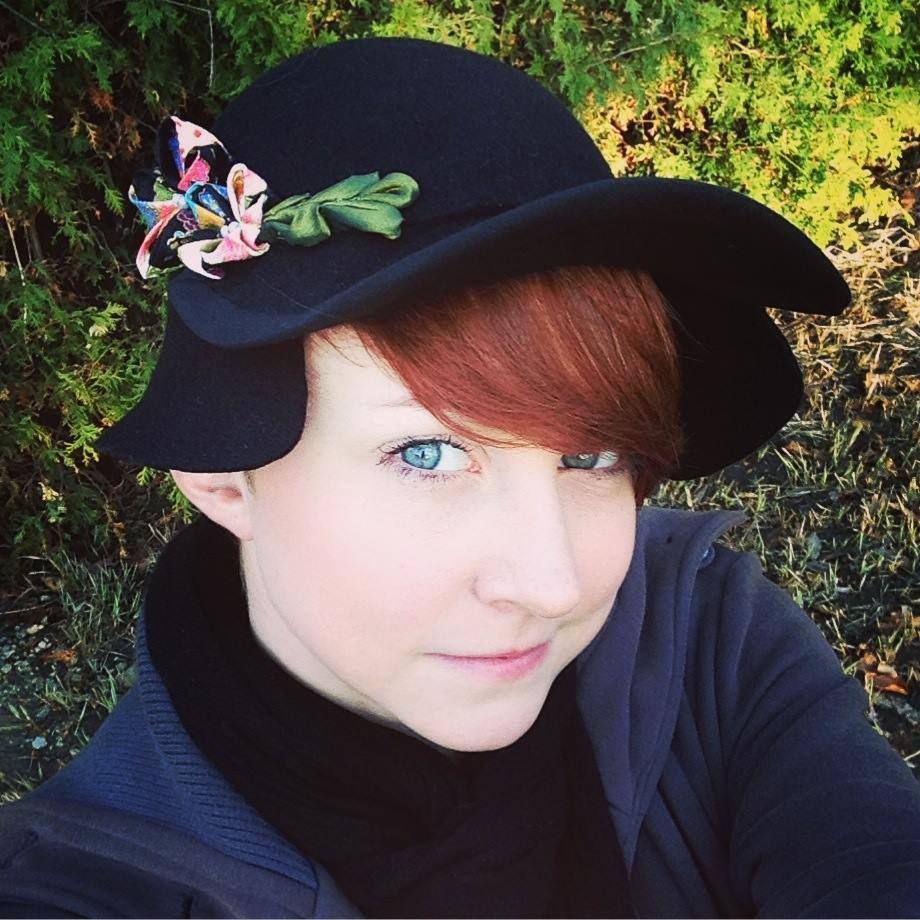
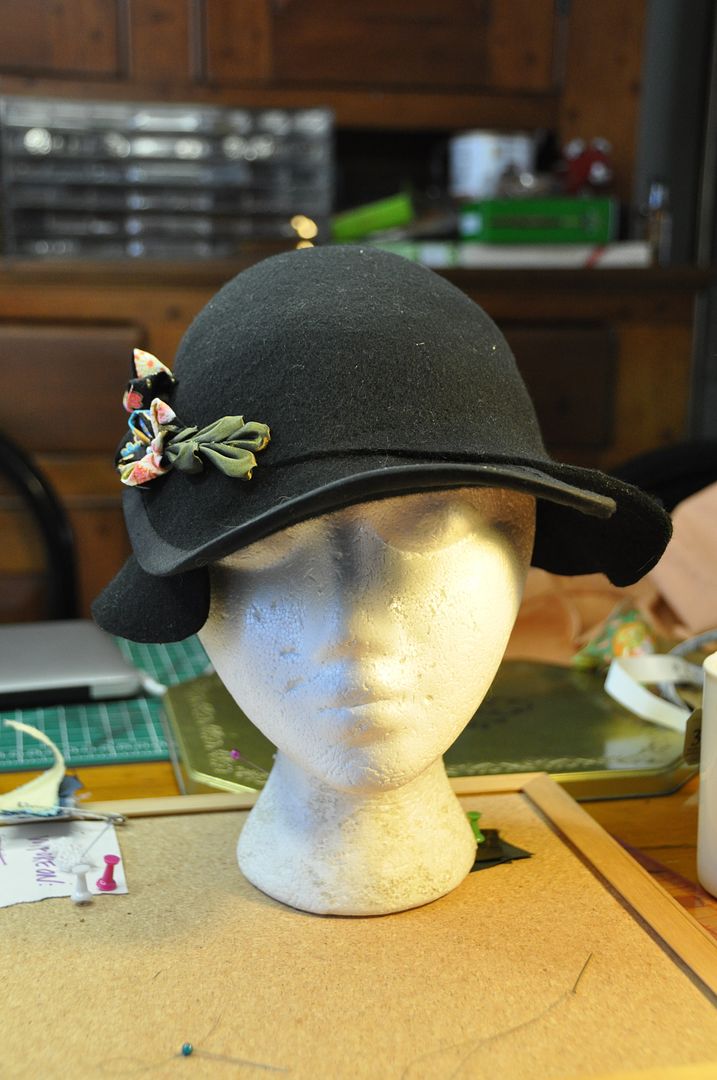
Today is a short entry about a project I did for school! The goal was to change the shape of an existing felt hat using steam, and decorate it. I created a 1920s inspired cloche hat that I decorated with kanzashi flowers. Pretty cute right? ;D

For doing this it is very important that the hat is 100% wool, otherwise it won't really work. I found this nondescript black hat at H&M for about $25.

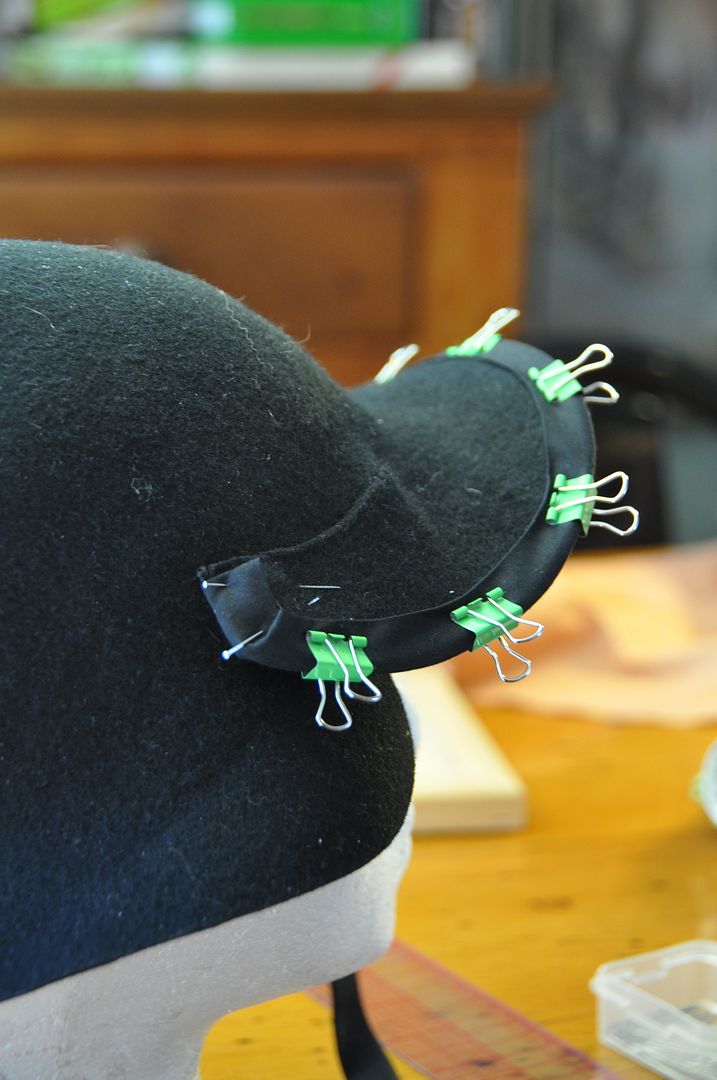
I cut off most of the brim, and from the cutaways I created the second brim layer. Using a tea kettle I let the hat steam and continued to stretch it by hand and over a metal bowl to change the shape. I did this until I was happy with it/the crease was gone. Then I hand stitched brim #2 on, then I wired the edge.  I finished the inside with a gros grain ribbon. This is so the hat wouldn't stretch later.

Once that was done I began to create the decorations. I found this great tutorial on making kanzashi flowers--Japanese style folded flowers. Using the same method I folded the leaves as well. It's basically like origami for fabric.

I finished the edge of the hat with a bias tape I had in my scrap bin.

I finished them by adding a couple of beads to the center, then I sewed them to the hat. I had a lot of fun making them and they turned out pretty great. I got the fabric when I was in Tokyo this past winter.

Then I had a cute hat to hand in! And to wear later! ;D

Tuesday, June 3, 2014

Steampunk Corset

Salutations! This is the first steampunk outfit I've put together in quite some time. (The last one was my steampunk inspired lolita oufit back in 2011!) I am a steampunk fan, so it would probably come as no surprise that everything in this outfit excluding the corset came straight out of my own closet.  Hahaha

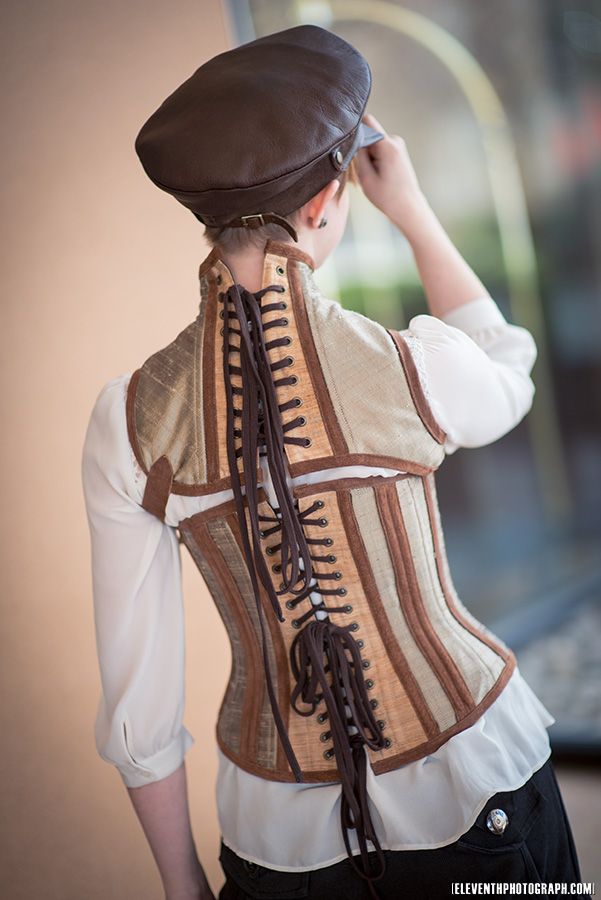
This was my final project for corsetry and the second corset I've ever made! This is also the first time a draped a pattern. I debuted this outfit at CostumeCon 32 and won a Hall Award for the ensemble. Planning on decking this out with more stuff in the future--like a weapon or possibly some gloves. But for now it's complete. 

Special thanks to Mike at EleventhPhotograph for the photoshoot! I have a few more pics up on my Cospix profile!

It is a decorative corset intended to be fairly tight-laced (at least for me!) I am particularly proud of how the back of this piece turned out. In terms of comfort, it's actually fairly comfortable when standing, but when sitting the neckpiece doesn't allow me to lean back. This makes it a bit tiring to wear for long periods of time.

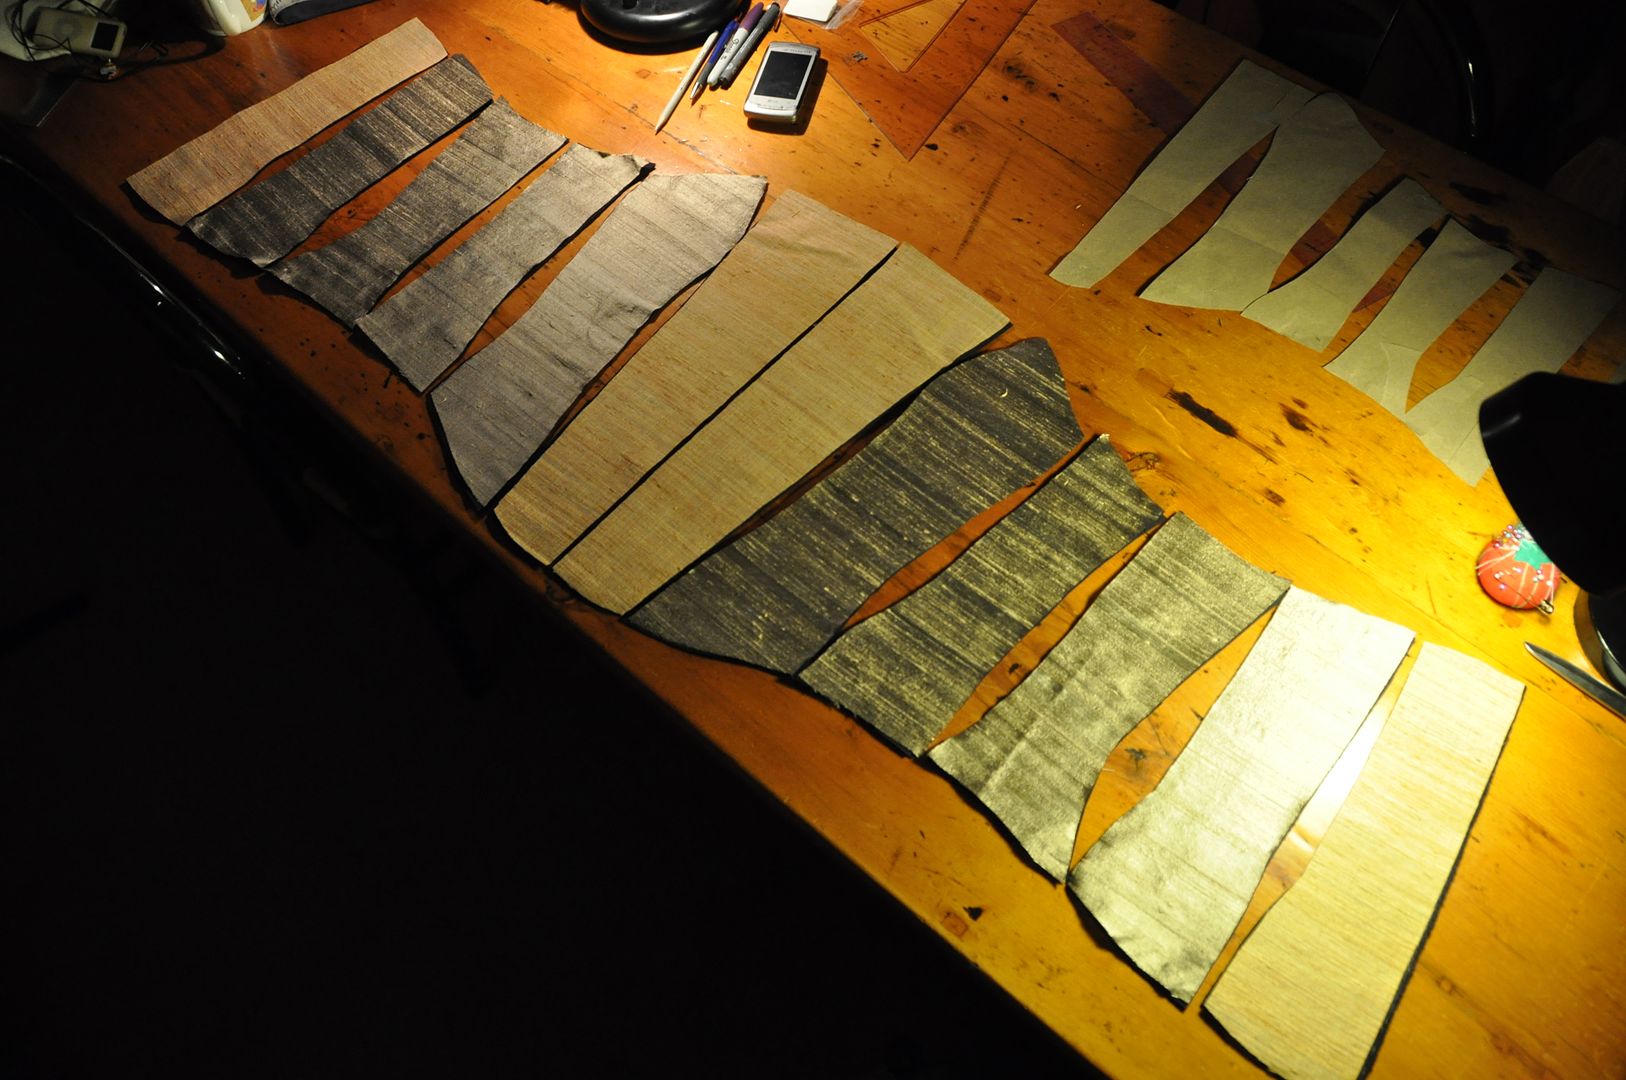
I had a hell of a time figuring out my colour scheme (as I almost exclusively design in pencil, without colour), but I am glad for the colours I eventually chose. Special thanks to the lovely gal at King Textiles who helped me pick out my fabrics! I like the contrast with the muted gold and the pale orange versus the brown suede. Mostly I really like fabric with texture. The dupioni (gold) and the raw silk (orange) have such great texture! Someone commented that the raw silk looks almost like woodgrain.

Here is my original concept sketch. I started my design process by sifting through the hundreds of google images of steampunk, corsets, and victorian fashion. I picked out the different elements I liked and came up with this. It is designed to be worn with or without the neck piece. In the original concept I had vertical buckles attaching the two at the back, but scrapped that during the build process, as I found them to be completely unnecessary; it would make it harder to get on and off by myself, and would clutter the design. I might add the chain detail at the front eventually, but I kind of like it without it.
To start I adjusted my dress form (which I refer to as Molly) and padded out the hips to be higher. This is to accommodate my shorter torso. The goal here was to make as accurate a representation as possible of my body. Then I used 1/4" twill tape to mark out the shapes I wanted on the body. These tapes marked the seam lines and the garment edges. When doing this it is important to decide which edge of the tape is the "line" and then stick with that. Be consistent, or you will confuse yourself.
Then using muslin I draped the design. Each section/piece is a different piece of fabric carefully smoothed to contour the body and pinned in place to the edges of the section. Then I took a ballpoint pen and traced the seam lines/edges onto each piece. I also marked the waistline. Additionally, when draping a corset it is best to keep the grain of the fabric perpendicular to the waist line, meaning the grain should run straight up and down the body. (Woven fabric stretches on bias/45 degree and can alter the shapes enough to be a problem later in the process.)
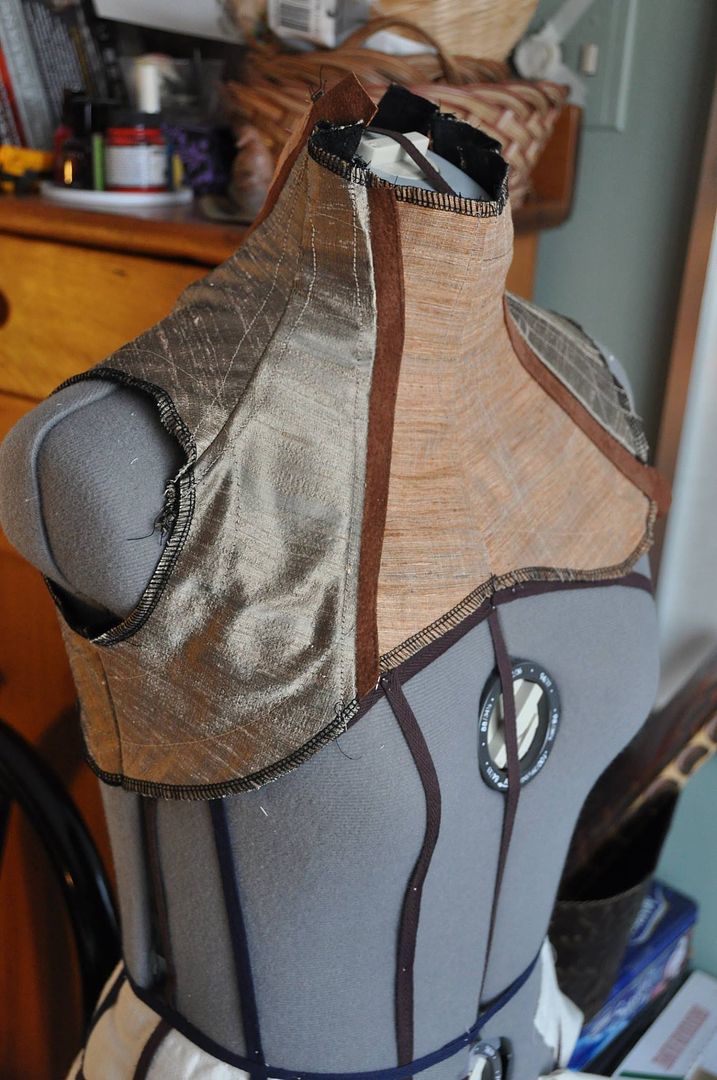
I unpinned the pieces from Molly and cut them out following the outline I had drawn. The two patterns were as follows: The neckpiece pictured above, and the corset pictured on the left. The corset has 6 panels on each side.

I then made a quick mockup to ensure the fit was correct. The neck piece needed some minor adjustments because my neck is thinner than Molly's. An average corset is designed to have a 2" gap at the back, so that when laced it cinches in the body. This obviously doesn't work on the mannequin, so after draping the pattern you then calculate and carve off the proportional amount from each panel. (This was not done to the neck piece because cinching in the neck would cause strangulation.) I made my corset just a fraction narrower at the waist, shaving off the same amount from each panel. This would bring the waist in tighter when tight-laced, giving the waist more definition. After doing this you may have to readjust the seams a little bit so the sides are the same length.

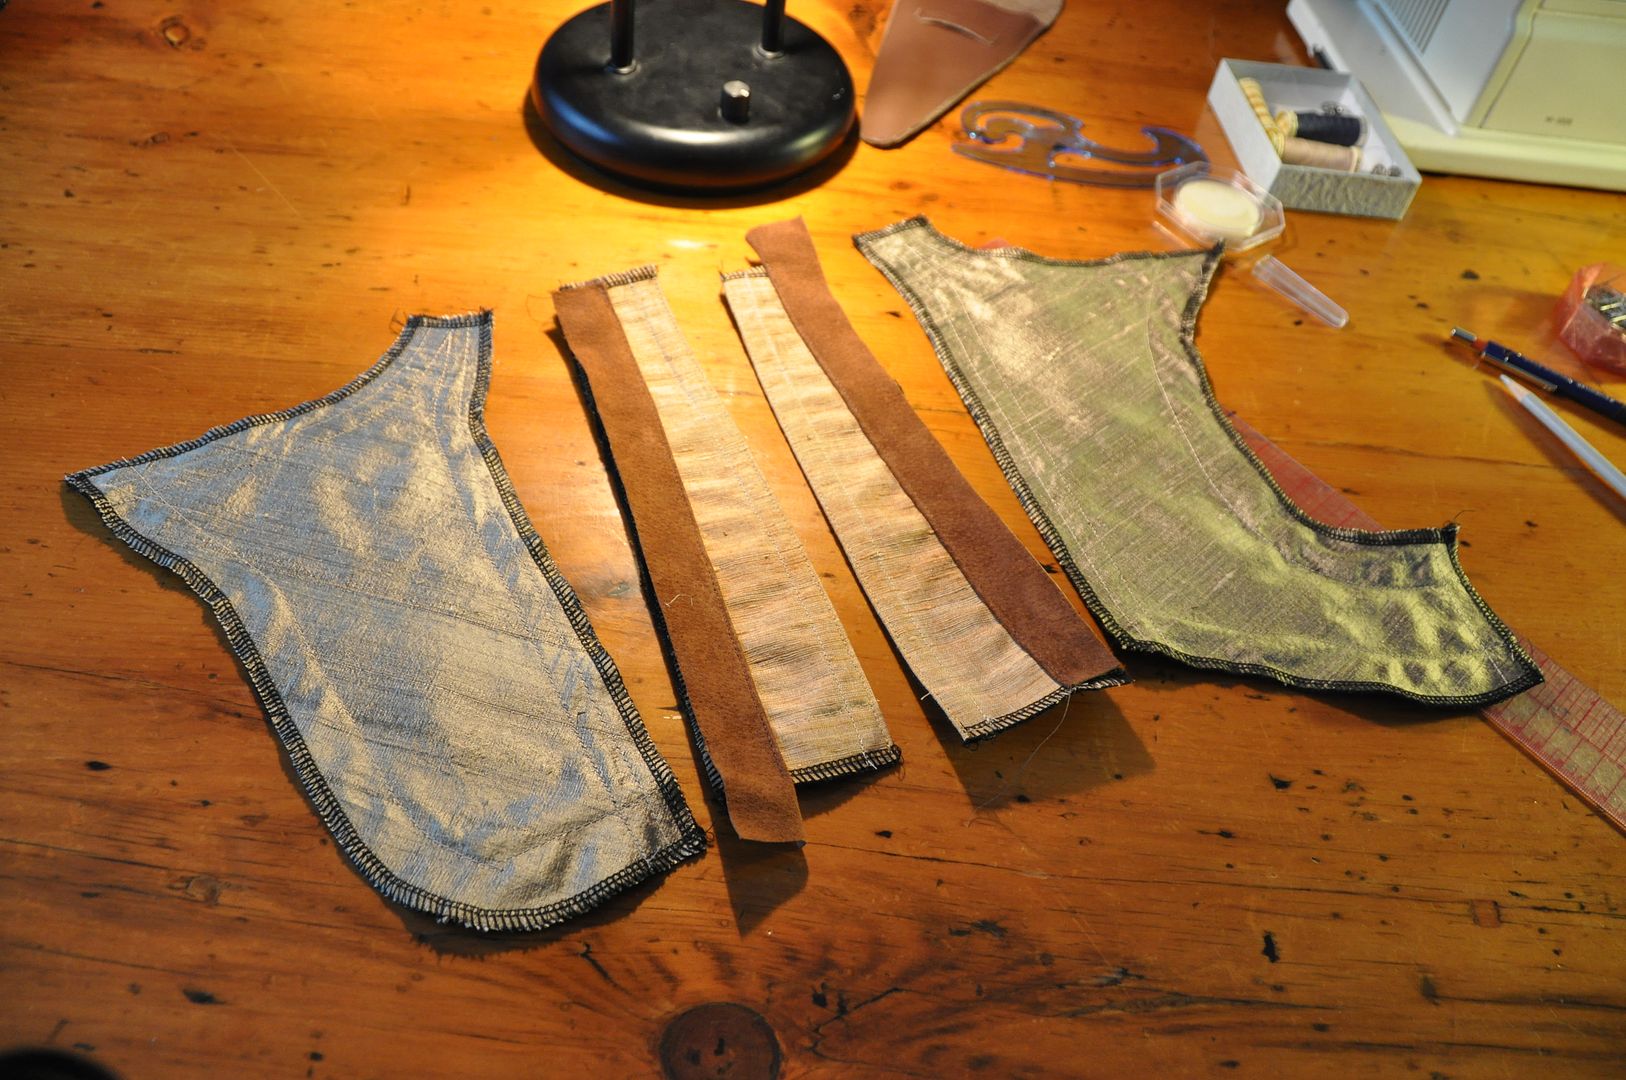
I used the leftover black coutil from my Black Corset, Beetle Green Trim to be the inner 2 layers of my corset (making this corset have 3 layers total). The silks I used as my outer "fashion layer" would be too thin to hold the bones without eventually fraying, also would not stand up to tight-lacing very well. I needed 4 of each of the 6 pattern pieces to make my inner layers. For the neckpiece I did the double inner layers in black twill instead, this would be less constricting and allow more motion (as twill is much less stiff that coutil), while still maintaining the desired structural stability.

I gave myself 1" seam allowance at the top and bottom of each piece, and 1/2" at the side seams.
I then cut out the pieces in the appropriate colours of silk. The center front and center back were done in the orange, while the rest was done in gold.

When it came to the neckpiece I did my best to just ensure the grainline was perpendicular to the neck. This meant I got some interesting diagonals on the shoulder/back.

I did my corset supply order from Farthingales to get my various findings. This included my busk, grommets and bones. I also got some d-rings that I didn't end up using... I made sure all my exposed metal pieces would have a matching colour. In this case that meant that all of them were an antique bronze colour. I think this complimented my fabric choices much better than a silver would.

For this corset I used 2 enamel bones for the center back and spiral bones for the rest. Overall there was 10+ meters of boning. The enamel bones don't bend sideways, which is why they are used in the center back, this keeps the lacing more straight/aligned than spirals which are bendy in all directions.

Next I added in the busk to the center panel. You can find out how I did that by reading my Busk Closure Tutorial. Don't worry, you can come back to this. Hahaha
I basted all the layers for each panel together, following my seam lines, and serged the edges (excluding the center back, which was bagged out, pressed and top stitched first). This would prevent fraying while I worked as well as keep the layers from shifting. Then I prepped all the bone casings. For the internal bones (the ones next to each side seam) I drew out my lines carefully on the fabric and then machine stitched them. For the external suede cases I cut and measured the strips, then top stitched them on with the raw edges folded under.

I sewed the side seams on every piece except the center front and back. I made sure to carefully line up my basting stitches and edges and waistline. I didn't want to overshoot into my bone casings anywhere. The most important thing here is patience and accuracy. It will make for a cleanly finished corset.

Next I top stitched the suede strip that would mask the colour transition (orange to gold) on the center front and center back panels. This was to make the transition look less jarring. On the neckpiece this suede strip was sewn into the seam, because the layers were thin enough. On the corset though, this would be impossible because the 4 layers of coutil, plus 2 layers of silk AND a suede layer would be too much for just about any sewing machine. So instead I left it flapping while I sewed each of those seams, then I carefully folded it over and top stitched it in the ditch so the machine wouldn't have to go through the seam allowance also. To say this was challenging is an understatement. Haha

Once the pieces were all together it was time to prep and insert the bones. This process actually took quite some time. It is easiest to cut, tip and insert each bone before moving on to the next, otherwise you are likely to get them mixed up. As a general rule you should cut the bones to be 3/4" shorter than the finished case, this allows a little more room for them to bend so they wont bust out of the casings when you try to sit. (Trust me, sitting is by no means overrated!)

In terms of cutting spiral bones, I highly recommend investing in a pair of aircraft cable cutters, which you can pick up at most hardware stores (though the salespeople are likely to be confused as to your intended use of that tool...). They are the best thing to cut through the bones, normal wire cutters just don't work very well (it can be done, it's just a lot of effort). They cost around 20$ though, so if you are planning on making multiple corsets it's a good investment, if not you may want to look into pre-cut bones (which are more expensive than buying a roll of boning). Figure out what works best for your budget/your project!

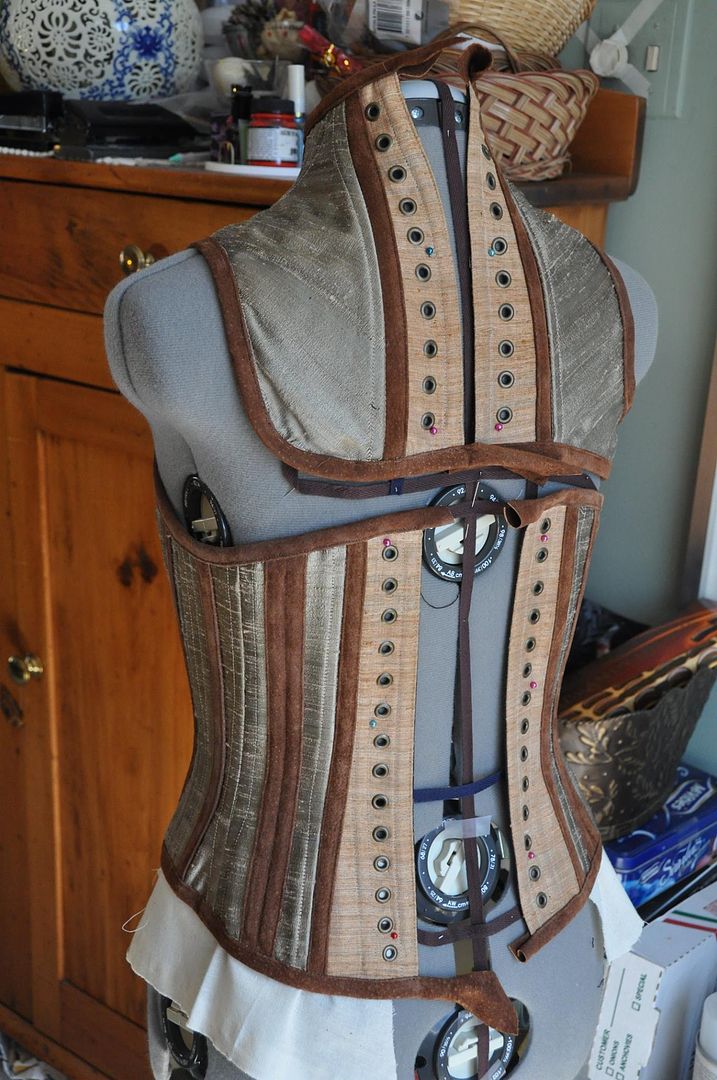
Now my corset was all pieced together (pictured left I still needed to top stitch the bone casing edge on the CF panels). Below you can see what it looked like after I top stitched it. You can see how it masks the colour transition perfectly!

At this time I also pressed the inner seams open & flat, then cross stitched them down, this reduces bulk on the inside and makes it more comfortable to wear (because the seams wont get folded over weirdly when you put it on and be uncomfortable).


Next was trimming and grommets. The suede trim on the corset was much easier than that on the neckpiece, as the curves were less extreme. Suede has a lot of stretch to it, but it is not nearly as kind as bias tape in that respect. So there are some places under the edge where I had to fold/gather the trim to get it to work. But it looks great on the outside! So that's all that really matters. I tucked the ends under and hand stitched them down.

The grommets I put in using the grommet press I have access to at school. It makes it much easier I had a record breaking zero failed grommets! (Not planning on buying my own press though for reasons of expense.)

The last thing I added (besides the laces) was a buckle under the left arm. Again I picked a buckle with metal that matched the colour of my busk and grommets.

I'm sure I will be wearing this to many more events!