Showing posts with label casting. Show all posts

Thursday, December 3, 2015

Sakura - Clow Wand - Cardcaptor Sakura

I'm back from hiatus guys, so let's look at the final part of my Sakura costume series--lets talk about the Clow Wand!

The wand was the only part of the costume that I did not have time to build for the original debut of the Sakura 1st Opening costume at AN 2013. Instead it was built for the Sailor Suit version for Otakon later that summer.

Once again shout-out to EleventhPhotograph for doing both the quick pics at Otakon and the awesome shoot this fall.

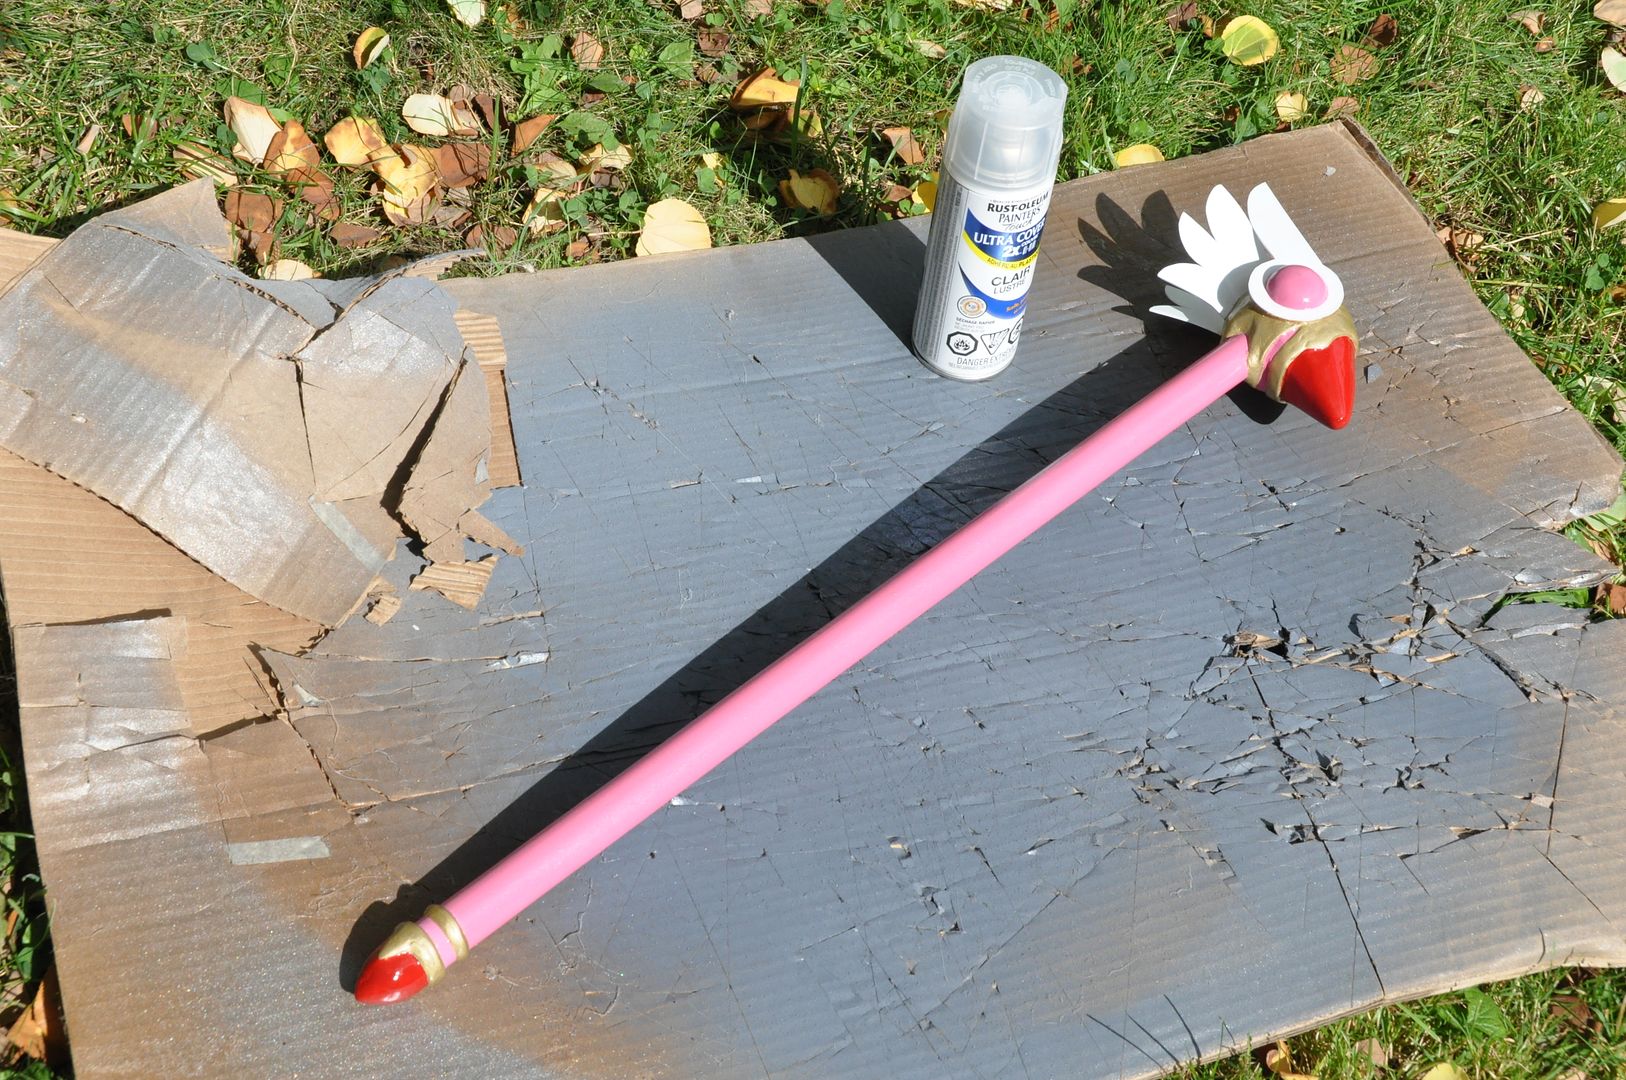
You may notice a slight difference between the photos from the school uniform shoot and the 1st opening outfit shoot I did over a year later--I redid the paint-job on the wand. Because the wand was originally painted in the hotel room the night before the con with acrylic paint and no reference picture. And I got the colours (based on the anime and not the manga illustrations) wrong! Yes, this does happen. (The eyes are pink like the handle and not red like the beak--whoops!) So, for subsequent events I had it repainted with spraypaints and finished it with a nice gloss coat to give it some extra shine. The gloss coat looks much better than the flat colours alone.

Also, at AN this past year I dropped the wand and broke it, chipping the beak. After fixing that I had to repaint it a third time.

I haven't built as many prop-heavy costumes in recent times (Splatoon doesn't count because I didn't build the props!). Props is where I started, and I would really like to get back into making more props. But I am always drawn in by more fabric construction heavy costumes I suppose?

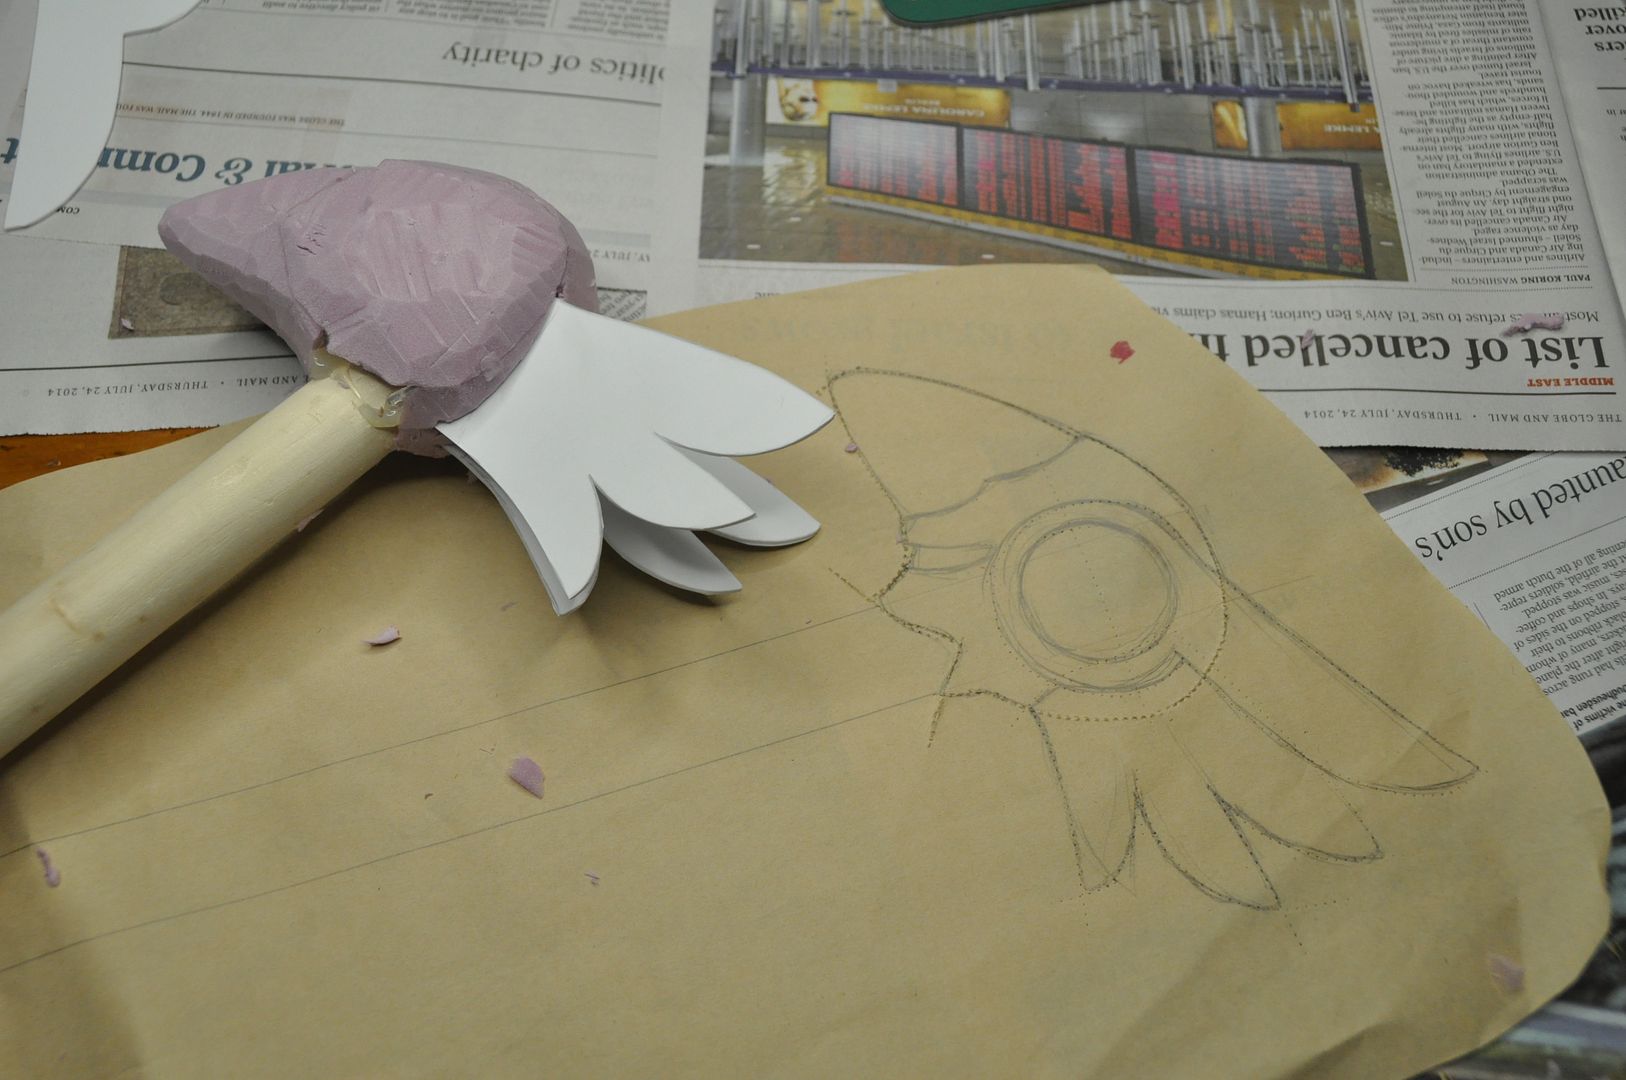
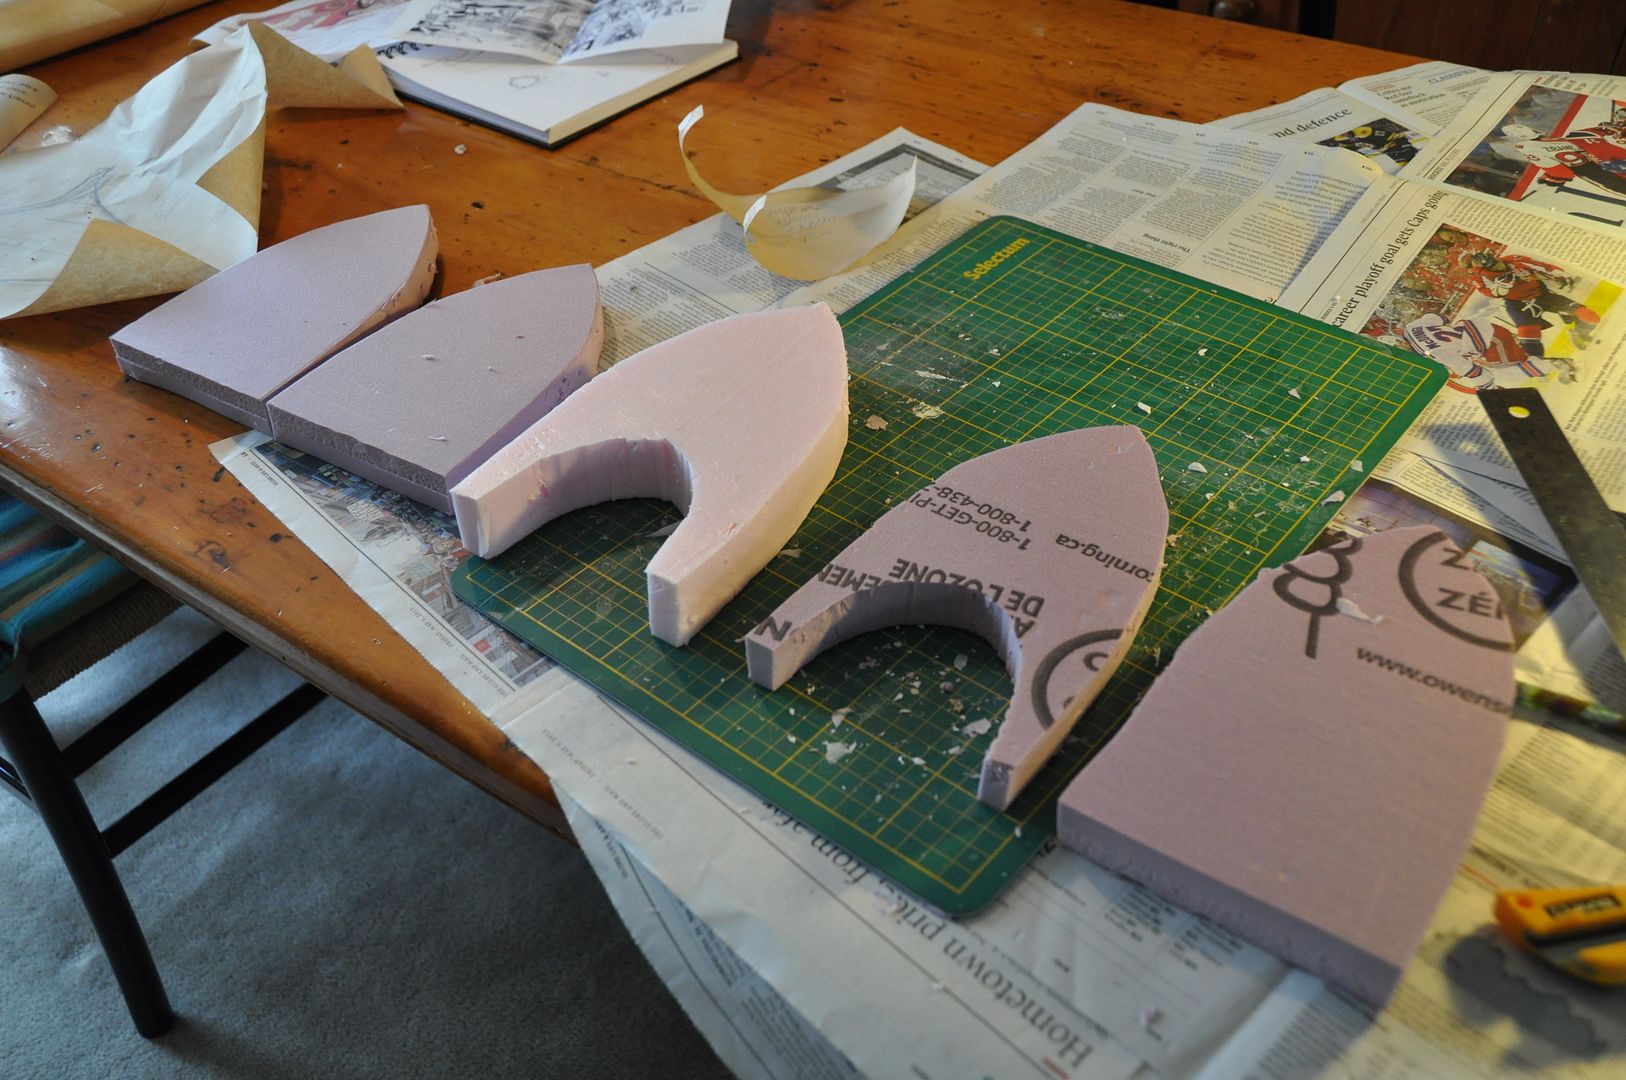
Without further ado, lets get started talking about the build. I began by sketching out the wand at full scale based on the reference photos. Once I was satisfied I used my sketch as a template to make the 4 wing pieces out of styrene. Did I mention I am still working on leftover materials from the Asuna armour? Because I am.

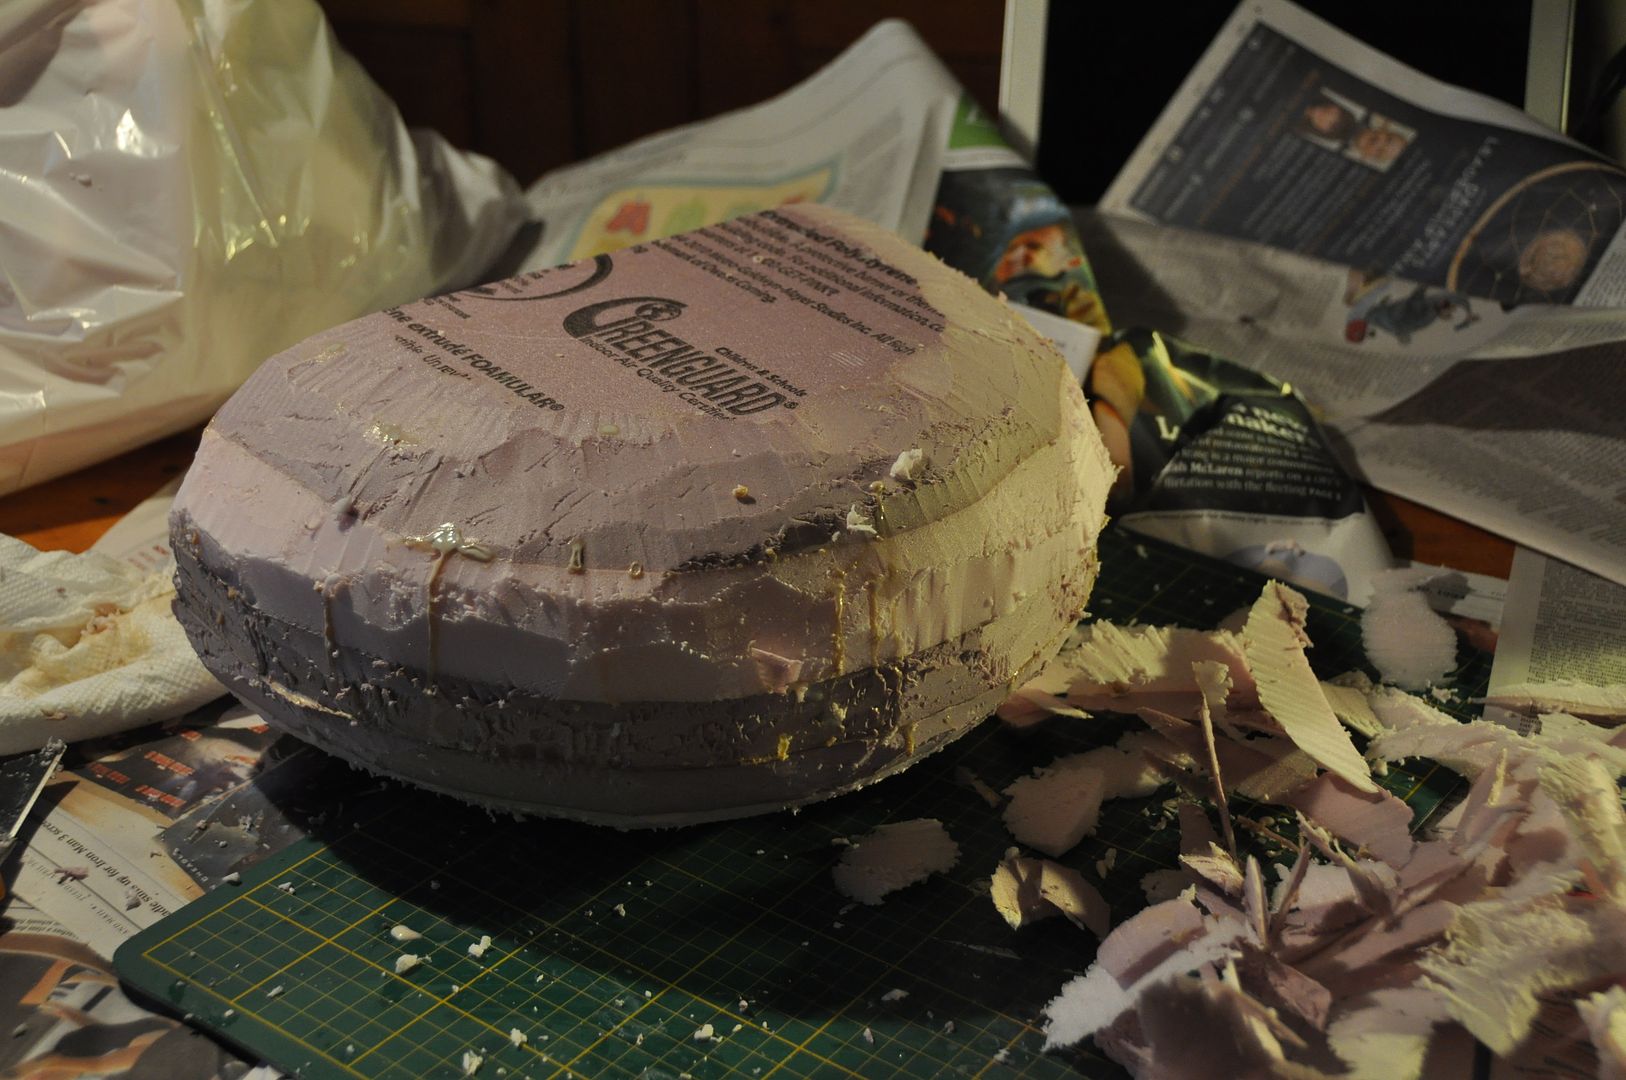
I also used this to cut out the basic shape of the bird head in insulation foam. I cut out a place to stick the rod up the center.
I used a dowel for the rod. I suppose the wand could have been lighter if I had used a pvc pipe instead of a dowel, but I totally didn't think about that until way later and by that point it was too late to swap it out without restarting.

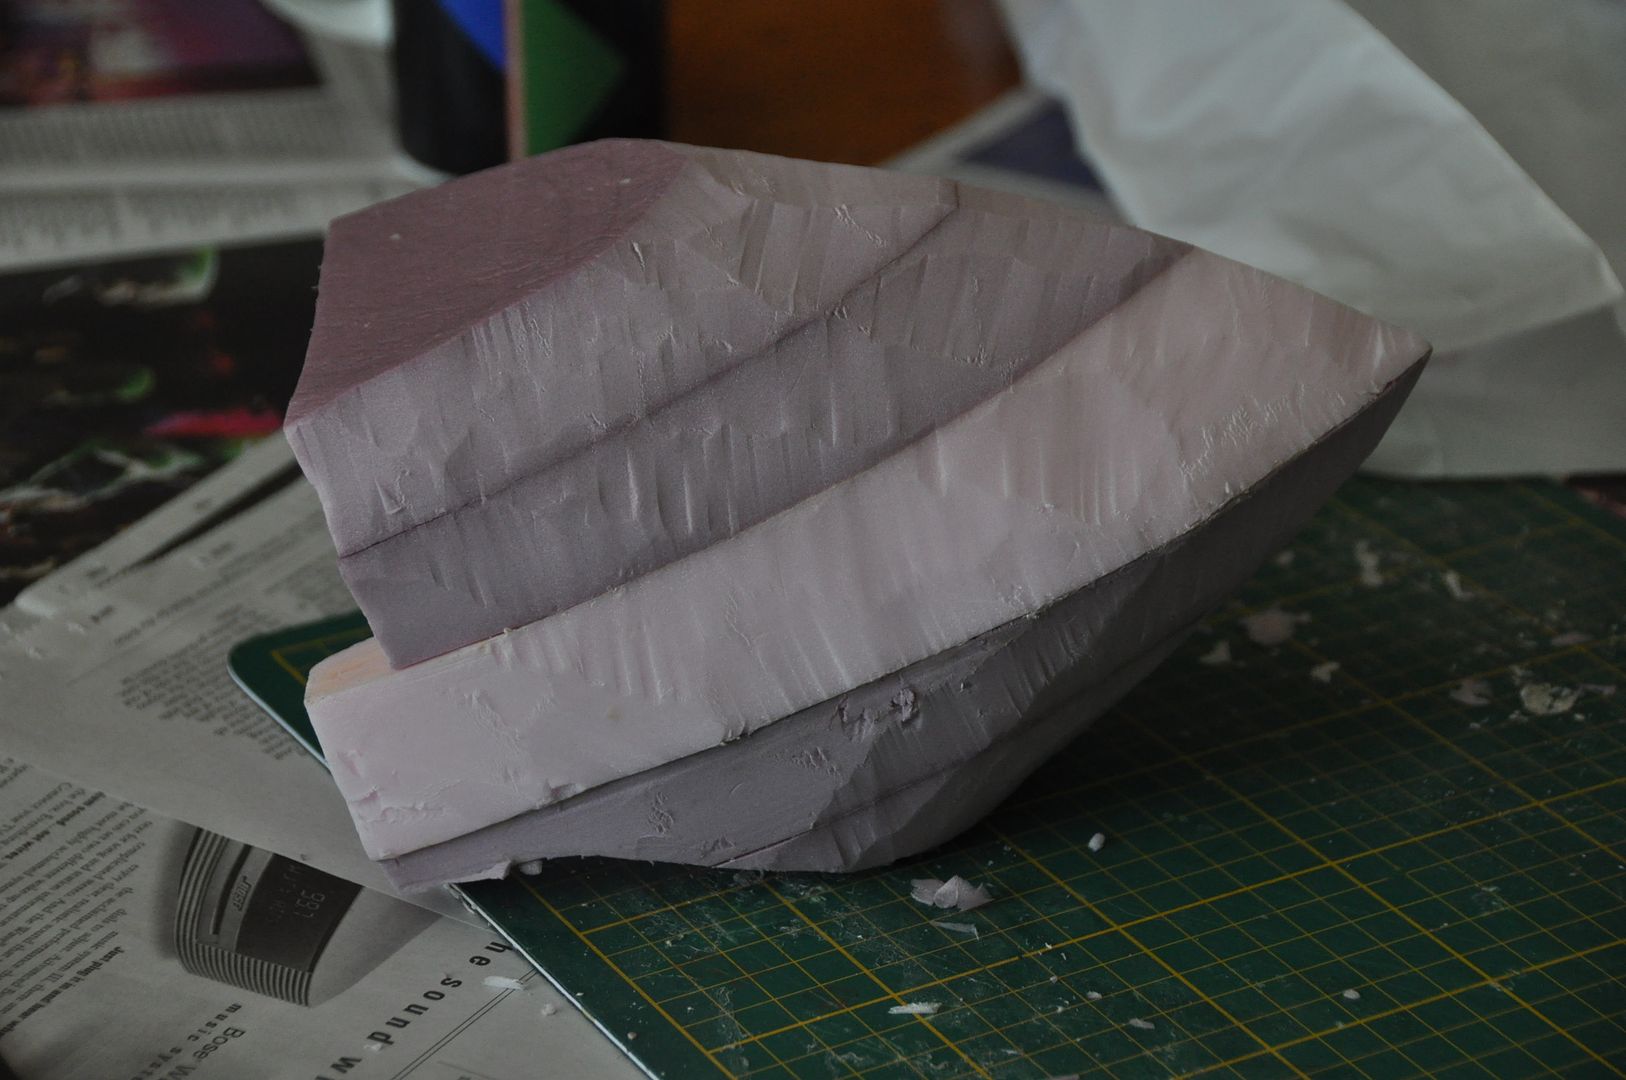
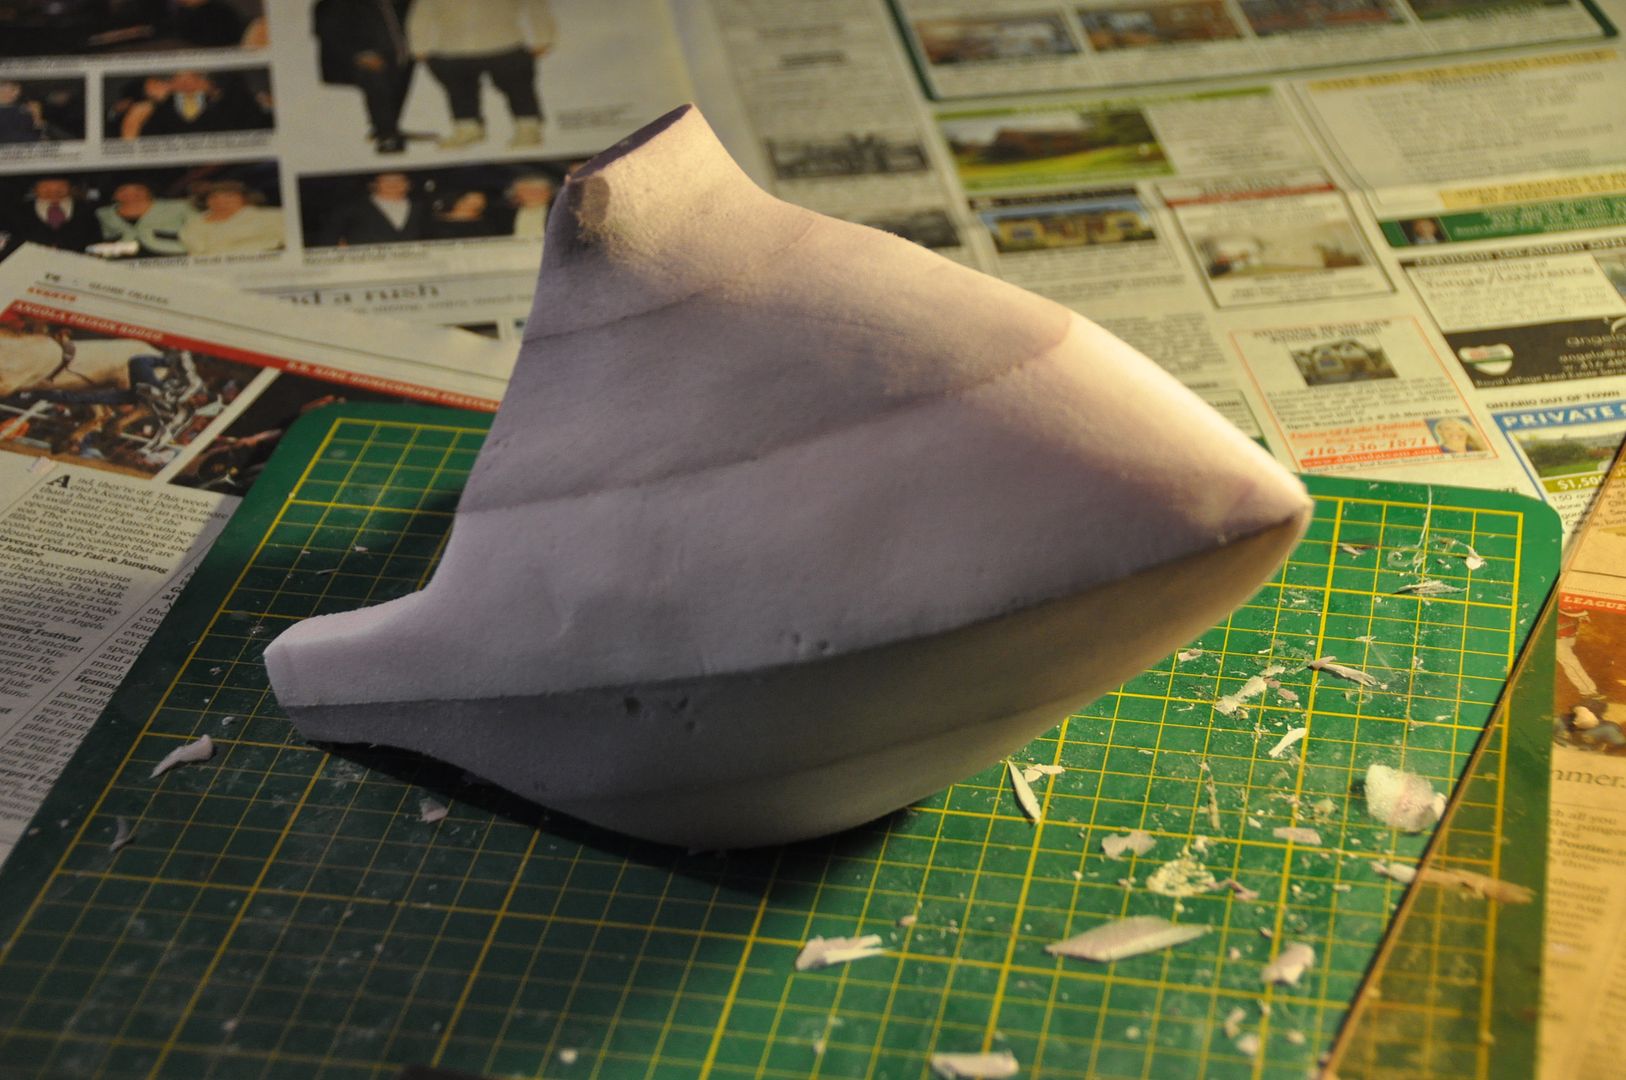
I cut 2 more copies of the insulation foam bird head shape and glued these to both sides. Then I started carving.

Then I cut two angled slits in the back to stick the first two wings. These were glued in place.

Then I used apoxie sculpt to add the raised details. I also used apoxie sculpt to make the detail on the bottom end of the rod. I had to do that in 2 stages though because the sculpting material tends to not want to stick to what I want it to. So I made a base layer in the approximate shape and then built up a smooth layer over top.


Once I was satisfied with the sculpt I sanded it down a bit. Then I glued the top wing on and built up the eye detail with more apoxie sculpt.

Then I sanded down the beak and painted over a few layers of gesso.

From this point onwards Clow Wand version 1.0 was finished in poor lighting in a hotel room using acrylic paints. The picture at the top of the article was the resulting paint job. Not terrible, but I was not satisfied.
I sanded off the majority of the original paint job so I could start with a more or less smooth surface. I decided to completely redo the paint job to better match the original Sakura costume.

I carefully used some leftover Shell Shock to paint a thin coat over the unprotected foam beak surface (this is what chipped off when I dropped it a year or so later).
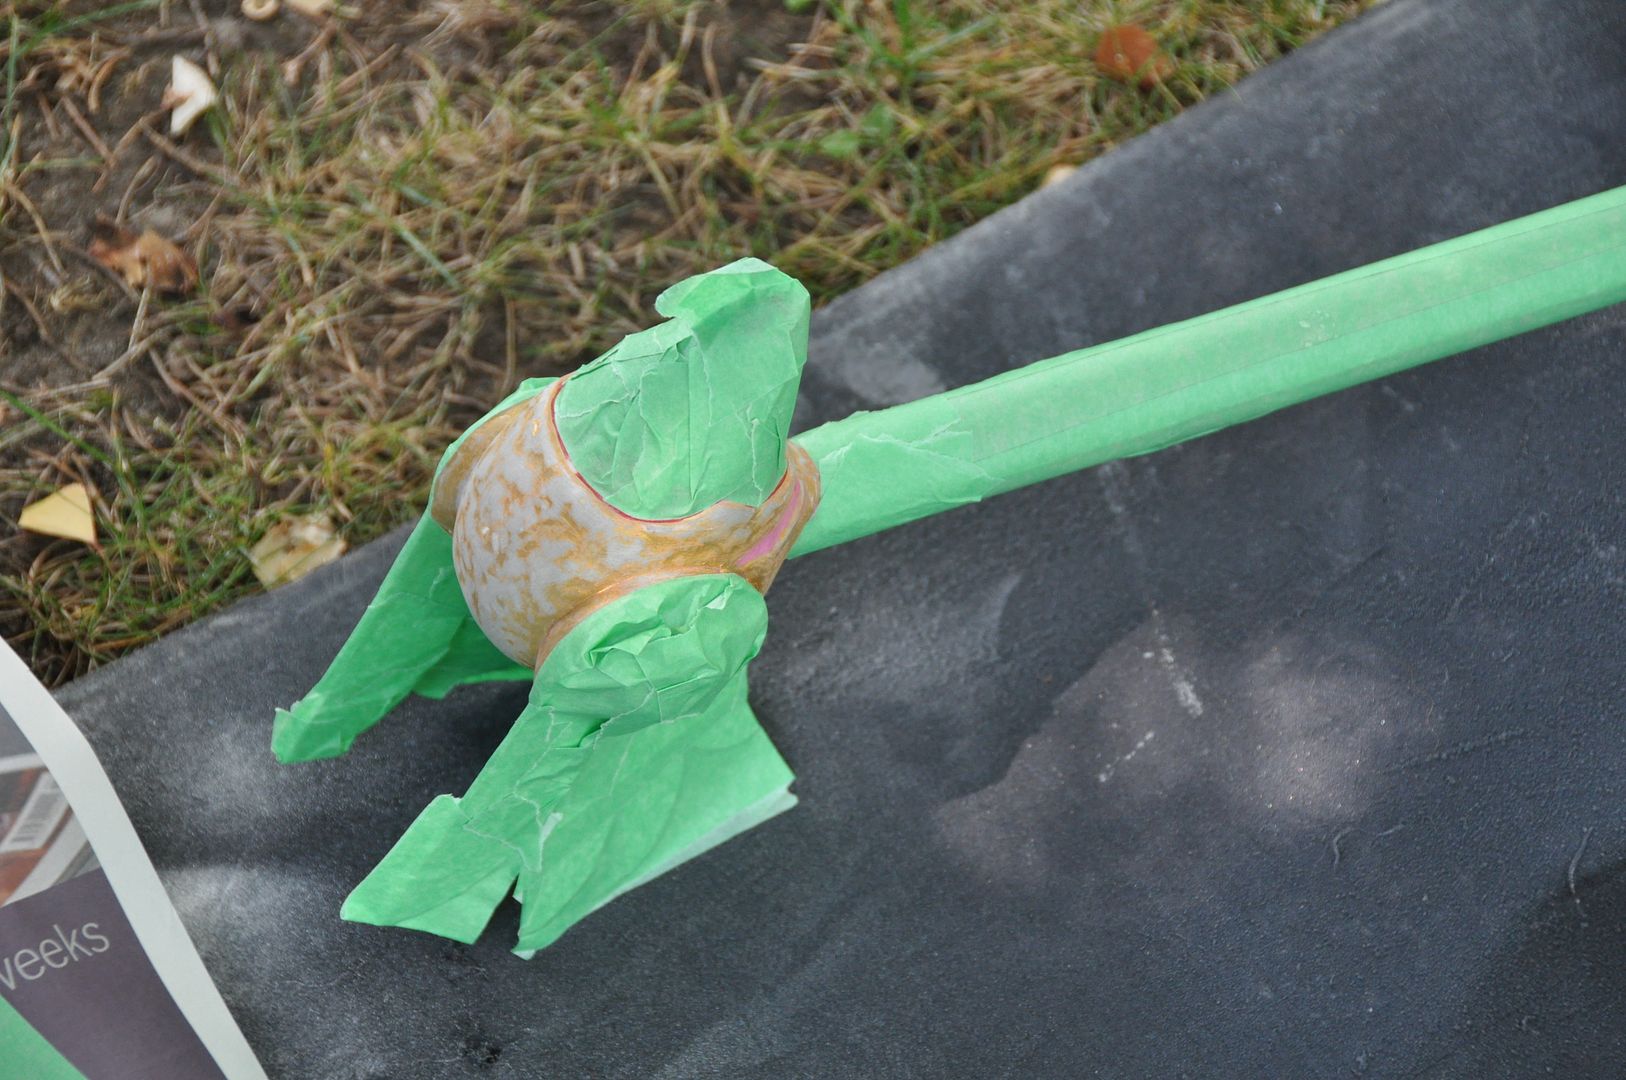
Using copious amounts of painters' tape to mask other areas, I began the paint process first with the gold. Then I hand painted the pink areas with acrylic, before re-masking and moving on the the red areas.

I finished the whole piece with nearly an entire can of gloss coat applied in many thin layers. 

This prop was pretty easy to make, it just took a bit of time with dry times, cure times, and sculpting times. 

And that's it folks! After years of waiting, I finally finished documenting my Sakura costume! Haha

Stay tuned: Vaporeon is coming up next!

Thursday, August 14, 2014

Forest Guardian - Wig, Mask, Bow & Arrows

[Sometimes life gets in the way of fun, most notably when writing a final essay for school takes several days longer than expected... Finally posting last Thursday's blog post. :P I will be carrying on as normal from here on out!]
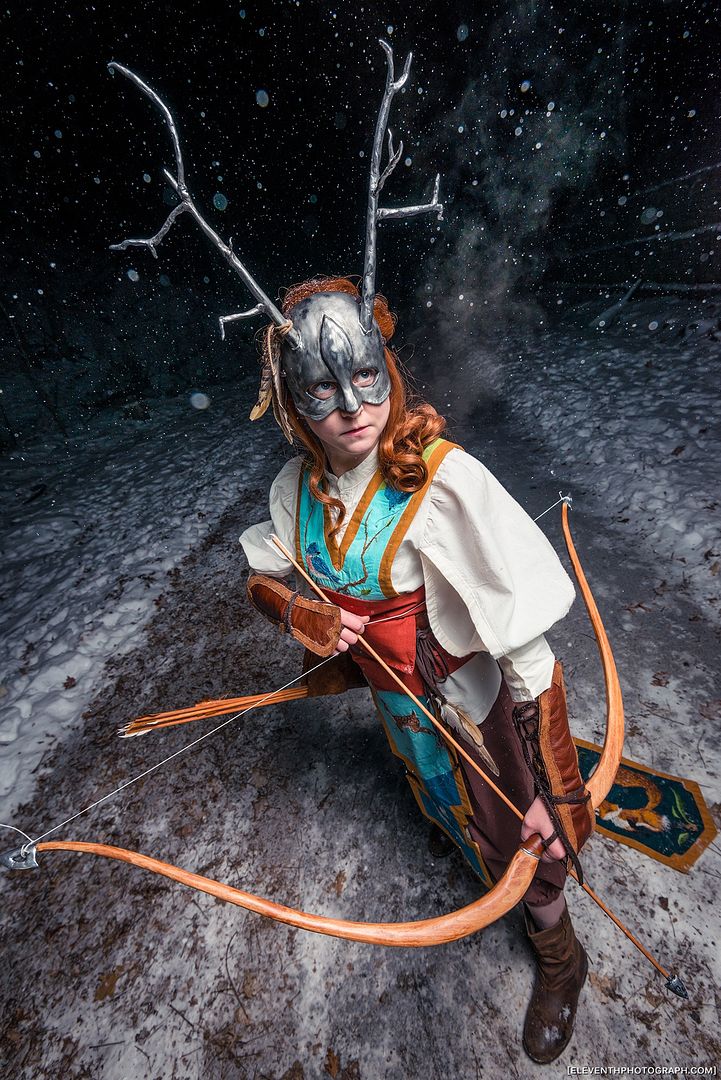
Now, on to the fourth and final part of my Forest Guardian costume: Wig, Mask, Bow & Arrows. (Not necessarily in that order.) If you are interested in the other sections, including my design process, accessories, and embroidery, check out parts one, two and three respectively!

The mask was actually the first piece I started on. I began this part of the project almost a year ago now (after I returned from Otakon 2013!). I knew I wanted to make it close fitting to the face, like I had designed it, meaning I knew I wanted to cast the piece from the very beginning.

I started by getting a friend of mine to do a life cast of my face. (Ian, who has helped me out on many other projects before, most notably: Nickel and Asuna's cast armour pieces). I didn't do this myself because a) it is impossible to cast your own face, and b) I didn't know how to do it last year. (But now I am wiser!) I will not go into explaining the details of life casting in this post, and will simply skip ahead to when I actually began on the mask itself.

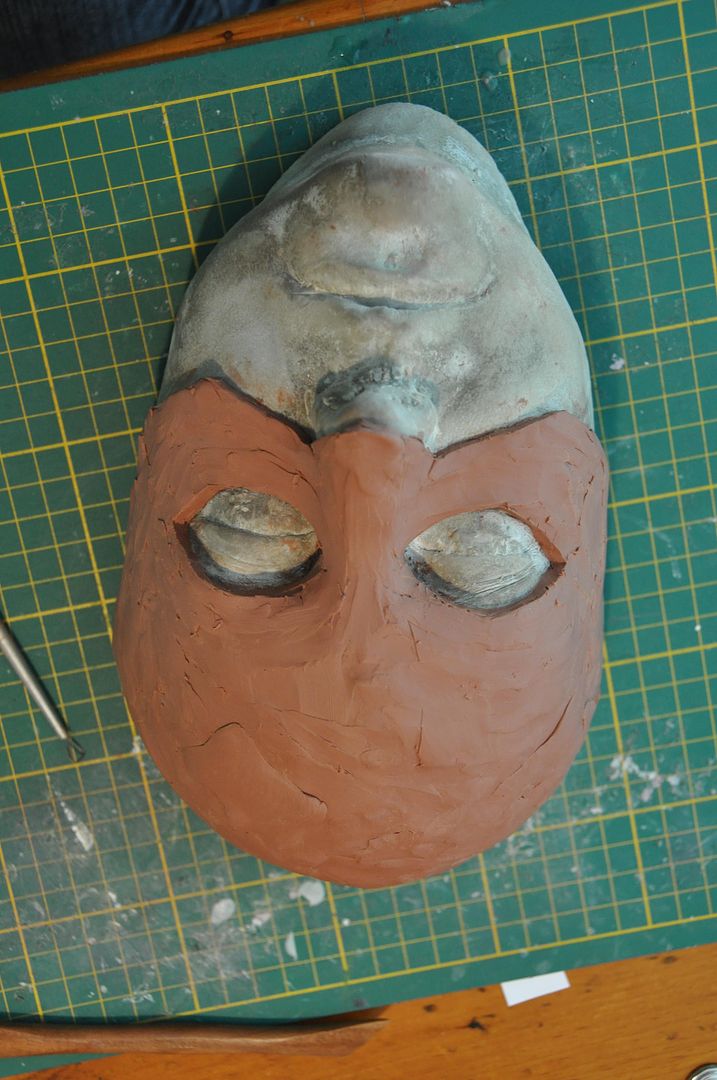
After I was handed a concrete replica of my head, I began sculpting my mask piece. I started by marking out the outline of the mask itself in pencil, ensuring I had the eyeholes and bottom edge looking more or less symmetrical. Then I laid down a layer of clay about 1/4" thick over the marked area. Note: If you are casting, always make sure you are using a sulfur-free clay!!!
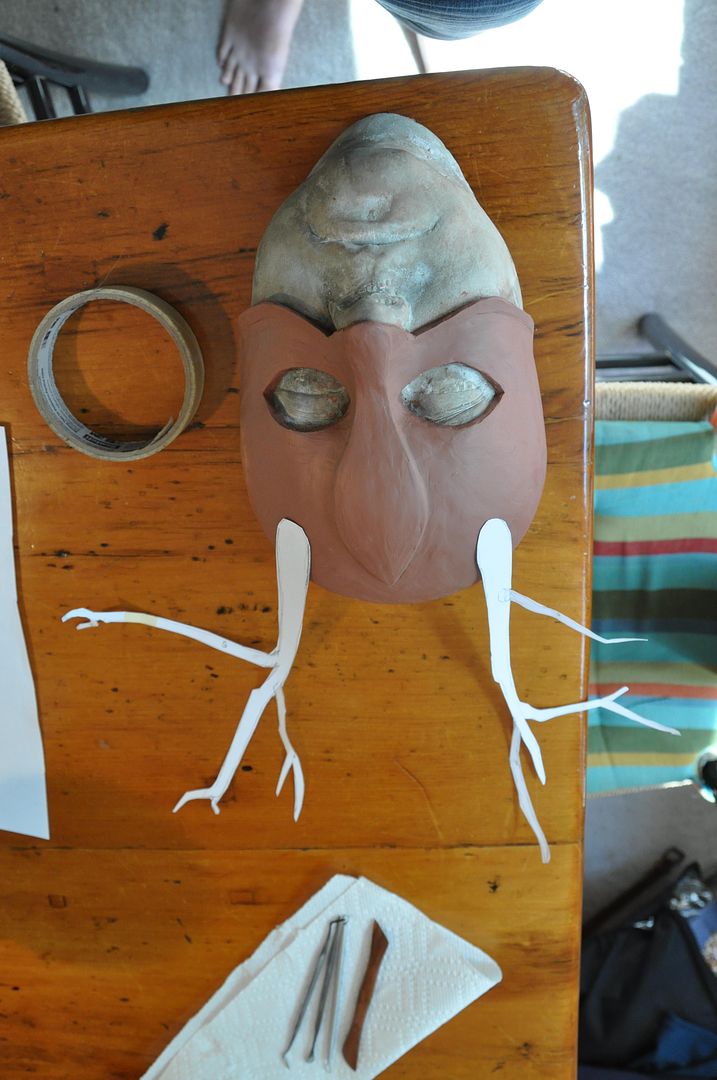
Then I began to smooth out the clay and add in the raised details. The smoothing was aided by 99% alcohol, which worked pretty well.

Then I drew an approximation of what I wanted for the antlers. Using these as a guide I sculpted my antlers out of a hardening clay (called apoxie sculpt) over a wire frame for stability.

The antlers were sculpted separately from the mask piece because casting the mask and antlers as a singular entity would be next to impossible.

Most of the materials used here were left over from my Asuna costume, which I had purchased with this project also in mind.
Once the antlers had cured completely, I sculpted 2 sockets which they would slot into on the mask itself. This would ensure they would bond well with the mask and not be at risk of falling off later under their own weight.

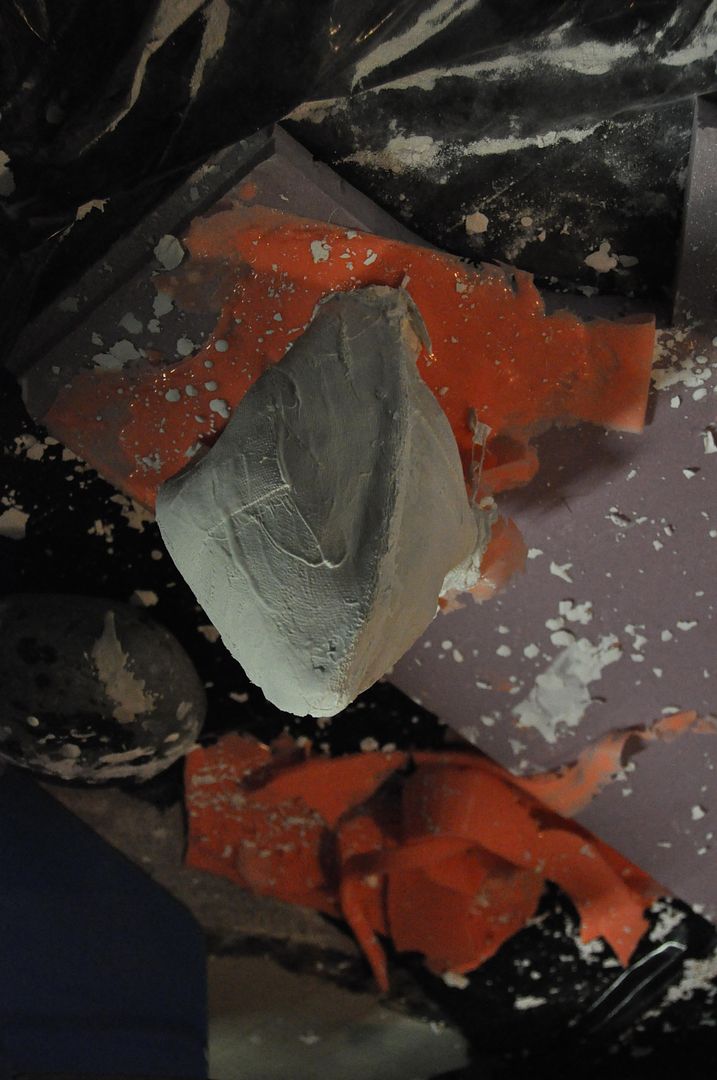
Then I created the negative mold for my mask. I used a product called "Rebound 25" which is a silicone rubber. I mixed the 2 parts together according to the box instructions and slathered it over my mask piece. It took about 2 layers. Once that cured, I made a plaster bandage 'mother shell' for support. Then I de-molded it.

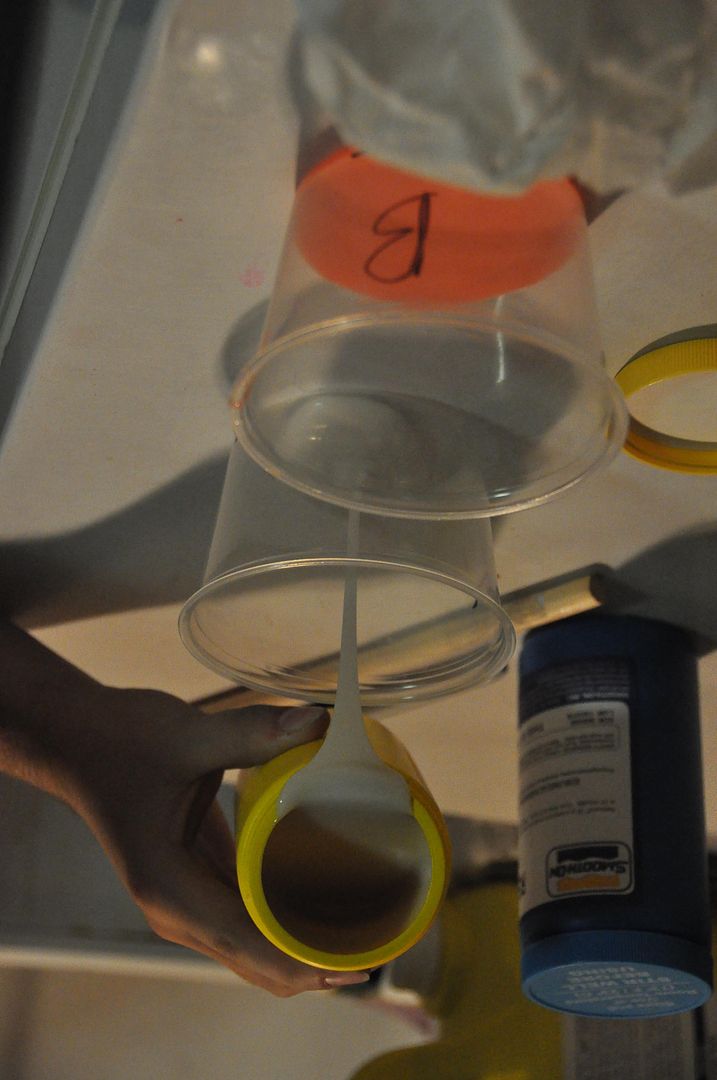
Next, I made the final pull of my cast out of a product called "Shell Shock", which is a plastic. Instead of using the life cast of my face as the 2nd part of the mold, I chose to instead 'slosh cast' the piece. Since my product had a short work/cure time, this was acceptable choice. I painted in my splash coat (first layer) carefully, making sure it went into all the nooks and crannies, and making double sure there were no air bubbles. Then I added a second and third layer as necessary.

I used paperclips to hold the mold and shell together at the edges. Admittedly, I made a bit of an undercut when I made the mother shell and had to break the edges to get it off the initial sculpt. It still worked for this cast, but in future I will try not to do that...

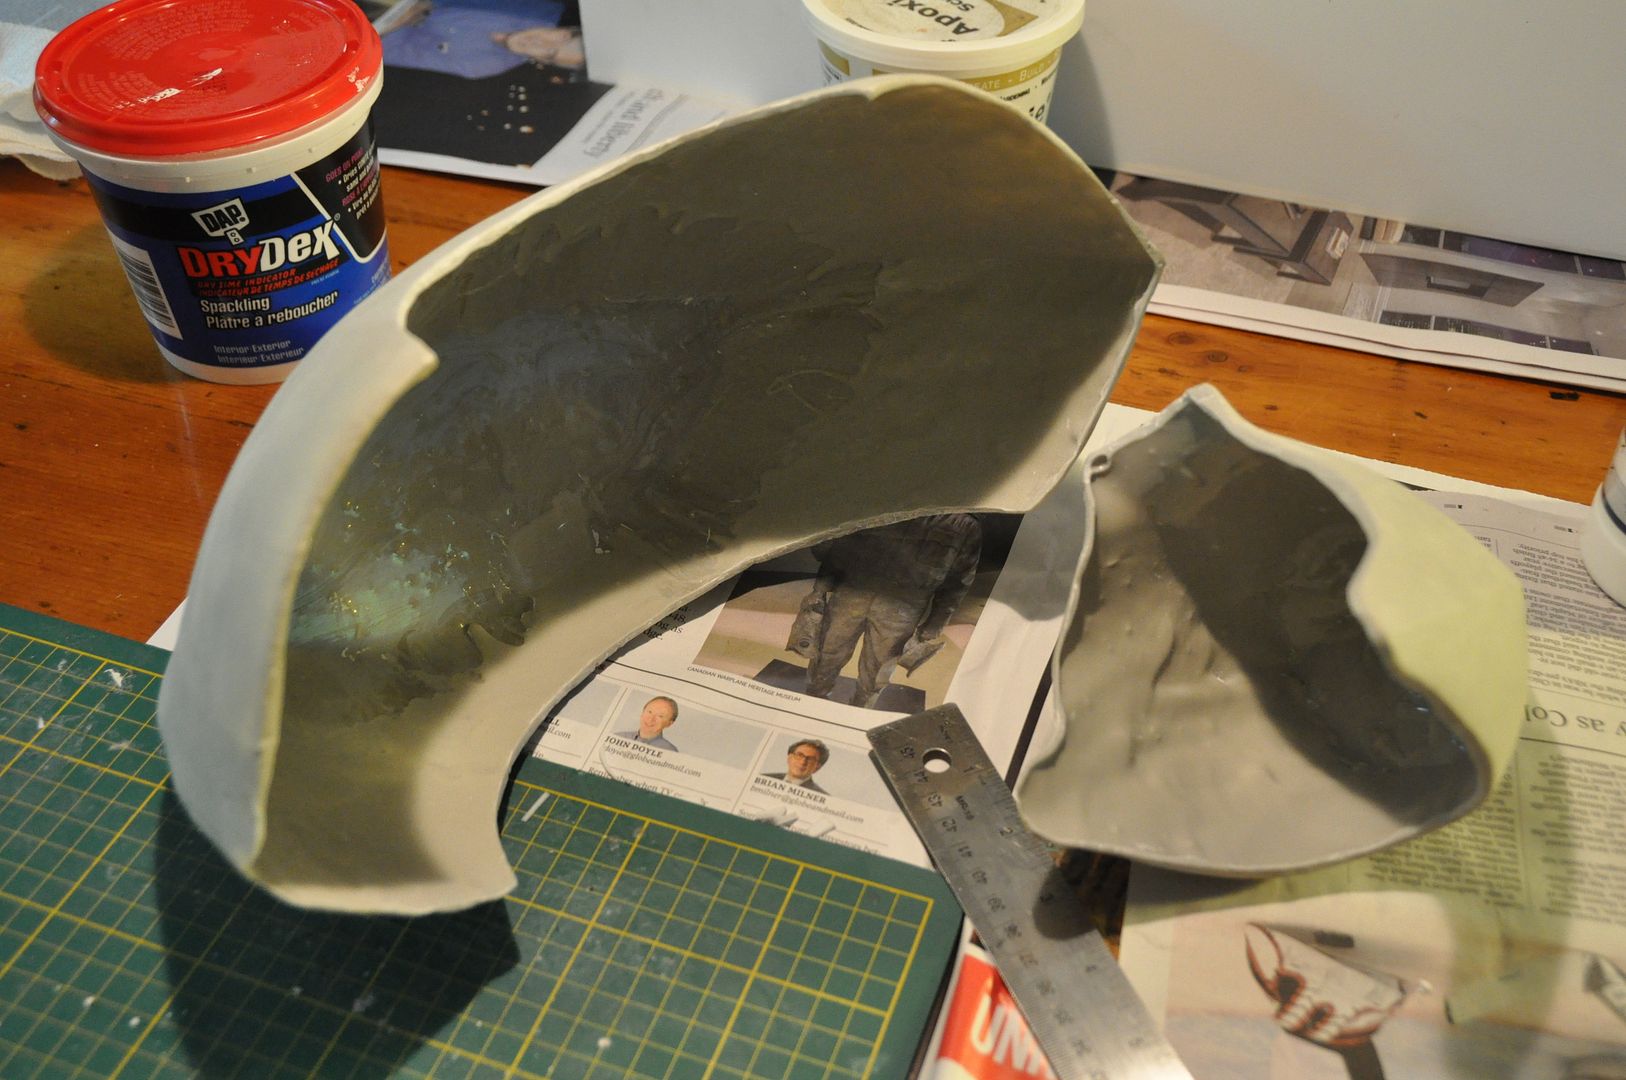
Pictured below are the three parts: the sculpt, the negative mold with mother shell and the positive cast.
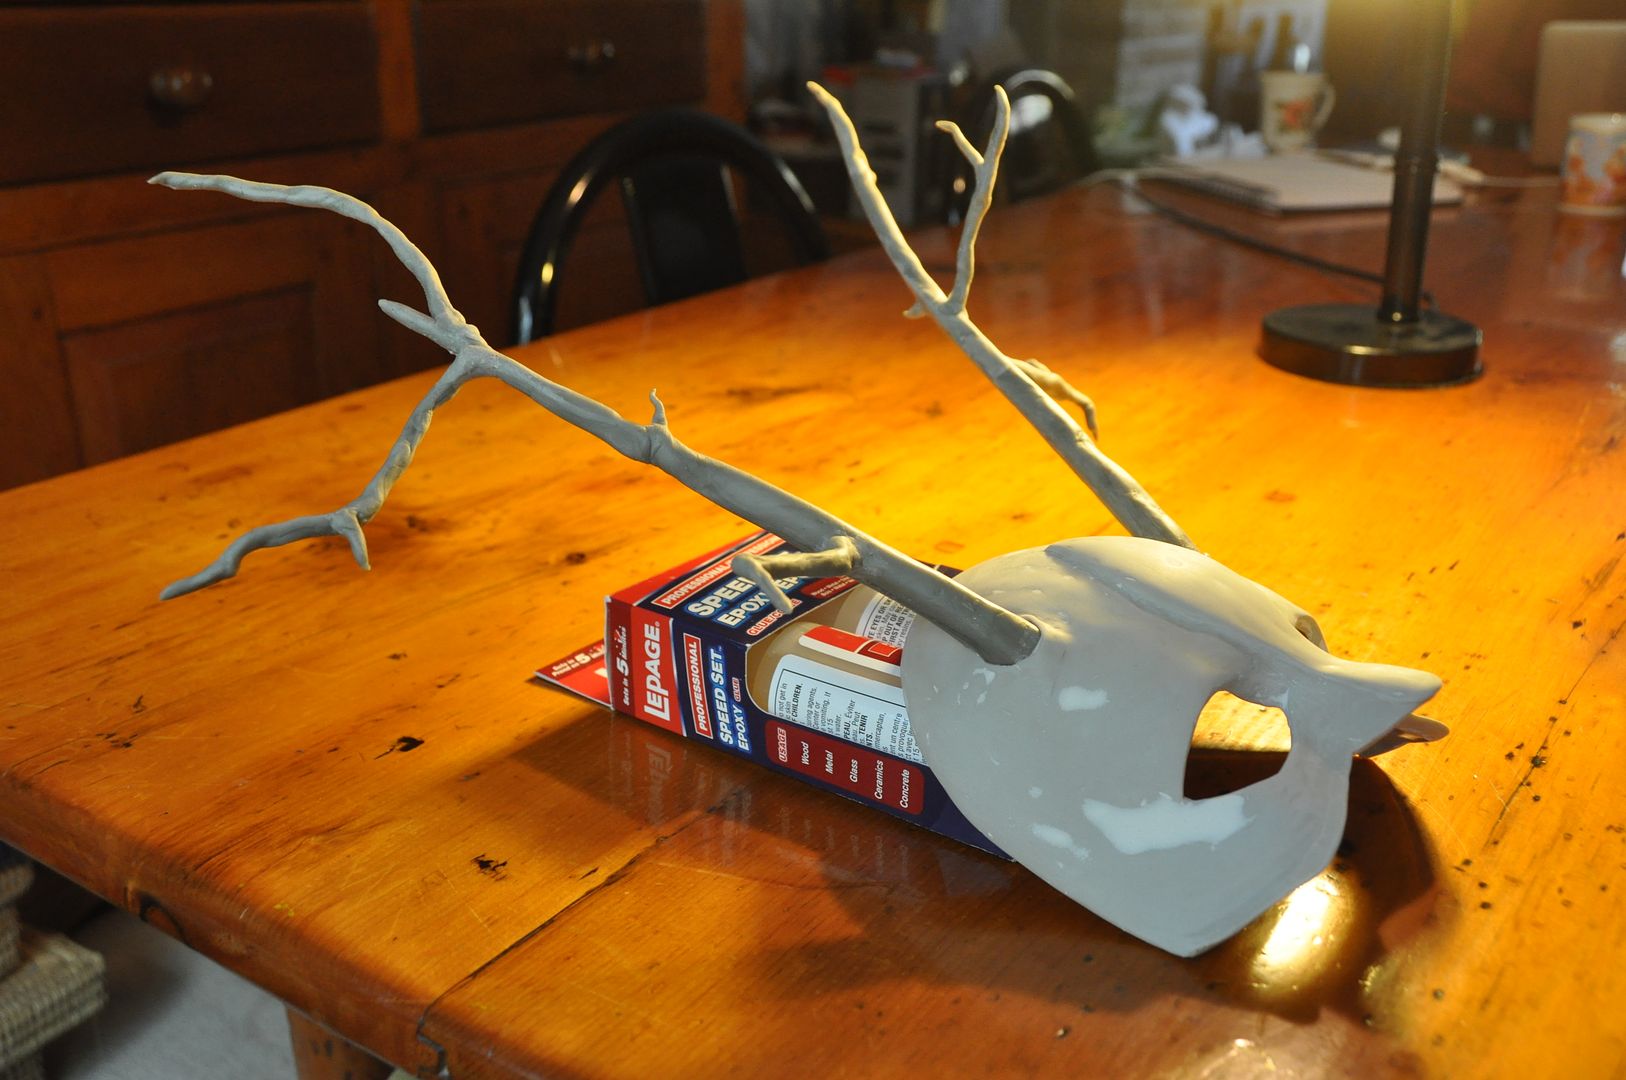


Then I cleaned up the cast using a dremmel. I had to round out all the edges, making sure there were no sharp points against my face--particularly in the eyeholes. I also had to thin down the forehead area in the back of the mask, as it was a bit thicker than the rest of the mask, making it not sit snugly on my face.
I filled any air bubbles and sanded the whole piece to be even smoother. Using a really strong epoxy I glued the antlers into the sockets. I later drilled 4 holes in the mask to add on the ties.

Fast forward several months to the next piece of this project, the bow and arrows.  When I started this part of the project this past March I knew there was going to be a slight problem: I knew approximately how I wanted to make this piece, but I didn't have the proper tools to do it at home. 

I was taking a scenic carpentry course at the time and brought the draft of my bow to my prof, asking his opinion on how best to make it, while also requesting to use the shop outside of class for this personal project. Since a) I was well ahead of the class on my furniture project, and b) we are such bros, he let me use both the tools I needed and found me a piece of hardwood to make it out of! :D

The bow itself is constructed from 3 pieces: 2 arcs made of poplar and a dowel for the center hand grip. t was important that I make the pieces out of hardwood, because although the bow itself would not be under tension, a softwood would splinter when being cut/sanded or would break very easily later. I didn't want this piece to be too fragile!
Using my full scale draft, I traced the 2 arcs onto the wood. These were carefully cut out using the bandsaw. Then using a spin sander I rounded out the corners and tapered the bow into the final shape. This took quite a bit of time, but I am very happy with the result! To get it extra smooth, I used a fine grit sandpaper and finished the job by hand.

To attach these pieces at the center, I drilled a pair of holes into each of the joining surfaces and placed dowels into them. Using epoxy, I glued the whole thing together. The dowels in the joint would strengthen it much more than gluing 2 flat surfaces together would. Also by having 2 dowels in each join this meant I wouldn't have the pieces rotating in place.


Next I used apoxie sculpt to make the detailed bits on the end of the bow.
For the arrowheads I was initially going to sculpt them out of apoxie sculpt too, but it wasn't achieving the desired look so I switched to clay. Then I molded the arrowhead and cast 7 arrows. (I was too lazy to make more.) I feel I need to improve my arrowhead casting method, as they didn't turn out as clean as desired. (For those who know casting: it was a 1 part box mold with a slit in it.)


Next I started the paint job. The mask, arrows and bow were done all at the same time. Any areas I didn't want silver were covered in painters' tape. I primered black, then sprayed silver in several coats, then sanded the pieces to age them.

The wooden part of the bow and arrows was then stained with a "cherry" colour and finished with a clear coat. I sanded and coated it a second time to make it extra smooth.

Then I hand stitched a piece of leather over the hand grip to match the rest of the costume.


The last detail was to add feathers to match the rest of the costume. The ones on the mask were tied on, the ones on the arrows were glued into slits that I had carefully cut with an exacto knife.

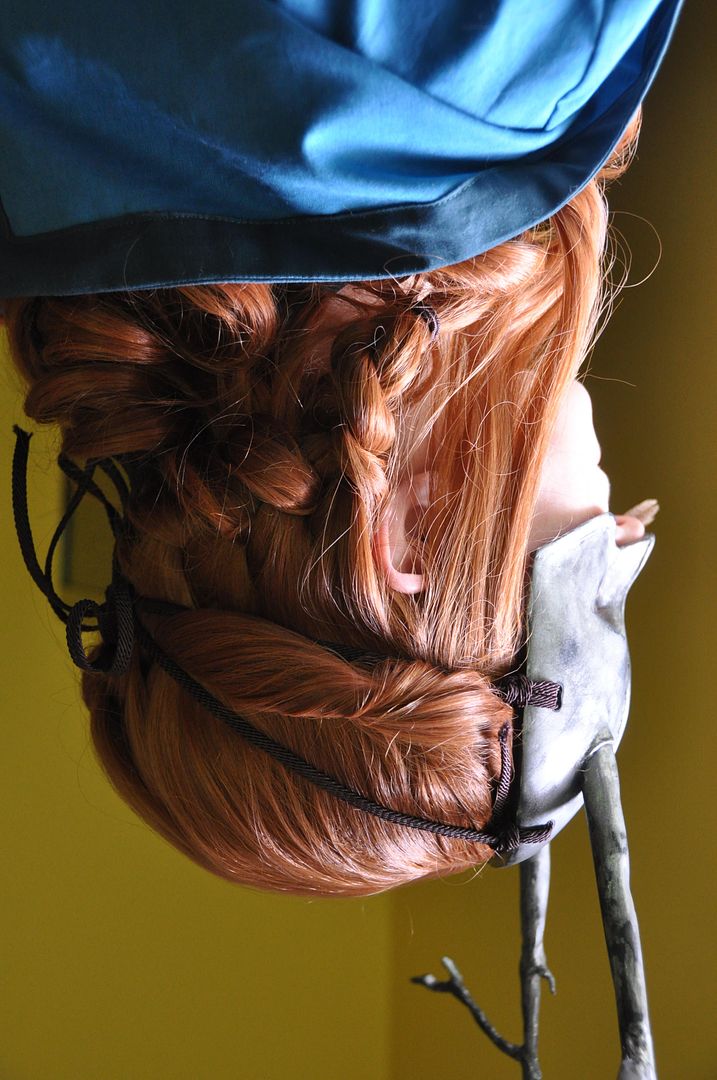
I measured and added the ties to the mask, finishing off the ends with clear nail polish so they wouldn't fray.

Now lets talk wigs! The wig was actually an "Amy Pond" wig I ordered off of Five Wits. (As a side note, I love the names these guys give their wigs!) I picked it because it didn't have bangs, which would get in the way of the mask. It had arrived before Costume Con, but I had no time to style it, so I didn't end up wearing it to that event.


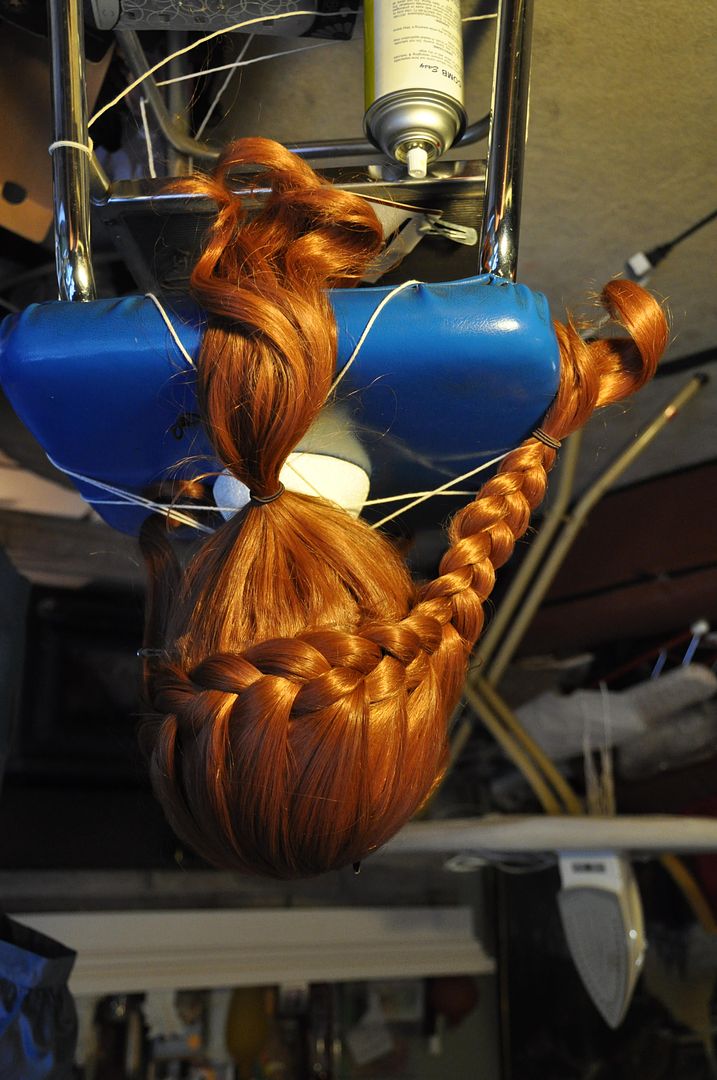
The style I eventually decided upon was relatively simple. I french braided horizontally across the back of the wig, only taking hair from the top. I left the 'sideburn' sections to hang freely at the front, but the rest of the hair was pulled away from the face to reduce bulk under the mask. From the opposite side of where I started my braid I created a twist with the front bunch of hair, which was pinned and threaded through the braid at the center back. I stuck a feather in the end of the braid for good measure.

This style worked well because it helped both keep the hair away from the face and also provided an 'anchor to tie the mask to at the back. Having the 4 ties meet at the center back under the braid kept the mask from sliding down my face as much as it did without the wig.

Overall I really love the finished look with the wig.

I hope to do a full photoshoot of this costume in the forest sometime soon, just need to find time (that also coincides with good weather and a photographer)... Also my bow will be making the trip to Otakuthon without me! I am lending it to a friend for his costume, which is some kind of mouse archer from a game I am not familiar with.

[Edit: The new snowy photos are from my winter photoshoot I did with EleventhPhotograph! Many thanks!]

Tuesday, September 24, 2013

Kero & Suppi - Bows, Gems, Giant Candy - Cardcaptor Sakura

This is the fourth post for Kero and Suppi! This is just a quick look at all the props and accessories for these costumes. :) I always feel that props and accessories just make a costume that much more interesting!

For the rest of these fabulous costumes see the Shirts & Shorts, Ears & Wigs, and Aprons & Wings. For more pictures of Kero and Suppi see Eleventh Photograph's Otakon gallery!

First let's talk about those delicious candies! They were actually made by my sister. It was really nice to have a super light prop to carry around for the day.

My mint is made of 2 layers of insulation foam hot glued together. The edges were sanded down to be round. She then painted it white, then added the red swirls using acrylic paint. Alex's gumballs were simply coloured balls she got at the dollar store. Both candies were wrapped in cellophane.

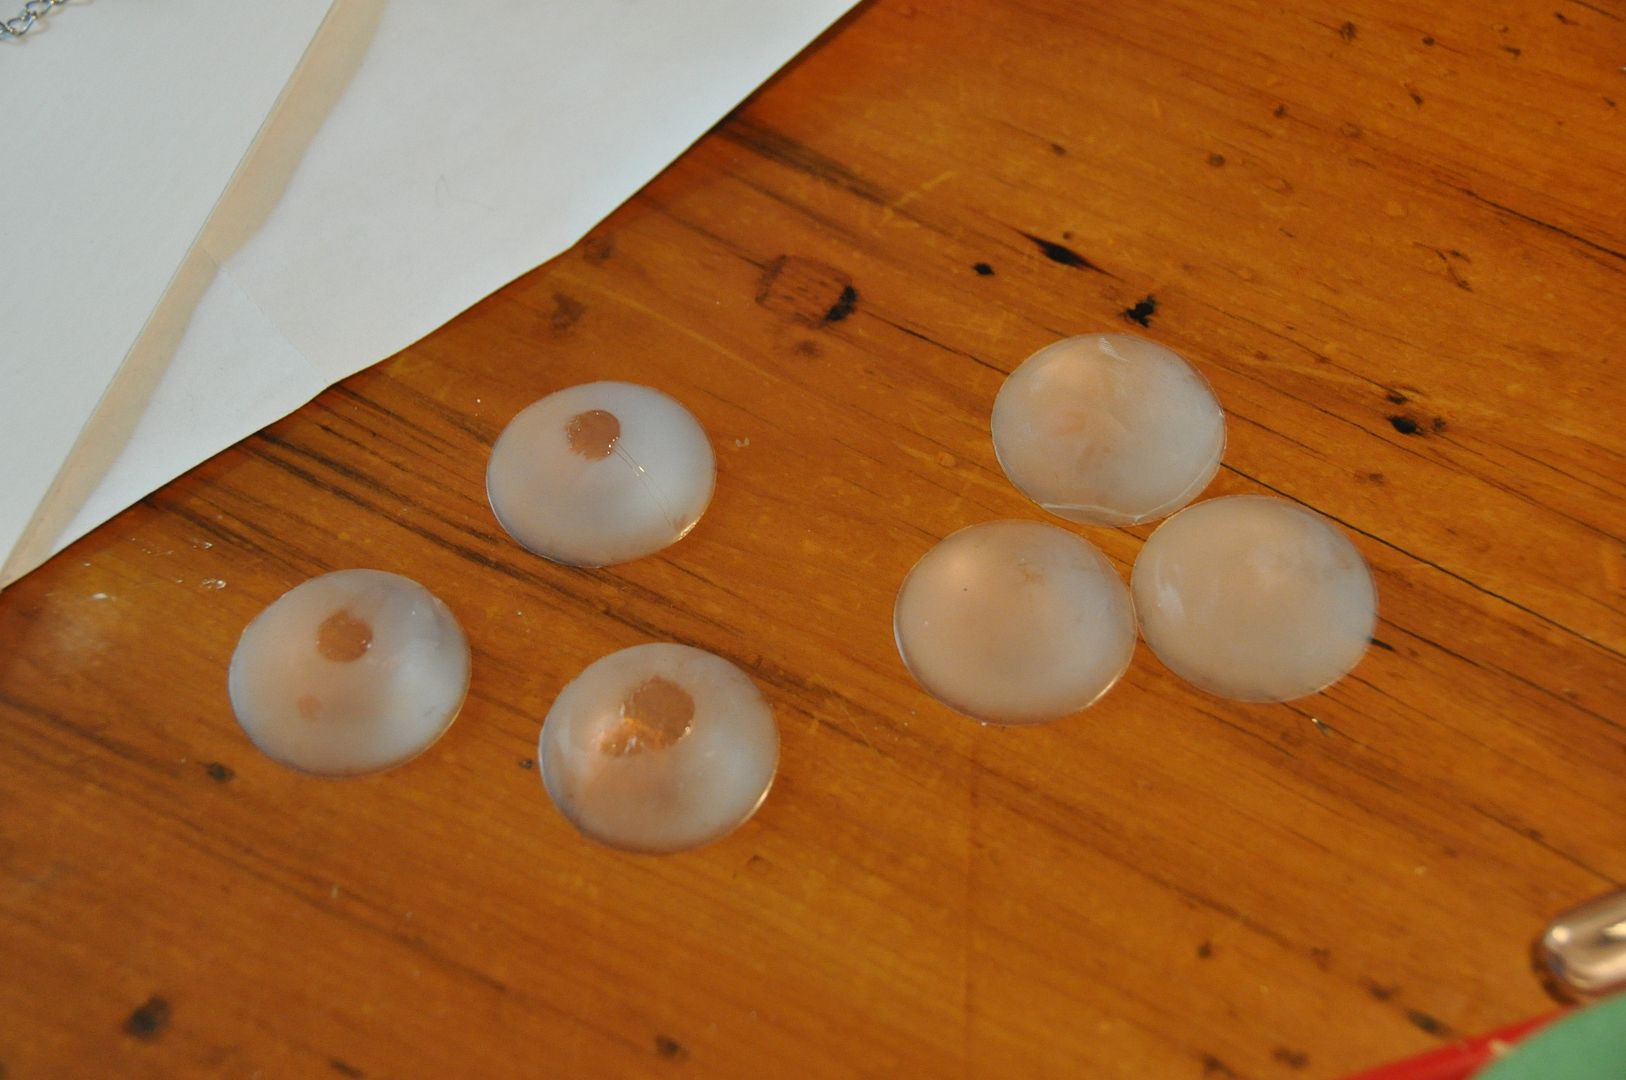
Alex also made our cool gems. For the gems we used a gedeo clear resin we bought at Curry's. Following the instructions she mixed the 2 parts accordingly and used a new paint tray as a circular mold. Then they were left to cure. We only needed 2, but she made 6. This was lucky because for whatever reason 50% of the gems didn't cure.

Then she painted them using nail polish. She backed them with a polish of each chosen colour (red and teal), then in order to bring out the shine she coated the top of the gem in a clear coat of nail polish. Trust me when I say that the clear coat is what turns them from looking "meh" into looking gorgeous.

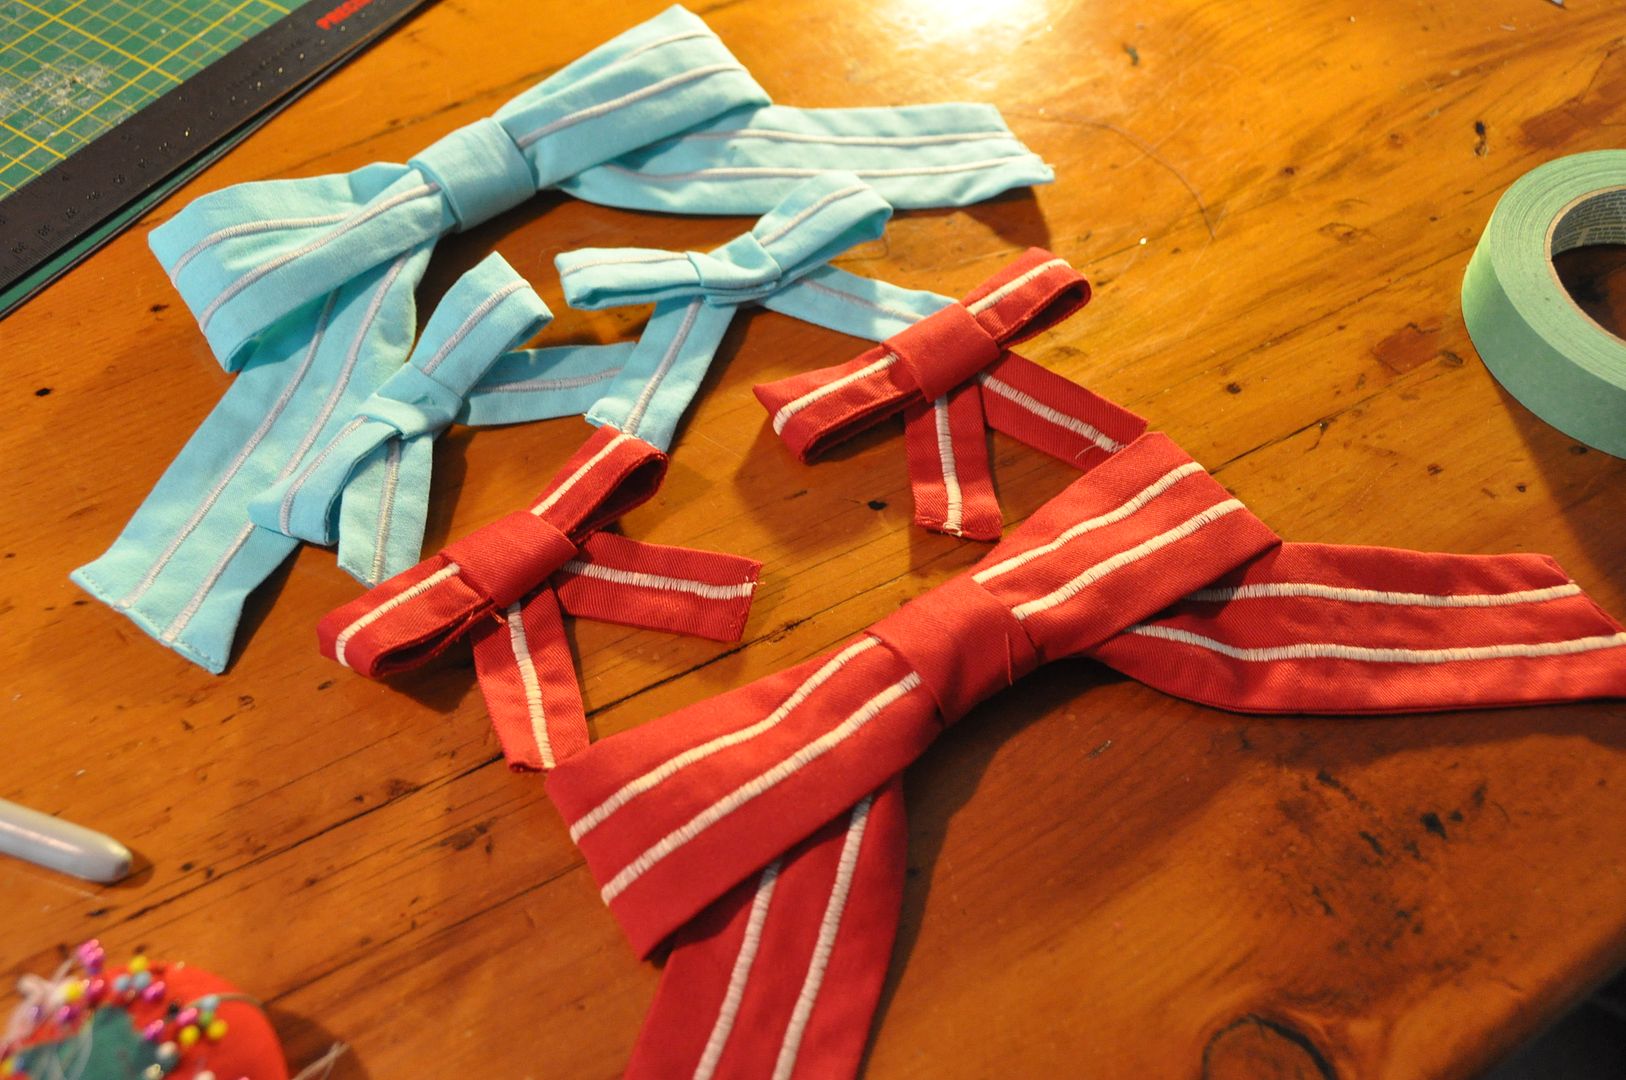
The next accessory was a set of 3 bows for each of us. Each bowtie was made of 4 pieces plus a neck band. All the rectangular pieces excluding the center were given stripes to match the aprons. The bows were hand stitched together, then the gems were hot glued onto the center. Finally to the neck bows I added a neck band, with a velcro closure. My sister's I made longer because she wanted to have her collar unbuttoned.

The shoe bows were simply attached to our own shoe laces with safety pins!

Tuesday, August 13, 2013

Asuna Kagurazaka (Knight) - Armour (Cast) - Negima

The last post from my Asuna set, then I am officially done Anime North 2013 stuff! Hahaha

Go here for my Heat Molded Armour, Wig, Bodice, Skirt, and Sword. And you can find the rest of my photoshoot with EleventhPhotograph here! The armour looks particularly stunning in these photos, the paint job on the shoulder piece really reflected light well.

So here we go with the second part of my armour tutorials, except this time we get to talk about casting. Probably one of the more finicky aspects of the whole project, and in spite of all its faults it turned out really well (particularly since this is my first time casting anything myself!) Before I get into the technical talk of this post, I would like to thank my friend Ian (aka Elephutan) for taking the time to walk me through the whole process! It would not have been possible without him!


The shoulder piece I am the most proud of, of the entire costume, while the elbow piece I am the least proud of (in terms of shape, size, rigging, etc. it just didn't fulfill my expectations.)

First I would like to say that it was an executive decision to change the design of the elbow armour to be something more physically possible. On real armour there are no metal bits on the inside of your joints so that you can actually bend your limbs. On the original design however the elbow piece encircles the entire elbow (see picture on the left). This would have made it a) more difficult to cast, b) more expensive to cast, and c) physically impossible to bend my arm. That being said I was so mobility impaired anyway that I doubt it would have mattered, but I didn't want to hamper myself from the get go. So I modified it to go only halfway around the arm.

While the heat molded armour is quite economical, the cast pieces are quite pricey. However, with the styrene plastic it would not have been physically possible to achieve the shapes I wanted. I could have carved it out of foam also, but I would have had my constant dilemma of foam being easily dinged, and carving the inside cleanly would have been nigh impossible. The hollow cast shell was what I was looking for in this project.

...And now for something completely different: The first thing I cast for this project was actually my legs to use as a base for heat molding. This was done with a plaster bandage mold.

First we covered the front half of my leg in plaster bandage, then after that set we covered the area of overlap in a generous layer of vaseline. Then Ian covered the back half in the plaster bandage. Obviously I could not do this by myself as it had to be done while I was standing, and I had to stand still so it didn't set in the wrong position.

These were then peeled away. We coated the inside in vaseline and then sealed the side seams and bottom. Using elastic bands to hold everything in place.

Following the instructions on the package we mixed the correct proportions of plaster and water. This was then poured into the molds. It wasn't a perfect replica, as the side seams were rough, and one leg didn't turn out as well as the other, but it made an excellent base to heat mold my calf and knee pieces around. 

Now on to the real reason we are here! I actually started this process by taking detailed measurements analysing my proportions and those of the reference pictures, mocking up my plans in autocad. This ensured I was on the right track before I started carving.
Using contact cement I glued 5 semicircle layers of foam together to create my starting shape. I drew on the semi circle cut outs on the top and bottom as reference points. The radius of the semicircles here were the same as the widest point of the piece. 

I carved down to the rough shape before switching to sandpaper.
I drew up my imagined elbow piece to scale. Unfortunately I was working under the assumption that the cast would be thicker than it was and as a result the piece wound up being very loose fitting.

I traced out pieces of my top view and cut out the layers.
I glued these together and began carving.
I then fine tuned these pieces. I filled in any divots or dents and sanded it smooth. This was repeated multiple times, keeping in mind that any mistakes on the master would be duplicated in all the replicas.

Then it was time to begin the casting process. I went out to Sculpture Supply Canada and they set me up with everything I needed! I brought both pieces with me so that they could ensure I had the right materials for the job in the right quantities.
We started by making the silicone mold. This is a brush on mold, that would be open on one side. The open side was tacked down to a scrap piece of foam so that it wouldn't make a mess and was easily moveable. In several layers we made a silicone shell that was about 1/8" thick. (Tip: always have like a million disposable paint brushes on hand for this, every time you use one it becomes garbage.)
We took extra care to ensure there was a thick layer of silicone on the tip and the ridge so it wouldn't tear.

Then we made a plaster bandage mother shell. Again this was done in a few layers. Like the leg molds I did earlier we first did one half, then put a coating of vaseline on the area of overlap, then did the other half. This ensured that we could take it apart and line it up easily when putting it back together.

Then we de-molded the pieces, meaning we took the foam originals out of the silicone casings.
The mold and mother shell were then put back together, ready for casting.

Following the instructions on the package we mixed the proportions of part A and B accordingly.

The cast was brushed in so it would be a hollow shell. This means I needed a resin with a short work time so it would stay on the vertical walls and not slosh back down before it was done curing. (Lots more disposable brushes were used.) I should have done more thin layers on this part, instead of fewer thicker layers as this resulted in a buildup of resin in the bottom of the mold, making the tip a lot heavier than I had anticipated.
Using my dremel I cleaned up the edges and cut out the two semicircles on the shoulder piece.

Then I heat molded two strips of styrene to nest into the curved sections. These were hot glued in place.
The last thing I did before paints was to drill some screw into the thick buildup of solid resin in the bottom. These were used as anchoring points for my rigging, which was much more secure than trying to adhere anything as the pieces are quite heavy. Unfortunately on the last screw we managed to crack the elbow piece. With no time to recast it, I filled the fracture with duradex.

All the pieces were then sanded to be even smoother than the foam originals. Then I painted them the same as the heat molded pieces.

The rigging for these was very complicated and resulted in me needing a squire to dress me for battle. I made the straps out of leather so they wouldn't chafe my skin (like pleather/vinyl would have) and they hooked around my anchor points on the inside. I used buckles to cinch everything in place. Unfortunately the straps stretched over the course of the day, meaning that things started to shift, hanging in the wrong place and slowly strangling me. This was remedied by boring more holes in the straps, although they continued to stretch and be a problem.

Final notes for casting: Unless you have someone to help you along every step of the way like I did, start small! Don't cast anything crazy large or complicated as your first project! Also, always read the instructions like 8 times before starting and ensure you have everything you need laid out before you start.

Overall I was super happy with the costume as a whole, and it was very well received at the convention. I hope to pull it out again next year, perhaps I can fix some of the rigging issues in the mean time!

Hope you enjoyed the Asuna tutorials, I had a lot of fun making it! We will be taking a short break from cosplay things before looking at Otakon costumes!