This is a plushie I made for my sister's birthday gift. Yes, it's Makar, and yes, Makar is adorable. He was pretty easy to make, and turned out as well as I'd hoped. :D
This plushie is made out of felt, which was a very different material for me to work with. It's always good to experiment with different fabrics. The beige felt I chose for this project is sort of mottled in colour, which suits the character well. (He is supposed to be a tree sprout thing.)
For those of you unfamiliar with the character, Makar is from the video game Wind Waker in the Legend of Zelda series. He is a Korok from the Forest Haven. My sister is a big fan of the game, and Makar is her favourite character. Probably because he is adorable.

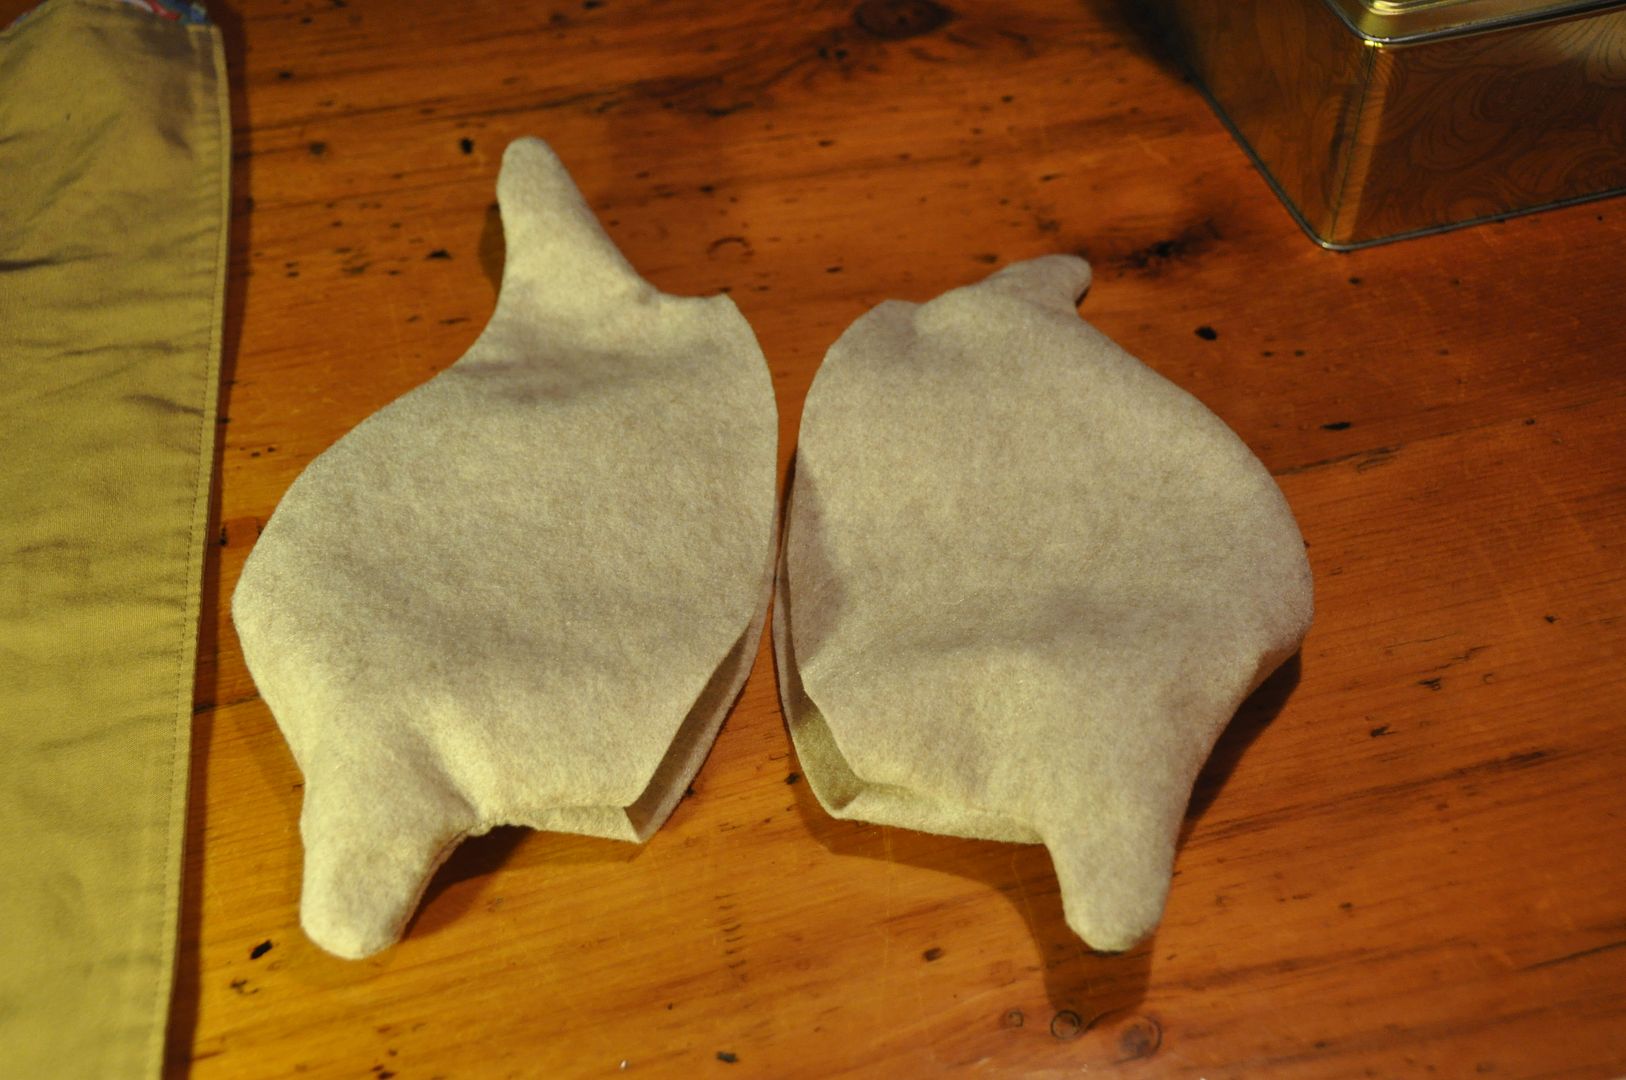
First I patterned the body. The two halves are different at the top. I started by making a mockup in muslin. This was a good idea, because this is my first time patterning a plushie, and so it looked a bit wonky.
The curve I originally had on the front and back seam of the body was too extreme, so I pinned and took it in on the mockup. You can see the change I made in red on the pattern pieces to reflect the change on the mockup.
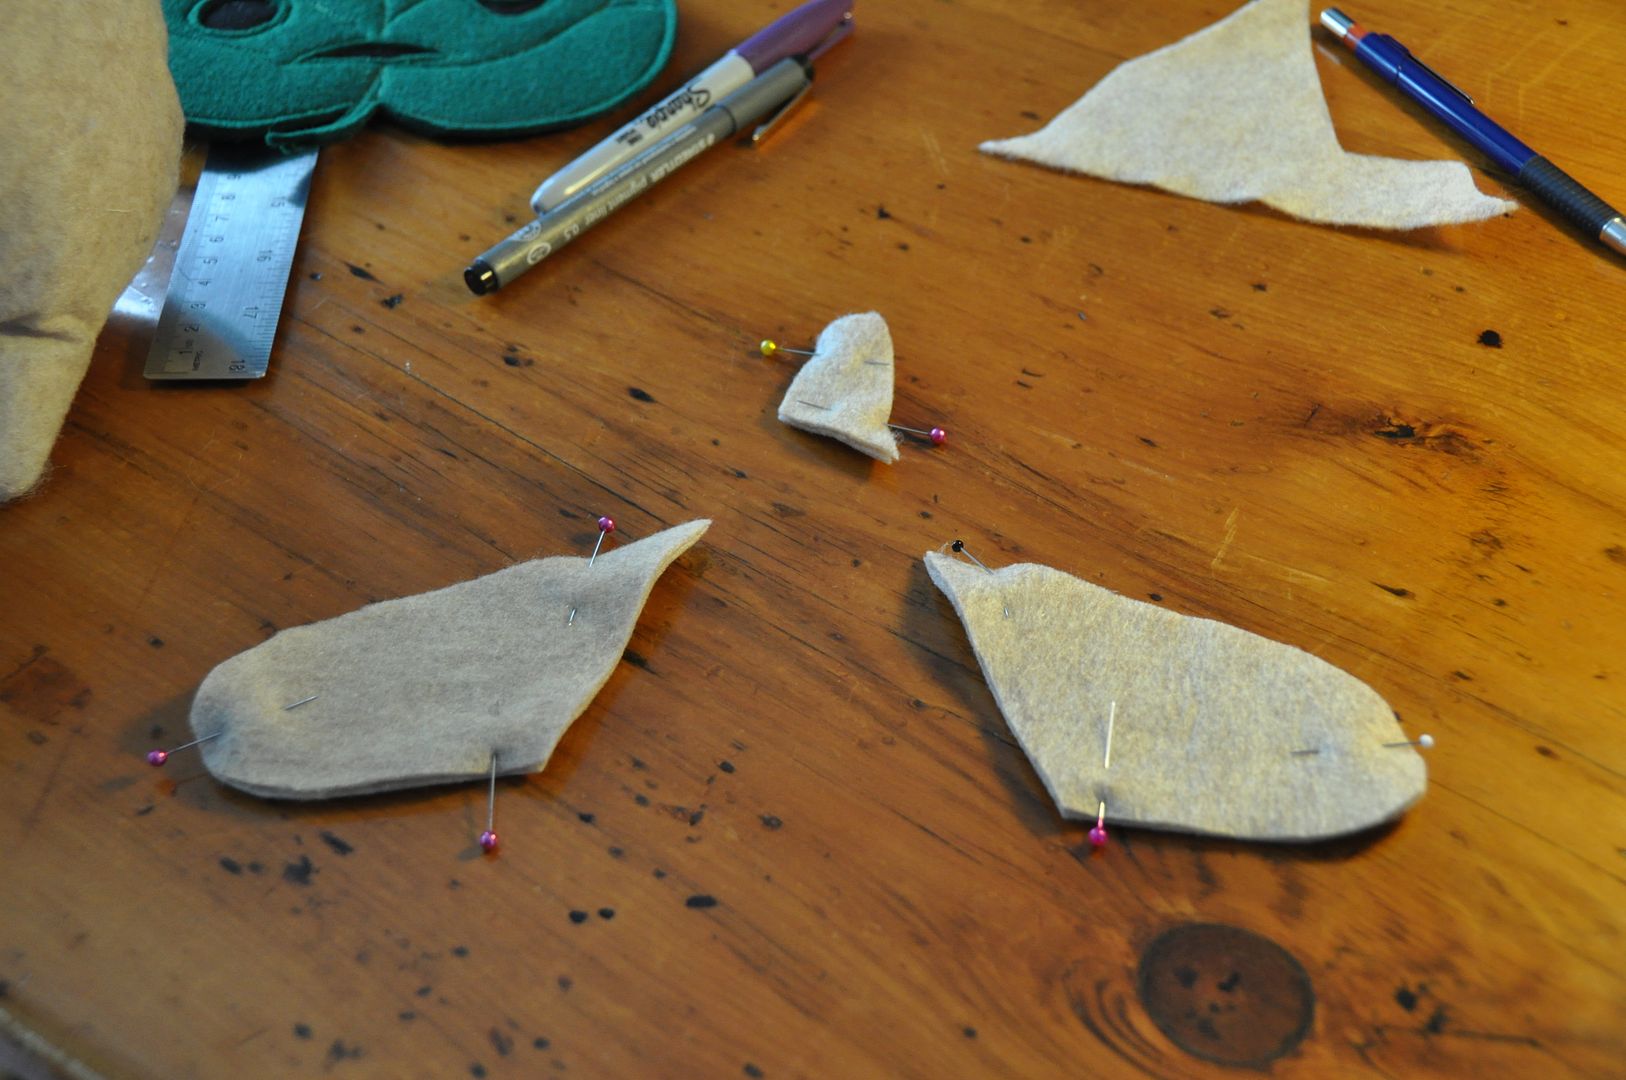
Once I was satisfied with my mockup I started on the final version.
I cut 2 pieces for each half (one for the front, one for the back). I sewed the side seams together, clipped the excess fabric on the inside so it would be easier to turn right way out.
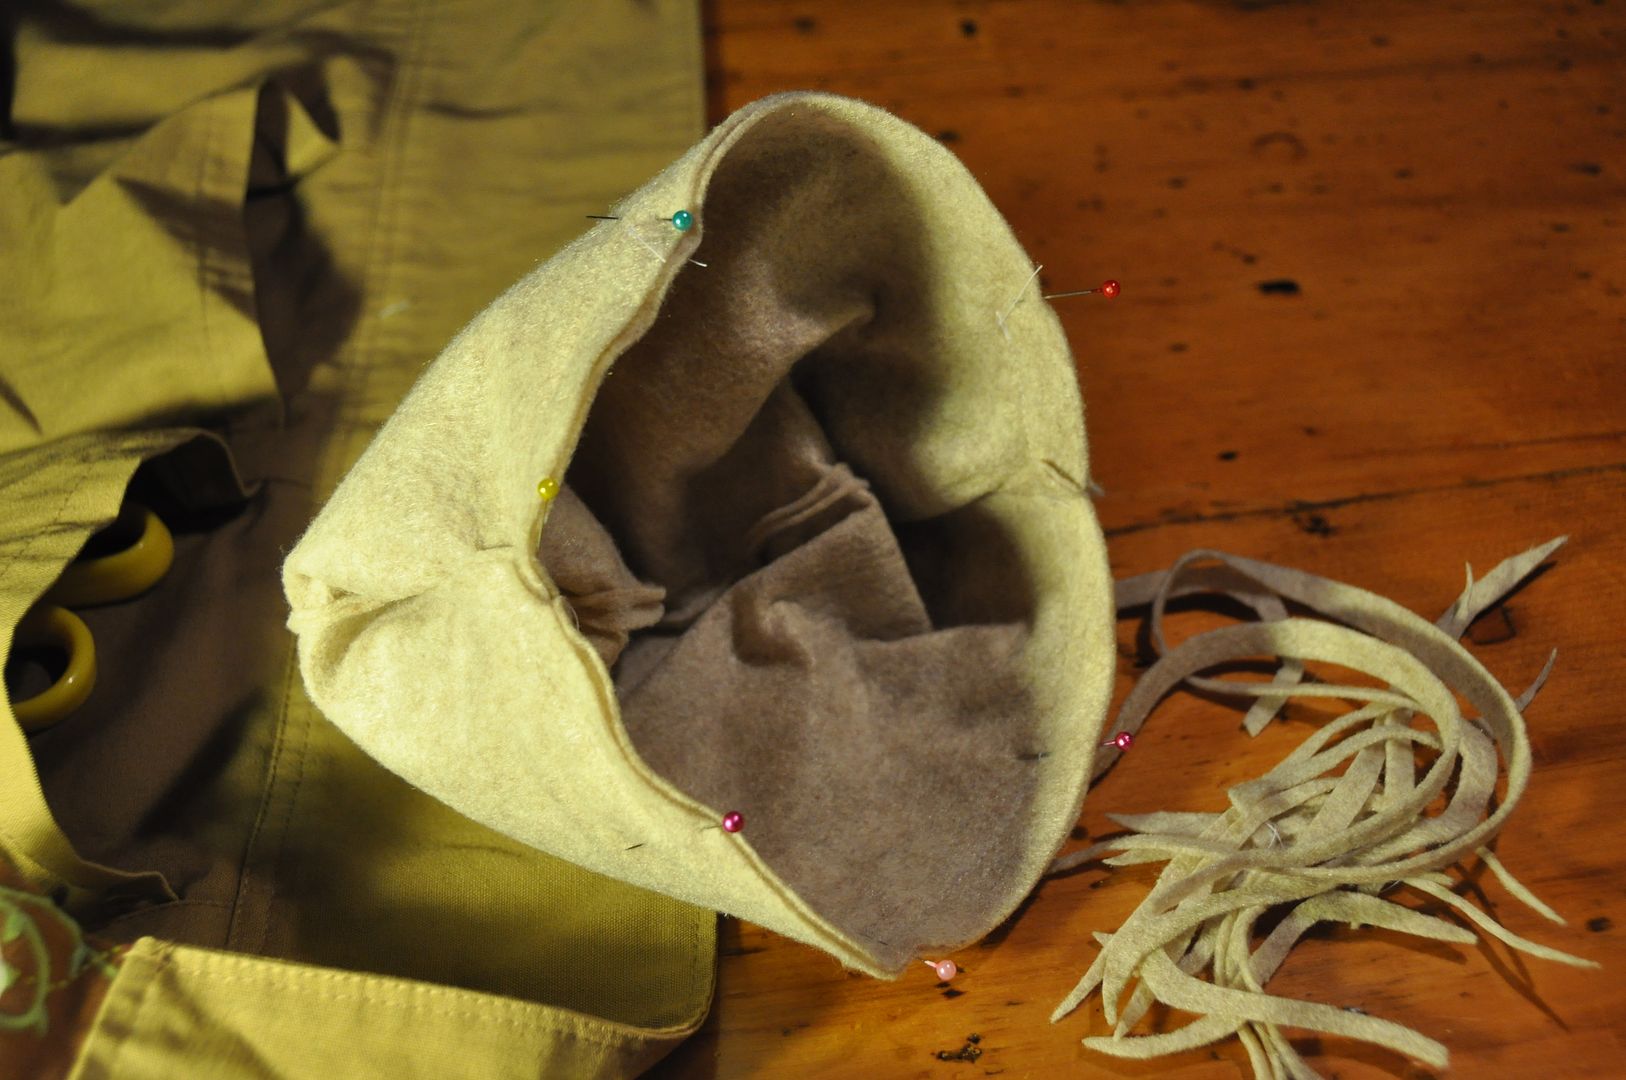
Leaving one right way out, and one inside out I lined up the center seams and sewed them together. I left a gap to turn it right way out and stuff it. This gap was left where it would be covered by the leaf face.

After sufficiently stuffing it--ensuring the stuffing got into all the extremities--I hand-stitched up the center seam.
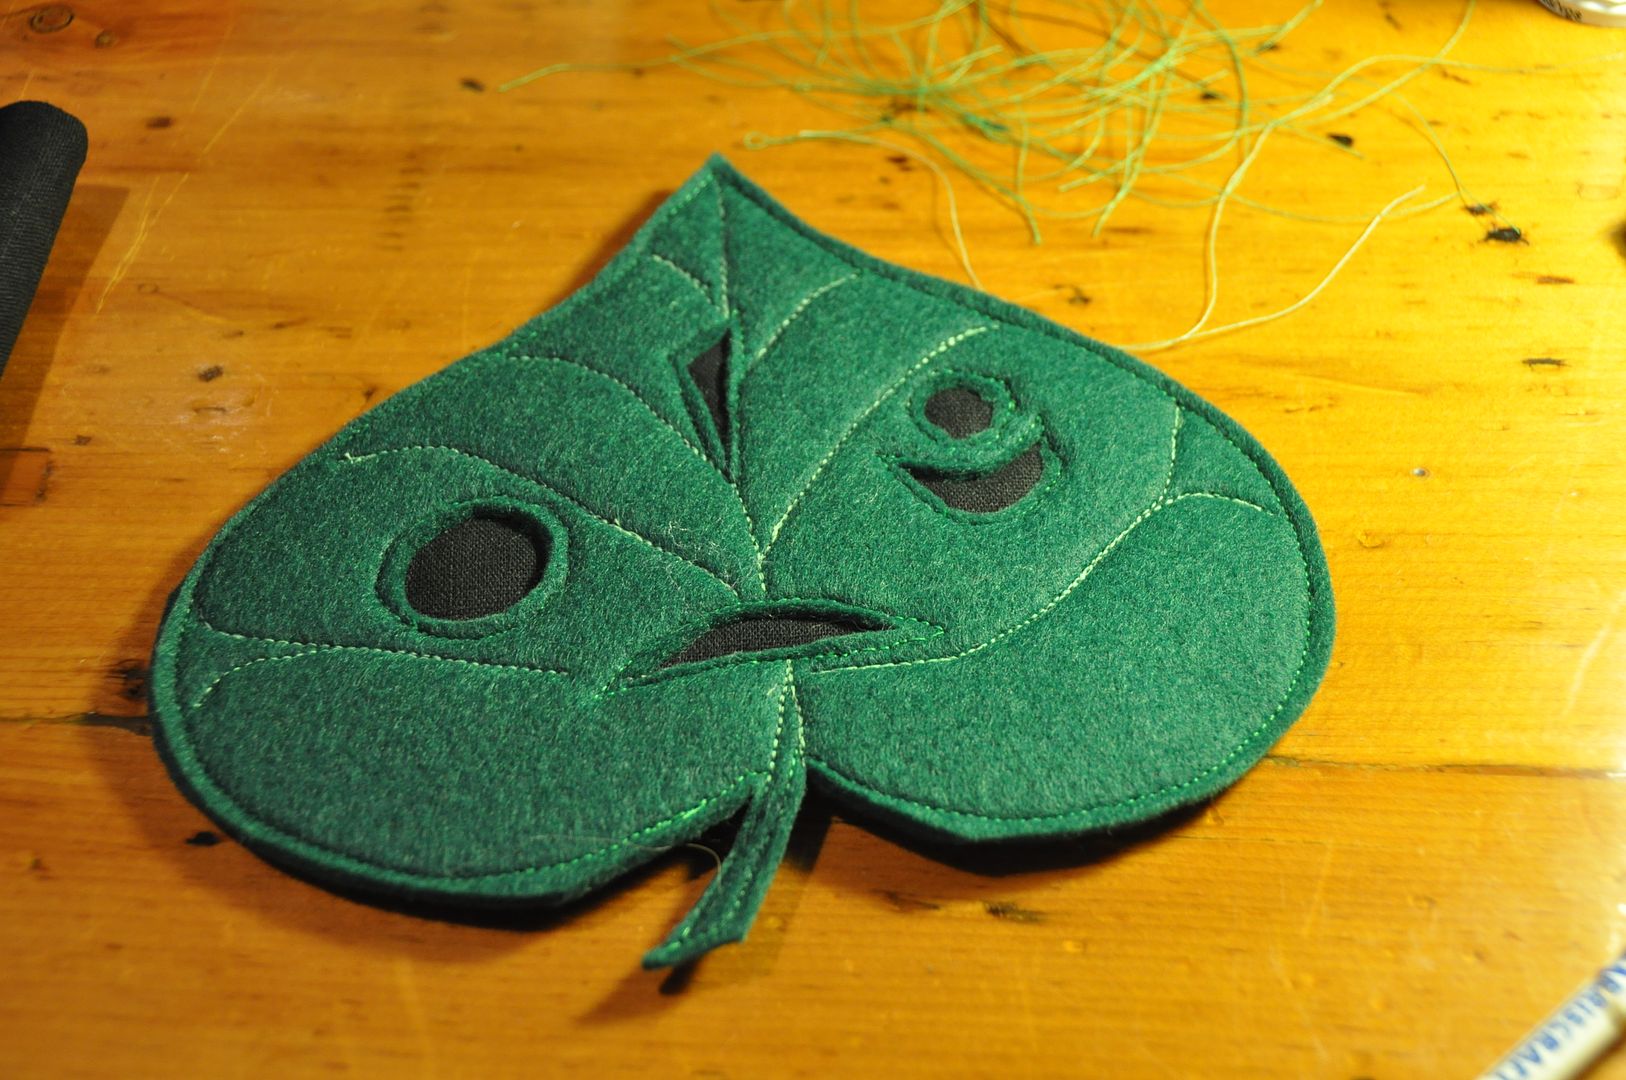
I made a pattern piece for the face. I cut 2 in green felt and one smaller piece in black fabric. I cut the holes out of the top piece of felt only, the black fabric in between the layers made the facial expression stand out rather nicely.
First I stitched around the outside of the face, then outlined all the facial features. Then in a lighter green thread I stitched the vein pattern onto the leaf.
Then I made some arms and a little twig. These were stitched together leaving one end open, seam allowance clipped, and then flipped right way out. I stuffed them and hand stitched them onto the body.
Lastly I tacked down the leaf face with a secure hand stitch.
The result was one cute plushie!

 Just a simple holster I made for myself.
Time to feel really pro with my scissors close at hand.
Just a simple holster I made for myself.
Time to feel really pro with my scissors close at hand. First I made a paper mockup to get the size right. I wanted to make sure that the flap would easily fold over the top of the scissors. (These pattern pieces included seam allowance.)