Showing posts with label nail polish. Show all posts

Tuesday, March 8, 2016

Vaporeon Gijinka - Sandals & Accessories - Pokémon


The 6th and final instalment of my Vaporeon building quest: Sandals & Accessories! This costume was all about the details and finishing touches. Beading, painting, trimming, gems, accessories, props--all elements that helped give this costume the extra wow-factor. It's not often I break a costume down into 6 posts, but this one is certainly worthy of that.

Links to Part 1: BoleroPart 2: Under LayersPart 3: Wrap Skirt TailPart 4: Wig & Hairpieces, and Part 5: Wraps & Bracers!

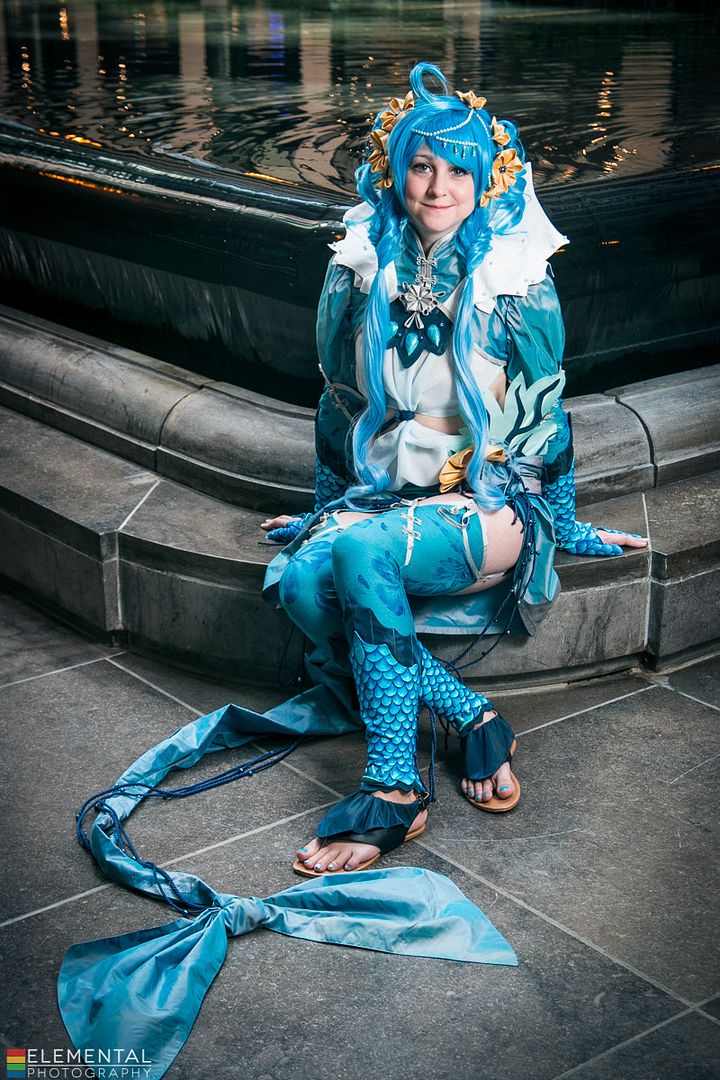
Thanks to Elemental Photography for the fantastical photoshoot! Credit for the original costume design goes to Cowslip!

Firstly I would like to thank my friend Harriet for lending me her fan! She does Chinese fan dancing and allowed me to borrow hers for this shoot. Thanks muchly!
For the sandals I started by buying a plain pair of cheapo flip flops from Ardene's. Which is a great place to buy shoes you don't care about.

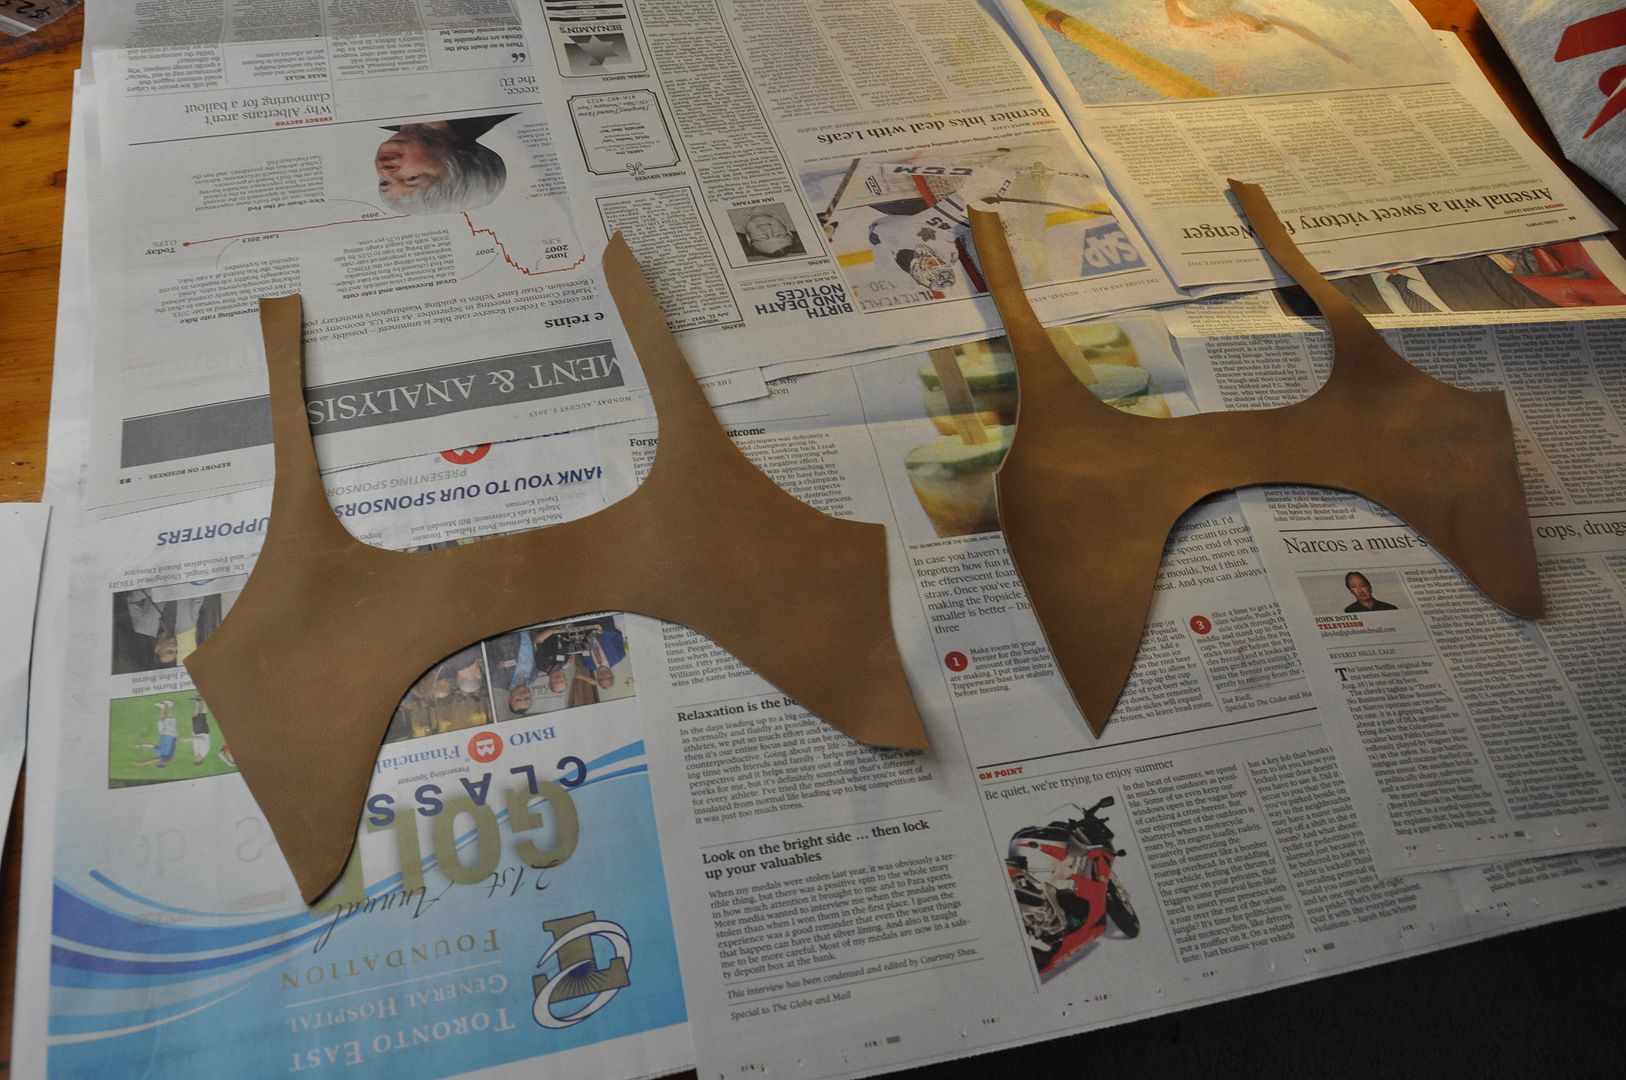
I patterned my base cover shape out of paper, then cut out my pieces (making sure they were mirror images) in leather. Using acrylic paint, I painted these leather pieces navy blue to match the costume.

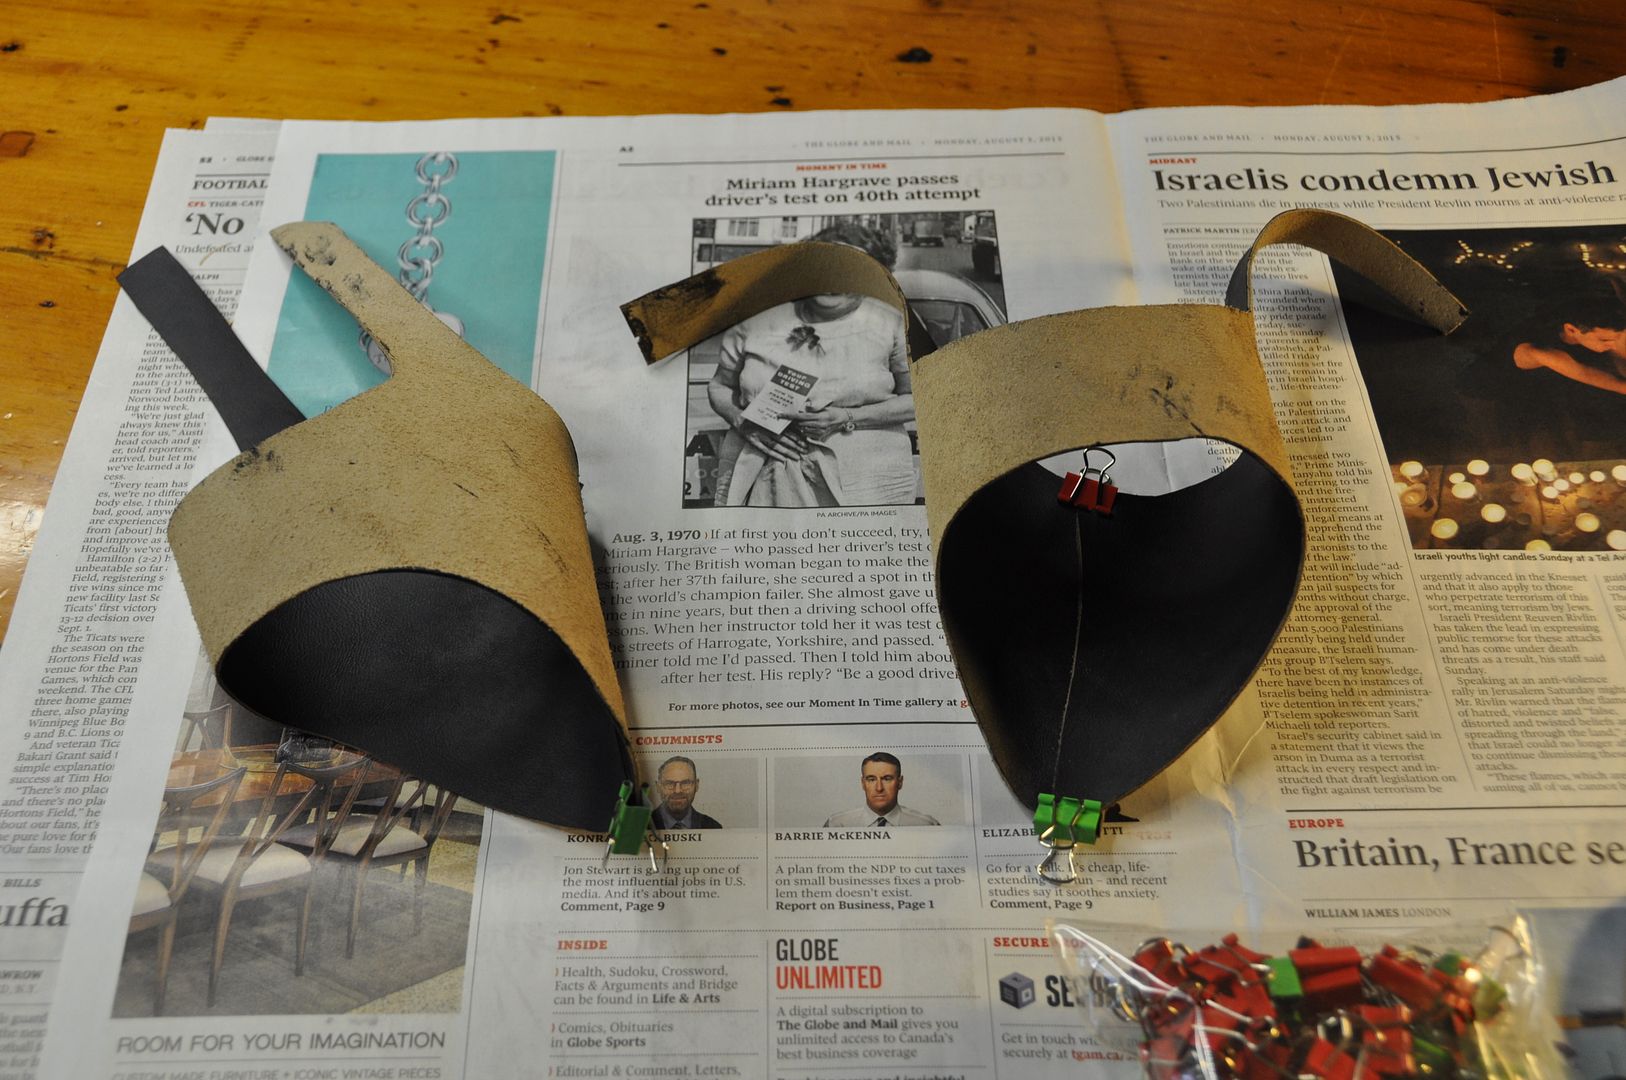
These pieces would wrap under the bottom of the shoe, with a single seam in the top. The long tails would be used to make a buckle strap around the back of the heel.

Once I was happy with the fit, I machine stitched that top seam.

Next step was to create ruffle bit. Using leftover navy fabric from the bracers I created the two pieces. Each is made of two layers, sewn right sides together along the outer edge, then flipped inside out and top stitched. 
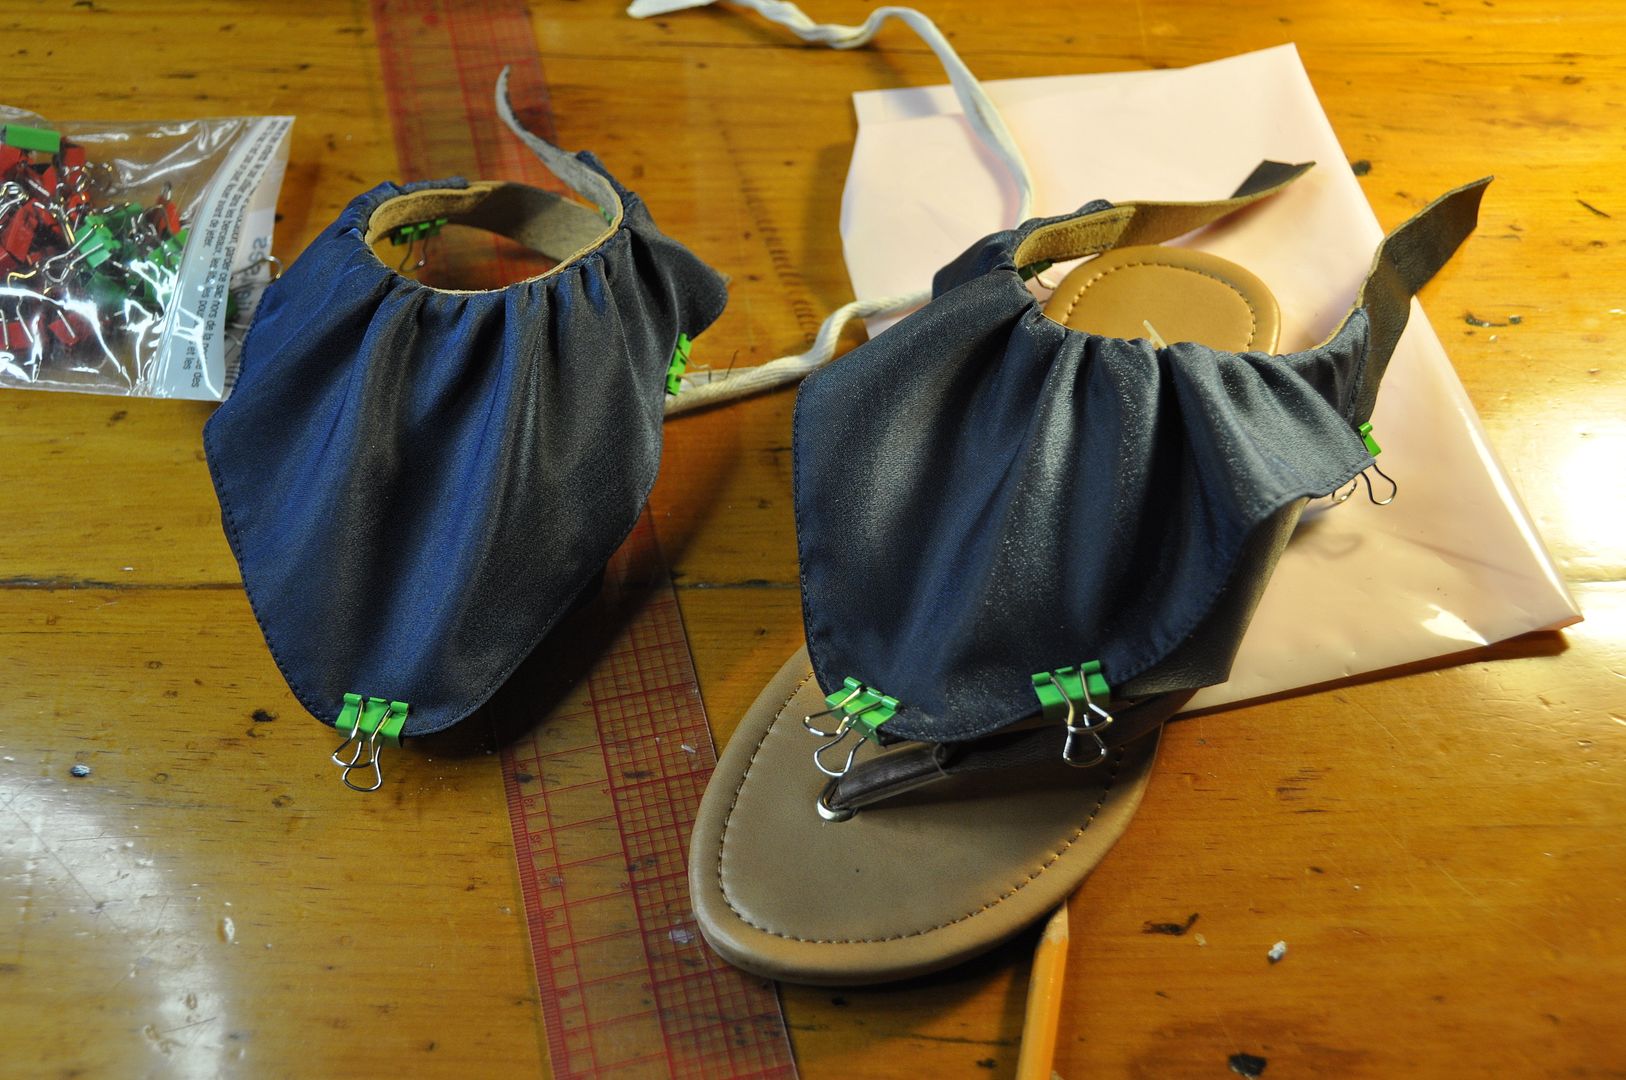
These were then gathered and stitched onto the top of the leather part of the sandal. I also tacked them down with a hand stitch in a few places on the outer edge, because the fabric was super stiff and didn't want to lie flat. 

Next I sewed a buckle into the back of each and punched holes to finish the closure. 

The last step was to glue the leather piece to the sole of the shoe to keep it in place/stop it from rotating. I used e6000 to glue it and it worked quite well. 

Another step in the detailing process for this costume was creating the gems for the center front and the edge of each bracer. 

I sculpted them using apoxie sculpt and then I painted them using a few different shades of nail polish. I did a splotchy application of my dark blue and light teal. And then went over that with a translucent shimmery blue, before finishing it off with a coat of clear gloss.

I applied the same paint to my toenails later! Details are important!

All of the gems were glued onto the costume with e6000. 

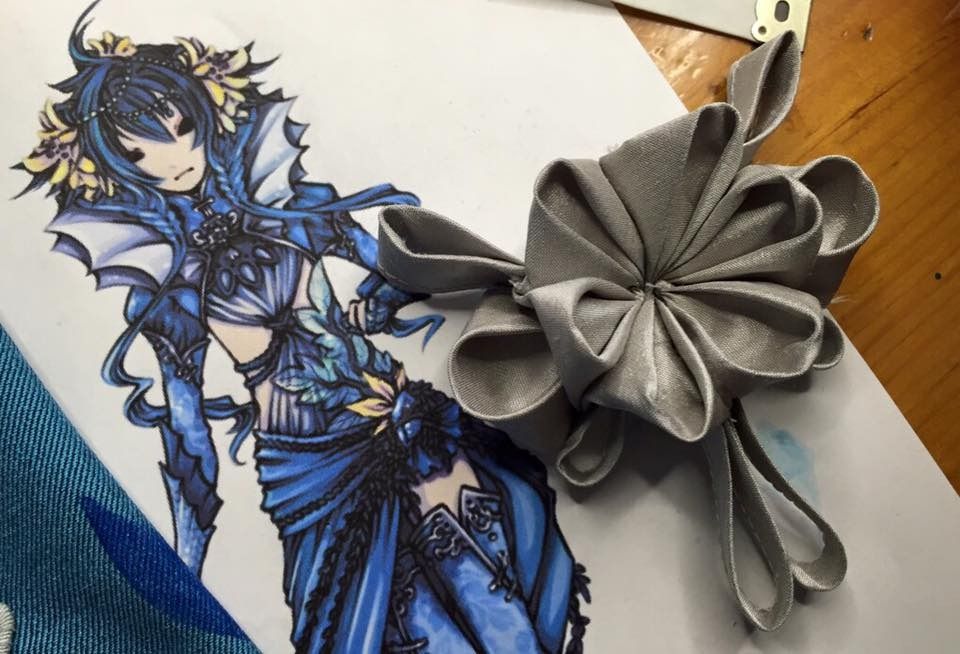
My last accessory was a brooch I created for the front of the costume. It was based on the very faint squiggle in the illustration. I got to interpret it how I wanted and this was the result. (I think I sewed beads to  the center later?)
Overall I am very satisfied with how this project turned out, and look forward to starting my next complicated fancy project.

Once again thanks for all your support! Now that this is done I can move on with my life! Hooray!
Tuesday, January 12, 2016

Vaporeon Gijinka - Under Layers - Pokémon


Let's talk about under layers!  This includes the front drape--with its built-in bra--and the navy booty shorts I constructed. If you want to see how I made the Bolero Jacket, go here!

Once again many thanks to Elemental Photography for the great photoshoot! I love this reflection shot. :) Credit for the original costume design goes to Cowslip!

Since the design only shows how the front looked I had to design a suitable back for the costume. I decided to make a second drape at the back, since it seemed logical and would cover more skin. Also, the design itself was originally designated as one of her "male" designs. I made a slight alteration to the design of the drape at the front for the purposes of female modesty--I changed the proportion of how the drape sat across the chest so it came further back towards my armpits at the top and would therefore properly cover my bust. This is one of the few minor changes I made to make the design work for me.

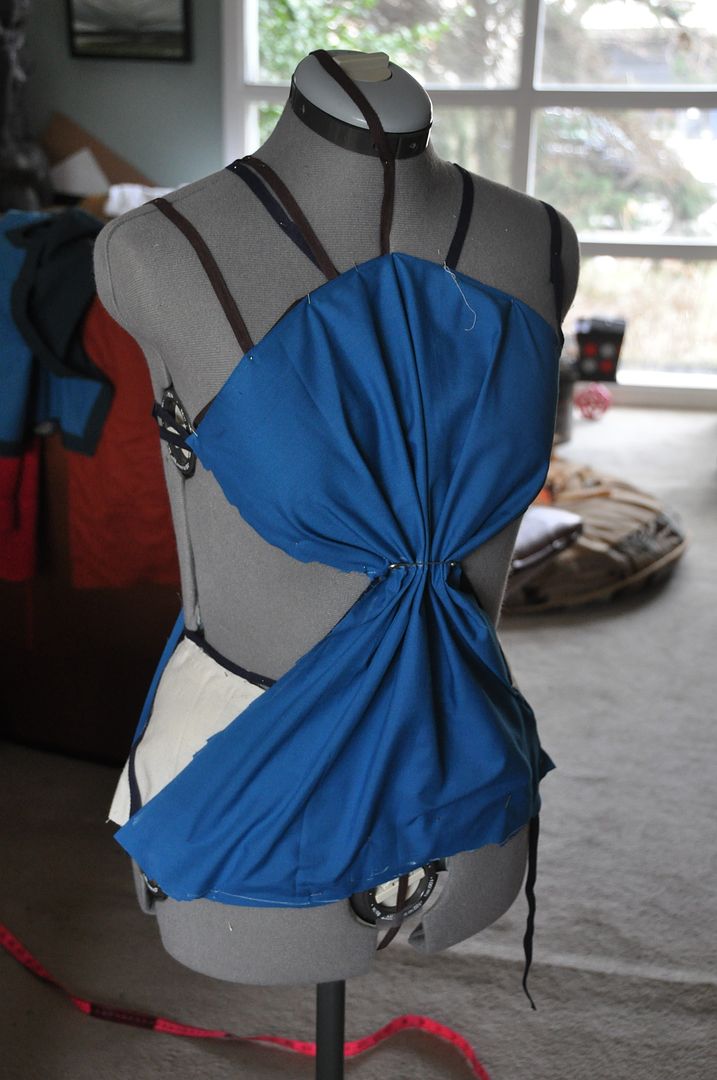
I started by using twill tape to outline on Molly where I wanted the gaps at the sides to be. I used some cheap broadcloth to drape the pieces.
I pinned and trimmed the fabric until I was satisfied with the way it gathered. I used these to create my pattern pieces.

The fabric I bought was pretty see through, so I double layered both sides. Each piece was sewn rights sides together along the side edges and turned right way out. Then I top stitched those edges to keep them from shifting about. This fabric was fairly uncooperative...


I created shoulder straps for the drape piece in the same beige cotton. The close using velcro to make them a bit more adjustable.

The bottom edge of the drape was finished with a band of beige cotton. On both sides where it overlaps it has velcro to adjust the size around the hips and allow me easy on/off.
 
I had to build a bra of sorts into this costume. I bought nude coloured bra cups in the right size. Awkward shopping moments include me trying to find the right size by holding them up to my body and comparing. Hahaha

Using beige cotton fabric and elastic I made the bra layer to fit comfortably. It opens at the back of the band with hook and eyes. I tacked the bra into the draped piece at the front so it would shift and be revealed. The band at the side peeks out a bit when I lift my arms, but it is not the end of the world.

The bra itself provides moderate support--I am not super busty, so I don't need that much support. Mostly it needed to be something that I could a) sew into the costume, and b) choose the placement of the straps so they wouldn't stick out too much and look weird. Had I used a regular bra bought in a store, the band would be clearly visible at the sides. This one I made comes up higher in the sides and back than a typical store bought bra--which is why it doesn't give maximum support. Also I didn't give it an underwire. Because I didn't think it would be super necessary.

The last detail was the cording. I bought tons and tons of navy blue cording for this costume. It wrapped around the gather at the center front and looped to the back. It's tacked in place so it doesn't move. The ends of the cord were dipped in clear nail polish so they wouldn't fray.

The other under-layer for this costume was a pair of booty shorts. Somehow I didn't clue in until the very last minute that the wrap-skirt did not actually cover all at the front and I didn't have anything suitable to wear underneath. Hence, I decided to make a very simple but unobtrusive pair of matching shorts.

They were made of some navy blue jersey I picked up at the last minute. I patterned them based off some leggings I own. I pieced them together at a friend's house so I could use a serger.

The hem was done with a zig-zag stitch on my own machine. The waistband had a roll-over where I inserted an elastic band.

I think this is one thing that convinced me I needed to get a serger of my own... I have been avoiding stretch fabrics for so long because I lacked the equipment to work with them.

Tuesday, September 24, 2013

Kero & Suppi - Bows, Gems, Giant Candy - Cardcaptor Sakura

This is the fourth post for Kero and Suppi! This is just a quick look at all the props and accessories for these costumes. :) I always feel that props and accessories just make a costume that much more interesting!

For the rest of these fabulous costumes see the Shirts & Shorts, Ears & Wigs, and Aprons & Wings. For more pictures of Kero and Suppi see Eleventh Photograph's Otakon gallery!

First let's talk about those delicious candies! They were actually made by my sister. It was really nice to have a super light prop to carry around for the day.

My mint is made of 2 layers of insulation foam hot glued together. The edges were sanded down to be round. She then painted it white, then added the red swirls using acrylic paint. Alex's gumballs were simply coloured balls she got at the dollar store. Both candies were wrapped in cellophane.

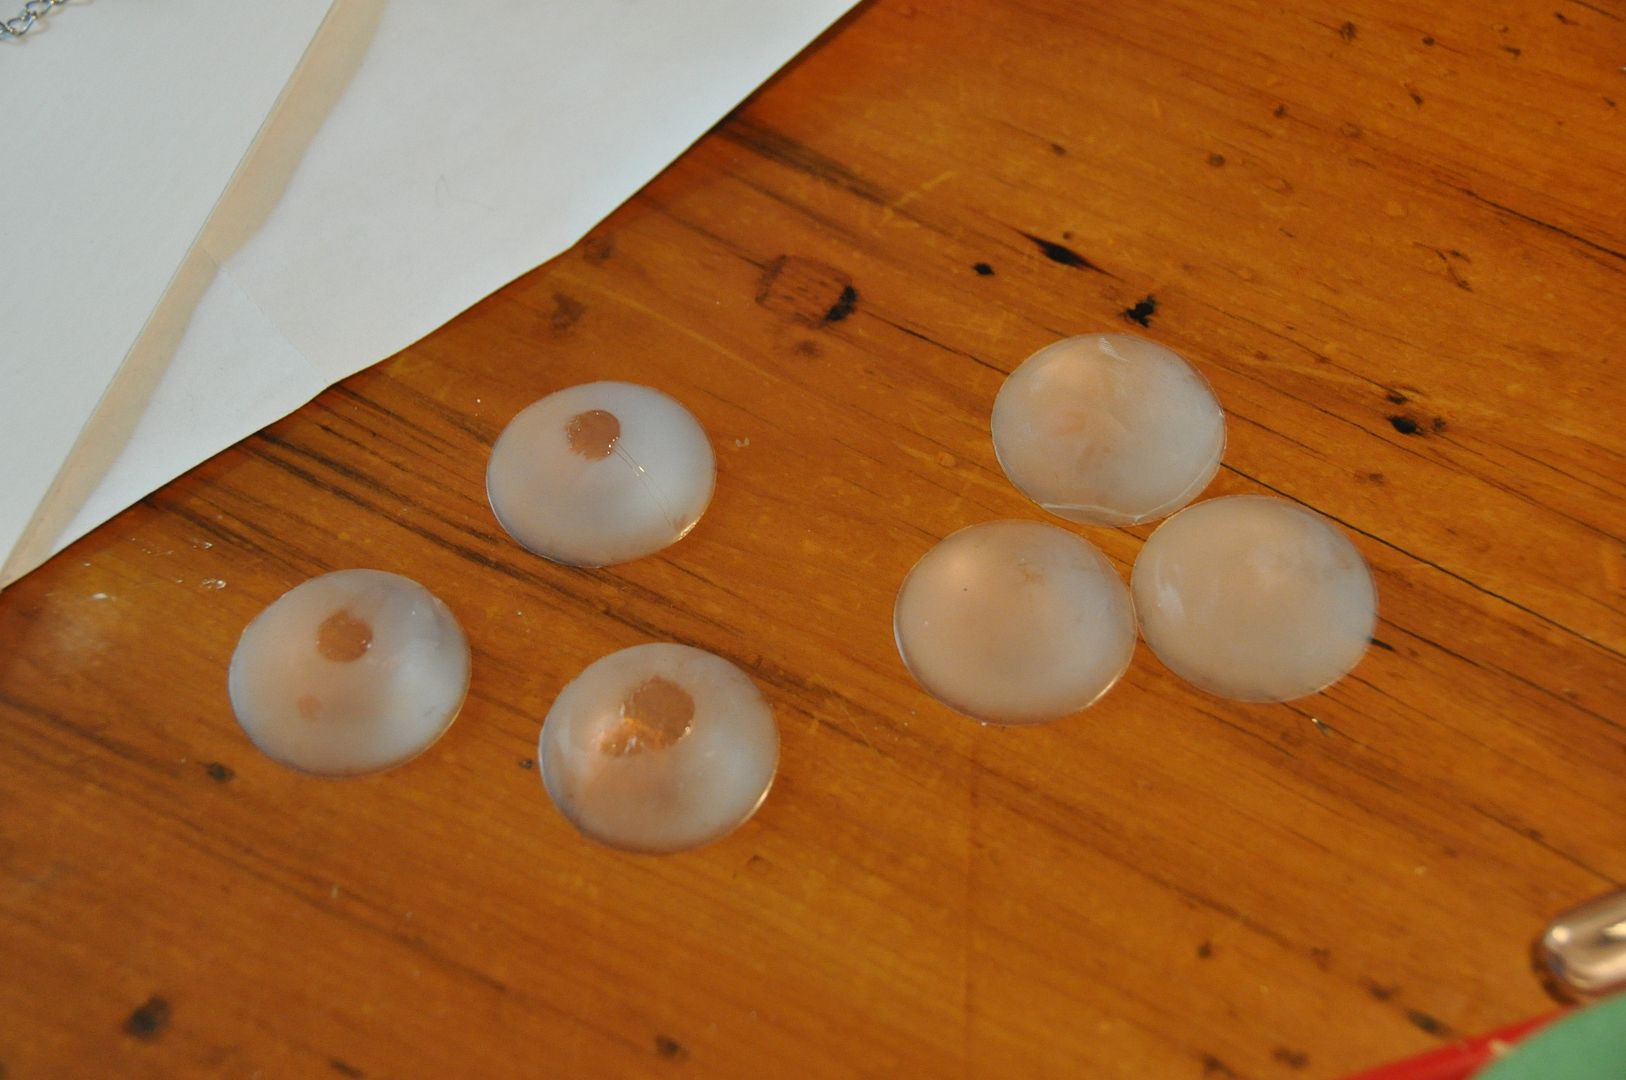
Alex also made our cool gems. For the gems we used a gedeo clear resin we bought at Curry's. Following the instructions she mixed the 2 parts accordingly and used a new paint tray as a circular mold. Then they were left to cure. We only needed 2, but she made 6. This was lucky because for whatever reason 50% of the gems didn't cure.

Then she painted them using nail polish. She backed them with a polish of each chosen colour (red and teal), then in order to bring out the shine she coated the top of the gem in a clear coat of nail polish. Trust me when I say that the clear coat is what turns them from looking "meh" into looking gorgeous.

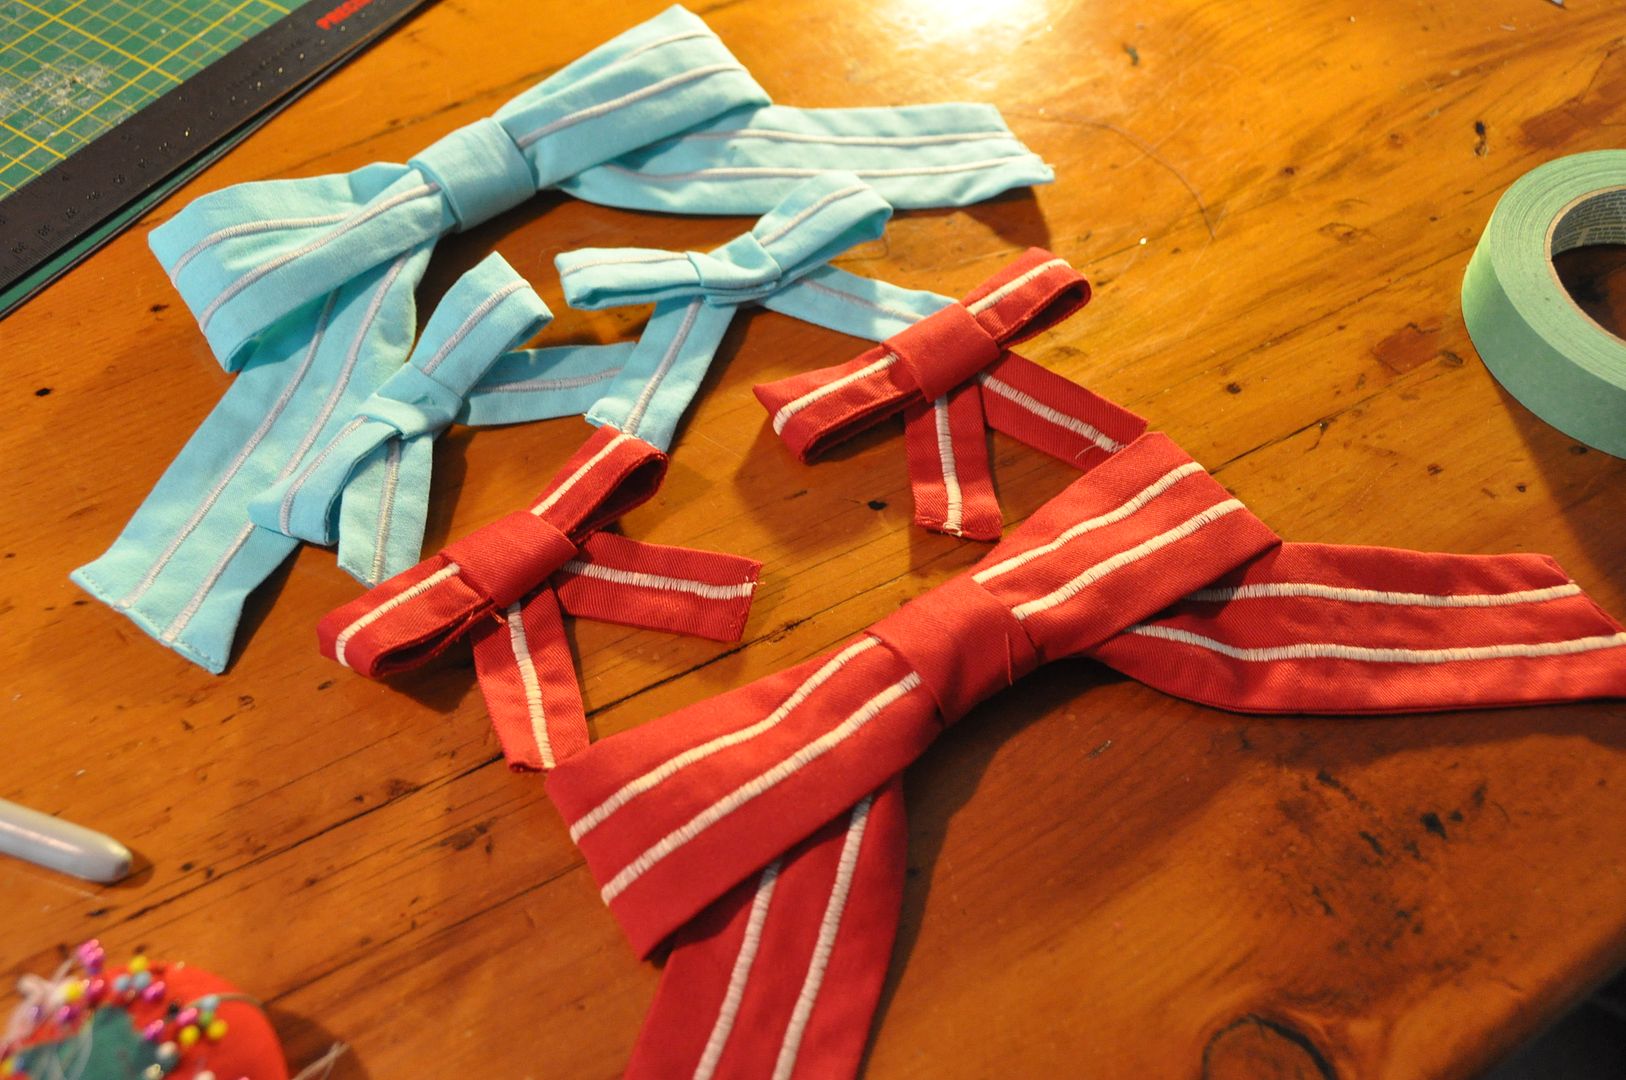
The next accessory was a set of 3 bows for each of us. Each bowtie was made of 4 pieces plus a neck band. All the rectangular pieces excluding the center were given stripes to match the aprons. The bows were hand stitched together, then the gems were hot glued onto the center. Finally to the neck bows I added a neck band, with a velcro closure. My sister's I made longer because she wanted to have her collar unbuttoned.

The shoe bows were simply attached to our own shoe laces with safety pins!