Showing posts with label acrylic paint. Show all posts

Wednesday, May 18, 2016

White Rabbit - Wire Frame Mini Tophat

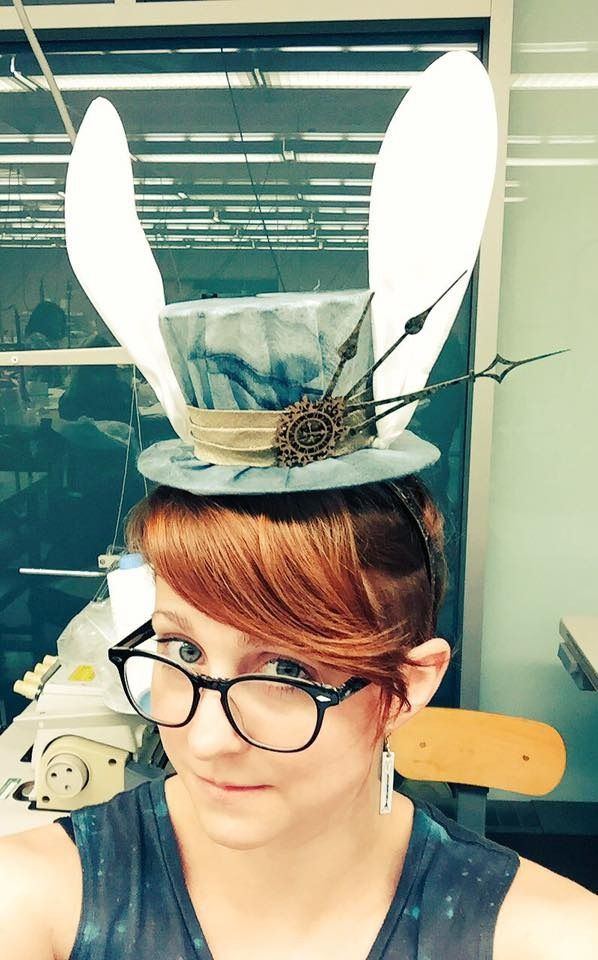
The second project from my millinery class--my White Rabbit top hat!

So the project outline was really open-ended: you had to make a wire frame hat, cover it with sheer fabric and decorate it to represent a theme/character. We were given the option of doing a mini top hat or boater that she had patterns for, or we could design our own hat shape. I picked the mini top hat because I didn't have time to pattern a new shape.

After going fabric shopping to get ideas, I found this really cool sheer blue-grey fabric. It had almost a paper-like quality to it. I thought it might make an interesting take on the White Rabbit. Since I have learned from theatre--stage lights wash out fabrics and make them look whiter, perhaps I could design a white rabbit while hardly using any white?
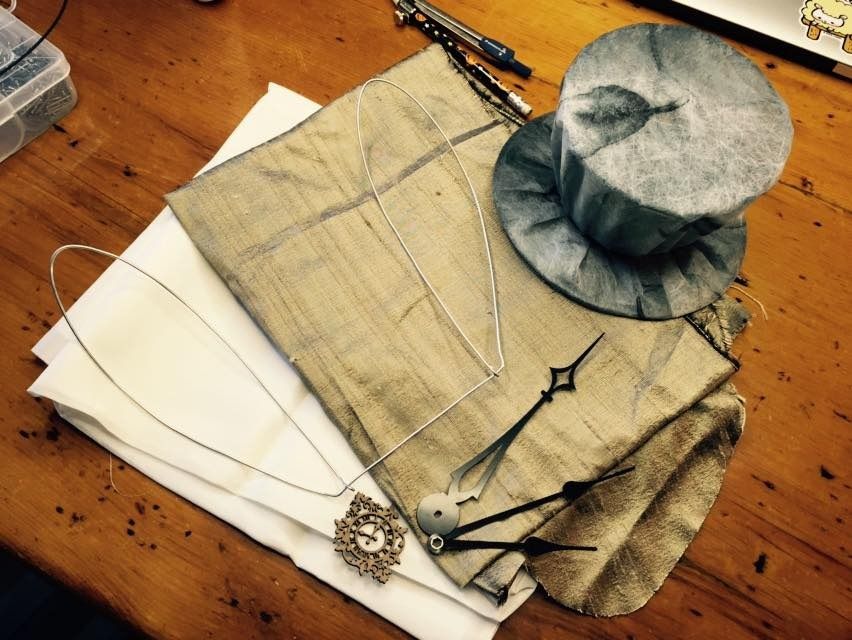
Here's a picture of the finished hat frame on top of the fabric. It shifts from blue to grey depending on lighting and instagram filters. Haha

I won't go into too much detail on how the frame was constructed. All the pieces of wire were carefully cut to length and bent into shape. I used quilting thread to tightly wrap the joints and then strengthened the bond with a mixture of white glue and water.

The brim and crown were not attached until after I covered it. It makes covering the pieces way easier.
I covered the crown and brim using 2 layers of my fabric. It was fairly sheer with just a single layer and I was worried it would rip. I like that with the double layer you get a ghost of the leaf pattern coming through.

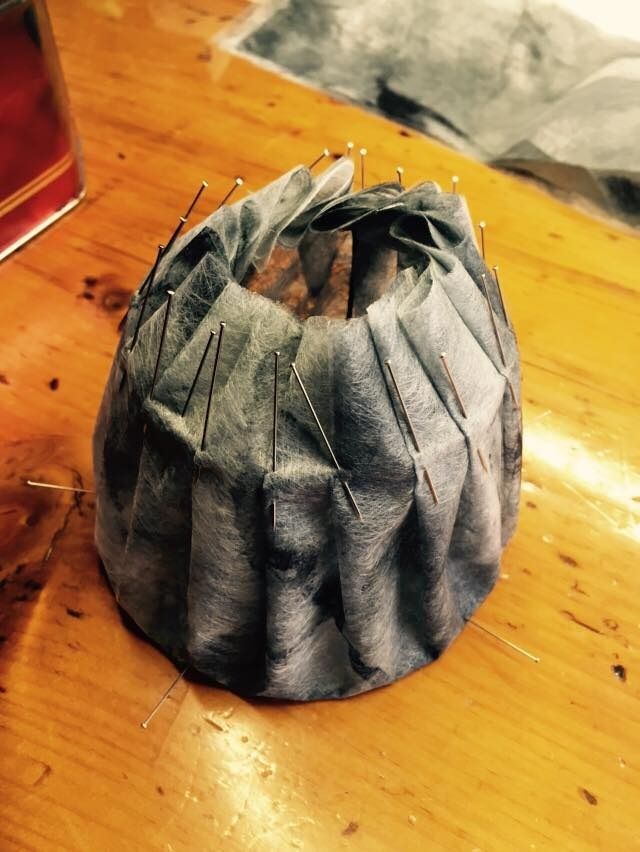
For the crown I cut 2 circles overlayed, I draped these over the top holding them in place with pins. Then I pleated the fabric along the bottom edge to conform it to the shape of the crown. I basted this in place, attaching it to the frame. I cut off some of the excess fabric, but the rest would be tucked into the inside.

The brim was done in a similar way. I cut 2 long rectangles that measured the same as the outer circumference of the brim. These were each sewn into a long loop and folded in half over the edge. Then I pleated and basted them to the frame.
Next I created my ear shape. As you can see here, both ears are made out of one piece of wire. It would sit between the crown and brim and make them much stronger overall. I covered them with a white silk leftover from the painting and dye class I took last summer.

All of my cool accent pieces--laser cut clock, clock hands--were picked up from Michael's art store. It has a great selection of weird crafting bits. I got the clock hands in the DIY clock section, for example.

The gold fabric I used to make a hat band was leftover from my Steampunk Corset (I really did buy way too much fabric for that).
I sewed the ears to the brim base, then sewed my brim to the crown. Then I carefully tacked the side of the ears to the top of the top hat--I sewed the wire frame to the wire frame, not just the fabrics.

Next was the hat band and decoration. I sewed the hat band on, the sewed the decorations on. Before attaching the clock hands I sponged on some gold acrylic paint and sprayed them with a gloss finish sealer. This was to help them match the costume better.

Lastly, I sewed a felt circle to the bottom to cover the hole and seal it shut. Then I sewed a headband to it (which I also painted gold). I think later I will swap out the headband for alligator clips, but for now (and for handing it it) it was fine.

I'm really happy with how the hat turned out and I am in the process of completing a full design for the costume. I'm thinking I would really like to complete the outfit in the future...

Tuesday, March 8, 2016

Vaporeon Gijinka - Sandals & Accessories - Pokémon


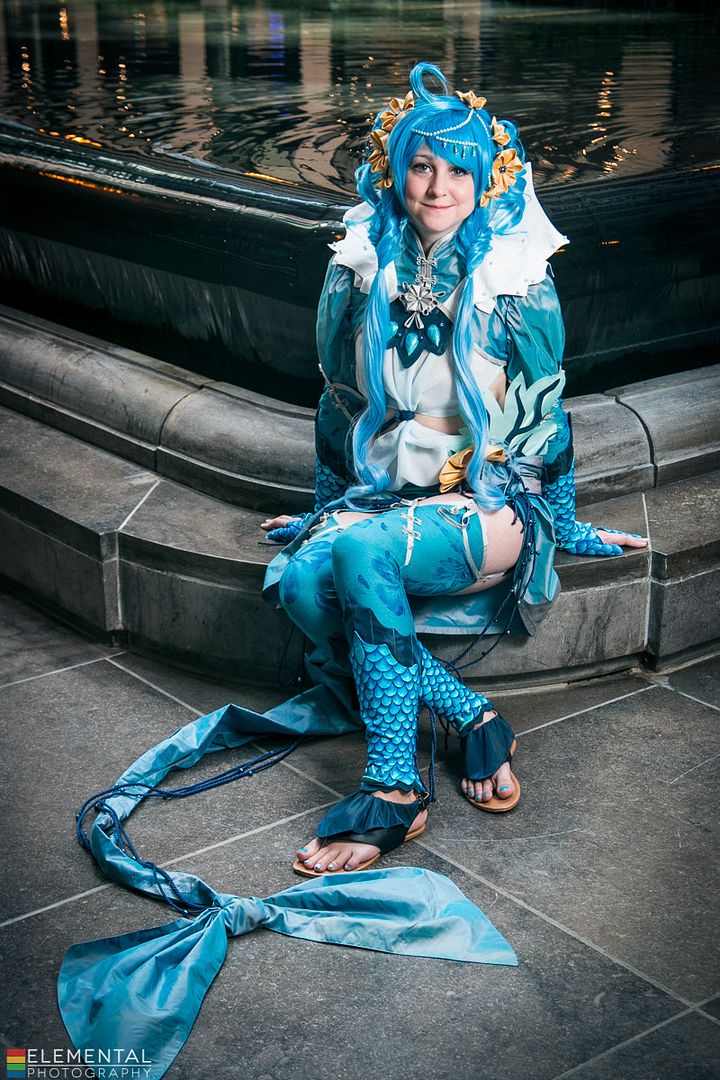
The 6th and final instalment of my Vaporeon building quest: Sandals & Accessories! This costume was all about the details and finishing touches. Beading, painting, trimming, gems, accessories, props--all elements that helped give this costume the extra wow-factor. It's not often I break a costume down into 6 posts, but this one is certainly worthy of that.

Links to Part 1: BoleroPart 2: Under LayersPart 3: Wrap Skirt TailPart 4: Wig & Hairpieces, and Part 5: Wraps & Bracers!

Thanks to Elemental Photography for the fantastical photoshoot! Credit for the original costume design goes to Cowslip!

Firstly I would like to thank my friend Harriet for lending me her fan! She does Chinese fan dancing and allowed me to borrow hers for this shoot. Thanks muchly!

For the sandals I started by buying a plain pair of cheapo flip flops from Ardene's. Which is a great place to buy shoes you don't care about.

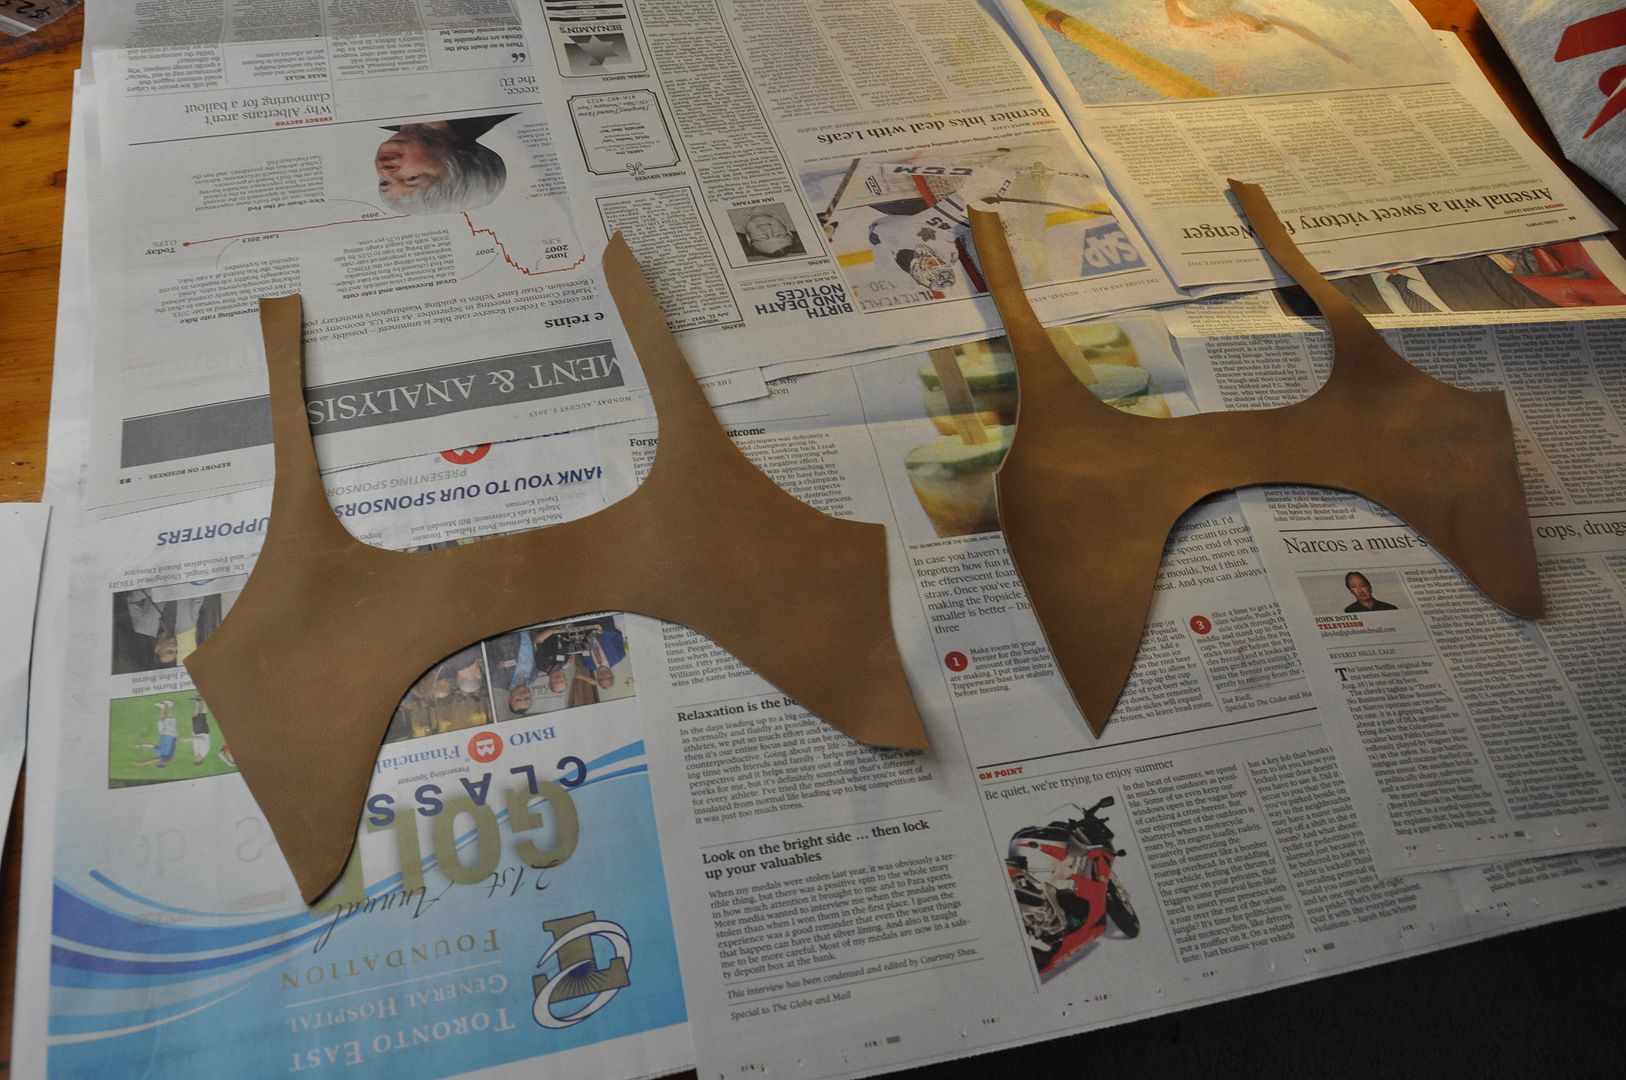
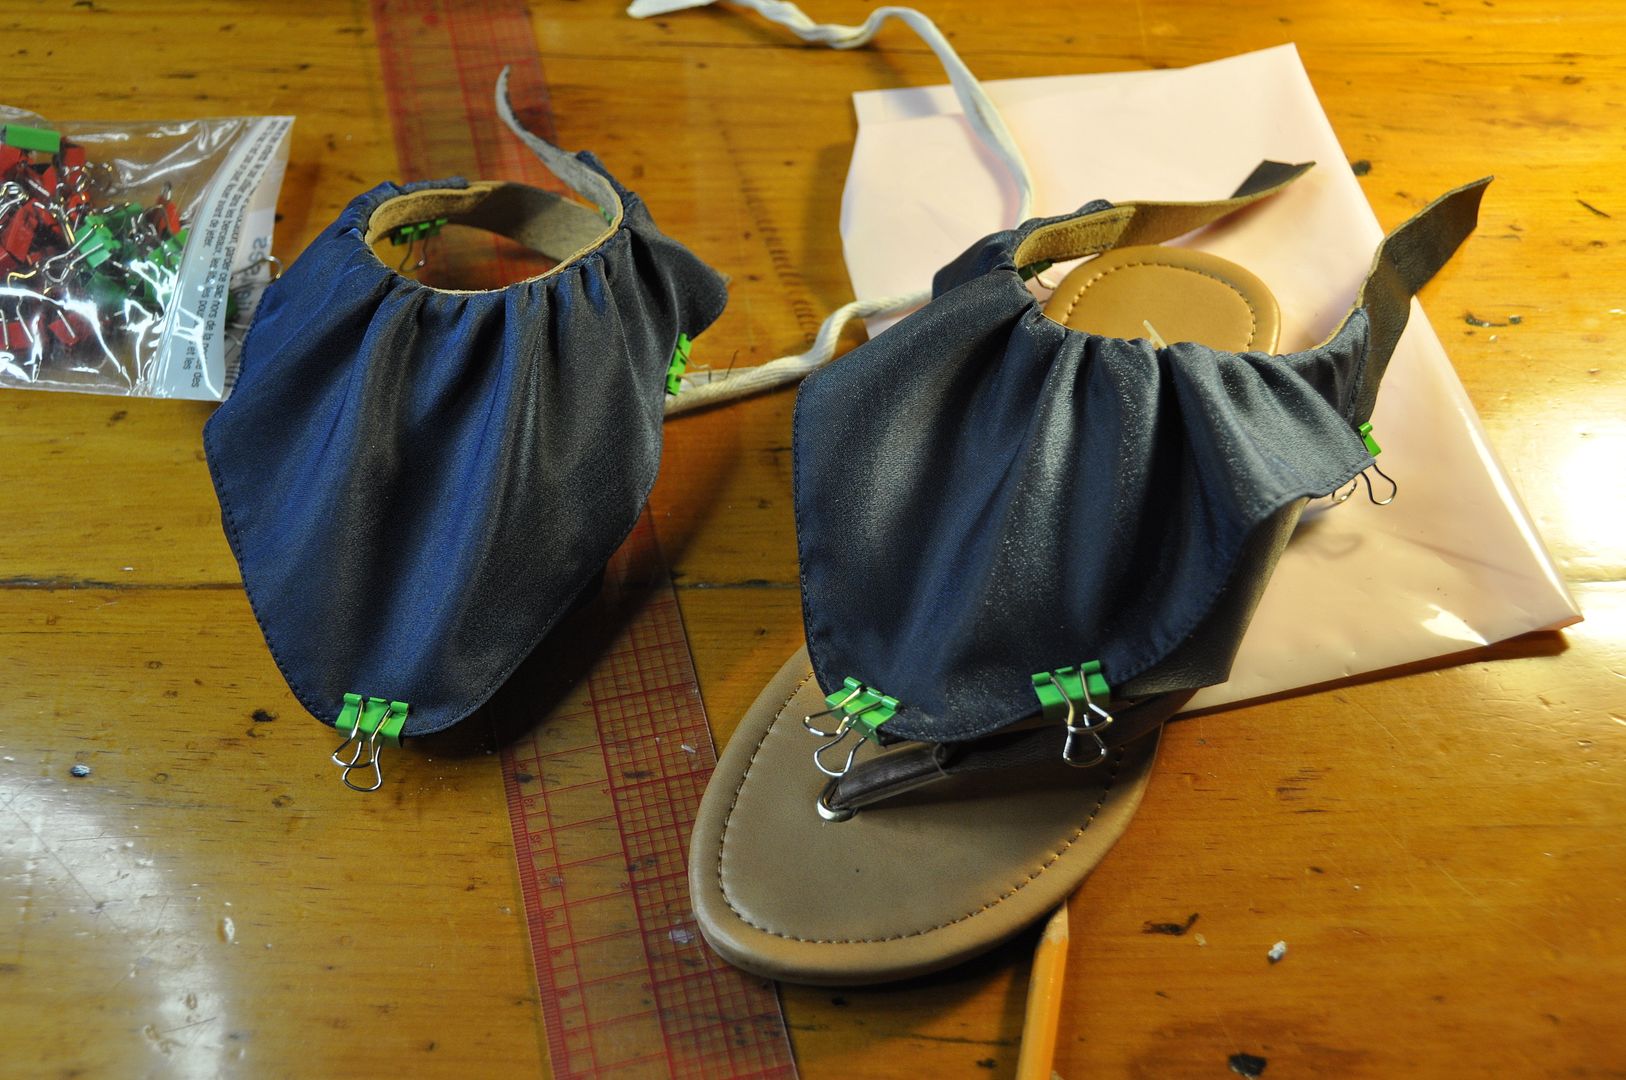
I patterned my base cover shape out of paper, then cut out my pieces (making sure they were mirror images) in leather. Using acrylic paint, I painted these leather pieces navy blue to match the costume.

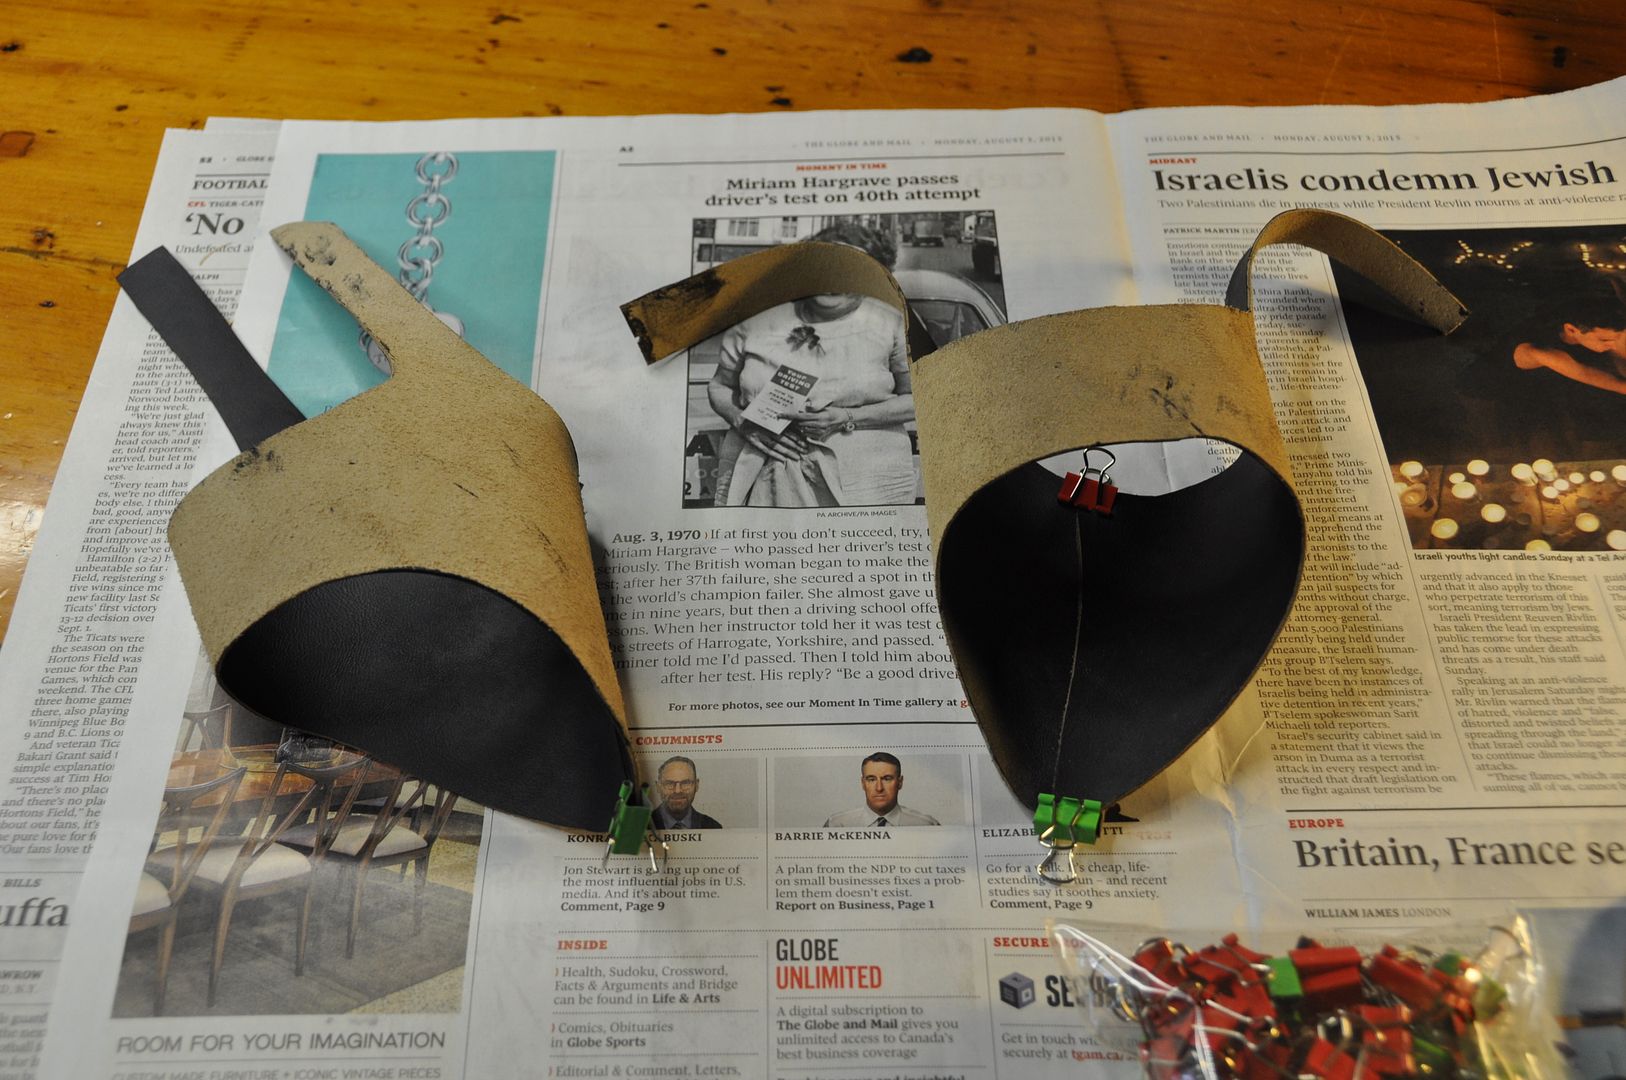
These pieces would wrap under the bottom of the shoe, with a single seam in the top. The long tails would be used to make a buckle strap around the back of the heel.

Once I was happy with the fit, I machine stitched that top seam.

Next step was to create ruffle bit. Using leftover navy fabric from the bracers I created the two pieces. Each is made of two layers, sewn right sides together along the outer edge, then flipped inside out and top stitched. 

These were then gathered and stitched onto the top of the leather part of the sandal. I also tacked them down with a hand stitch in a few places on the outer edge, because the fabric was super stiff and didn't want to lie flat. 

Next I sewed a buckle into the back of each and punched holes to finish the closure. 

The last step was to glue the leather piece to the sole of the shoe to keep it in place/stop it from rotating. I used e6000 to glue it and it worked quite well. 

Another step in the detailing process for this costume was creating the gems for the center front and the edge of each bracer. 

I sculpted them using apoxie sculpt and then I painted them using a few different shades of nail polish. I did a splotchy application of my dark blue and light teal. And then went over that with a translucent shimmery blue, before finishing it off with a coat of clear gloss.

I applied the same paint to my toenails later! Details are important!

All of the gems were glued onto the costume with e6000. 

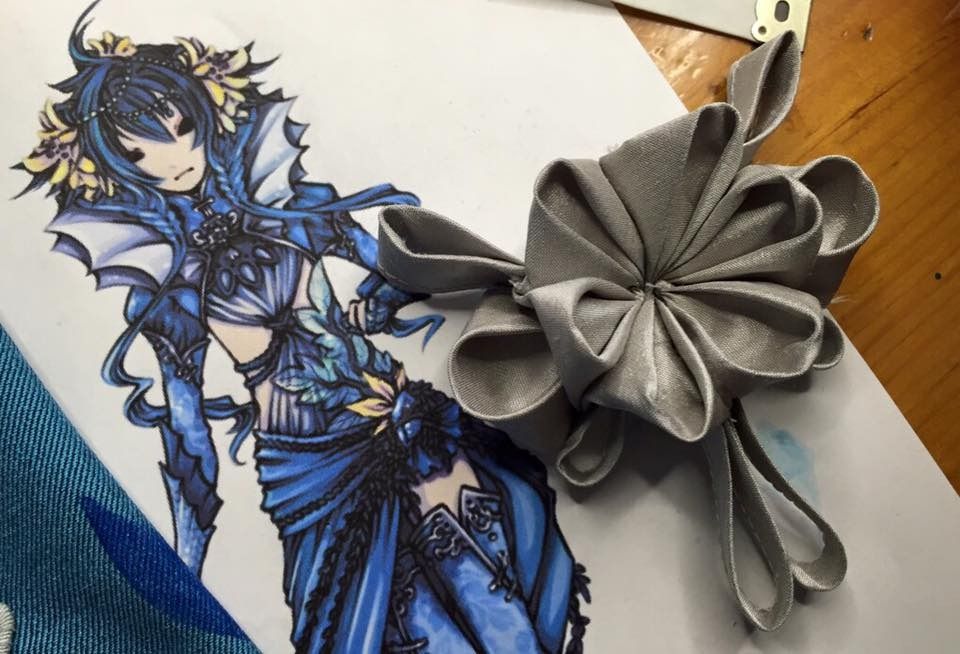
My last accessory was a brooch I created for the front of the costume. It was based on the very faint squiggle in the illustration. I got to interpret it how I wanted and this was the result. (I think I sewed beads to  the center later?)
Overall I am very satisfied with how this project turned out, and look forward to starting my next complicated fancy project.

Once again thanks for all your support! Now that this is done I can move on with my life! Hooray!

Wednesday, August 19, 2015

Toph (Fire Nation Disguise) - Wig - Avatar: The Last Airbender

This is my first post on Toph. Rather than the traditional green outfit, I decided to make her Fire Nation disguise outfit from season 3. Of all the nations, I really thought the Fire Nation had the nicest designs in the series, but Toph is one of my favorite characters--so this seemed like a good compromise.

This costume was originally supposed to debut at Otakon last summer, and I had managed to get everything finished except the wig and shoes. But without the wig, the costume isn't really wearable, so the costume went on the backburner for a while as I worked on the wig.

I really need to make time to do a real photoshoot of this costume. Perhaps next year...

I thought I would start by talking about the wig--easily the most difficult piece of the costume. This wig took me 3 attempts until I was satisfied with the end result.

It was a nightmare to construct, partially because the reference is so vague. All you can see is that she has a large black blob of hair at the back of her head--which is presumably a bun? I've seen people achieve this in different ways, some opting for a small bun (a bit of a cop-out, and not very accurate), others choosing to do an intricately braided style to create the mass. I wanted to create a smooth rounded "bun" that was as accurate as possible.

My main issue I encountered--which carries over to many costumes--is that I have a small head and not an abundance of hair. This means that 99% of all the wigs I ever bought are loose on me. Back in the day I had waist-length hair which I had difficulty stuffing under a wig, and this would keep it from slipping. But these days, any wig that is remotely back heavy slides out of position like nobody's business. It is a problem I have noticed since I have started to do more elaborate styled wigs (Asuna was a problem in particular because of the heavy metal bells).

To counteract this problem I have found the best way to keep a wig from sliding to to sew a small comb into the front of the wig and then french braid my actual bangs. The comb hooks into the braid and prevents it from sliding out of position. (I did the same thing on my Tomoyo wig.)

Black is such an easy colour of wigs to find, so I was not worried about finding a wig (for once!). To save myself some time, I ordered a ponytail wig from Epic Cosplay, this meant that I wouldn't have to also make my base wig into a ponytail wig first to cover the gaps in the wefts. Their ponytail wig is a short wig that comes with an extension you can wrap around the ponytail base to make it a long wig. This was great for my purposes, as the large extension would be put to use later in creating the bun.

I started by taking out some of the wefts from the middle of the back of the wig. This was done very carefully with a seam ripper. This was to remove bulk under the bun while also procuring more hair to make the bun with.

Out of some back fabric I made the base of the bun and loosely stuffed it. I hand stitched the wefts around the edge. I cut a hole in the middle of the fabric to stick the loose ends of the wefts in.

This is the point where I realized I wasn't going to finish the wig before Otakon, and put it on hold for a while. The next steps were done over the next couple of months before going on hold while I finished my degree and then finally finishing in the weeks leading up to AN.

After that I attached the bun at the top of the wig with a strong hand stitch. I tied the hair that would later be the bangs out of the way.

At this point I also made the wig slightly smaller smaller along the back with some darts that I stitched in to the netting. This helped it fit better. I also hand stitched the small comb into the front of the hairline.

Next I pulled the wig under the bun into a ponytail and stubbed it using regular white glue. Then I cut off the excess hair. 


I also stubbed the bottom of the hair that was draped over the top of the bun.


Next I cut and styled the bangs. The wig was quite thick at the front, so I had to thin it out a fair bit. Because although Toph's hair is supposed to fall into her eyes (which isn't a problem because the character is blind), I kind of needed to be able to see.

To finish off the wig I used some heavy duty hair pins to affix the bun in place.

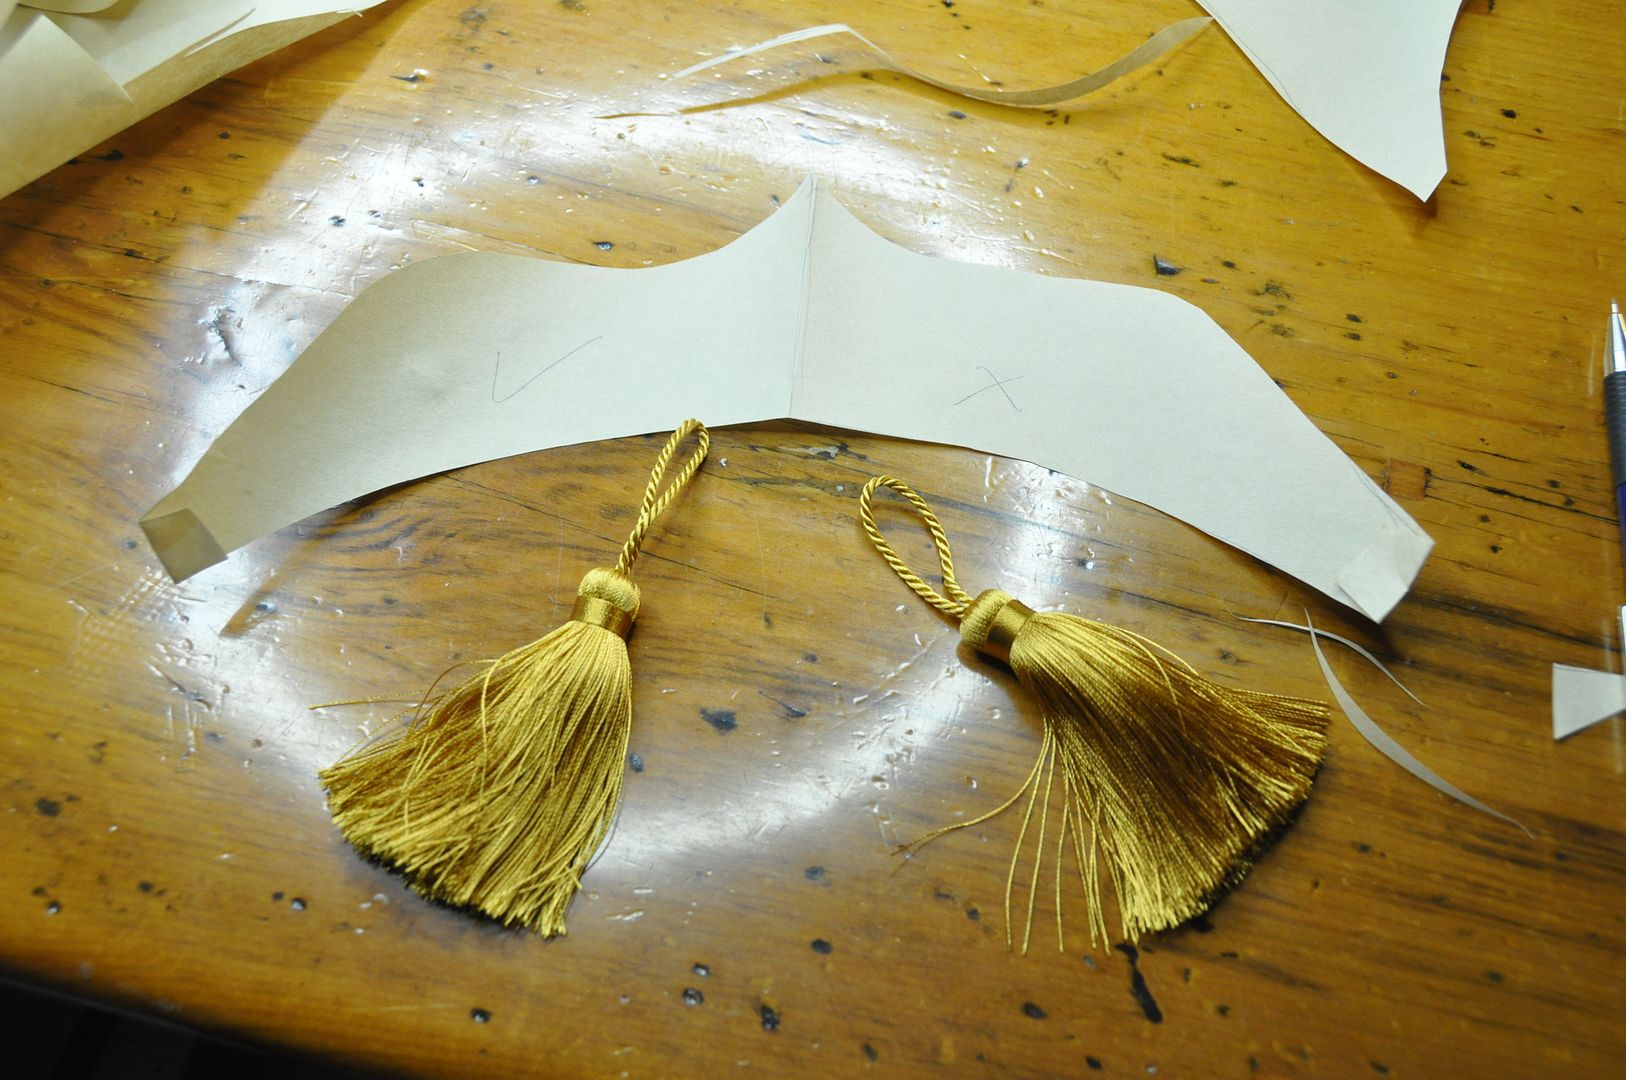
Next I paper patterned the tiara/headband. Once I was happy with the pattern I cut out 2 pieces of worbla and laminated them together with a heat gun. This was to make it sturdier.

This part of the costume was done after I had finished my independent study on worbla, so I used some of the leftover materials to make this tiara/headband.

I molded some scrap bits of worbla into a long roll and used that to make the raised detail along the edge. Then I heated the whole piece and gently curved it into the desired shape.

Using a dremel with a drill bit, I drilled a hole through the center of the raised loops at each end.

I made the tassels shorter to be more accurate.

Here you can also see how the finished wig looks from the side. The bun is a little smaller than the actual character's hair, but I think this is a more manageable size. It is already insanely back-heavy!


Next was priming the surface for painting. Worbla tends to have a slight bumpy texture to it, so I used a couple of coats of gesso and gorilla glue as a filler.

I primered it with a red spraypaint. The red colour underneath helps to counteract the green-ness that is common in most gold paints. I gave it a light sanding, before doing a second coat of red.

I painted it using a bronze acrylic paint as my main colour and then a gold for the raised detail. It required a few coats.

Then I used a clear gloss spraypaint as my final layer, to seal it and give it some shine. "Metallic" acrylic paints tend to be more sparkly than glossy.

I looped the tassels through the holes I created earlier and hot glued them in place.

To attach the headband to the wig I hot glued a small metal comb and two ties to the inside of the tiara. The metal comb would hook into the wig and then the ties were tied under the bun at the back. This made it secure, but also easily removable.

And in a nutshell, that's how I made the wig. Hopefully I can get some more side shots of the wig at another con.

Thursday, April 16, 2015

Newsboy Cap

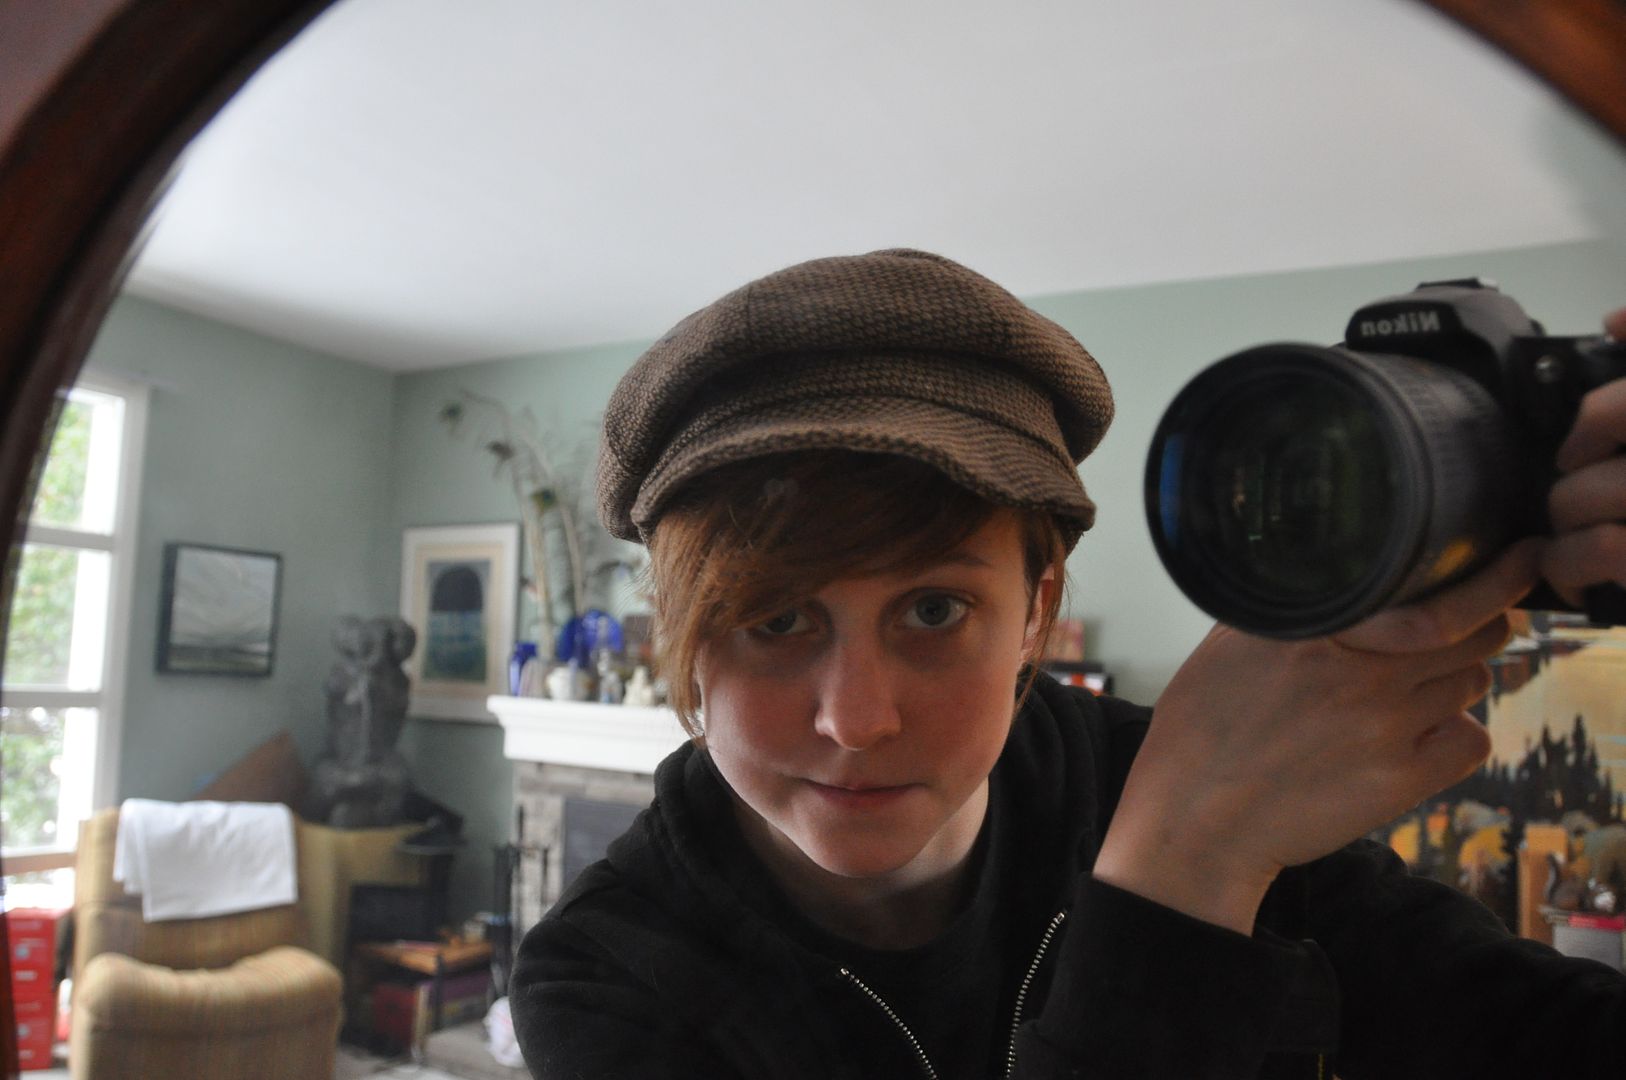
Let's take a look at a school project of mine! I had to make a hat and then distress it. I chose to go for a zombie apocalypse theme! I guess this newsboy met an unfortunate end.

All the distressing was done with a rasp, and all the 'blood' is watered down acrylic paint.
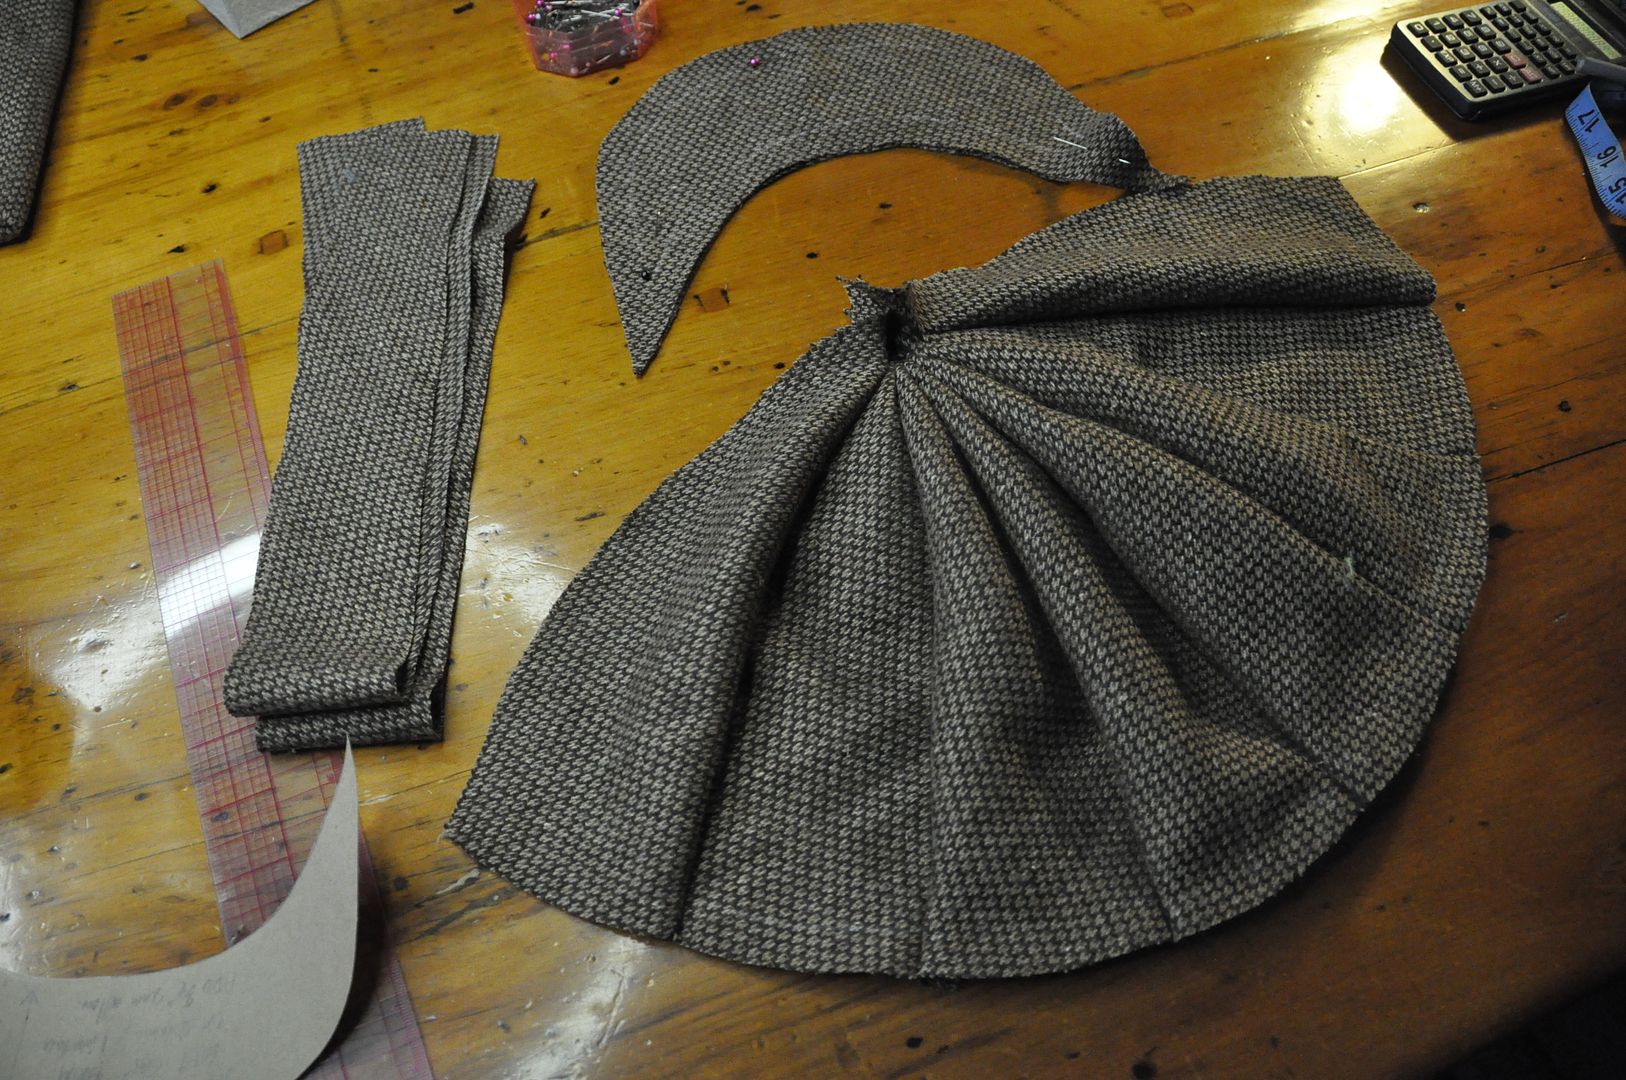
I started by patterning a 8 section hat using my head size measurement. I made sure it had a bit of poof to it, but not enough to make it super floppy.

I cut out all the sections and sewed them together.
I cut out the brim and sewed it right sides together along the outer edge. Within the stitch line I ironed on a piece of fusible interfacing. Then I clipped the excess fabric so it would turn right way out more crisply.

I turned it right way out and ironed it flat.


I created a lining for the hat out of blue fabric. It is sewn in the same way as the outside of the cap.

As part of the project requirements, I made a buckram hoop to put inside the hat band. This is wired so that the hat will hold its shape.

Next I sewed the hat band pieces to the brim.


The edge of the buckram was finished with a bias tape to protect the stitching.

The hat band was attached to the cap on the outside, but left open on the inside. This is so I could insert the buckram.

The inside of the hat band was stitched closed to the lining by hand. The inside of the completed hat can be seen below.
This is what the hat looks like before I wrecked it. Pretty cute!


Tuesday, December 9, 2014

Set Model - My Fair Lady


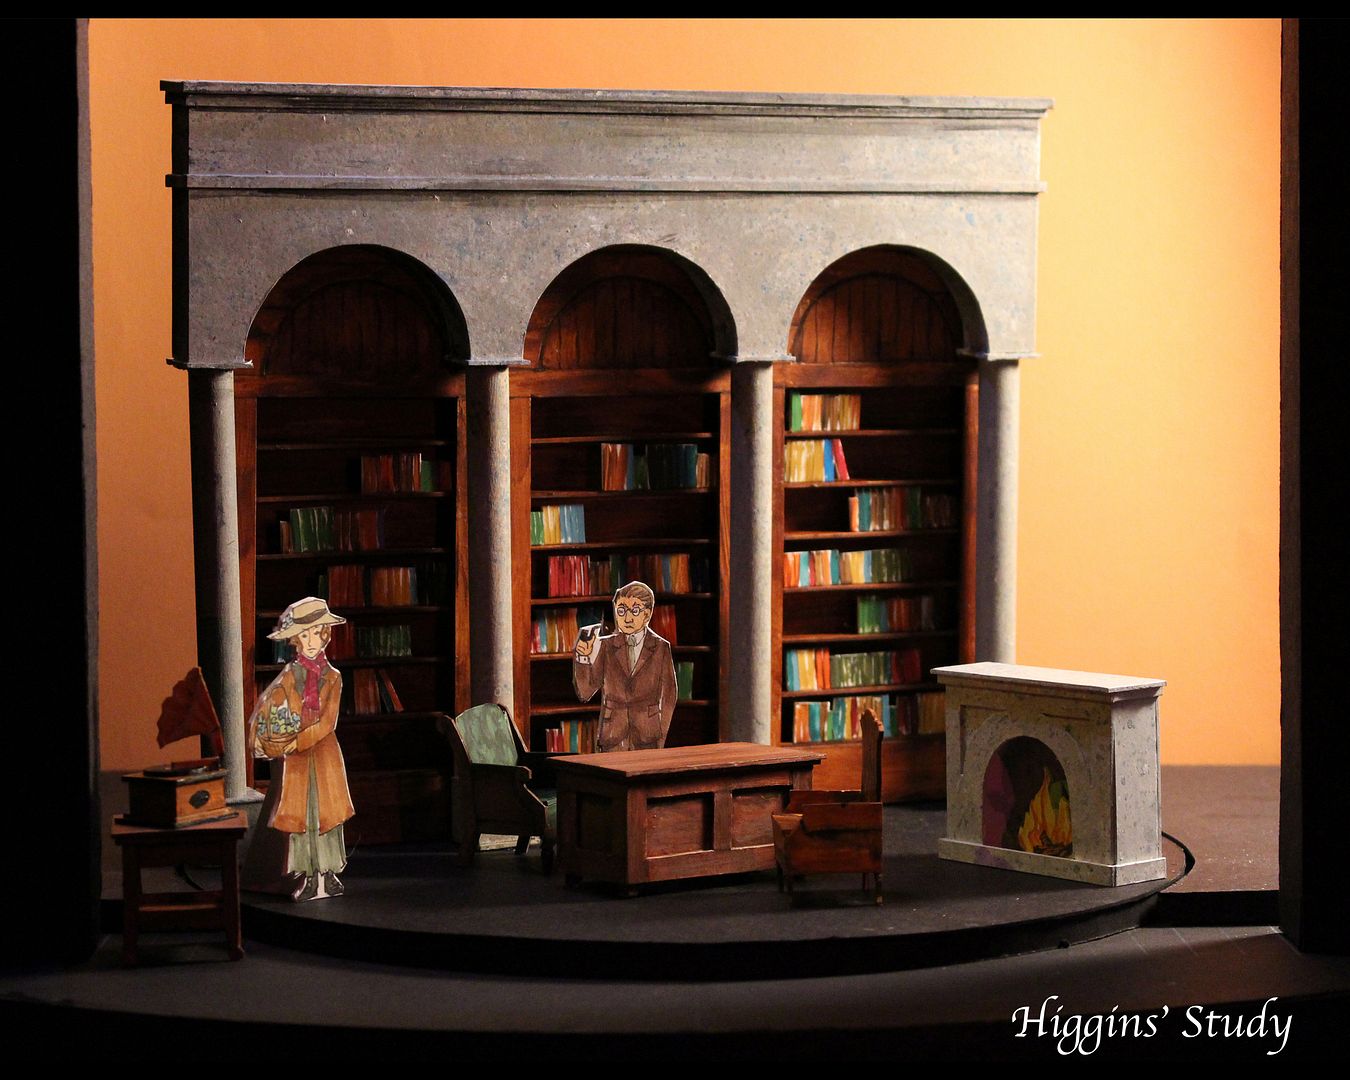
This is a project I finished and presented last week for my set design class. It is a scale model of my set design for the musical My Fair Lady by Alan Jay Lerner and Fredrick Loewe (based on the Pygmalion by George Bernard Shaw).

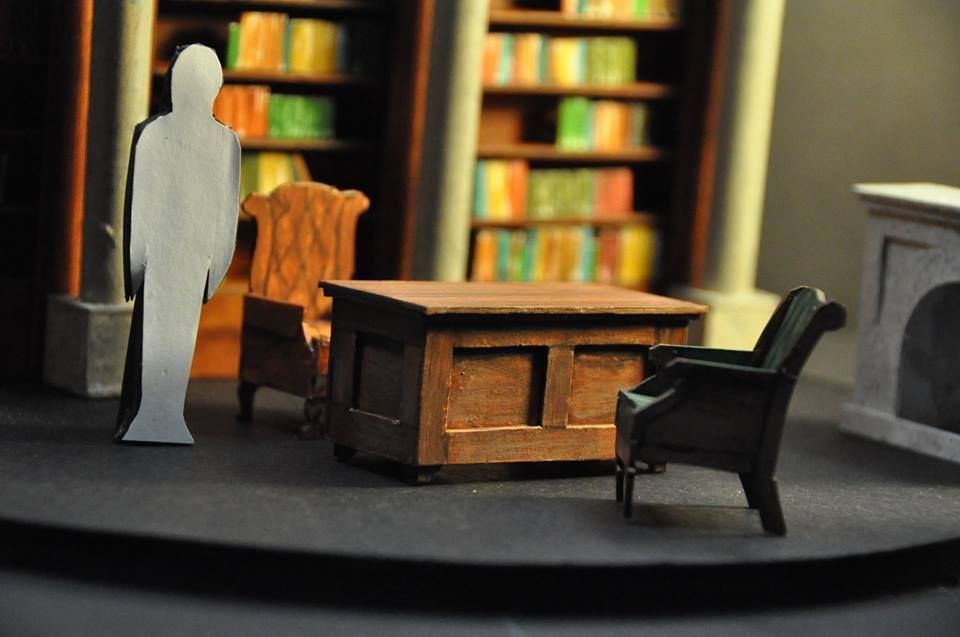
The model box is made of foam core and black matte board. The set itself is constructed primarily with illustration board, but also some wooden dowels, clear plastic (from folders I got at the dollar store) and muslin for the little burlap sacks.

The whole thing is painted with acrylic paints. And made me really glad I took that scenic painting class last year. Otherwise I would have no clue how to paint stone or wood properly...

 I've set the play in the original time period/location of around 1912, London, England. I did lots of research on the city and the architecture of the time period. I wanted to to something that reflected the design aesthetics of the late 1800's to early 1900's. Because even if you set a play in 1912, not all the buildings and furniture would be brand new--I mean we still have furniture from the 70's in my house!

The archway is the centerpiece of the design, onstage for the entirety of it. It sits on a turntable that allows it to rotate to create different locations/scenes both indoors and outdoors. I was inspired by both the architecture of London, as well as the woman's silhouette in the costume of 1912.

This set was Higgins' office and could be used for all the interior scenes in Professor Higgins house.  Higgins' office had the most complicated pieces to build. It took a long time to make all the tiny furniture. Everything is constructed at 1/2"=1'-0", meaning the seats of the chairs are only about 1" wide. The bookshelves are rolled in and set up behind the archway for these scenes.


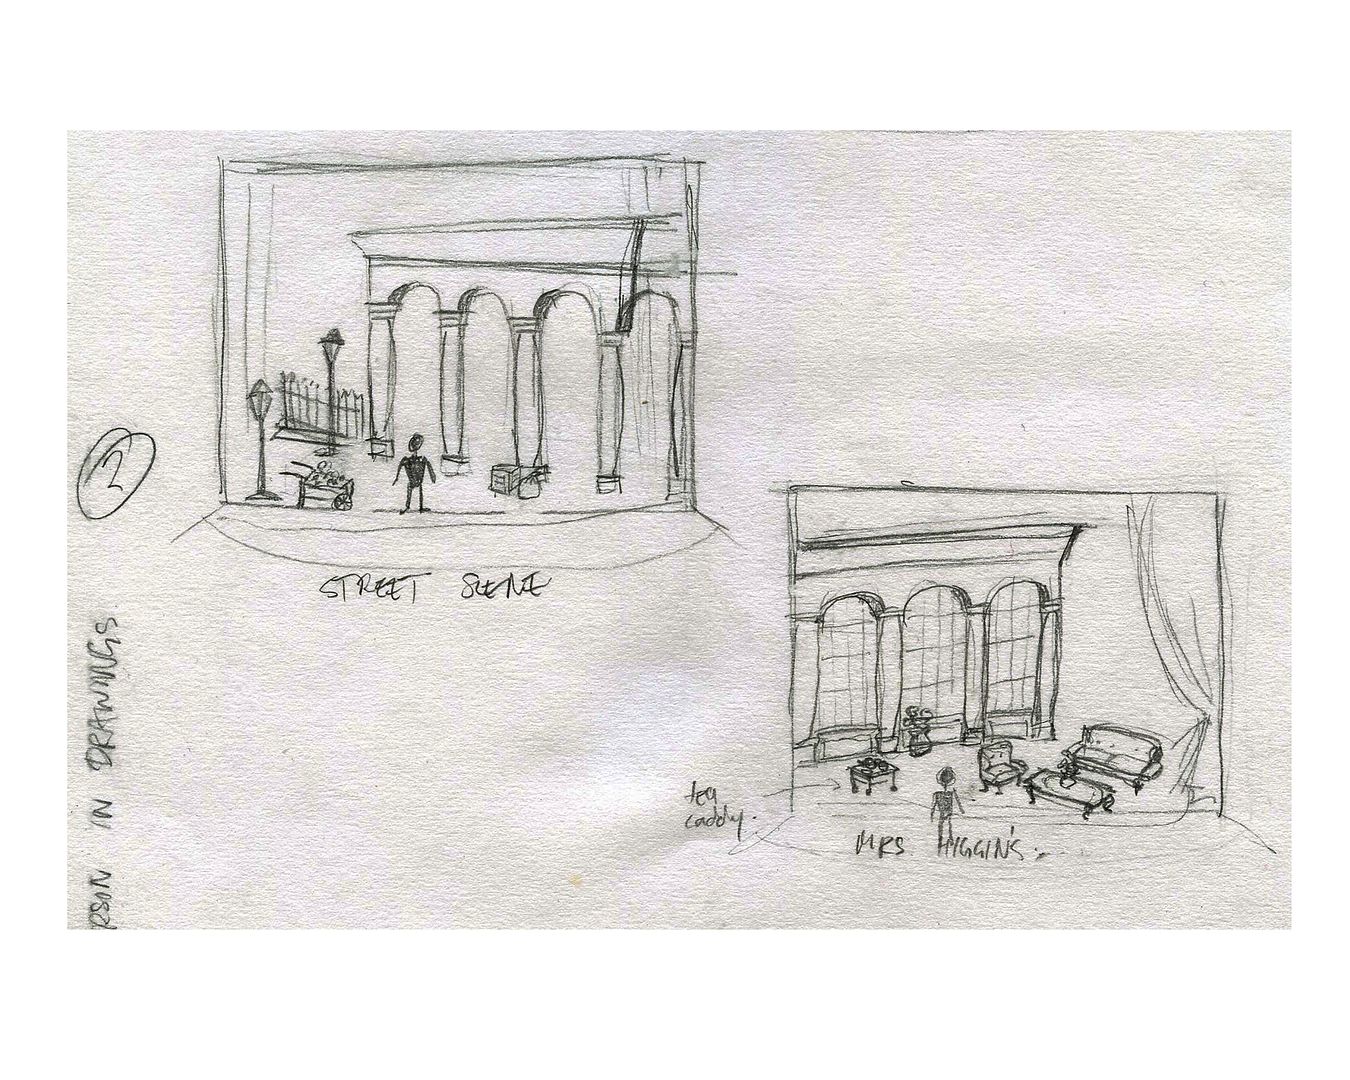
 This configuration is for the street scenes such as the musical numbers "Why Can't the English?", "Wouldn't it be Loverly?", and "With a Little Bit of Luck".

This configuration would be used for the scenes outside of Higgins house like "On the Street Where you Live" and "Show Me".  It reuses elements of the street scene set pieces. 

There are a few other scenes I designed, such as the ball and the racetrack, but those were not built for the project as I ran out of time and energy. The ball would have had the arch centered at the back with drapes hung behind and at the side of the stage. The racetrack would have had the same placement except no drapes, instead using the fences at the back and cafe tables in front. The racetrack scene is by far my favourite scene in the whole play.

Overall I am really proud of the finished result. :)

Tuesday, September 24, 2013

Kero & Suppi - Bows, Gems, Giant Candy - Cardcaptor Sakura

This is the fourth post for Kero and Suppi! This is just a quick look at all the props and accessories for these costumes. :) I always feel that props and accessories just make a costume that much more interesting!

For the rest of these fabulous costumes see the Shirts & Shorts, Ears & Wigs, and Aprons & Wings. For more pictures of Kero and Suppi see Eleventh Photograph's Otakon gallery!

First let's talk about those delicious candies! They were actually made by my sister. It was really nice to have a super light prop to carry around for the day.

My mint is made of 2 layers of insulation foam hot glued together. The edges were sanded down to be round. She then painted it white, then added the red swirls using acrylic paint. Alex's gumballs were simply coloured balls she got at the dollar store. Both candies were wrapped in cellophane.

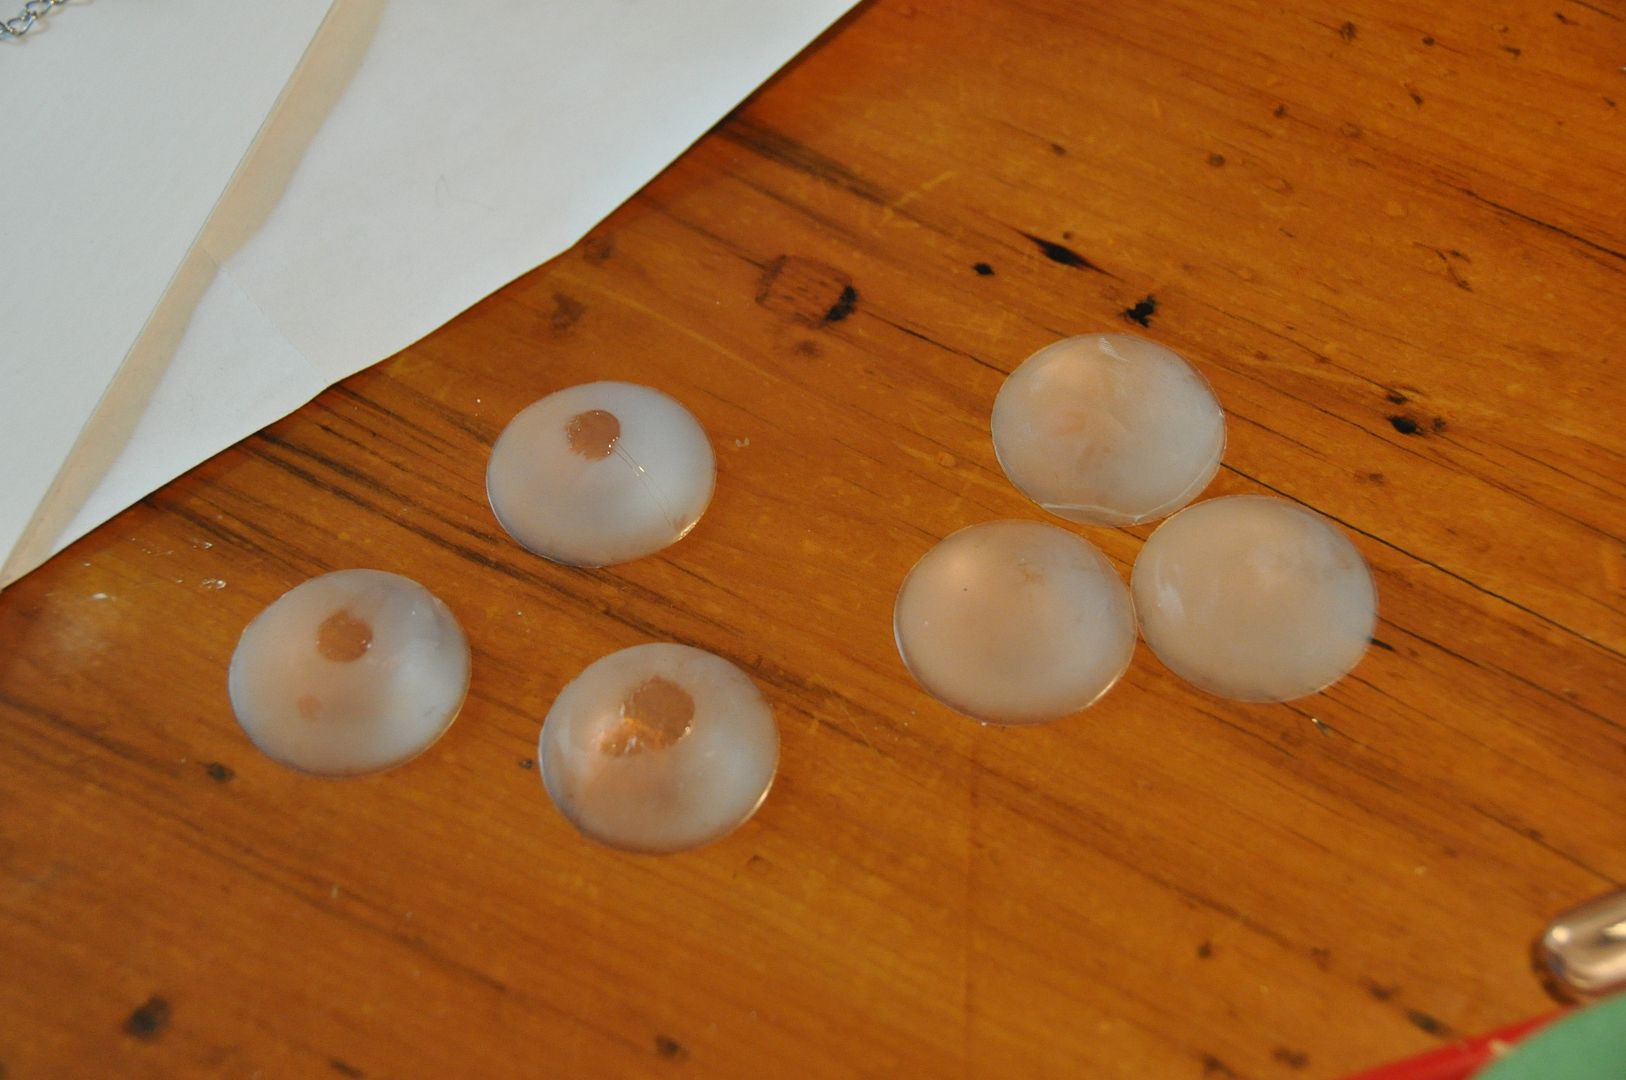
Alex also made our cool gems. For the gems we used a gedeo clear resin we bought at Curry's. Following the instructions she mixed the 2 parts accordingly and used a new paint tray as a circular mold. Then they were left to cure. We only needed 2, but she made 6. This was lucky because for whatever reason 50% of the gems didn't cure.

Then she painted them using nail polish. She backed them with a polish of each chosen colour (red and teal), then in order to bring out the shine she coated the top of the gem in a clear coat of nail polish. Trust me when I say that the clear coat is what turns them from looking "meh" into looking gorgeous.

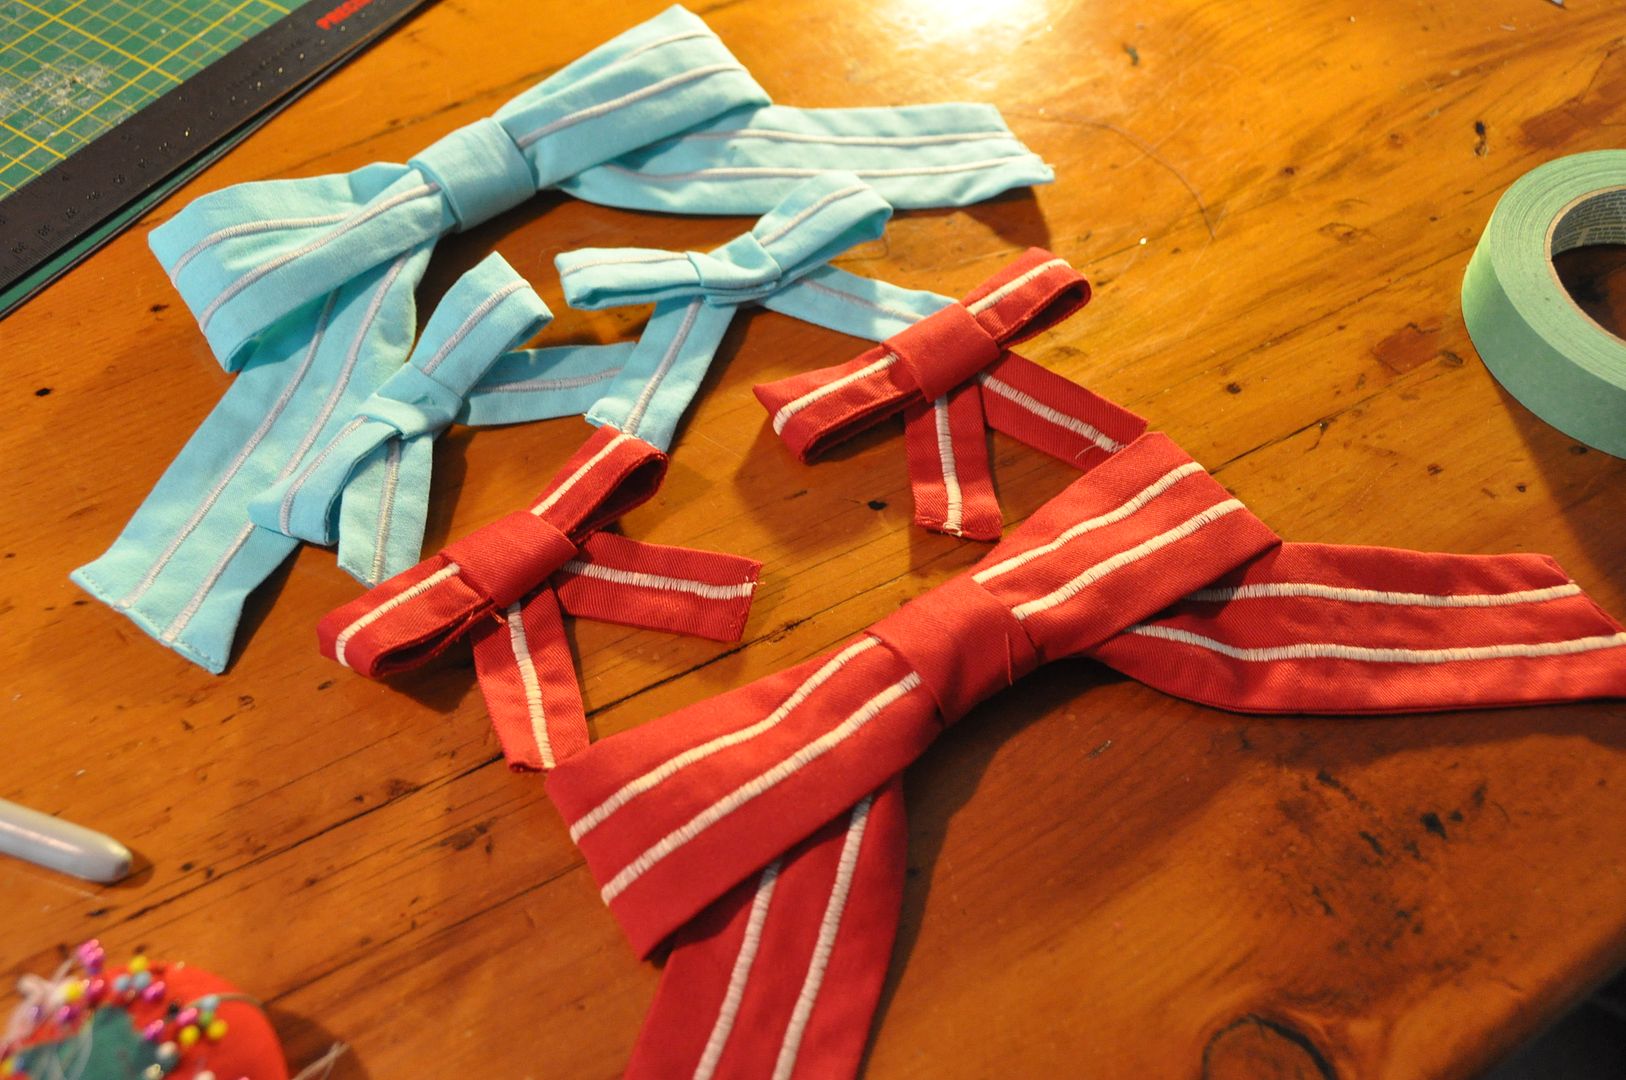
The next accessory was a set of 3 bows for each of us. Each bowtie was made of 4 pieces plus a neck band. All the rectangular pieces excluding the center were given stripes to match the aprons. The bows were hand stitched together, then the gems were hot glued onto the center. Finally to the neck bows I added a neck band, with a velcro closure. My sister's I made longer because she wanted to have her collar unbuttoned.

The shoe bows were simply attached to our own shoe laces with safety pins!