
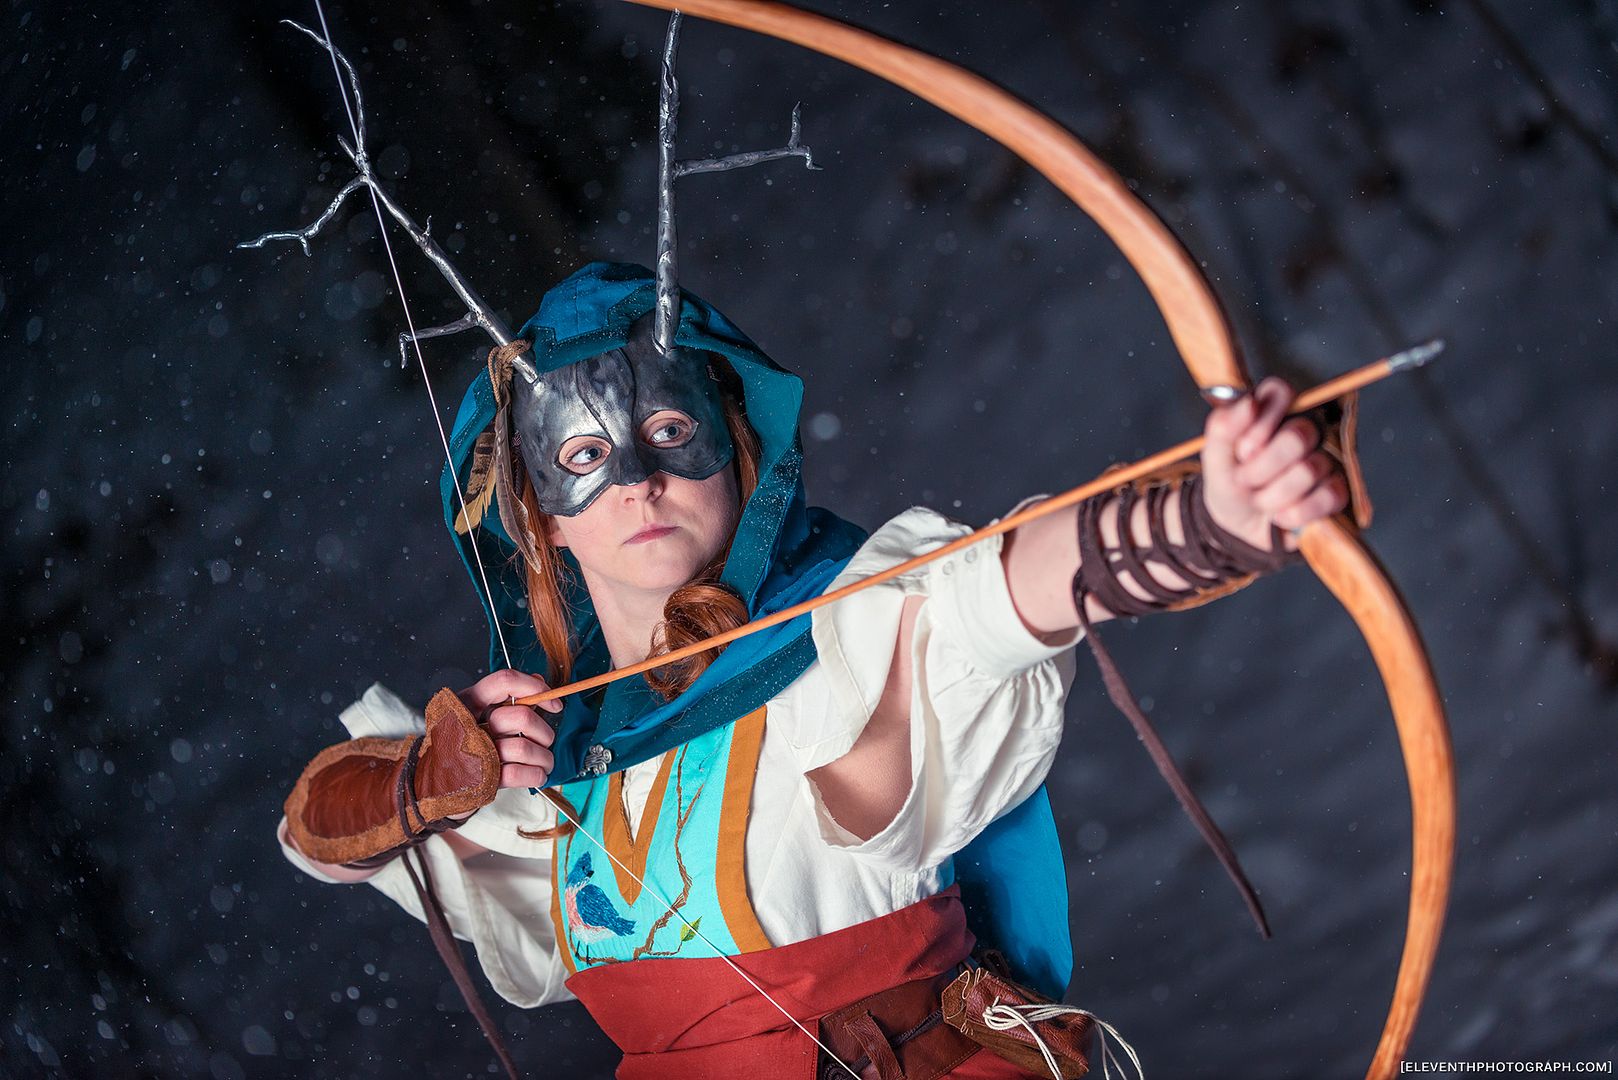

I wore most of the costume to CostumeCon 32, excluding the embroidered panel, which I was sadly unable to finish in time. The costume was completed for Anime North, and I competed it in the Masquerade. I won an award for my embroidery in the Master Division, which I am super proud of! This was my entry.
I still need to do a photoshoot of this costume, hopefully that will
happen sometime in the near future. I have been location scouting in the
forest behind my house. :P
I started the design concept of this last summer. I had bought my badge
for CostumeCon 32 at Anime North last year, so I knew I wanted to make
something original. There were several different designs leading up to
this one, several different versions before I arrived at this one. I
developed the design over the course of the summer and got started on
the project after returning from Otakon.

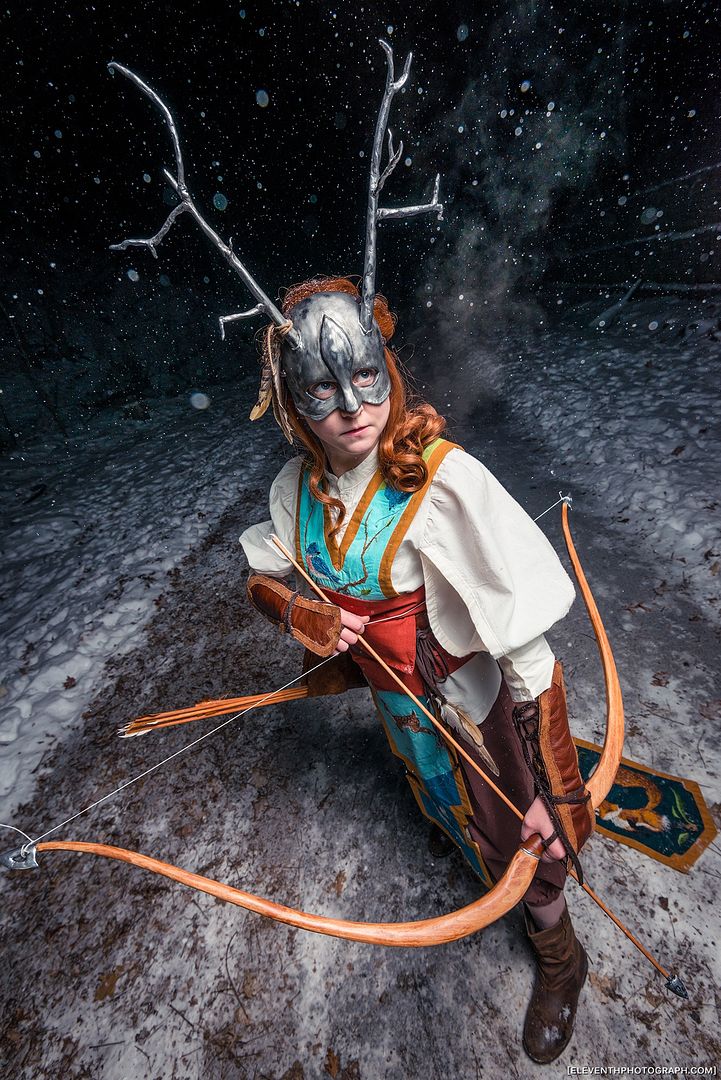 The hardest part once I had the shapes down was colourizing everything. I knew I wanted the character to have auburn hair and that the shirt was going to be off-white but other than that I wasn't sure. I didn't even know if I wanted to make the mask look like metal or clay & bone. There were several different coloured versions before I settled on this one (there was even one where the animals on the embroidered panel were to be done as silver silhouettes). It ended up being quite colourful in the end, I was sort of going for ceremonial garb when I first started drawing it and ultimately I think the colour suits the design. Even then there have been several changes that developed over the course of the build since I did this "final" sketch. I purposefully designed the under clothing for this costume to be quite simple, as I wanted the focus to be on the embroidered panel and accessories.
  I started by patterning and mocking up the shirt. The shirt was designed to be a looser fit, with flowy sleeves that would allow easy/unrestricted movement. The shirt itself only has 2 darts at the armhole to the bust, the waist get cinched in by the belt. The sleeve pattern had required some adjustments initially because unlike a regular sleeve this had a slit in the front. So I had to move the seam from the bottom to the front.
 After doing a mockup, I cut and sewed the pieces. I closed the darts and then sewed the front and back pieces together, leaving a little slit open at the bottom of each side seam. I cut the slit open at the front and finished off the edges with a strip I made out of the same fabric. This would reinforce the fabric when I added the laces later.
I then sewed on the collar and gathered the sleeves. Then I finished/reinforced the edges of the sleeve opening. Originally I had intended for the sleeves to be laced shut, but I decided I really liked the look of them open and left them that way.
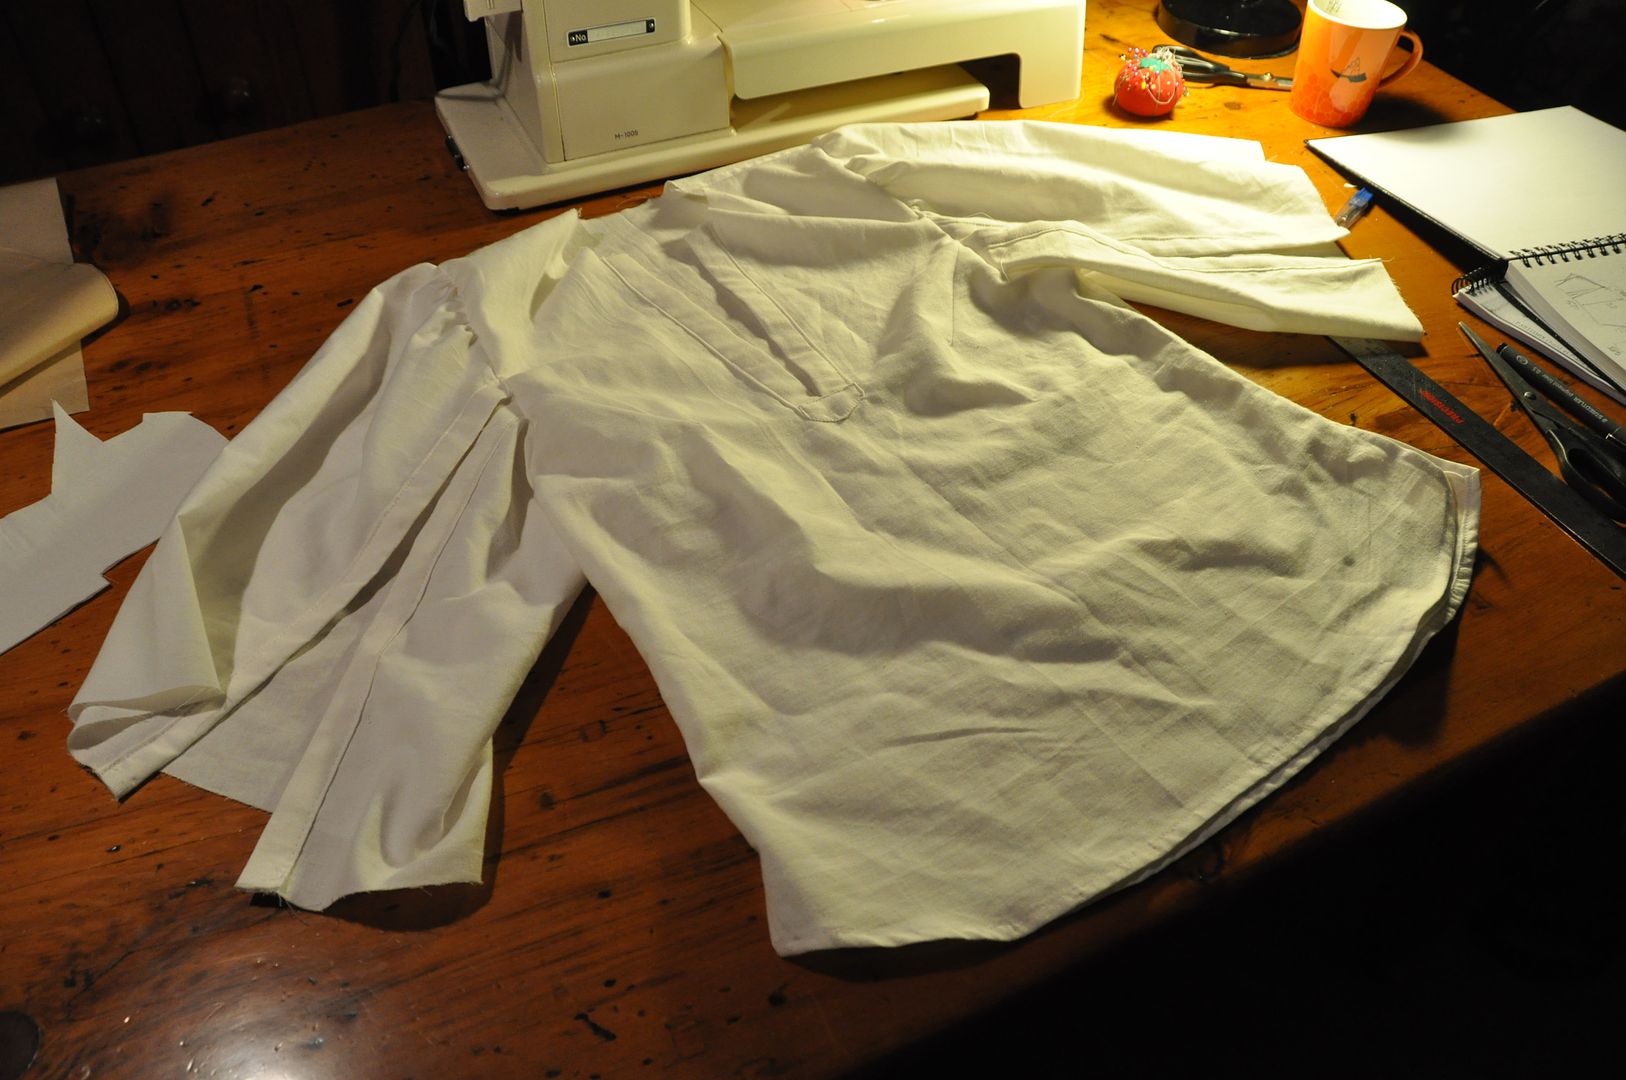
I hemmed the bottom of the shirt.
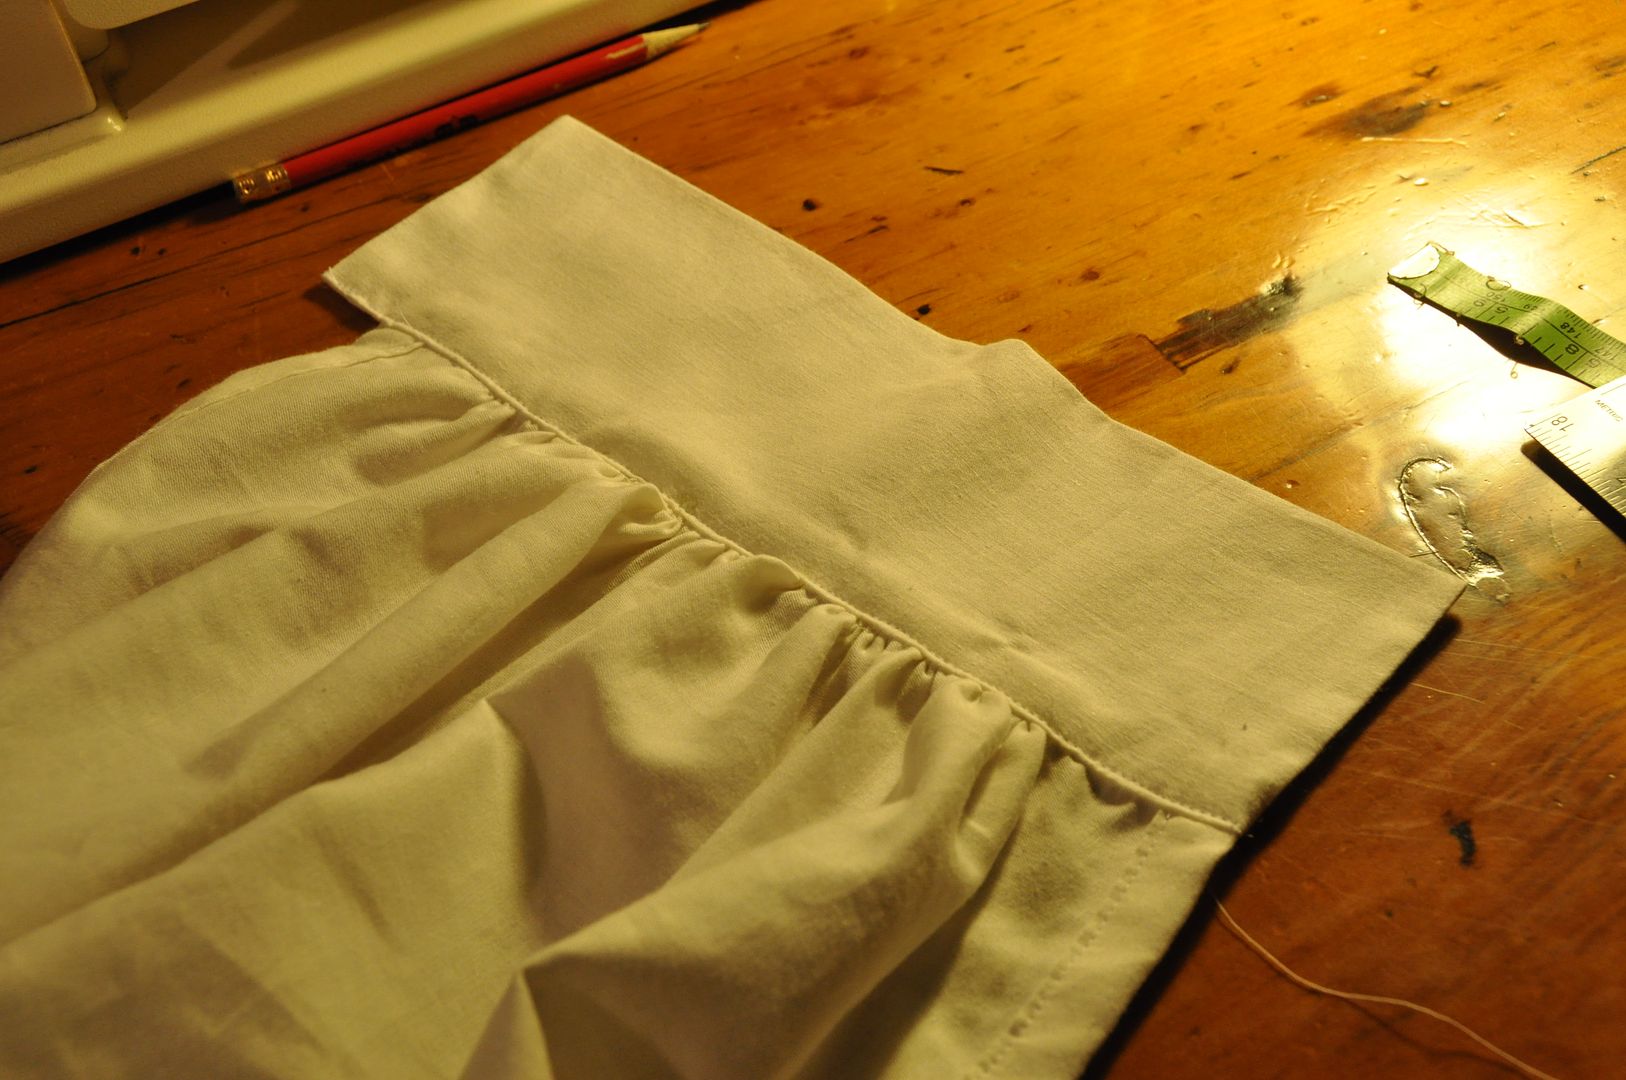 Then I gathered the edge of the sleeve and added the cuffs to the sleeve. Later I put 3 buttons & buttonholes on each to close them.I also added in the holes on the front closure for the laces. These were done in the same way as the button holes rather than with grommets.
Once the shirt was done I began work on the cape.

The cape itself had originally been designed to be longer, but after much consideration I felt it would detract from the embroidered panel so I made it a short cape, but still kept the large hood. I am pretty inexperienced patterning hoods, and this was my first cape. It took a few tries to get it to look how I wanted it. The only advice I can give is make a mockup!
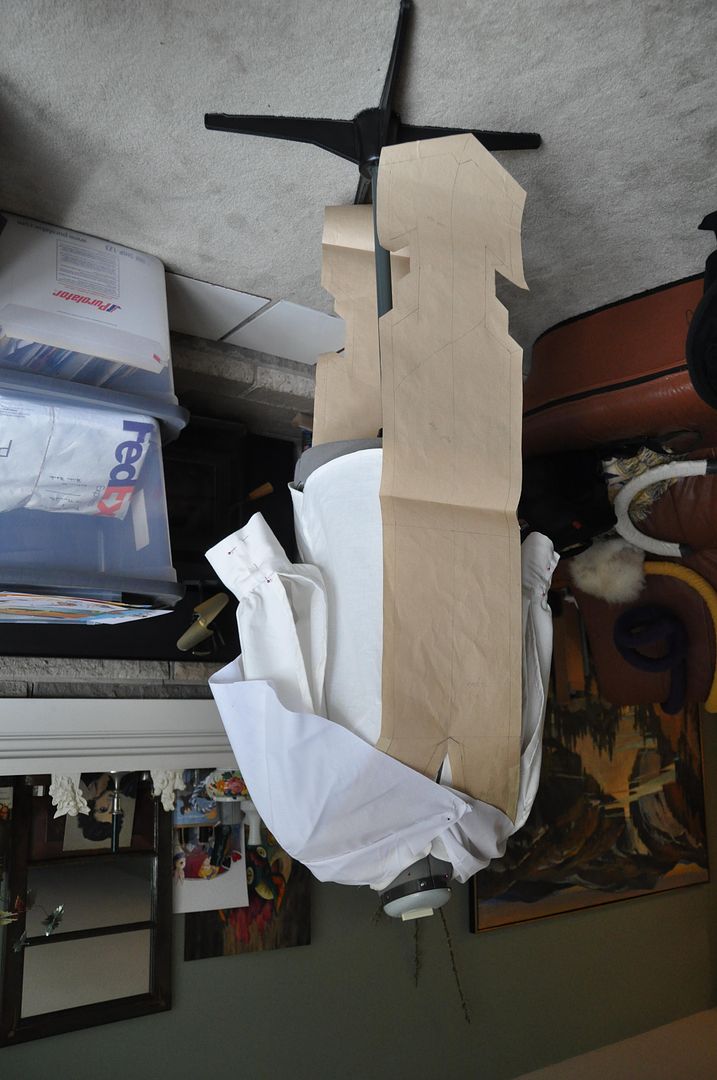
 The pattern pieces for this look pretty odd!
My main design feature on the hood was the two slots for the antlers to stick through. It was one of the design elements from the initial concept sketch that came all the way through to the end. I had to make a reinforced edge piece that went all the way around the edge of the hood and the hem of the cape. It had to conform to all the odd angles and contours. It is made of the same fabric as the hood lining.

 I started by sewing the sides and center seams on the hood, hood-lining and cape pieces. For the hood I attached the trim piece to the lining and bagged it out. Then I slotted the outer fabric under the trim and pinned it in place. I carefully measured and folded under the raw edges then top stitched the trim in place.
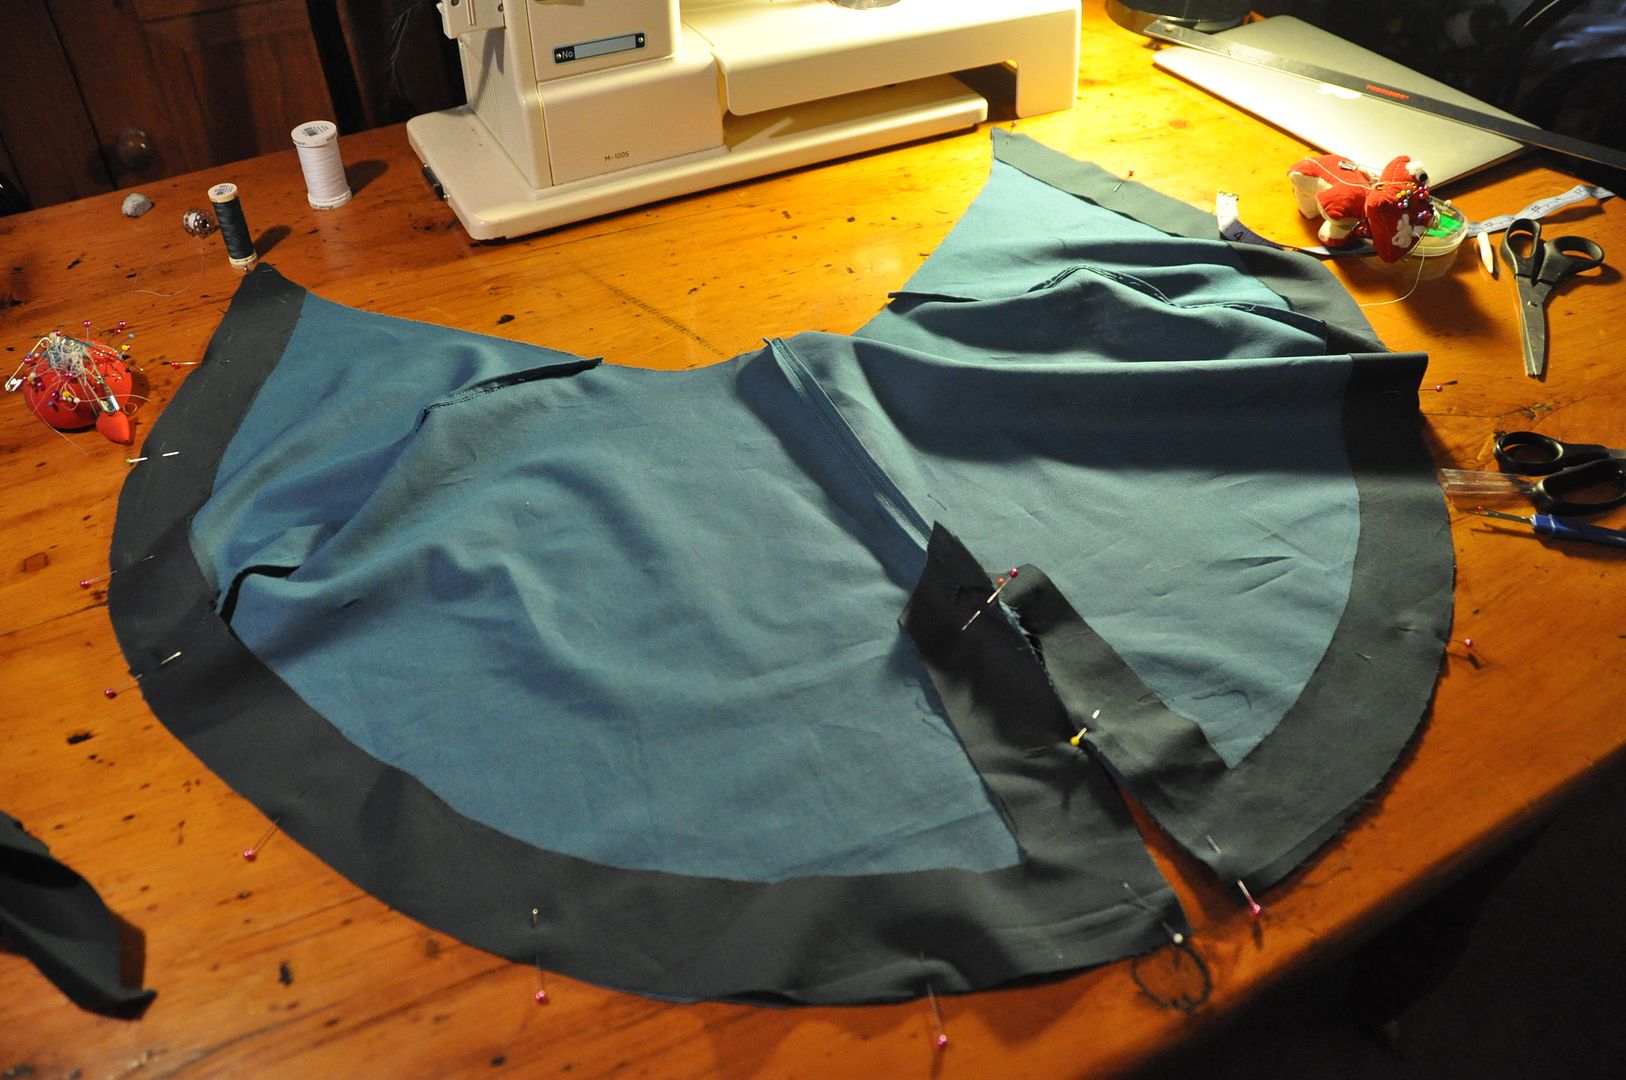
For the main part of the cape I bagged out the trim, having stitched it directly to the inside of the outer fabric. I folded it to the outside and finished the raw edges in the same way, top stitching it all in place. This way the raw edges are all hidden inside the trim, leaving for a clean look on the inside and outside!
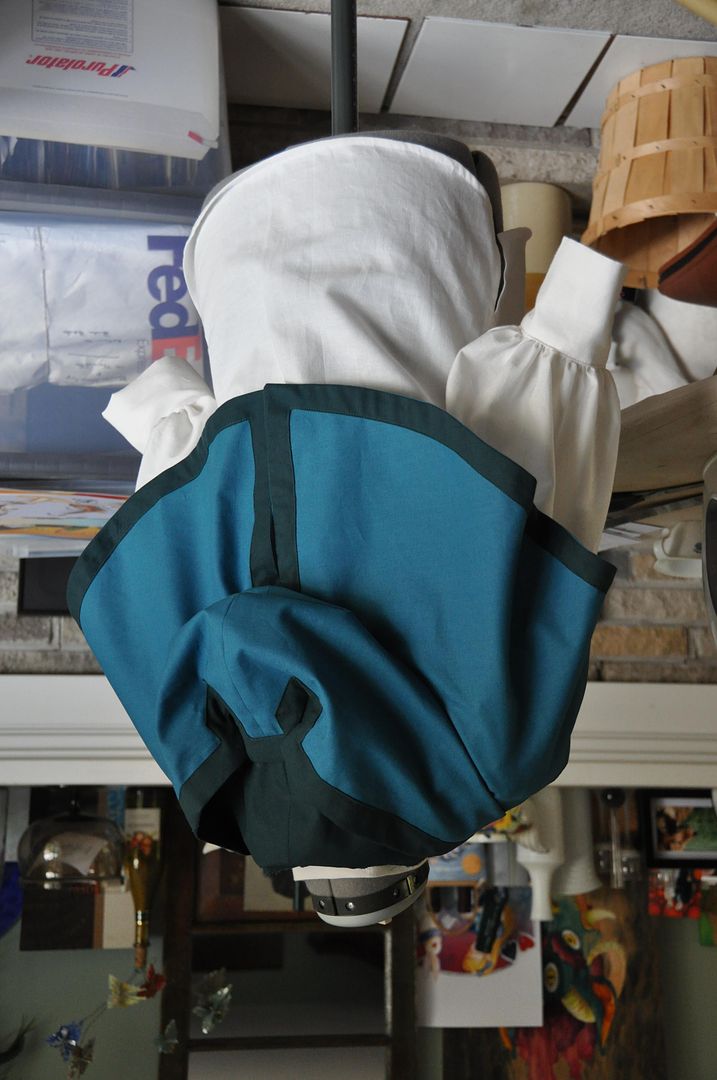 You can see how the hood collapses in on itself. Which was frustrating as even when worn over the mask the edges of the antler slots just drooped. I later re-opened the seam and added in a wire to the hood, which kept it rigid and held the desired shape perfectly!

The pants are actually based on a pattern I had modified for a costume I started but never finished. (Jack Frost) I modified my modified pattern to get the pants I made for this costume. Haha
 To make the leg wider I opened up the front of each pant leg and added in a pleat on each. I flared each pant leg out more as well. This way, it still fit nicely at the butt, but the legs would pouffe out a bit.
When I was satisfied with the changes to the pattern I cut and sewed the pieces. I started with the pleats on the front, then the side seams. Then I partially closed the crotch seam and finished the inner seams.

 Lastly I finished the cuffs by cinching them and then adding on a strip of fabric that I had closed to be a circle.
I can definitely say that the base outfit for this costume is very comfortable.
No comments:
Post a Comment