
Click here to see how I made the dress.
Go here for the photoshoot. ;D


I knew when I started the project that this dress would require a petticoat in order to achieve the volume I desired for the skirt.
So I looked online for a tutorial on how to make a petticoat. This is the one I found and it was super helpful. :D
Building a petticoat is like making a layer cake... lots of fluff. :D

The other thing you need for this is ribbon. It makes finishing off all the seams way easier. Seriously.

 The first thing you need to do is decide how many tiers you want your
petticoat to have. I decided on 4. Then you need to decide how long you
want it to be. I made mine 23" long so it would fall an inch short of
the dress's hem line.
The first thing you need to do is decide how many tiers you want your
petticoat to have. I decided on 4. Then you need to decide how long you
want it to be. I made mine 23" long so it would fall an inch short of
the dress's hem line.I added 1/2" seam allowance in to attach each tier to one another. Which is a total of 3". In the long run, since the petticoat isn't visible it doesn't really matter if the layers aren't exactly even. The easiest way of adding in the seam allowance so you can just cut all the layers to the same size is to add your seam allowances to the total length and then divide by the number of layers.
For example: For my 23" petticoat I added the 3" of seam allowance to the total making 26" then divided that by 4 tiers. This means that the strips would be cut to be 6 1/2" wide.
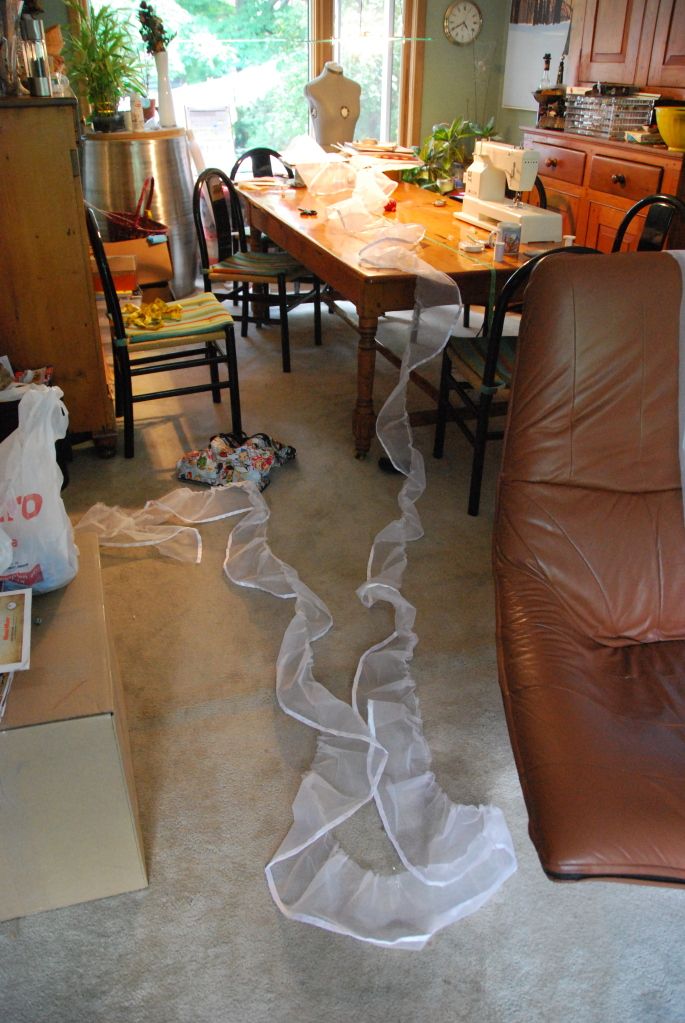
I don't know if there is a scientific way to calculate pouffiness... So I just improvised. From the bottom up the circumference of the tiers were as follows: 12 ft, 9 ft, 6.5 ft and 3 ft. Note: Make sure you separate each set of strips and label them because having to recheck the measurement on a piece that is 12ft long is not exactly preferable.

 First finish off the bottom of the petticoat by stitching a folded piece of ribbon over the bottom edge.
 Then I used a basting stitch to gather up the tiers so I could sew them to the next layer. You take the tier and evenly gather it to the measurement of the tier you want to sew it to. The unfinished edge of the seam should go on the outside.
I found it easiest to gather it evenly by dividing my fabric strips into equal sections and gathering them all to the same measurement. And also taping a measuring tape to the table.
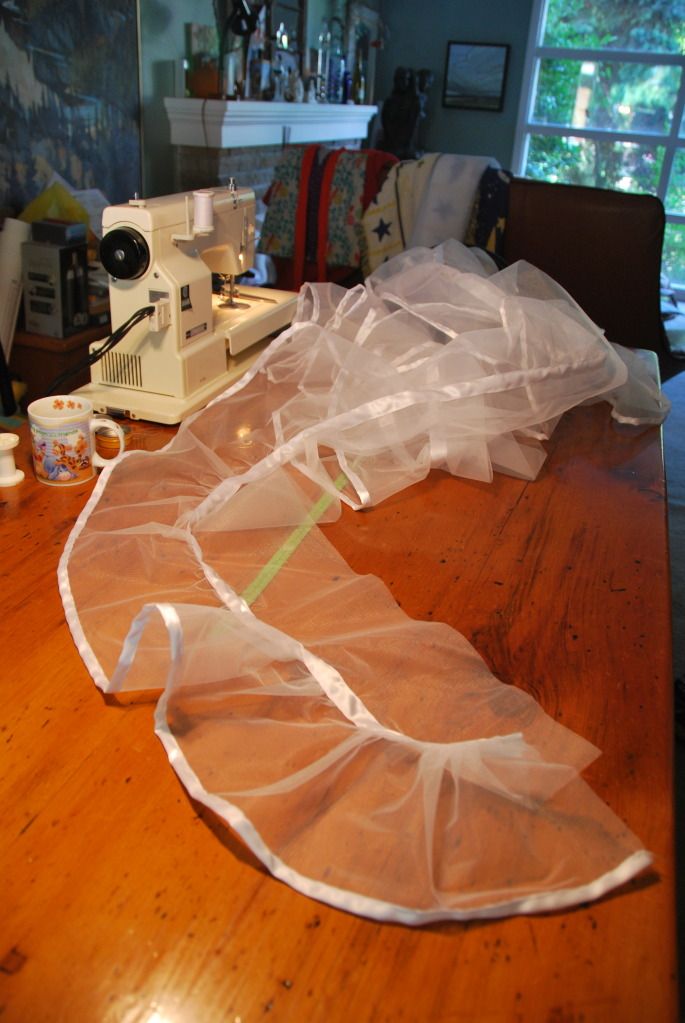

It's easiest to finish each seam as you go, as you are less likely to get wrinkles. Once you gather a tier it is more difficult to go back and sew the ribbon on.
Then I sewed the skirt together. I left the top tier open and finished the edge with ribbon.
I made a fold over waistband and sewed it to the top tier, leaving an overlap so I could sew on some velcro.


 This second one had 2 tiers, and the bottom was made of a quilting cotton finished off with lace trim. It was made long enough so that the lace trim could be seen below the hem of the dress.

LOL The dog peeking out from under your skirt!! XD
ReplyDeleteAnd if I ever needed to make a petticoat I would look at this tutorial. ;)
This is a great tutorial! I'll be using this for my Alice costume that I'm working on. Thanks!
ReplyDelete