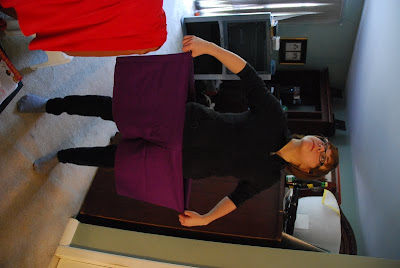
 Hey all! I'm back with another detailed progress gallery! This time it's the outfit for Cousin Miso! :D I made this for my sister about a week before the con, after finishing the feathers on my mask, and before I started the cursed foam coat. I was able to finish this completely in a few days, without too much trouble (which was a nice change).
Cousin Miso is just SO cute! I love Katamari, what a great game!
Somehow I managed to forget to take any progress pictures of the beginning of this project, but I basically just traced a pattern from a t-shirt that fit her comfortably, morphing that into a short A-line dress and working from there. I put a seam in the back to make it easy to put a zipper in. It ended up being too long, so I shortened it.
 Alex made the roll that goes around the bottom of the dress/shirt. A simple tube stuffed with leftover bits of cotton batting.
The collar was simply a rectangle that I folded over. I pinned it securely and the ditch-stitched it on.
Oh look at my fingers. They are so beautiful. I just love how my ring-finger sticks out at a bizarre angle... -_- Yeah, that's all natural.
Anyway, the collar was finished off at the back with a few dome fasteners. (Because I just love them so much.) I decided to put it in after the zipper for the simple reason that I've had too many problems putting in zippers where there are a lot of layers and am now purposefully trying to avoid doing that to myself again (see: Floral Pouffe Dress.)
I realized that in order to have a the mittens be part of the sleeve, I would nee to have 2 seams in the sleeve, but I realized that if the 2 seams were top and bottom of the sleeve the fabric would have to twist and put a lot of wrinkles into the sleeve. So I decided to put a seam on either side of the sleeve, which worked out quite well. To make this part of the pattern, I traced the armhole, and then measured the circumference of my sister's arm every 2 or 3 inches down her arm to get a form fitting sleeve. I decided to add an extra 1/2" to ensure movement, because I wasn't sure how well the fabric would stretch. As it was, the 1/2" was unnecessary, and if I get a similar type of fabric for my cousin, I will not add as much.
Some progress shots. Alex was working away on her bloomers. They were patterned of a pair of her shorts which she then added about 20 extra inches of fabric to make them nice and pouffy. She left extra fabric at the top and bottom to do a roll in which she could put some elastic.
These are all the pieces of one sleeve laid out. The top of the sleeve is one piece, while the bottom is 2 pieces. (So I could have a slight overlap where there is a hole to slide her hands out. You know, so she doesn't have to take the costume off if she needs to use her fingers.) I finished the seams at the place where the 2 bottom pieces meet. Then I pinned it with front sides together and sewed the sleeve.
The finished bloomers. Looking good. You may also notice her shoes, which match her tights rather nicely. Recognize them? Yeah, those are mine. From my Kiki costume.
2 finished sleeves. I ended up having to modify them at this point, because the gap was too far up her wrist and she couldn't easily get her hands out.
Also I don't know why, but this picture just reminds me of Thing 1 and Thing 2 from 'Cat in the Hat'.
All sewn together! I ended up taking in the sleeve at the shoulder seam a bit because the fabric was loose there.
I pinned the edge of the dress to the roll. Not easy. Or fun.
I sewed it all together. Less easy and even less fun. My finger got grazed by the sewing machine several times creating a nice bruise under the nail.
The roll was then measured and hand stitched together at the back, and then the rest was machine stitched to the garment.
I'm really pleased with how this on turned out! I definitely want to make companion costume for this one. Miso needs more friends~! XD


No comments:
Post a Comment