
The Princess was picked and worn by my younger sister Elanne. She is also a blogger, so be sure to check out
Sweet Boake is you want to drool all over you keyboard while you ogle her delicious desserts.
So cute! I was really excited to make this one just because of the cute factor, and also--like Miso and Nickel--I have NEVER seen anyone cosplay this cousin. ;D
I based my pattern off the Miso pattern for the a-line dress, except I had to scale it down a bit.
This cream stretch was really nice to work with. But I always have trouble when working with fabrics that have a right and wrong side which is not dead obvious. To aid myself in remembering the correct side I always put a pin in the center of the piece with the pin head on the correct side of the fabric. This saves me lots of anger later. And time spent seam ripping. :P
I start with these 3 pieces which make up the dress. the front piece and the 2 back pieces. First thing I did was sew up the back seam and then flatten and put in the zipper.
I then sewed up the shoulders and side seams and finished the insides.
I did a standard roll over/fold over collar, finished with a neat ditch stitch. Dome fasteners were sewn on later to close the flap.
I had Alex make and stuff the tube that would become the roll at the bottom.
Meanwhile I got started on a puffed sleeve mock-up.
...I think it is a little too full Alex... O.o
We pinned it in circle form and left it that way for a few days in an attempt to convince it that it
really wanted to be a circle...
The real sleeve. I added a couple extra inches under the arm in case it didn't fit properly. Then I used a hand stitch to lightly scrunch up the fabric before I sewed the sleeve on so it would get that puff at the top.
I cut out the strips that would be used as trim for the bottom of the sleeve.
I scrunched up the fabric for the bottom of the sleeve and as I was pinning the trim on my sister came up to me and said, "You know, if the roll and the sleeve are both the same colour, shouldn't they be stuffed to match?"And I was like: D:< "No".
...But I did it anyway. :P
I attached it in a similar way to a fold-over collar. I stitched the 1 side of the trim to the front side folded it over and ditch stitched it. The only difference is I added in stuffing before I ditch stitched it.
I used a hand stitch to finish up the edge.
Sleeves finished! And they look SO CUTE! :D
Then I had the arduous task of attaching that blasted roll. I pinned it in place and got to work pushing it through the machine. The difficult part about doing this is that in order to get a clean attachment, you have to stitch over your line of stitching that hold the tube together EXACTLY. The problem is that because it is stuffed, it doesn't want to stay under the foot of the machine and is constantly trying to push you off your line.
So pushing it through becomes a 2 person job. D:
OMG tube attached. NEVER AGAIN. D:<
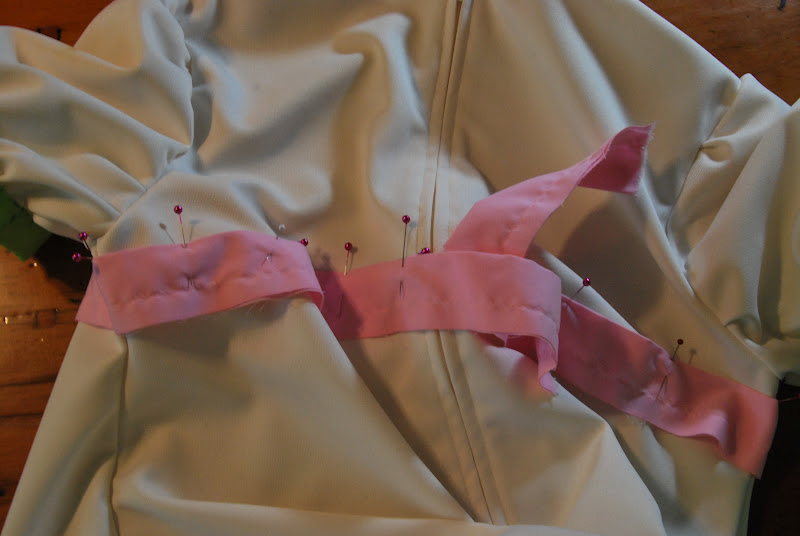
Then I set about adding the final touch: the bow. I took a strip of pink broadcloth and sewed the stripe to the garment on both sides. I hand stitched the bow in place afterwards.
At the back I made sure the stripe lined up, seam ripped the zipper at this spot to create a hole on both sides, and tucked the loose ends to the pink stripe in. Afterwards I simply finished the ends, resewed that part of the zipper and tacked the flappy bits down. :D
The roll was finished with a hand stitch, just like the sleeves.
And there you have it: one Princess dress! :D SO cute. It's really a shame she's still growing and this will totally not fit her next year... D;

 The Princess was picked and worn by my younger sister Elanne. She is also a blogger, so be sure to check out Sweet Boake is you want to drool all over you keyboard while you ogle her delicious desserts.


すごく かわいい です ね
ReplyDeleteありがとう!:D
Delete