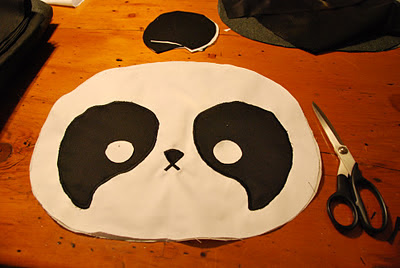
So here's a look at how I made this adorable panda bag. It is based on a doodle I drew in class. :)
I redrew the pattern at full size, and cut the pattern pieces out. Keeping in mind that the pieces that will get applied to the front don't need seam allowance.
I cut out the ears next, and made sure to cut out a layer of interfacing too.
Next I cut out 2 pieces for the top panel (same length as the zipper), sewing them together in preparation for adding in the zipper.
I also cut out some fabric for the lining, and interfacing.
I pinned it in place, then basted the zipper in place. And then I sewed the zipper in for real.
I appliqued the face on to the front of the back.
I added in the nose details.
Then I sewed the ears together, clipped, and turned them inside out.
Next I measured for the inner pocket.
I finished off the edge for the pocket.
I measured the rest of the perimeter of the bag and cut out the remaining bottom piece in my black fabric, interfacing, and lining.
Then I sewed the bottom piece to the top on one end, forming a long strip of fabric.
I also sewed the inner pocket to the back piece.
I clipped the ears to allow them to stretch and be sewn in on a curve.
I also stitched the lining to the front piece, keeping the ears out of the way while I did so.
I finished off the first inner seam with bias tape.
I then sewed the side strip to the front piece. Then I closed the strip into a loop.
Then I pinned and stitched it to the back piece.
Beautiful! And then I had trouble getting the zipper open from the inside... XD
I then finished all the inner seams with bias tape.
Gorgeous! Then I made the strap.

 Next time I would use more interfacing in the ears, and main pieces so that it doesn't fold in on itself as much when there is nothing inside.
Next up: Mum's jumper! ;D


Very cute! I can hardly wait to see Mum's jumper!
ReplyDelete