Tuesday, June 3, 2014

Steampunk Corset

Salutations! This is the first steampunk outfit I've put together in quite some time. (The last one was my steampunk inspired lolita oufit back in 2011!) I am a steampunk fan, so it would probably come as no surprise that everything in this outfit excluding the corset came straight out of my own closet.  Hahaha

This was my final project for corsetry and the second corset I've ever made! This is also the first time a draped a pattern. I debuted this outfit at CostumeCon 32 and won a Hall Award for the ensemble. Planning on decking this out with more stuff in the future--like a weapon or possibly some gloves. But for now it's complete. 

Special thanks to Mike at EleventhPhotograph for the photoshoot! I have a few more pics up on my Cospix profile!

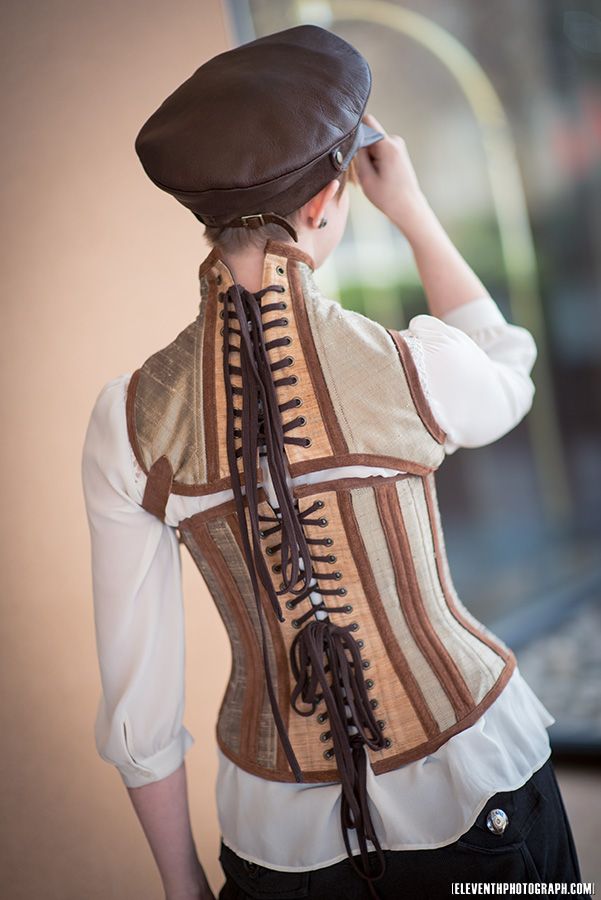
It is a decorative corset intended to be fairly tight-laced (at least for me!) I am particularly proud of how the back of this piece turned out. In terms of comfort, it's actually fairly comfortable when standing, but when sitting the neckpiece doesn't allow me to lean back. This makes it a bit tiring to wear for long periods of time.

I had a hell of a time figuring out my colour scheme (as I almost exclusively design in pencil, without colour), but I am glad for the colours I eventually chose. Special thanks to the lovely gal at King Textiles who helped me pick out my fabrics! I like the contrast with the muted gold and the pale orange versus the brown suede. Mostly I really like fabric with texture. The dupioni (gold) and the raw silk (orange) have such great texture! Someone commented that the raw silk looks almost like woodgrain.

Here is my original concept sketch. I started my design process by sifting through the hundreds of google images of steampunk, corsets, and victorian fashion. I picked out the different elements I liked and came up with this. It is designed to be worn with or without the neck piece. In the original concept I had vertical buckles attaching the two at the back, but scrapped that during the build process, as I found them to be completely unnecessary; it would make it harder to get on and off by myself, and would clutter the design. I might add the chain detail at the front eventually, but I kind of like it without it.
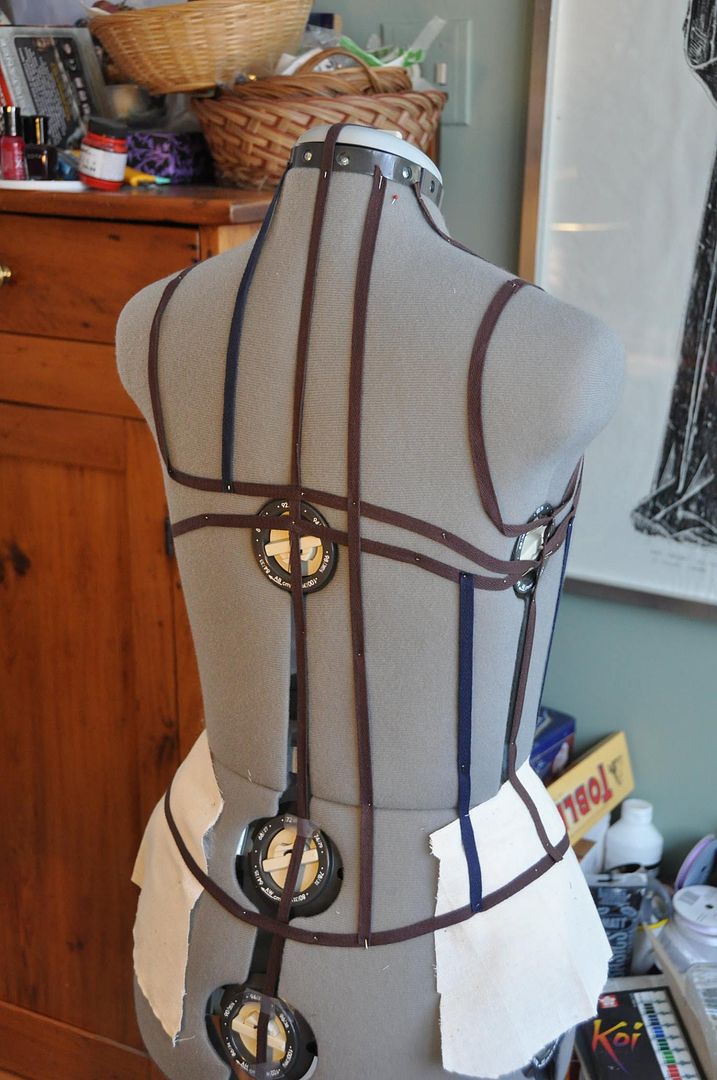
To start I adjusted my dress form (which I refer to as Molly) and padded out the hips to be higher. This is to accommodate my shorter torso. The goal here was to make as accurate a representation as possible of my body. Then I used 1/4" twill tape to mark out the shapes I wanted on the body. These tapes marked the seam lines and the garment edges. When doing this it is important to decide which edge of the tape is the "line" and then stick with that. Be consistent, or you will confuse yourself.
Then using muslin I draped the design. Each section/piece is a different piece of fabric carefully smoothed to contour the body and pinned in place to the edges of the section. Then I took a ballpoint pen and traced the seam lines/edges onto each piece. I also marked the waistline. Additionally, when draping a corset it is best to keep the grain of the fabric perpendicular to the waist line, meaning the grain should run straight up and down the body. (Woven fabric stretches on bias/45 degree and can alter the shapes enough to be a problem later in the process.)
I unpinned the pieces from Molly and cut them out following the outline I had drawn. The two patterns were as follows: The neckpiece pictured above, and the corset pictured on the left. The corset has 6 panels on each side.

I then made a quick mockup to ensure the fit was correct. The neck piece needed some minor adjustments because my neck is thinner than Molly's. An average corset is designed to have a 2" gap at the back, so that when laced it cinches in the body. This obviously doesn't work on the mannequin, so after draping the pattern you then calculate and carve off the proportional amount from each panel. (This was not done to the neck piece because cinching in the neck would cause strangulation.) I made my corset just a fraction narrower at the waist, shaving off the same amount from each panel. This would bring the waist in tighter when tight-laced, giving the waist more definition. After doing this you may have to readjust the seams a little bit so the sides are the same length.

I used the leftover black coutil from my Black Corset, Beetle Green Trim to be the inner 2 layers of my corset (making this corset have 3 layers total). The silks I used as my outer "fashion layer" would be too thin to hold the bones without eventually fraying, also would not stand up to tight-lacing very well. I needed 4 of each of the 6 pattern pieces to make my inner layers. For the neckpiece I did the double inner layers in black twill instead, this would be less constricting and allow more motion (as twill is much less stiff that coutil), while still maintaining the desired structural stability.

I gave myself 1" seam allowance at the top and bottom of each piece, and 1/2" at the side seams.
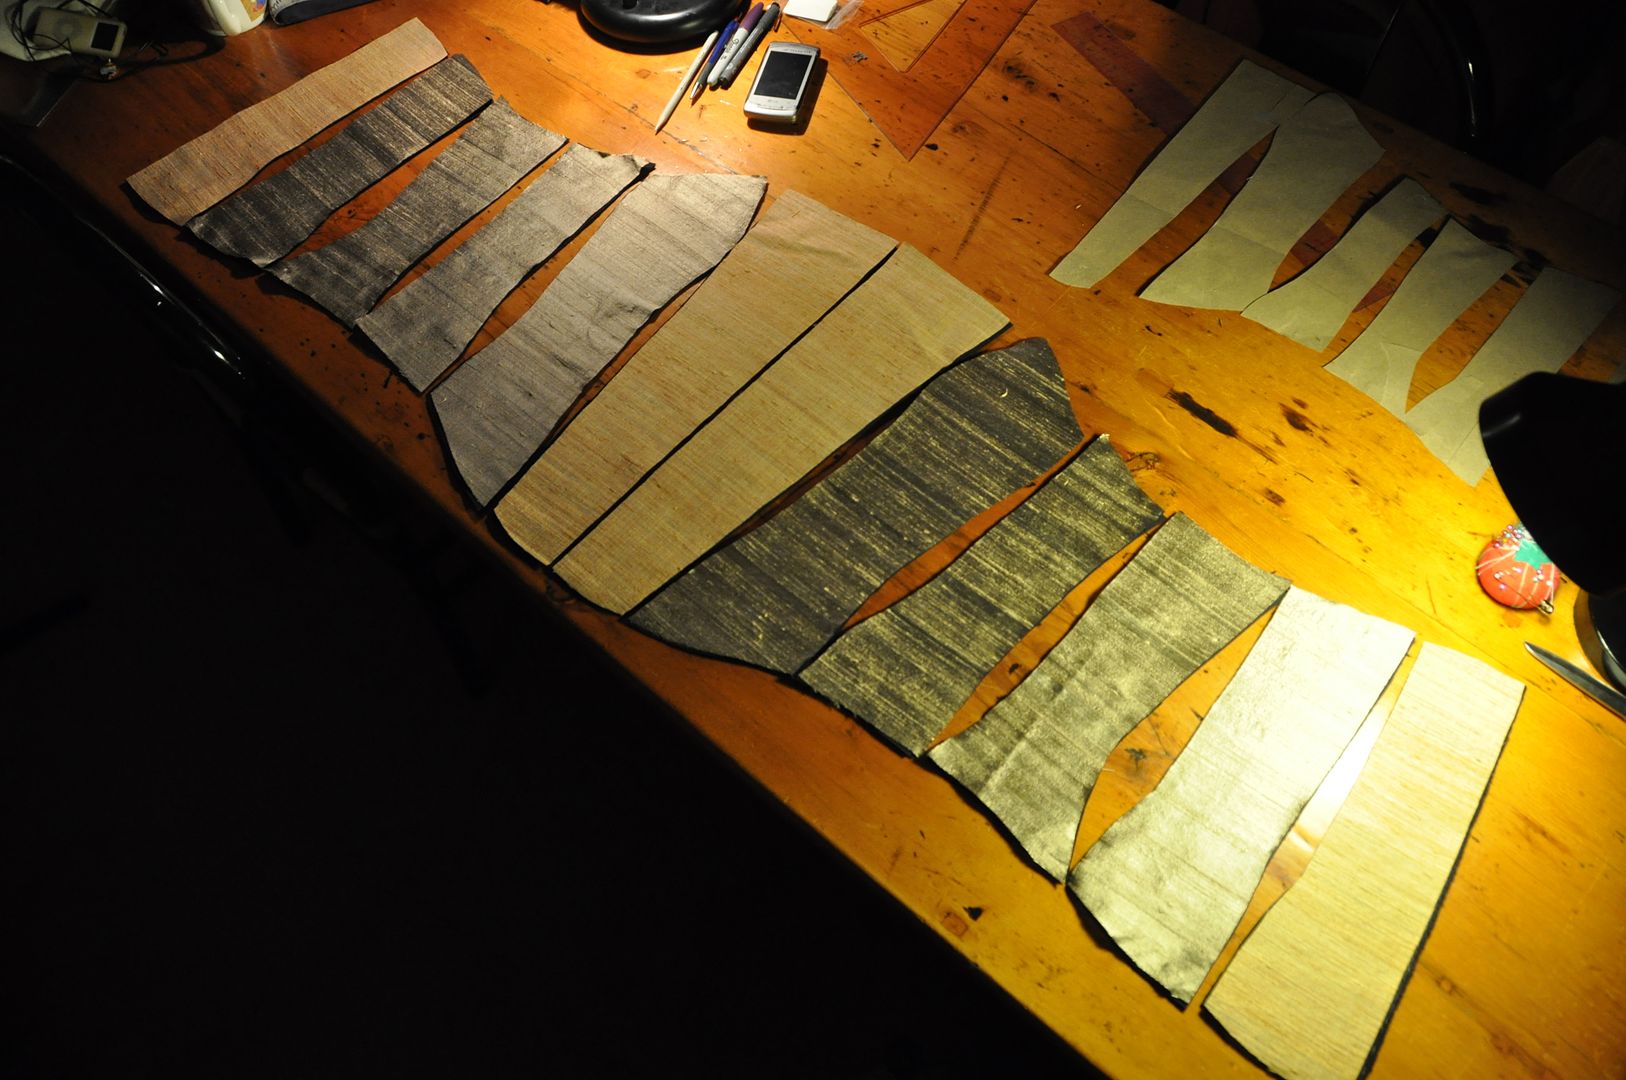
I then cut out the pieces in the appropriate colours of silk. The center front and center back were done in the orange, while the rest was done in gold.

When it came to the neckpiece I did my best to just ensure the grainline was perpendicular to the neck. This meant I got some interesting diagonals on the shoulder/back.

I did my corset supply order from Farthingales to get my various findings. This included my busk, grommets and bones. I also got some d-rings that I didn't end up using... I made sure all my exposed metal pieces would have a matching colour. In this case that meant that all of them were an antique bronze colour. I think this complimented my fabric choices much better than a silver would.

For this corset I used 2 enamel bones for the center back and spiral bones for the rest. Overall there was 10+ meters of boning. The enamel bones don't bend sideways, which is why they are used in the center back, this keeps the lacing more straight/aligned than spirals which are bendy in all directions.

Next I added in the busk to the center panel. You can find out how I did that by reading my Busk Closure Tutorial. Don't worry, you can come back to this. Hahaha
I basted all the layers for each panel together, following my seam lines, and serged the edges (excluding the center back, which was bagged out, pressed and top stitched first). This would prevent fraying while I worked as well as keep the layers from shifting. Then I prepped all the bone casings. For the internal bones (the ones next to each side seam) I drew out my lines carefully on the fabric and then machine stitched them. For the external suede cases I cut and measured the strips, then top stitched them on with the raw edges folded under.
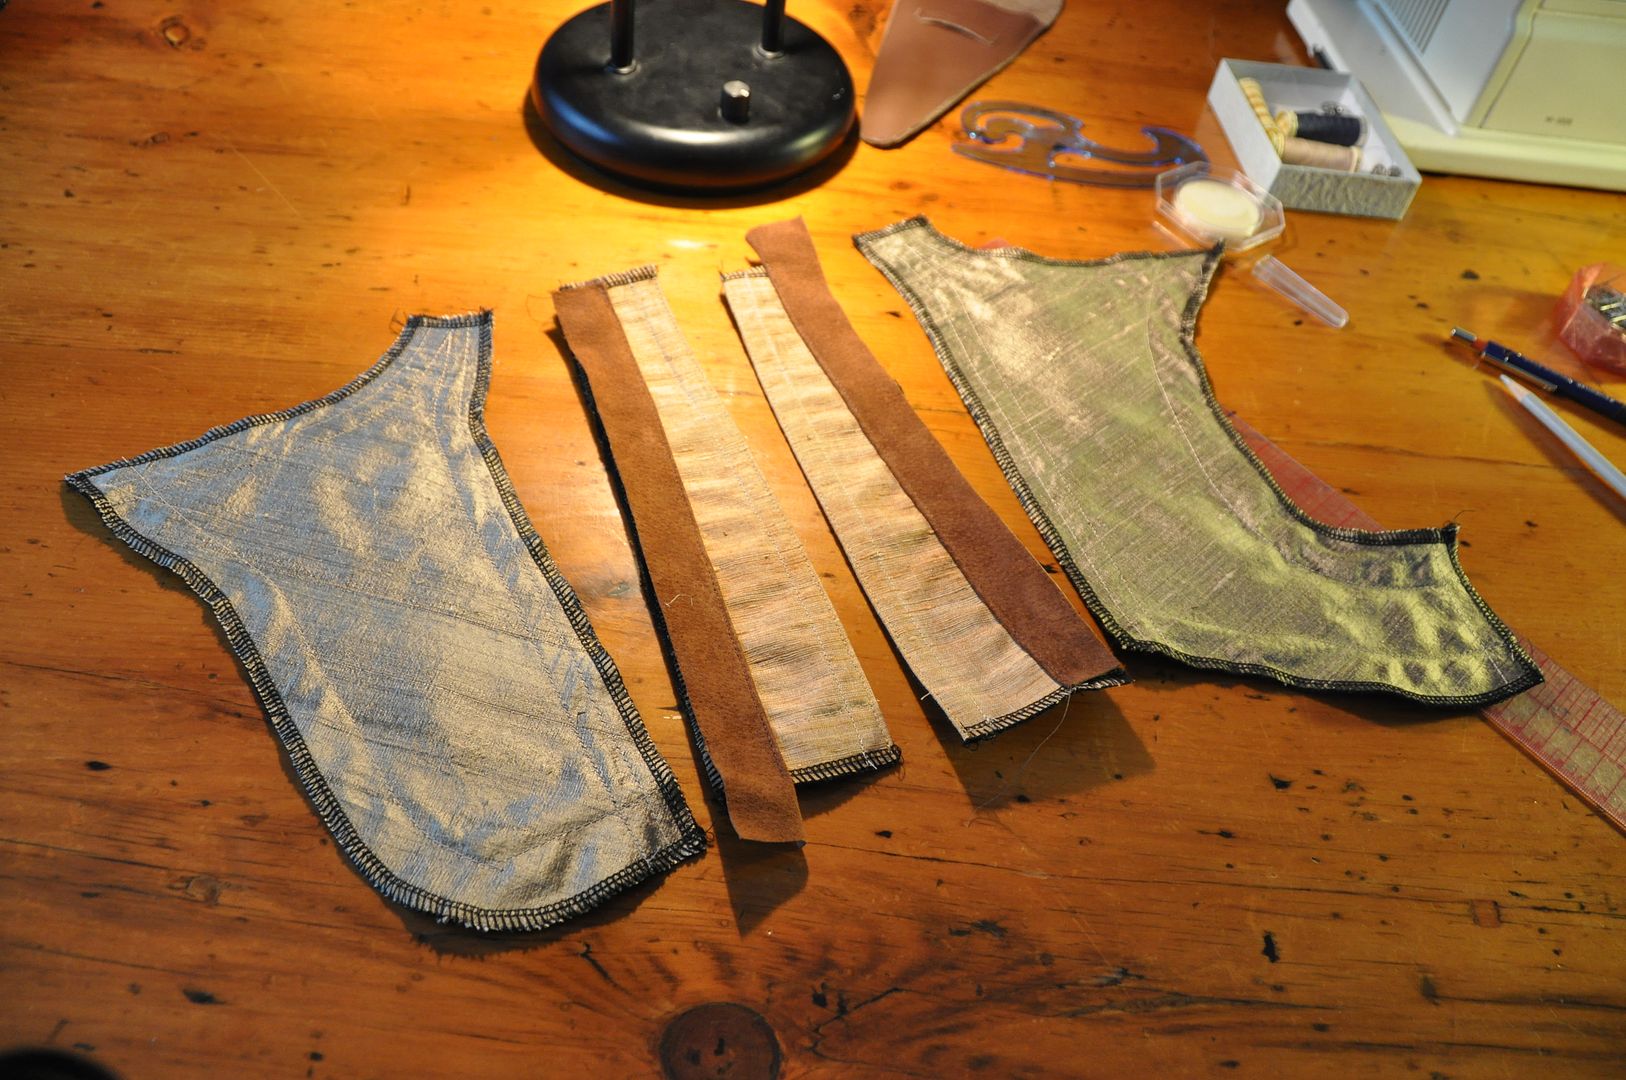
I sewed the side seams on every piece except the center front and back. I made sure to carefully line up my basting stitches and edges and waistline. I didn't want to overshoot into my bone casings anywhere. The most important thing here is patience and accuracy. It will make for a cleanly finished corset.

Next I top stitched the suede strip that would mask the colour transition (orange to gold) on the center front and center back panels. This was to make the transition look less jarring. On the neckpiece this suede strip was sewn into the seam, because the layers were thin enough. On the corset though, this would be impossible because the 4 layers of coutil, plus 2 layers of silk AND a suede layer would be too much for just about any sewing machine. So instead I left it flapping while I sewed each of those seams, then I carefully folded it over and top stitched it in the ditch so the machine wouldn't have to go through the seam allowance also. To say this was challenging is an understatement. Haha

Once the pieces were all together it was time to prep and insert the bones. This process actually took quite some time. It is easiest to cut, tip and insert each bone before moving on to the next, otherwise you are likely to get them mixed up. As a general rule you should cut the bones to be 3/4" shorter than the finished case, this allows a little more room for them to bend so they wont bust out of the casings when you try to sit. (Trust me, sitting is by no means overrated!)

In terms of cutting spiral bones, I highly recommend investing in a pair of aircraft cable cutters, which you can pick up at most hardware stores (though the salespeople are likely to be confused as to your intended use of that tool...). They are the best thing to cut through the bones, normal wire cutters just don't work very well (it can be done, it's just a lot of effort). They cost around 20$ though, so if you are planning on making multiple corsets it's a good investment, if not you may want to look into pre-cut bones (which are more expensive than buying a roll of boning). Figure out what works best for your budget/your project!

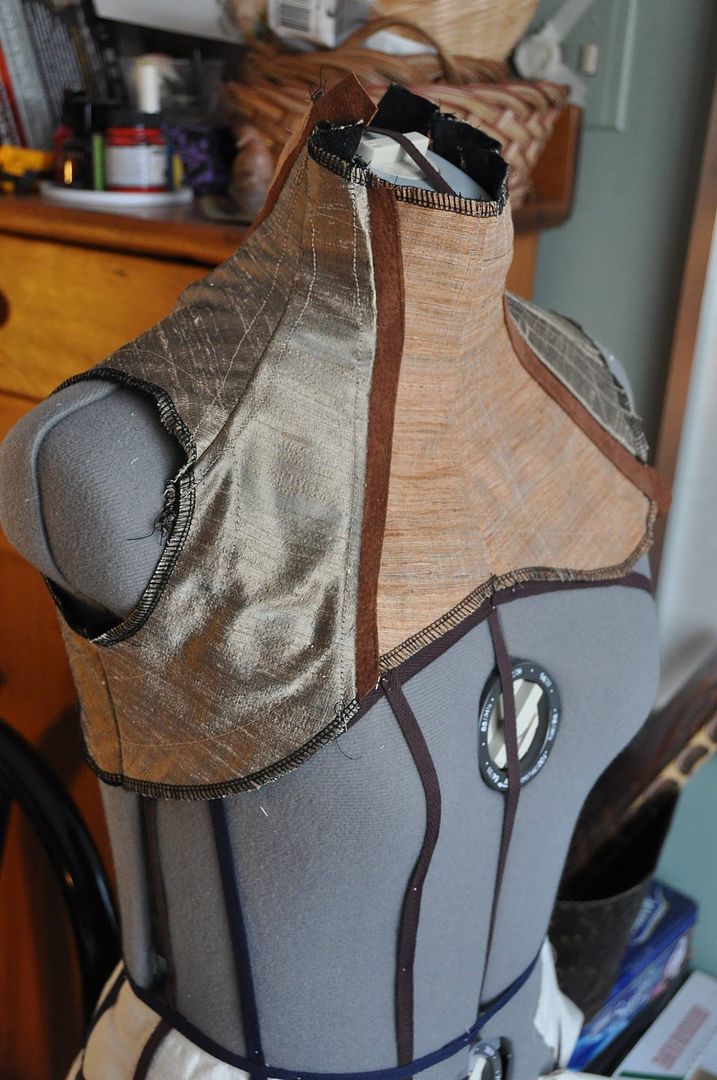
Now my corset was all pieced together (pictured left I still needed to top stitch the bone casing edge on the CF panels). Below you can see what it looked like after I top stitched it. You can see how it masks the colour transition perfectly!

At this time I also pressed the inner seams open & flat, then cross stitched them down, this reduces bulk on the inside and makes it more comfortable to wear (because the seams wont get folded over weirdly when you put it on and be uncomfortable).


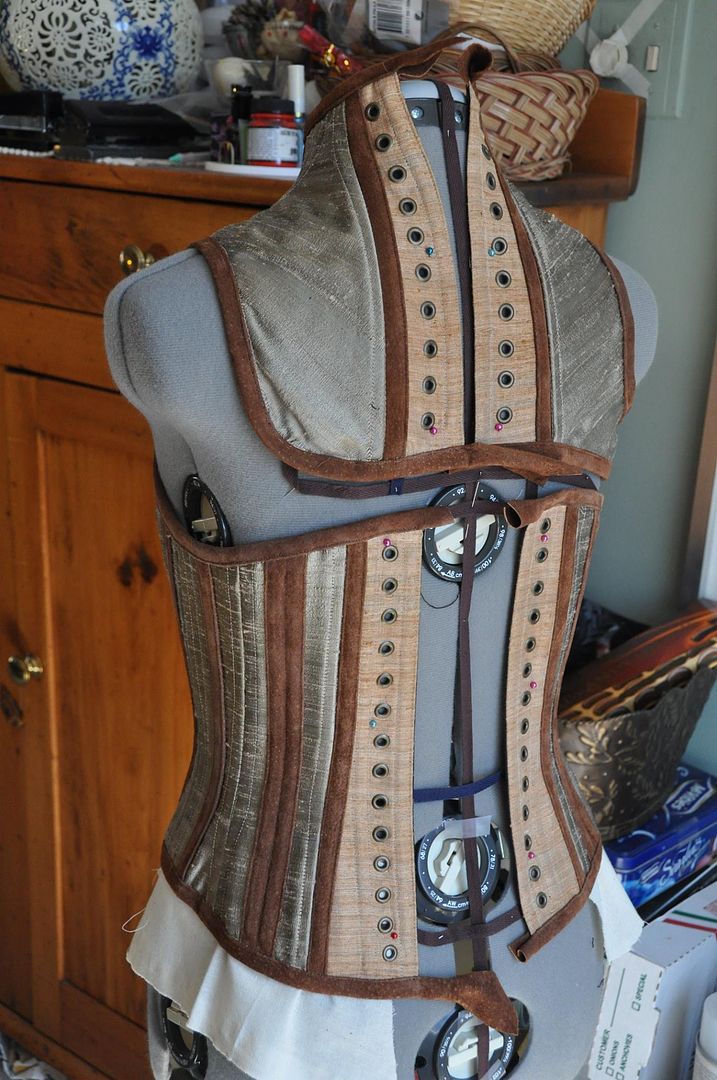
Next was trimming and grommets. The suede trim on the corset was much easier than that on the neckpiece, as the curves were less extreme. Suede has a lot of stretch to it, but it is not nearly as kind as bias tape in that respect. So there are some places under the edge where I had to fold/gather the trim to get it to work. But it looks great on the outside! So that's all that really matters. I tucked the ends under and hand stitched them down.

The grommets I put in using the grommet press I have access to at school. It makes it much easier I had a record breaking zero failed grommets! (Not planning on buying my own press though for reasons of expense.)

The last thing I added (besides the laces) was a buckle under the left arm. Again I picked a buckle with metal that matched the colour of my busk and grommets.

I'm sure I will be wearing this to many more events!

Sunday, June 1, 2014

June Update

Hey all! After the hectic lead up to CostumeCon 32 and Anime North I had to take a bit of a break from sewing. Feeling a touch burnt out. Still making more things this summer, but hopefully a little less intensely than the last 3 months.

Spent the last week or so catching up on creating my blogposts, which takes considerable amount of effort sorting through hundreds and hundreds of progress pictures--especially since I started my Forest Guardian costume last August, so I have to go that far back to find pictures... But I have returned to my regular tuesday posting schedule with one slight difference: I will be adding an extra post the first Saturday of every month! (Because otherwise I will still be posting about AN this september.)

I am happy my Forest Guardian is complete, and am hoping to do a photoshoot in the woods sometime this month, as I have almost zero pictures of this from the actual convention. If you want to hear more about Anime North and my 10th Cosplay-versary, I have written up a detailed account of that, and if you missed my Masq entry from AN you can find it here!


I received the pictures from my shoot with EleventhPhotograph at Costume Con! We shot my Steampunk Corset ensemble in the hotel lobby. I really love how this outfit turned out! An in-depth look at this is coming soon! (Meaning this tuesday, so look forward to it!)
In other news I made a Cospix account which now has finished pics of all my costumes. Note that this only includes costumes that I have made for me at the present, I have yet to add any of the ones I have made for my sisters. I will probably be posting those sometime this month, as there is not that many of them and then it will be complete. I am pleased to say that the interface is super user-friendly (unlike cosplay.com which was far too complicated), and a lot of people have been switching over to it. I don't know if it will be the next big thing that everyone uses, but at the very least with this it should be easier to look at my collection, rather than going through years worth of stuff on my blog (seeing how I don't have a real website). Feel free to check it out!

Those of you who follow me on facebook already know that I did not finish my Vaporeon costume in time for Anime North, however I do plan on finishing it this summer (at a more leisurely pace) and competing it in the Masq next year.

After a couple smaller projects in the next few weeks, I am probably making something new for Otakon in August, but I am not planning anything elaborate and still haven't narrowed down my choice yet...

In other news I am taking 2 summer courses this year, one of which is an advanced prosthetics makeup course! Lots of casting and sculpting coming up this summer. And I am going to have to recreate a character from a novel/play that hasn't been done in a movie. I have no idea what character yet, but now that AN is over I might have time to read some books.

That's all for now!

Wednesday, May 28, 2014

Anime North 2014 Retrospective - 10th Cosplay-versary!

Hey guys! So I've been on a bit of a nostalgia trip recently because this was my 10th year attending Anime North. Easily my favourite convention of the year! I had a really great time this past weekend with friends and family! It was good to see everyone again! I finished 3 costumes for the weekend: Sakura, Isabelle, and Forest Guardian (previously known as Elven Archer). The weather was altogether pretty great (though I was hot and dehydrated on saturday...) and made for a fantastic weekend.

Friday: I got to the con a bit late (though not as late as last year) and hung around for a bit wearing Alice with my sister as Sakura. I looked around the Crafters' Corner for a bit and helped a friend set up her table before heading over to the Doubletree International Plaza for the friday night Workmanship Competition. I entered Sakura for this event, which was new to the convention! You know things are serious when your judges include Merlin, Sailormoon, Catwoman(?) and some sort of were-rabbit? (Competition results were announced sunday!) I had a nice dinner at Swiss Chalet with the family before heading home for the night.

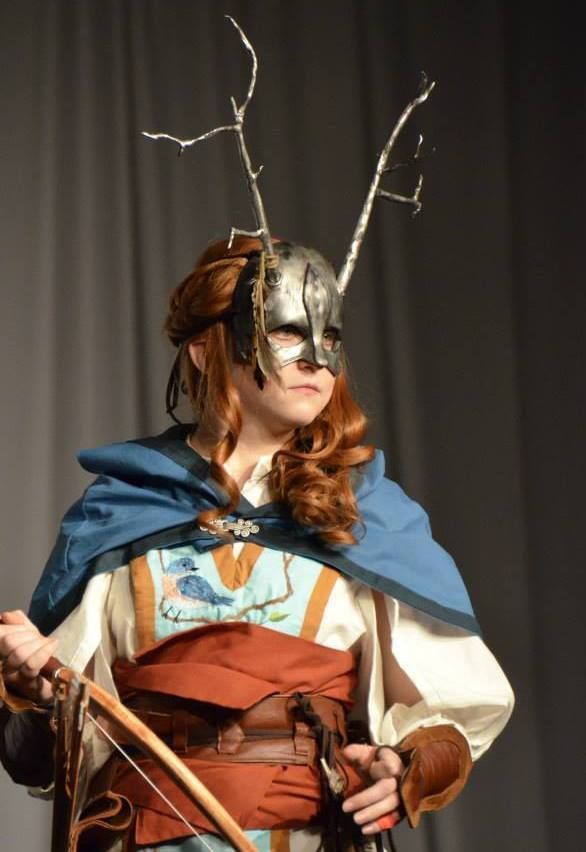
Saturday: After some major disappointment with failed prosthetic ear (the other one worked fine?) I decided that I had worked too damn hard to let that stop me from entering Masq this year. Rather than entering as "Elven Archer" I had impulsively written "Forest Guardian" on my form the night before, which worked beautifully for me! After an initial hiccup with entering the Masq, my mum swung it for me (ex: was very persistent).

It was a bit too hot with the amount of layers I was wearing so saturday was a constant quest for water. Probably my only complaint about the con this year was that they weren't quick enough with refilling the water stations in Artist Alley/Crafters' Corner area so there was a good couple of hours during the hottest part of the day where there was no access to water in that part of the building... Mostly I spent the day walking around and posing for pictures. Though most people were confused and couldn't figure out what show/videogame I was from--answer: none! This is my original design!

After food I went to the green room for the Masq and did my photo and judging portions. My judges were Feather Weight and the were-rabbit. They were most impressed with my embroidery. I was the last entry to present, which you can check out here!

Congratulations to my fellow competitors, your costumes were fantastic and your hard work really showed! I was most impressed by the level of quality in the Novice category and a certain lack of Artisans?! If you have time, I highly suggest also checking out the rest of the entries here, or at the very least take a look at the highlights reel by Dan TheVideoNinja. Special thanks to Alex for doing my audio again this year (I have no idea what I will do next year when you are in Japan??) she found me some great music from Cirque du Soleil's "Totem" CD.

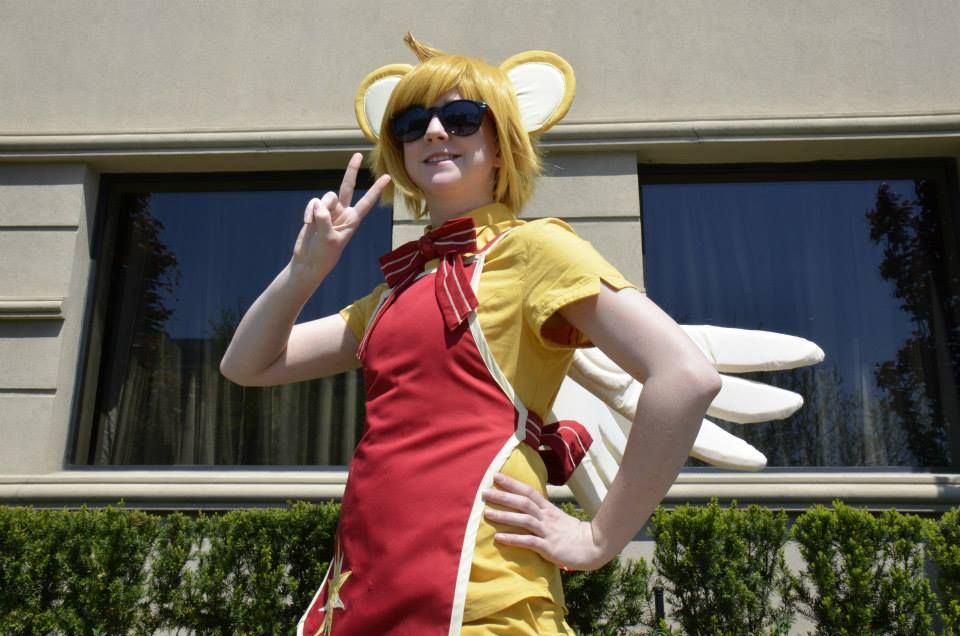
Sunday: Instead of spending my whole sunday trying to rush finish Vaporeon I opted to wear Kero! It was much cooler to wear around (having been originally designed to wear at Otakon), a great casual cosplay that received much love with the AN crowd! The day was mostly spent hanging out with friends and shopping. In the afternoon I attended the Award Ceremony. I won 4 awards this weekend! A Hall Costume award each for Isabelle and Kero. I won "Best Accessories: Master Division" in the friday night Workmanship Competition for Sakura, and "Best Embroidery: Master Division" in the Masquerade for my Forest Guardian. Super happy! Special thanks to Alli Sosnoski for her help on the Sakura costume and Harriet Lee for her work on Vaporeon (even though it didn't get finished).

I saw so many friends this weekend that I couldn't possibly mention them all, but you guys know who you are! (Unless you got amnesia in the last 2 days) You guys rock and made my 10th AN that much more memorable!

10 YEARS OF COSPLAY!

I spent the past couple of days putting together a collection of pictures including all of my Anime North Costumes from the last 10 years. So without further ado lets take a journey back in time! (If you don't want to read my sappy nostalgia commentary, feel free to just look at the pics, which are also posted on facebook.)


So to start, here is a collage of all my Anime North costumes from 2005-2014. (The only one missing is Alice from this past weekend.) If the me from now could talk to the me from 2005, oh what a conversation that would be... Never would I have dreamed that one day would spark a hobby that would change my life! I discovered a talent I never knew I had. ;D And yes, there were at least 6 years of costumes before I started Among Bobbins and Thread!

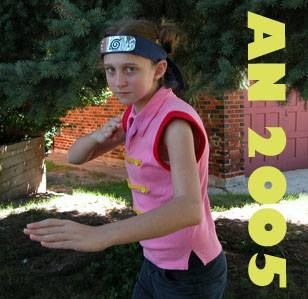
My very first costume my mum made for me! I was Tenten from the popular anime series Naruto. It was made up of modified clothing items. But we splurged on an official headband! I only attended AN for 1 day, but I wore it again to Fanexpo (then known as CNAnime) later that summer. I was accompanied by my older sister who was dressed as Rock Lee. :D So youthful!

Team 8! My favourite team in Naruto-verse (except for perhaps the Sand-squad, which we would be cosplaying later that summer.) I put up with an unbearably itchy low-quality wig for several cons in this costume. My mum is the amazing woman who took the time to craft all these cool costumes! Some pieces were from the closet, others made from scratch.

In case you aren't starting to see the pattern, we too started by cosplaying from mainstream anime and kept this up for the first few years doing several different groups from Naruto and Bleach. Our Division 11 group was our first Masquerade entry ever, for which we won a presentation award (the "We <3 Katamari Award" if my memory is correct.) Mike was added to the group as our Kenpachi, which perfectly complimented Elanne's Yachiru. Mum made all of these from scratch with several billion meters of black broadcloth! Power to her! We also wove our very own (very painful) sandals!

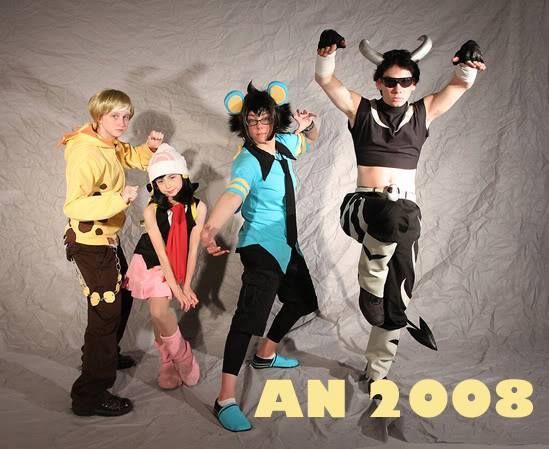
Pokemon Gijinkas (+Pokemon trainer)! I think this costume set was in part decided by Elanne's love of Pokemon. We entered our group in the Masq and won another presentation award for our dance skit (which is amazing because judges typically hate dance skits!) Pokemon on Broadway (or Dawn's Secret Hobby)! Another set of costumes masterfully made by Mum. :)

The first and last time we got the full family on stage! My fifth Anime North. We had attempted to finish the King of Red Lions boat for this convention, but did not get it done. On the other hand, Mike's Phantom was pretty darn impressive. We won a workmanship award in the Journeyman Division.

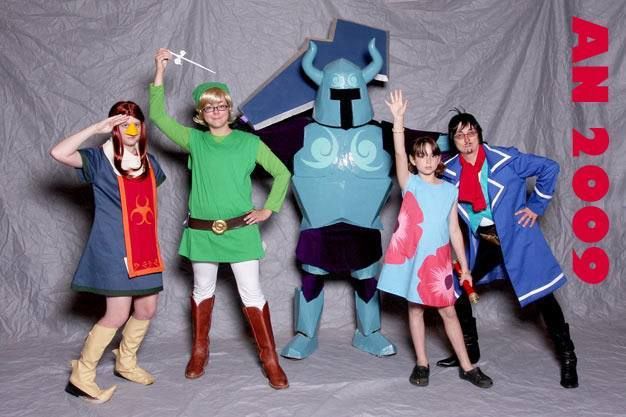
 Alex and I finished the King of Red Lions this year which is probably still the cosplay achievement I am most proud of. That year I also wore my first costume almost entirely by myself, which was Kiki, from Kiki's Delivery Service (first worn to Fanexpo, the previous summer!). :) In the Masq we won a workmanship award for our crazy awesome boat and I got a Props award for my Kiki costume.

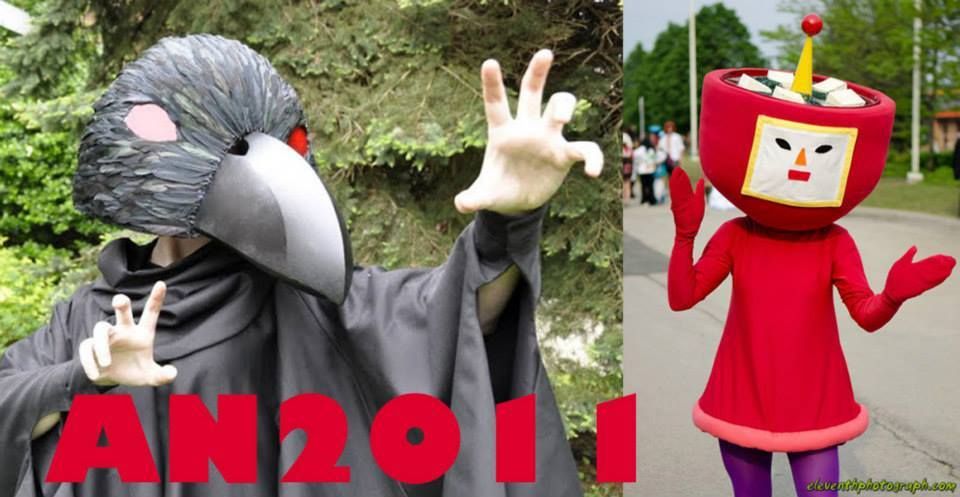
My "Crow Soldier" costume from the less well-known series Princess Tutu was fun to make and wear! It was my first experiment in putting lights in costume (dollar store flashlights!) and it was a piece I used in my Ryerson Theatre School application portfolio. I also helped to make Alex's Cousin Miso costume, constructing the outfit while she and Mum made the head. This was the year I began my blog, Among Bobbins and Thread.

Our Katamari group! (minus Jen as Mag) This was a very well received group of costumes. The weather was not particularly kind to us, meaning it was just too darn hot to wear them for more than a day.  I did the majority of the construction on these with assistance from Ian and Alex, while Mum made the Katamari itself. We entered at Master Level due to our 5th member (Mai Sherie Costumes) and won a Technical Achievement award.

Another costume that I am really proud of! I just wish the armour were less heavy and strangulating... The sword was heavy enough that I couldn't lift it properly and it actually became the focus of my skit. Hahaha I won a props/accessories award for this costume, if I recall correctly. I learned how to mold and cast as well as began working with thermoplastics. All I can say is that I will need a long break before I ever attempt a costume with that much bias tape ever again...


My first con where I wore a different costume each day! This was my first year entering solo without any family members also competing in the competition. I entered my first original design costume "Forest Guardian" in the Masquerade and won an award for the Best Embroidery in the Master Division. Several hundred hours of it. I also entered my Sakura costume (made for Elanne) in the Workmanship Competition and won an award for Accessories. I also made an Isabelle (from Animal Crossing) costume for my older sister, which won a hall award, re-wore Kero (also got a hall award) and re-wore Alice. What a whirlwind weekend full of costumes! :D

Hope you enjoyed that as much as I did! Some of those old pics were REALLY hard to find.

Tuesday, May 6, 2014

Wooden Night Table


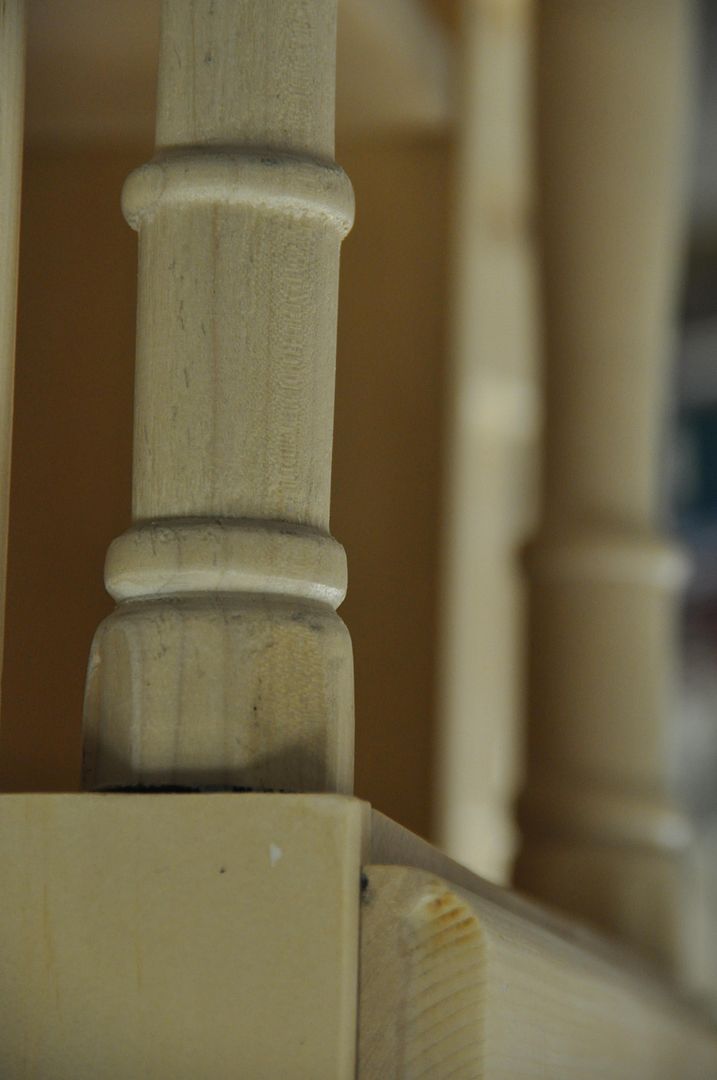
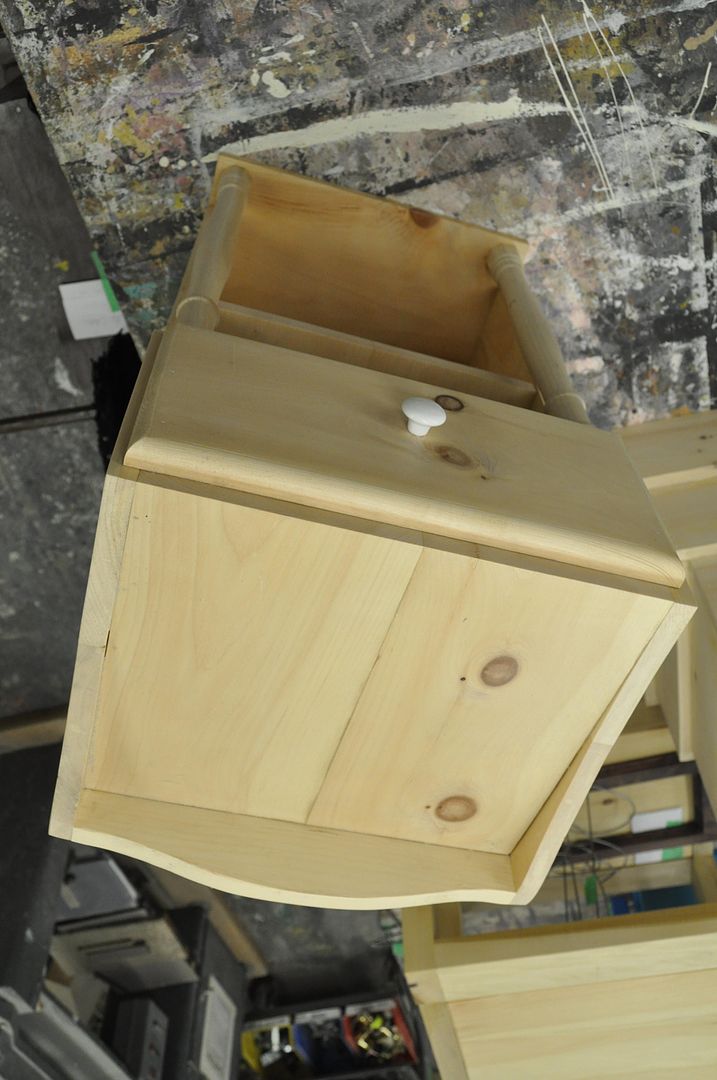
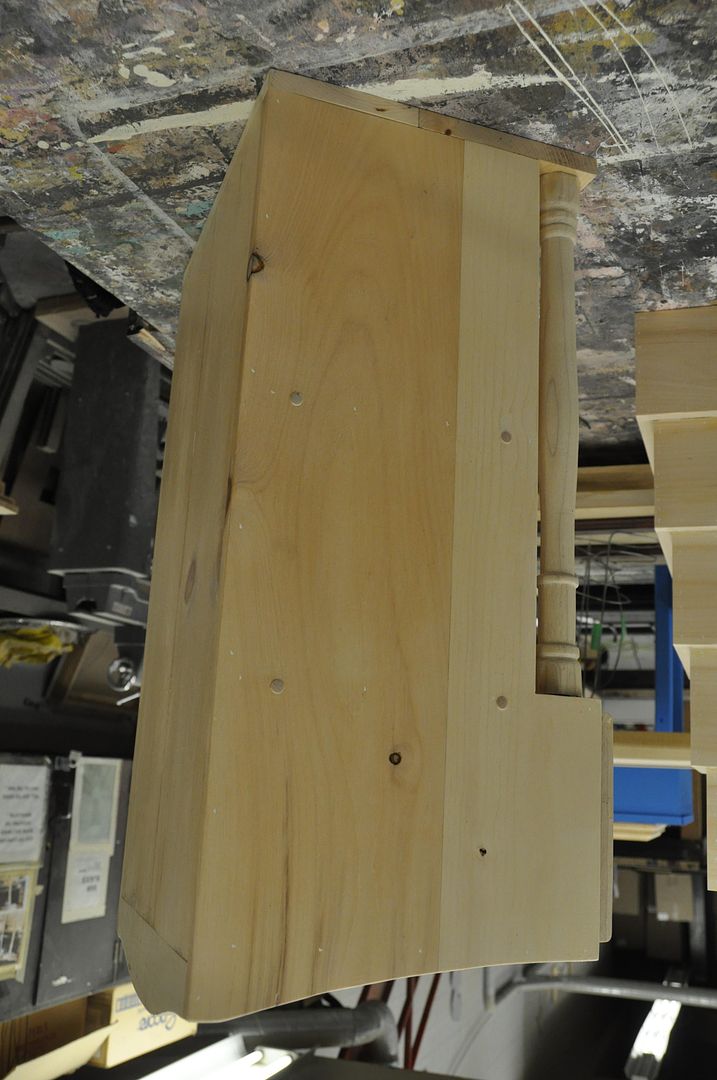
Before we get into all of the costume/fabric stuff for this season, here are some pictures of my final project for scenic construction this term. This piece was done as a commission for a friend of mine, as I had no need for any more furniture in my house. It's my own design, made to fit the needs of my friend: 1 drawer, 1 shelf, with a specific width and height to work with her room. It's made of poplar (except for the inside of the drawer, which is made of plywood.)

The big flat pieces are all biscuit-joined together, and much of the assembly (for the corners) was done with wood glue and a brad nailer with a few carefully placed screws for extra support. The majority of my pieces were cut with the chop-saw or the radial arm saw. Lots of sanding to make the piece smooth and even. The curved edges on the top were cut with a jigsaw. The rounded edge on the drawer was done with a router. It was finished with a clear eurythane coating (two coats with sanding in between). I had a lot of fun making this piece! I particularly enjoyed using the lathe to make the fancy round pieces on the front (which provide minimal structural support, but look darn cool!).

PS: I got an A+ and it's going in the "Greatest Hits" book. ;D