

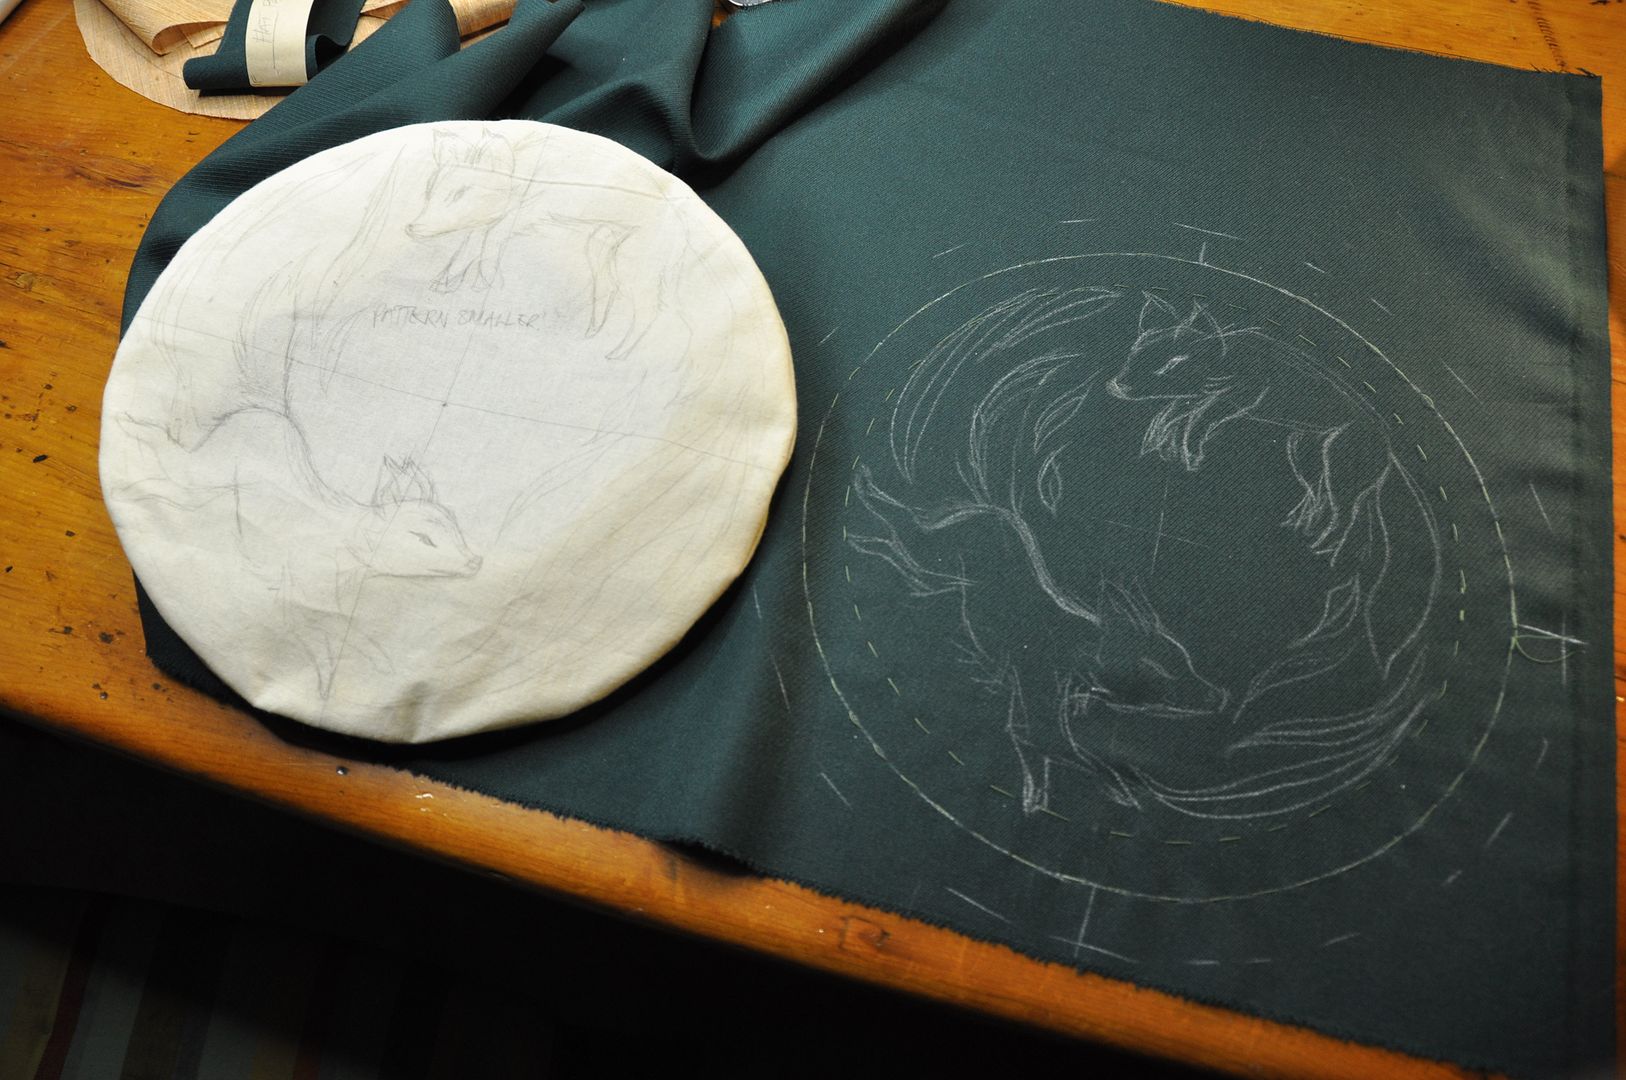
I patterned the hat from scratch. And mocked it up to ensure I liked the style and fit. Then I sketched out my design for the top. Once I was satisfied with that, I moved on to the real hat.
 I first cut out all my pieces. I picked a beautiful green wool for the fashion fabric and the lining is leftover silk from my Steampunk Corset.
Then I embroidered the top. I had to finish my embroidery completely before moving on, so that the back of the embroidery stitching could be protected by the lining and interfacing layers. That is the part that obviously took the longest.

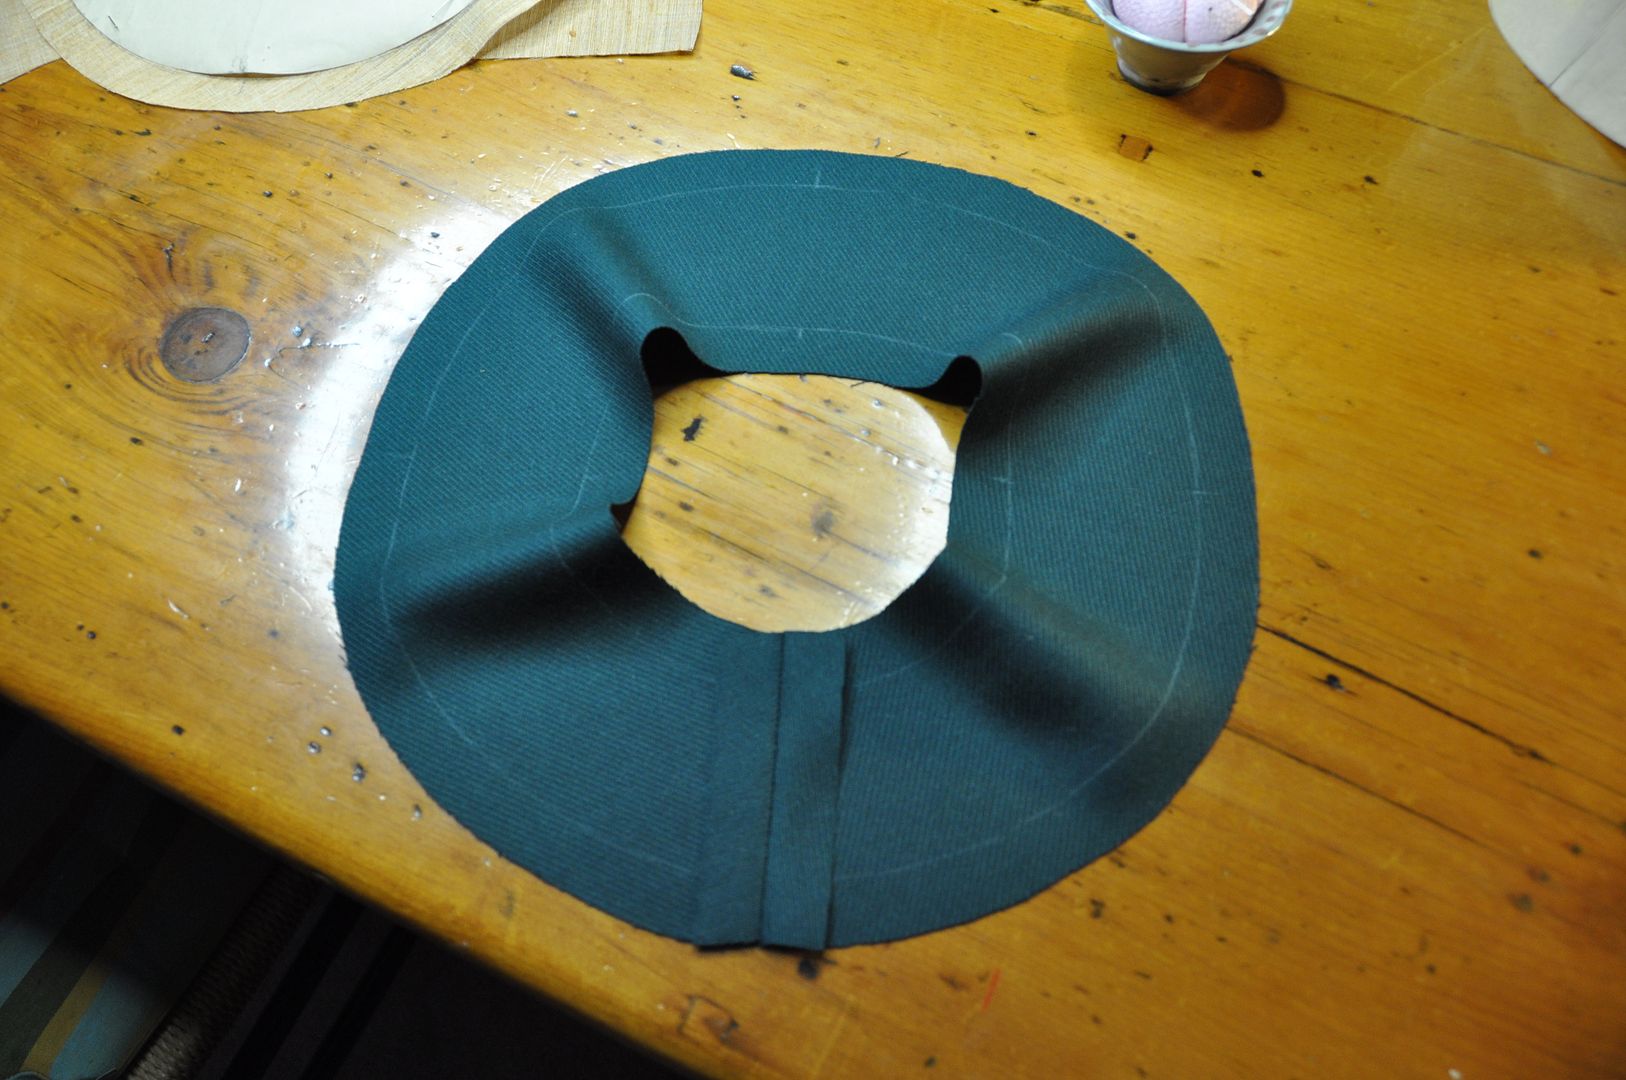
I constructed the hat in the "pancake" method. The tip (top) of the hat has 3 layers: the outer layer, horse hair canvas interfacing, and the silk lining. I basted the 3 layers together.

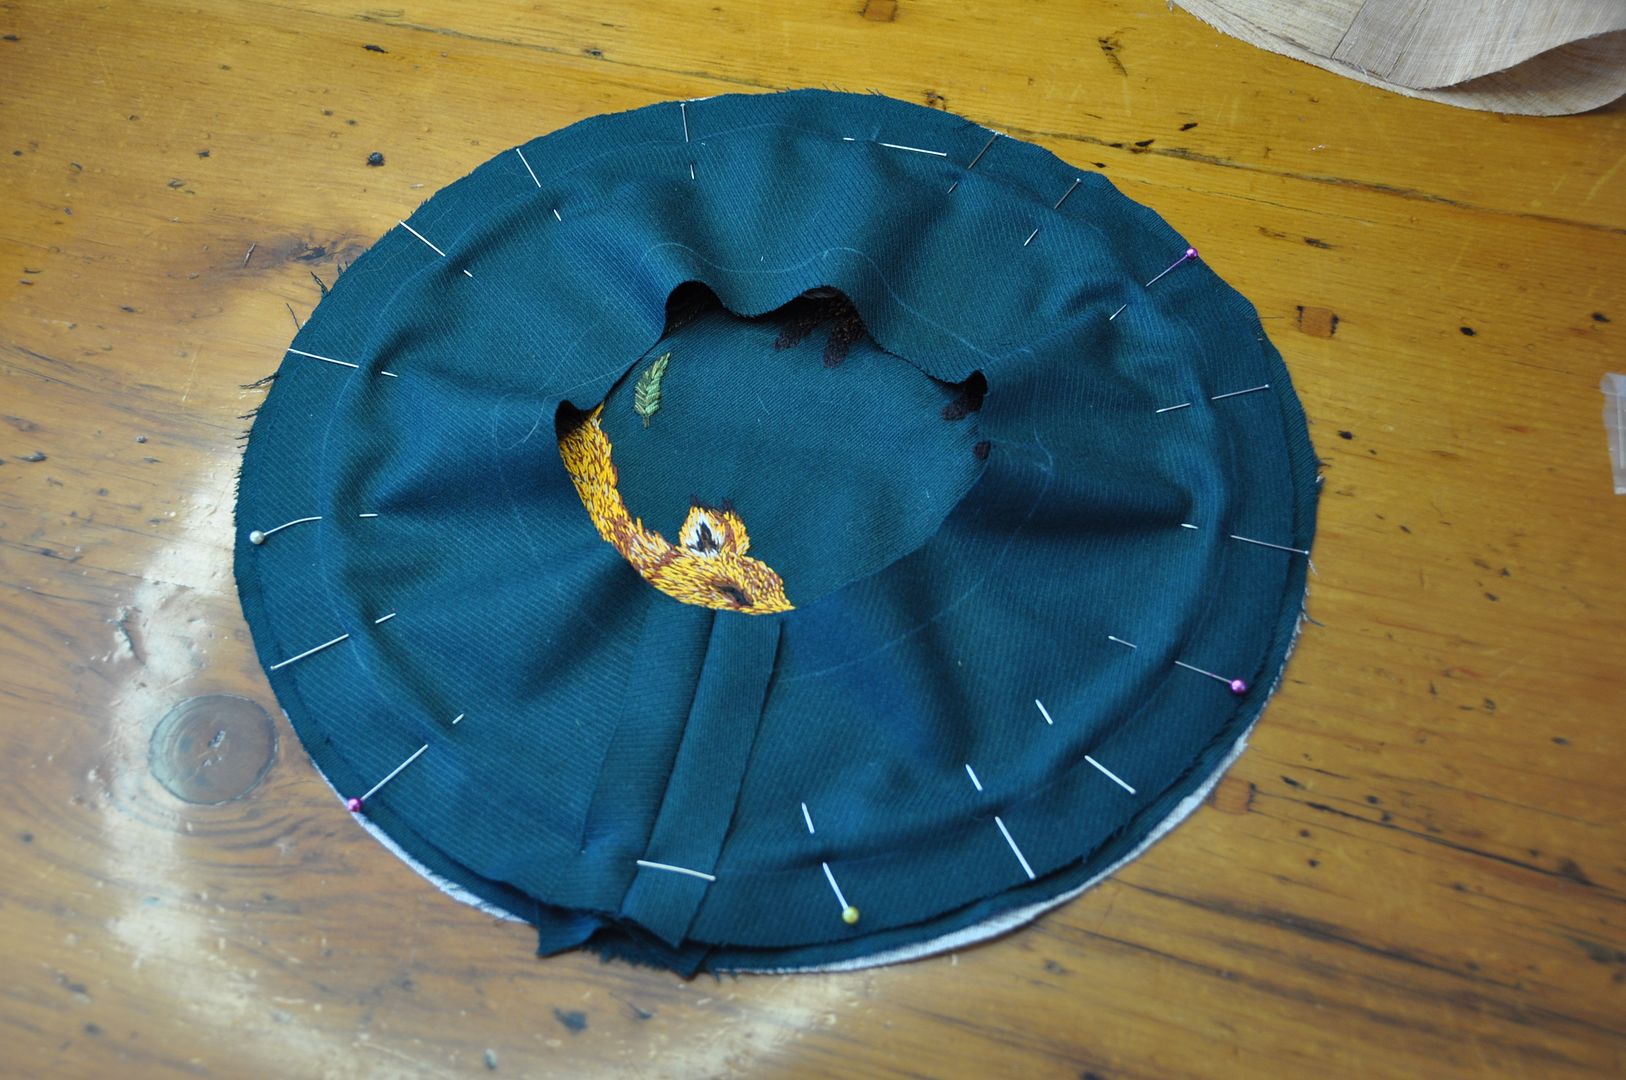 Next I made some piping trim. This was stitched onto the top layer, piping to the inside, and seam allowance to the outside of the stitch line.
Then I basted on my outer layer of the side band. This was basted to the top, on top of the piping trim, following the same stitch line. Then I flipped it over and sewed the lining sideband to the bottom side, through all the layers.
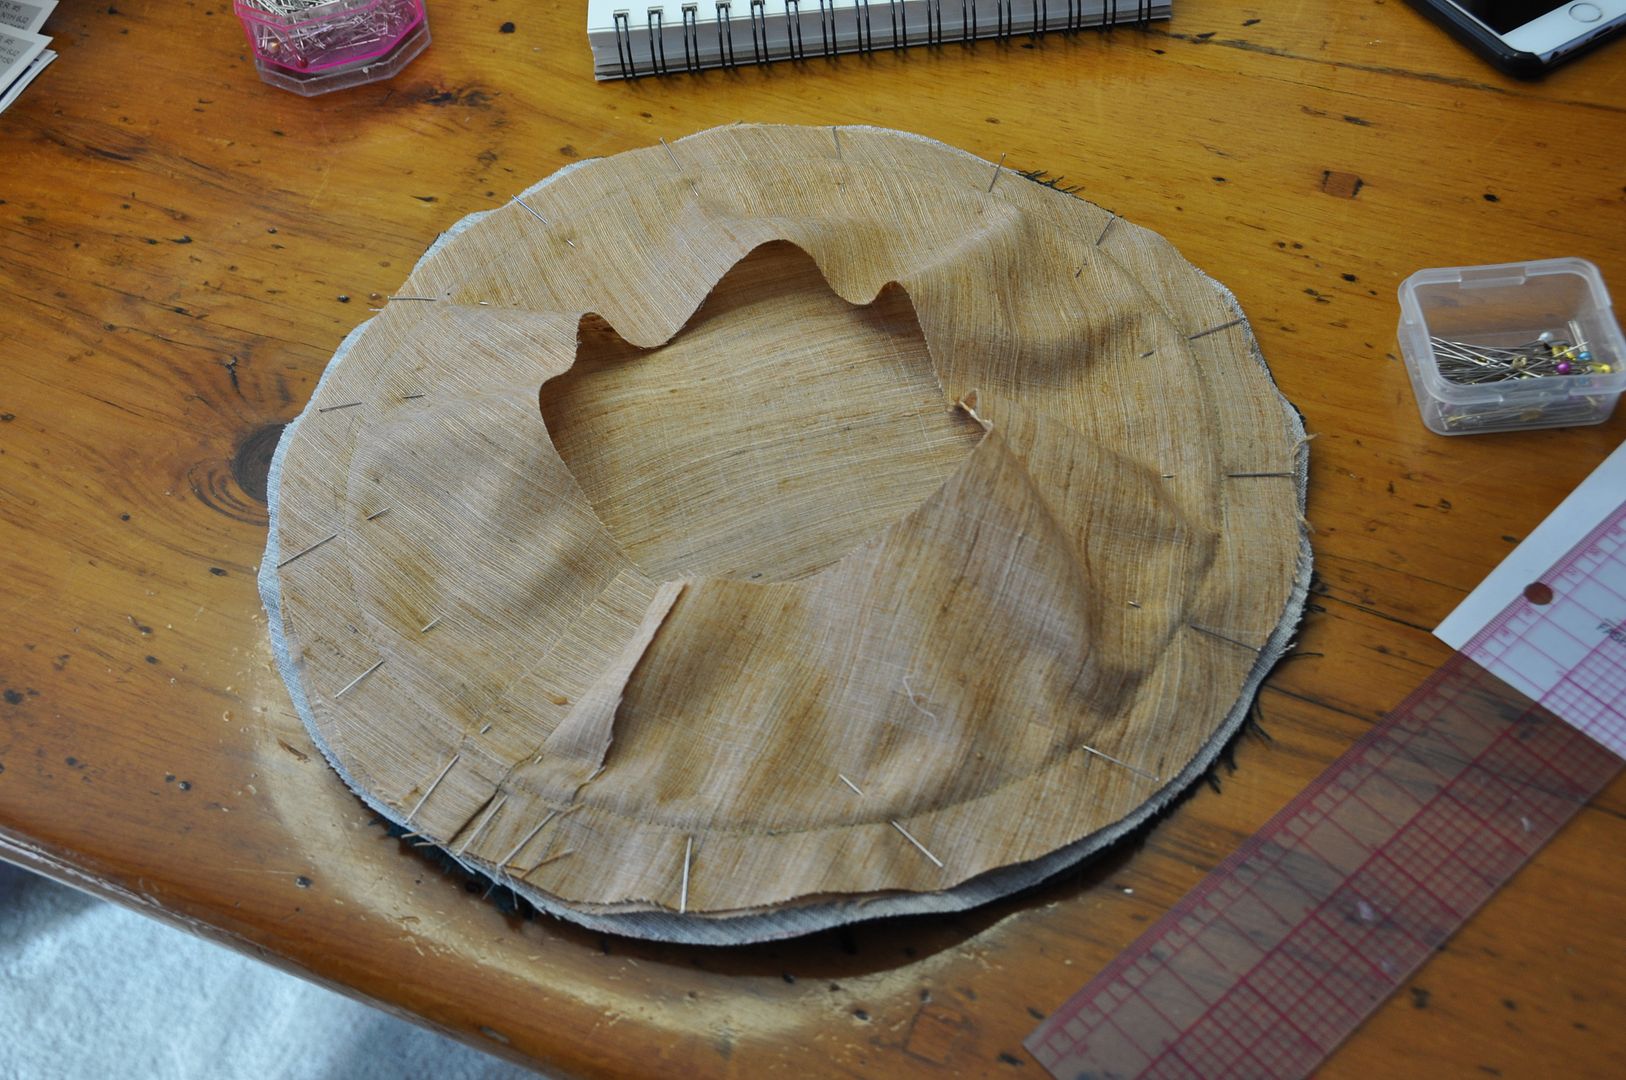
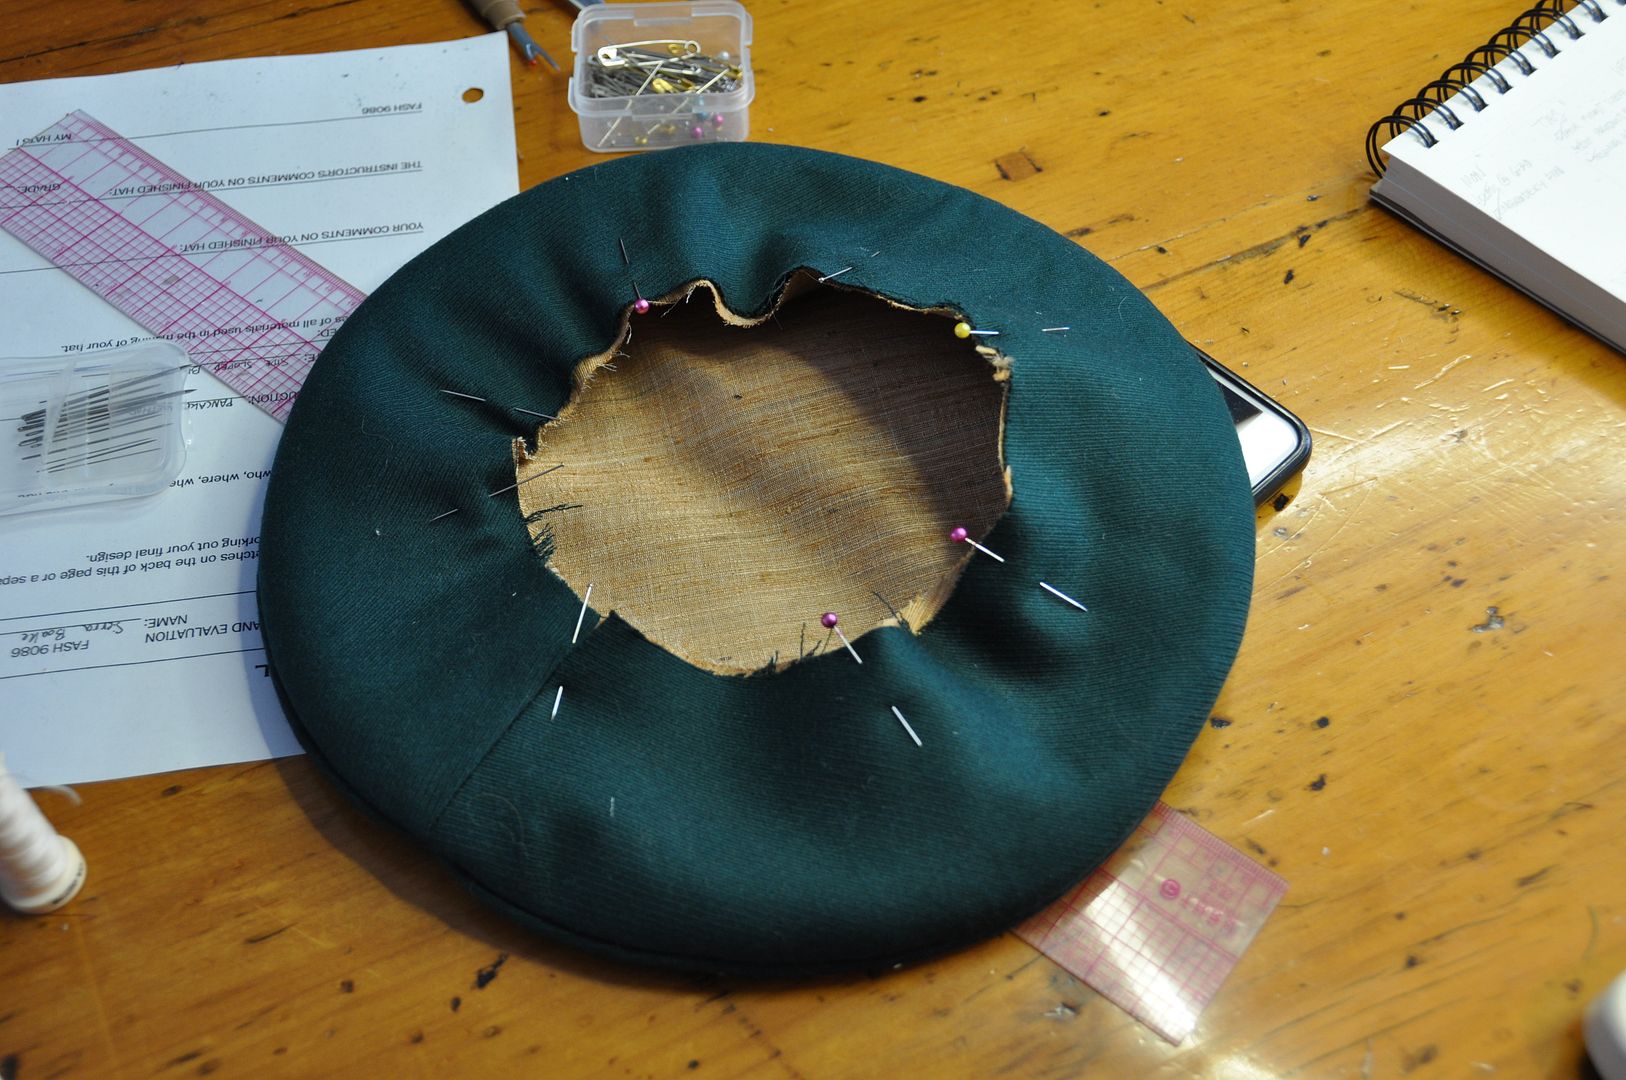 The next step was to properly grade and notch my seam allowances to cut down on the bulk. Then I flipped the outside sideband over to the bottom. I carefully pressed it--without crushing the piping trim. Now the top of the hat was completely constructed and lined, and I could move on to the final part--the headband.
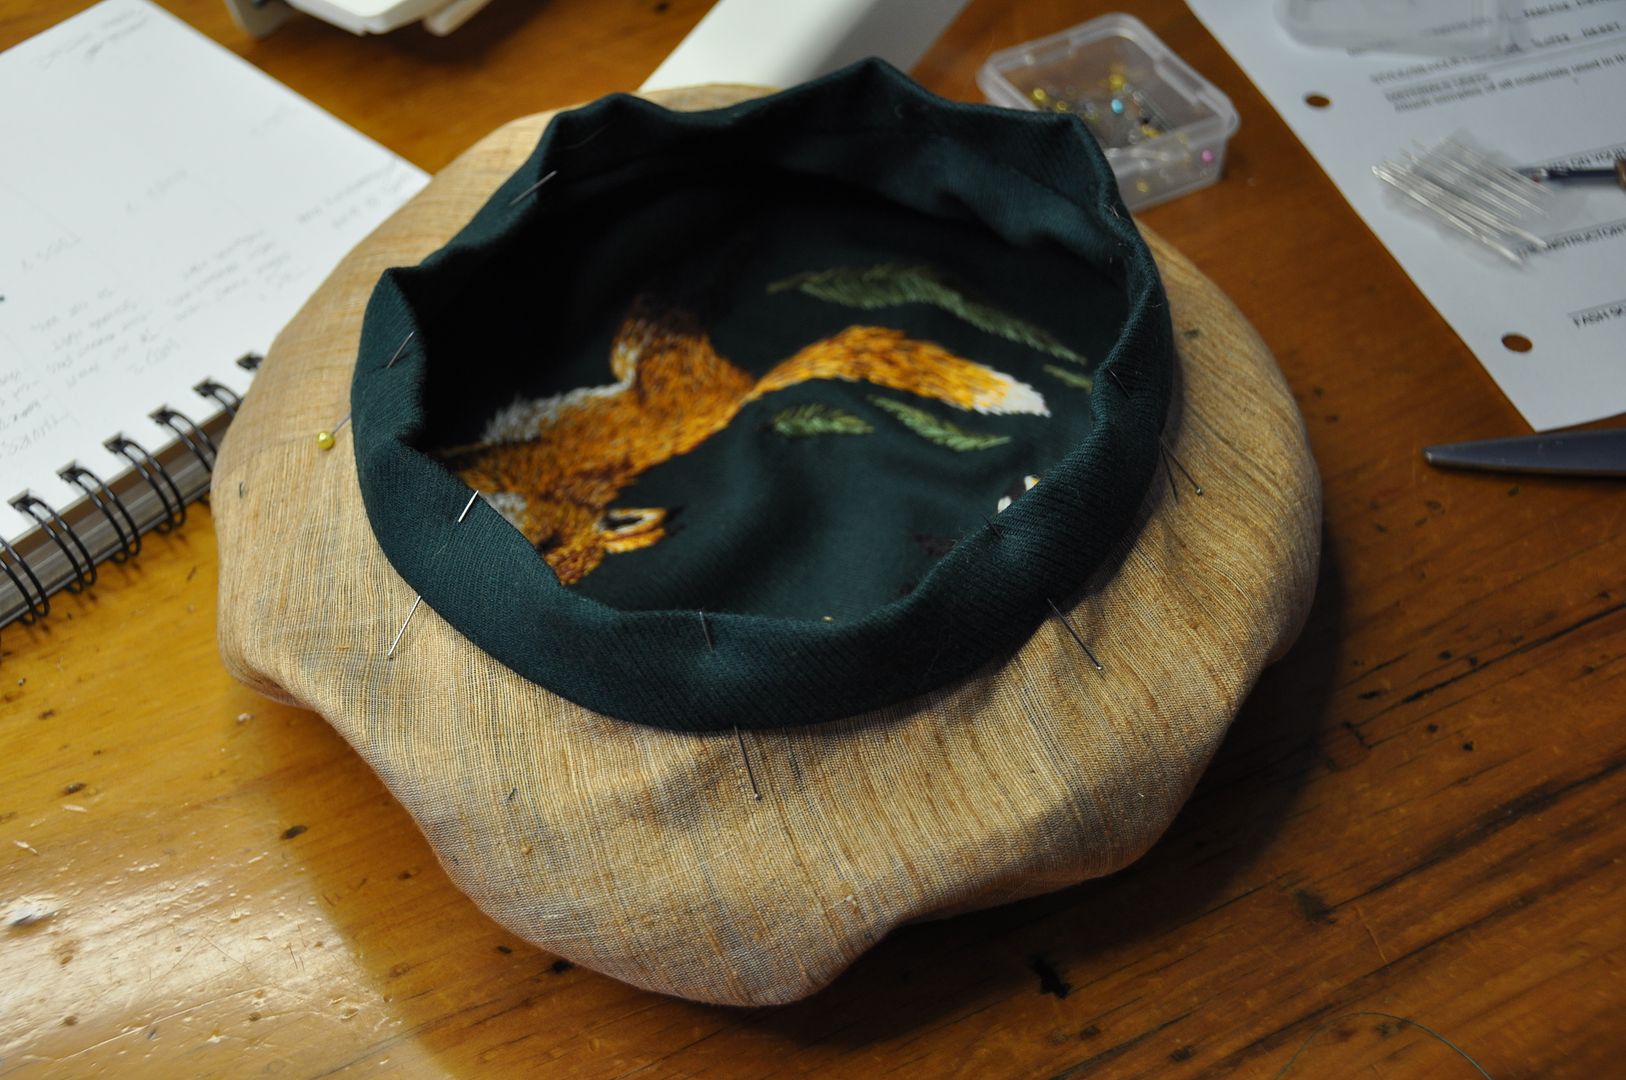
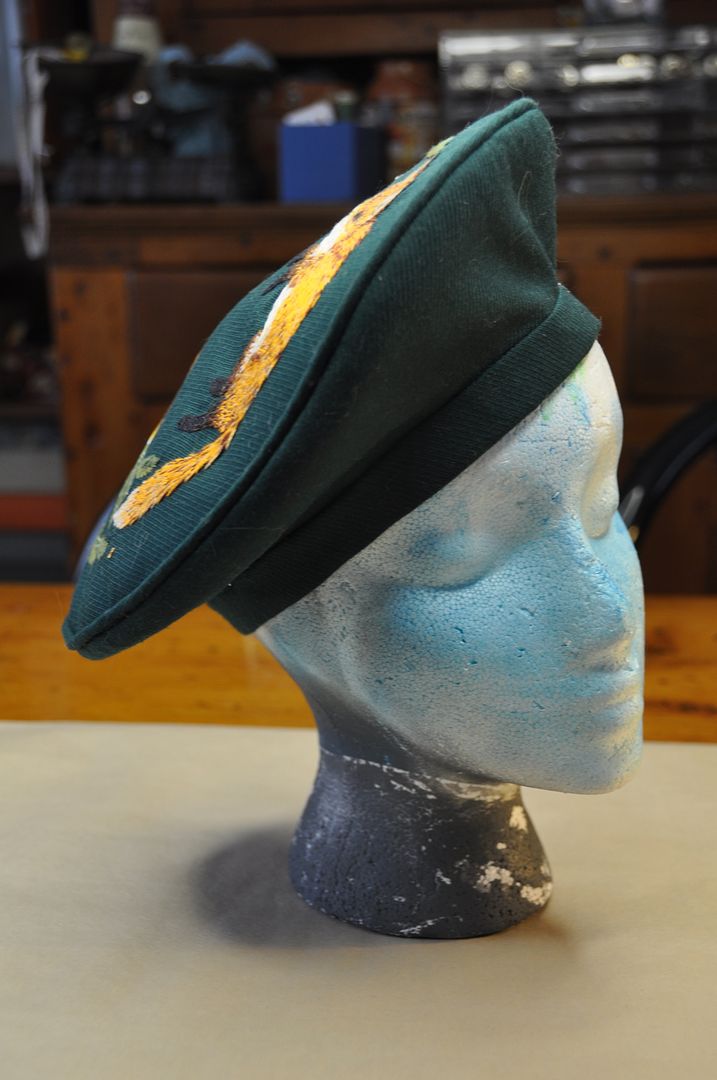
Presto! A fabulous beret!

That hat is just stunning and I hope you get to wear it often! Please post some pictures of you in it so we can see how it sits on your head if you find the time.
ReplyDelete