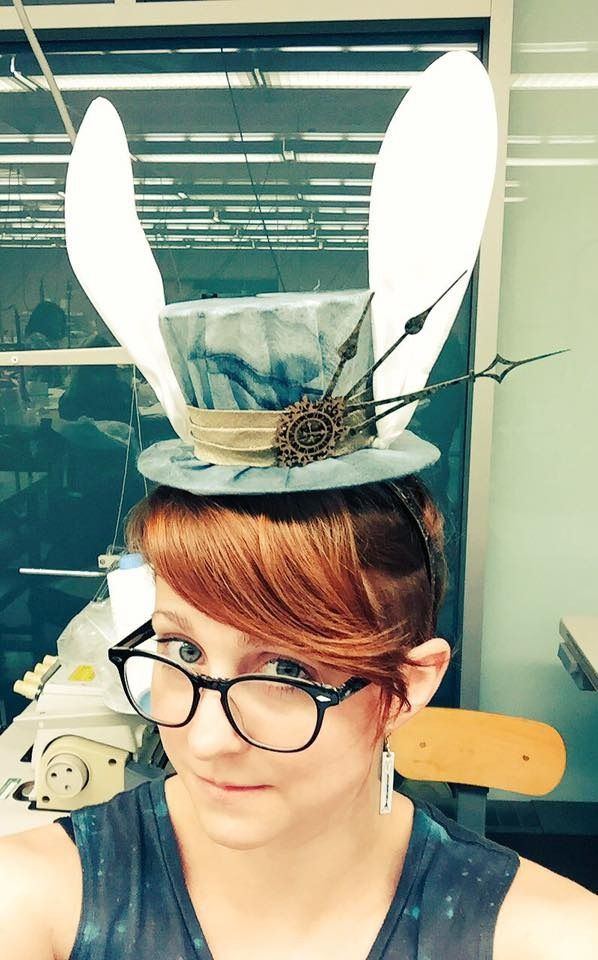
The second project from my millinery class--my White Rabbit top hat!
So the project outline was really open-ended: you had to make a wire frame hat, cover it with sheer fabric and decorate it to represent a theme/character. We were given the option of doing a mini top hat or boater that she had patterns for, or we could design our own hat shape. I picked the mini top hat because I didn't have time to pattern a new shape.
After going fabric shopping to get ideas, I found this really cool sheer blue-grey fabric. It had almost a paper-like quality to it. I thought it might make an interesting take on the White Rabbit. Since I have learned from theatre--stage lights wash out fabrics and make them look whiter, perhaps I could design a white rabbit while hardly using any white?
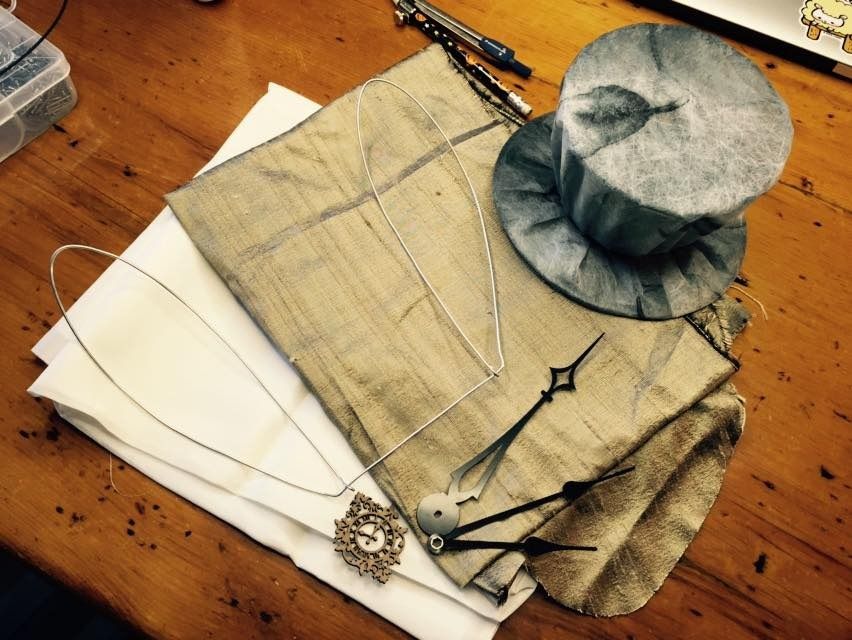
Here's a picture of the finished hat frame on top of the fabric. It shifts from blue to grey depending on lighting and instagram filters. Haha
I won't go into too much detail on how the frame was constructed. All the pieces of wire were carefully cut to length and bent into shape. I used quilting thread to tightly wrap the joints and then strengthened the bond with a mixture of white glue and water.
The brim and crown were not attached until after I covered it. It makes covering the pieces way easier.
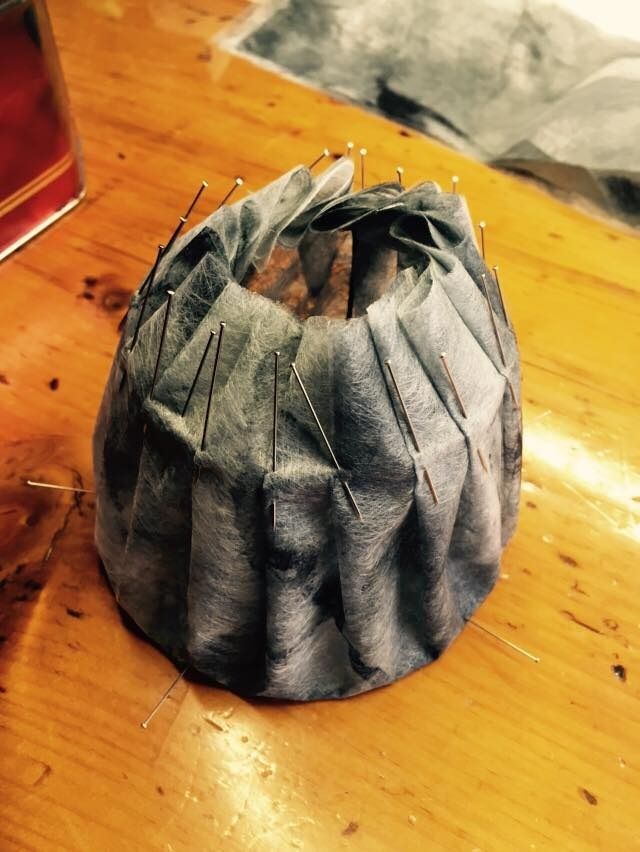
I covered the crown and brim using 2 layers of my fabric. It was fairly sheer with just a single layer and I was worried it would rip. I like that with the double layer you get a ghost of the leaf pattern coming through.
For the crown I cut 2 circles overlayed, I draped these over the top holding them in place with pins. Then I pleated the fabric along the bottom edge to conform it to the shape of the crown. I basted this in place, attaching it to the frame. I cut off some of the excess fabric, but the rest would be tucked into the inside.
The brim was done in a similar way. I cut 2 long rectangles that measured the same as the outer circumference of the brim. These were each sewn into a long loop and folded in half over the edge. Then I pleated and basted them to the frame.
Next I created my ear shape. As you can see here, both ears are made out of one piece of wire. It would sit between the crown and brim and make them much stronger overall. I covered them with a white silk leftover from the painting and dye class I took last summer.
All of my cool accent pieces--laser cut clock, clock hands--were picked up from Michael's art store. It has a great selection of weird crafting bits. I got the clock hands in the DIY clock section, for example.
The gold fabric I used to make a hat band was leftover from my Steampunk Corset (I really did buy way too much fabric for that).
I sewed the ears to the brim base, then sewed my brim to the crown. Then I carefully tacked the side of the ears to the top of the top hat--I sewed the wire frame to the wire frame, not just the fabrics.
Next was the hat band and decoration. I sewed the hat band on, the sewed the decorations on. Before attaching the clock hands I sponged on some gold acrylic paint and sprayed them with a gloss finish sealer. This was to help them match the costume better.
Lastly, I sewed a felt circle to the bottom to cover the hole and seal it shut. Then I sewed a headband to it (which I also painted gold). I think later I will swap out the headband for alligator clips, but for now (and for handing it it) it was fine.
I'm really happy with how the hat turned out and I am in the process of completing a full design for the costume. I'm thinking I would really like to complete the outfit in the future...
Wednesday, May 18, 2016
White Rabbit - Wire Frame Mini Tophat
Labels:
acrylic paint,
alice in wonderland,
blue,
bronze,
cosplay,
ears,
felt,
gold,
grey,
hat,
headband,
millinery,
mini,
rabbit,
sewing,
sheer,
spraypaint,
tophat,
white,
wire
Thursday, May 12, 2016
May Update
Salutations! In case you did know, I moved across the country for a temporary contract job in Alberta. Yay for work in my field! But downsizing my life to fit in suitcases is difficult.
I've been so busy with packing and moving that I haven't done much posting this past month or so, but I did manage to do a major overhaul of the blog and fix tons of broken image links before I left home. I've got a few more small things lined up for the next few months (my hats and some small DIY projects), but nothing super major, as I have caught up on most of my major cosplay projects at this point.
Still settling in here. As of yesterday, I now finally have an internet connection! In the process of setting up my little work space in my apartment so I can work on stuff for Otakuthon--waiting on my serger to arrive and still working on getting a sewing machine. Specifically working on Leia. Be excited. ;D
Still a little sad I am missing AN this year... sigh. :( I will live. Being a productive member of society sometimes has to take priority.
Thursday, May 5, 2016
Fox Embroidered Beret
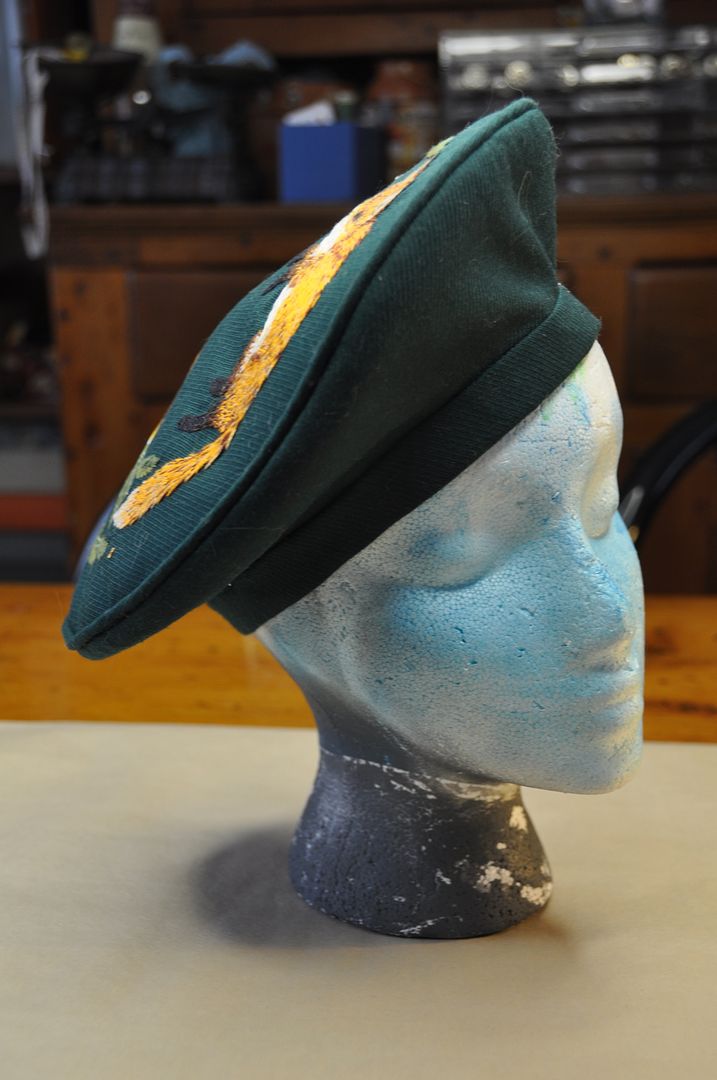
My first project for my millinery class--the project outline gave us a choice of a number of styles of sewn hats. I chose to do a side sloped beret. And since decorating was required and beret tops have such a nice flat surface area I decided to turn this into an embroidery project.
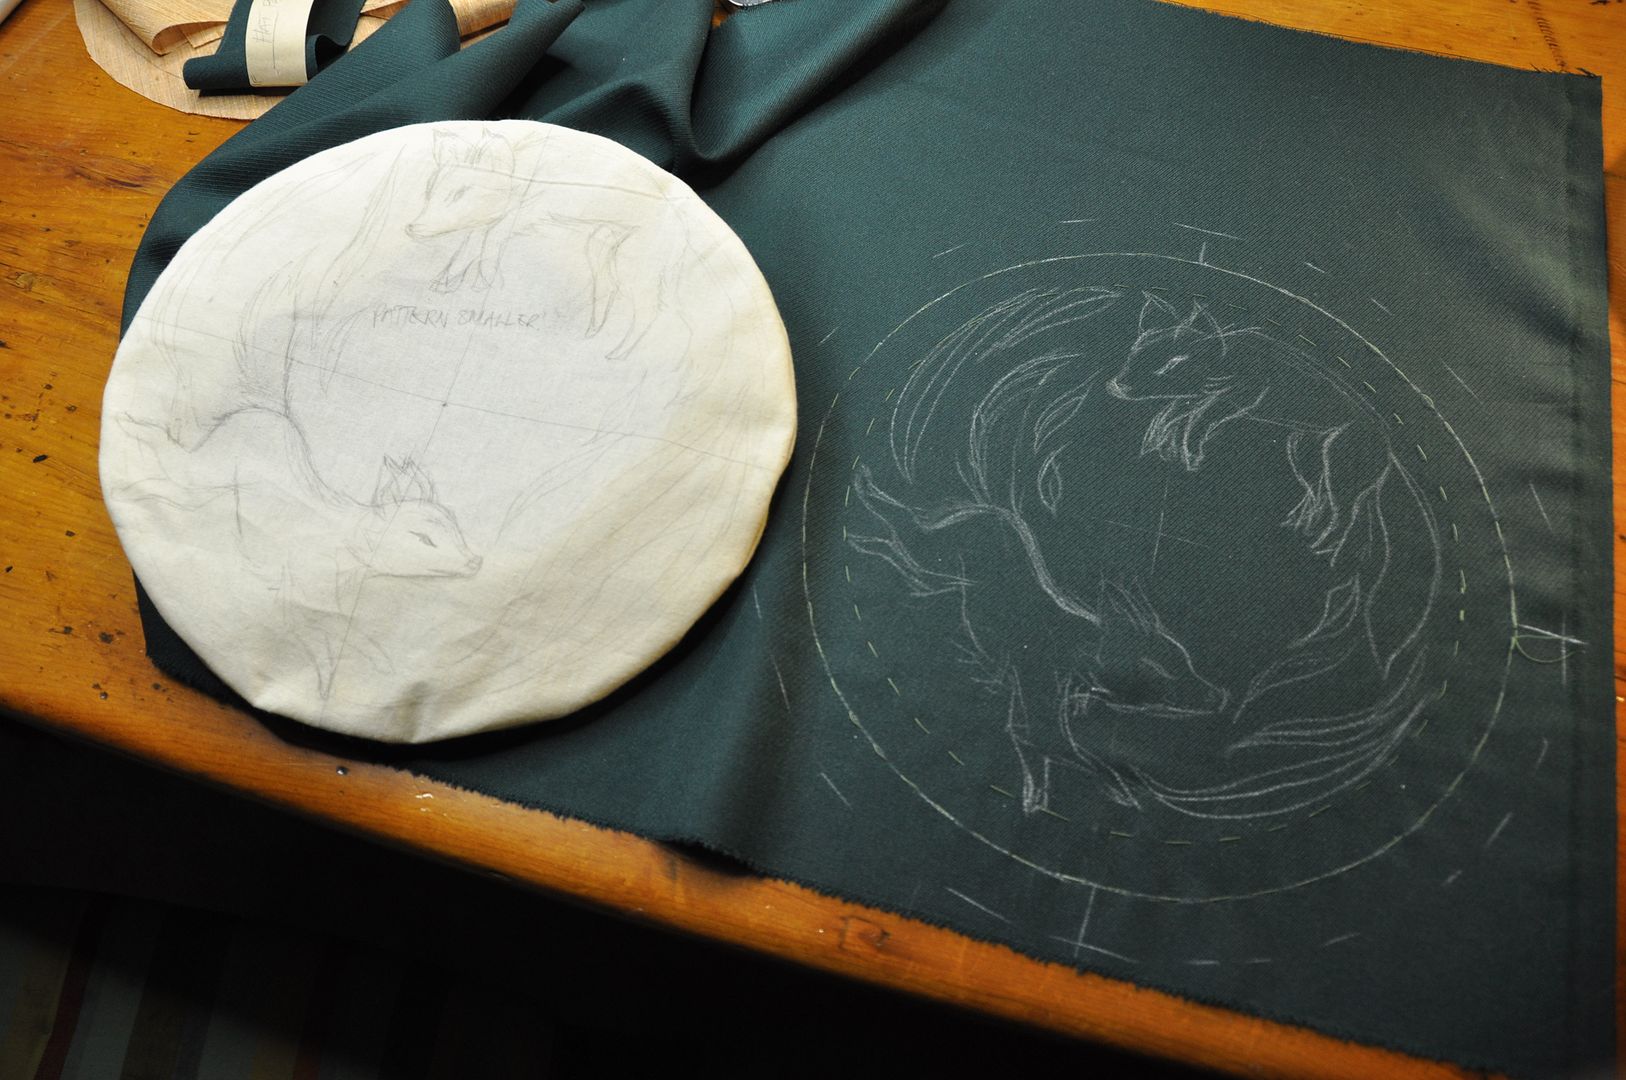
I patterned the hat from scratch. And mocked it up to ensure I liked the style and fit. Then I sketched out my design for the top. Once I was satisfied with that, I moved on to the real hat.
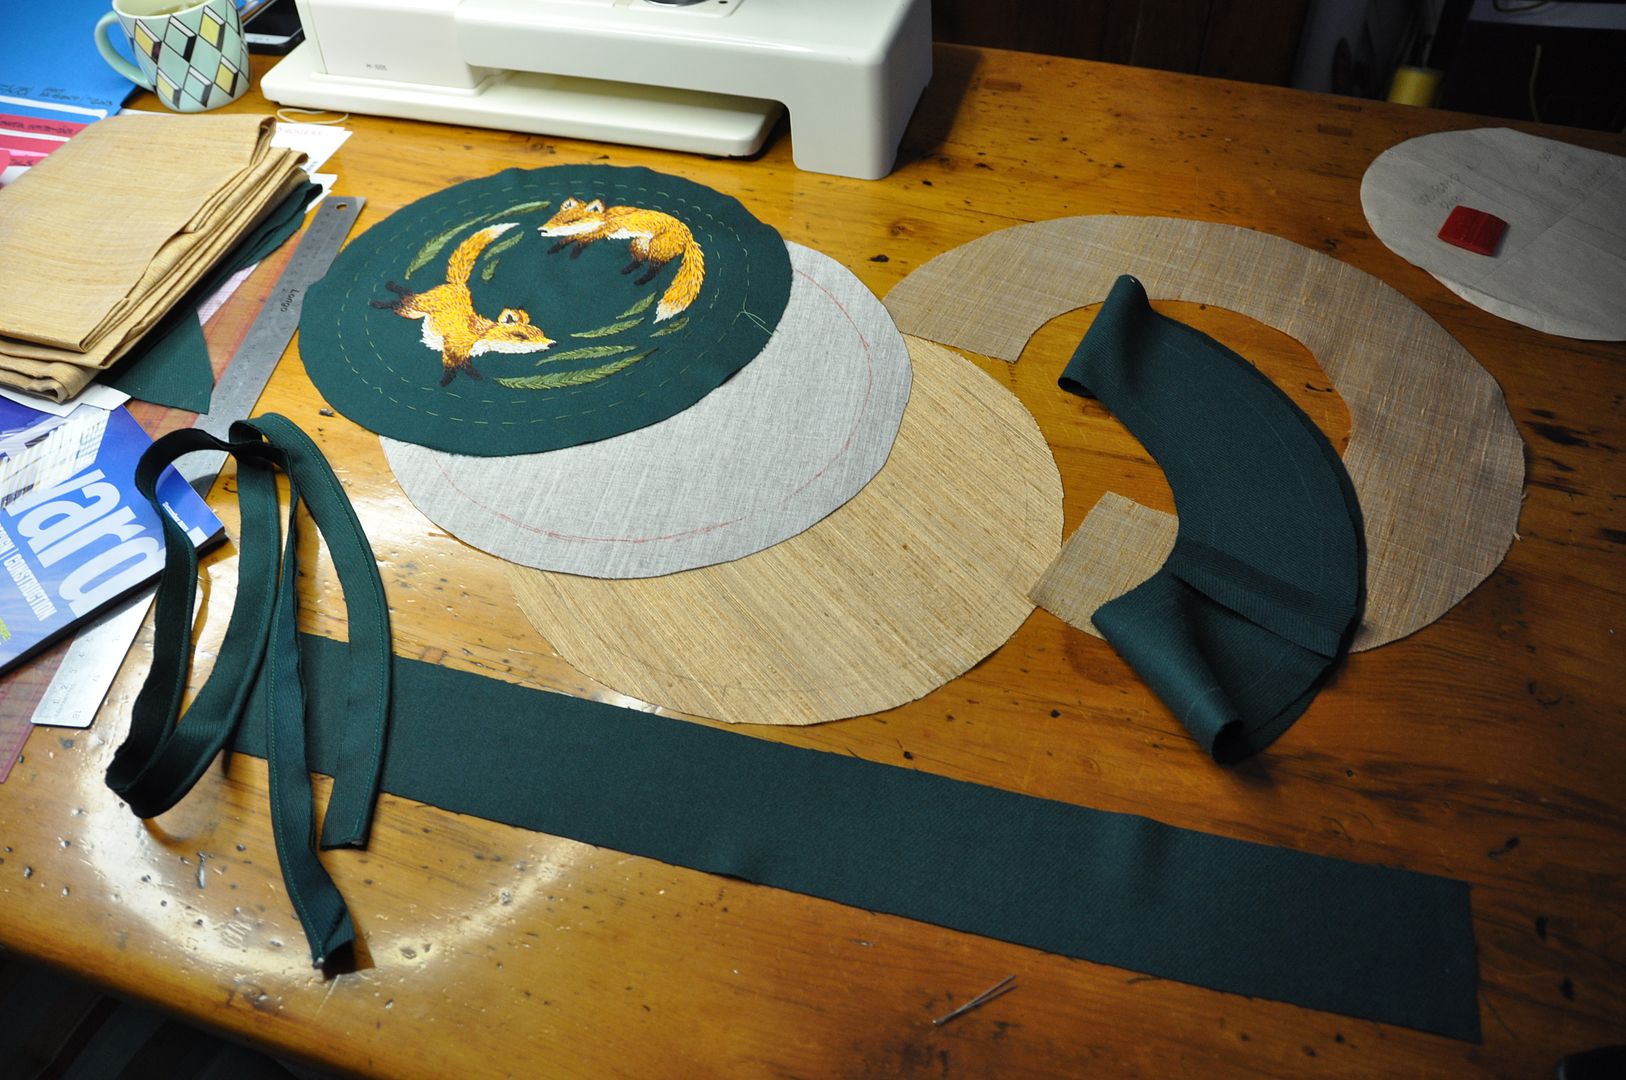 I first cut out all my pieces. I picked a beautiful green wool for the fashion fabric and the lining is leftover silk from my Steampunk Corset.
Then I embroidered the top. I had to finish my embroidery completely before moving on, so that the back of the embroidery stitching could be protected by the lining and interfacing layers. That is the part that obviously took the longest.
I sewed the center back seam on my sidebands--lining and fashion layer.
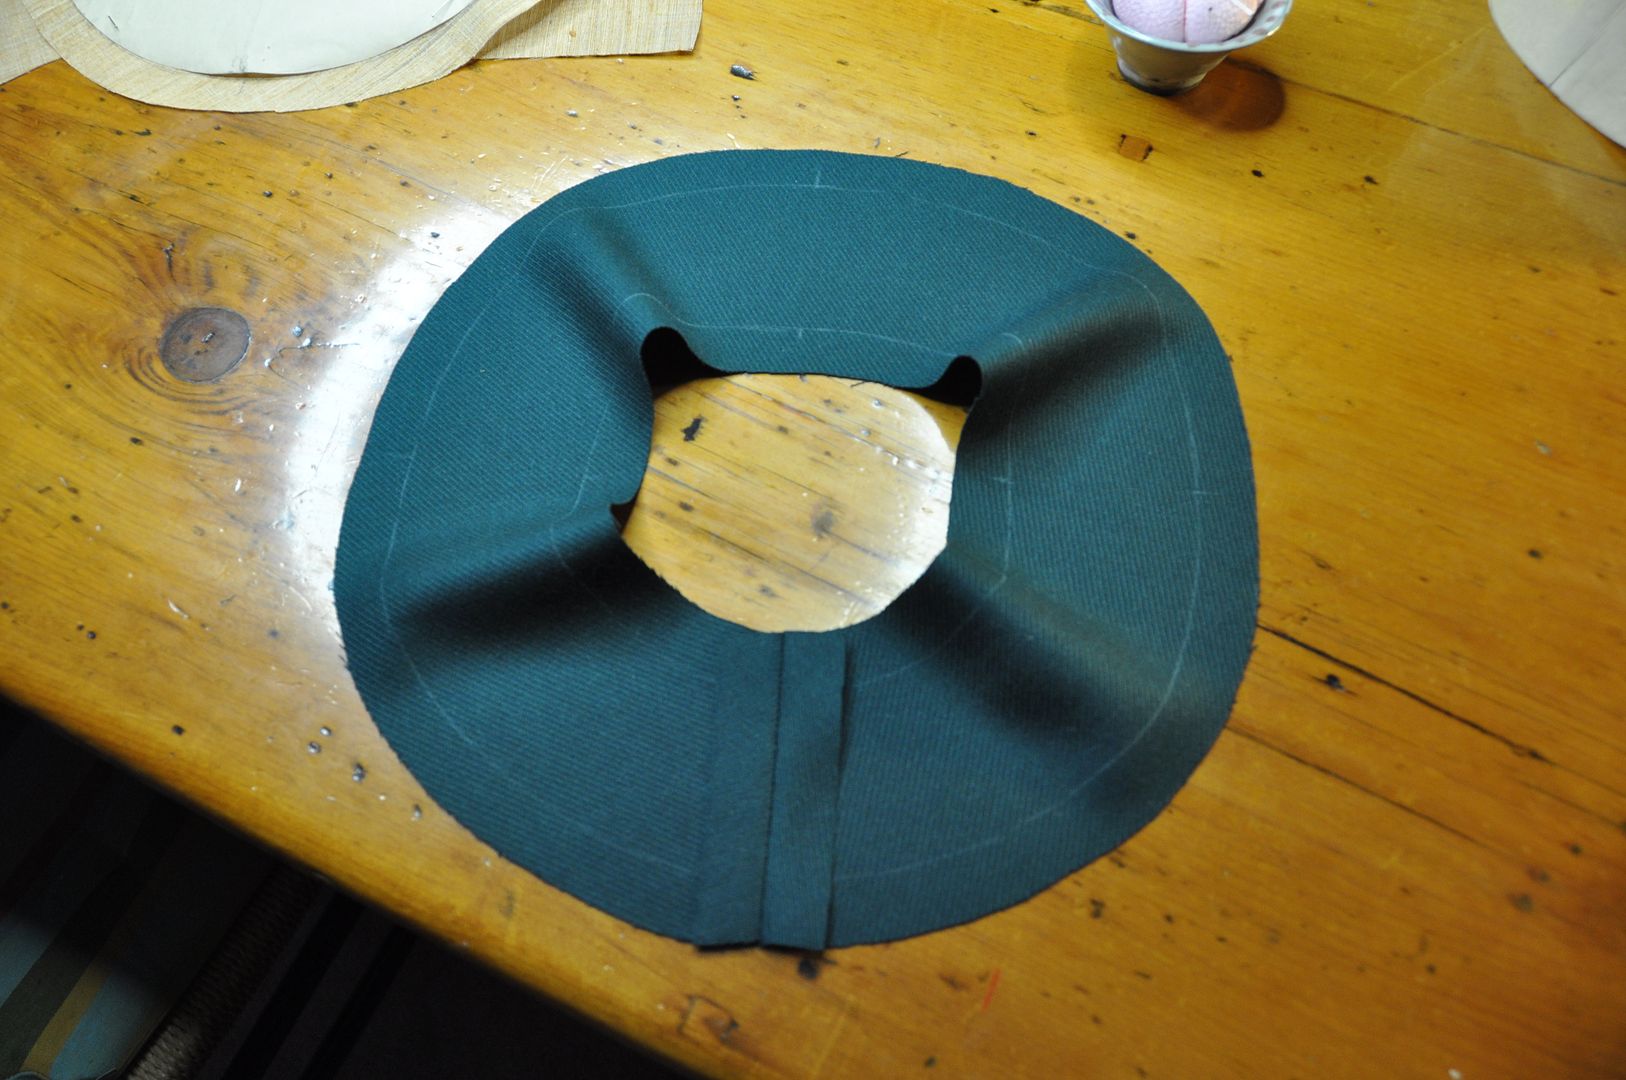
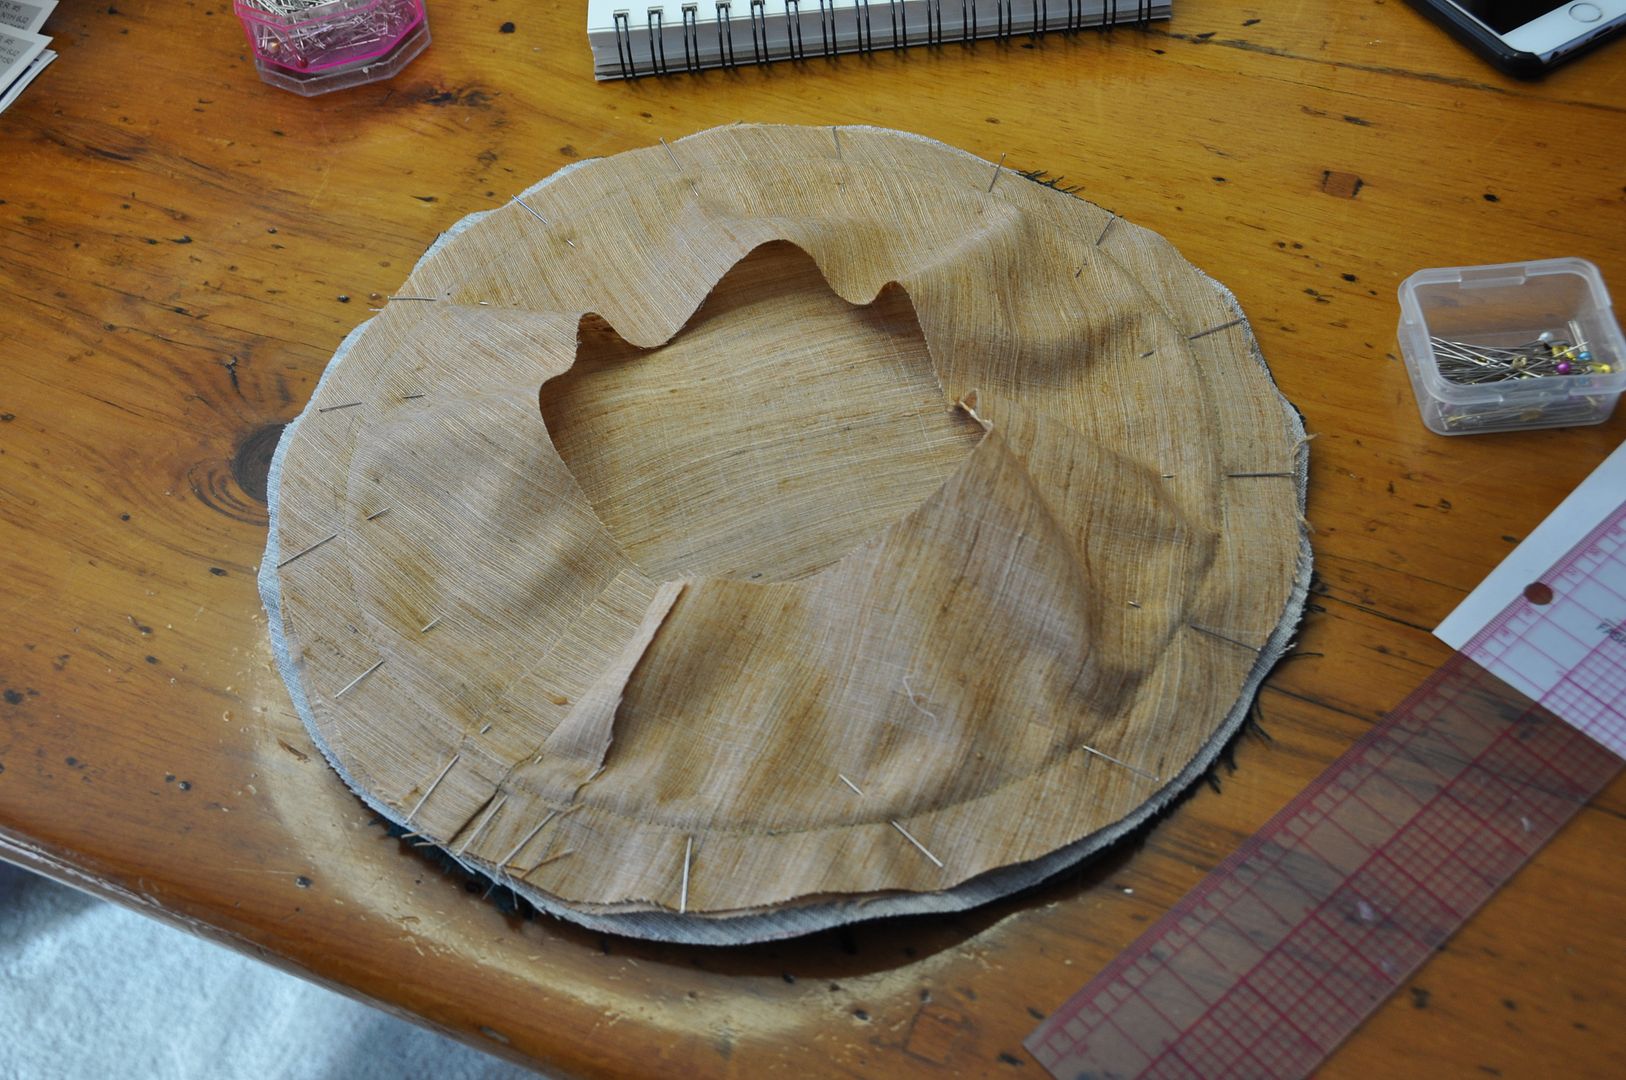
I constructed the hat in the "pancake" method. The tip (top) of the hat has 3 layers: the outer layer, horse hair canvas interfacing, and the silk lining. I basted the 3 layers together.
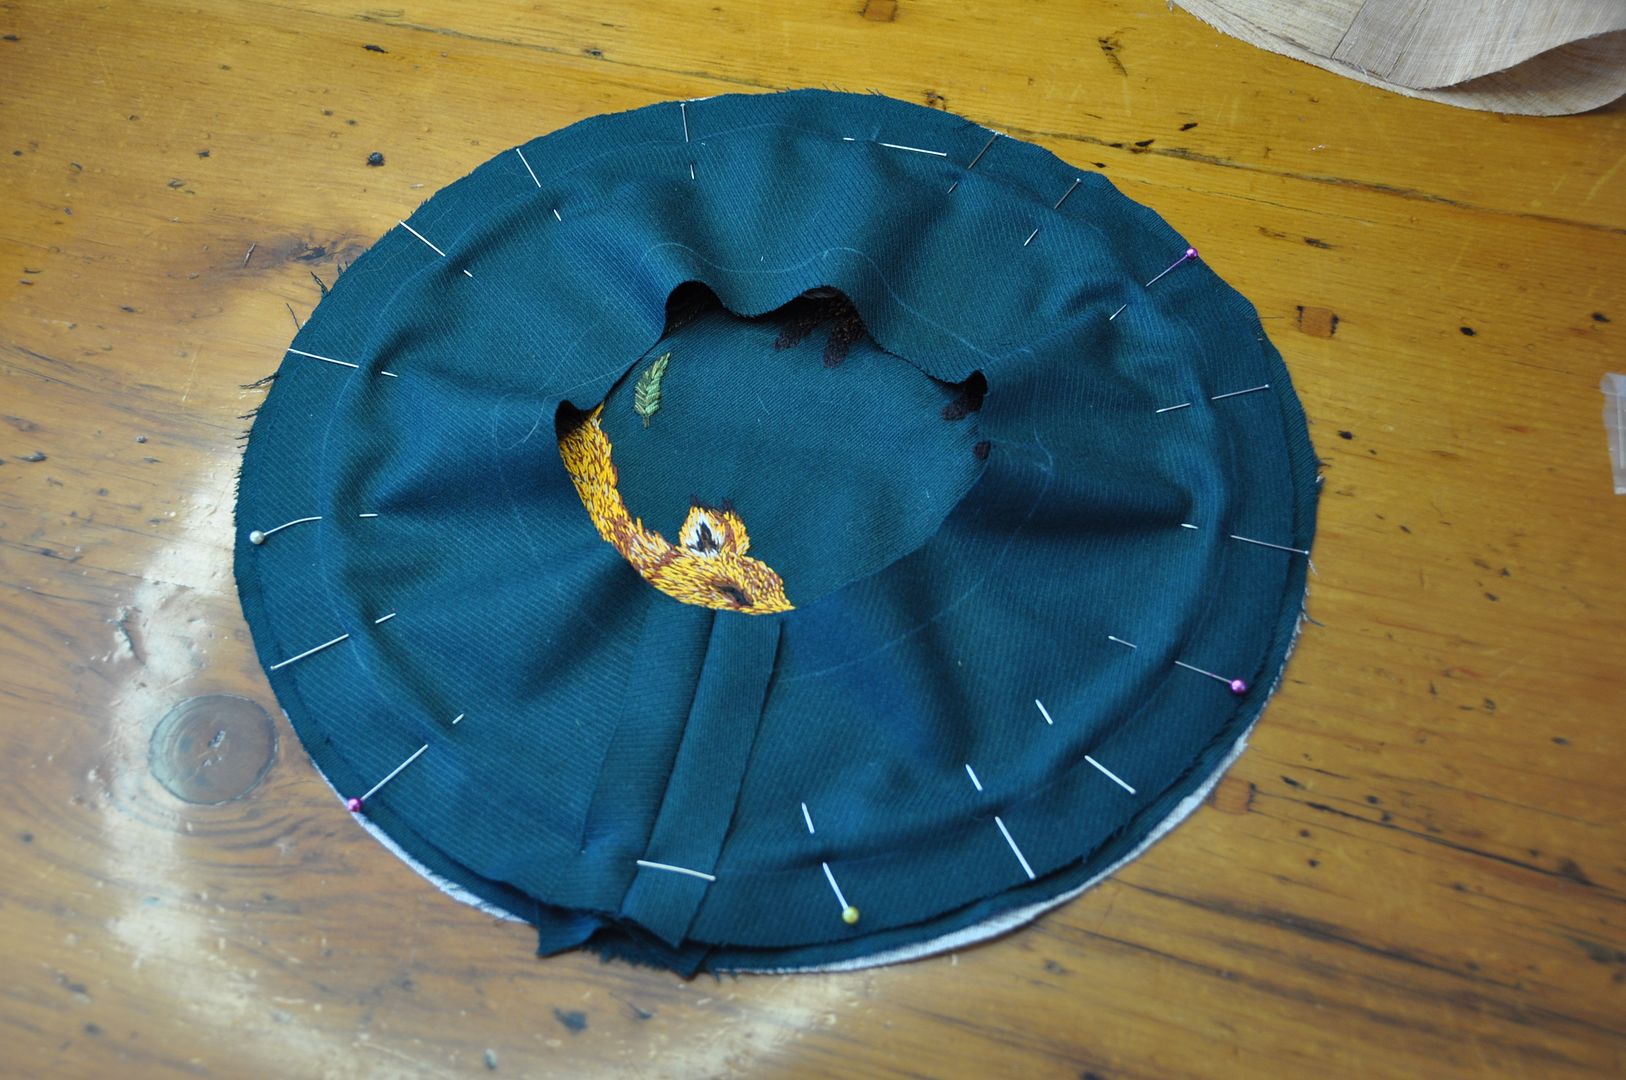 Next I made some piping trim. This was stitched onto the top layer, piping to the inside, and seam allowance to the outside of the stitch line.
Then I basted on my outer layer of the side band. This was basted to the top, on top of the piping trim, following the same stitch line. Then I flipped it over and sewed the lining sideband to the bottom side, through all the layers.
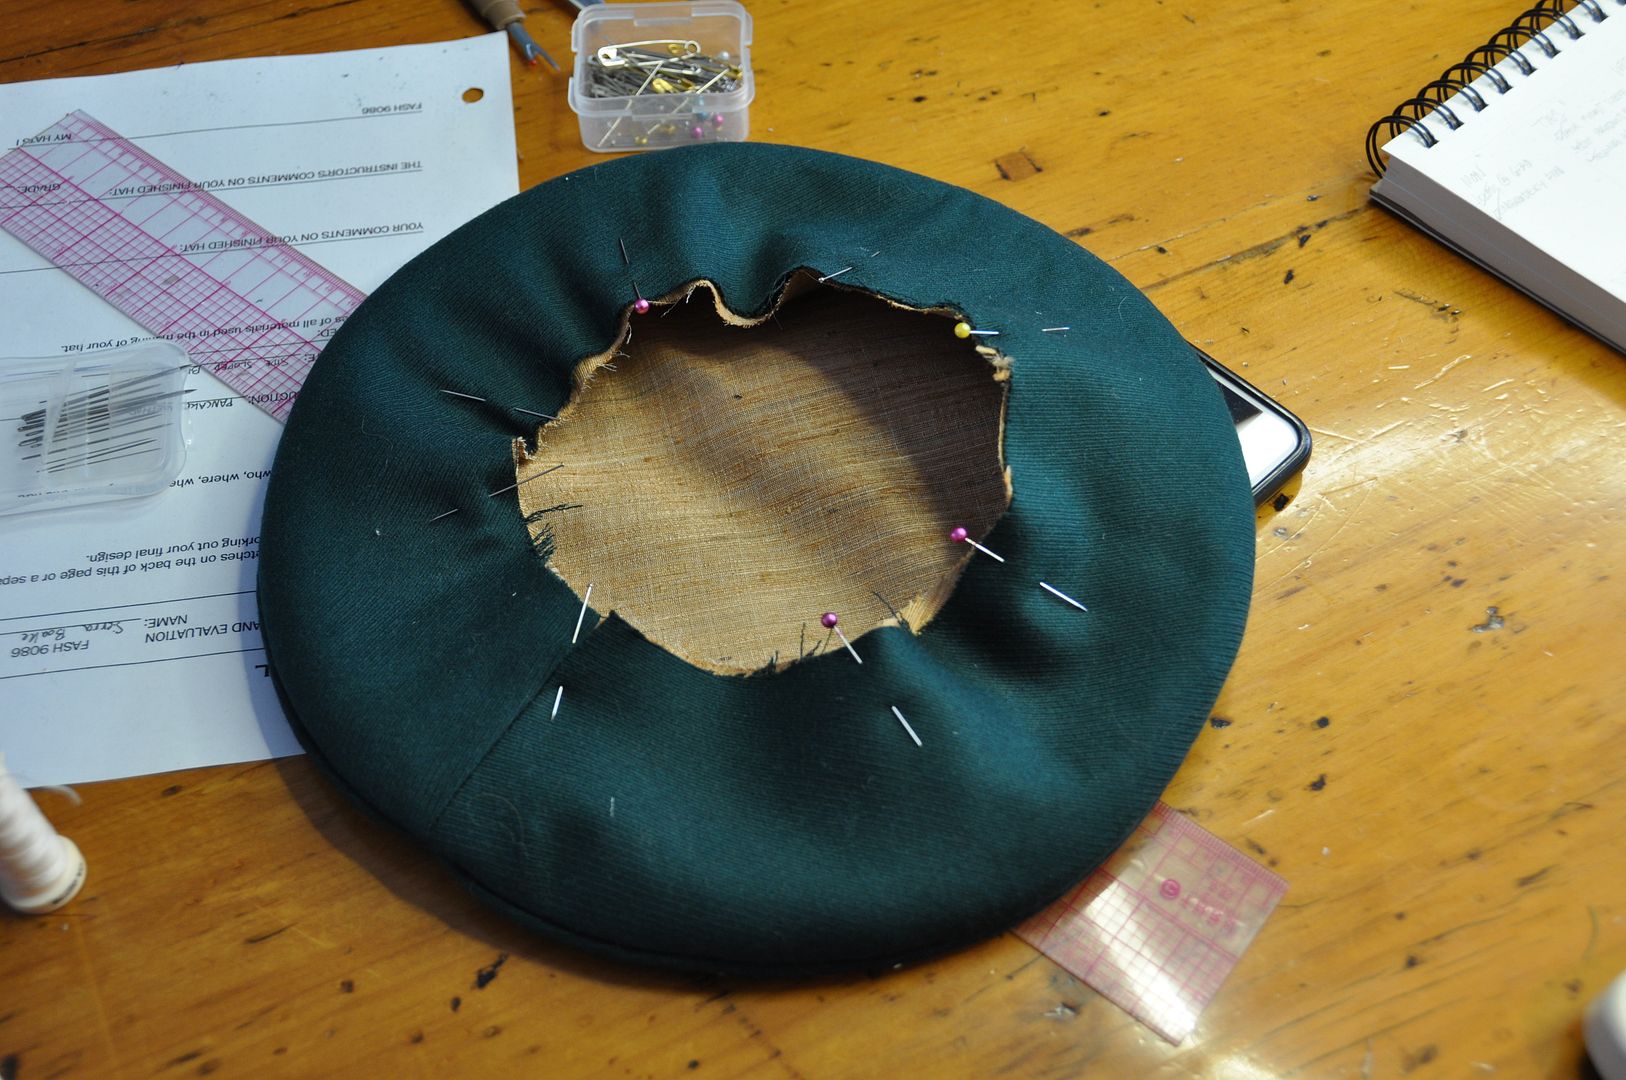 The next step was to properly grade and notch my seam allowances to cut down on the bulk. Then I flipped the outside sideband over to the bottom. I carefully pressed it--without crushing the piping trim. Now the top of the hat was completely constructed and lined, and I could move on to the final part--the headband.
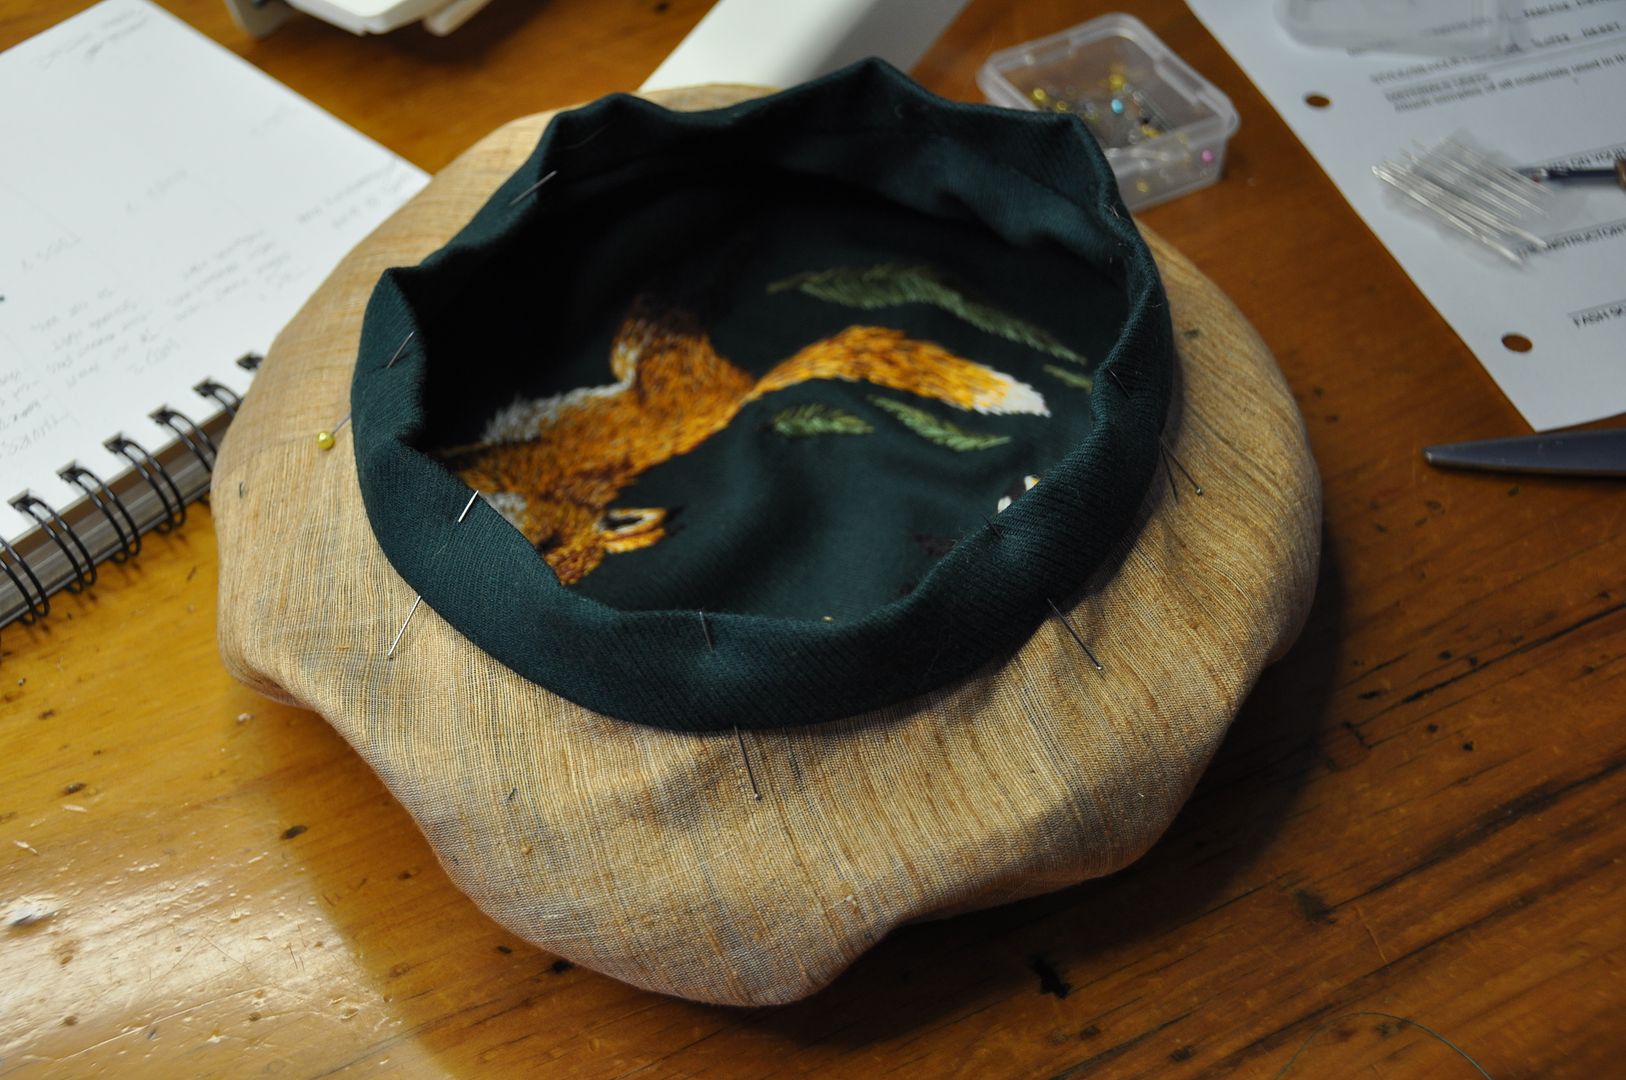
I basted my sideband layers together along the bottom seam allowance. Then I sewed one edge of the headband to the outside. I graded and notched my seam allowances before ironing and folding over the headband to the inside. This was pinned and then carefully slip-stitched in place by hand.
Presto! A fabulous beret!
I patterned the hat from scratch. And mocked it up to ensure I liked the style and fit. Then I sketched out my design for the top. Once I was satisfied with that, I moved on to the real hat.
 I first cut out all my pieces. I picked a beautiful green wool for the fashion fabric and the lining is leftover silk from my Steampunk Corset.
Then I embroidered the top. I had to finish my embroidery completely before moving on, so that the back of the embroidery stitching could be protected by the lining and interfacing layers. That is the part that obviously took the longest.
I sewed the center back seam on my sidebands--lining and fashion layer.
I constructed the hat in the "pancake" method. The tip (top) of the hat has 3 layers: the outer layer, horse hair canvas interfacing, and the silk lining. I basted the 3 layers together.
 Next I made some piping trim. This was stitched onto the top layer, piping to the inside, and seam allowance to the outside of the stitch line.
Then I basted on my outer layer of the side band. This was basted to the top, on top of the piping trim, following the same stitch line. Then I flipped it over and sewed the lining sideband to the bottom side, through all the layers.
 The next step was to properly grade and notch my seam allowances to cut down on the bulk. Then I flipped the outside sideband over to the bottom. I carefully pressed it--without crushing the piping trim. Now the top of the hat was completely constructed and lined, and I could move on to the final part--the headband.
I basted my sideband layers together along the bottom seam allowance. Then I sewed one edge of the headband to the outside. I graded and notched my seam allowances before ironing and folding over the headband to the inside. This was pinned and then carefully slip-stitched in place by hand.
Presto! A fabulous beret!
Labels:
beret,
brown,
cord,
cording,
embroidered,
green,
hat,
lined,
orange,
original design,
piping trim,
sewing,
trim
Subscribe to:
Comments (Atom)

