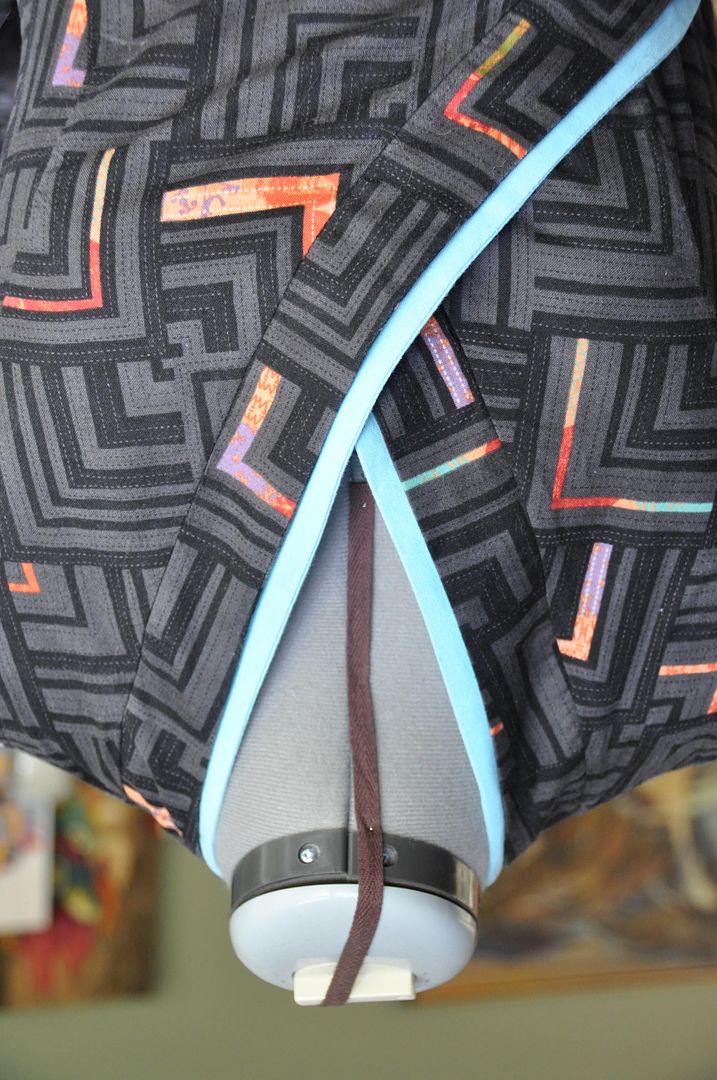
This is an original design I made using fabric I got from my sister for Christmas. Woo! I decided this fabric would make a good kimono top, but I didn't have enough of it to do a full kimono top. Since I wanted something I could wear with normal clothes I decided to make it into a cool tank top with a kimono style closure instead. :)
I started off with a mockup. The pattern I drafted myself, modified from a basic block. It was a bit of a challenge to get the princess seams to work.
Once I was happy with my pattern I cut it out of my cool fabric. It's asymmetrical so I only cut 1 of each different front piece, making sure that I was cutting a right and left side (not 2 rights or two lefts by mistake!).
Above you can see the different pieces all laid out together!
First I sewed the collar pieces together at the shoulder seams. Then I sewed the inner collar to the outer collar along the outer edge, right sides together--this way the outer edge was finished nicely. I clipped the curves and flipped it right way out, then ironed it flat.
I sewed my front pieces together along the princess seam and sewed the darts in the back. Then I attached my front and back pieces at the side seams and shoulders. I then finished all inner seams.
I made my inner collar accent piece the same way as the outer collar. The inner collar is about 3/8" wider so it is visible in behind. The inner collar is made out of leftover fabric from my Suppi costume!
I attached the collar along the front edge and back up around the neck. The outer collar is layered underneath. This was then flipped right way out, the seam was finished, ironed to one side and then topstitched neatly in place.
Then I hemmed the bottom edge. I finished the sleeve holes which was flipped to the inside and top stitched in place.
Lastly I stitched on the ties. The inner ties were made of a twill tape to hold the under flap closed, the eternal tie was stitched between the two collar layers, and into the side seam (I had to unpick it to do this). This was done with leftover fabric from my Forest Guardian costume!
This shirt is nice and comfortable. The cotton breathes well in summer!
Thursday, September 25, 2014
Thursday, September 18, 2014
Special Effects and Prosthetics Makeup Class
So this past year I have been taking extra classes in makeup and advanced prosthetics through Ryerson's continuing education program. This past month I finally finished my last course and received a certificate in Advanced Makeup Artistry and Special Effects. This in no way means that I am an expert, merely that I have completed my basic training! >:D
Having no background in makeup it was a bit of a challenge learning all the necessary foundation skills (no pun intended) in order to advance to special effects. I definitely learned a lot!
(My fangs pictured above broke not 3 hours after I took that picture because something heavy fell on them! D; So sad! I will have to make another pair...)
My favourite part was definitely the sculpting, molding and casting from the advanced prosthetics part of the course. If I were to pursue a career in makeup later on in life (after much more practice!) it would definitely be in lab-work, rather than on-site application.
I'm pretty excited to start incorporating what I have learned into future costume projects! Though technically speaking I have already begun using my improved knowledge of basic photographic/beauty makeups for my costumes this past summer.
I documented some of my progress through instagram. I won't go into details, but I will show a bit of my work.
This was my face cast and sculpt for my prosthetic pieces I designed. It was an aquatic-fish-elf-character. I also cast some flat prosthetic pieces for neck gills.
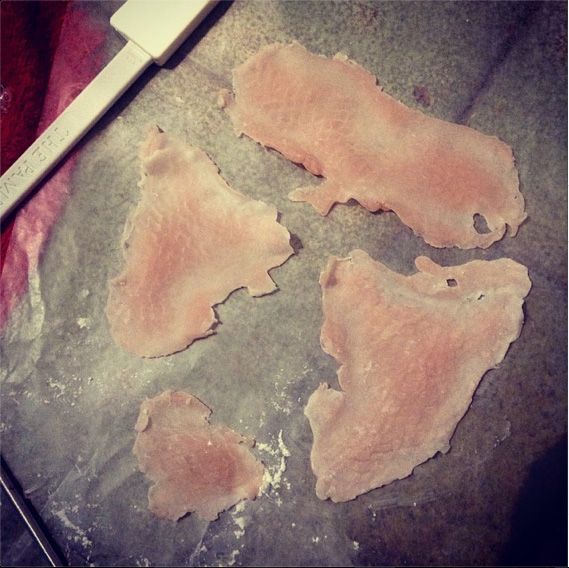
These were the pieces after I cast them.
This was the final result. Unfortunately I am not too happy with how it turned out. I really should have patched my edges as some of them didn't blend down at all, particularly on the center for the face. Also I was going tropical fish, but ended up looking more reptilian. Next time I will pre-paint up my pieces, I think I would have better success that way.
In any case, it was a learning process and it is safe to say I learned a lot!
Thursday, September 11, 2014
FanExpo 2014
After my boycott last year I have returned (but only for one day). FanExpo, why can't I quit you? XD
My increasing distance from FanEx is mostly because of the insane price hikes and my lack of interest in comics, which have kind of taken over the con as of recent years. Though Sci-fi and Fantasy seem to have made a bit of a come back.
I would probably have preferred to go Saturday to see the Masquerade (which is by far my favourite event), but because of the price for single day passes and the huge crowds that saturday draws, I thought Sunday would be a bit more relaxed. A few months ago I had considered competing Masq, but was shocked to discover that you have to have a Deluxe Weekend Pass to compete! I couldn't justify the price, so here I am.
I pulled out my Steampunk Air Captain ensemble for the event. (Pictured here, though this pic was taken at CostumeCon by EleventhPhotograph) Though I must confess it was much warmer in the building than in previous years and I became quite dehydrated. The price of food and water at this convention is criminal and the new "no outside food allowed" policy they began enforcing is ridiculous!
I had a photoshoot of my Forest Guardian planned for after the con, but sadly due to issues that were entirely my own fault it got cancelled. Hopefully in the future I will try again, because I would really love some finished shots of that one...
Overall I had a good time though. I was impressed as always with the quality and quantity of the Artist Alley, which is by far my favourite part of FanExpo. It's always nice to see such different styles/genre of arts and crafts converging in one location. Picked up some cool earrings. :) Also I attended a panel called "Cosplay Horror Stories" hosted by Glay and Quantum Destiny, which was absolutely hilarious/horrifying!
I think I may attend again next year, but once again I think only for one day.
Sunday, September 7, 2014
September Update!
[I just want to start off by saying that yes, I am aware there is a problem with some of the pictures in my older posts. For those who haven't noticed: the problem appears to be that all vertical images are appearing as horizontal, but stretched to fit in a vertical box, if that makes sense. For reference on what issue I am talking about, take a look at my 10th Doctor Wig post to get an idea... This issue appears to be affecting all the posts prior to my Panda Bag post, which was posted in January of 2012... Which means there are 78 affected posts that I have to figure out how to fix the image rotation on. They were fine before?!?! Rest assured, I am going to sort this out, but it will take some time to go through all those pictures. If anyone is a resident tech wizard and knows how to fix this, please contact me!!! Halp!]
What do you mean summer is over?! D: I only ended summer courses last week and now I am back to school again. Sadface. I enjoyed my summer, though it feels both long and short at the same time. I bunched all my vacations into one short month on top of school, yikes! This included trips to Ottawa, Baltimore, and Barcelona.
Now I am back for my 4th and final year of university! Fingers crossed that it is a good one!
I am not taking nearly as many "fun courses" this year, so my new material I create over the next semester will be quite limited. Of course, you won't have to worry because I am still working through the backlog of posts--which date back as far as Anime North! Egads! D: I will try to stick to my posting schedule, but since I am only human, I apologize in advance! (For being a human? I guess?) We've already had quite a few interruptions last month, and I can see many more on the horizon. Posts on Sakura, Toph, prosthetic makeup and much more to come in the near future!
I have already started designing my thesis/independent study project for my final semester--I got started early because I am so slow. There will be plenty more on that later, as it will be quite over the top and take many months of work. Difficulty-wise it would be like combining all the tricky bits of Forest Guardian, Asuna and Vaporeon together... So yeah, maybe too crazy? XD Got to work on curbing my crazy ideas!
As some people who have talked to me personally already know: I will not be making anything new for Anime North next year. I will instead be finishing the projects I already have on the go--namely Vaporeon and Toph. I have already invested a lot of time and money into those and I would really like to take the time to finish them properly. I will most likely be way too burned out after thesis anyway to even think of starting a new project and I'd rather not over-estimate my stamina and kill myself so early in the con-season.
Speaking of the con-season, my con-season this year has officially wrapped up. I attended my last con for the year--FanExpo--last Sunday. (Unless I decide to go to Unplugged Expo at the last minute, but right now that's doubtful.) More to come on that soon!
That's all for now! Mischief Managed! >:D
Thursday, September 4, 2014
Toothless - Kigurumi - How to Train Your Dragon
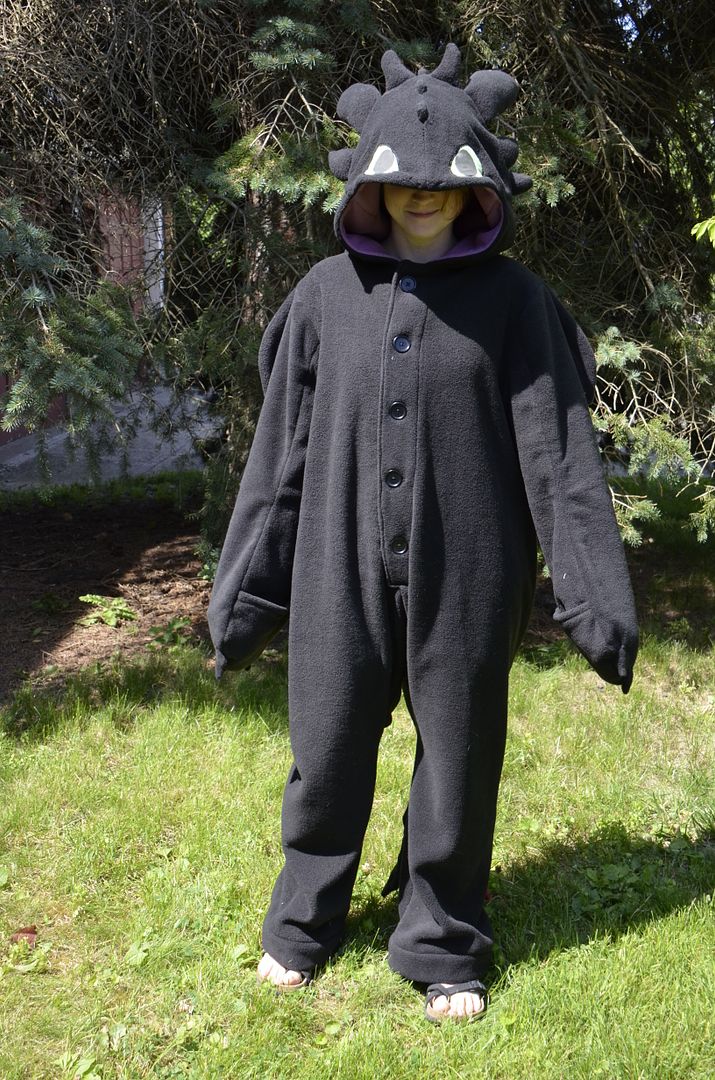
Jumping up the schedule by popular demand: Toothless! I made this Toothless kigurumi (onesie) to wear to Atomic Lollipop this past July. To be honest, I had been contemplating buying a kigu for the longest time, but I had never seen a design that I really loved. So long story short, I decided to make my own. I picked Toothless because I really love the movie How to Train Your Dragon--Toothless is the most adorable dragon ever. Of all time.
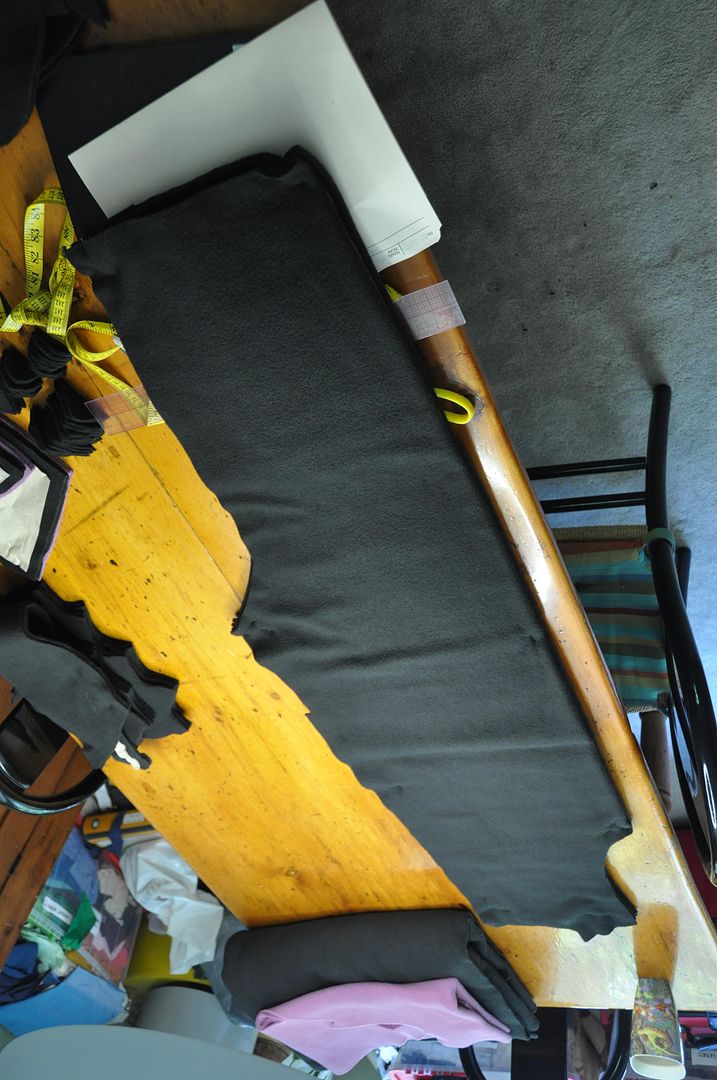
An added bonus here is that because it was summer, all this fleece was on sale! Definitely worth it with the amount I had to buy. My recommendation is to never under any circumstance buy fleece in fall/winter. You will pay 3 times as much as you do in summer. For reference, I bought my fleece at Fabricland in July for 6$/meter, now (September) they are selling the exact same product for 17$/meter. Yikes!
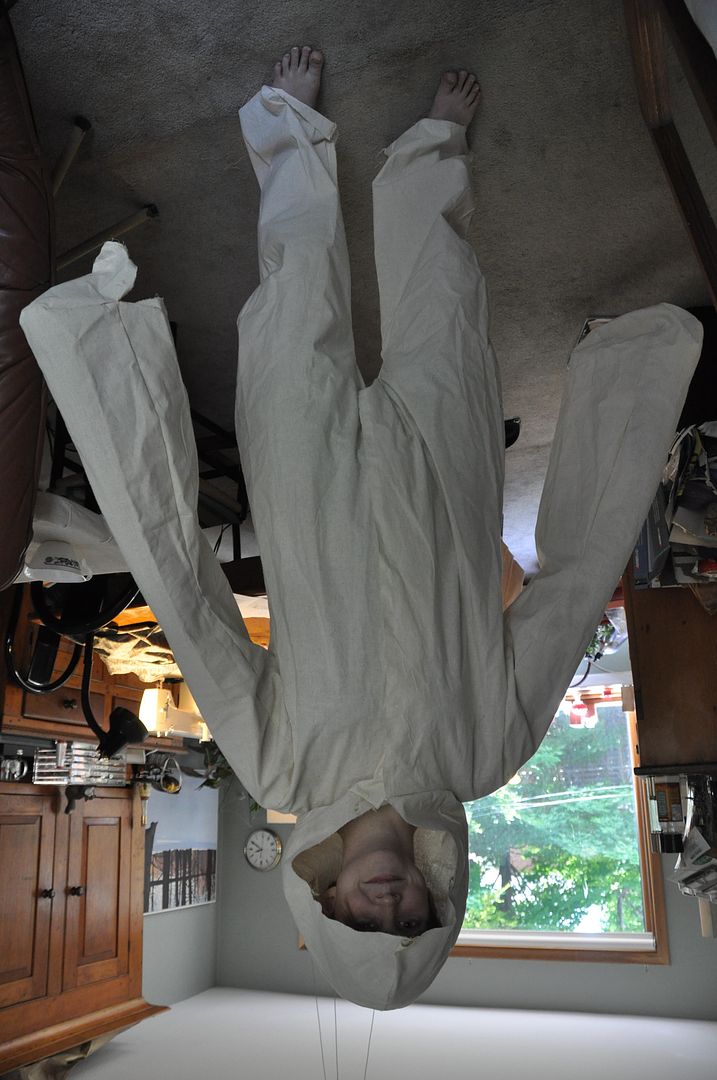
I looked at kigu patterns online, but eventually decided to draft my own from scratch. It took me 2 tries to get the onesie itself looking how I wanted it and 5 tries to get the hood right. Lots and lots of mockups.
Below you can see the onesie version 1 and 2 side by side. The first sleeves totally didn't work, and my hood problems were always that it was too big and floppy.
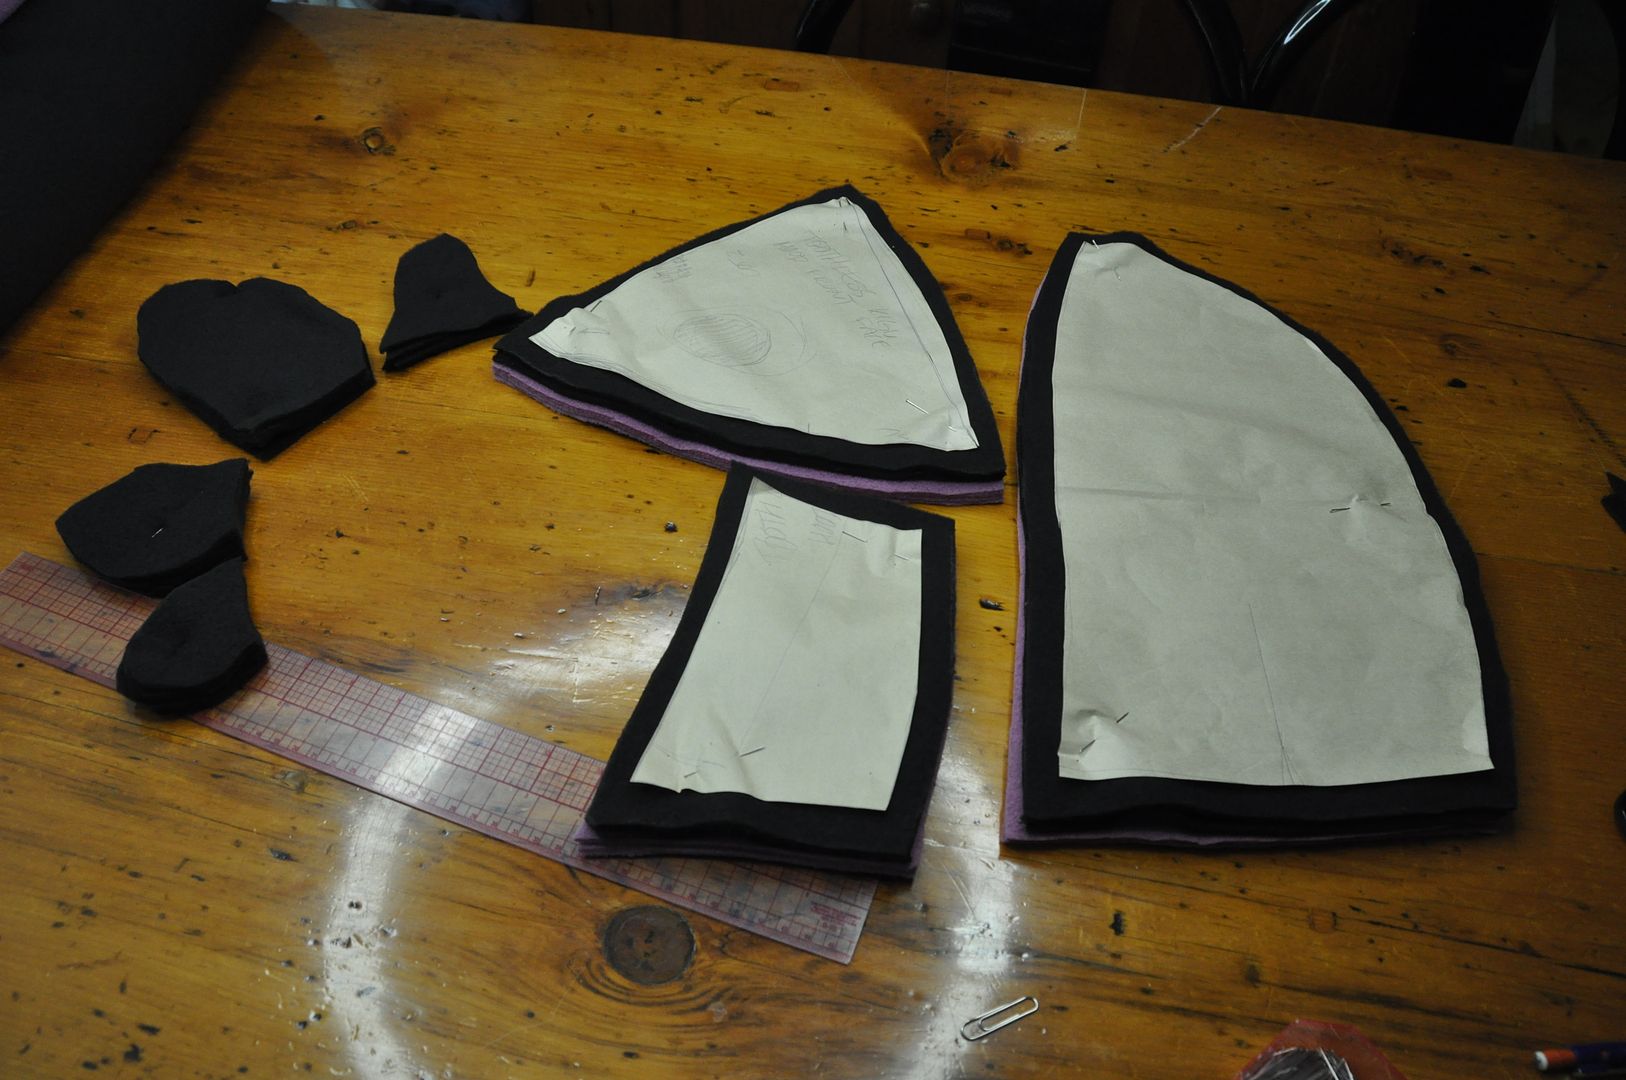
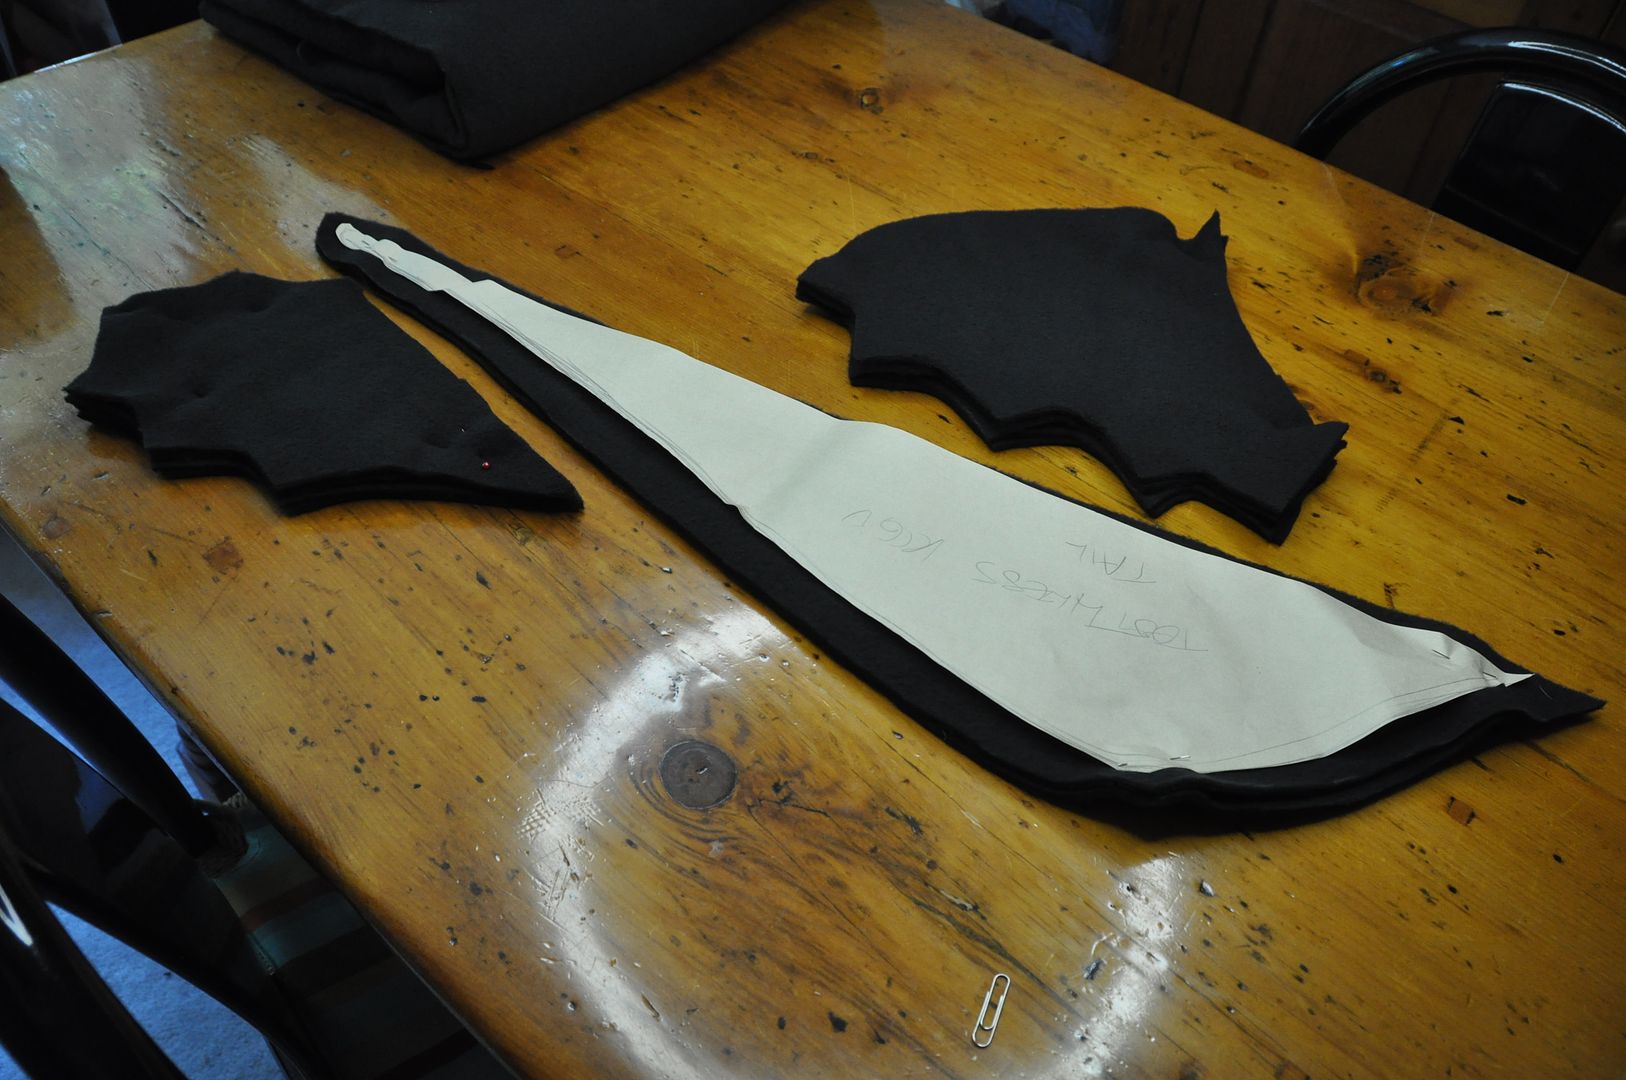
After finally getting a pattern I was happy with, I moved on to cutting out all the pieces. Here are the hood pieces complete with fins, below you can see the wings and tail.
I changed my initial design for the sleeve, ending up with a sleeve style similar to my Katamari cousin pattern. It is a mitten sleeve with a slit on the underside of the sleeve to slip the hand covers on and off. This means the sleeve top is made of one piece, and the under sleeve is made of 2 pieces.
The bodysuit is in 2 pieces, with each half (right and left) being cut on the fold along the sides. (Meaning there are no side seams on this garment!)
On each of these I first sewed up the leg and shoulder seams, then I basted the center back-crotch-front seam, stopping where the opening for the buttons would go.
I hemmed the edges of the opening, then the sleeve top and bottom pieces were sewed right sides together then flipped right way out. I made sure the hand cover was on the outside.
I sewed the wings and tail fins right sides together, then clipped the excess in the corners and flipped them right way out. I top stitched on the details. (Not pictured here is the red fin!)
It took much deliberation, but I decided to line the hood in pink, to look like the inside of Toothless' mouth, as opposed to making it black to match the rest. I sewed the hood lining together; first I stitched the whole front together, then the back, lastly the side seam that divided the two.
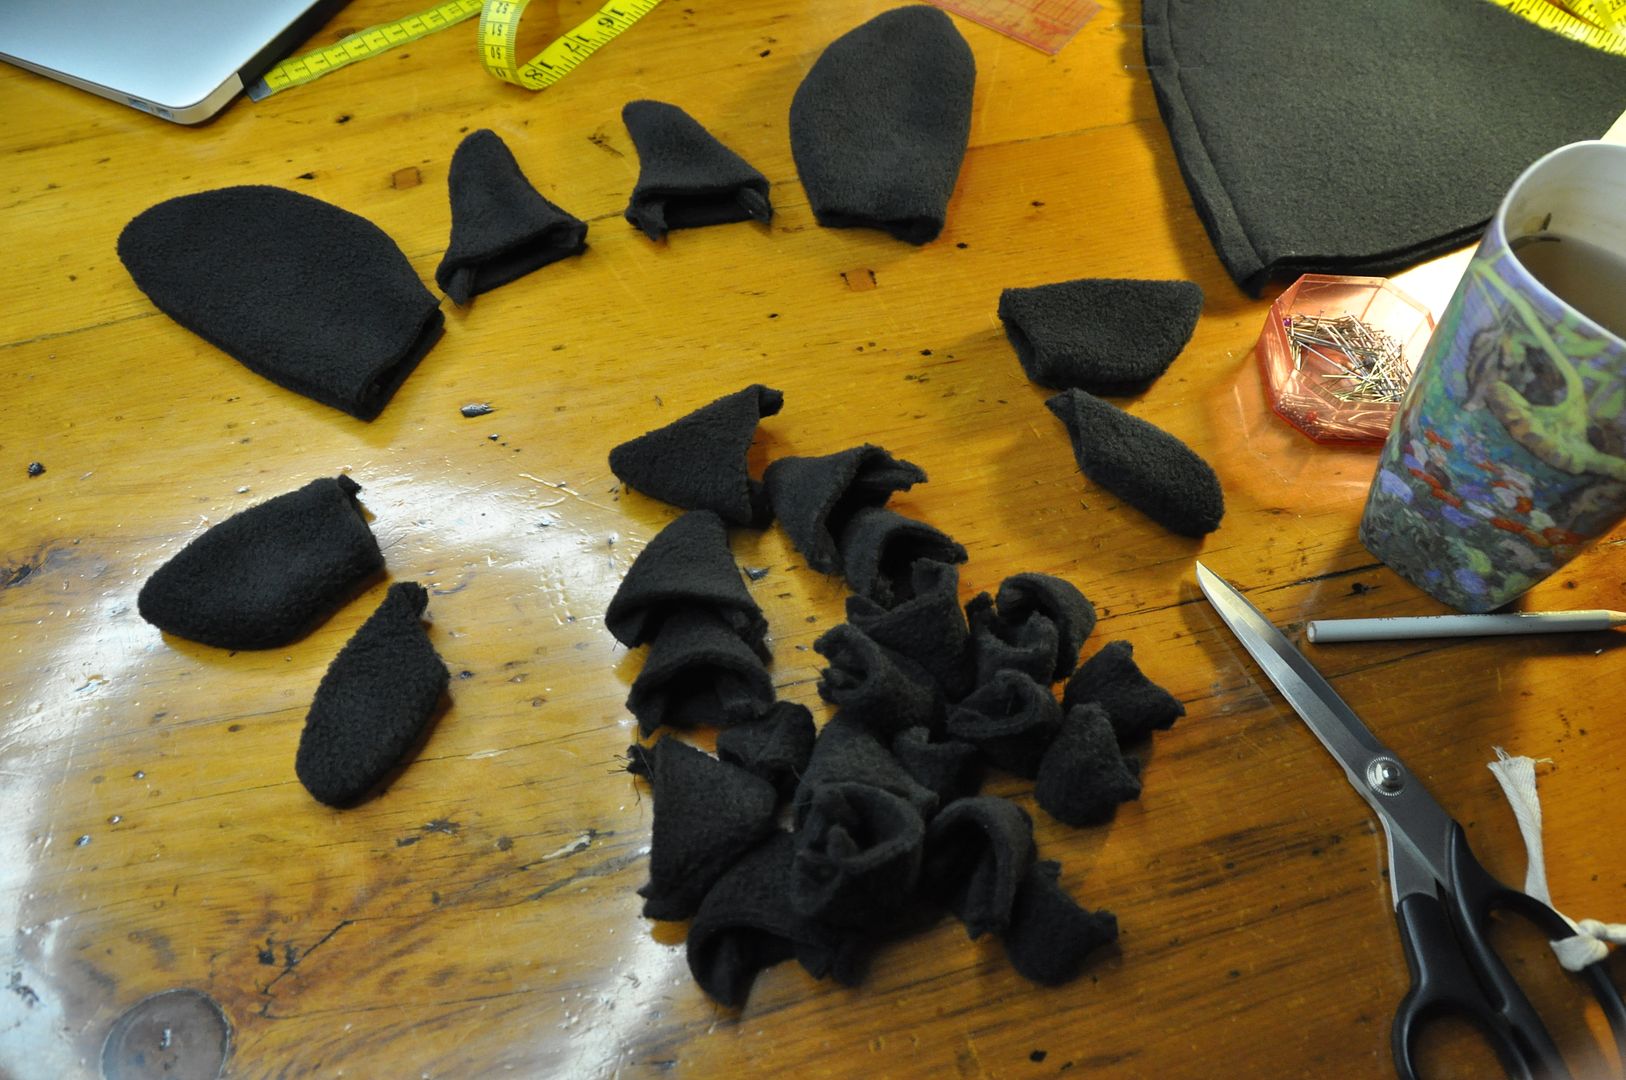
I sewed all of the fins right sides together, then clipped and flipped them right way out. I made a whole bunch of triangle shaped ones in varying sizes that would go up the center back seam.
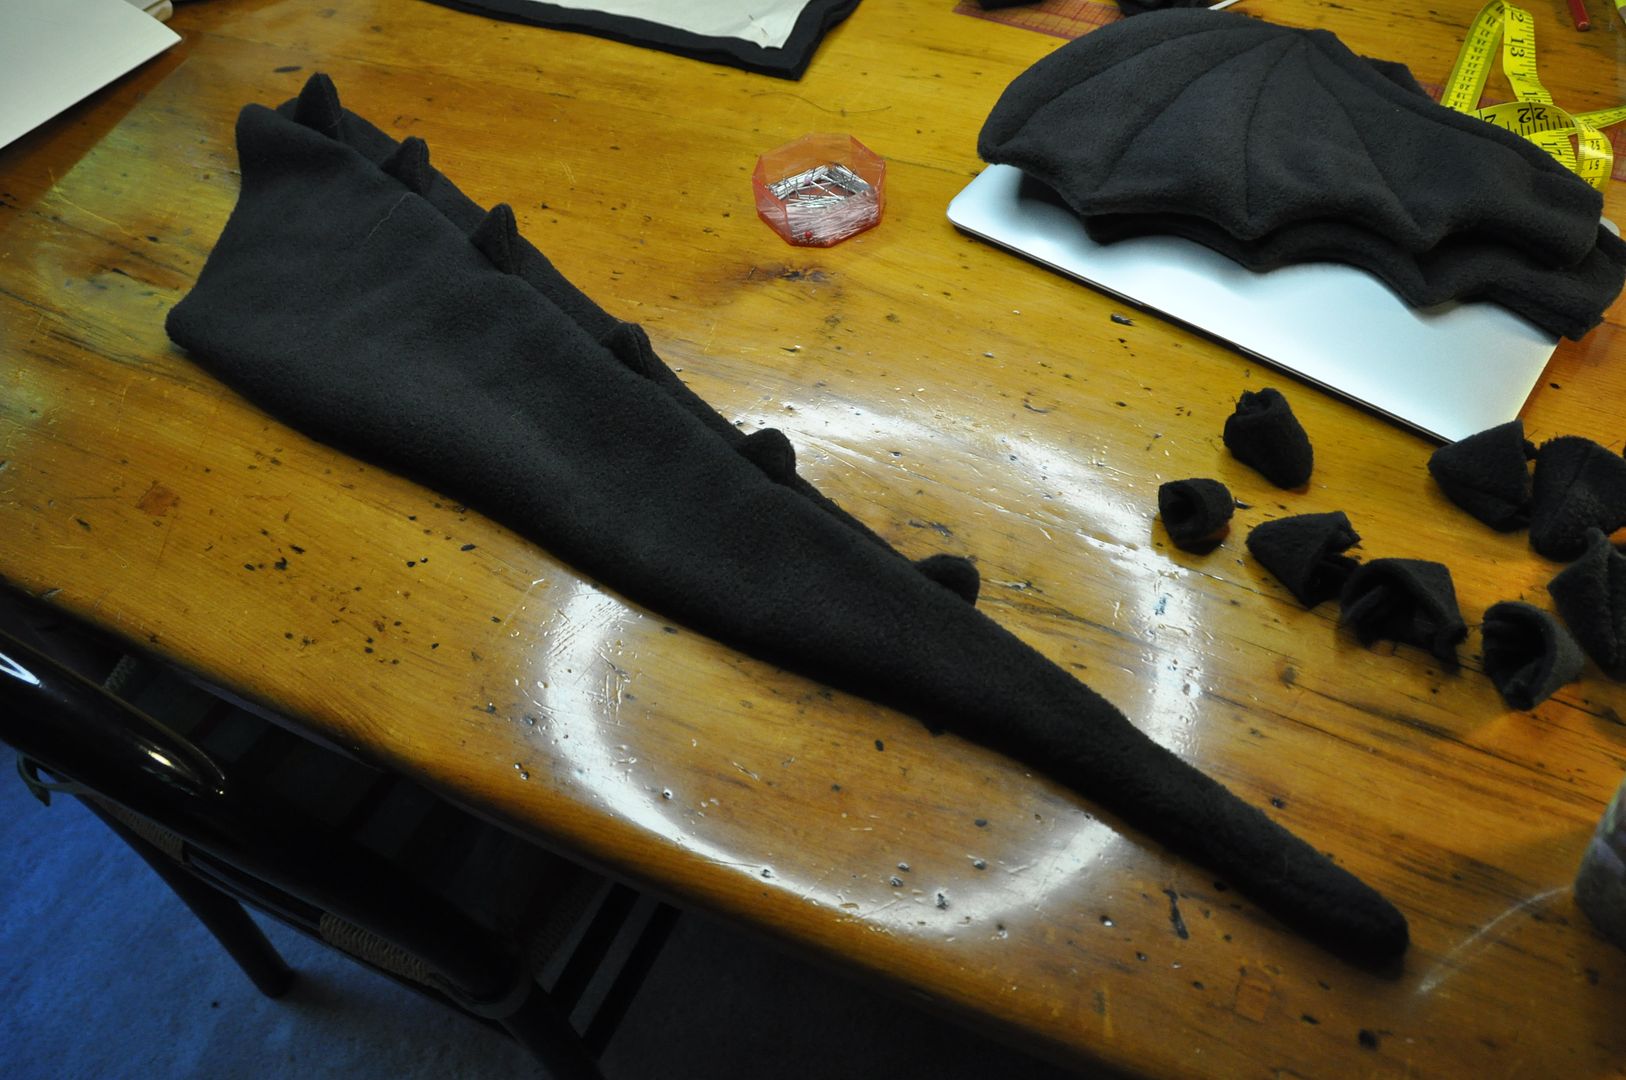
Carefully spacing the spines, I sewed the 2 tail pieces right sides together, then flipped it right way out. (I had to make sure the spines ended up on the correct side during this process.)
Next I attached the front pieces of the out hood together. While I was at it, I put two small spines on his forehead in the center seam. While looking at reference images I carefully arranged the fins around his face, pinned them in place then sewed the side seam, completing the outer hood. The reason why the hood is made of 6 pieces is partially because it made the shape better, but also because I needed seams that I could easily attach all the fins/spines into.
Next was detailing. Using leftover green fabric from Isabelle, I cut 2 ovals. Using black fabric paint leftover from Vaporeon I painted on the pupils. I pinned the eyes in place and then zig-zag stitched around the edges. This made the fabric ripple a bit, which I am not so happy about. I also zig-zagged on some nostrils while I was at it.
Right sides together, I attached the hood lining to the outside along the front edge.
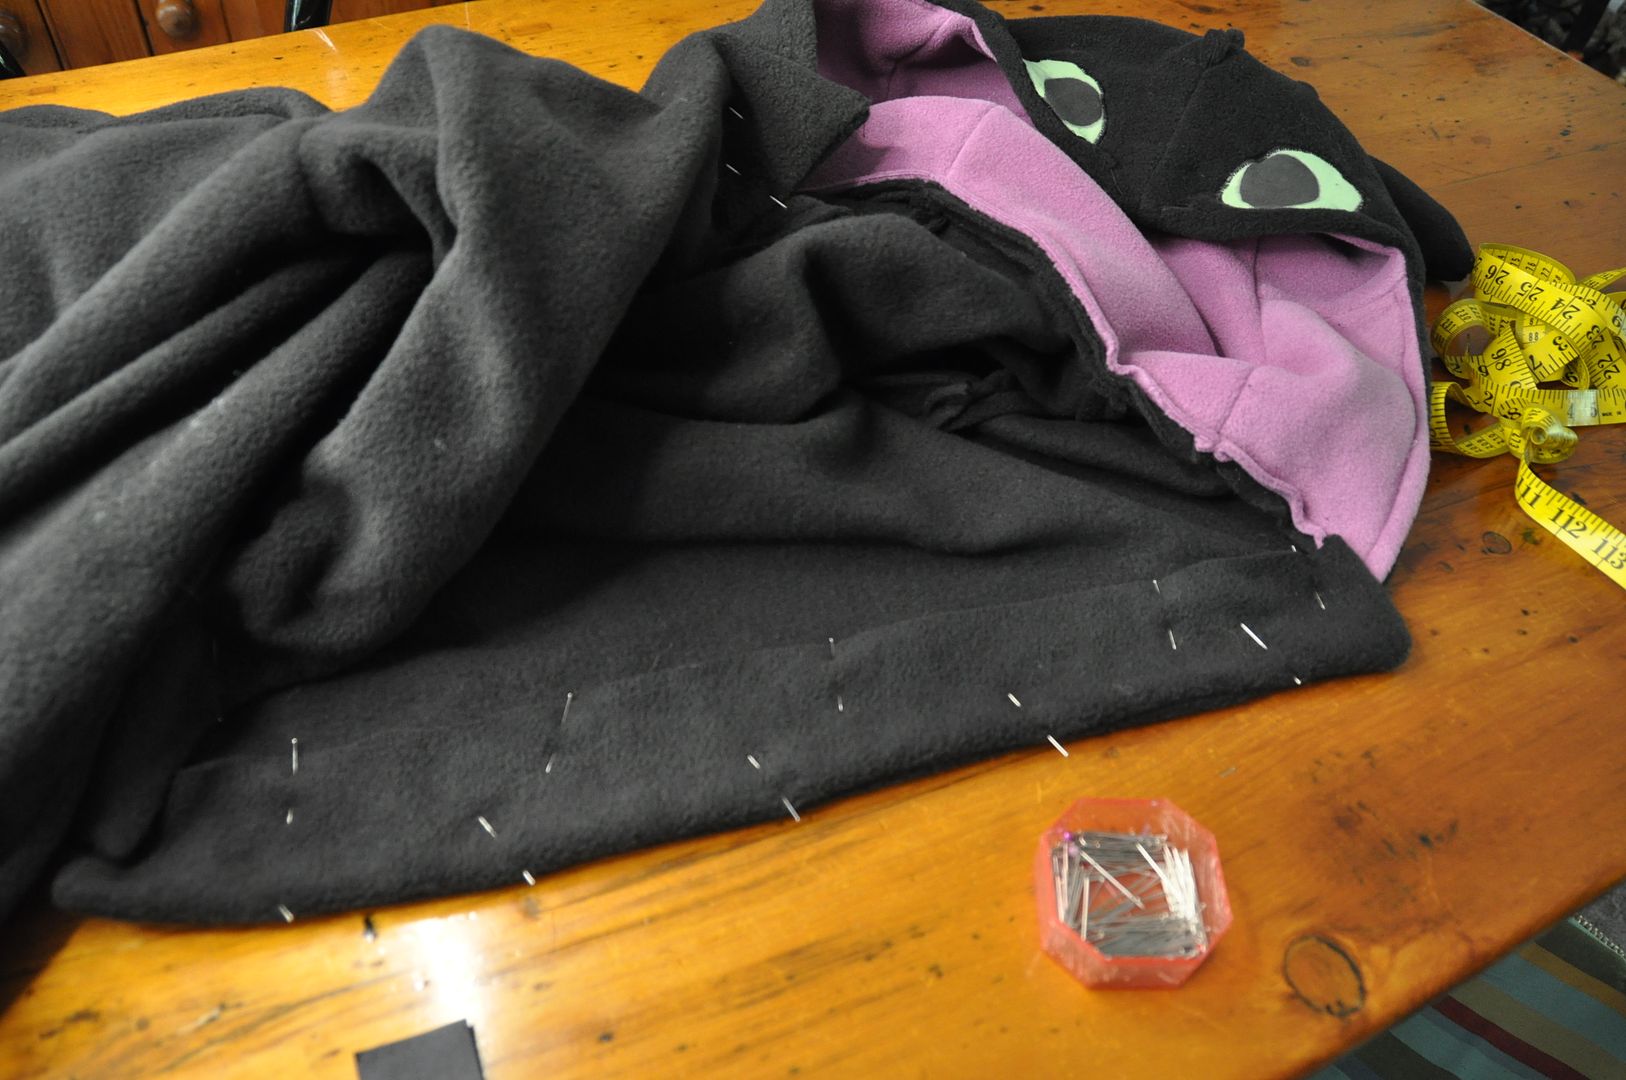
Blarg! What is this monstrosity? Looks like Dr. Finkelstein. D; The hood was not so thrilling at first, it took some cleverly hidden stitching to keep the lining tacked in its proper place, because it wanted to curl outward. Pulling the hood lining back inside the hood so that the outside over-hanged slightly I pinned it in place. Then I stitched the two layers together along the lower edges of the eyes and on the sides of the hood opening. Trust me when I say this helped a lot.
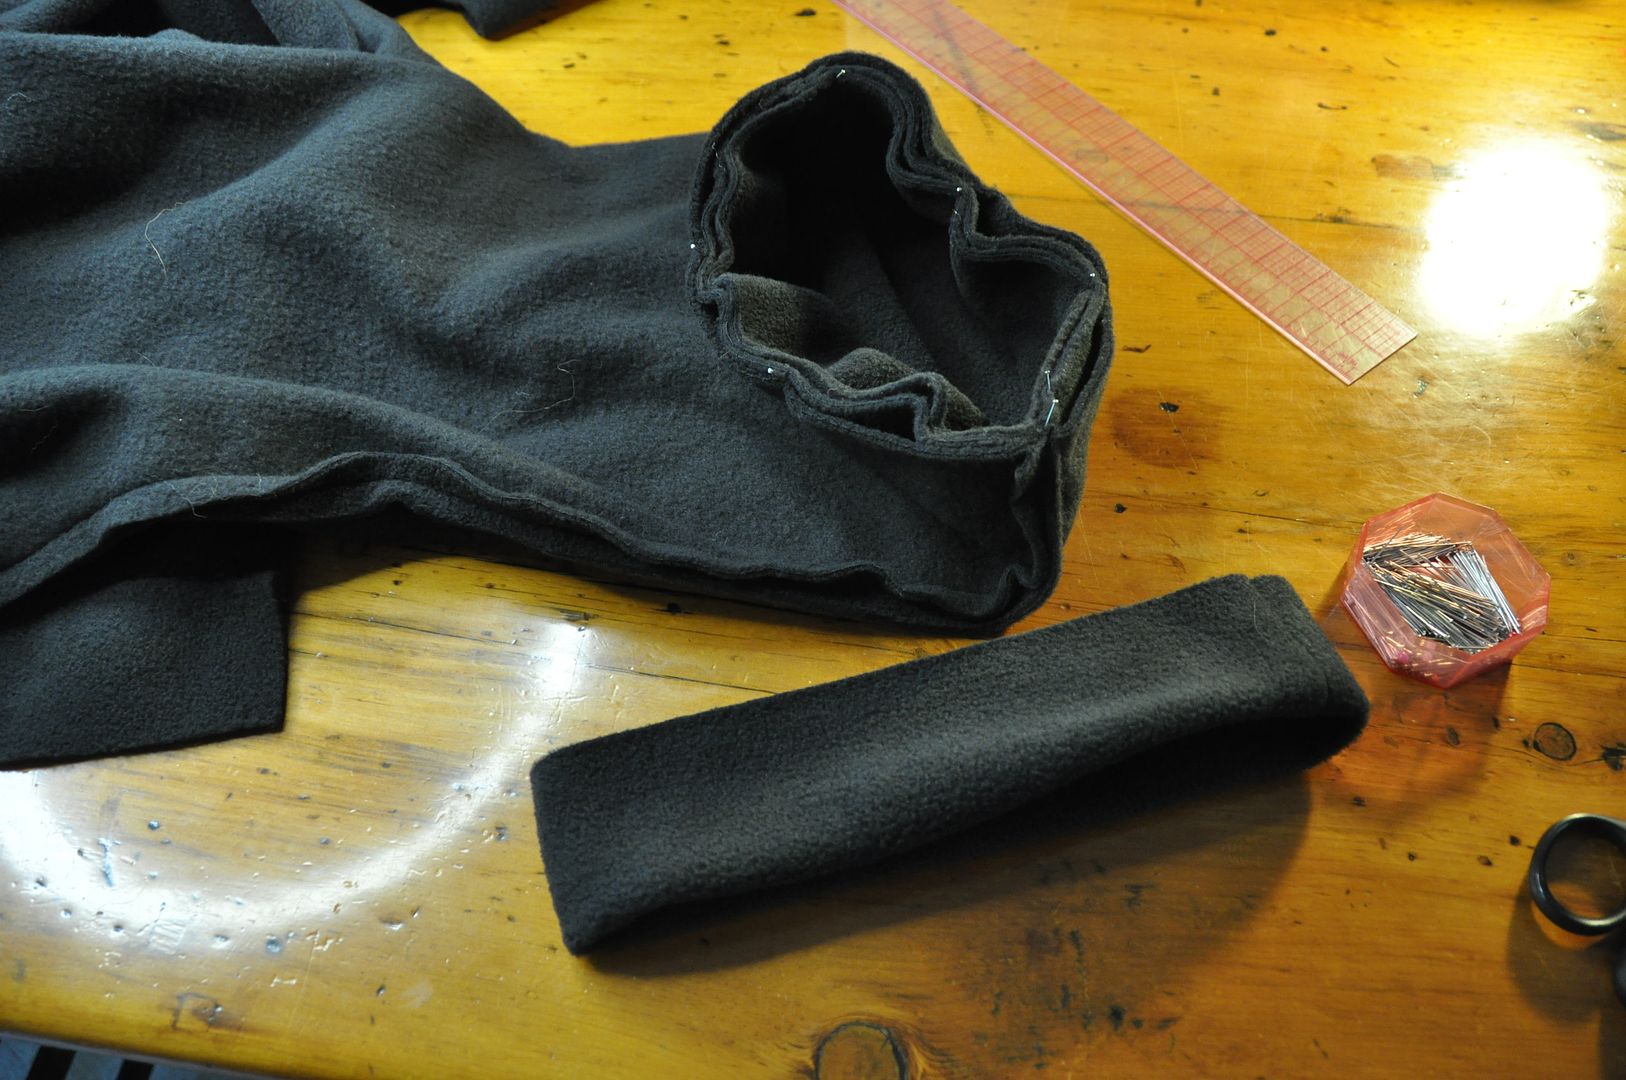
Next I put cuffs on the pant legs. I also sewed the arms into the armholes at this point.
With some difficulty I put a rectangle on each side of the opening for the placket.
I painted the viking skull on the red fin with white fabric paint. Way cool! Once this was dry I hand stitched these directly to the tail, which I had stuffed by this point.
Then I marked for the tail placement and spaced the spikes in the back seam according, picking it out to put the spikes in, and then going over the whole thing with a permanent stitch.
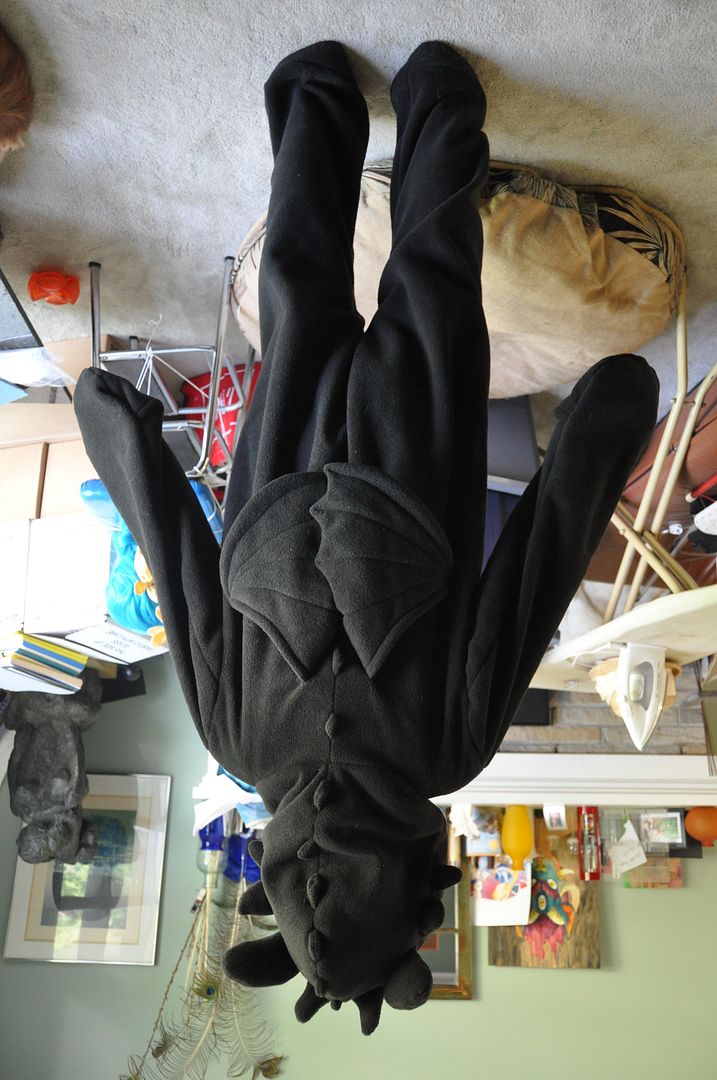
I measured and attached the wings, which were then tacked up with velcro so that they wouldn't flop down.
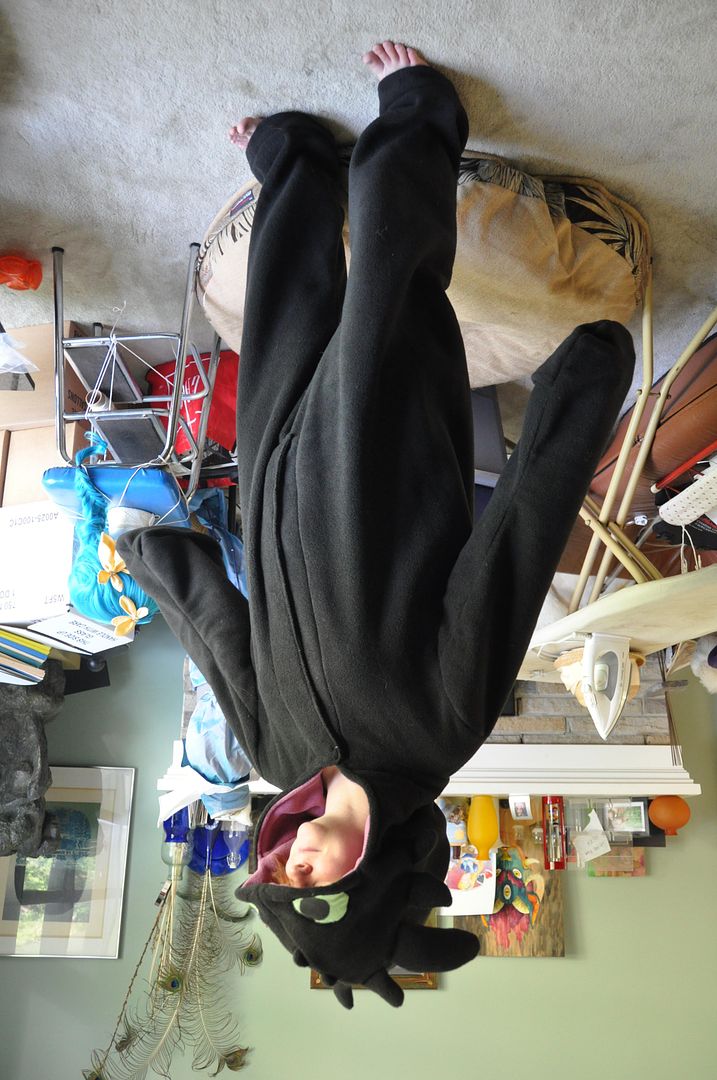
I pulled the kigu over an ironing board so that I could pin the tail to the back without accidentally catching the front. Making sure the tail was extra stuffed, I pinned it in place, then stitched around the raw edge with a zig-zag stitch to keep the tail firmly in place.
Lastly I added buttons and button holes to the front!
1 excellent kigu that made everyone at APop jealous. Sorry all! This kigu is one of a kind, but if someone were to commission me, I might consider making a second one. But not right now, because fleece is crazy expensive again!
An added bonus here is that because it was summer, all this fleece was on sale! Definitely worth it with the amount I had to buy. My recommendation is to never under any circumstance buy fleece in fall/winter. You will pay 3 times as much as you do in summer. For reference, I bought my fleece at Fabricland in July for 6$/meter, now (September) they are selling the exact same product for 17$/meter. Yikes!
I looked at kigu patterns online, but eventually decided to draft my own from scratch. It took me 2 tries to get the onesie itself looking how I wanted it and 5 tries to get the hood right. Lots and lots of mockups.
Below you can see the onesie version 1 and 2 side by side. The first sleeves totally didn't work, and my hood problems were always that it was too big and floppy.
After finally getting a pattern I was happy with, I moved on to cutting out all the pieces. Here are the hood pieces complete with fins, below you can see the wings and tail.
I changed my initial design for the sleeve, ending up with a sleeve style similar to my Katamari cousin pattern. It is a mitten sleeve with a slit on the underside of the sleeve to slip the hand covers on and off. This means the sleeve top is made of one piece, and the under sleeve is made of 2 pieces.
The bodysuit is in 2 pieces, with each half (right and left) being cut on the fold along the sides. (Meaning there are no side seams on this garment!)
On each of these I first sewed up the leg and shoulder seams, then I basted the center back-crotch-front seam, stopping where the opening for the buttons would go.
I hemmed the edges of the opening, then the sleeve top and bottom pieces were sewed right sides together then flipped right way out. I made sure the hand cover was on the outside.
It took much deliberation, but I decided to line the hood in pink, to look like the inside of Toothless' mouth, as opposed to making it black to match the rest. I sewed the hood lining together; first I stitched the whole front together, then the back, lastly the side seam that divided the two.
I sewed all of the fins right sides together, then clipped and flipped them right way out. I made a whole bunch of triangle shaped ones in varying sizes that would go up the center back seam.
Carefully spacing the spines, I sewed the 2 tail pieces right sides together, then flipped it right way out. (I had to make sure the spines ended up on the correct side during this process.)
Next I attached the front pieces of the out hood together. While I was at it, I put two small spines on his forehead in the center seam. While looking at reference images I carefully arranged the fins around his face, pinned them in place then sewed the side seam, completing the outer hood. The reason why the hood is made of 6 pieces is partially because it made the shape better, but also because I needed seams that I could easily attach all the fins/spines into.
Blarg! What is this monstrosity? Looks like Dr. Finkelstein. D; The hood was not so thrilling at first, it took some cleverly hidden stitching to keep the lining tacked in its proper place, because it wanted to curl outward. Pulling the hood lining back inside the hood so that the outside over-hanged slightly I pinned it in place. Then I stitched the two layers together along the lower edges of the eyes and on the sides of the hood opening. Trust me when I say this helped a lot.
Next I put cuffs on the pant legs. I also sewed the arms into the armholes at this point.
With some difficulty I put a rectangle on each side of the opening for the placket.
Then I marked for the tail placement and spaced the spikes in the back seam according, picking it out to put the spikes in, and then going over the whole thing with a permanent stitch.
I measured and attached the wings, which were then tacked up with velcro so that they wouldn't flop down.
I pulled the kigu over an ironing board so that I could pin the tail to the back without accidentally catching the front. Making sure the tail was extra stuffed, I pinned it in place, then stitched around the raw edge with a zig-zag stitch to keep the tail firmly in place.
Lastly I added buttons and button holes to the front!
1 excellent kigu that made everyone at APop jealous. Sorry all! This kigu is one of a kind, but if someone were to commission me, I might consider making a second one. But not right now, because fleece is crazy expensive again!
Subscribe to:
Posts (Atom)