Wednesday, October 14, 2015

Sakura - Dress, Blouse & Petticoat - Cardcaptor Sakura

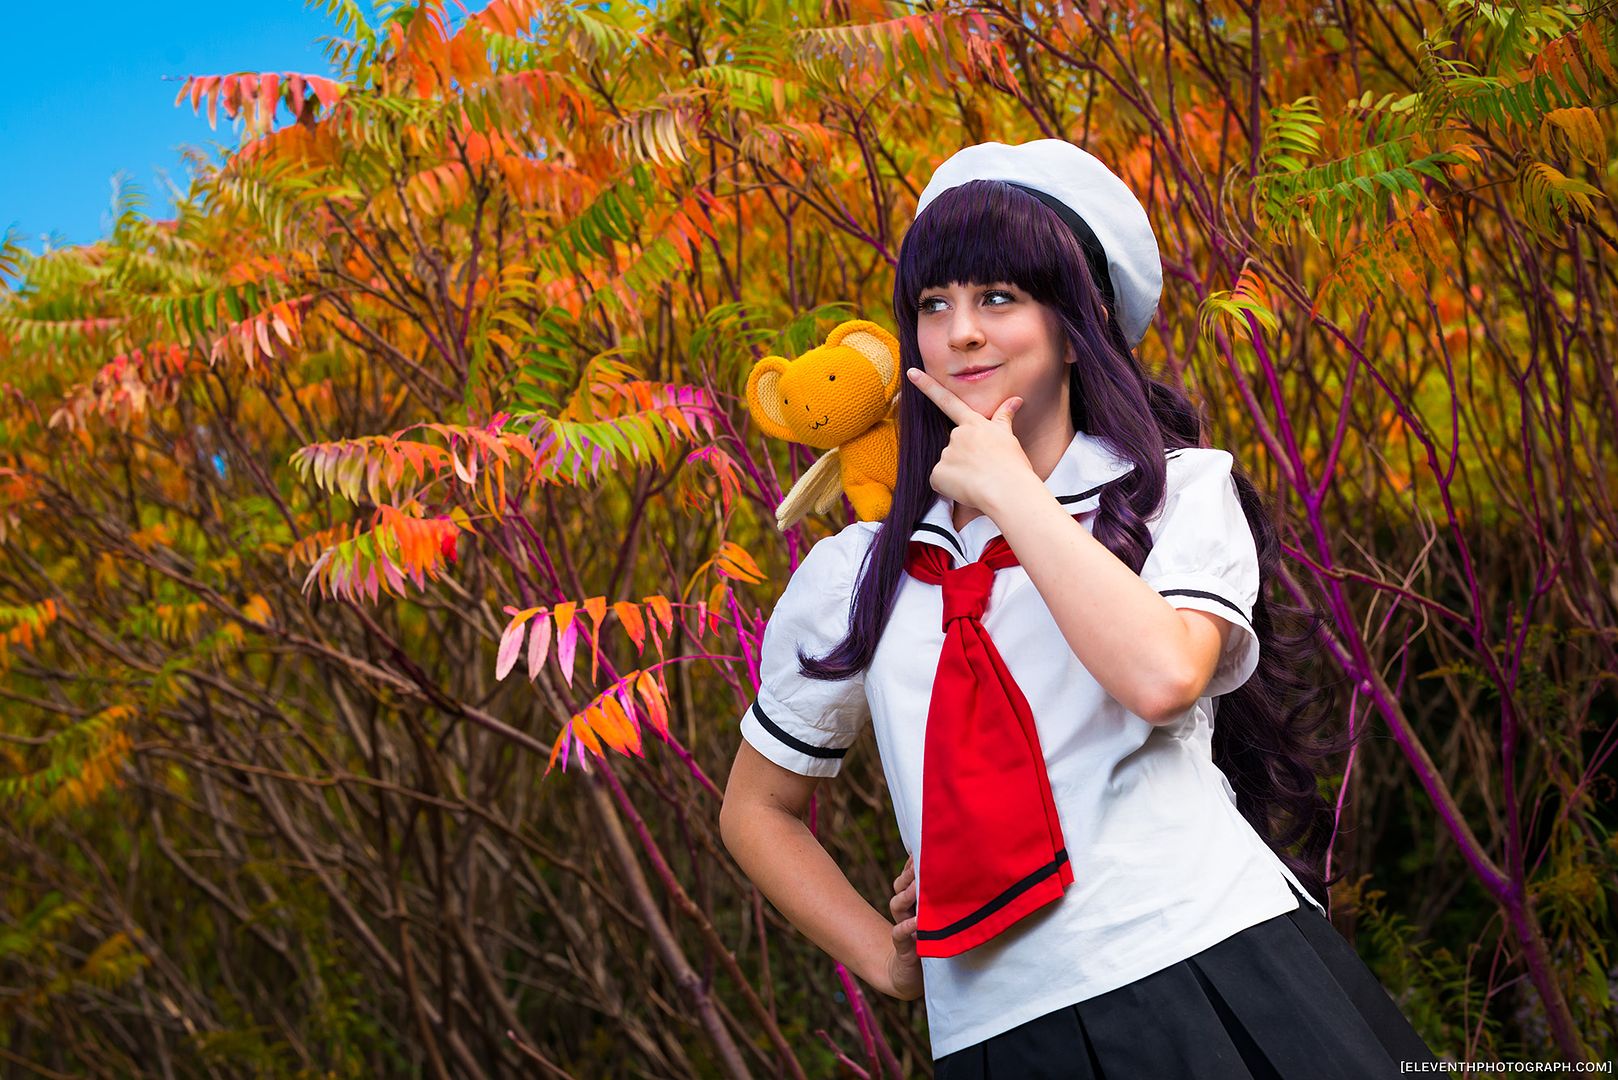
So guys, it finally happened: I finally got some finished shots of this costume. Special thanks to EleventhPhotograph for the amazing fall shoot! I loved the use of colour gels in the trees to pump up the colour even more!

You may have already guessed that I have a slight obsession with the 90s series CardCaptor Sakura. It was the first anime I ever watched in Japanese with subtitles. The numerous other CCS costumes should have clued you in to my obsession at this point.

I've already made Suppi & Kero, Sakura's sailor suit, and Tomoyo. Adding this one and the one I am currently working on, that brings my total up to 6 costumes from the same series. Which is kind of crazy. Although, not all of these costumes are for me. Suppi was for my older sister Alex, and this iconic Sakura outfit was made for my lovely sister Elanne.

It may not be totally apparent that my sister is actually 7 years younger than me (we have been told on numerous occasions that we look like twins...), but this means that she was not old enough/actually alive to watch the series with me in the 90s. She only watched it for the first time about 3 years ago when Alex and I were having a nostalgia trip. And she quickly became a fan. She hadn't cosplayed in a few years, but asked me if I would consider making something CCS for her. How could I refuse? And behold, the cutest Sakura I know!

So lets get started talking about how I made the dress, blouse and petticoat!

This is definitely one of the most iconic Sakura outfits, this one is featured in the season 1 opening theme. Fabric shopping proved a bit of a challenge for this costume, as I had difficulty finding the correct colour of pink. Because the dress is pink, not red, as some people make it--though that may be to better match one of the manga illustrations? I don't know. It's a reddish/salmon-y/flamingo-ish pink depending on which reference picture you look at. The fabric I found was a medium salmon-y pink colour. When compared to the red fabric I already had on hand for the bow details it had a nice contrast and the colours looked good together. Which is an important part of colour matching any costume.

The most difficult thing about CLAMP is that the way they draw their CCS designs is so simple. They look simple. But they aren't. My main issue is that they don't typically draw seams onto the clothes. This can make it extraordinarily difficult to determine how exactly the clothes should be constructed.
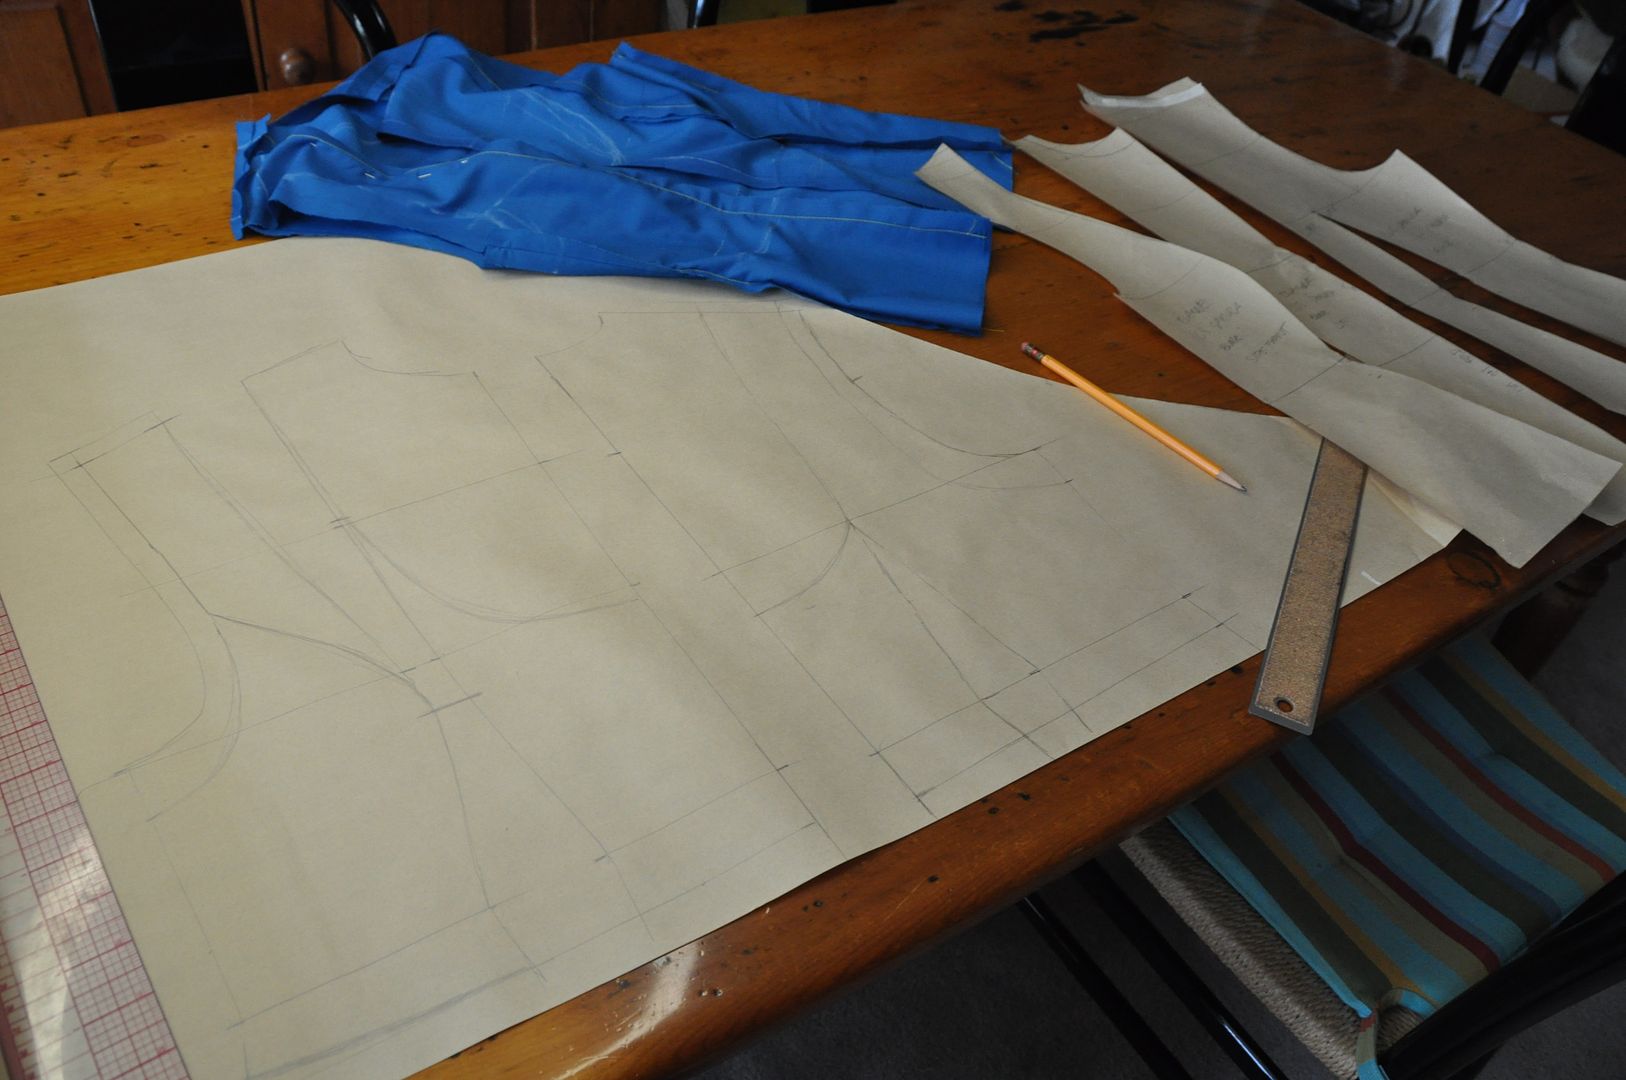
I started off by patterning a basic block, which I heavily modified to create the pattern for the bodice.

The skirt is a full circle and a half. It has been too long since for me to explain the mathematics of how I did that. It consists of 3 panels which are 1/2 of a circle each. This is so I can have a seam down the center back for the zipper, but not one down the center front (which I think looks bad).
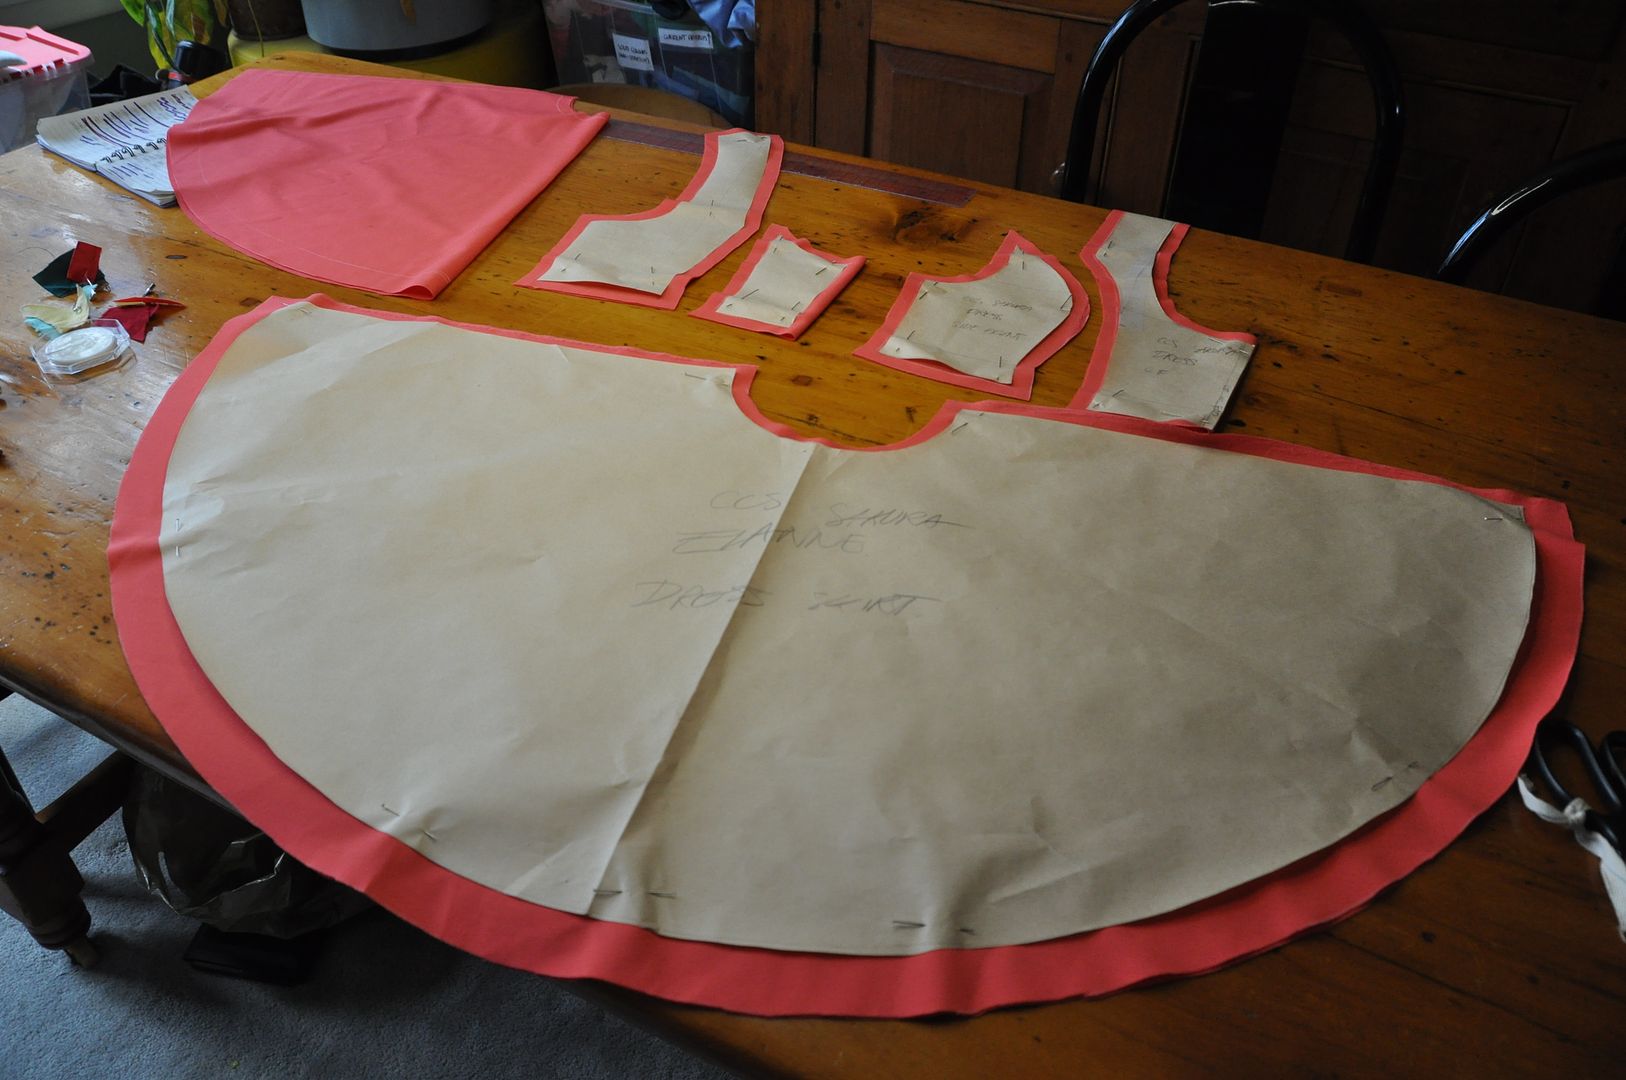


I cut out my pieces and then began assembling it.

The bodice was designed not to be super fitted to her curves in spite of having a princess seam--Sakura is supposed to be like 10, so emphasizing curves does not really emulate the character accurately. But not having the seam would have made the bodice gape weirdly at the armholes. Also, it couldn't be too fitted, because there were several layers going underneath: the wing rig being the bulkiest, but also the blouse and the petticoat waistband. If it was super fitted she would look lumpy. Sakura is not lumpy.
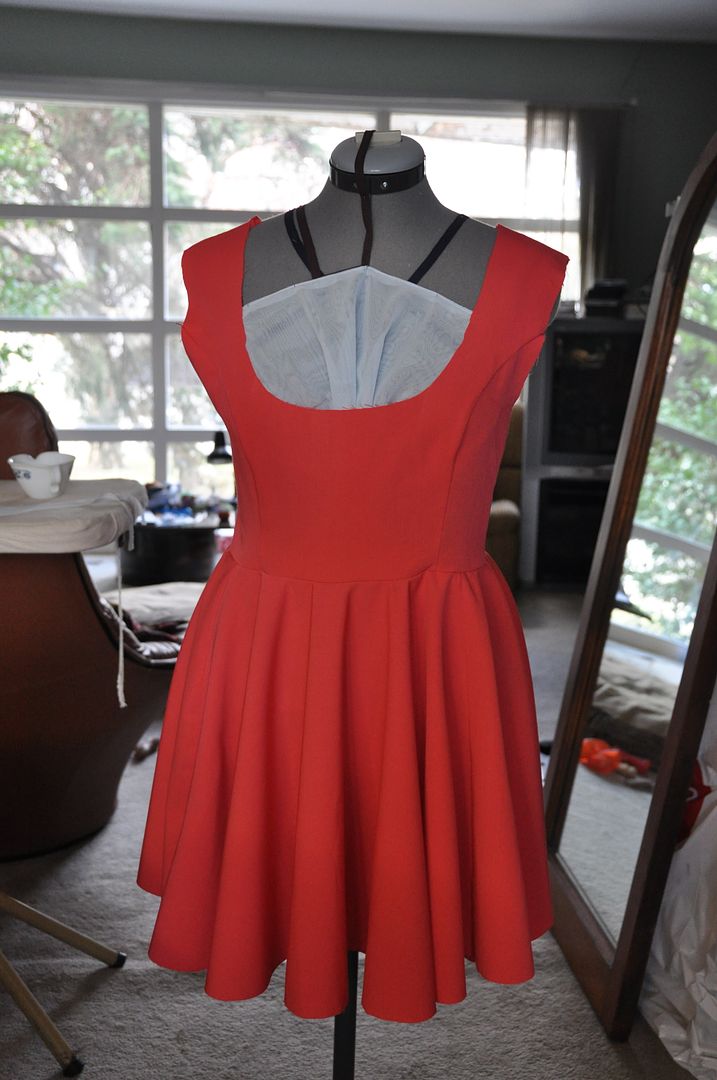
I finished the seams on the inside.

You can see how full the skirt is as it hangs. This is what the skirt looks like without the petticoat underneath. Pretty sad and not floofy. I always think it looks so sad when a character is supposed to have a giant floofy skirt and cosplayers aren't wearing a petticoat. :( Sometimes it's understructure that can make or break a costume.
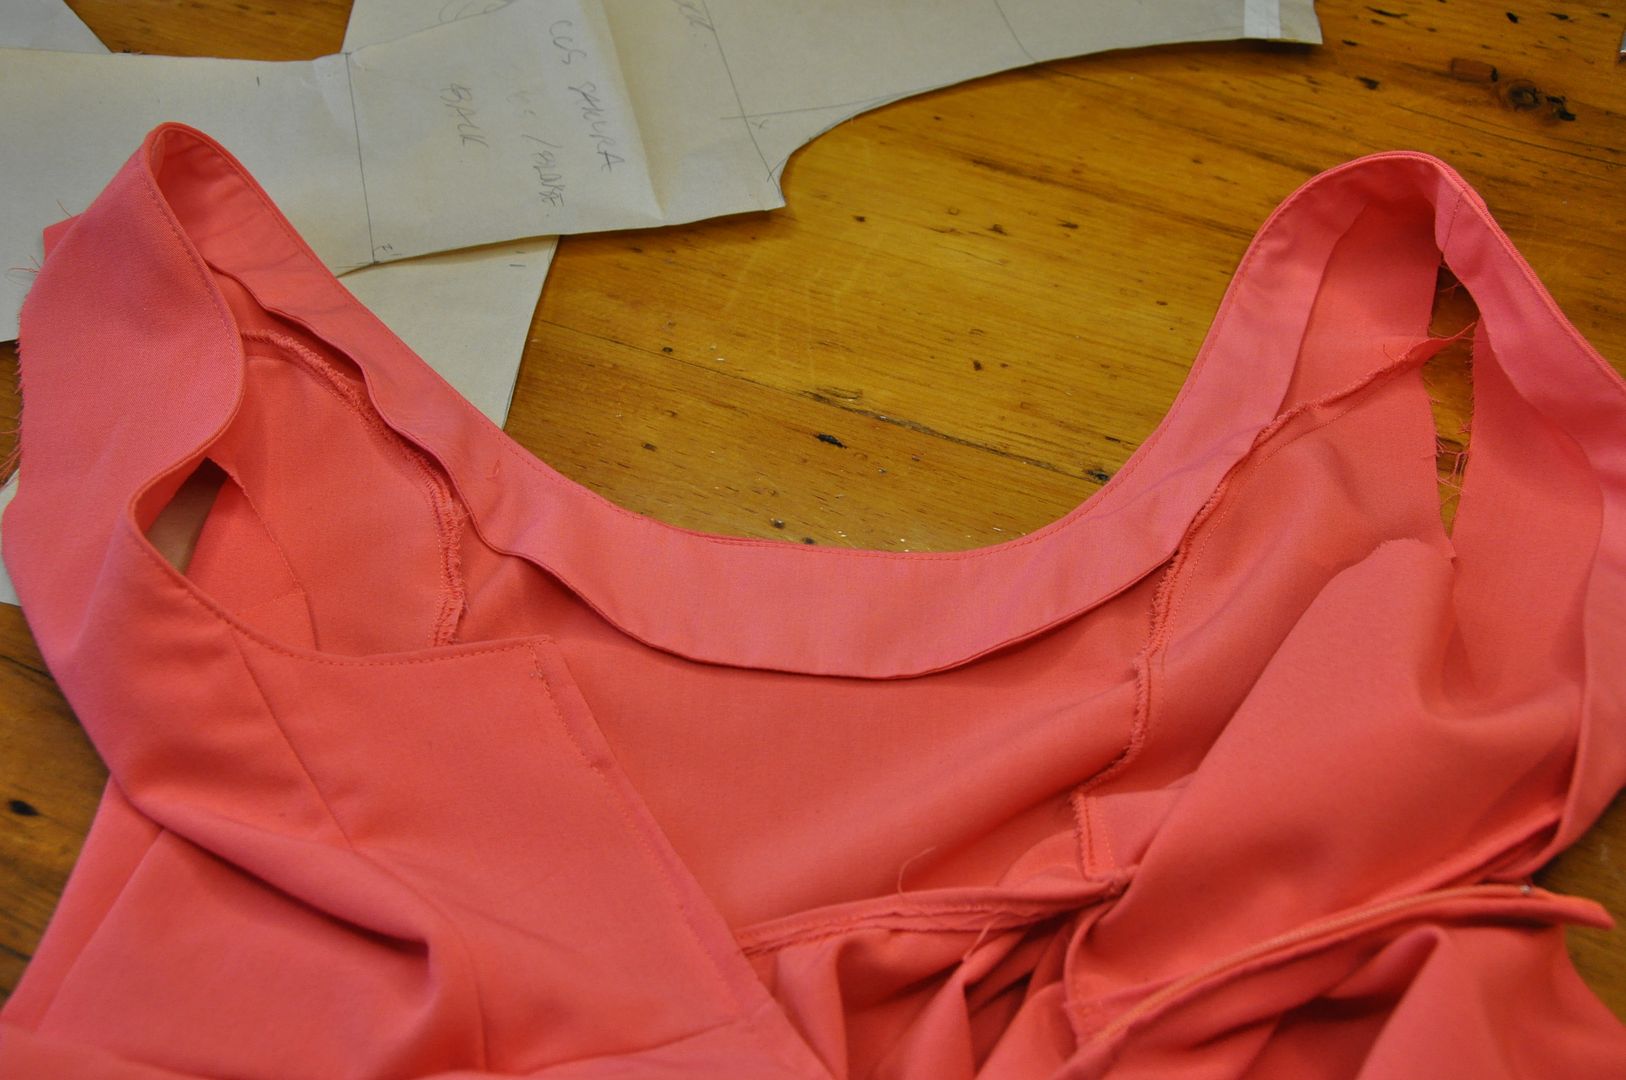
Next I added a zipper into the center back seam. Next I finished the edge of the neckline with a facing. This was tacked down on the inside to keep it from flapping about.


Next I made a facing for the armholes. This was also tacked to the inside.

Next the stripe was added to the bottom of the dress with a pale yellow bias tape, and the dress was hemmed.
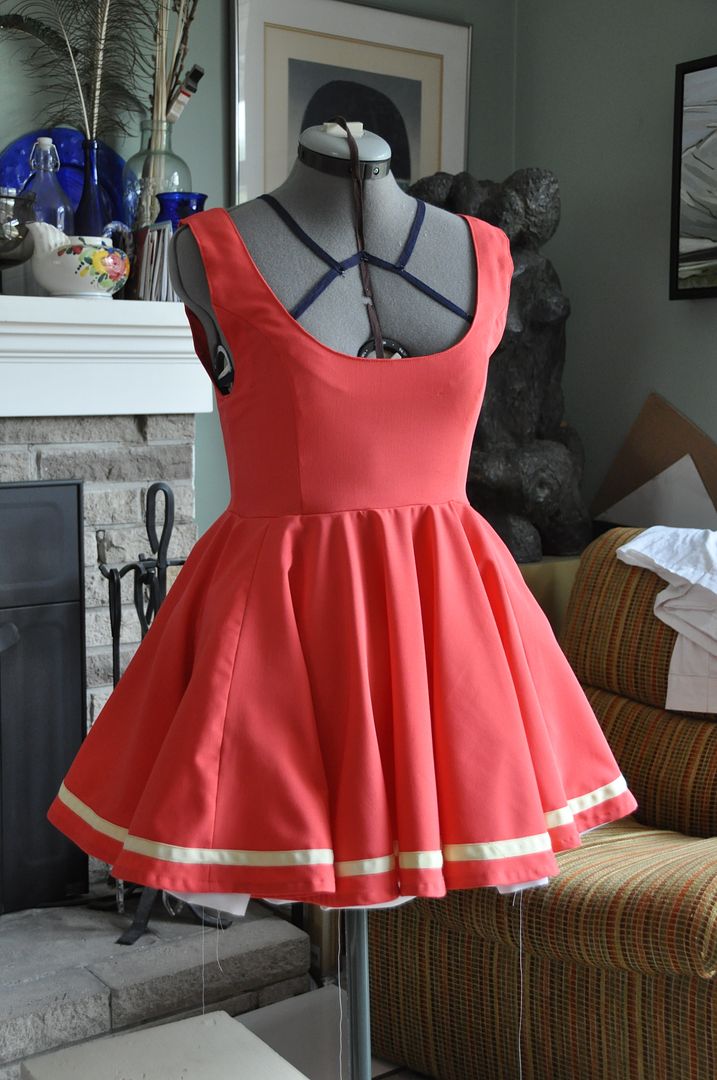
Special thanks must go to my wardrobe gnome Alli, who helped me with finishing up this dress. She did 99% of the hand stitching on this costume. Which included hand basting the yellow bias tape stripe along the bottom edge and the hem (as well as making and attaching all of the bows!). This was so I could machine stitch it with absolute precision (and no wrinkles later. Hand basting is one of those tasks I loathe doing, even though it can be super helpful.

Here you can see I have tested out the dress with 1 layer of the petticoat. Even then I decided I would need almost 3 times as much floof. And even still, I feel I could have done 1 more layer.

Simultaneously I was making the blouse. It started off as the same basic block, but the similarities end there. For the top front portion of the blouse (that would be revealed by the neckline of the pink dress) I created a panel that was wider than the center front piece below by about 2 inches. I gathered  this panel along the bottom edge and neckline so that it would appear ruffled along the center front. The rest of the blouse was fitted, so there wouldn't be too much added bulk under the dress.

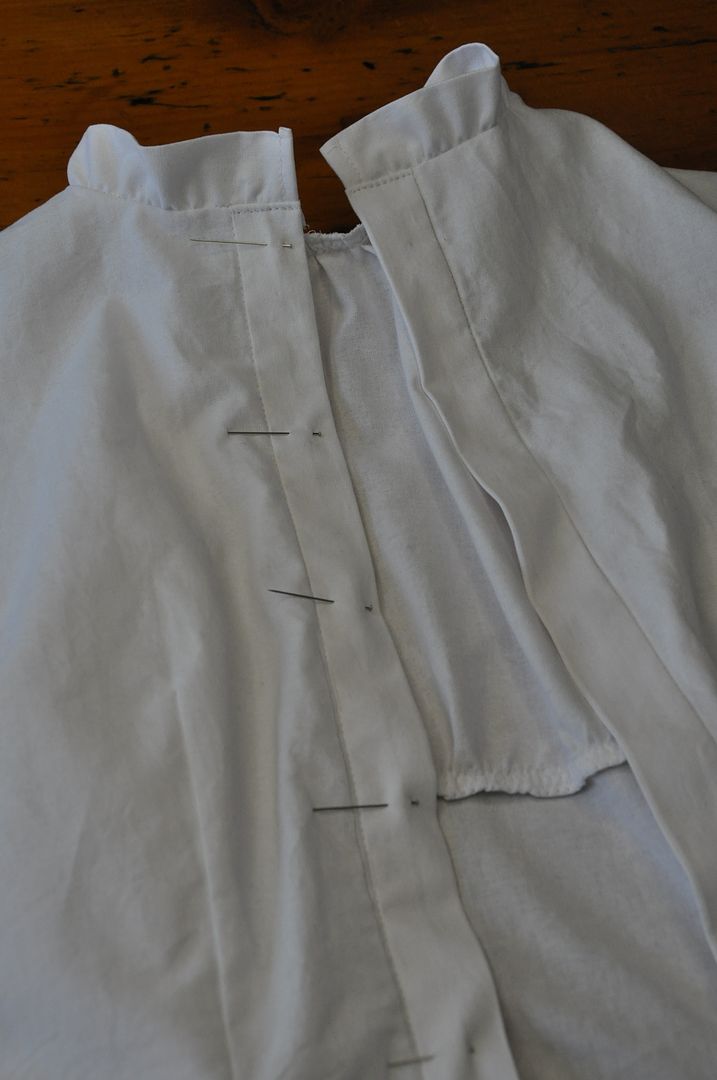
The collar is simply a long rectangle of fabric folded in half lengthwise. It was made long and gathered to fit the neck hole. Again, this costume is nothing but ruffles, ruffles, and more ruffles.

For the back closure I decided to make it button up, because it looked adorable. Although it was a bit of a challenge for her to take on and off, she managed!
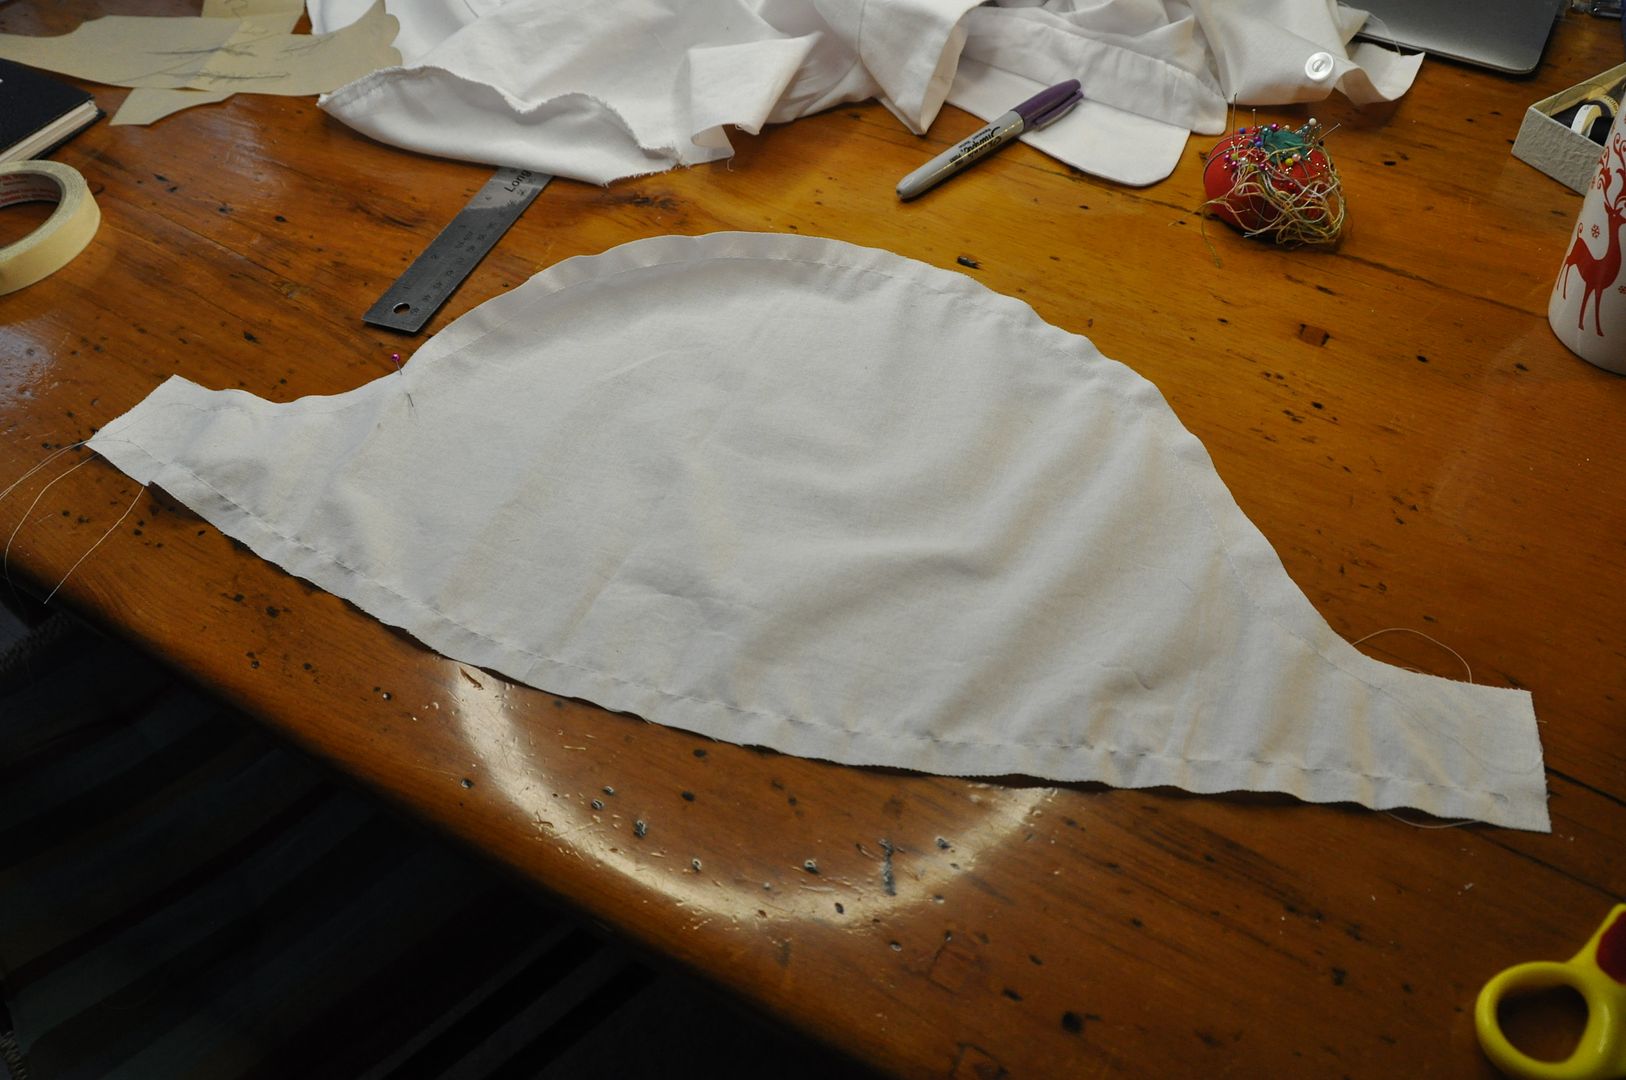
The sleeve took a few tries to get the correct proportion of poof. They are larger than the sleeve hole and gathered to fit.

The sleeve cuffs were done in the same way as the collar.
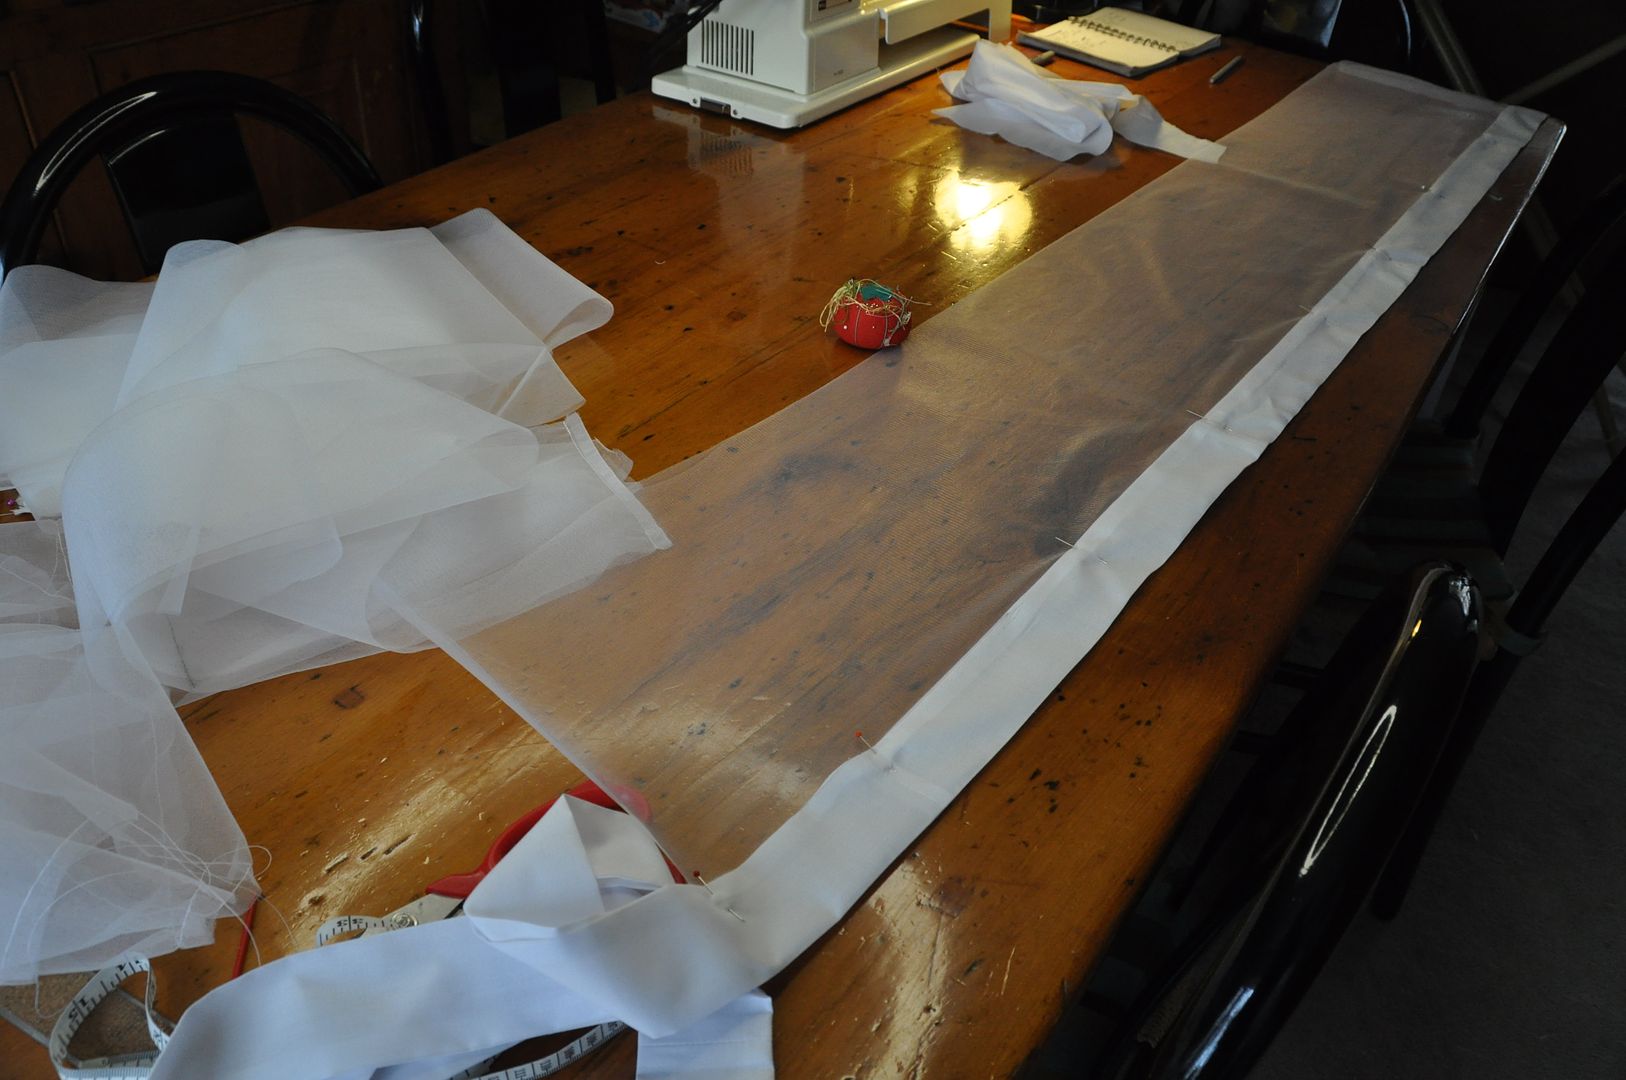
The last step in the project was the petticoat. It is surprisingly labour intensive to make one. With this I used up all the crinoline I had left from when I bought it for my Alice petticoat.

After determining how long I wanted it to be, I cut as many strips as I could of crinoline in each width I needed. I sewed these together, with french seams.

Much like layer cakes, petticoats are easiest to construct from the bottom up. You make the bottom tier first--finish the hem, ruffle it along the top edge--then attach it to the tier above and repeat until you get to the waistband. You make each layer separately.

You can see that each layer in this petticoat has 2 tiers of crinoline--a small one at the waistband. This was to cut down on the already substantial bulk that would have to be sewn into the waistband.

To finish the bottom hem, I created a strip of broadcloth to fold over the bottom edge. This created the look I wanted for the bottom visible edge. While still having the structure that crinoline provided. Making the petticoat entirely out of broadcloth would have been far too flimsy.
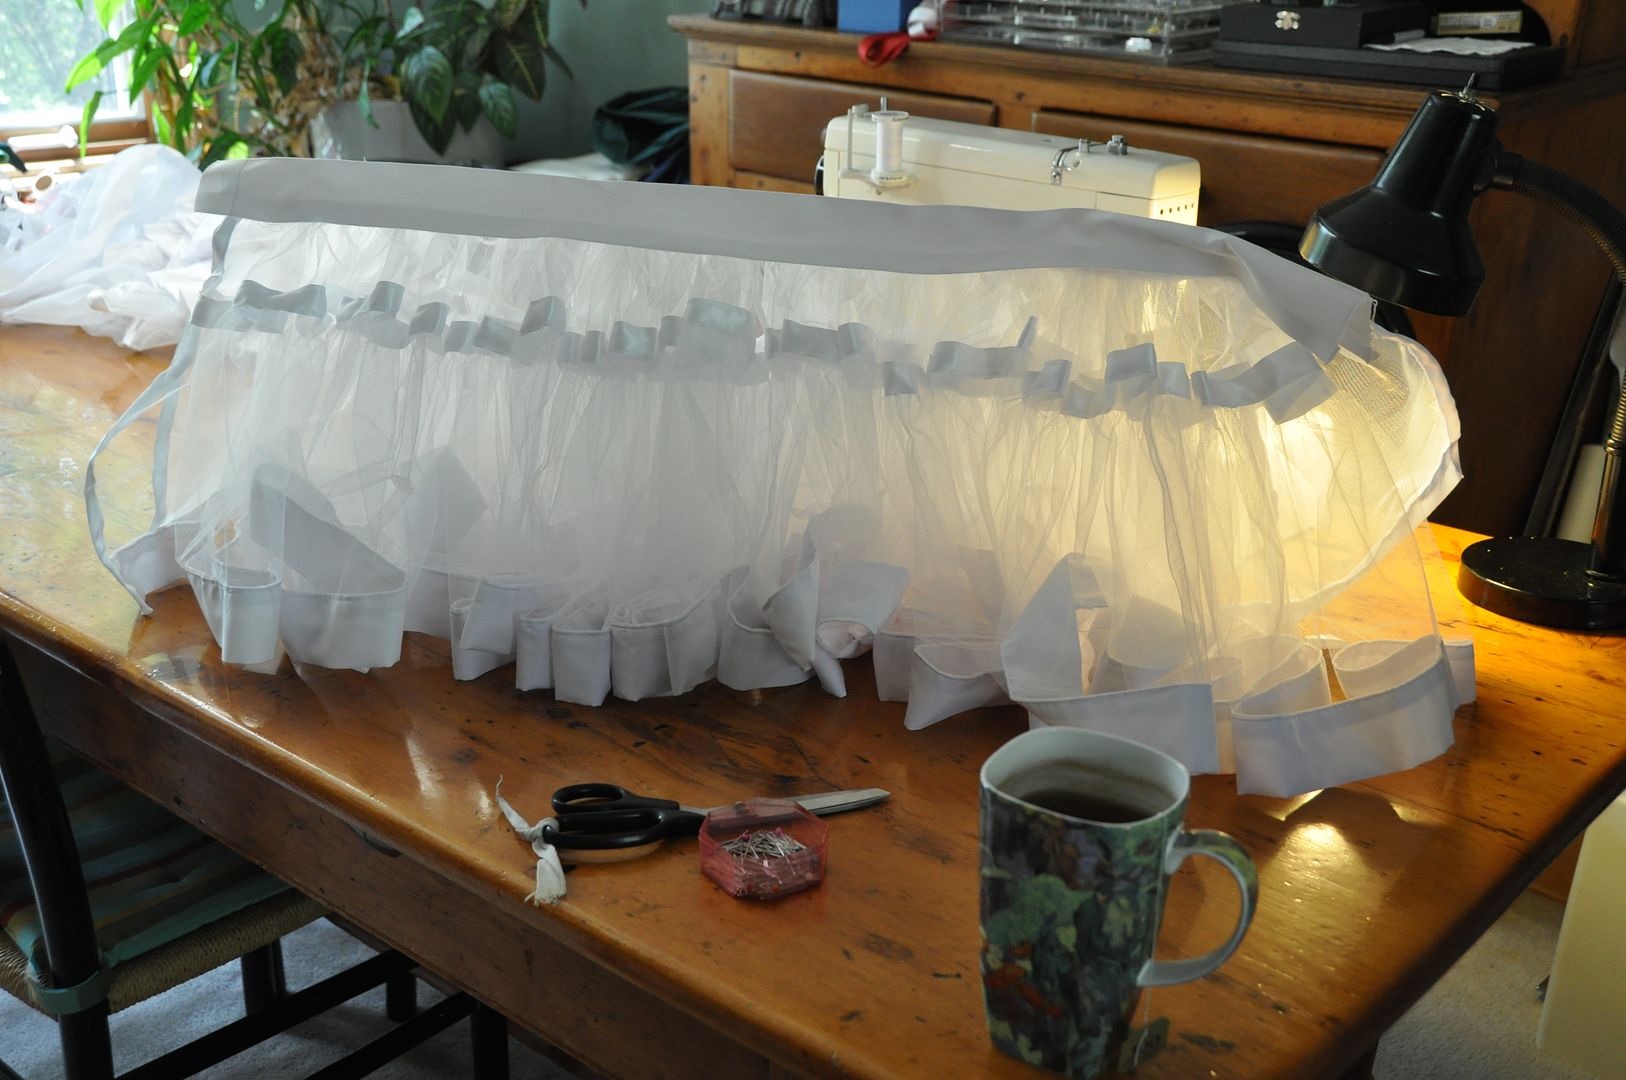
To give you an idea of just how much fabric this is: the petticoat can stand on its own. This is only 2 layers, this is before I decided to make a third.


After making layer number 3, I also made a simple white circle skirt (1 full circle) to go over top of it. Like the blouse I made a ruffle to add along the bottom edge. This was long enough so it would be visible below the edge of the skirt.
To give you some perspective, this is how much petticoat I put into this costume. And I could have done more. I would probably have used a stiffer crinoline layer.

This one is 3 layers of crinoline, plus a white circle skirt with a ruffle along the edge over top.


The completed dress looked pretty good!

Monday, October 5, 2015

October Update

It's October now, crazy right? I thought it was time for a new banner on my facebook page, highlighting all my best/newer costumes. Photo credits to EleventhPhotograph (for Steampunk Captain, Forest Guardian, & Asuna), and Elemental Photography (for Splatoon & Vaporeon). I'm still on the fence about changing my banner on this page, because I like the current one so much. I will probably wait a few months before changing it.

This month I will be starting to post about my Sakura costume. It's a surprisingly complicated costume, so it will be broken down into many parts. I finished my Splatoon posts now, so be sure to take a look at those! Posts on Vaporeon will be coming in December most likely.

EleventhPhotograph is back in Canada for a bit, so I did a photoshoot with my Tomoyo and Sakura costumes the other weekend. Loving the fall colours from that shoot! Must enjoy the fall weather while we can. I've added my Tomoyo shots to my Tomoyo blog post, so be sure to go back and check those out!


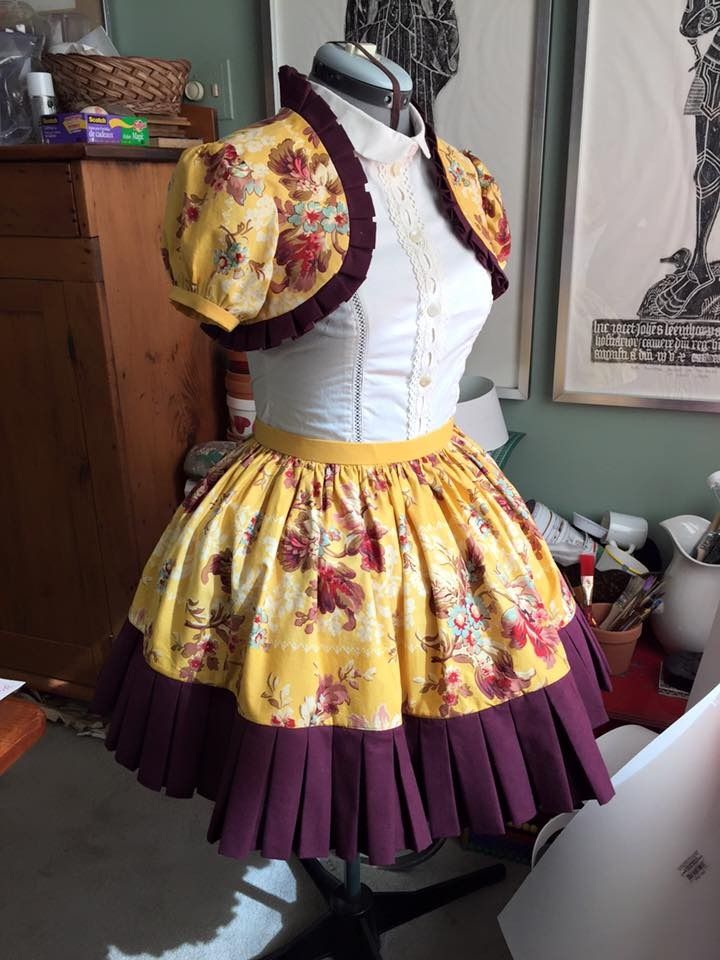
I am currently prototyping some bags that I am planning on selling. Hopefully more info to come later this month. Other than that, I've got a couple costume projects on the go now--specifically my newest CardCaptor Sakura outfit and a lolita costume that I am just putting the finishing touches on. I'm also working on a Toothless onesie commission for Yavarice at the moment. I finished up some Splatoon tentacle commissions for some Squids 2.0, excited to have members of the blue and pink teams to join our ranks!

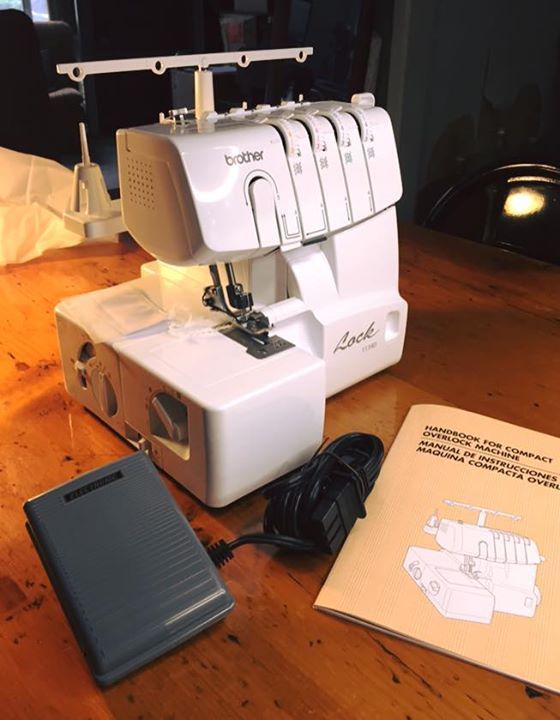
Speaking of joining the ranks, allow me to introduce you to the newest member of the team: Hans! It was about time that I bought a serger of my own. It's not the most hi-tech machine on the market, but it has a variety of features, and the reviews were positive. Having a serger on board will allow me to work with more stretch fabrics than I did previously, and also make finishing inner seams much faster.

At the end of the month I will be taking a short trip to New York City! Excited to do some fabric shopping! This time I will be going with a shopping list and reference pictures. Last time I was so unprepared, all I bought was a small bit of lace trim... Which I finally just used on my lolita outfit! Going to get fabric for my next costumes while I am in a place with such variety! I must be prepared!

Speaking of trips, I will be going back to Japan to visit my sister in November. There will be no blog posts while I am over there.


In other news, after many years of many many headaches, on the extreme insistence of a friend of mine I decided to get my eyes tested. It turns out I needed glasses for close up vision. So far they are working out well and appeared to have solved my problem, but wearing them has taken some getting used to--since I have never worn glasses in my entire life!

As you can see, September was a pretty busy month! Hopefully things will be a little less hectic here in the workshop this month.

That's all for now!

Wednesday, September 30, 2015

Inkling - Guns and Tanks - Splatoon

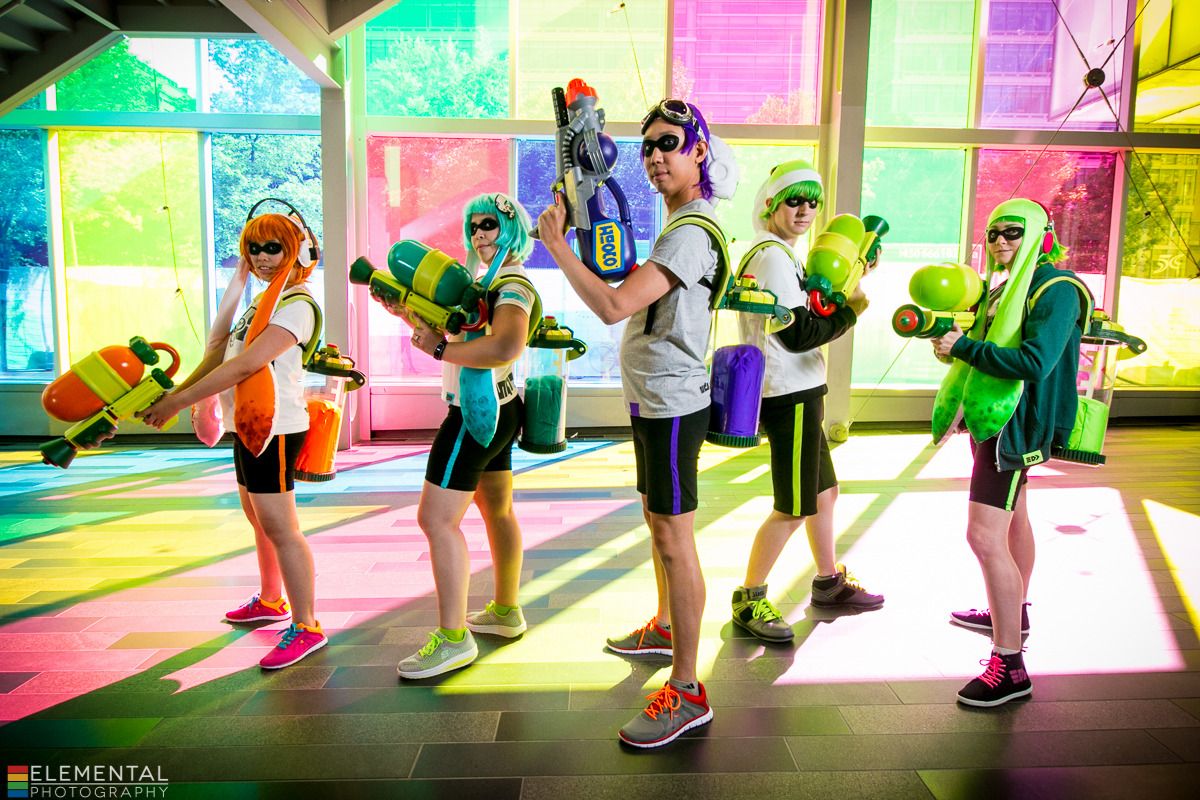
Part 3 of the Splatoon Squad posts! Lets talk armaments! >:D If you are interested in the tentacle hats, go here! If you want to see how we put together the outfits, go here! Once again hats off to Elemental for the great shots from the photoshoot!

Now we delve into territory that I know little to nothing about: The Armaments. I had very little involvement in this area. I was a helping hand in the mass production line for the harnesses, ink pillows, and I helped put the electrical tape gauges on the side of the tanks. That's about it. Credit goes to the real masterminds Brian (Ragz Cosplay) and Adrien, and their very best shop gnome Andy (Yavarice).

Based on a 3D model that Andy did of the tank, Brian broke down and printed all the components. These had to be cleaned up (sanded) and painted, and then these were assembled into a full team of tanks. Andy gave a hand in this process.

All I can tell you about 3D printers is that they operate by wizard magic. I am fairly certain Brian is a wizard, and Andy is a sorcerer's apprentice.

The pieces were painted up separately using spraypaints and then glued together using a glue called E6000. The bottom of the tank is removeable so that the ink pillow can be changed. By changing the ink pillow you can easily re-purpose the tank for a different colour team.

The pillows are made from the same spandex as our hats. Michelle (Mage Cosplay) and I made fabric cylinders of varying heights and stuffed them. The pattern is literally 2 circles and a rectangle. Except Brian's, he made the top of his wavy. Because he is not lazy like me.

The harness rigs are made out of foam mats from walmart, black webbing, buckles and hot glue. The shoulder straps are 2" wide and tapered at the front end. After being cut to the desired length, we put a slit at each end for the webbing to be fed through. The webbing had the female end of the buckle sewn on to one end. We carved out a small depression in the inside of the strap and glued this end of the buckle in place. The other end is the adjustable side. When we had the desired length, the excess webbing was cut off. We burned the ends with a lighter so they wouldn't fray.

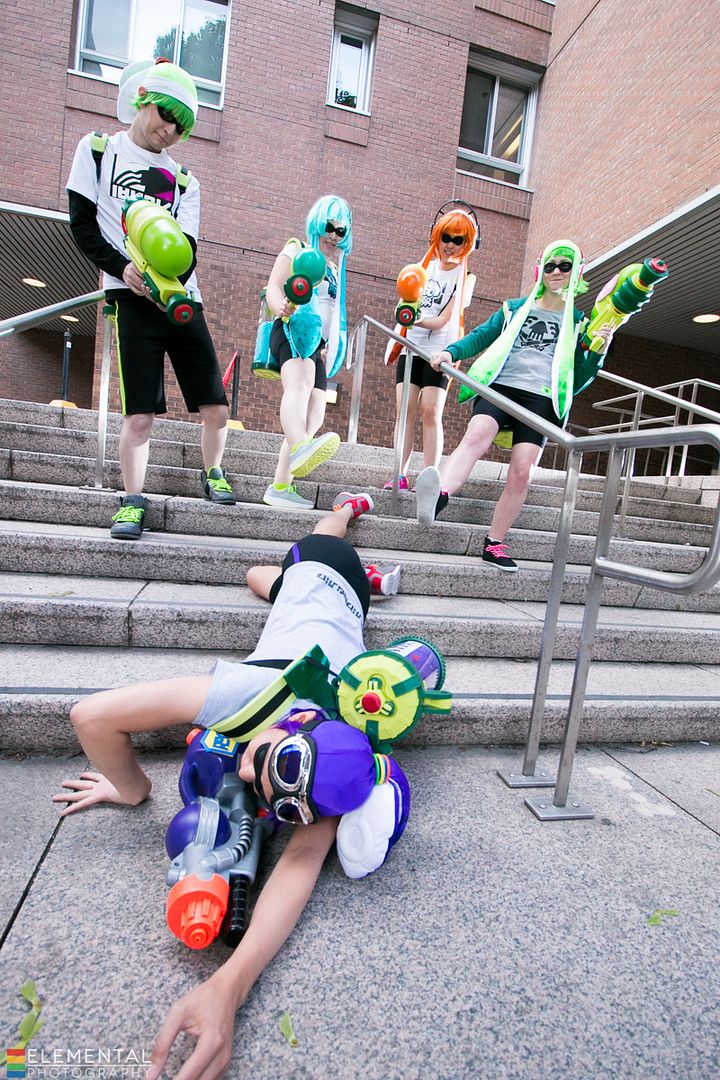
The two straps were glued to a back piece that is a dumbell shape that has a thinner webbing strap attached to it. This smaller straps has velcro and feeds through two slots on the tank. They make the tank removable from the harness. You can see where the tank attaches to the harness in this great shot of us beating up Andy.


As for the Splattershots, Adrien takes all the credit there. (Well, Andy does get some credit for being his resident shop gnome and doing much grunt work cutting out pieces.) Adrien created some foam pieces as templates and vaccuformed all the separate pieces over them. These were then cut out and glued together. But I assure you it is more complicated than I have described. I am still in awe of these, they are so professionally made!

I believe Andy's gun is a Nerf gun? With a logo added to make it look super legit. The logos were made from craft foam.

Overall I was really impressed how we were able to pull together a really cohesive looking group! I hope I get to take part in something like this again in the future. Special thanks goes to everyone who helped make this happen. I'm excited for Squids 2.0! :D

Thursday, September 24, 2015

Inkling - Tentacle Hats & Wigs - Splatoon


Part 2 of the Squids or Kids series! If you are interested in seeing how we put together the outfits and accessories, go here! Once again credit to Elemental for her fabulous job doing the group photoshoot! So many really great shots!

Let get down to business; time to talk about those crazy squid hats! Patterning and painting the tentacle hats was my big group contribution. It was a bit of a challenge for me, as I have very minimal experience working with spandex/stretch materials.

We did some google image research to see what other cosplayers had come up with. We saw quite a few who had made theirs out of fleece. We decided not to use fleece because we wanted to a) be shiny and b) be paintable for the gradient. We also saw ones who had made the tentacles and covered them in wig fibers. We all decided that was more effort than we were willing to put in. I decided to go with a hat, while the other girls were more partial to the "tentacles sticking out of the wig" idea. So for them we used the same tentacle pattern, but instead of sewing it into the hat, they stitched/pinned theirs directly to their wigs. I may go back and change mine to match the rest... I'm still on the fence about that.

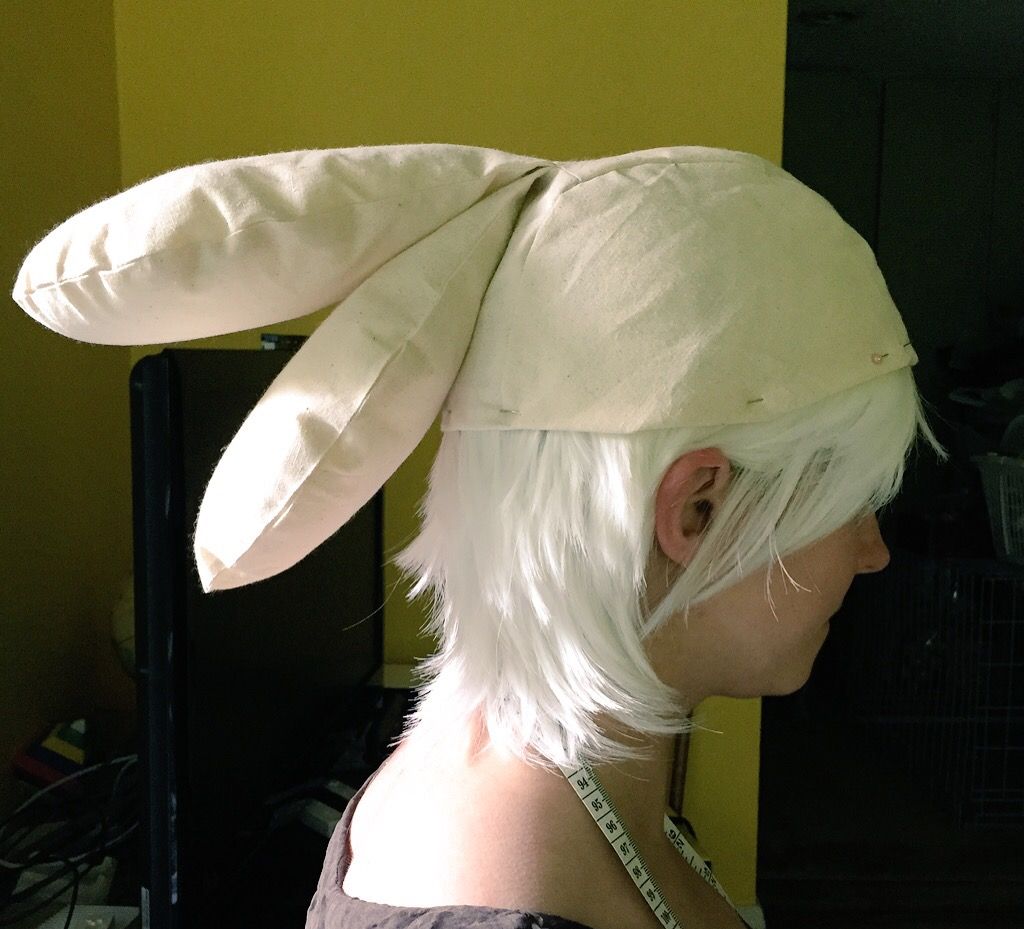
For the girl hat I started with drafting a basic pattern. The patterning process was very loosely based on how I patterned the Newboy Cap a few months ago. It consists of 5 tapered panels of various sizes that meet at the top. 1 front panel, 2 back panels, and 2 side panels that were the fronts of the tentacles.

It is important to note that since these hats were being worn over wigs, all of the measurements were taken while wearing a wig and all mockups were tested over a wig for a more accurate fit.

The one difference between the mockup and the final hat is that after doing the mockup I realized that creating "bangs" with the front flap was going to be too challenging in spandex. So I opted to instead make the bangs of the wig stick out from underneath.

For the boy hats, I knew there needed to be a seam near the top that the tentacles could be attached from. The boy hat pattern ended up looking very different than that of the girl hat. It consists of two "semi circles" as the sides, and then a rectangular shape tapered near the top seam for the center front and back. After I put together a mock up that looked alright on me, I then had to create a second mockup in a larger size that looked alright on Andy. Because my head is really small.

After creating a mockup that I was satisfied with, I went fabric shopping. Affordable Textiles on Queen St. had a good colour selection of spandex for a decent price. When you are doing a group this large, it is more affordable to share materials--in my case the 1yd of white spandex I bought was enough for 3 pairs of girl tentacles with a bit of leftover. But the 1 yd length was necessary anyway because the tentacle pieces are so long.

After cutting the pieces out I realized that if I wanted to paint on a gradient on the green side and add a sucker to the white side I would have to do it before I sewed the two halves together. In both cases I wanted to work on a flat surface.

For the paint job I originally was only in charge of doing my own and Brian's (as payment for making my tank). But since I was the only real painter of the group, I was soon asked to do the full set so they would all match.

The gradient had a different tint to it in every reference photo. In gameplay most took on an almost purple-y hue at the tip, but in still photos it was a darker shade of the team colour. I decided to go with a darker shade of the team colour so it wouldn't look weird.

I was going for a watercolour & paint splatter look. I used round brushes and fabric paint. I did all the ones that had to be painted the same colour back to back so I could be consistent in my colour mixing. I started with the greens, then orange, then turquoise and lastly purple. I typically worked with a pair at a time.

I started by mixing my darkest colour. This would be the only colour I mixed for each. All of the hues in between were created by watering down my brush before painting. Sometimes I would only paint with water, to help blend the colours. At the very tips I used almost purely fabric paint. I would make darker spots here and there. Lastly I loaded up my paintbrush with paint and ran my thumb through the bristles to flick small spatters of paint onto the fabric. This left the dark little speckles. There was no real science to this process.

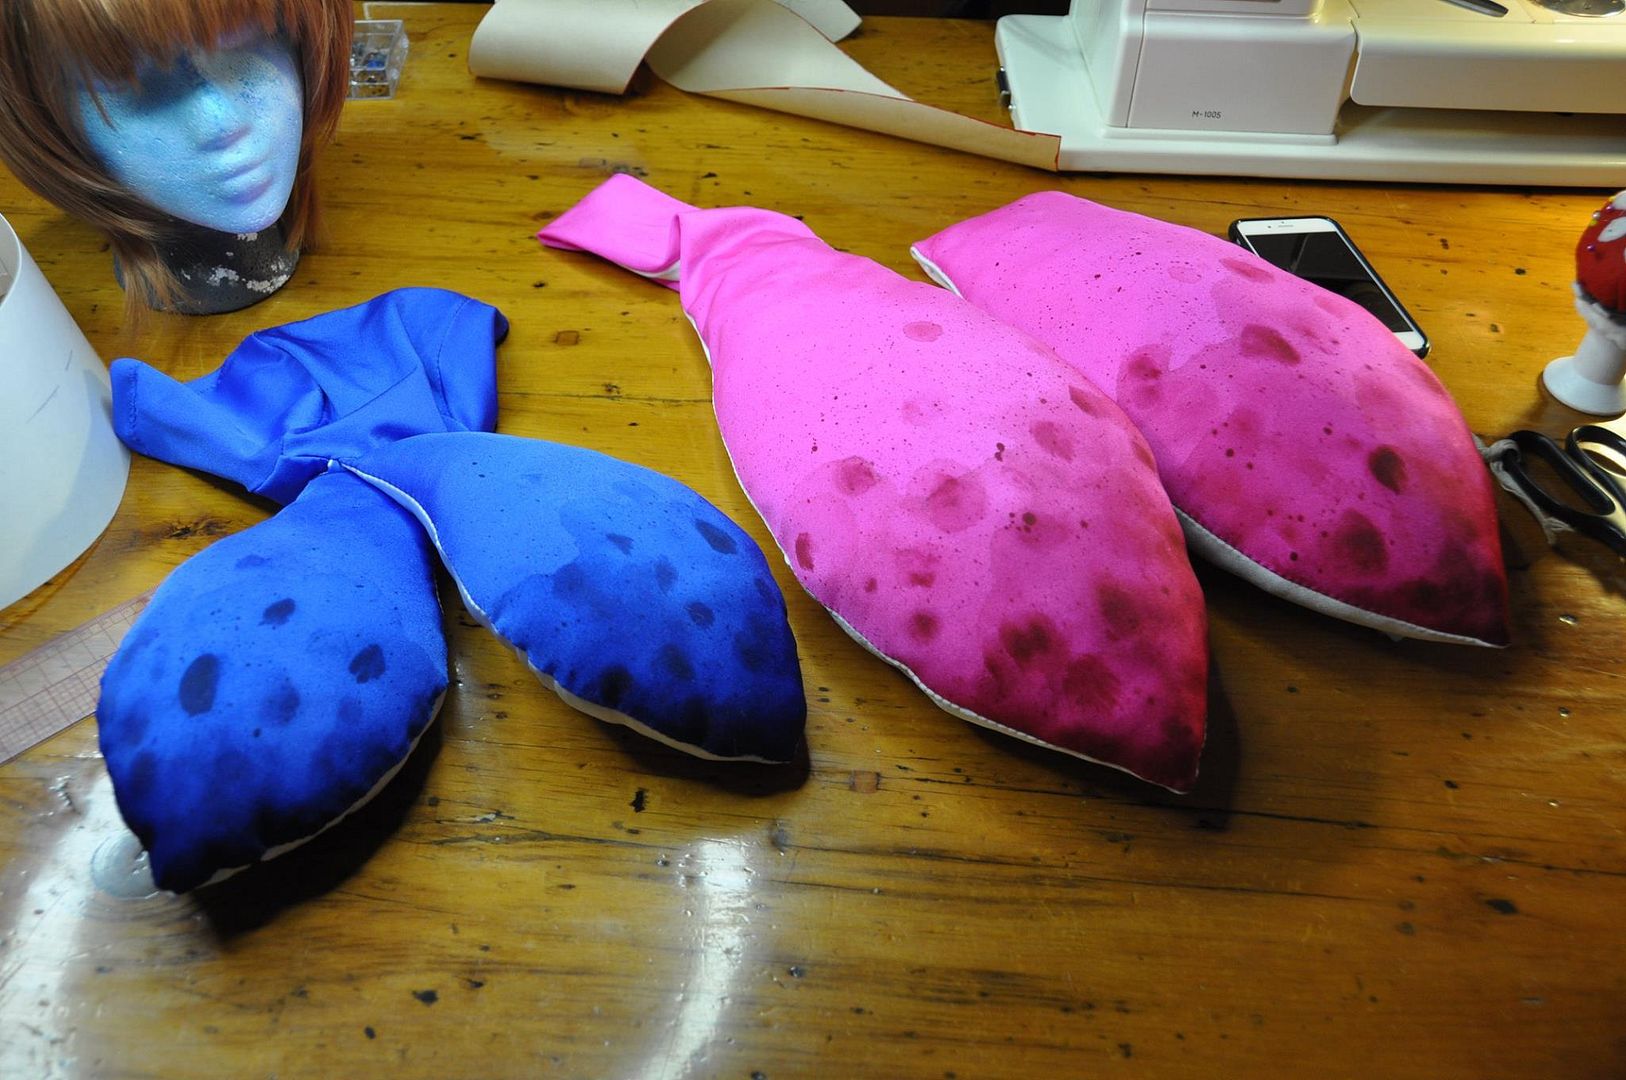
Above are the original 7 I painted, labelled as to who they belonged to. Louise and Patrick will be joining us for Squids 2.0.

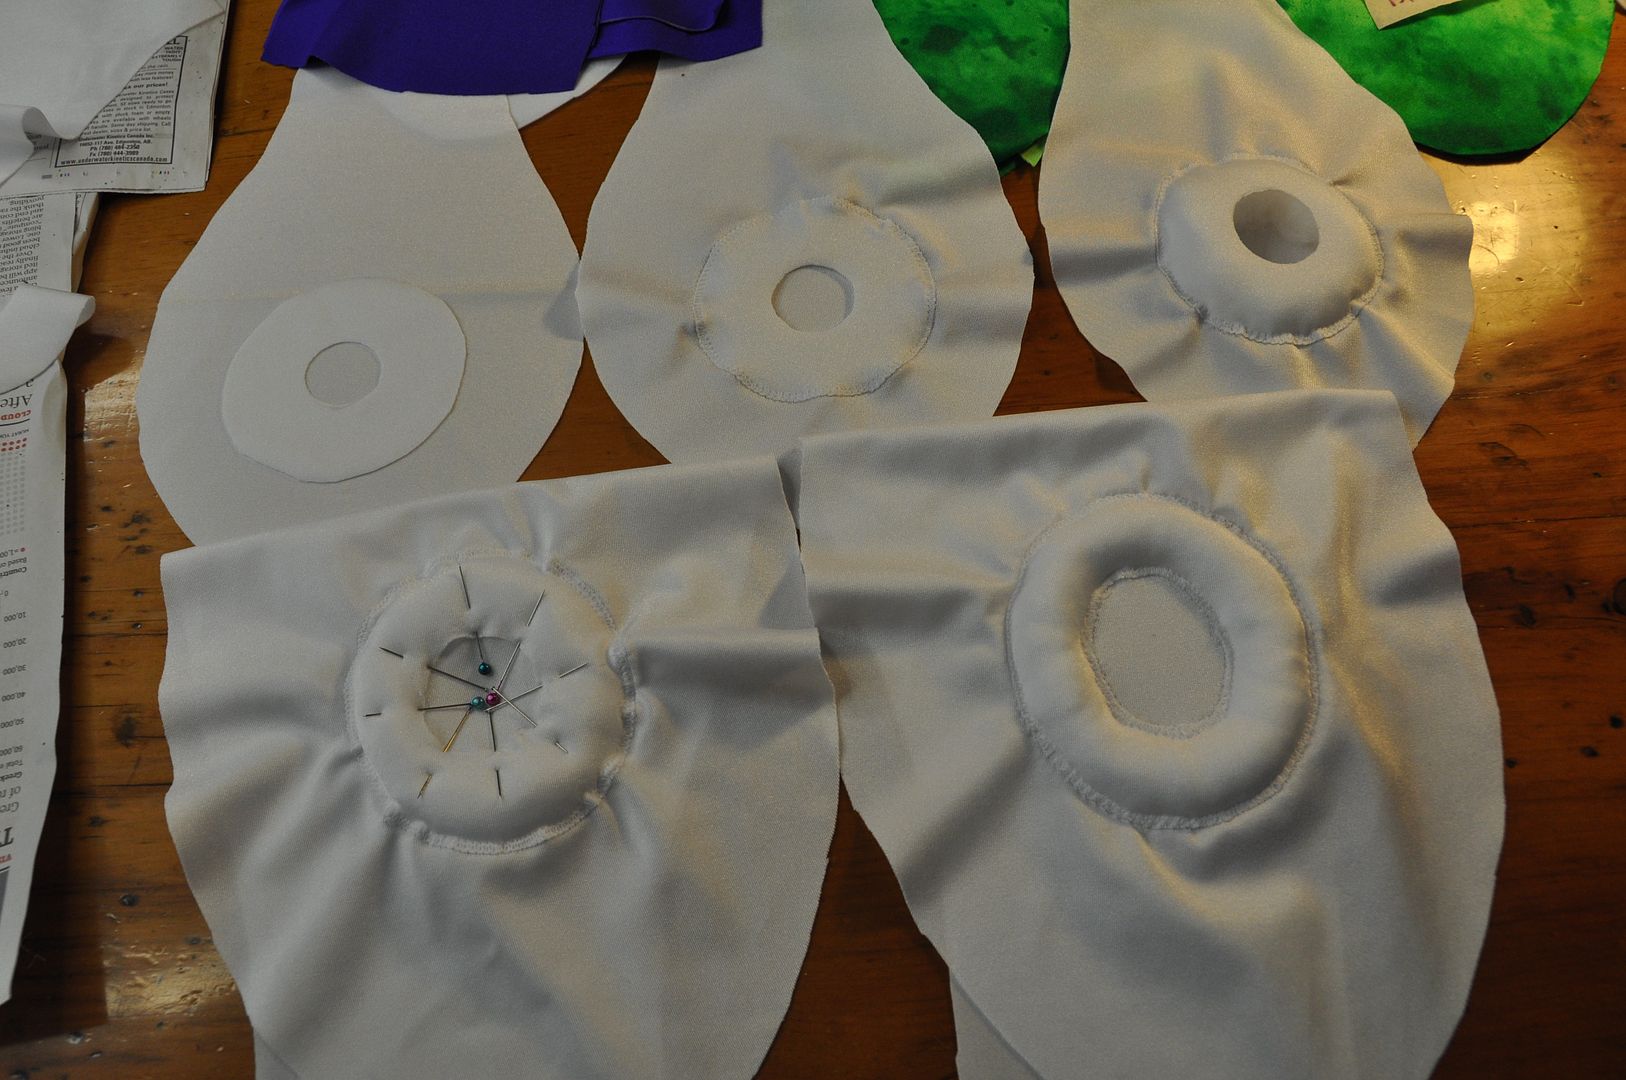
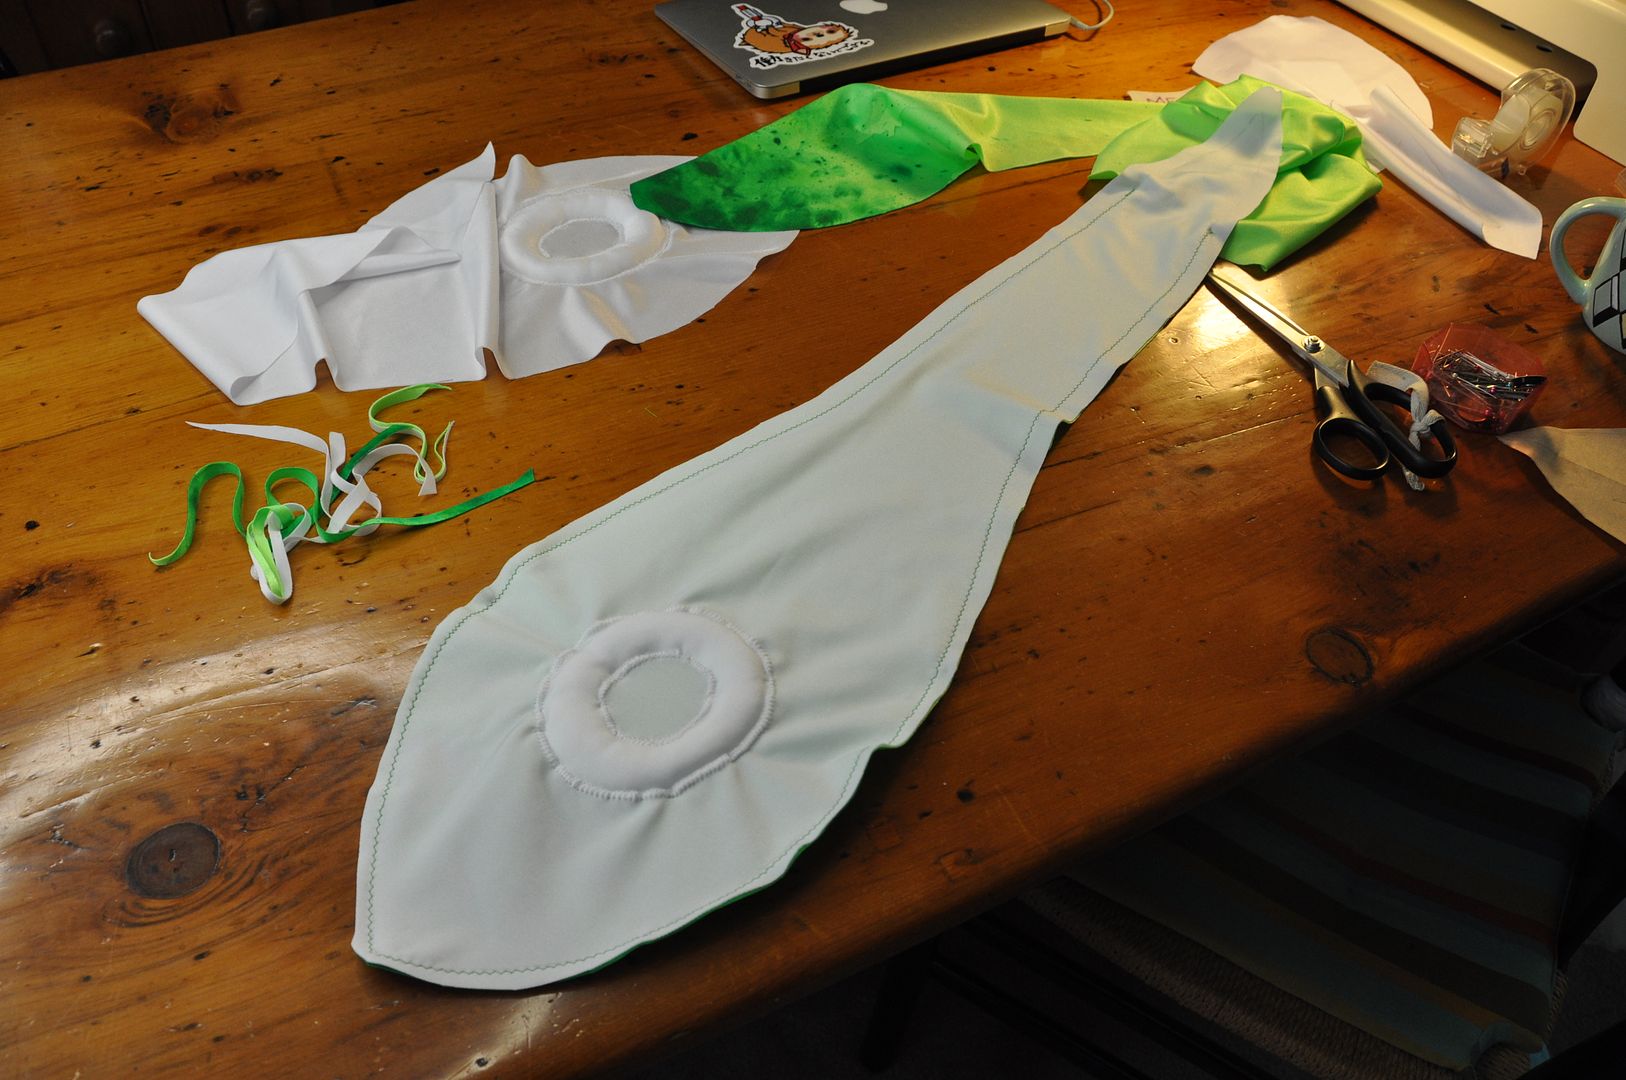
The process for the suckers was relatively simple. First I cut out a 'donut' shape in white spandex. Pinning it in place, I then used a zig-zag stitch to appliqué it to the tentacle around the outer edge. Then it would get stuffed from the center. Then the center edge was pinned down. Lastly the center hole edge would get carefully zig-zagged closed. The picture on the left shows each step of the process.

Many thanks to Michelle and Andy for coming over and assembly-lining the cutting, pinning and tentacle sewing process while I painted. They did a great job!

The next step was to sew the tentacles together. They were pinned right sides together and then sewed with a slight zig-zag stitch. We left a hole at the base so we could carefully flip them right way out and stuff them.  This many tentacles required a surprisingly large amount of stuffing!

For the girls who didn't want hats the tentacles were at this point handed off to them to attach to their wigs. For myself and the guys, the next step was putting together the hats.

For the guy hat the tentacles were first sewn into the top seam. Then the two semi circle side pieces were sewn on. Lastly it was hemmed.

For the girl hat I sewed the two back panels together first along the center back seam. Then I sewed the two side (tentacles) to the center front piece. Then I sewed the sides to the back panels and trimmed the excess seam allowance from inside the hat. Then I hemmed the hat, tacking down the white fabric on the inside in the same stitch. 

I picked up this green wig from EpicCosplay. The colour match is pretty darn good, especially since there are so few colours of green to choose from when it comes to buying wigs.

Excluding my wig--which I cut myself--the rest of the group's wigs were cut and styled by the ever lovely Louise, who will be joining us for Squids 2.0! For the girls we cut blunt bangs straight across the front and trimmed the backs a bit. I wanted the back of mine to be more flippy, so I pinned it up in sections, lightly sprayed it with hairspray and then used a warm hairdryer to set the curls. Then I combed them out. They were a bit too curly, so I used a warm hairdryer again to get them to relax a bit.

For the guys Andy and Brian went with two different styles. For Andy's wig, Louise took the bangs and pulled them completely back and pinned them out of the way, under the wig. She left the sideburns, which she trimmed a bit, and then trimmed the back as well.  For Brian, he wanted to keep the bangs, so she just trimmed them to be shorter and out of the eyes. The sideburns were done similarly to Andy's wig.

For both of theirs, because the weight of the tentacles made the hat back heavy and the spandex was super slippery, they had to have the hats hand stitched to the wigs. For a finishing touch they added their own hair accessories to the tentacle "topknot" hat. As far as I remember Andy used some bright coloured hair elastics. Brian added the white headband and a dollarstore bracelet as a hair tie.