Showing posts with label grommets. Show all posts

Tuesday, February 23, 2016

Vaporeon Gijinka - Wraps, Bracers & Gloves - Pokémon


Part 5 of the Vaporeon saga! Let's talk about wraps, bracers and gloves! This was probably the most time consuming and difficult part of the entire costume to construct. Lots of hand painting and hand stitching was involved. The end result ended up looking even better than I had envisioned! >:D

Links to Part 1: Bolero, Part 2: Under Layers, Part 3: Wrap Skirt Tail, and Part 4: Wig and Hairpieces!

Thanks to Elemental Photography for the wonderful photoshoot! Credit for the original costume design goes to Cowslip!

The way I started drafting the pattern for these was super scientific! Not really. I literally traced my leg onto paper. This is so I could figure out the relational distance between my ankle, knee and thigh. This was purely to use to get the proportional heights of the bracers and wraps correct.

From there I was able to mark how tall I wanted the bracers and wraps to be. Then I drafted the pattern for the wraps and bracers separately. I also drafted the arm wraps and bracers at this time.
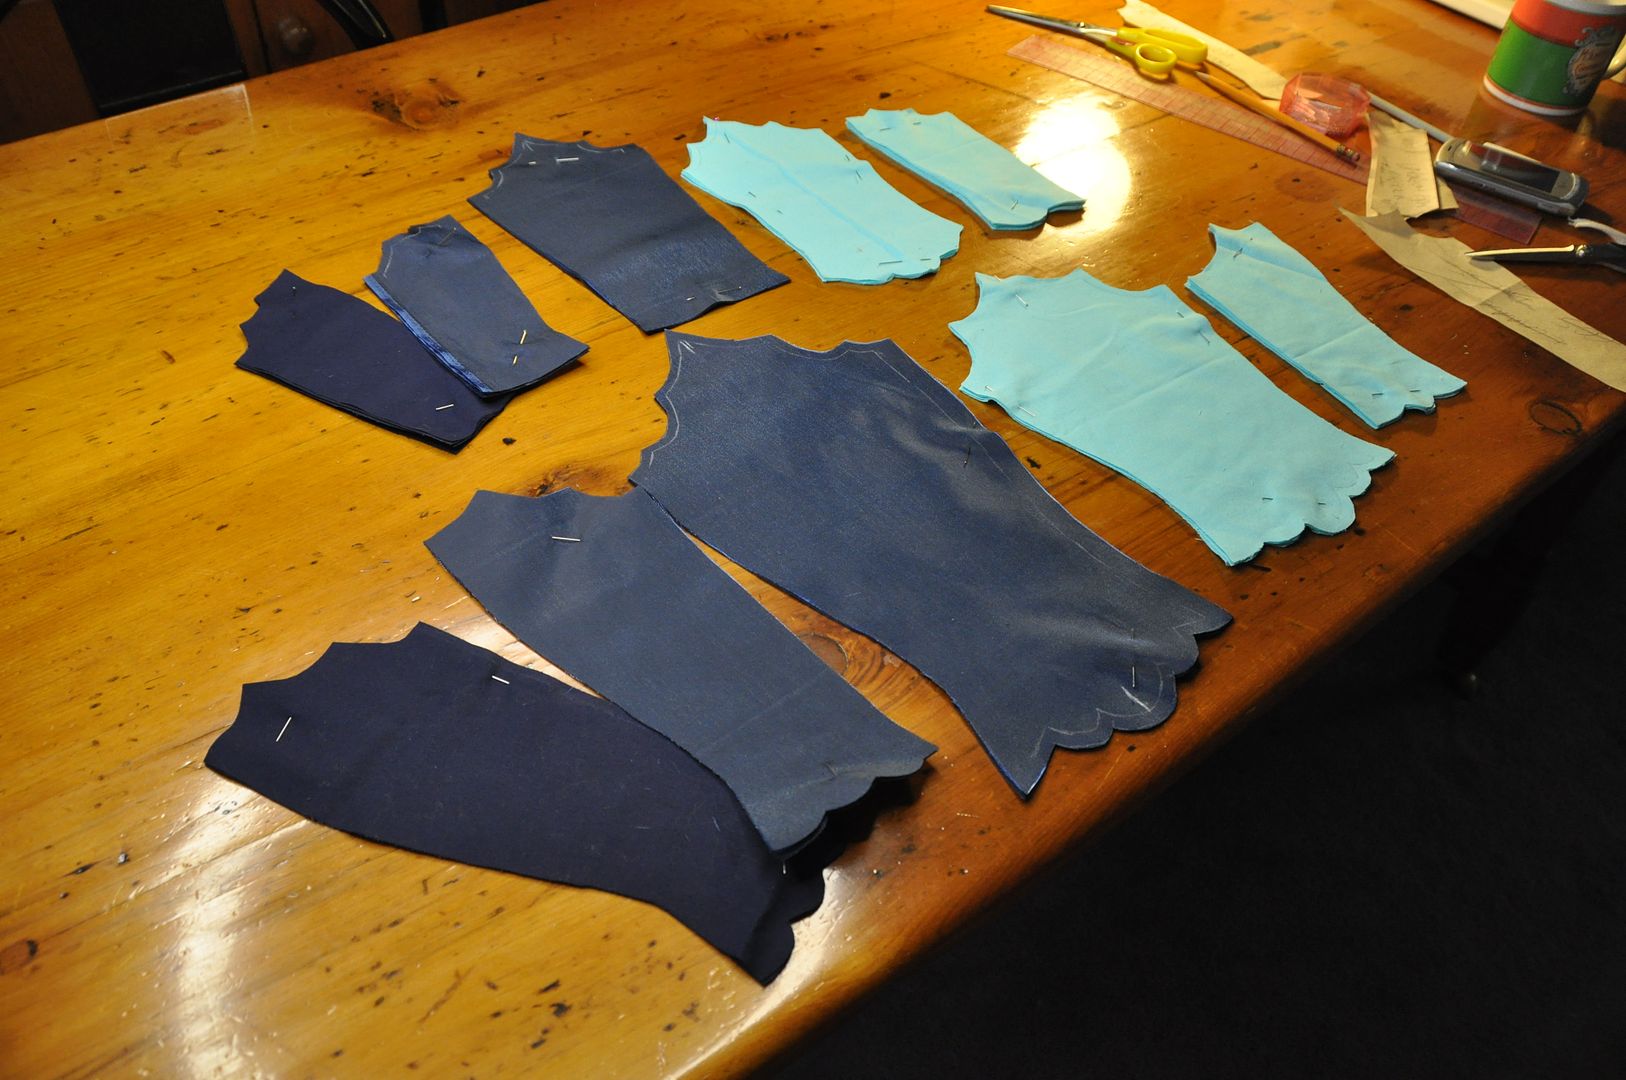
I'll start with the bracers first, since I finished the construction on those first.

I cut out my pieces in the various fabrics. I had an under layer in a shiny synthetic navy blue fabric and an over layer in a light aqua cotton (which was leftover from the Suppi costume).

I nearly cut out the wrong amount of pieces when I was laying out my pattern. Every piece has a backing because I needed that to properly finish the scalloped edges on the top and bottom. This meant every piece was doubled. The navy under layer was backed with the same navy cotton as the bolero lining because I ran out of my other navy fabric.
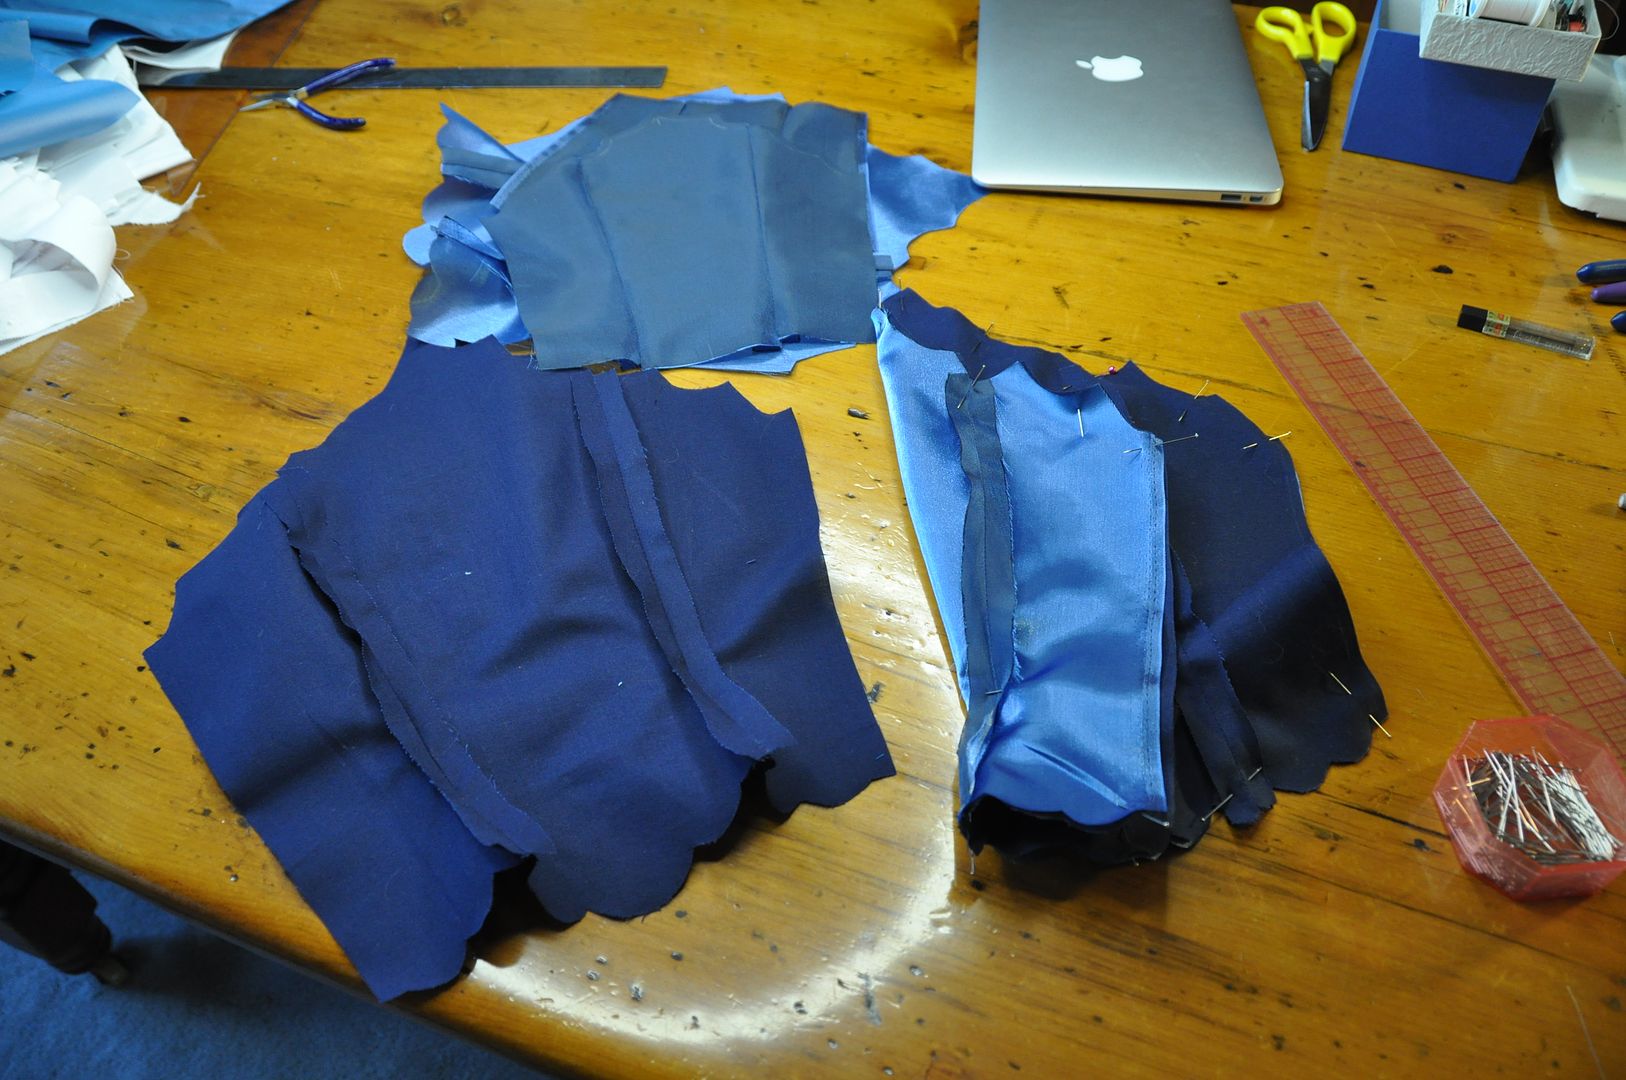
I assembled each of the fronts and backings separately, sewing them along the side seams. I ironed the seams open flat.

At this point I took the front over layer pieces of the bracers and painted on my scale pattern. I lightly drew this out in pencil and then traced over my lines with navy blue fabric paint. It sounds simple, but it took a really long time. I ironed them to set the paint before moving on.

Next I pinned each piece to its backing right sides together. I sewed them together along the top and bottom edges, leaving both sides open to turn them right way out. Before turning them out, I trimmed the excess seam allowance on the inside. I top stitched along the edges to neatly finish them.

I also added in my top stitching detail on the tops of the under layer at this time.

I aligned my side edges, zig zagged stitched over the raw edge of the fabric and then turned that to the inside and top stitched it down.

Then I used a punch to punch out the holes to put the grommets in for the laces. At this point I still had access to the grommet press at school, which I made good use of.

This was the point where I laid the project to rest for a year, because one of the main hurdles was the leg wraps, which I was positively stumped on. I didn't know how to rig them, I didn't know how to do the detailing and I didn't want to rush them and do a crappy job of it.

When I returned to the project, along with replacing the wig to fix the colour matching issue I also found another thing that was bothering me. The bracers were too teal for the rest of the costume, especially now that I had replaced the wig.

After re-evaluating, I decided to upgrade the paint job on the bracers, and in the process change the colour of them to be bluer. I added in depth to the scales, but also dry brushed over the whole thing to tint it. You can really see the difference it made in this progress shot.
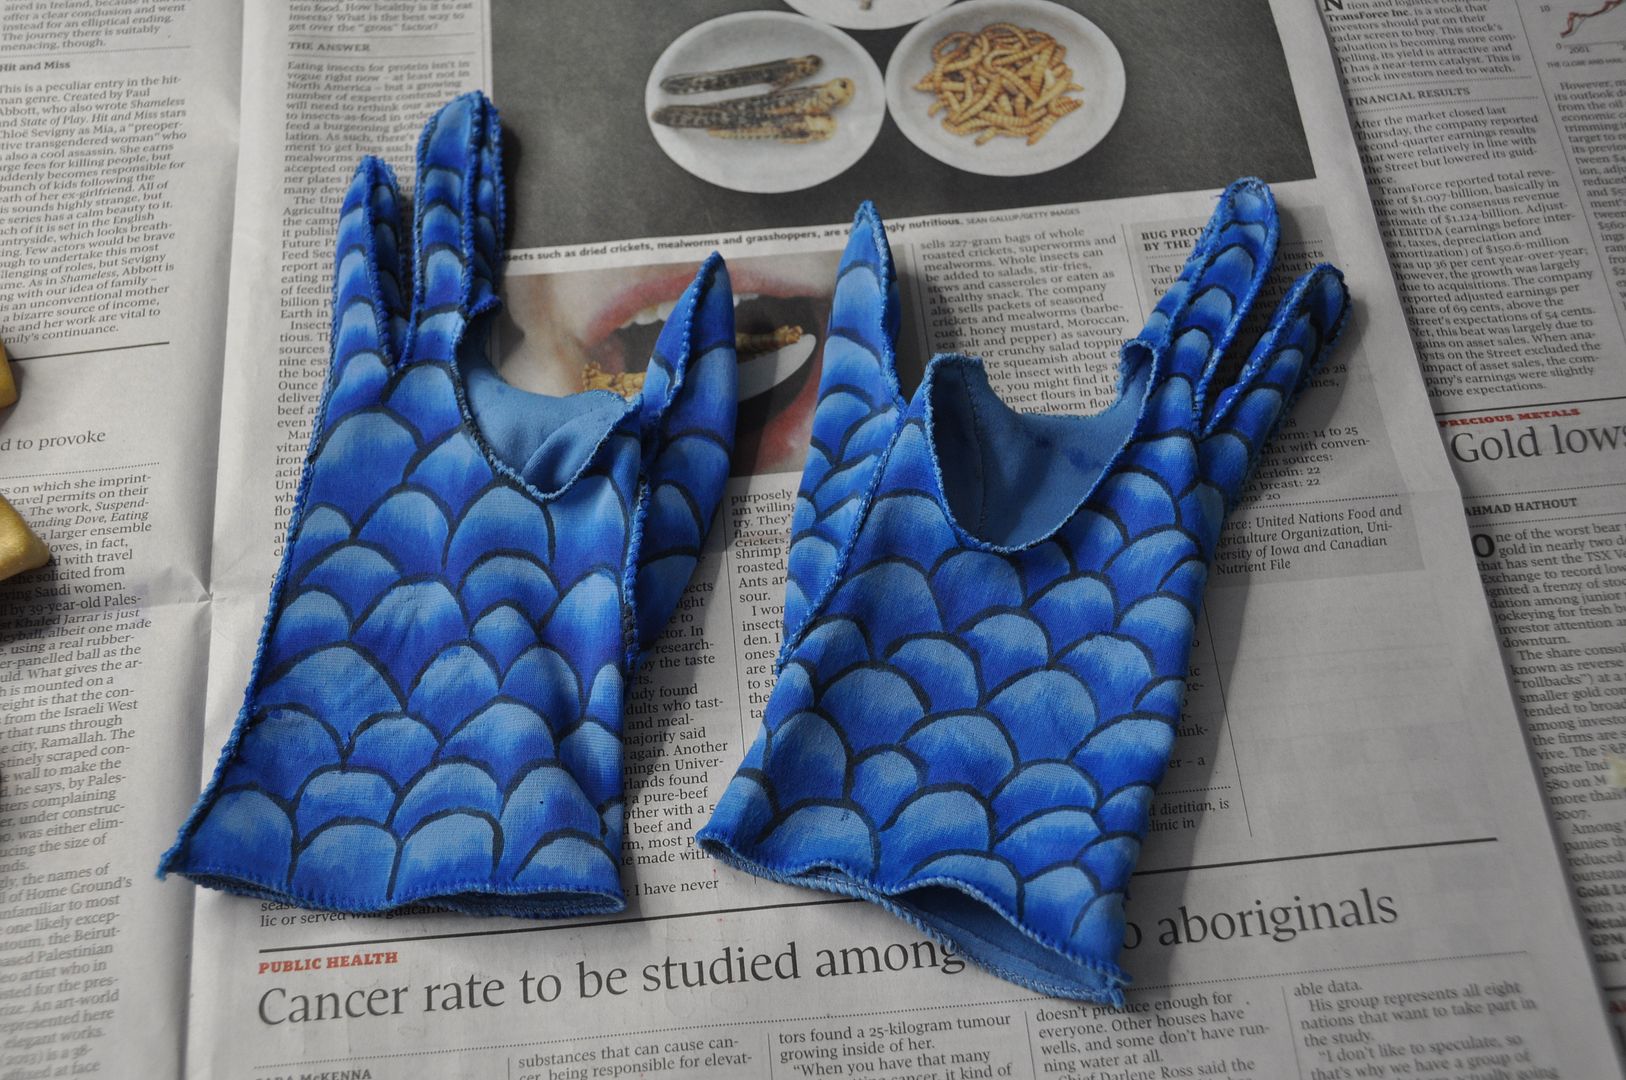
The gloves I bought in Kensington market. I made gloves for an earlier project and decided it was by far the most horribly tedious thing to do ever. So I decided to buy and alter a pair. I cut out the hole that encompassed the index and middle finger on each glove, then zig zagged stitched the edges to finish them so they wouldn't fray all over the place.

The gloves were painted in the same style, except instead of laying them flat, I had to wear them each on my left hand in turn to paint them.

By doing the scale pattern and adding the depth to both the gloves and bracers it helped to meld them together visually and also give the false impression that they are even remotely the same shade of blue. Because they really weren't.

Now let's travel back to the beginning of the project when I traced my leg and started patterning. For the wraps I was venturing into an area I didn't have much experience with at the time--stretch fabric. In this project I can freely admit that I had no idea what I was doing and problems I encountered in the construction of these wraps are one of the main reasons I stopped working on the project for a while.

I will start with my first mistake: I bought fabric that was one-way stretch. Somehow it was more unpredictable than stretch fabric. I don't know, I just didn't like working with it.

I patterned out my pieces, figuring out the overlap at the top. In this picture you can see the two pieces for a leg wrap on the left and the two pieces for an arm wrap on the right.

I took them to school to assemble them with the serger, because this fabric frayed like crazy. I ended up making them slightly uncomfortably snug, but since I had serged off the seam allowance I couldn't let them out, and I used up all my fabric so I couldn't remake them.

I used the silver silk bias tape I had made for the bolero to finish the top edges.

At this point, I had no idea how to rig them. They were super snug, but not enough to stay up without slipping. This is when I threw in the towel on the project.

Zoom forward to one year. I am one year wiser. And I have ideas about how to finish this project.

First I decided to actually add the floral pattern to the fabric, which I had originally decided to not bother with (because of time constraints).

I decided to make stamps to create my design, rather than hand painting on the floral design. This is much quicker and easier if you are making repeating patterns/patterns with repeating elements. Based on the barely visible details in the reference image I sketched out some suitable flower and leaf designs, then traced those onto craft foam and cut them out. I glued the pieces onto a foam backing creating my stamps.

I laid out my wraps and began stamping. Using a blue fabric paint, I used a brush to apply the paint to the stamps and then pressed the stamp into a spot of my choosing on the wraps. I made the paint application purposely patchy. I didn't want the flowers to be solid. 
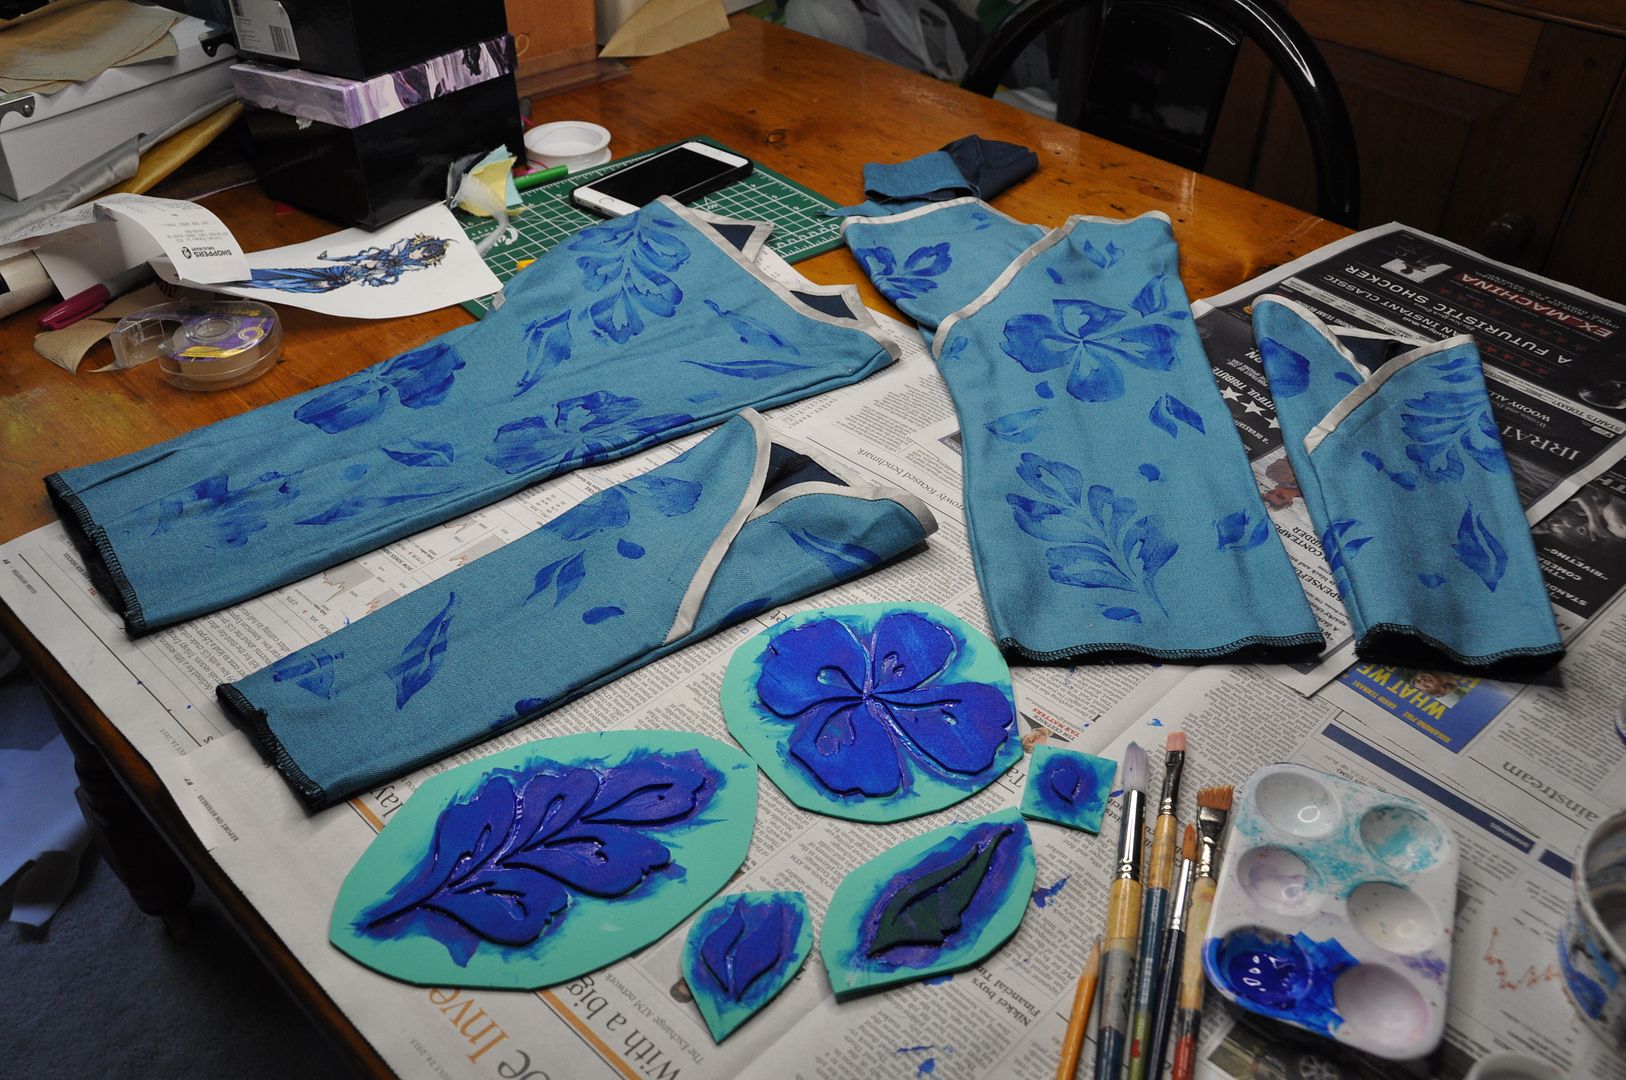
I wanted the flowers to be random and sporadic. There is no science to the design. I just made sure not to have too many of the same stamp to close to each other. 

I had to wait for them to dry before flipping them over and doing the sides and back. When everything was painted and dry I heat set the paint with an iron.

Next I decided to finish the overlaps differently. My original plan was to make the overlaps a functional closure. But it wasn't working--it pulled the fabric on a weird diagonal, and looked super bad. So I decided to sew it shut and just fake it. I sewed the frogs on top as decoration.

Next I used bias tape and hand stitched on all the fancy loops and detailing on each of the wraps. This took forever.

Lastly I had to rig them so they would stay up. As I mentioned in my wrap skirt section, the rigging for the wraps was attached to the inside of the skirt's waistband. At the back there is an elastic strap that attaches to each wrap using garter hooks. They are stretched to be pretty tight, but not so much that I can't bend or sit. Then I have a second backup strap made of webbing that doesn't put as much tension on it. This is for the sake of redundancy--if the first strap fails, the second will keep it up. You can see a bit of the rigging system in the picture below. I tried to keep it as invisible as possible.

The arm wraps are attached to the bolero with simple buttons and loops. Unfortunately they tend to pull the bolero sleeves down oddly. I plan to remedy this in the near future by stuffing the bolero sleeves.


Friday, July 10, 2015

Floral Cream Underbust Corset

Hey all! I made another corset this past winter. This is not an obsession I swear... This one is an underbust corset that is going to act as a waist cincher/posture modifier, to be worn under my Phoenix costume (which is currently on hiatus). I also made it with another future steampunk outfit in mind... 

Showcasing here the new pistol prop I bought in Austria last month. Also worn with my Long Pleated Skirt.


I like how the shape of this one turned out much better than my black corset. Instead of using a fashion fabric on the outside, I just used the coutil. Except this time my coutil has a cool floral pattern on it! I picked up this fabric from the Farthingales booth at CostumeCon32 last year. It's super strong and super pretty.


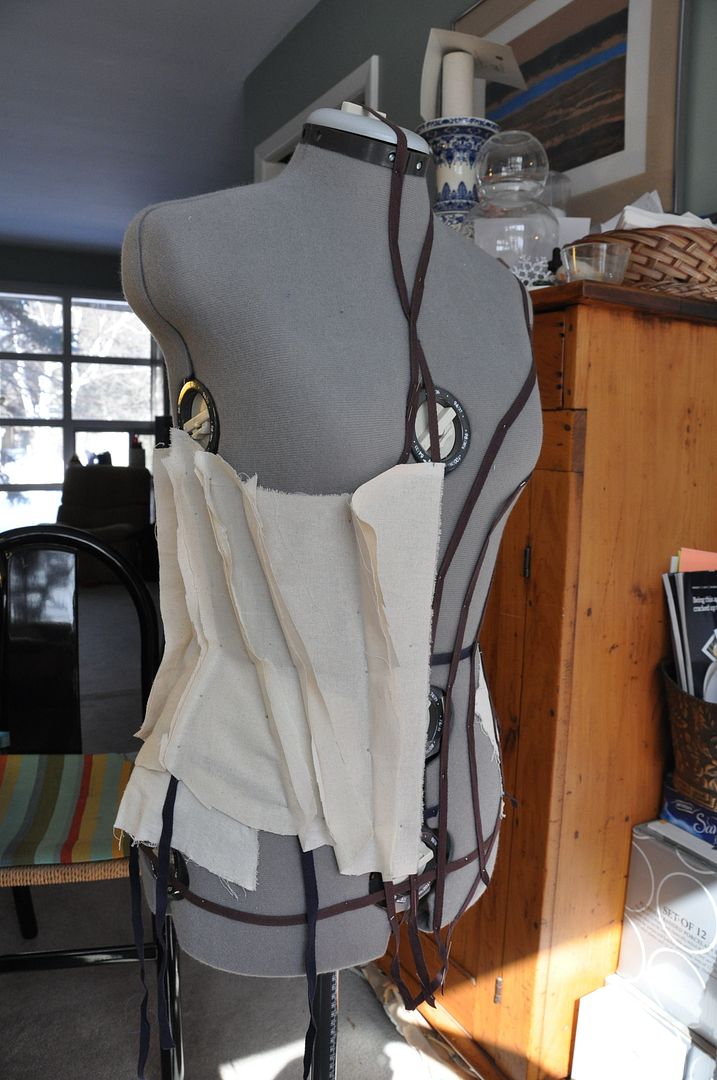
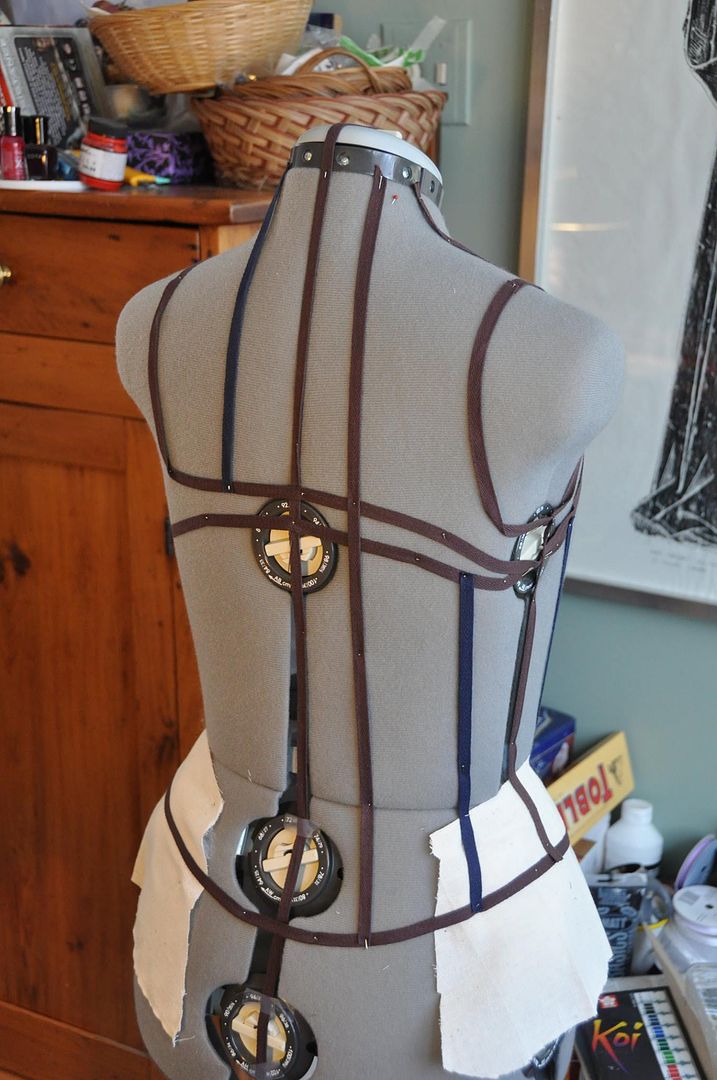
 First I used twill tape to mark out my seam lines on my judy. Then I draped muslin over those sections to get my pattern piece shapes. I used a pen to draw the shapes on the fabric, unpinned the pieces and then cut along the lines I drew.

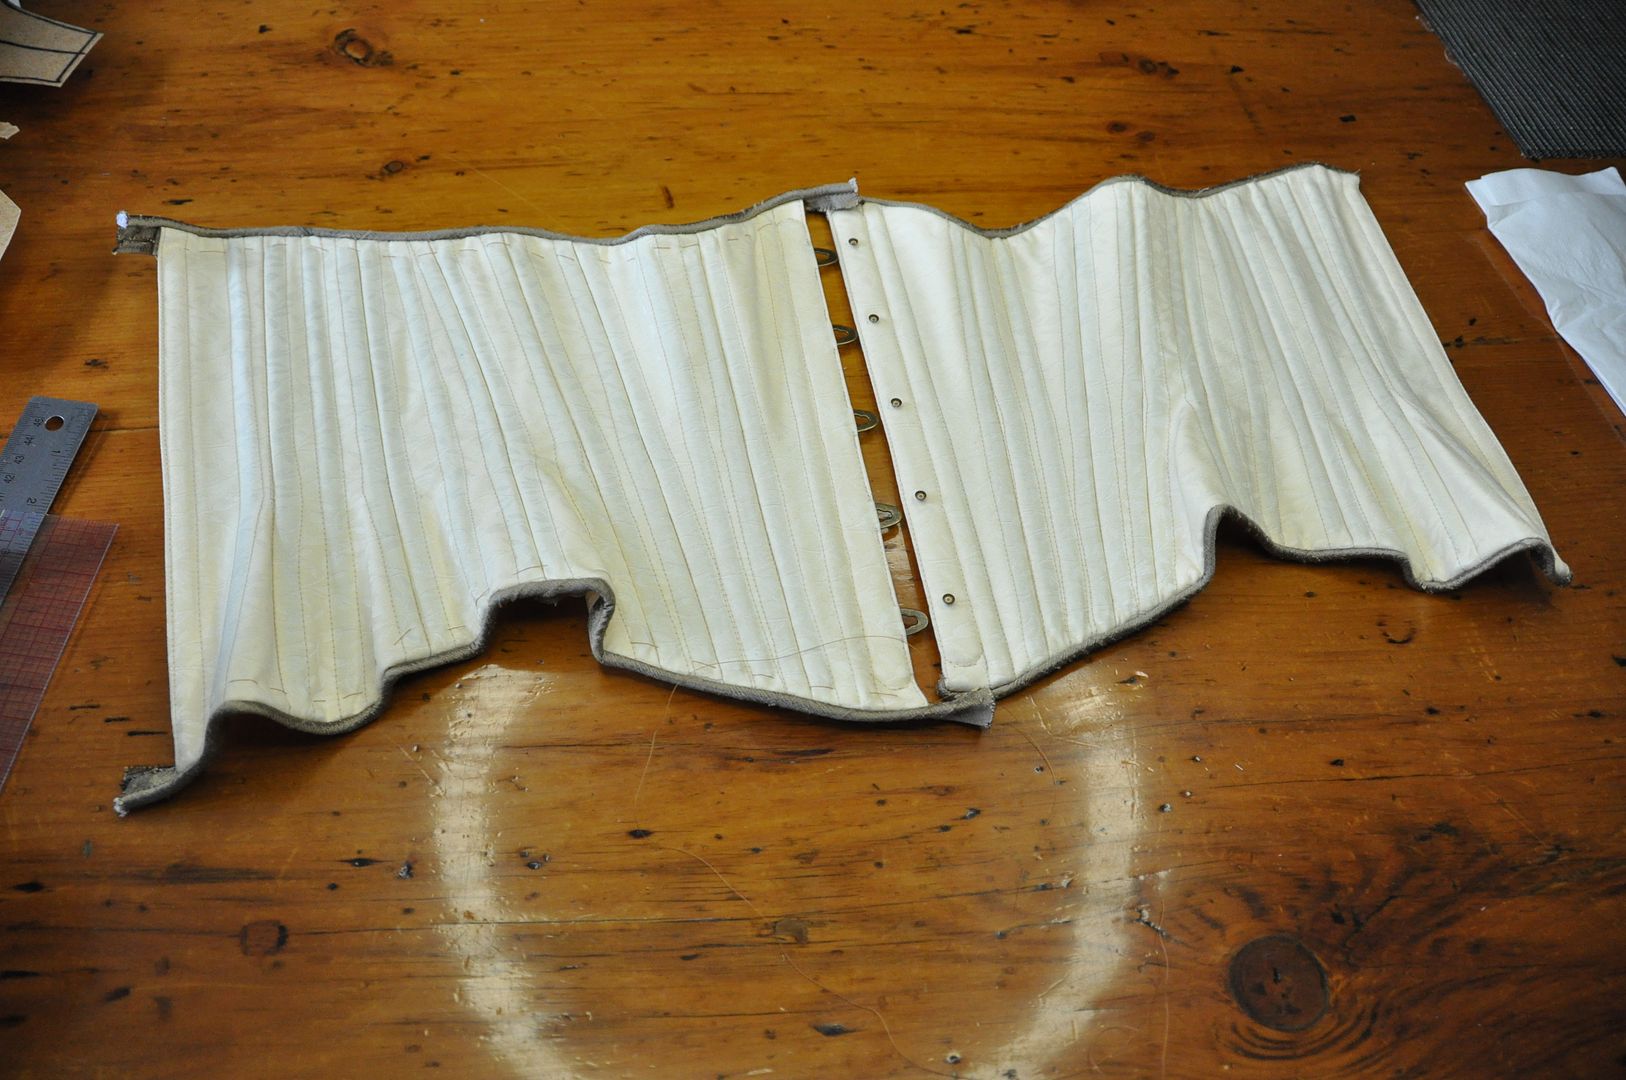
The pattern I ended up with looked like this. I numbered my pieces from 1-7 (center front to center back).

After making a mockup and tweaking the pattern to reflect the changes I made, I reduced the pattern so that it would have a 2" gap at the back. This means that I divided 2" into 7 parts and shaved off that amount from every seam. I shaved off just slightly more at the waist so that part could cinch even tighter. 
Then I cut my pieces out of my coutil. Remember you need 4 of every piece, a pair for each side.
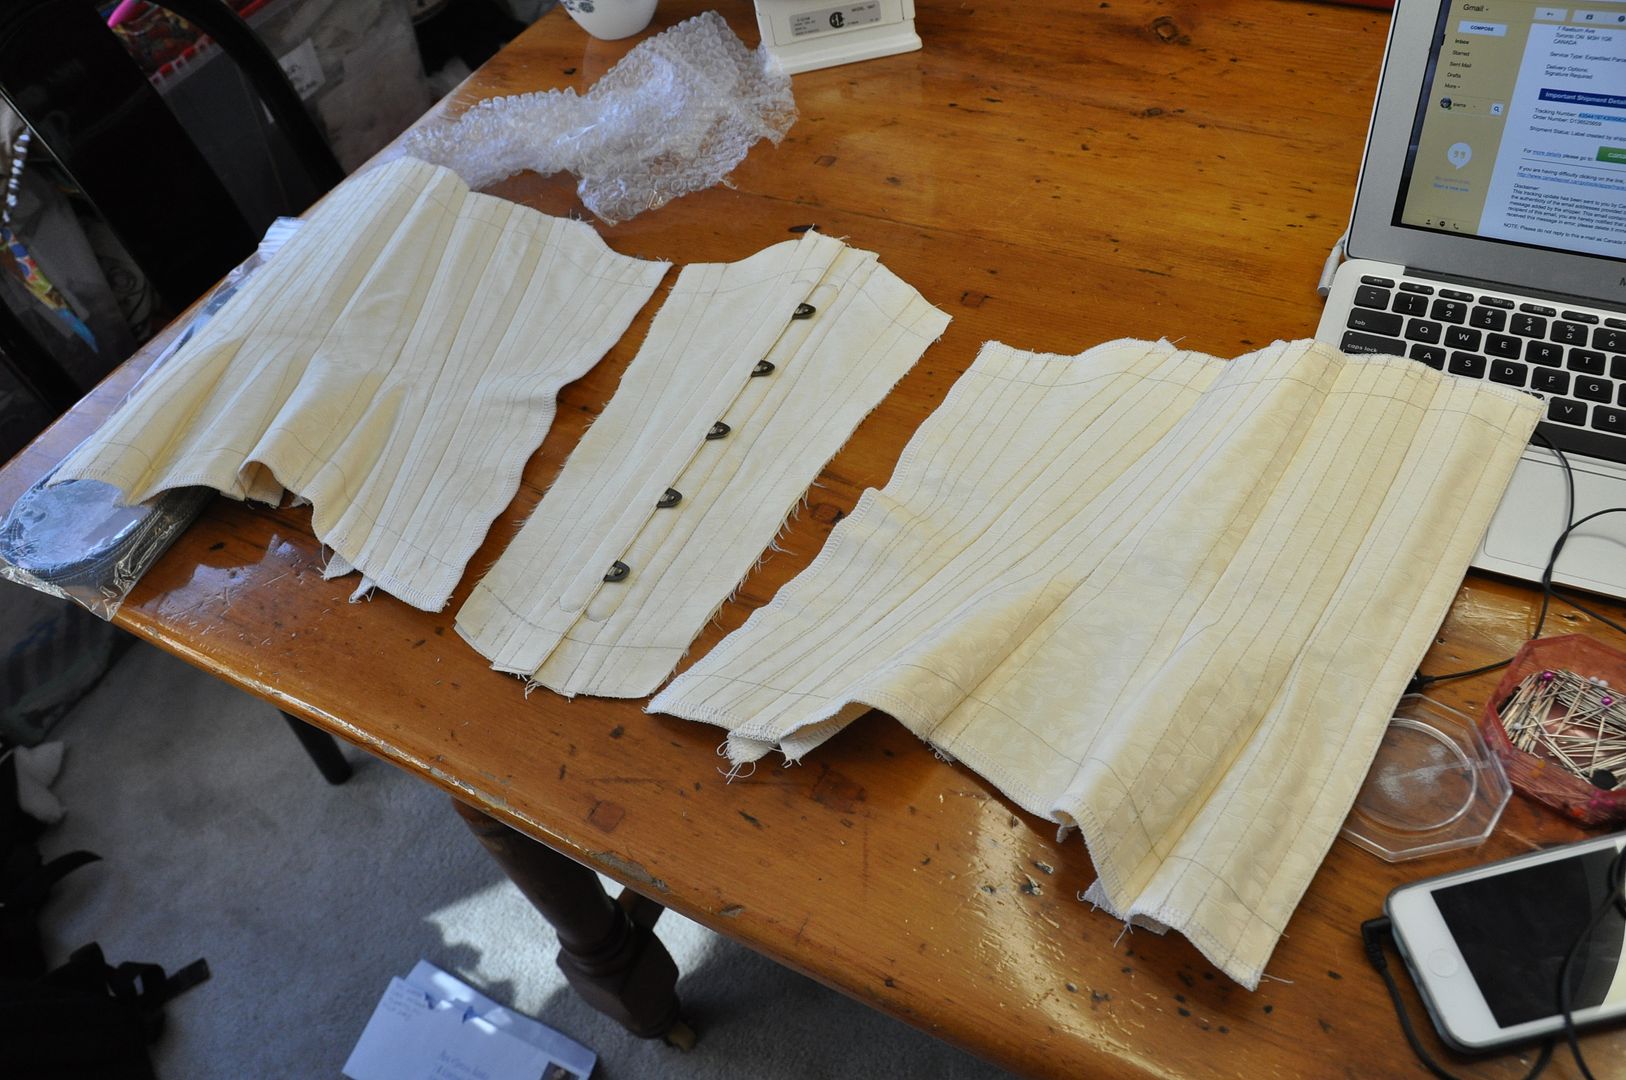
For the center back panels I first sewed the pairs right sides together along the CB edge, then turned them right way out and pressed them. I flat basted all my pairs together (excluding the center front panels) and top stitched all the boning channels. The 14 panels looked like this.


I added in the busk to the center front, then flat basted it and added the last boning channels. If you want a tutorial on how to insert a busk, go here!

Then I began to sew the panels together. This is done very carefully, lining up the flat basted lines and the waist line. Accuracy is your friend.
Then I cut my spiral bones to length and inserted them.


I made my own piping trim from leftover fabric from my Steampunk Corset. If you want a tutorial on how I make piping trim, go here!

I attached the piping, then hand stitched down all the seams on the inside. Then I put the eyelets/grommets in the center back and added some cord to lace it.

Presto! Another corset! ;D


Tuesday, June 3, 2014

Steampunk Corset

Salutations! This is the first steampunk outfit I've put together in quite some time. (The last one was my steampunk inspired lolita oufit back in 2011!) I am a steampunk fan, so it would probably come as no surprise that everything in this outfit excluding the corset came straight out of my own closet.  Hahaha

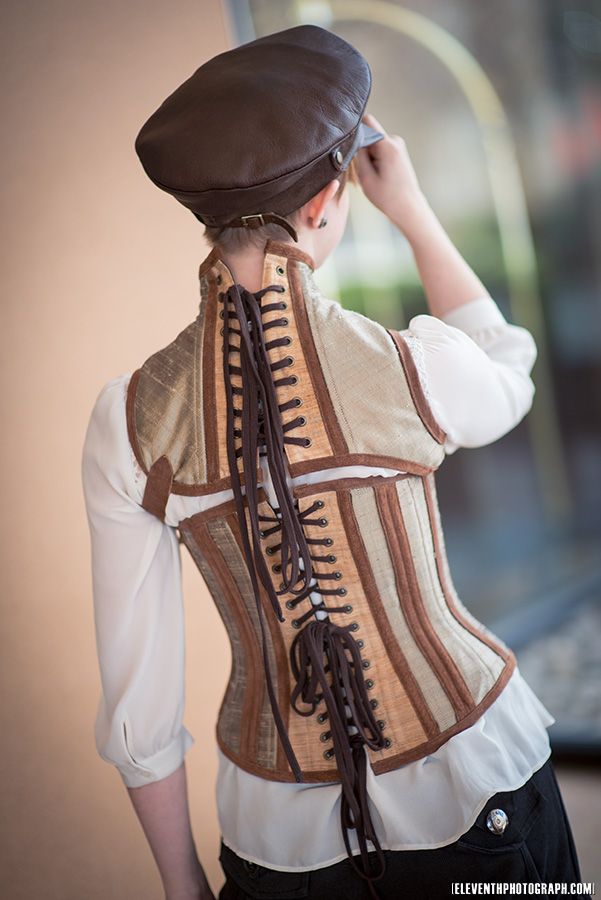
This was my final project for corsetry and the second corset I've ever made! This is also the first time a draped a pattern. I debuted this outfit at CostumeCon 32 and won a Hall Award for the ensemble. Planning on decking this out with more stuff in the future--like a weapon or possibly some gloves. But for now it's complete. 

Special thanks to Mike at EleventhPhotograph for the photoshoot! I have a few more pics up on my Cospix profile!

It is a decorative corset intended to be fairly tight-laced (at least for me!) I am particularly proud of how the back of this piece turned out. In terms of comfort, it's actually fairly comfortable when standing, but when sitting the neckpiece doesn't allow me to lean back. This makes it a bit tiring to wear for long periods of time.

I had a hell of a time figuring out my colour scheme (as I almost exclusively design in pencil, without colour), but I am glad for the colours I eventually chose. Special thanks to the lovely gal at King Textiles who helped me pick out my fabrics! I like the contrast with the muted gold and the pale orange versus the brown suede. Mostly I really like fabric with texture. The dupioni (gold) and the raw silk (orange) have such great texture! Someone commented that the raw silk looks almost like woodgrain.

Here is my original concept sketch. I started my design process by sifting through the hundreds of google images of steampunk, corsets, and victorian fashion. I picked out the different elements I liked and came up with this. It is designed to be worn with or without the neck piece. In the original concept I had vertical buckles attaching the two at the back, but scrapped that during the build process, as I found them to be completely unnecessary; it would make it harder to get on and off by myself, and would clutter the design. I might add the chain detail at the front eventually, but I kind of like it without it.
To start I adjusted my dress form (which I refer to as Molly) and padded out the hips to be higher. This is to accommodate my shorter torso. The goal here was to make as accurate a representation as possible of my body. Then I used 1/4" twill tape to mark out the shapes I wanted on the body. These tapes marked the seam lines and the garment edges. When doing this it is important to decide which edge of the tape is the "line" and then stick with that. Be consistent, or you will confuse yourself.
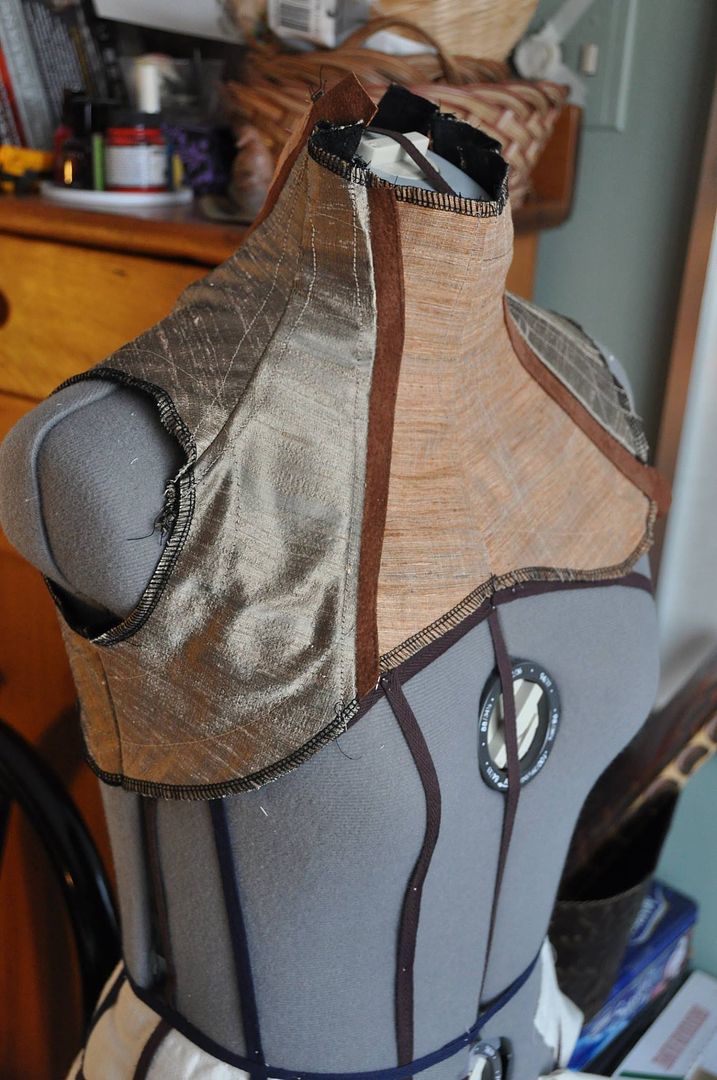
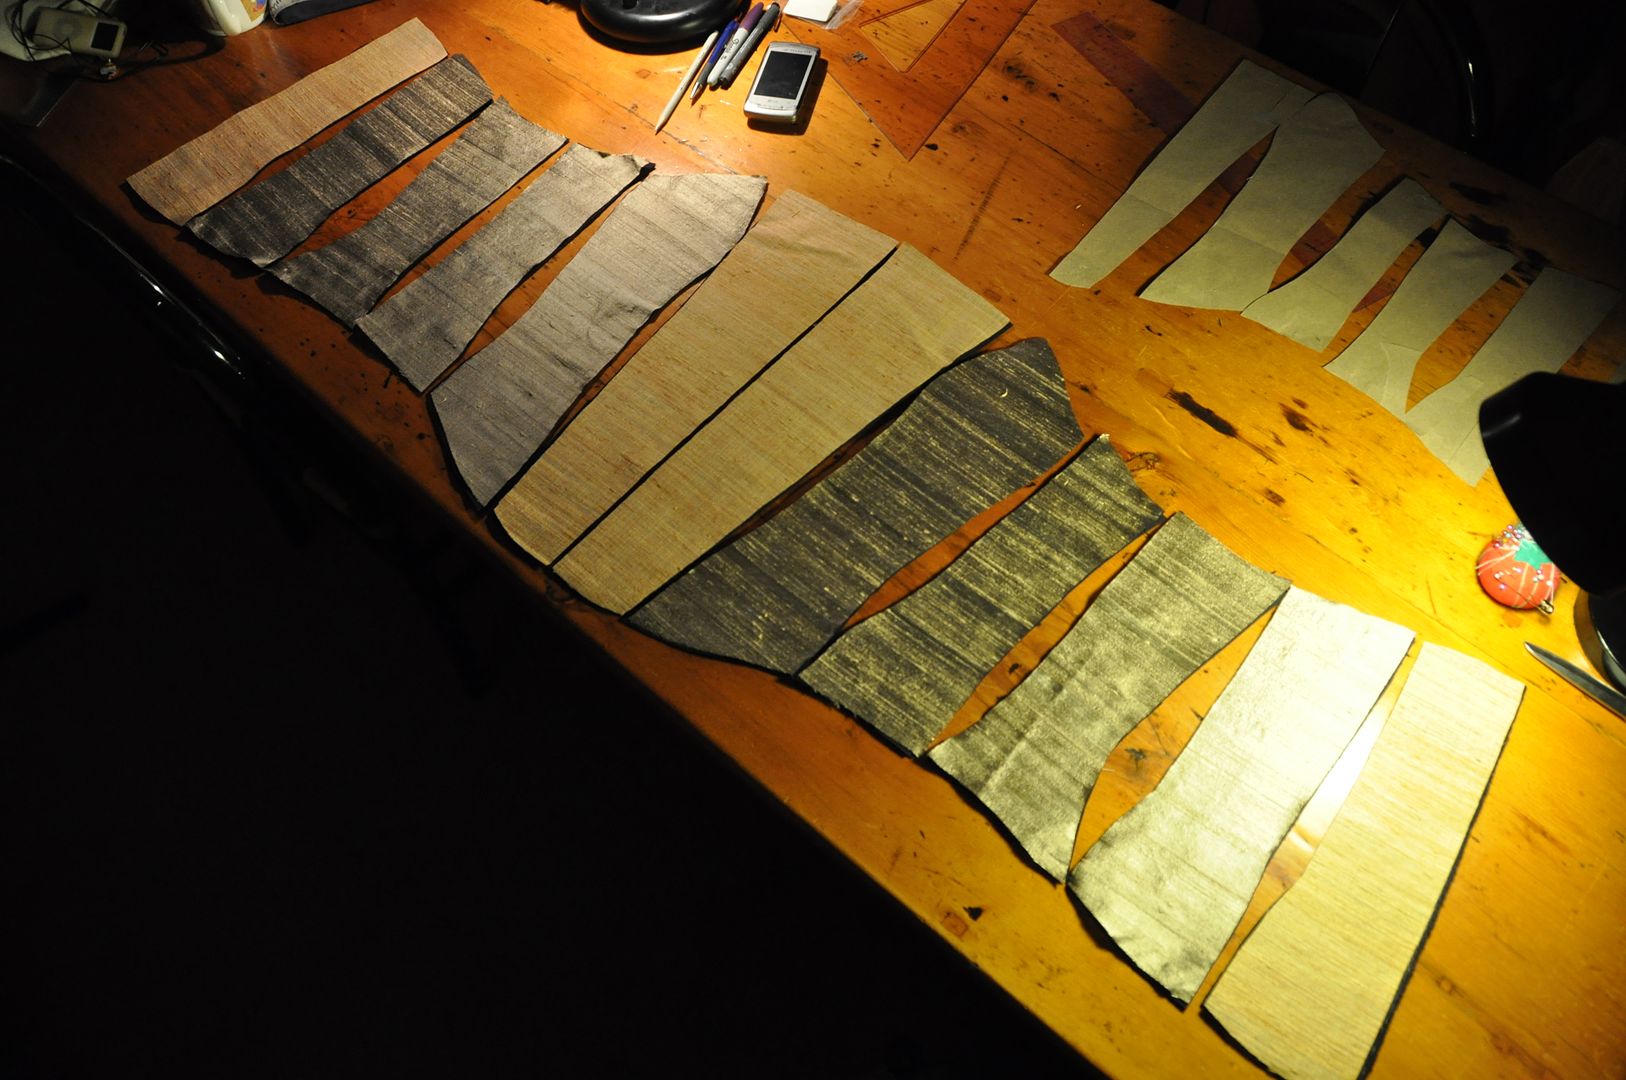
Then using muslin I draped the design. Each section/piece is a different piece of fabric carefully smoothed to contour the body and pinned in place to the edges of the section. Then I took a ballpoint pen and traced the seam lines/edges onto each piece. I also marked the waistline. Additionally, when draping a corset it is best to keep the grain of the fabric perpendicular to the waist line, meaning the grain should run straight up and down the body. (Woven fabric stretches on bias/45 degree and can alter the shapes enough to be a problem later in the process.)
I unpinned the pieces from Molly and cut them out following the outline I had drawn. The two patterns were as follows: The neckpiece pictured above, and the corset pictured on the left. The corset has 6 panels on each side.

I then made a quick mockup to ensure the fit was correct. The neck piece needed some minor adjustments because my neck is thinner than Molly's. An average corset is designed to have a 2" gap at the back, so that when laced it cinches in the body. This obviously doesn't work on the mannequin, so after draping the pattern you then calculate and carve off the proportional amount from each panel. (This was not done to the neck piece because cinching in the neck would cause strangulation.) I made my corset just a fraction narrower at the waist, shaving off the same amount from each panel. This would bring the waist in tighter when tight-laced, giving the waist more definition. After doing this you may have to readjust the seams a little bit so the sides are the same length.

I used the leftover black coutil from my Black Corset, Beetle Green Trim to be the inner 2 layers of my corset (making this corset have 3 layers total). The silks I used as my outer "fashion layer" would be too thin to hold the bones without eventually fraying, also would not stand up to tight-lacing very well. I needed 4 of each of the 6 pattern pieces to make my inner layers. For the neckpiece I did the double inner layers in black twill instead, this would be less constricting and allow more motion (as twill is much less stiff that coutil), while still maintaining the desired structural stability.

I gave myself 1" seam allowance at the top and bottom of each piece, and 1/2" at the side seams.
I then cut out the pieces in the appropriate colours of silk. The center front and center back were done in the orange, while the rest was done in gold.

When it came to the neckpiece I did my best to just ensure the grainline was perpendicular to the neck. This meant I got some interesting diagonals on the shoulder/back.

I did my corset supply order from Farthingales to get my various findings. This included my busk, grommets and bones. I also got some d-rings that I didn't end up using... I made sure all my exposed metal pieces would have a matching colour. In this case that meant that all of them were an antique bronze colour. I think this complimented my fabric choices much better than a silver would.

For this corset I used 2 enamel bones for the center back and spiral bones for the rest. Overall there was 10+ meters of boning. The enamel bones don't bend sideways, which is why they are used in the center back, this keeps the lacing more straight/aligned than spirals which are bendy in all directions.

Next I added in the busk to the center panel. You can find out how I did that by reading my Busk Closure Tutorial. Don't worry, you can come back to this. Hahaha
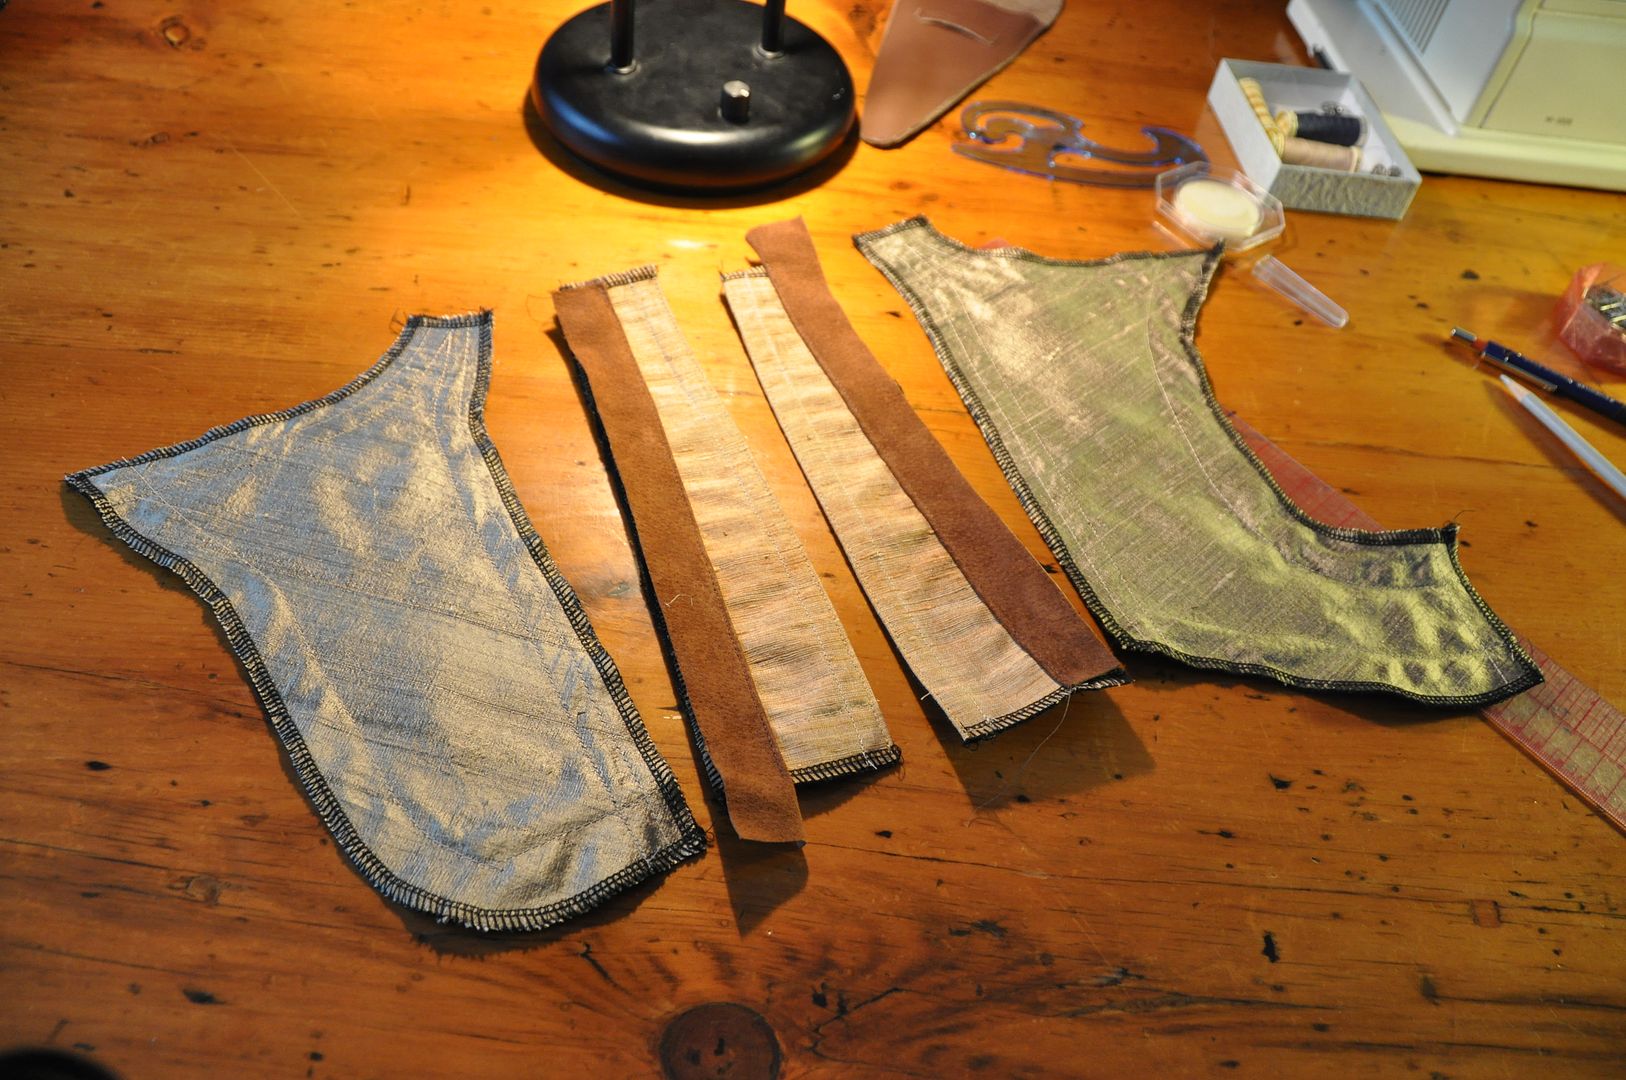
I basted all the layers for each panel together, following my seam lines, and serged the edges (excluding the center back, which was bagged out, pressed and top stitched first). This would prevent fraying while I worked as well as keep the layers from shifting. Then I prepped all the bone casings. For the internal bones (the ones next to each side seam) I drew out my lines carefully on the fabric and then machine stitched them. For the external suede cases I cut and measured the strips, then top stitched them on with the raw edges folded under.

I sewed the side seams on every piece except the center front and back. I made sure to carefully line up my basting stitches and edges and waistline. I didn't want to overshoot into my bone casings anywhere. The most important thing here is patience and accuracy. It will make for a cleanly finished corset.

Next I top stitched the suede strip that would mask the colour transition (orange to gold) on the center front and center back panels. This was to make the transition look less jarring. On the neckpiece this suede strip was sewn into the seam, because the layers were thin enough. On the corset though, this would be impossible because the 4 layers of coutil, plus 2 layers of silk AND a suede layer would be too much for just about any sewing machine. So instead I left it flapping while I sewed each of those seams, then I carefully folded it over and top stitched it in the ditch so the machine wouldn't have to go through the seam allowance also. To say this was challenging is an understatement. Haha

Once the pieces were all together it was time to prep and insert the bones. This process actually took quite some time. It is easiest to cut, tip and insert each bone before moving on to the next, otherwise you are likely to get them mixed up. As a general rule you should cut the bones to be 3/4" shorter than the finished case, this allows a little more room for them to bend so they wont bust out of the casings when you try to sit. (Trust me, sitting is by no means overrated!)

In terms of cutting spiral bones, I highly recommend investing in a pair of aircraft cable cutters, which you can pick up at most hardware stores (though the salespeople are likely to be confused as to your intended use of that tool...). They are the best thing to cut through the bones, normal wire cutters just don't work very well (it can be done, it's just a lot of effort). They cost around 20$ though, so if you are planning on making multiple corsets it's a good investment, if not you may want to look into pre-cut bones (which are more expensive than buying a roll of boning). Figure out what works best for your budget/your project!

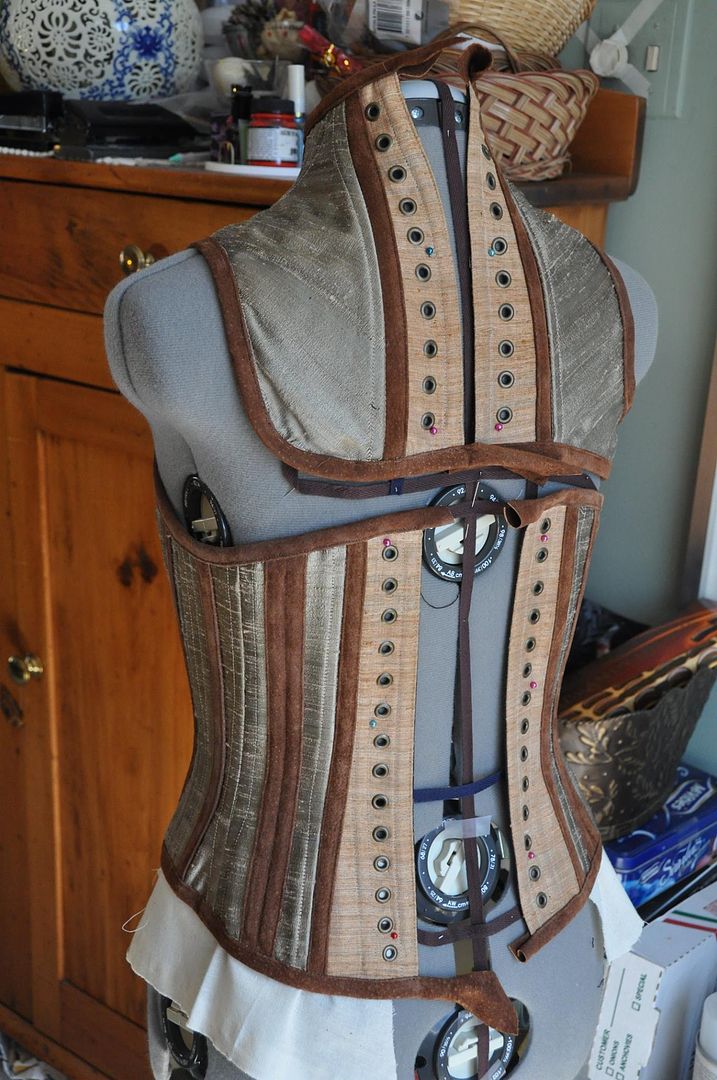
Now my corset was all pieced together (pictured left I still needed to top stitch the bone casing edge on the CF panels). Below you can see what it looked like after I top stitched it. You can see how it masks the colour transition perfectly!

At this time I also pressed the inner seams open & flat, then cross stitched them down, this reduces bulk on the inside and makes it more comfortable to wear (because the seams wont get folded over weirdly when you put it on and be uncomfortable).


Next was trimming and grommets. The suede trim on the corset was much easier than that on the neckpiece, as the curves were less extreme. Suede has a lot of stretch to it, but it is not nearly as kind as bias tape in that respect. So there are some places under the edge where I had to fold/gather the trim to get it to work. But it looks great on the outside! So that's all that really matters. I tucked the ends under and hand stitched them down.

The grommets I put in using the grommet press I have access to at school. It makes it much easier I had a record breaking zero failed grommets! (Not planning on buying my own press though for reasons of expense.)

The last thing I added (besides the laces) was a buckle under the left arm. Again I picked a buckle with metal that matched the colour of my busk and grommets.

I'm sure I will be wearing this to many more events!