Showing posts with label inkling. Show all posts

Tuesday, October 25, 2016

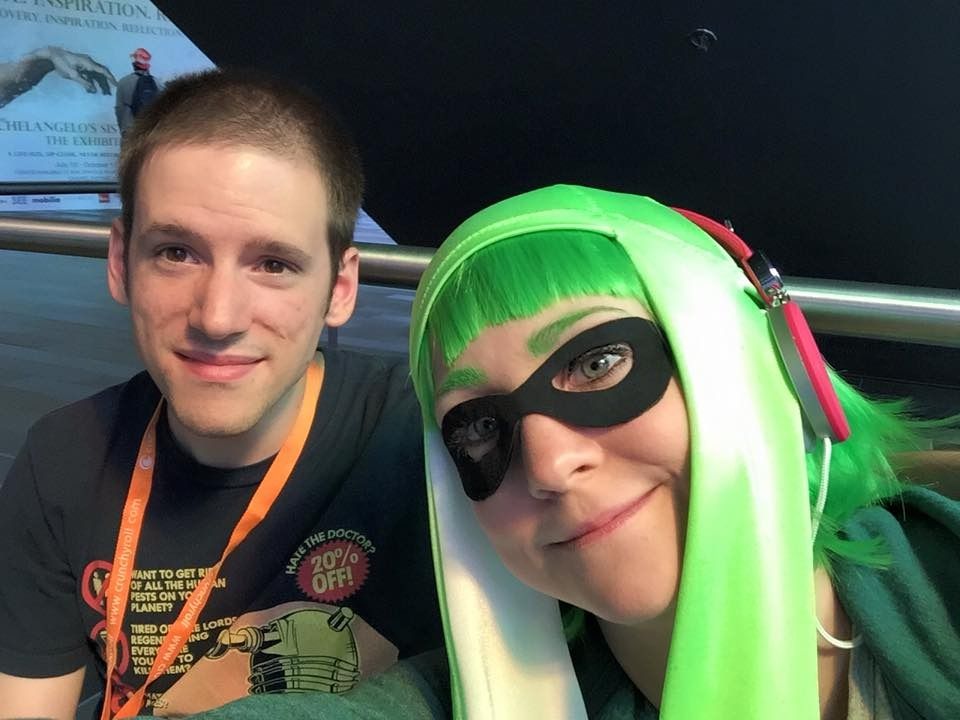
Taking Orders for Splatoon Commissions!

Taking orders for Splatoon hats and tentacles!

- 30$ for full "boy" hats 
- 25$ for just the "girl" tentacles

All are made of spandex and hand painted. Team colour on request!

**Shipping is extra, determined by location

***All squid headgear must be sewn down to a wig in order to stay on (including boy hats). This is not included.

Shoot me a facebook message if you're interested!

Photo credit to Elemental Photography!


Friday, February 12, 2016

February Update - 5th Blogiversary


Today marks my 5th Blogiversary! 5 years of blogging, this must be some kind of milestone? Wow! :,D When I started this blog, I didn't know how long I would stick with it. It was a huge undertaking to start documenting all my costume making progress and some of those write-ups take me practically forever, but over the last 5 years I've had such wonderful support from my fans. Whether there are 10 people or 200 who follow regularly, you guys are my motivation to continue sharing what I learn on every costume journey. I believe that knowledge is for sharing, and so as long as there are those who want to learn, I will do my best to keep writing for you guys.

Some highlights of this year include: finishing my university degree (with honours!), presenting design work at Prague Quadrennial, having a piece of mine in a museum exhibit, building my own website, and finally completing my Vaporeon costume!

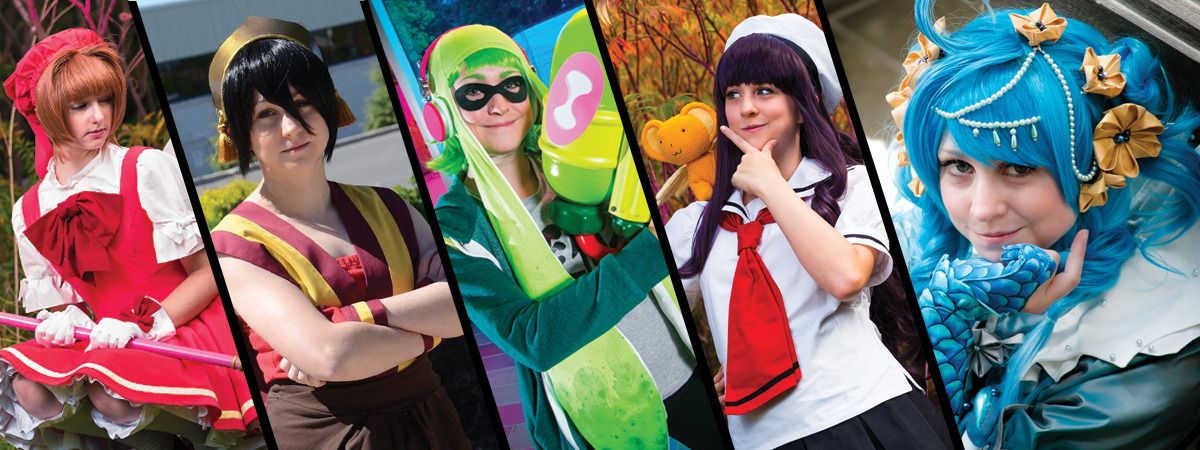
I didn't finish nearly so many major costumes this year--and I started a whole bunch more. Costumes I completed this year include: Vaporeon, Inkling, Toph, Tomoyo, and Sakura. Considering how busy I was, I'm pretty amazed I was able to even finish 5 costumes--though only one of those was a notably ambitious project.

As I mentioned in my January update, this year's goal is to finish the 6 costumes I have in various states of completion. Another goal for this year is to go back through 200 blog posts and fix all the broken images, and re-vamp the blog. I think it's time to change up the layout a bit. Wish me luck with that... Because it will take AGES. But considering my lack of employment, I should really work on that while I have the free time.

Upcoming posts include the conclusion of the Vaporeon posts and some small DIY projects I did. Hoping to finish my Jack Frost costume before all the snow disappears so I can do a photoshoot, but considering the lack of snow we've been having here, that may not happen. Fingers crossed! Facebook followers have been seeing all the progress pics of the paint job on that sweater. Holy crap it's taking forever!

In other news, I'm back in school again. Well, night school anyway. I'm taking a millinery class! Hat-making ahoy! >:D (I'm starting to feel like by the time someone hires me for a job I will be extremely over-qualified, what with all this schooling...)

I have more exciting news coming in another post near the end of the month... stay tuned for that and more great stuff this year!

Wednesday, September 30, 2015

Inkling - Guns and Tanks - Splatoon

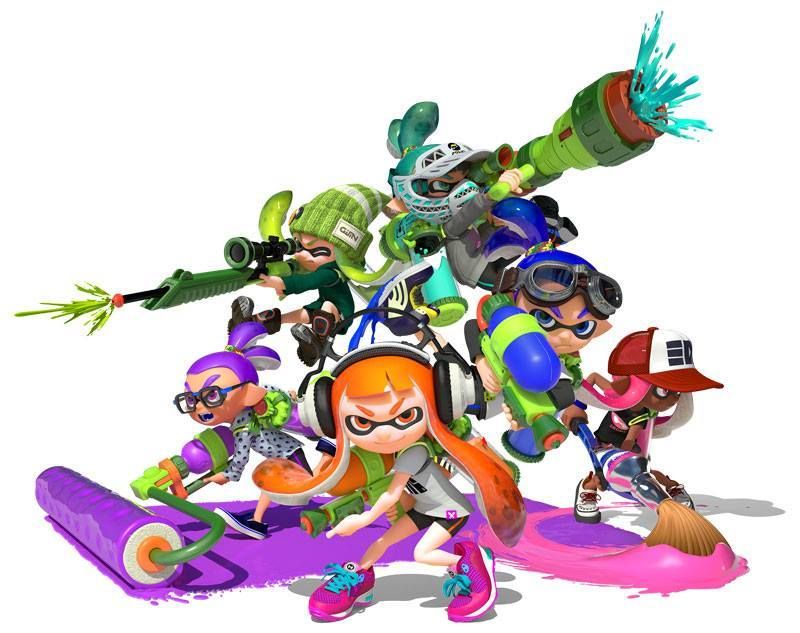
Part 3 of the Splatoon Squad posts! Lets talk armaments! >:D If you are interested in the tentacle hats, go here! If you want to see how we put together the outfits, go here! Once again hats off to Elemental for the great shots from the photoshoot!

Now we delve into territory that I know little to nothing about: The Armaments. I had very little involvement in this area. I was a helping hand in the mass production line for the harnesses, ink pillows, and I helped put the electrical tape gauges on the side of the tanks. That's about it. Credit goes to the real masterminds Brian (Ragz Cosplay) and Adrien, and their very best shop gnome Andy (Yavarice).

Based on a 3D model that Andy did of the tank, Brian broke down and printed all the components. These had to be cleaned up (sanded) and painted, and then these were assembled into a full team of tanks. Andy gave a hand in this process.

All I can tell you about 3D printers is that they operate by wizard magic. I am fairly certain Brian is a wizard, and Andy is a sorcerer's apprentice.

The pieces were painted up separately using spraypaints and then glued together using a glue called E6000. The bottom of the tank is removeable so that the ink pillow can be changed. By changing the ink pillow you can easily re-purpose the tank for a different colour team.

The pillows are made from the same spandex as our hats. Michelle (Mage Cosplay) and I made fabric cylinders of varying heights and stuffed them. The pattern is literally 2 circles and a rectangle. Except Brian's, he made the top of his wavy. Because he is not lazy like me.

The harness rigs are made out of foam mats from walmart, black webbing, buckles and hot glue. The shoulder straps are 2" wide and tapered at the front end. After being cut to the desired length, we put a slit at each end for the webbing to be fed through. The webbing had the female end of the buckle sewn on to one end. We carved out a small depression in the inside of the strap and glued this end of the buckle in place. The other end is the adjustable side. When we had the desired length, the excess webbing was cut off. We burned the ends with a lighter so they wouldn't fray.

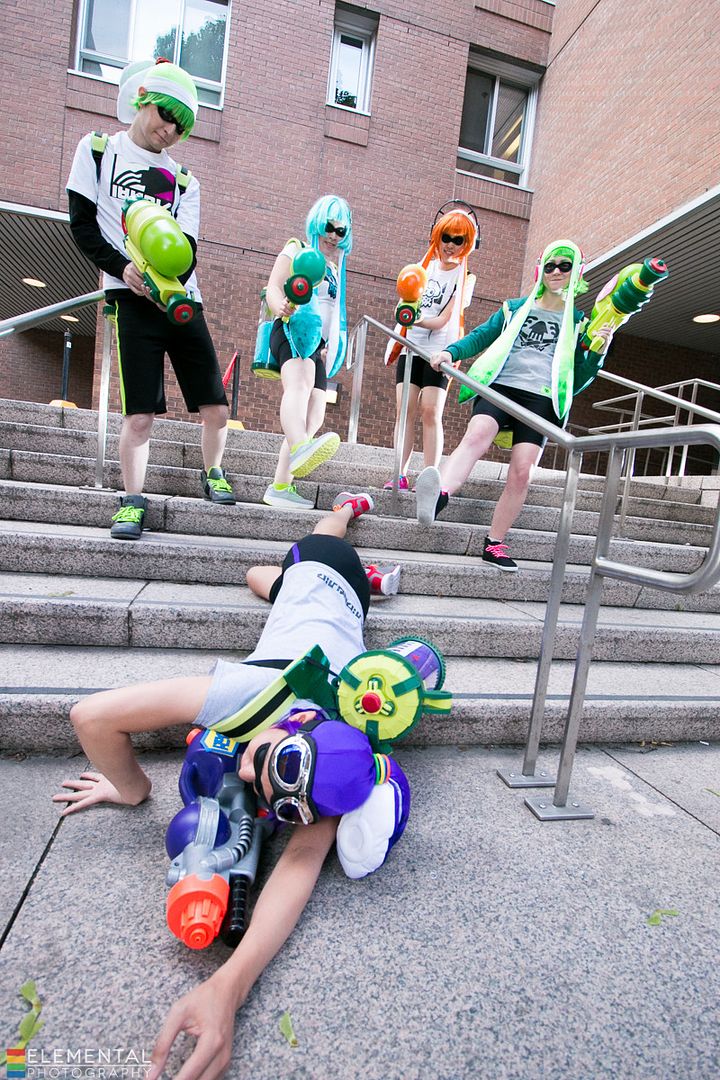
The two straps were glued to a back piece that is a dumbell shape that has a thinner webbing strap attached to it. This smaller straps has velcro and feeds through two slots on the tank. They make the tank removable from the harness. You can see where the tank attaches to the harness in this great shot of us beating up Andy.


As for the Splattershots, Adrien takes all the credit there. (Well, Andy does get some credit for being his resident shop gnome and doing much grunt work cutting out pieces.) Adrien created some foam pieces as templates and vaccuformed all the separate pieces over them. These were then cut out and glued together. But I assure you it is more complicated than I have described. I am still in awe of these, they are so professionally made!

I believe Andy's gun is a Nerf gun? With a logo added to make it look super legit. The logos were made from craft foam.

Overall I was really impressed how we were able to pull together a really cohesive looking group! I hope I get to take part in something like this again in the future. Special thanks goes to everyone who helped make this happen. I'm excited for Squids 2.0! :D

Thursday, September 24, 2015

Inkling - Tentacle Hats & Wigs - Splatoon


Part 2 of the Squids or Kids series! If you are interested in seeing how we put together the outfits and accessories, go here! Once again credit to Elemental for her fabulous job doing the group photoshoot! So many really great shots!

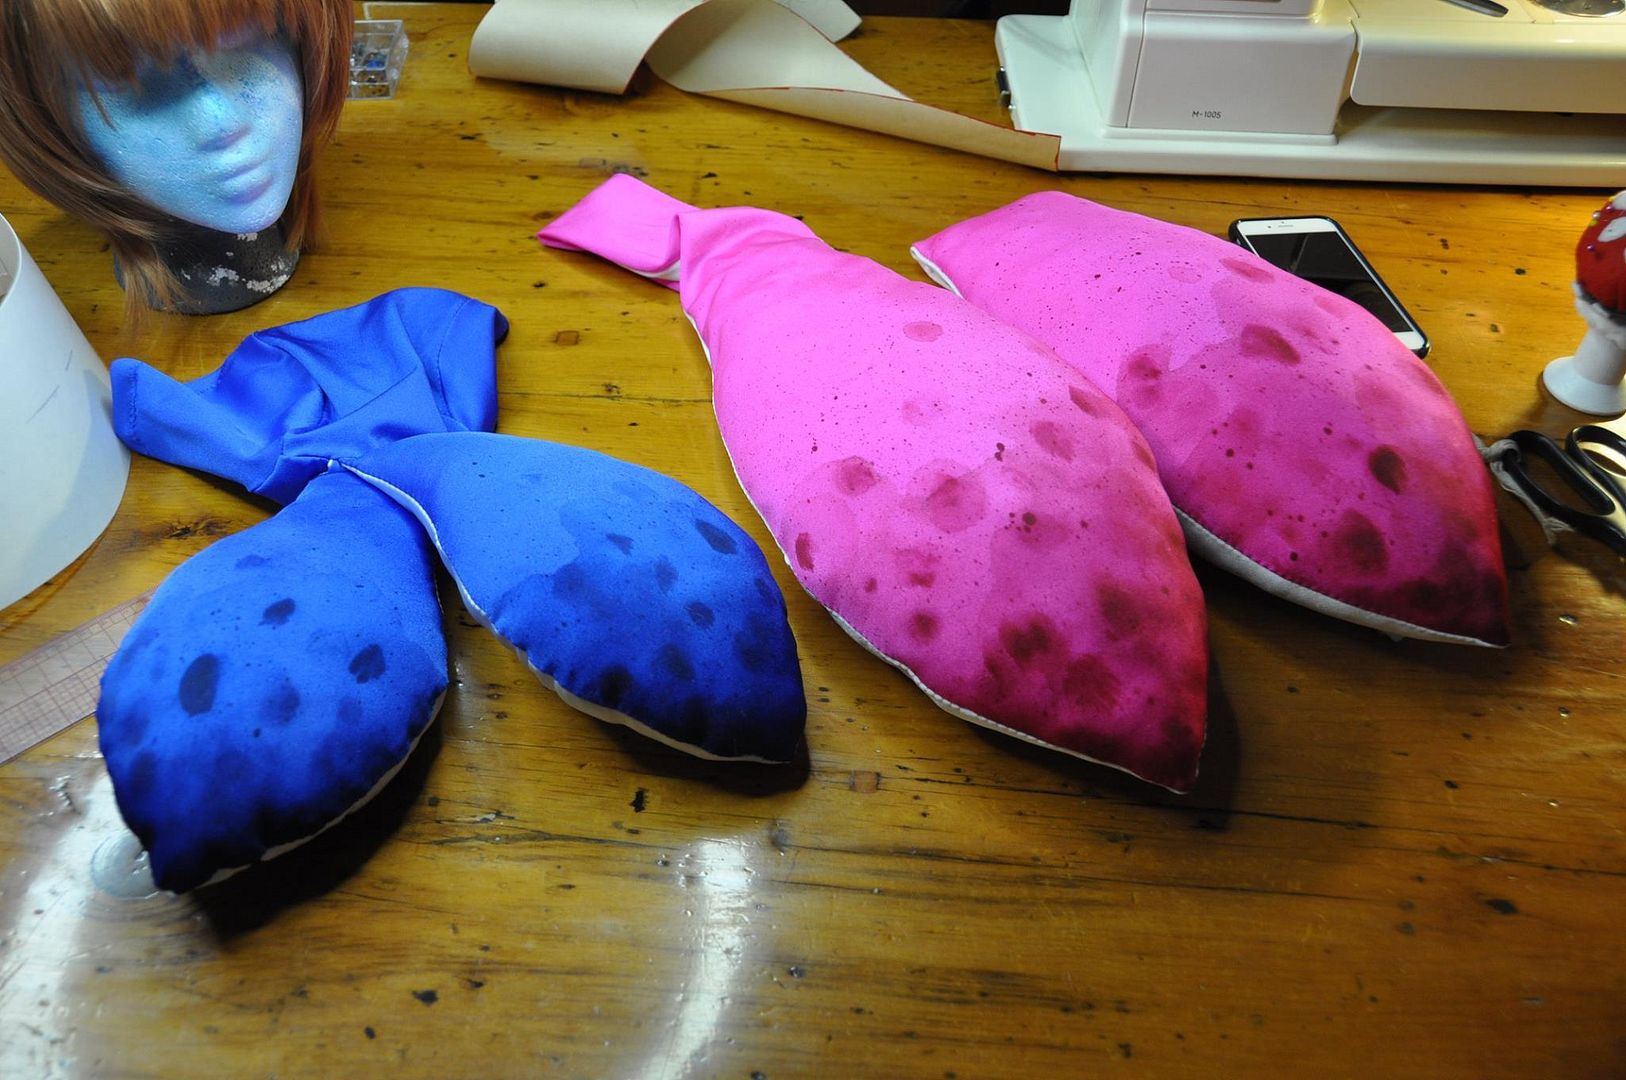
Let get down to business; time to talk about those crazy squid hats! Patterning and painting the tentacle hats was my big group contribution. It was a bit of a challenge for me, as I have very minimal experience working with spandex/stretch materials.

We did some google image research to see what other cosplayers had come up with. We saw quite a few who had made theirs out of fleece. We decided not to use fleece because we wanted to a) be shiny and b) be paintable for the gradient. We also saw ones who had made the tentacles and covered them in wig fibers. We all decided that was more effort than we were willing to put in. I decided to go with a hat, while the other girls were more partial to the "tentacles sticking out of the wig" idea. So for them we used the same tentacle pattern, but instead of sewing it into the hat, they stitched/pinned theirs directly to their wigs. I may go back and change mine to match the rest... I'm still on the fence about that.

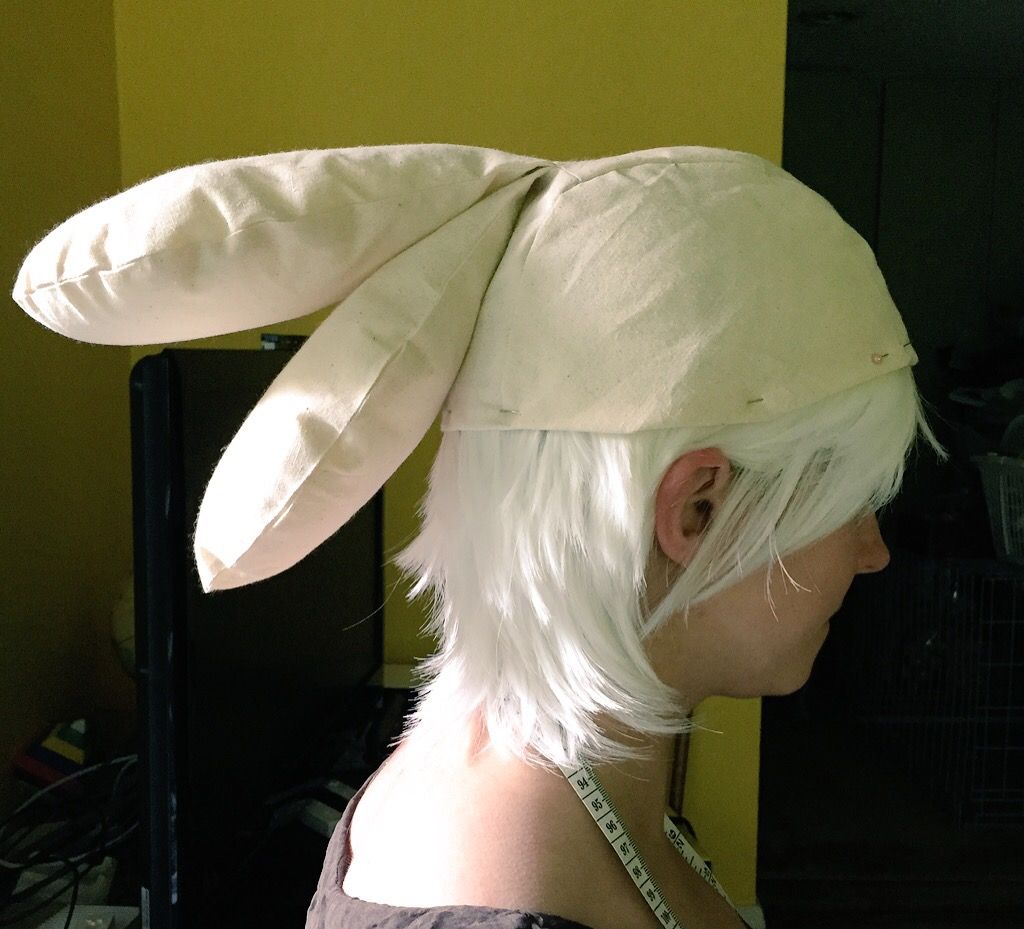
For the girl hat I started with drafting a basic pattern. The patterning process was very loosely based on how I patterned the Newboy Cap a few months ago. It consists of 5 tapered panels of various sizes that meet at the top. 1 front panel, 2 back panels, and 2 side panels that were the fronts of the tentacles.

It is important to note that since these hats were being worn over wigs, all of the measurements were taken while wearing a wig and all mockups were tested over a wig for a more accurate fit.

The one difference between the mockup and the final hat is that after doing the mockup I realized that creating "bangs" with the front flap was going to be too challenging in spandex. So I opted to instead make the bangs of the wig stick out from underneath.

For the boy hats, I knew there needed to be a seam near the top that the tentacles could be attached from. The boy hat pattern ended up looking very different than that of the girl hat. It consists of two "semi circles" as the sides, and then a rectangular shape tapered near the top seam for the center front and back. After I put together a mock up that looked alright on me, I then had to create a second mockup in a larger size that looked alright on Andy. Because my head is really small.

After creating a mockup that I was satisfied with, I went fabric shopping. Affordable Textiles on Queen St. had a good colour selection of spandex for a decent price. When you are doing a group this large, it is more affordable to share materials--in my case the 1yd of white spandex I bought was enough for 3 pairs of girl tentacles with a bit of leftover. But the 1 yd length was necessary anyway because the tentacle pieces are so long.

After cutting the pieces out I realized that if I wanted to paint on a gradient on the green side and add a sucker to the white side I would have to do it before I sewed the two halves together. In both cases I wanted to work on a flat surface.

For the paint job I originally was only in charge of doing my own and Brian's (as payment for making my tank). But since I was the only real painter of the group, I was soon asked to do the full set so they would all match.

The gradient had a different tint to it in every reference photo. In gameplay most took on an almost purple-y hue at the tip, but in still photos it was a darker shade of the team colour. I decided to go with a darker shade of the team colour so it wouldn't look weird.

I was going for a watercolour & paint splatter look. I used round brushes and fabric paint. I did all the ones that had to be painted the same colour back to back so I could be consistent in my colour mixing. I started with the greens, then orange, then turquoise and lastly purple. I typically worked with a pair at a time.

I started by mixing my darkest colour. This would be the only colour I mixed for each. All of the hues in between were created by watering down my brush before painting. Sometimes I would only paint with water, to help blend the colours. At the very tips I used almost purely fabric paint. I would make darker spots here and there. Lastly I loaded up my paintbrush with paint and ran my thumb through the bristles to flick small spatters of paint onto the fabric. This left the dark little speckles. There was no real science to this process.

Above are the original 7 I painted, labelled as to who they belonged to. Louise and Patrick will be joining us for Squids 2.0.

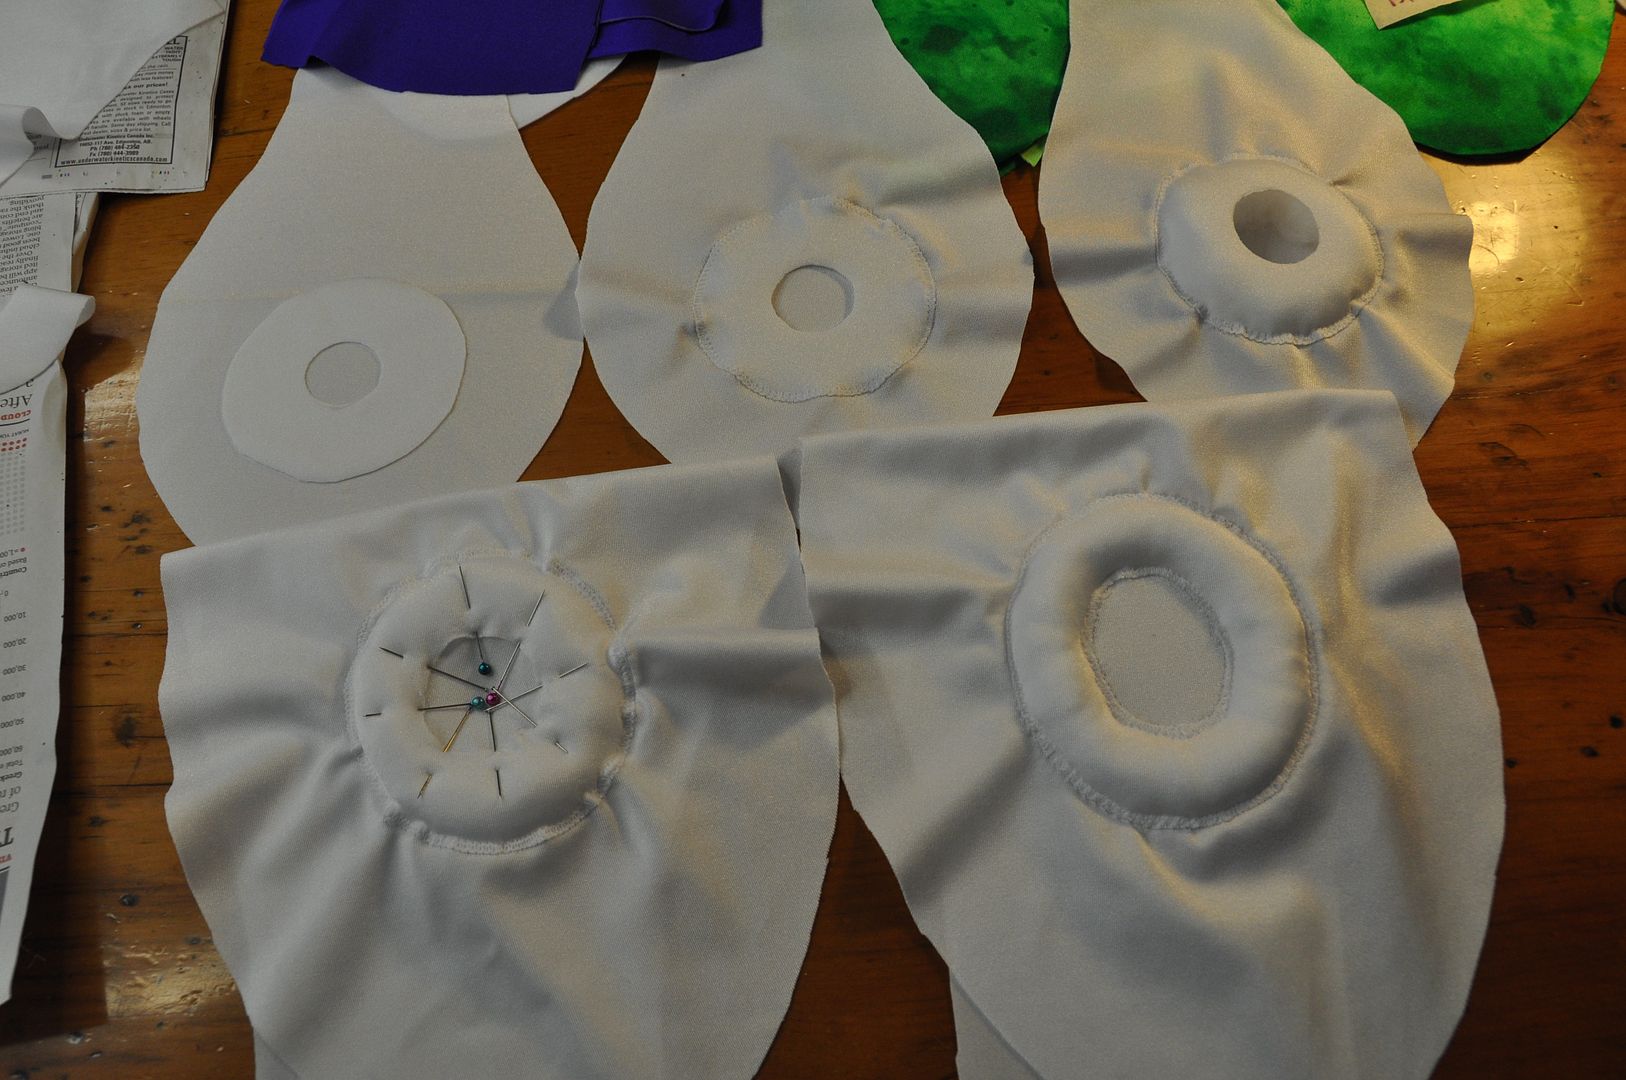
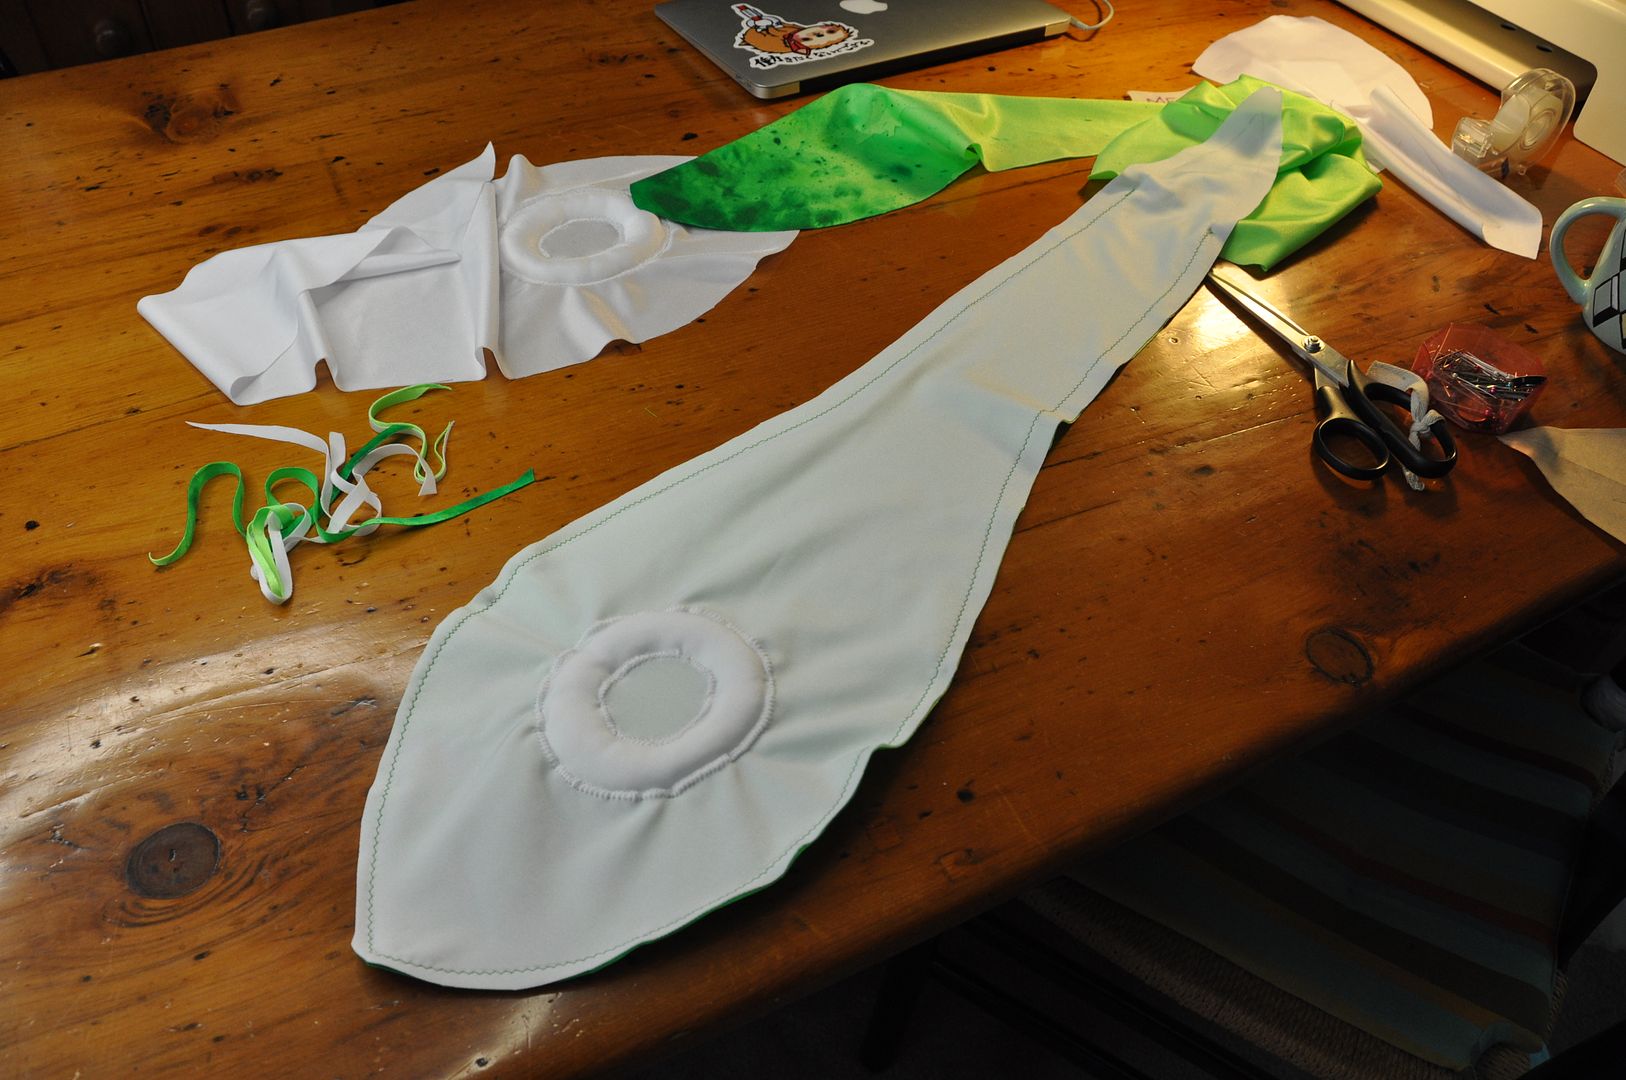
The process for the suckers was relatively simple. First I cut out a 'donut' shape in white spandex. Pinning it in place, I then used a zig-zag stitch to appliqué it to the tentacle around the outer edge. Then it would get stuffed from the center. Then the center edge was pinned down. Lastly the center hole edge would get carefully zig-zagged closed. The picture on the left shows each step of the process.

Many thanks to Michelle and Andy for coming over and assembly-lining the cutting, pinning and tentacle sewing process while I painted. They did a great job!

The next step was to sew the tentacles together. They were pinned right sides together and then sewed with a slight zig-zag stitch. We left a hole at the base so we could carefully flip them right way out and stuff them.  This many tentacles required a surprisingly large amount of stuffing!

For the girls who didn't want hats the tentacles were at this point handed off to them to attach to their wigs. For myself and the guys, the next step was putting together the hats.

For the guy hat the tentacles were first sewn into the top seam. Then the two semi circle side pieces were sewn on. Lastly it was hemmed.

For the girl hat I sewed the two back panels together first along the center back seam. Then I sewed the two side (tentacles) to the center front piece. Then I sewed the sides to the back panels and trimmed the excess seam allowance from inside the hat. Then I hemmed the hat, tacking down the white fabric on the inside in the same stitch. 

I picked up this green wig from EpicCosplay. The colour match is pretty darn good, especially since there are so few colours of green to choose from when it comes to buying wigs.

Excluding my wig--which I cut myself--the rest of the group's wigs were cut and styled by the ever lovely Louise, who will be joining us for Squids 2.0! For the girls we cut blunt bangs straight across the front and trimmed the backs a bit. I wanted the back of mine to be more flippy, so I pinned it up in sections, lightly sprayed it with hairspray and then used a warm hairdryer to set the curls. Then I combed them out. They were a bit too curly, so I used a warm hairdryer again to get them to relax a bit.

For the guys Andy and Brian went with two different styles. For Andy's wig, Louise took the bangs and pulled them completely back and pinned them out of the way, under the wig. She left the sideburns, which she trimmed a bit, and then trimmed the back as well.  For Brian, he wanted to keep the bangs, so she just trimmed them to be shorter and out of the eyes. The sideburns were done similarly to Andy's wig.

For both of theirs, because the weight of the tentacles made the hat back heavy and the spandex was super slippery, they had to have the hats hand stitched to the wigs. For a finishing touch they added their own hair accessories to the tentacle "topknot" hat. As far as I remember Andy used some bright coloured hair elastics. Brian added the white headband and a dollarstore bracelet as a hair tie.


Wednesday, September 16, 2015

Inkling - Outfit & Accessories - Splatoon

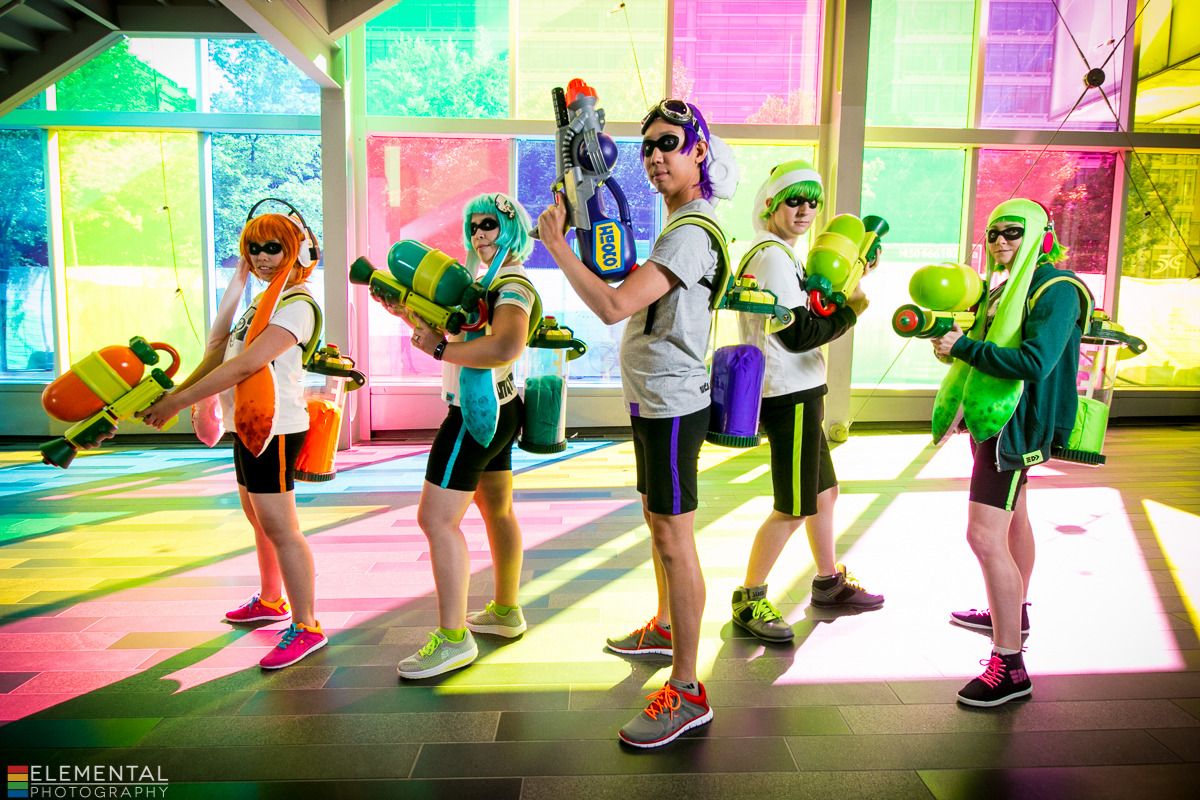
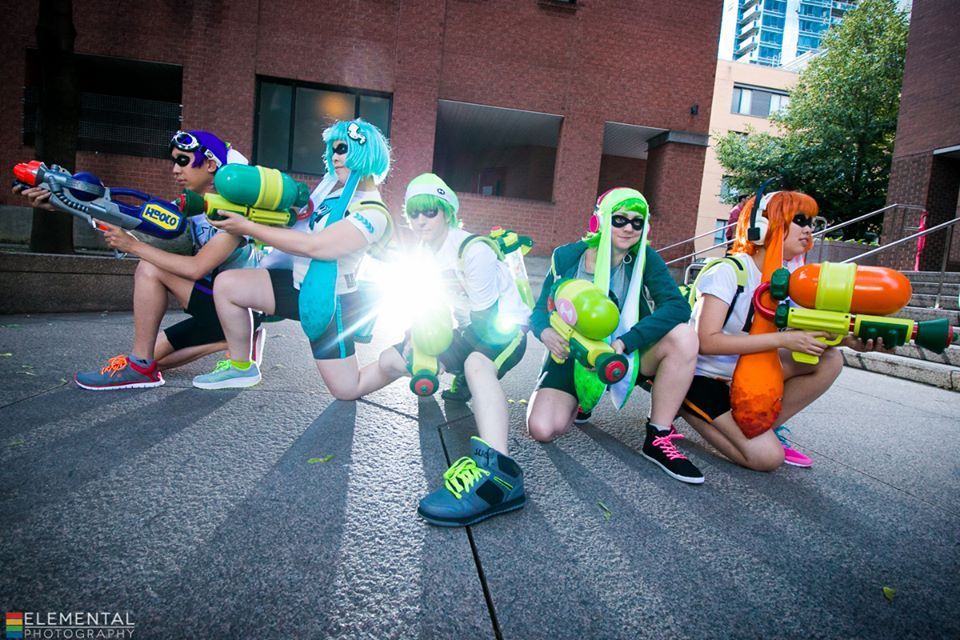
This is the first post on our Splatoon Squad--affectionately referred to by the group as "Squids or Kids?". What was supposed to be a group of easy casual cosplays quickly snowballed into a crazy colossal effort to make the most awesome Inkling costumes possible. Special thanks (and photo credit) to Elemental for doing the group photoshoot! All of the pics from the shoot were wonderful!

The current group from the photoshoot consisted of: Brian (Ragz Cosplay) --the brains of the operation; Andy (Yavarice) --our task manager; Michelle (Mage Cosplay) --a heat n' bond wizard; Kim --the only one who can actually has the power to create vector files; and myself--the squid hat pioneer. Special thanks also to our fellow squids--the wig expert Louise and magical wizard Adrien--for all their hard work as well! We look forward to them joining us for Squids 2.0. :) There will most likely be a second shoot at some point in the future, with even more Kids. Or Squids?

Obviously since this is a large group cosplay there is a certain amount of tasks that were shared or delegated so that everyone's costume would match! I will do my best to generally explain how things came together, but obviously credit goes to the individuals who made each specific thing!


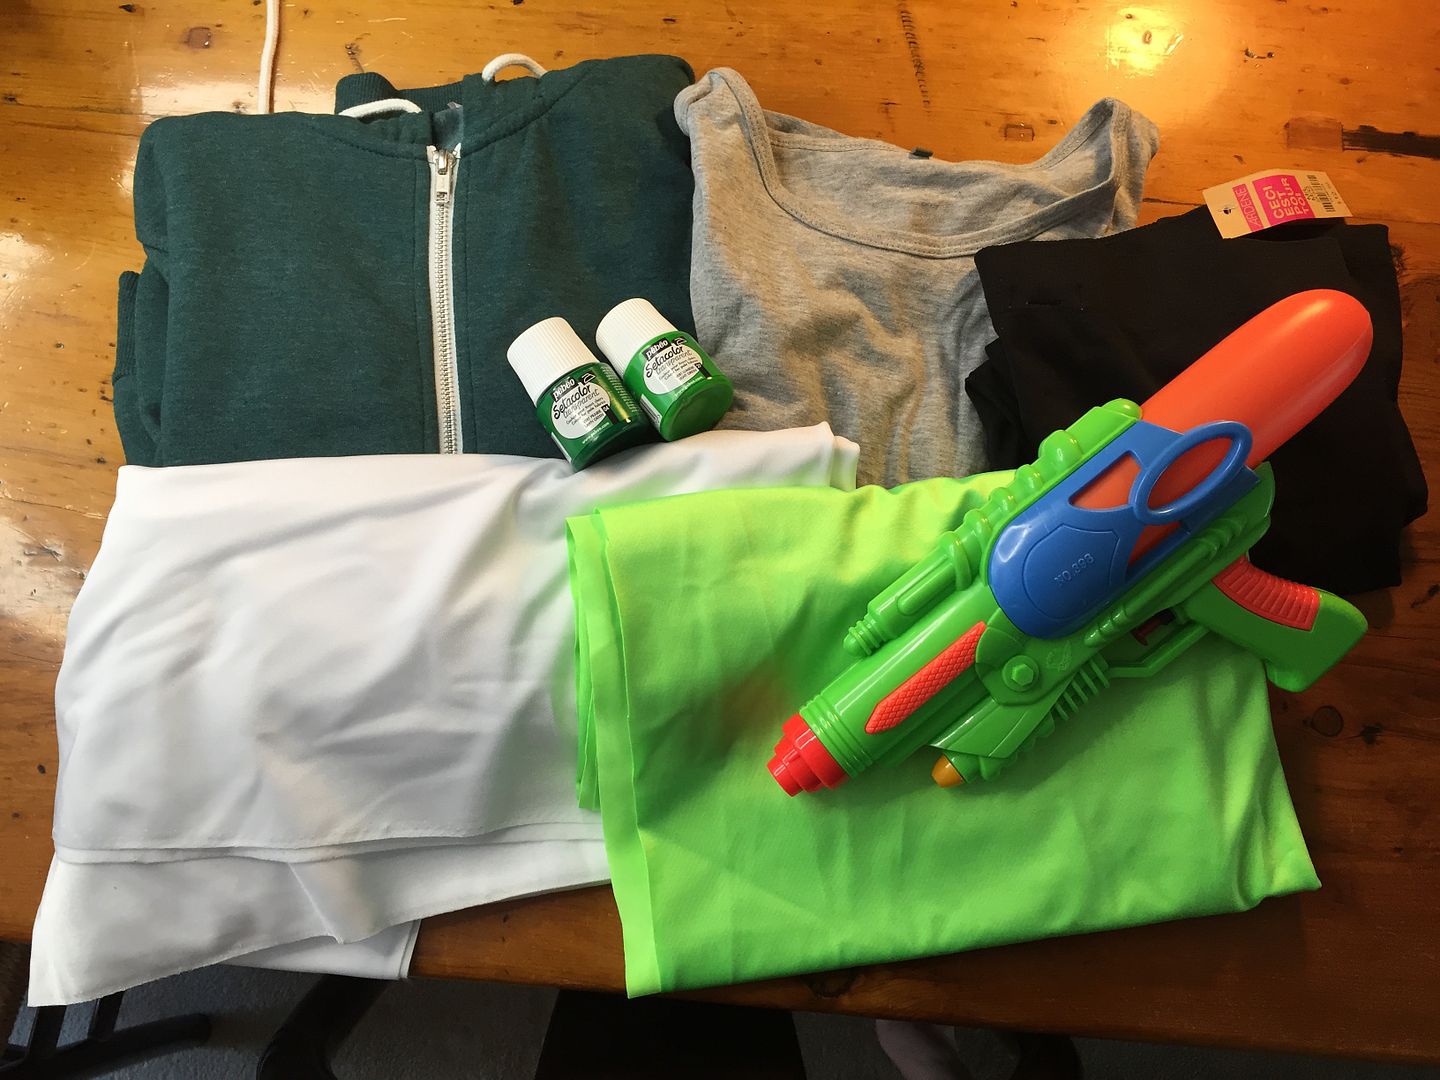
For the clothes we all set about creating our own outfits. I tried to keep the base items I bought on the cheap side.

Since the Inklings all wear a standard pair of black biking shorts with a stripe their team colour down the side, we all found black leggings/bike shorts to modify.

For my shorts, I bought a pair of black leggings at Ardenes for about $10. I marked how short I wanted them, then cut off the excess. I topstitched a stripe of green spandex down the side of each leg using a zig-zag stitch--so it would allow the fabric to stretch. Then I hemmed the pants.
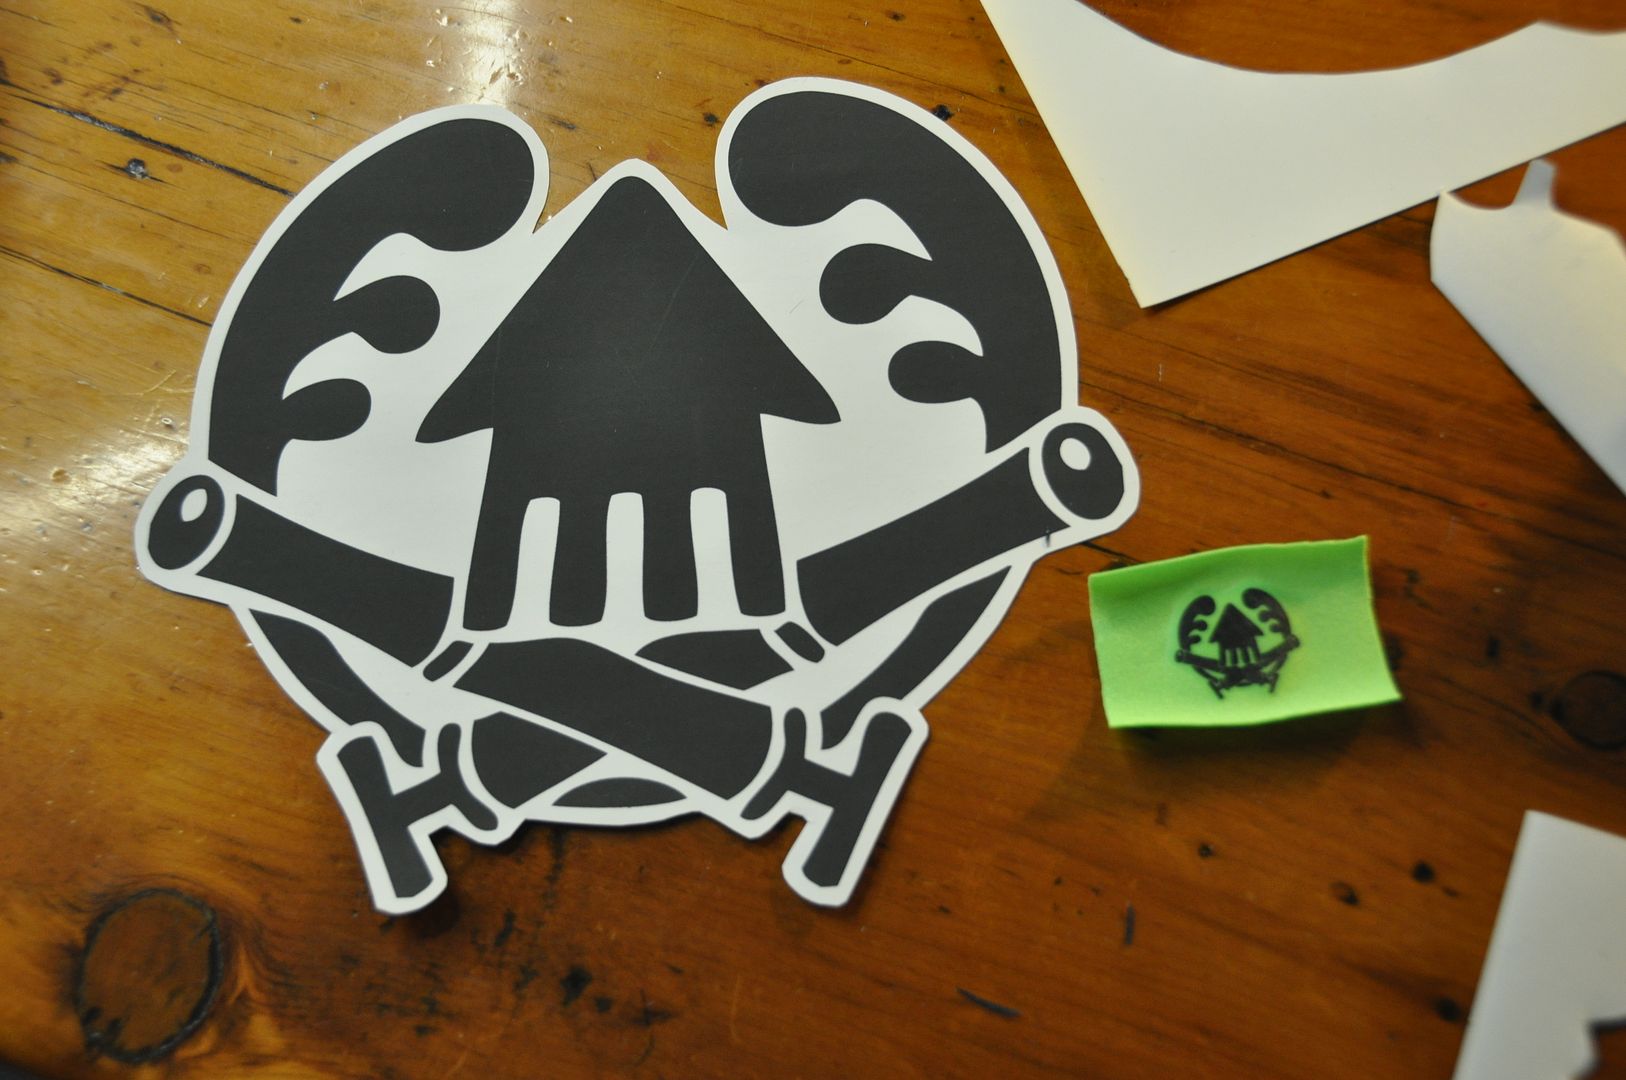
We all opted for t-shirts in varying colours with one of the various logos from the game on them. In the game the clothes you can buy have different brands to choose from, and each brand has a unique logo. For those of us who decided to create our logos with heat transfer paper, Kim vectored and resized the designs. Those of us with inkjet printers printed the logos onto heat transfer paper. (Which I believe was purchased at Michael's?) Those were then applied to the shirts using an iron.

I bought my t-shirt in chinatown for $2. I think other people bought theirs at Walmart. I also got a green hoodie at H&M to match my costume--in case it was cold. Brian layered his shirt over a long sleeved shirt.

For the coloured tags on the shirt we each used a rectangle of our own team colour fabric and used a small version of our logo applied with heat transfer paper. Then we used heat n bond to attach the tags to our shirts.

Mage actually created her adorable squid shirt logo entirely with heat n bond to appliqué the design on in the different coloured fabrics pieces. I think it turned out really awesome! She also made several of the simpler tags (like the one on my hoodie) in this method. She is a heat n' bond wizard.
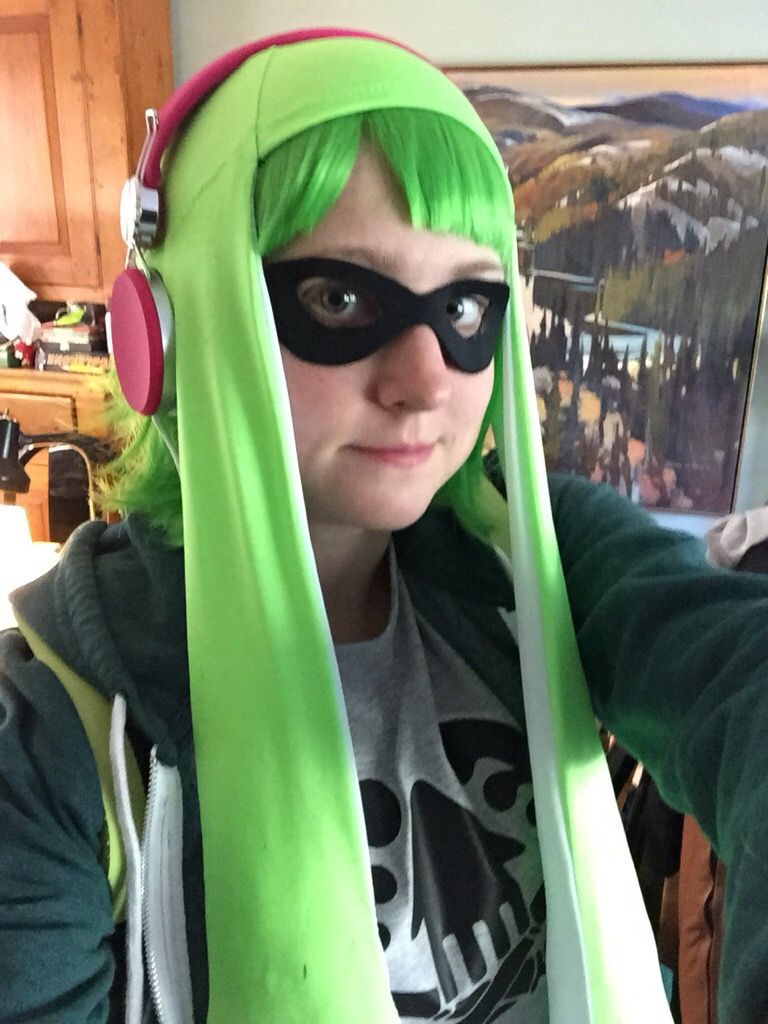
Accessories allowed us to personalize the costumes a bit more. We looked like a cohesive group, but the accessories gave our characters personality. For example: Andy wore goggles, Kim had headphones, Michelle had hair clips, and Brian wore glasses and a headband. In a lot of cases, we would find a colourful item for cheap and then slap a logo on it. Hahaha

For shoes, I got a pair of $14 high tops at Ardenes that I stenciled a logo on using fabric paint. I tried to make my accessories have a colour theme--which was pink. We had a group field trip to Walmart one night to pick up some accessories. We got some packs of brightly coloured shoe laces there, so I was able to swap out the boring white ones that came with my shoes for a pair of neon pink ones! Other members of the group picked up their brightly coloured running shoes at Walmart. I don't think anyone spent more than $30 on shoes.

I picked up a pair of bright pink headphones in chinatown for about $20. So I wouldn't have to worry about making any pointed ears for the costume, which we made a group decision later to forgo anyway. I wish the headphones I bought were a little bigger, but I wasn't willing to spend any more on them. I may mod them at some point. Perhaps for Squids 2.0?

The masks were our solution to not having to paint large areas of our eyes black. A friend of of the group put together an easy superhero mask tutorial, which you can find here! These masks are lightweight and can be spirit gummed directly to your face, or tied on. Andy made my mask for me, and it looks awesome, but unfortunately the felt backing seems to irritate my eyes a lot. :( I am going to look into alternative materials to make the same thing, because I really liked the look of the costume with the mask. Next time I am definitely going to fill in the area around my eyes with black makeup, though.

Stay tuned for part 2!

Monday, August 10, 2015

Otakuthon 2015

Otakuthon--my 3rd con of the season! The summer continues to fly by! I have finished constructing all my planned costumes for this season, so now I can sit back and relax for a few weeks!


Photo credit: Don Dolce Photography

The weather was generally very nice for the whole weekend. I didn't mind that it was a bit on the cool side, as I really hate overheating in costume. I haven't attended Otakuthon since 2012, when I debuted my Cosmo costume and wore Alice. I had a much better time this year, and I think should add this con to my regular con season.

Friday: I met up with my travel buddies/roomies early friday at the bus station. The party consisted of Blayke (my boyfriend), Harriet (a friend from school) and Hotaru (Harriet's friend--a Japanese exchange student). We took Megabus in from Toronto and arrived around 3:30 in the afternoon. We checked in to the hotel first and freshened up. We went grab some caffeine and then pick up badges.  After a short stint in the dealers room we grabbed some quick food and then lined up to go see World Cosplay Summit.

I have to say--I was really impressed with the WCS event. The stage was great, and the lights were fantastic. The MC was enjoyable, and handled both the french and english sides well. As for the contestants, I was very impressed with the level of quality of the costumes as well as the onstage presentations. They all did Canada proud! The cosplayer interviews afterwards were delightful, and I hope that they continue this tradition! It was nice to hear the voices of the artists and get a little background information on the contestants and their costumes. Above all, I wish the winners good luck next year at WCS in Japan! Fight-o!

To round off the evening I met up with the Splatoon Squad for a late dinner and went back to their hotel to pick up my armaments for the next day.


Saturday: I was up pretty early to get into costume. Blayke was kind enough to go and grab caffeine for us--and deserves like 10 gold stars and a million hugs for all his help this trip! I wore Vaporeon in the morning, and Harriet borrowed my Alice costume. We checked out the rest of the dealers room before heading off to my first photoshoot of the day. I shot with Elemental, and it really was a pleasure! She found a really beautiful--and secluded--fountain and reflecting pool to shoot my water Pokémon at. She was lovely to work with and I hope to shoot with her again soon--which I actually did later that afternoon! hahaha I went back to the hotel and changed into my Inkling Girl costume for the Splatoon group photoshoot. Both shoots went really well and I am excited to see the photos!

After all that we were sufficiently starving and went to grab a very late lunch. We went back to the con for a bit before rejoining the squids/kids and heading back to their hotel for mask/makeup/costume removal. We had dinner at Reuben's--yum! Then Blayke and I went on an evening adventure to explore old Montréal for a bit.


Sunday: After packing up and checking out, we went to Jardin Nelson for a delicious brunch--crepes! Then we explored old Montréal until it was time to catch our bus to return to Toronto.

Overall I had an excellent con weekend! Looking forward to attending again next year!


Sunday, August 2, 2015

August Update

Holy Batman! The summer is already half over? I haven't even done half the things I wanted to get done. Like post my AN stuff. And make a website. But rest assured I have been busy here in the elf workshop! The Otakuthon deadline approaches. I leave Friday morning for Montréal.

Vaporeon is the closest to finished it's ever been. And I see glimmers of hope on the horizon that I will be bringing this costume with me. (Credit goes to Cowslip for the design!)


Also in the works is a massive Splatoon group (massive relatively speaking anyway--because it is fairly difficult to coordinate 7 cosplayers and therefore qualifies us as a massive group). We have had several cosplay sweatshop days (including last night's field trip to Walmart) getting us coordinated and swapping tasks so all our tentacles, guns, tanks, and accessories all match. That costume is at the point of finishing touches.

For the con itself I'm still working out my costume lineup, but I have 2 photoshoots on Saturday that will require me to switch costume halfway through the day? The rest of the weekend is undecided.

In other news: I got Twitter. Username is sierraboake.