Showing posts with label e6000. Show all posts

Tuesday, March 8, 2016

Vaporeon Gijinka - Sandals & Accessories - Pokémon


The 6th and final instalment of my Vaporeon building quest: Sandals & Accessories! This costume was all about the details and finishing touches. Beading, painting, trimming, gems, accessories, props--all elements that helped give this costume the extra wow-factor. It's not often I break a costume down into 6 posts, but this one is certainly worthy of that.

Links to Part 1: BoleroPart 2: Under LayersPart 3: Wrap Skirt TailPart 4: Wig & Hairpieces, and Part 5: Wraps & Bracers!

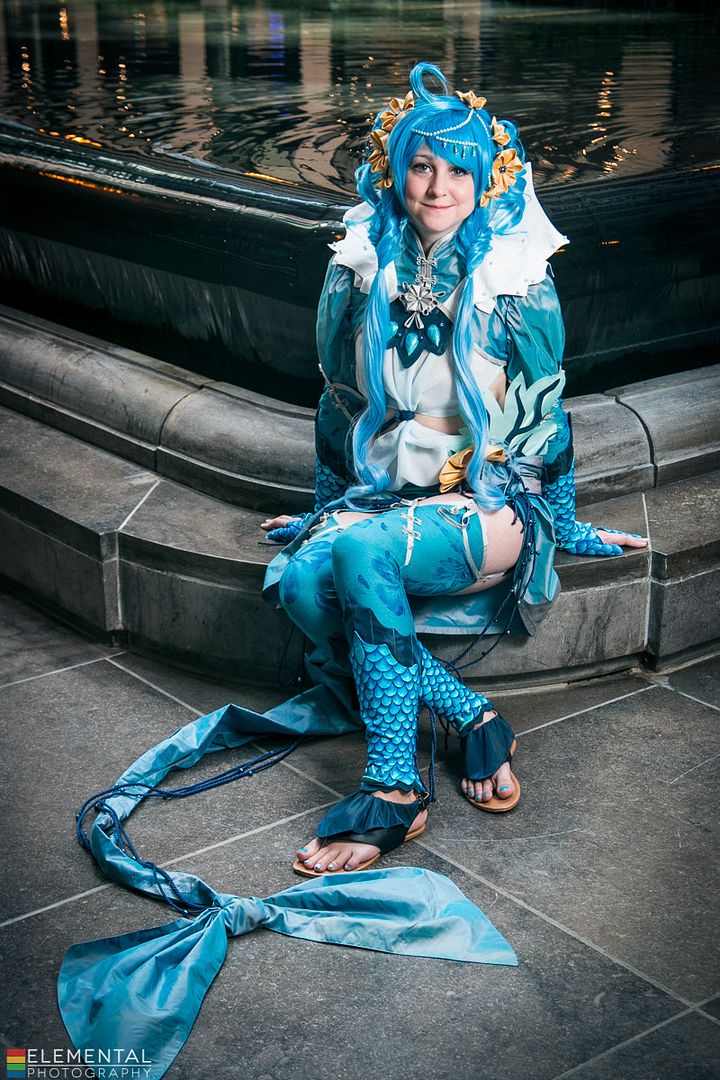
Thanks to Elemental Photography for the fantastical photoshoot! Credit for the original costume design goes to Cowslip!

Firstly I would like to thank my friend Harriet for lending me her fan! She does Chinese fan dancing and allowed me to borrow hers for this shoot. Thanks muchly!
For the sandals I started by buying a plain pair of cheapo flip flops from Ardene's. Which is a great place to buy shoes you don't care about.

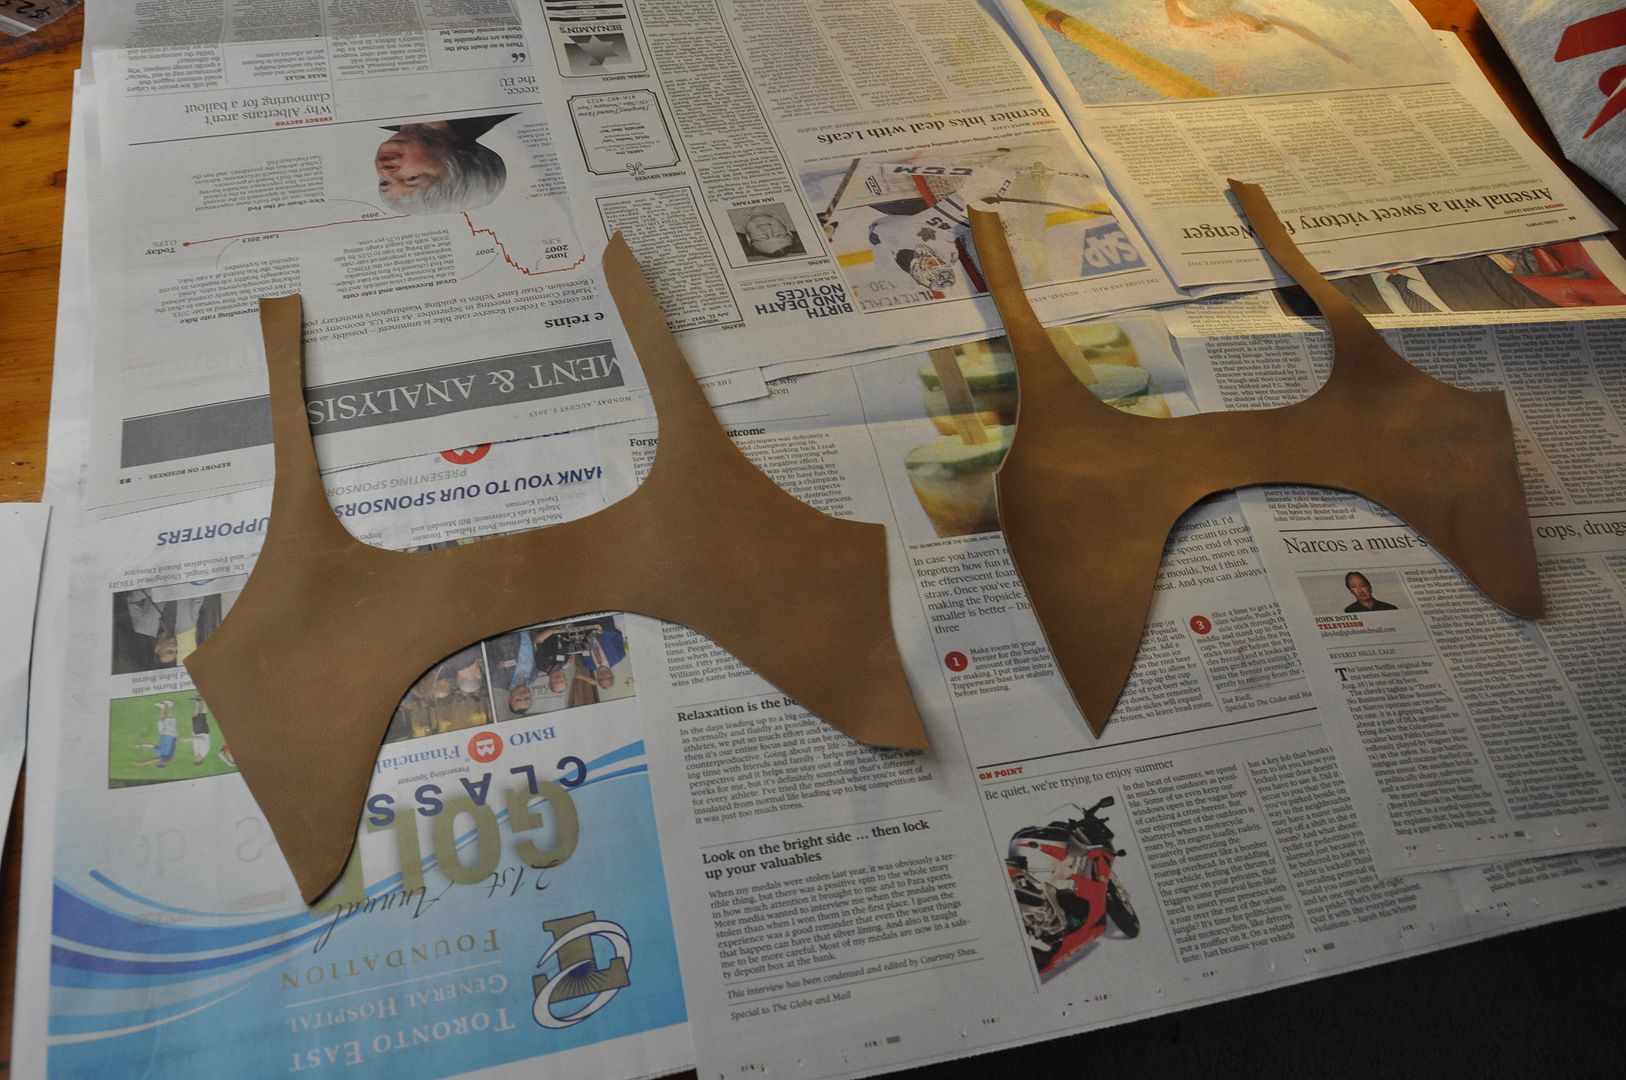
I patterned my base cover shape out of paper, then cut out my pieces (making sure they were mirror images) in leather. Using acrylic paint, I painted these leather pieces navy blue to match the costume.

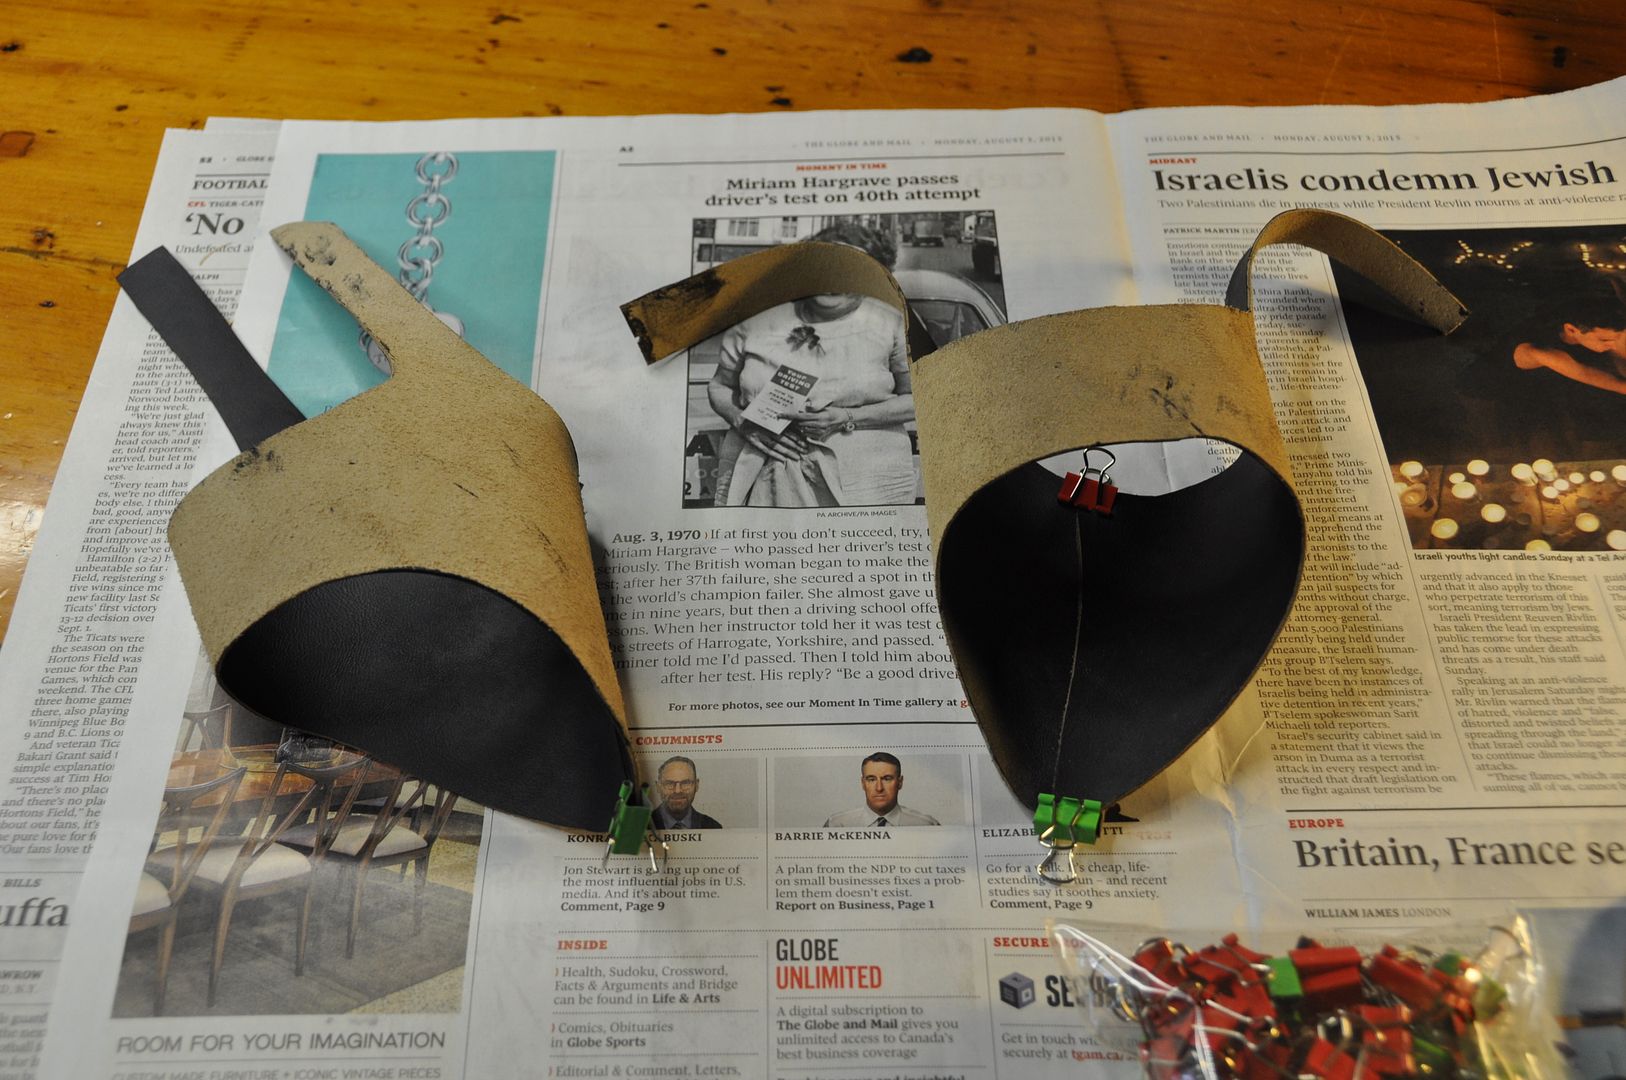
These pieces would wrap under the bottom of the shoe, with a single seam in the top. The long tails would be used to make a buckle strap around the back of the heel.

Once I was happy with the fit, I machine stitched that top seam.

Next step was to create ruffle bit. Using leftover navy fabric from the bracers I created the two pieces. Each is made of two layers, sewn right sides together along the outer edge, then flipped inside out and top stitched. 
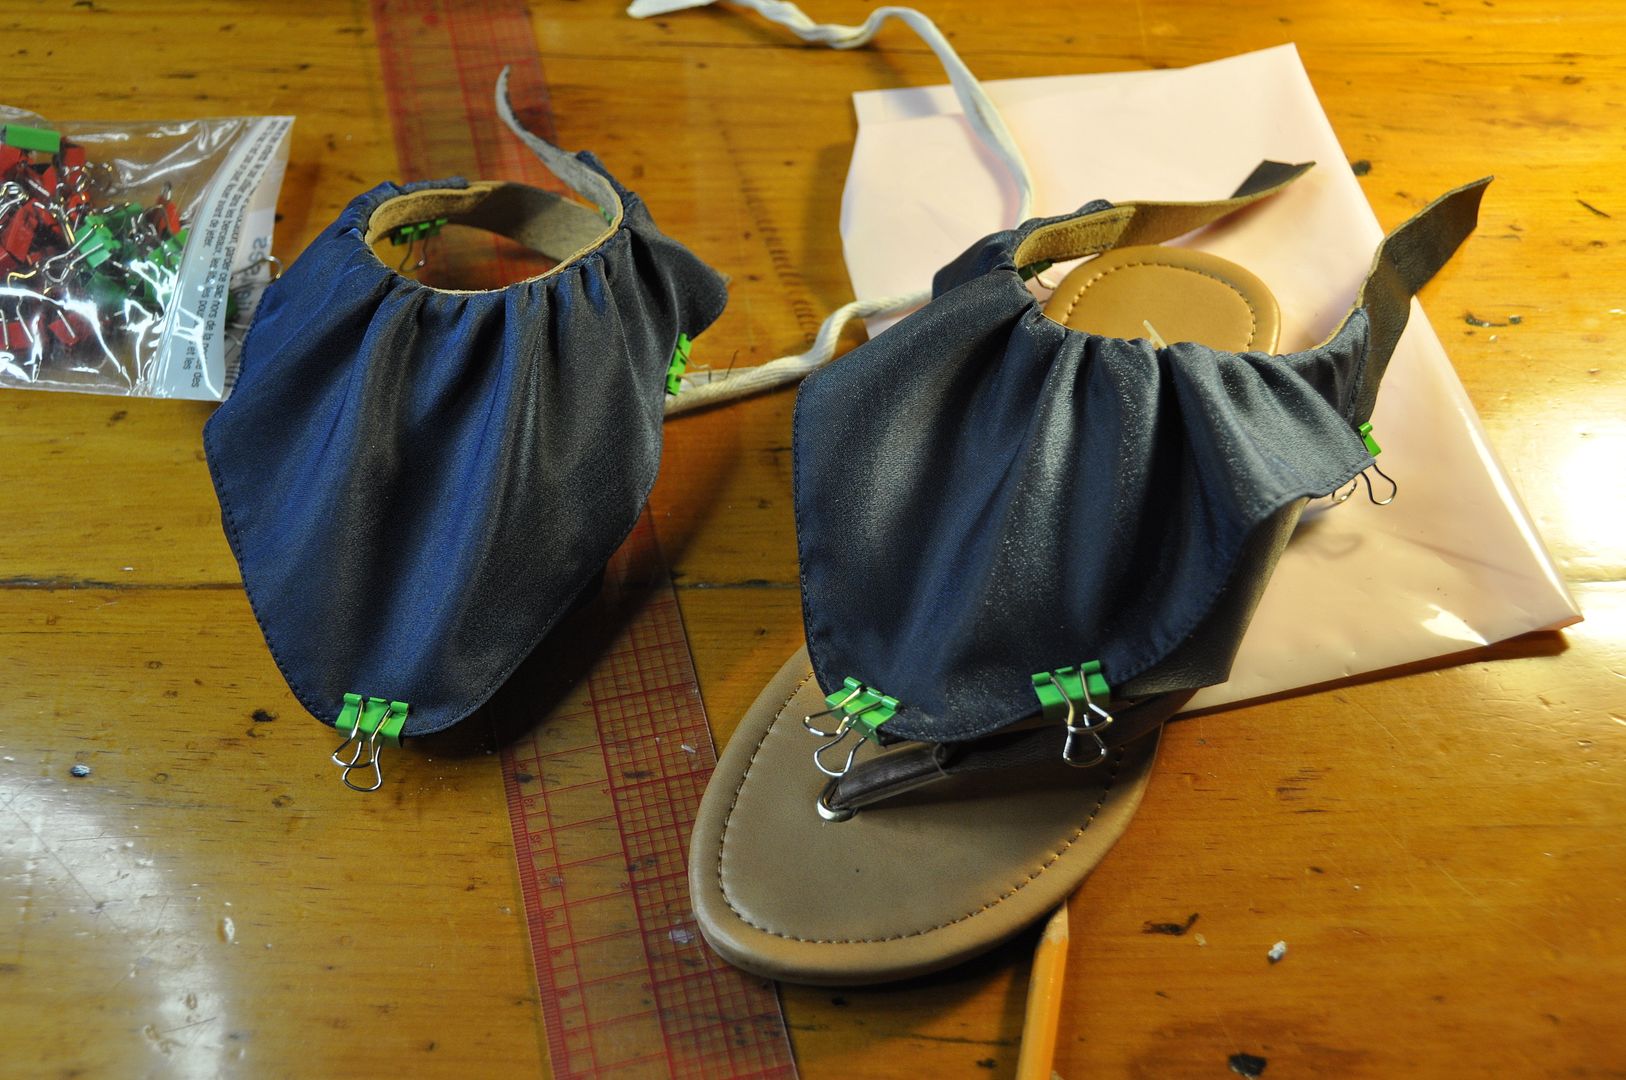
These were then gathered and stitched onto the top of the leather part of the sandal. I also tacked them down with a hand stitch in a few places on the outer edge, because the fabric was super stiff and didn't want to lie flat. 

Next I sewed a buckle into the back of each and punched holes to finish the closure. 

The last step was to glue the leather piece to the sole of the shoe to keep it in place/stop it from rotating. I used e6000 to glue it and it worked quite well. 

Another step in the detailing process for this costume was creating the gems for the center front and the edge of each bracer. 

I sculpted them using apoxie sculpt and then I painted them using a few different shades of nail polish. I did a splotchy application of my dark blue and light teal. And then went over that with a translucent shimmery blue, before finishing it off with a coat of clear gloss.

I applied the same paint to my toenails later! Details are important!

All of the gems were glued onto the costume with e6000. 

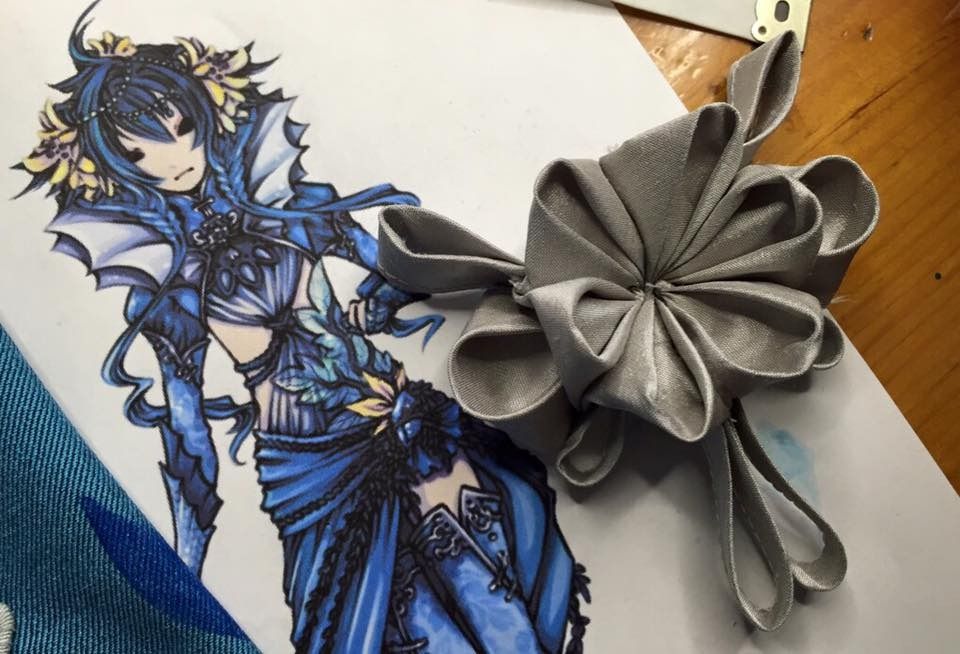
My last accessory was a brooch I created for the front of the costume. It was based on the very faint squiggle in the illustration. I got to interpret it how I wanted and this was the result. (I think I sewed beads to  the center later?)
Overall I am very satisfied with how this project turned out, and look forward to starting my next complicated fancy project.
Once again thanks for all your support! Now that this is done I can move on with my life! Hooray!
Wednesday, September 30, 2015

Inkling - Guns and Tanks - Splatoon

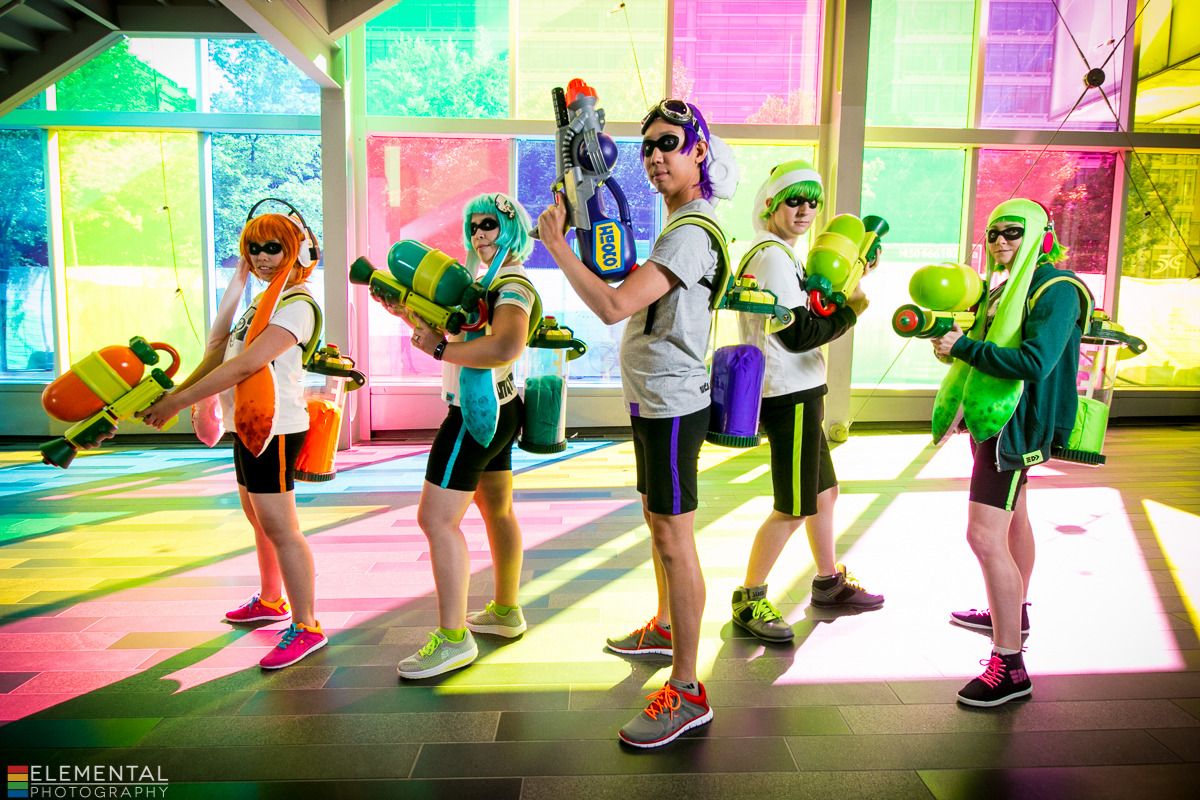
Part 3 of the Splatoon Squad posts! Lets talk armaments! >:D If you are interested in the tentacle hats, go here! If you want to see how we put together the outfits, go here! Once again hats off to Elemental for the great shots from the photoshoot!

Now we delve into territory that I know little to nothing about: The Armaments. I had very little involvement in this area. I was a helping hand in the mass production line for the harnesses, ink pillows, and I helped put the electrical tape gauges on the side of the tanks. That's about it. Credit goes to the real masterminds Brian (Ragz Cosplay) and Adrien, and their very best shop gnome Andy (Yavarice).

Based on a 3D model that Andy did of the tank, Brian broke down and printed all the components. These had to be cleaned up (sanded) and painted, and then these were assembled into a full team of tanks. Andy gave a hand in this process.

All I can tell you about 3D printers is that they operate by wizard magic. I am fairly certain Brian is a wizard, and Andy is a sorcerer's apprentice.

The pieces were painted up separately using spraypaints and then glued together using a glue called E6000. The bottom of the tank is removeable so that the ink pillow can be changed. By changing the ink pillow you can easily re-purpose the tank for a different colour team.

The pillows are made from the same spandex as our hats. Michelle (Mage Cosplay) and I made fabric cylinders of varying heights and stuffed them. The pattern is literally 2 circles and a rectangle. Except Brian's, he made the top of his wavy. Because he is not lazy like me.

The harness rigs are made out of foam mats from walmart, black webbing, buckles and hot glue. The shoulder straps are 2" wide and tapered at the front end. After being cut to the desired length, we put a slit at each end for the webbing to be fed through. The webbing had the female end of the buckle sewn on to one end. We carved out a small depression in the inside of the strap and glued this end of the buckle in place. The other end is the adjustable side. When we had the desired length, the excess webbing was cut off. We burned the ends with a lighter so they wouldn't fray.

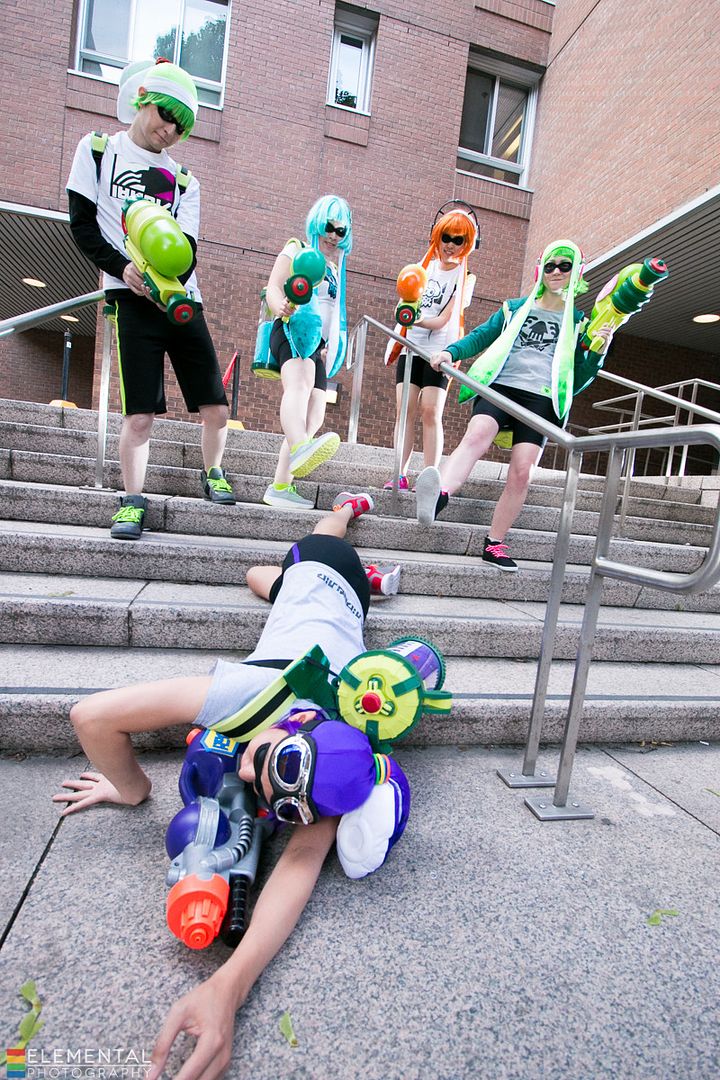
The two straps were glued to a back piece that is a dumbell shape that has a thinner webbing strap attached to it. This smaller straps has velcro and feeds through two slots on the tank. They make the tank removable from the harness. You can see where the tank attaches to the harness in this great shot of us beating up Andy.


As for the Splattershots, Adrien takes all the credit there. (Well, Andy does get some credit for being his resident shop gnome and doing much grunt work cutting out pieces.) Adrien created some foam pieces as templates and vaccuformed all the separate pieces over them. These were then cut out and glued together. But I assure you it is more complicated than I have described. I am still in awe of these, they are so professionally made!

I believe Andy's gun is a Nerf gun? With a logo added to make it look super legit. The logos were made from craft foam.

Overall I was really impressed how we were able to pull together a really cohesive looking group! I hope I get to take part in something like this again in the future. Special thanks goes to everyone who helped make this happen. I'm excited for Squids 2.0! :D