Showing posts with label ties. Show all posts

Thursday, October 9, 2014

Sakura - Sailor Suit - CardCaptor Sakura

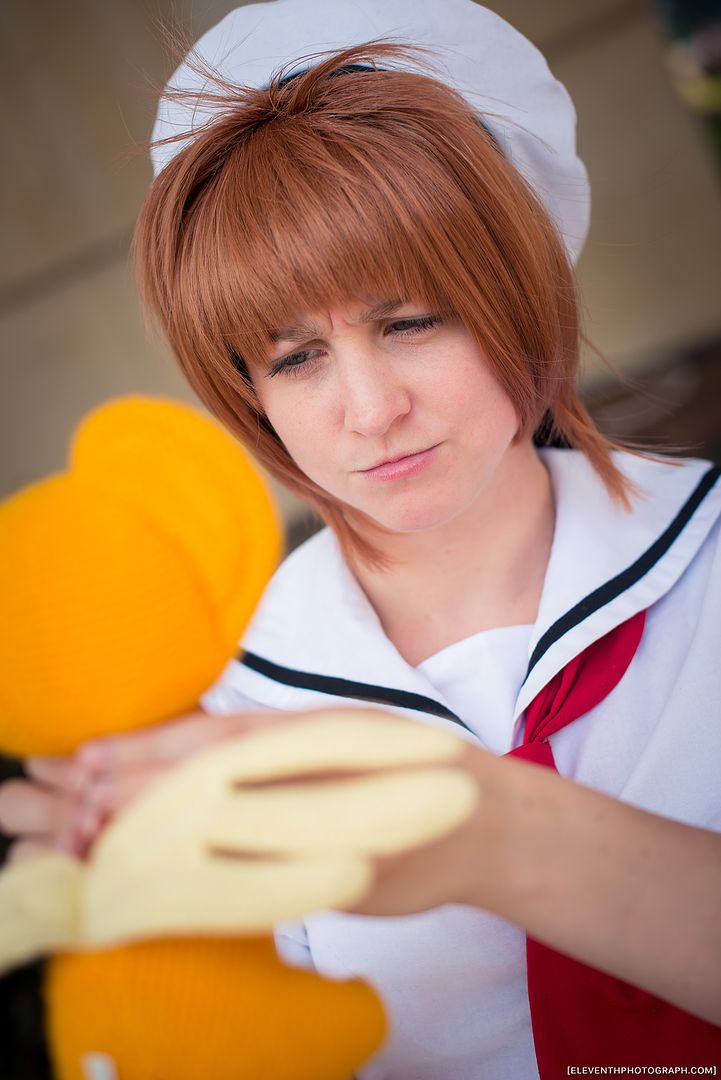
First let's take a look at my more casual Sakura outfit: her school uniform (spring/summer version). I've been cosplaying for over 10 years and this is my first school uniform/sailorsuit outfit I've ever made! Crazy huh? This cosplay was especially picked for Otakon because it packs into a suitcase really easily, I already had the wig, and it has very few layers which makes it great for insanely hot weather.

I got a couple cute pics with EleventhPhotograph at Otakon this summer! Many thanks! Also thanks to my sister Alex for lending me her adorable Kero plushie while she is away in Japan!

One thing I made sure of when I bought my fabrics for this costume was that none of my fabrics were shiny. I've seen many school uniform costumes done with shiny fabrics and I always think it looks cheap... Lets be honest, I've never seen a real school uniform that is shiny/satiny. It's also not coloured to look shiny in the show either.
To start I patterned a basic block for the shirt, ignoring the usual front and back darts in favour of only having a small dart come in from the armhole at the bust. I curved in the sides a bit at the waist, but did not make the shirt tight fitting. This was to ensure that a) I could slip it on over my head even though it is not made of stretch fabrics, and b) so I looked younger. Sakura is supposed to be a between grades 4-6, meaning she is a child, so I wanted to make sure that I didn't look too old for the character. In spite of the fact that I am not particularly well-endowed, a fitted blouse would still reveal curves that a child would not have, so hence a more loose fitting shirt was in order.

I patterned the neckline and sailor collar by creating a mockup of the shirt and then draping the collar on Molly (my Judy) with muslin. This way I was able to easily figure out the proportions.

Once that was done I laid out my fabric and cut out my pieces.

The collar was first sewn right sides together, excess fabric clipped and then flipped right way out and ironed.
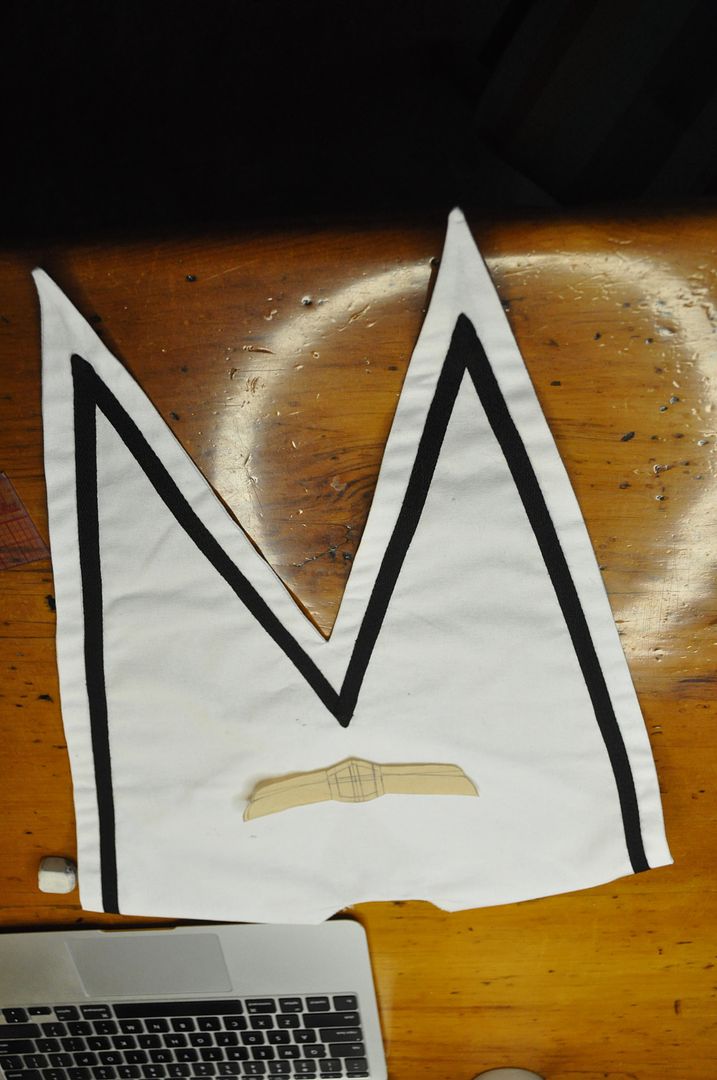


I then top-stitched on 1/4" black twill tape to make the edge detail. I made sure my bobbin thread was white (as opposed to black to match my top thread) so my stitching would be virtually unnoticeable from the other side.

Then I sketched out the crest for the back detail.
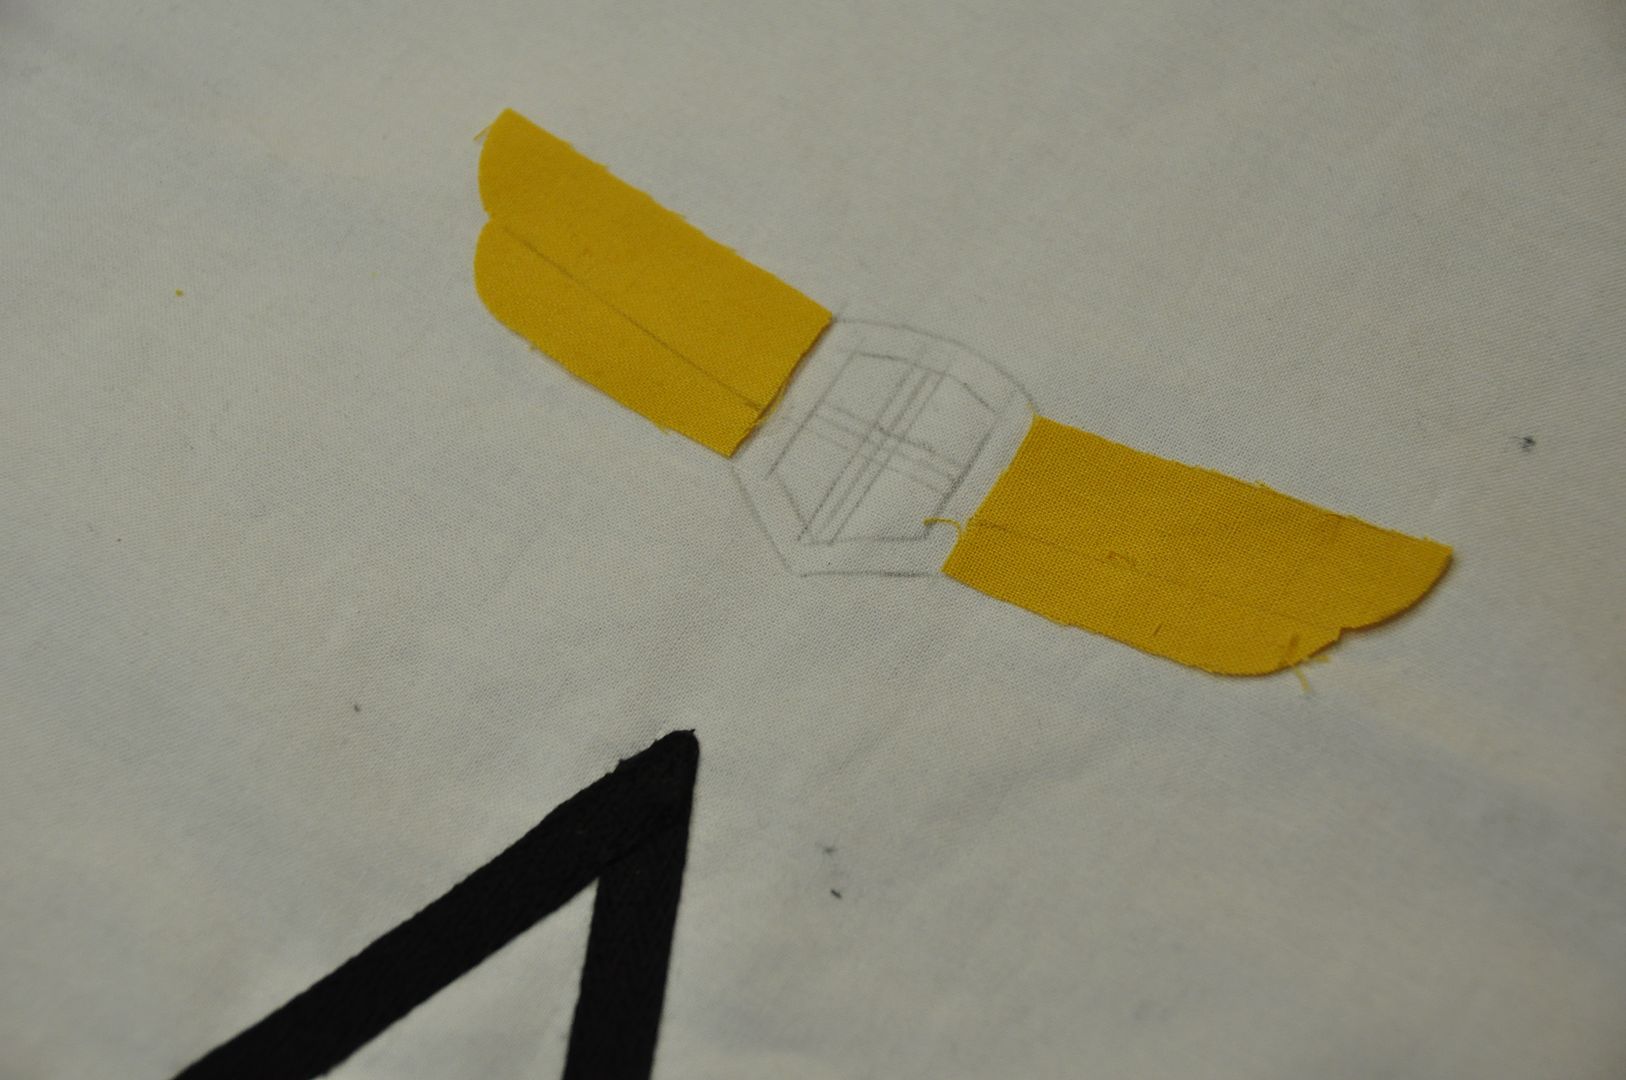
Next step was the appliqué and embroidery of the crest on the back. Using yellow fabric leftover from Kero, I blocked out the areas for the 'wing' part of the crest. This saved me from having to fill that area with an embroidery stitch. Instead I merely sewed around the edges. Next I did the red shield-shaped piece in the center.
After finishing all the seams inside the shirt,  I made some puffy sleeves. I made sure they weren't too puffy, so they were only slightly larger than the armhole. I used a basting stitch along the sleeve cap and bottom and cinched them to the right diameters before sewing them to the armhole and cuffs respectively. The cuffs are just rectangles sewn into a loop and folded in half lengthwise that I have sewn another stripe of black twill tape on.
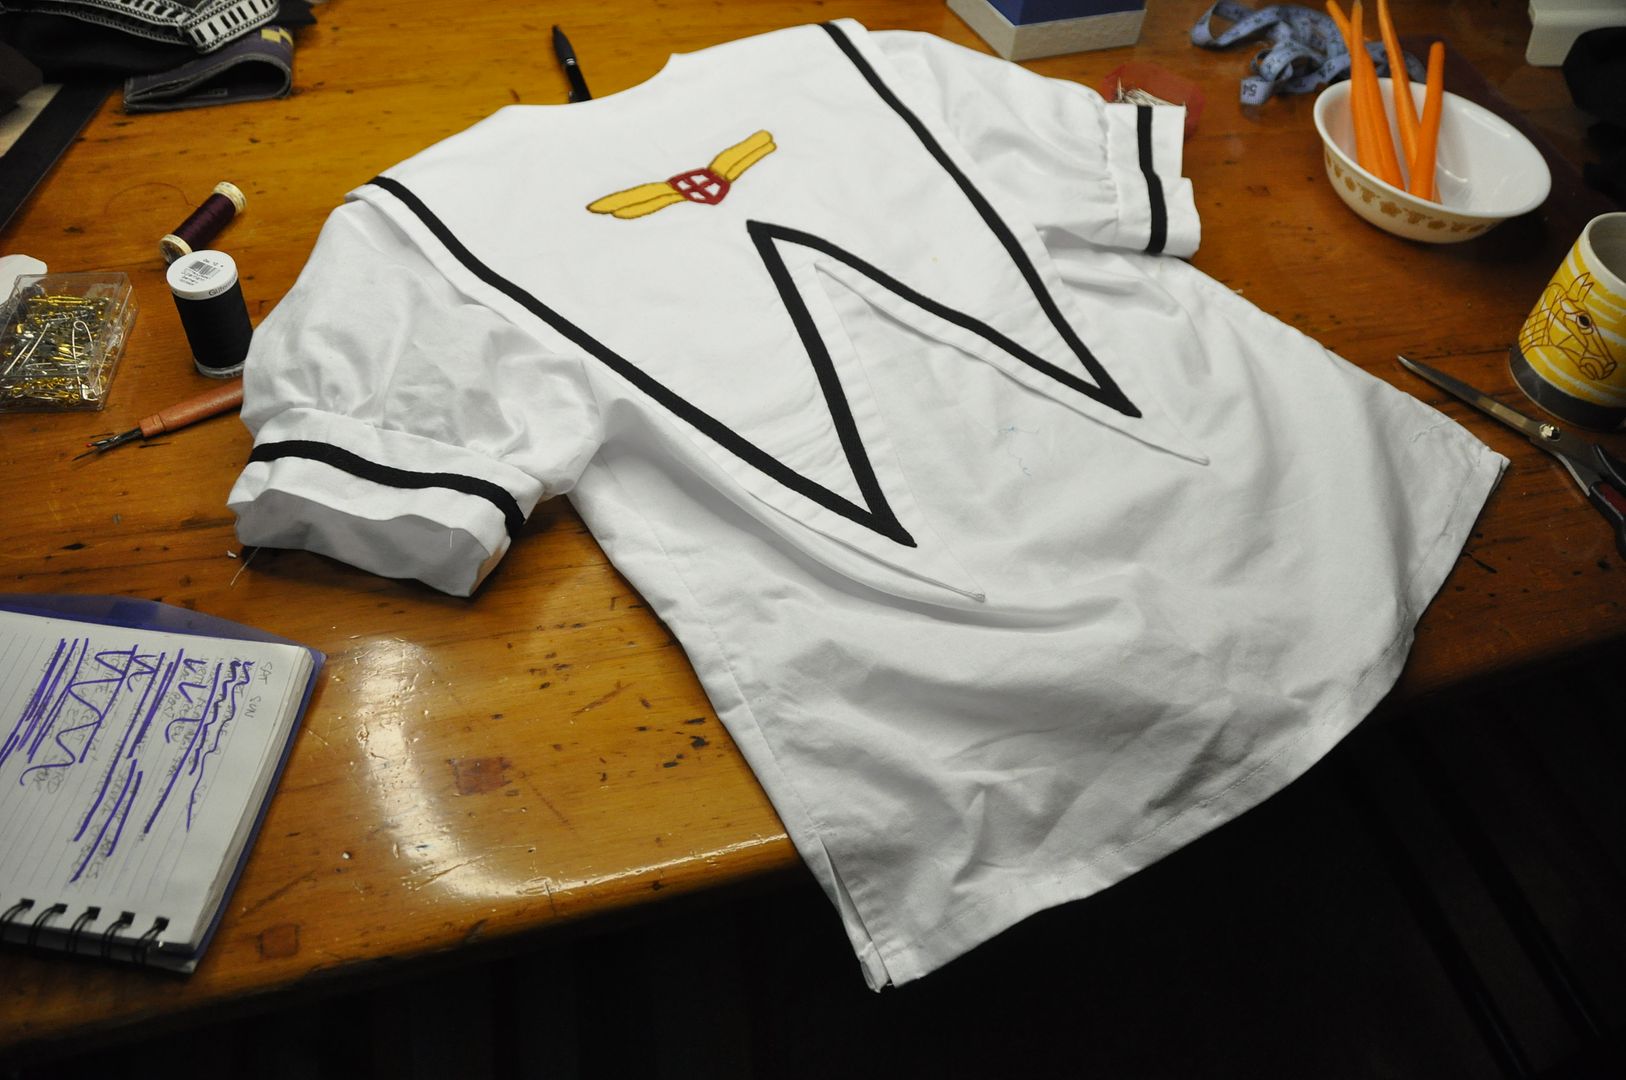
I hemmed the bottom of the shirt with a simple rollover, but went back and changed the side seams to have a 2" slit up each side.

Then I attached the collar to the outside ans zigzagged the raw edge. I flipped it to the inside, pressed it, then top stitched it down. I took extra care to reinforce the point of the v-neckline.
The last step for the shirt was to create a little triangle  to sit under the v-shaped neckline. It was secured with dome fasteners so it could be removed so I could take the shirt on and off. 

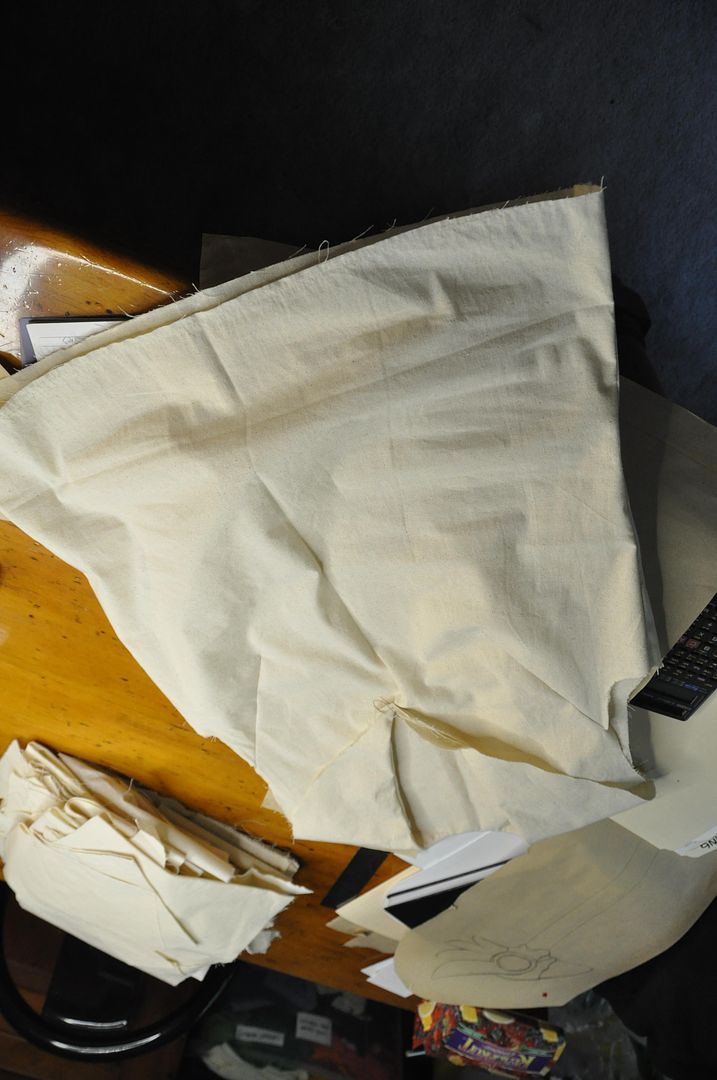
Now lets talk about the skirt. Creating a pleated garment is all about math, unfortunately. The garment has 10 pleats. In order to make it fit snugly at both waistband an over hips I had to take 2 measurements, one at waist, and on 4" down from waist. Then I divided those numbers into 10 equal parts and carefully drew out a pattern piece. Left you can see one of my side panels. The thin trapezoids are the parts that would be visible, the wide ones would be hidden in the folds. 

The hardest part of patterning this was making it so the side seams would be inside a pleat and therefore virtually invisible. 

The size of the skirt at the bottom was arbitrarily decided, but I knew I wanted it to be pretty full, because it's CardCaptor Sakura guys.
Each of my three skirt pieces I sewed the center pleats into before sewing the pieces together. I sewed the center back together and added in the zipper before finishing the pleats directly beside it.
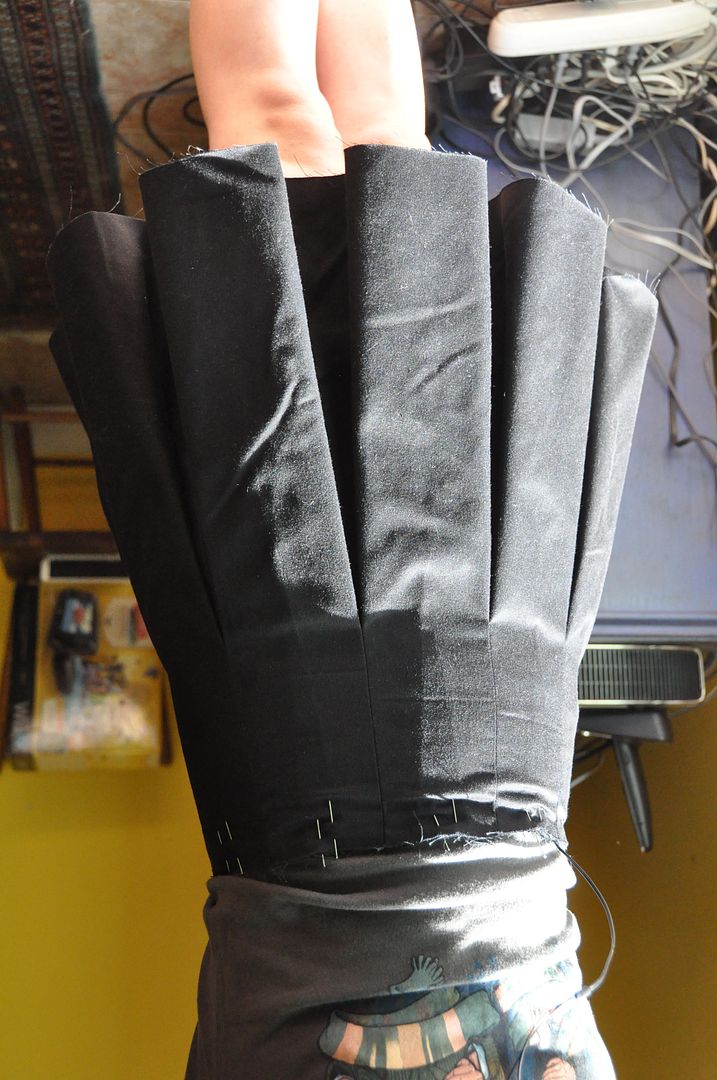
I ironed the pleats centered, rather than off to one side (because that's how it looks in all the reference photos). I didn't press the pleats all the way to the hem either, because I wanted them to still have that soft, rounded look. For your own reference look at my Long Pleated Skirt to see what pleats look like when pressed to one side, all the way to the hem. Very different, right?

Once the pleating and waistband were finished I hemmed the skirt.
The saddest part is I couldn't figure out how to work pockets into the skirt, so this costume has no pockets. Oh well.

Above you can also see my mockup for the hat. Surprisingly this is the item I was most excited to make. I've always loved the hats that Clamp designs, particularly these adorable sailor hats. I love that they magically perch on the back of the head.

When making hat, always take the band measurement while wearing the wig you will be wearing under it, otherwise you run the risk of making it too small!

Below you can see the pattern pieces for this--the pieces on the right are both folded in half.

First I assembled the band, with is a long rectangle, sewn into a loop and then folded in half lengthwise. For the cap first I sewed the c-shaped piece into a circle, then sewed it right sides together with the top of the cap.
I finished the inner seams, then pressed it right way out. Next I attached the band, leaving a gap at center back to attach the black tails. The tails were sewn right sides together, clipped, flipped and pressed. These were then inserted into the gap at the back, splayed at a slight angle, and stitched in place. I then finished the inner seams of the hat.
Last piece to make was the under skirt. Above you can see the pattern, which is completely different from the pleated over skirt which is made of rectangles. This is because a) pleating is time consuming, b) all you see is the edge and c) I didn't want all that bulk under the already considerable bulk of those pleats.

Using the 2 measurements I took earlier to create my pleats, I made the top piece of the underskirt. Then I made a circle skirt piece to attach to that (of which I cut 3, making the bottom 1.5 circles). This ensured that all the flare of the underskirt would be below the stitch line of the pleats, reducing bulk.

I attached a lace trim to the bottom edge as an extra cute detail.
At the center back at the waist of the underskirt, it was finished to remain open. The underskirt was attached to the overskirt by buttons (holes on the underskirt, buttons on the inside of the overskirt). This way it was removable and could be washed separately.

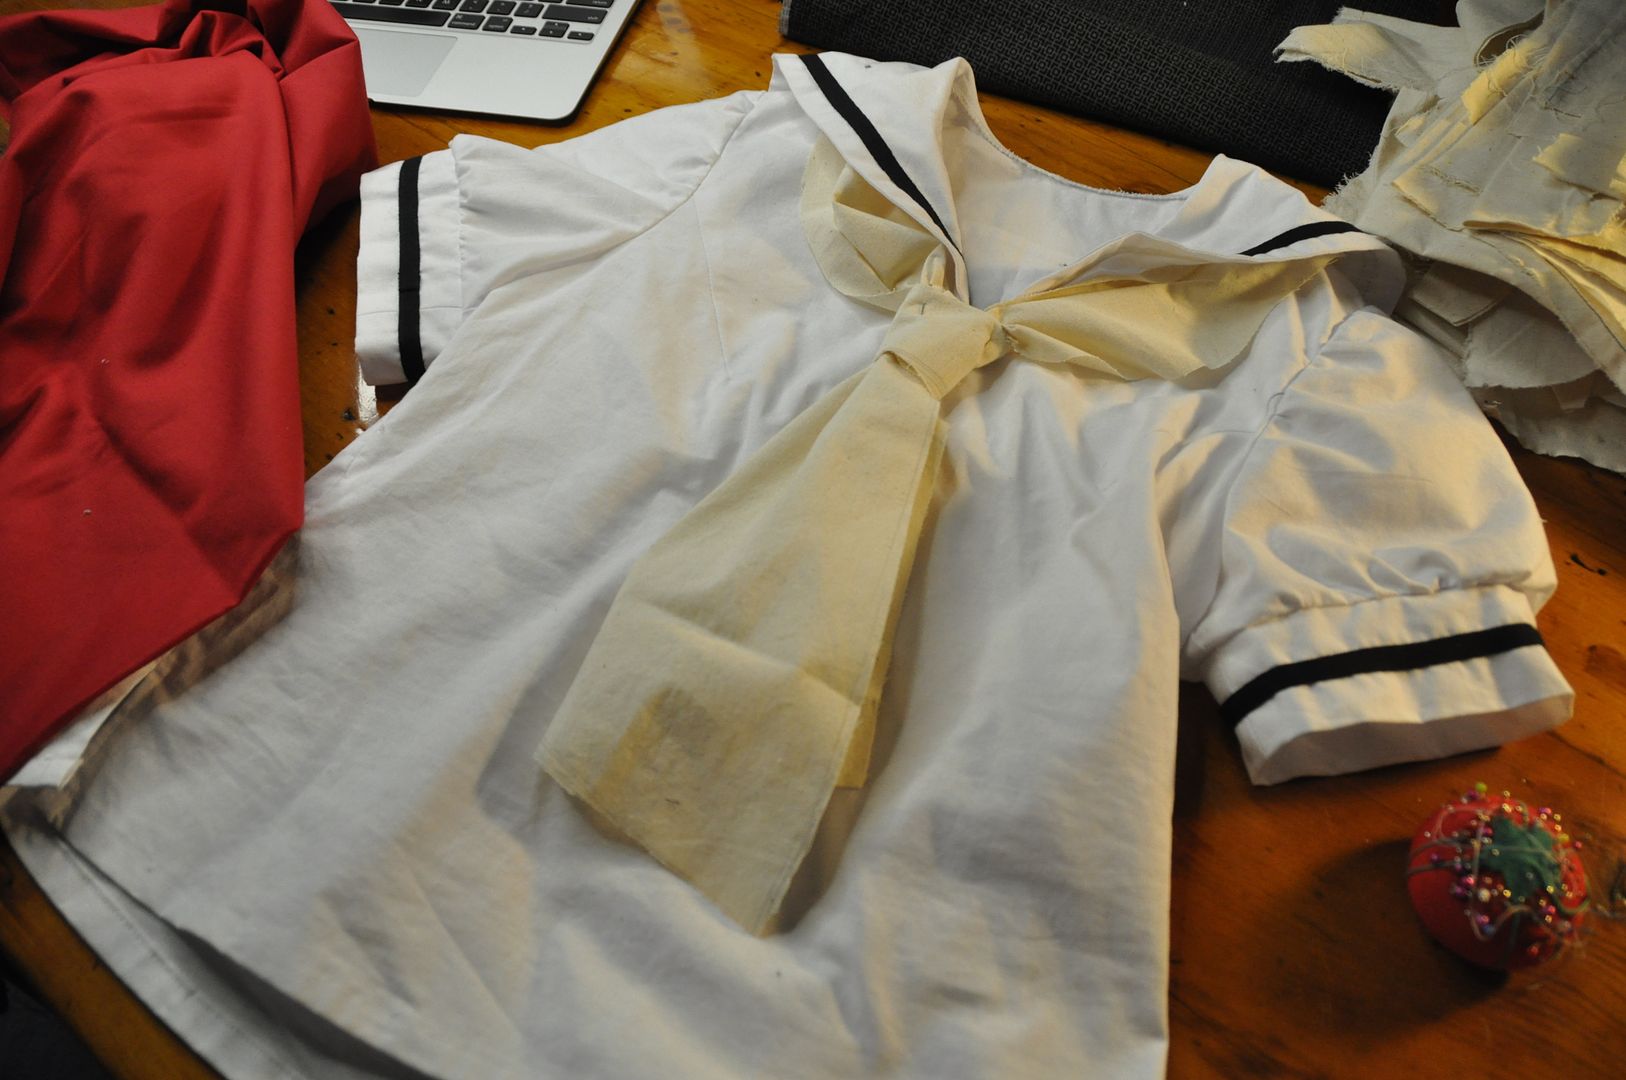
Lastly I made a tie. I mocked it up with leftover muslin scraps, and then made a nice one out of red twill.

Each of the individual pieces were stitched right sides together then flipped right way out and pressed. I top stitched more black twill tape along the bottom of the tie edge. before hand stitching the pieces together. The last thing I did was make a velcro closure at the back.  Because I have no idea how to tie a real sailor tie.

Thursday, September 25, 2014

Kimono Style Sleeveless Shirt

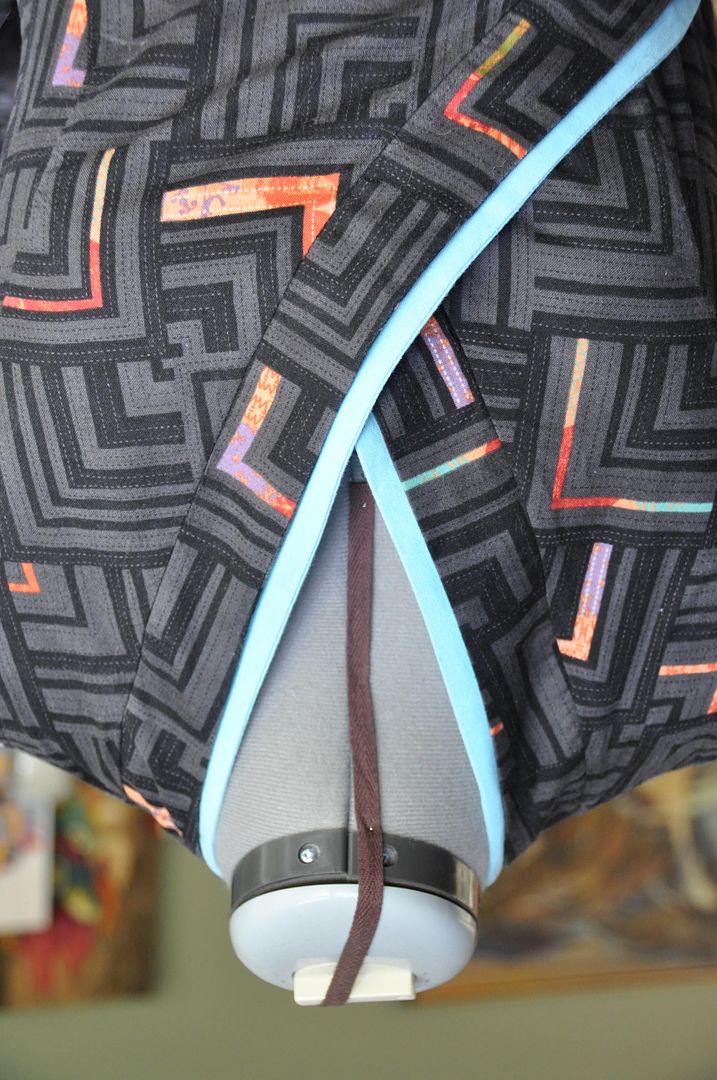
 This is an original design I made using fabric I got from my sister for Christmas. Woo! I decided this fabric would make a good kimono top, but I didn't have enough of it to do a full kimono top. Since I wanted something I could wear with normal clothes I decided to make it into a cool tank top with a kimono style closure instead. :)
I started off with a mockup. The pattern I drafted myself, modified from a basic block. It was a bit of a challenge to get the princess seams to work.

Once I was happy with my pattern I cut it out of my cool fabric. It's asymmetrical so I only cut 1 of each different front piece, making sure that I was cutting a right and left side (not 2 rights or two lefts by mistake!).
Above you can see the different pieces all laid out together!

First I sewed the collar pieces together at the shoulder seams. Then I sewed the inner collar to the outer collar along the outer edge, right sides together--this way the outer edge was finished nicely. I clipped the curves and flipped it right way out, then ironed it flat.

I sewed my front pieces together along the princess seam and sewed the darts in the back. Then I attached my front and back pieces at the side seams and shoulders. I then finished all inner seams.
I made my inner collar accent piece the same way as the outer collar. The inner collar is about 3/8" wider so it is visible in behind. The inner collar is made out of leftover fabric from my Suppi costume!


I attached the collar along the front edge and back up around the neck. The outer collar is layered underneath. This was then flipped right way out, the seam was finished, ironed to one side and then topstitched neatly in place.

Then I hemmed the bottom edge. I finished the sleeve holes which was flipped to the inside and top stitched in place.

Lastly I stitched on the ties. The inner ties were made of a twill tape to hold the under flap closed, the eternal tie was stitched between the two collar layers, and into the side seam (I had to unpick it to do this). This was done with leftover fabric from my Forest Guardian costume!

This shirt is nice and comfortable. The cotton breathes well in summer!

Tuesday, July 15, 2014

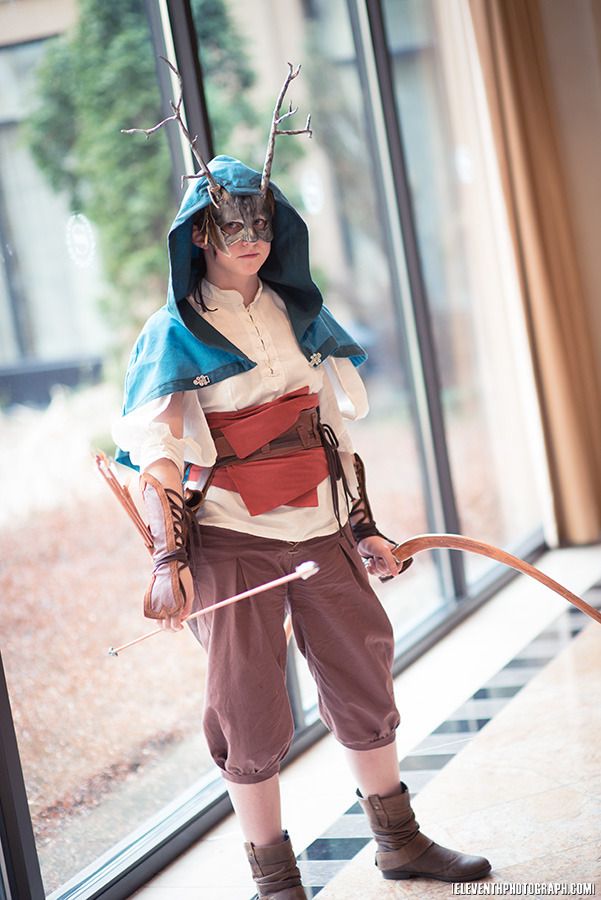
Forest Guardian - Belt, Bracers & Quiver

Greetings! Welcome to part 2 of Forest Guardian. If you want to look at my pants, shirt and cape, go here!

Thanks to EleventhPhotograph for taking some nice shots of me at Costume Con!

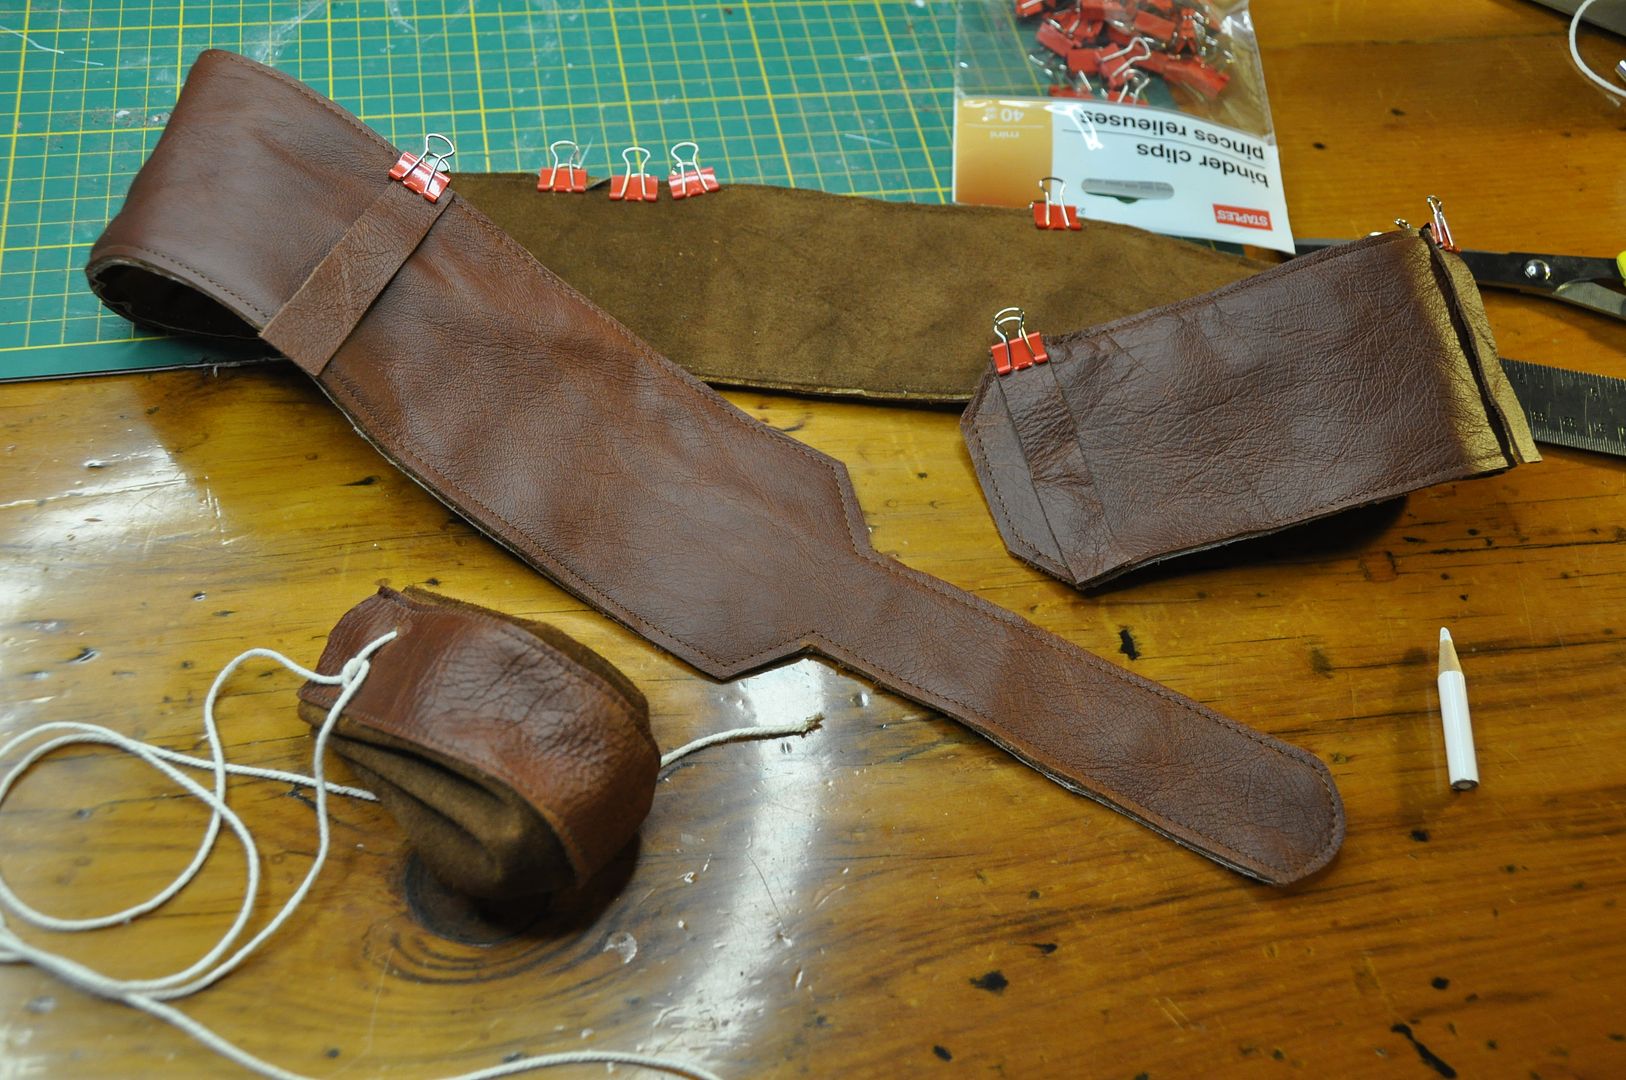
I must say, I am very inexperienced at working with leather, but I daresay I learned a great deal on this project! Namely that leather stretches a lot when you try to sew layers together. You can't pin it, but mini bulldog clips work surprisingly well. I suggest picking up a pack from Staples (or any other local office  supply store) if you are going to do this, its worth it. I have red and green ones! :) Also get a leather needle for your sewing machine.

You may notice that there are 2 different colours of leather used in this project; I used the 2 different sides of my main leather (the leather side and the suede side) as well as a matching suede for reinforcement purposes. Any outer detail is done with the suede side of the leather, while the inner reinforcement layers are done in suede.

I started with the bracers. First I patterned my shape in paper, when I was satisfied I cut out 3 for each arm: 1 suede, 1 leather, 1 leather (with the middle cut out).

I sewed the suede and leather layers together, then sewed the fancy outline piece on suede side out.

Then I attached the loops for the lacing. It was basically a strip of suede with circles cut out of the middle folded in half. (Above you can see it folded and open) These were sewn on following the top stitching line of the inner part of the topmost detail piece. I added one more loop above where my middle finger would be on the inside so I could take the end of the lace and secure my hand into the bracer. They were designed to go over the top of the hands, and without that loop they would just flap awkwardly. The bracers are strong enough, but still bend easily at the wrists allowing me full range of motion.
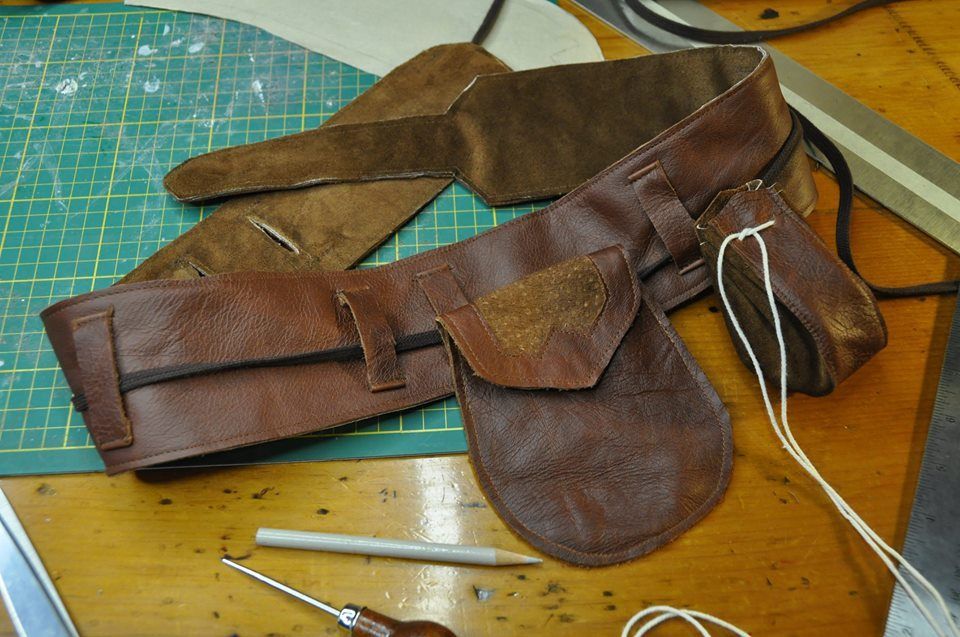
Next I made 2 pouches for the belt. One is a coin purse, the other was for my cellphone. I didn't have any pockets in this garment, so the pouches were both practical from a wearers point of view as well as a design point of view. Meaning most adventuring type characters would need a place to put stuff.

The coin purse was actually based off the dice bag of a friend of mine at D&D. It was made using a strip of leather with an eye shaped piece of suede attached to each side. the suede was pinched and folded evenly along the top edge where I marked and punched holes for the laces. When pulled tight the laces cinch in the top, closing the purse. I attached a loop at the back to hang it off the belt.

The second pouch, or my ye olde cellphone pocket was made by simply plopping my phone down on the leather and drawing a rounded shape slightly bigger than it. I cut 2 pieces like this and attached beltloops to the back piece before sewing them together. Then I made a fancy flap to go over the top.

 The belt itself is both decorative and functional. It had to be strong enough to support the weight of the quiver and pouches while still remaining tight and holding the layers in place at the waist. Like the bracers there is a piece of leather with a piece of suede underneath to give a bit more support. Visually I didn't want any buckles on this costume, I wanted all the closures to be done with ties, because it looks more organic/more handmade. The belt folds under itself and the narrower section is threaded through a slit in the belt.

This is then cinched tight with a tie. On the surface of the belt there are belt loops that hold up the ties. This keeps the pouches and quiver from shifting positions. The tie is simply 4 different laces sewn together at each end with a triangle of leather. There are a couple feathers hanging off the end as a detail.

The quiver itself was a big rectangle with a "cuff" added at the top to make it a little more fancy.

Attached to the main piece on the inside is a thin strip of styrene plastic (leftover from Asuna) to provide reinforcement and help the quiver keep shape when the arrows are removed. I simply sewed a piece of suede over it to attach it. The stitching is visible on the back of the quiver, but that part is to the inside and is therefore unnoticeable. (Though there are 3 pieces pictured I only ended up putting in 1!) I was going to make the quiver lined with an extra layer of suede to hide the reinforcement, but that didn't work well so I scrapped that bit.

I used bulldog clips to "pin" the quiver into it's finished shape and marked where the beltloops needed to go. I attached the beltloops to the back of the quiver, then stitched the bottom in, before closing up the side seam.

In the original design, the quiver was actually supposed to go at the shoulder, but with the straps, embroidered panel and cape that area was going to be too busy. Also I didn't want the straps to tug on any of the embroidery. So it was a last minute decision to move it to the hip, but was worried I would get called out on this for inaccuracy because I know next to nothing about archery. Incidentally I was told by a fellow costumer in the greenroom that it was actually a perfectly accepted location for the quiver (apparently used by Olympic athletes, or so I was told) more logical than a back quiver in certain circumstances. Woo!

Saturday, June 22, 2013

Ran - Kimono Top - Tsukikage Ran

Here's a kimono top set I made for my mum as an easy casual costume to wear around the convention. Very comfortable, and not cumbersome to wear. Also super easy to make!

This costume was loosely based on the main character Ran from an old anime called Tsukikage Ran, which is one of my mum's favourite animes. It's a really great show, just a wandering female samurai who is just looking for some really good sake and a nice nap. Good action/comedy mix. My mum fondly refers to this show as "The Samurai Sake Woman", which is also an apt title. Hahaha

I suppose I could have made the sleeves bigger if I wanted to be really accurate.

I will actually be going in depth on the pattern I modified for this costume, so hopefully this tutorial will be helpful!

The pattern (which was modified from one my mum made ages ago for some Bleach Shinigami costumes) goes as follows:

Outer Kimono:
Back: (cut 2) Length 34", Width 11", Shoulder 5 1/2"
Front: (cut 2) Length 34", Width 22", Shoulder 5 1/2", Slope to 15"
Sleeve: (cut 2) Length 17 1/2", Width 31"
Collar: (cut 2) Length 34", Width 3"

Inner Kimono:
Back: (cut 2) Length 34", Width 11", Shoulder 6 1/2"
Front: (cut 2) Length 34", Width 22", Shoulder 6 1/2", Slope to 16"
Sleeve: (cut 2) Length 18 1/2", Width 28"
Collar: (cut 2) Length 30 1/2", Width 3"

(This all includes 1/2" seam allowance, and 1 1/2" roll over hem for the sleeves and bottom edge. Will most likely fit a person who wears a medium to large size women's shirt.)

The shoulder length listed is on a 1" slope down from the max length to the side seam. The leftover width on the back curves down 1"  to the center back seam for the neckhole, leftover width on the front slopes down across the panel to the other side forming the overlapping front. You will also need twill tape for the ties. 4 decent sized pieces for each kimono.
I sewed up the main seams first: The side seams, center back and shoulders. Then I finished the inside nicely.
The two collar pieces were stitched together to make one long strip. I added the collar facing in the same way I normally do waistbands-- sewing the band right sides together with the collar, folding it over and ditch stitching it in place.

I cut off the excess from the collar in a straight line following the vertical edge of the front overlap. Then I finished this edge by folding over the edge and stitching it in place.
I sewed each sleeve into a tube finishing the side seam, then I sewed the sleeves onto the shirt. On the outer kimono, I only sewed on the top half of the sleeve, leaving the bottom an open gap in the armpit. By doing this, you can see the colour of the under kimono through. The under kimono I closed the sleeve all the way.

I then finished all the edges. This included the open underarm on the outer kimono, the bottom hem, and the sleeve hem. 

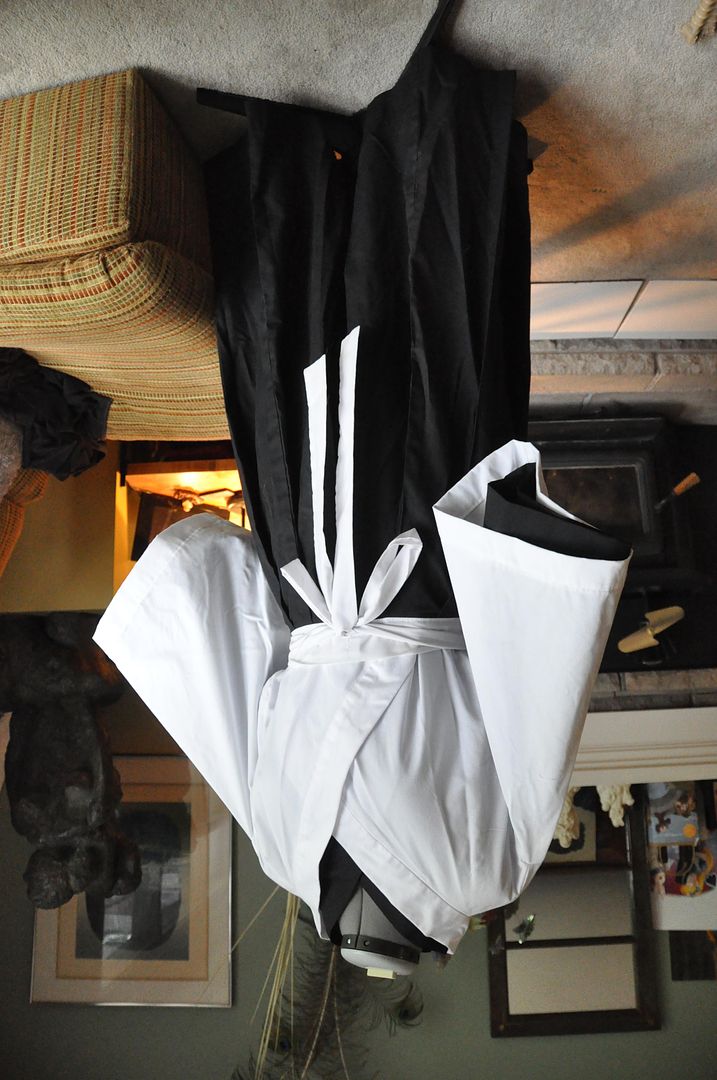
The last thing I did was to mark and add the ties, which helped to keep the kimono from slipping open. This kimono was tucked into a pair of black hakama pants that my mum made for our set of Bleach Shinigami outfits back in the day.