Showing posts with label sailorsuit. Show all posts

Sunday, August 2, 2015

Tomoyo - Wig & Accessories - CardCaptor Sakura

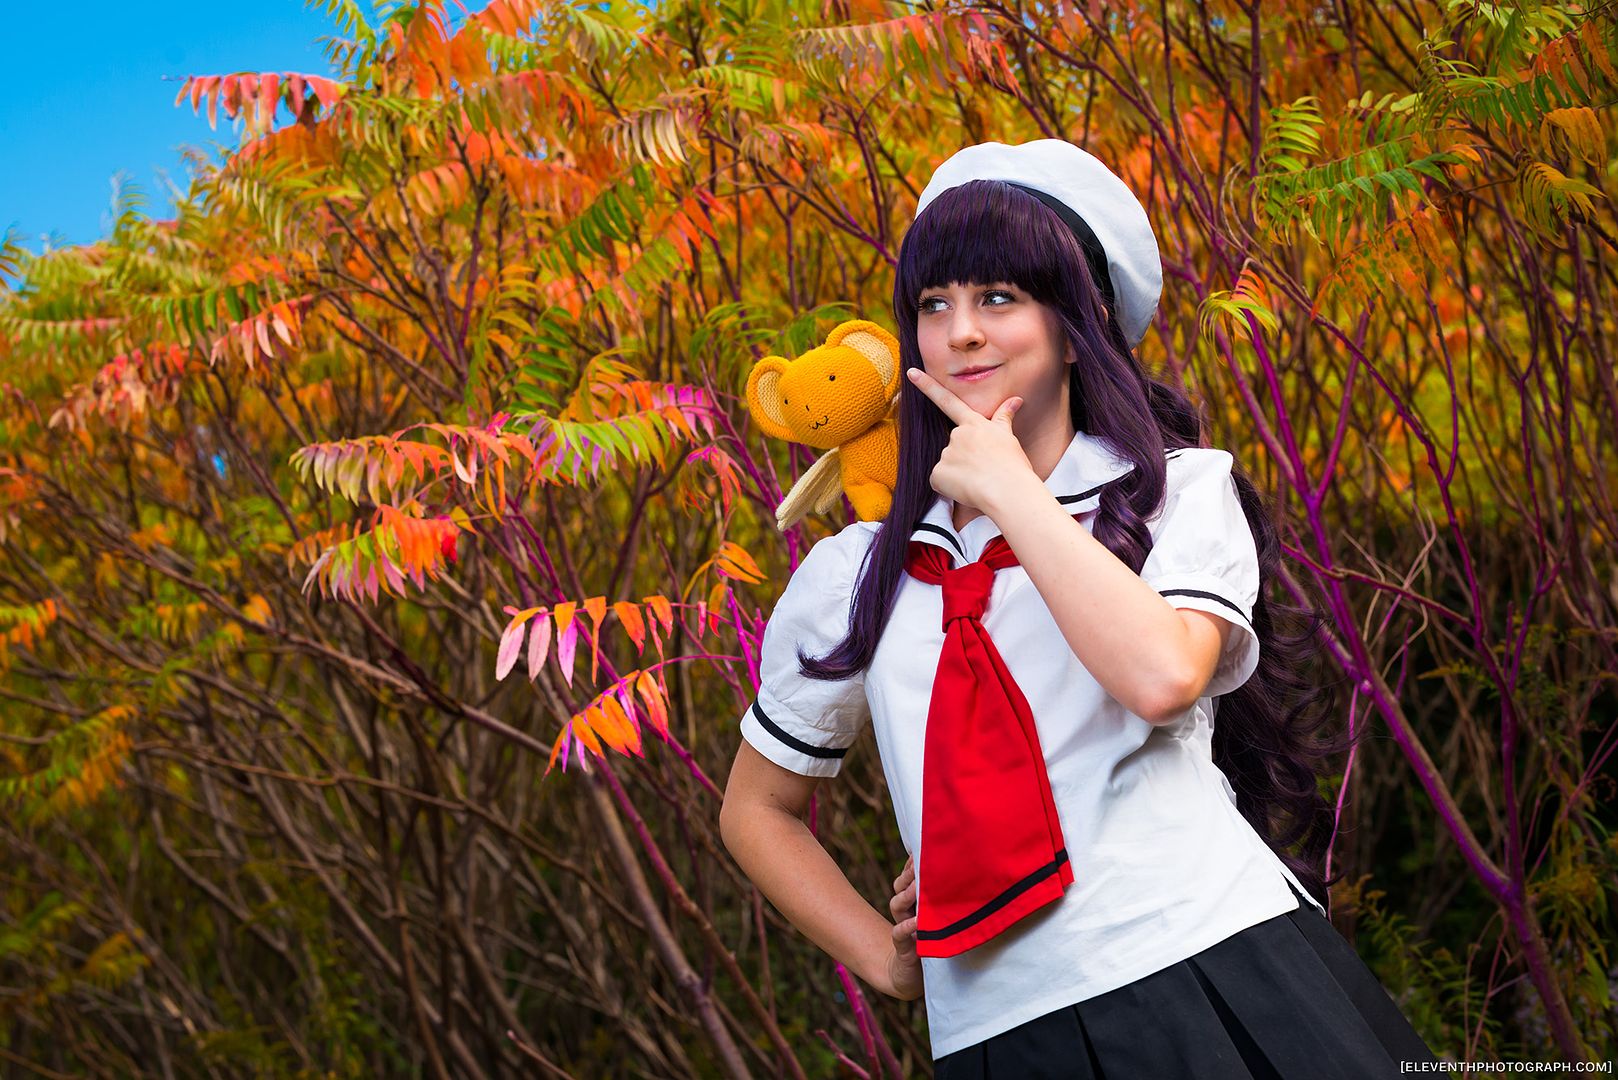
I only have 1 wig for both of my Sakura costumes. So I decided that I should turn my sailorsuit outfit into another character, so I could have a pair of costumes to wear with my sister's Sakura (1st opening outfit). It was a bit of a no-brainer to make it into a Tomoyo costume--she's one of my favourite characters in the series!

Transforming a Sakura costume into a Tomoyo costume was fairly easy--they both wear the same uniform. It was simply a matter of changing the wig and accessories.

...Now, saying that is the easy part, but the real problem was figuring out what colour of wig to buy!

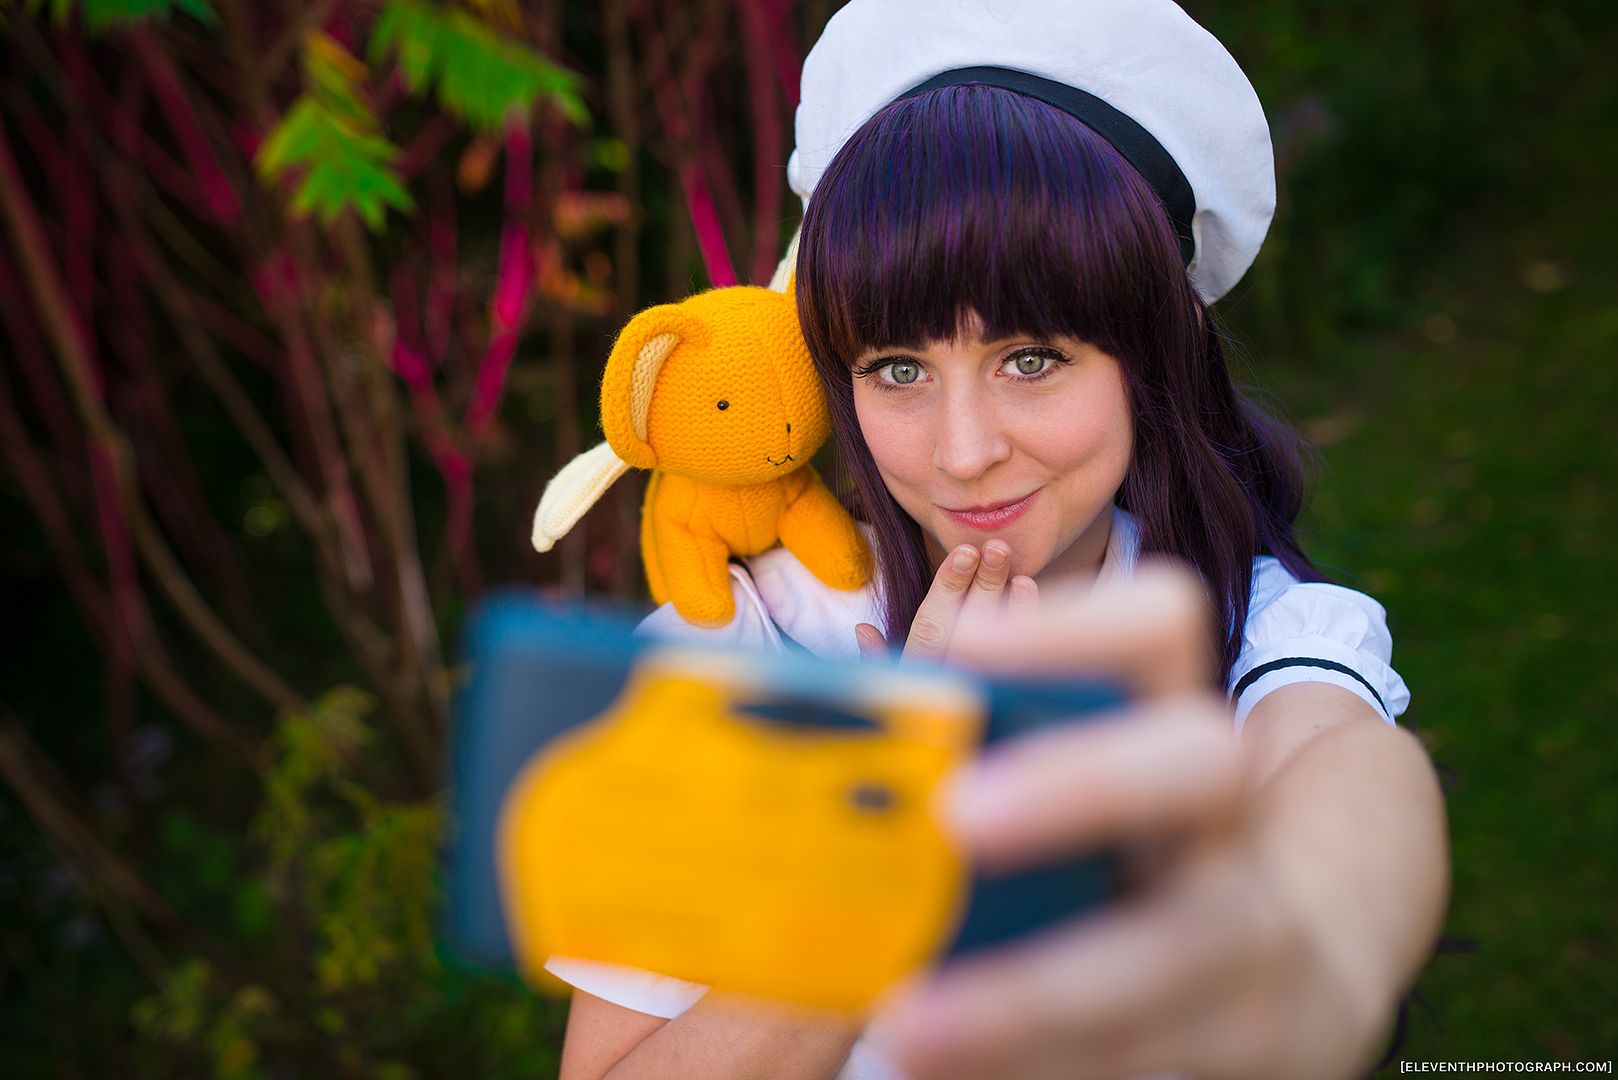
Edit: Special thanks to EleventhPhotograph for the fall photoshoot. The pictures have now been added to this post!
I looked through hundreds of reference pictures and eventually put together the above collage to pose my question to the wise sages of the internet--my facebook fans.

I knew I wanted to go curly like the manga illustrations, but the discussion eventually decided on purple-black as Tomoyo's hair colour/the colour that would look the least weird as a wig. The trick was then finding a wig that reflected that choice. After much searching I managed to find Arda Wigs' Luthien in Dark Purple, which looked perfect.

I must confess, I had not bought a wig from Arda before this because they are a bit more expensive than other sellers. Their quality and colour selection is top-notch, but I just couldn't afford it in the past. Before they had their Arda Wigs Canada store, their shipping prices for Canada were outrageous. (Approximately 20-25$ for regular shipping--no tracking, not fast--on a 30$ wig was not in my budget back then. Still not really in my budget.) But the new store has made things much more affordable for Canadians, even if they don't have as large a selection in stock as the American counterpart.

The wig arrived and I gave the bangs a trim. I made the blunt bangs a little rounded so they would look softer on my face. (Blunt bangs are not the best on me.)
I had to take Sakura's sailor hat and enlarge it by an inch, because it would not fit over the extreme volume of Tomoyo's hair.

As you can see the wig is a blend of black and purple fibers.

I had to add a comb into the front hairline because this wig is super back heavy, and does not fit super snugly on my head. (Most wigs are too big for me because I have a small head and short hair.) The comb hooked into my bangs which I had tightly french braided horizontally along my hairline. It meant that the wig wouldn't slip and slide around all day. I sewed in the comb by hand with some heavier thread.

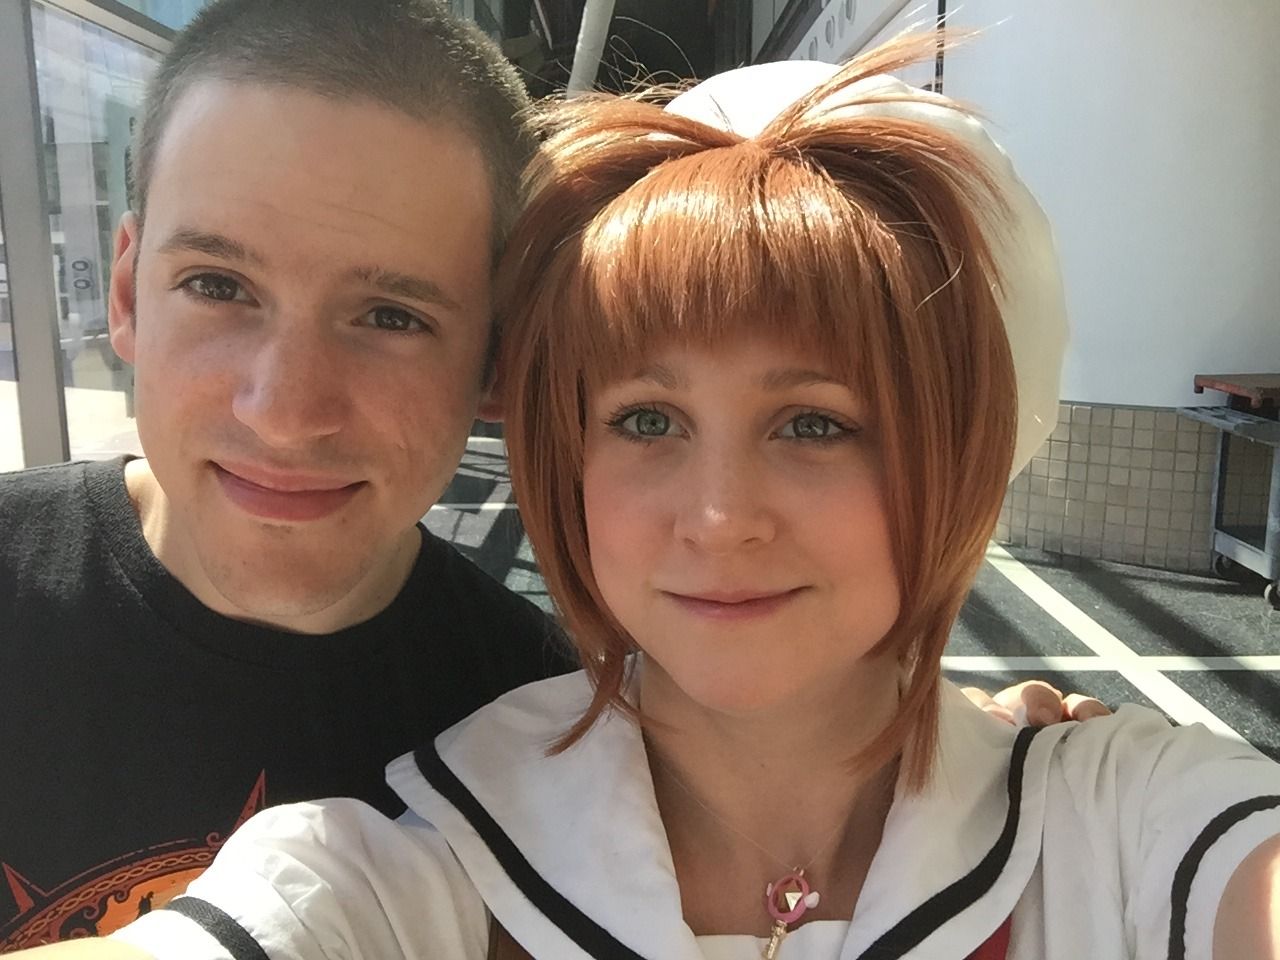
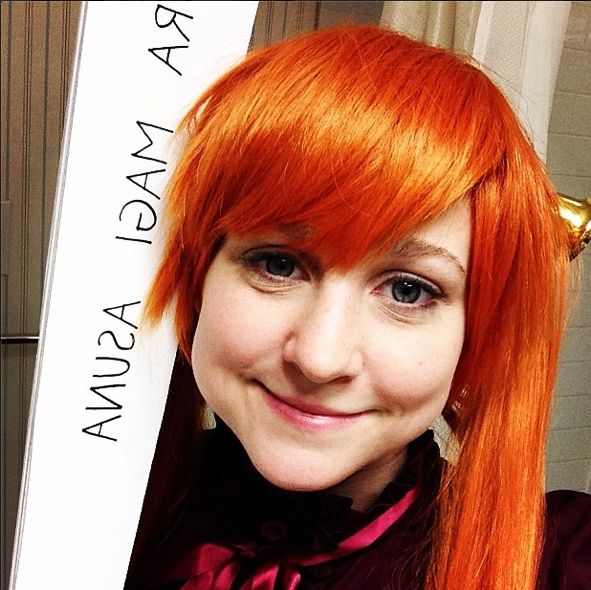
I may trim the bangs just a touch more, but I think it looked pretty good. Fluorescent lighting does nobody any favours (as you can see right), but I changed how I did the makeup for this costume and it turned out much better.

As for props: I kept Kero with me (Sakura had her hands full with the Clow wand) to make myself more recognizable. My Sakura had dance rehearsals all day and wasn't at the con until 3pm, so this turned out to be a good idea. We attracted tons of photos as a pair in the afternoon, but I was not so recognizable as a solo costume.


My favourite ancient relic of a prop is a disposable camera i had leftover from the 90s! I used it to take pictures of all the Sakuras at the con.

Still waiting on photos from our professional shoot from AN... hopefully they will be done soon...

As I may have mentioned before, Tomoyo is one of my favorite characters from the show. What is less well known is that Tomoyo was my very first cosplay. Ever. I'm still looking for the photographic evidence but I know I put that costume together for Halloween way back when I was in grade 5. It had a horrible blue wig that we got at Shopper's Drug Mart in the Halloween section. It was awful and itchy and I have thrown it out since then. I even made my own camera. Out of tin foil. It was pretty impressive. ;D We all have to start somewhere?

Sunday, July 19, 2015

Atomic Lollipop 2015

My second year attending Atomic Lollipop, which is my second con this year. I wore my casual Sakura sailorsuit outfit, because it was too bloody hot for anything more complicated. (Was not expecting Otakon weather for APop.)

I enjoyed it greatly because I got to see a good chunk of my con friends and hang out. Much more relaxing for me than Anime North, which is nice. Attending was a last minute decision, and I only went for the sunday. (Blayke came too!)

Good times hanging out in the gaming room (playing Street Fighter), checking out the dealers, and engaging in epic battles on bouncy castles. Once again I enjoyed visiting the Science Center, which I still think is a great venue for this con--which I don't think has outgrown the venue yet. There was a lack of good crafts on sunday though, which was disappointing for me, because that was what I enjoyed most of last year...

One thing I think I should mention that left a bad taste in my mouth was all of the bad stories I heard about the saturday night. I know that APop is generally known as a "rave con" but it sounded more out of hand than normal? Rowdier than normal? I heard from one of the dealers that there were about 30 incidents (unconfirmed) from the previous night, which involved attendees ending up in ambulances --several of which were due to drug overdose--but many were from people knocking each other over on the dance floor. D: This could easily have been exaggeration of rumours, mind you. That being said, it still sounds like something needs to be done about this next year?? Like, for the safety of other attendees? I dunno.

Overall, I personally had a good time. And will most likely attend again next year. :)

Thursday, October 9, 2014

Sakura - Sailor Suit - CardCaptor Sakura

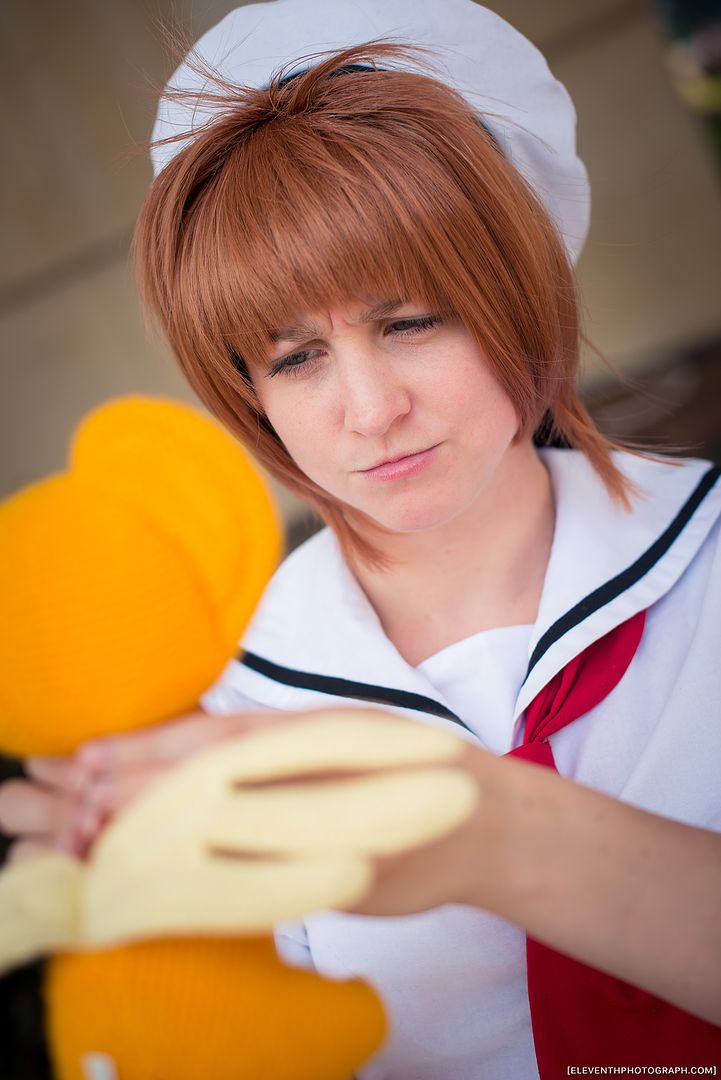
First let's take a look at my more casual Sakura outfit: her school uniform (spring/summer version). I've been cosplaying for over 10 years and this is my first school uniform/sailorsuit outfit I've ever made! Crazy huh? This cosplay was especially picked for Otakon because it packs into a suitcase really easily, I already had the wig, and it has very few layers which makes it great for insanely hot weather.

I got a couple cute pics with EleventhPhotograph at Otakon this summer! Many thanks! Also thanks to my sister Alex for lending me her adorable Kero plushie while she is away in Japan!

One thing I made sure of when I bought my fabrics for this costume was that none of my fabrics were shiny. I've seen many school uniform costumes done with shiny fabrics and I always think it looks cheap... Lets be honest, I've never seen a real school uniform that is shiny/satiny. It's also not coloured to look shiny in the show either.
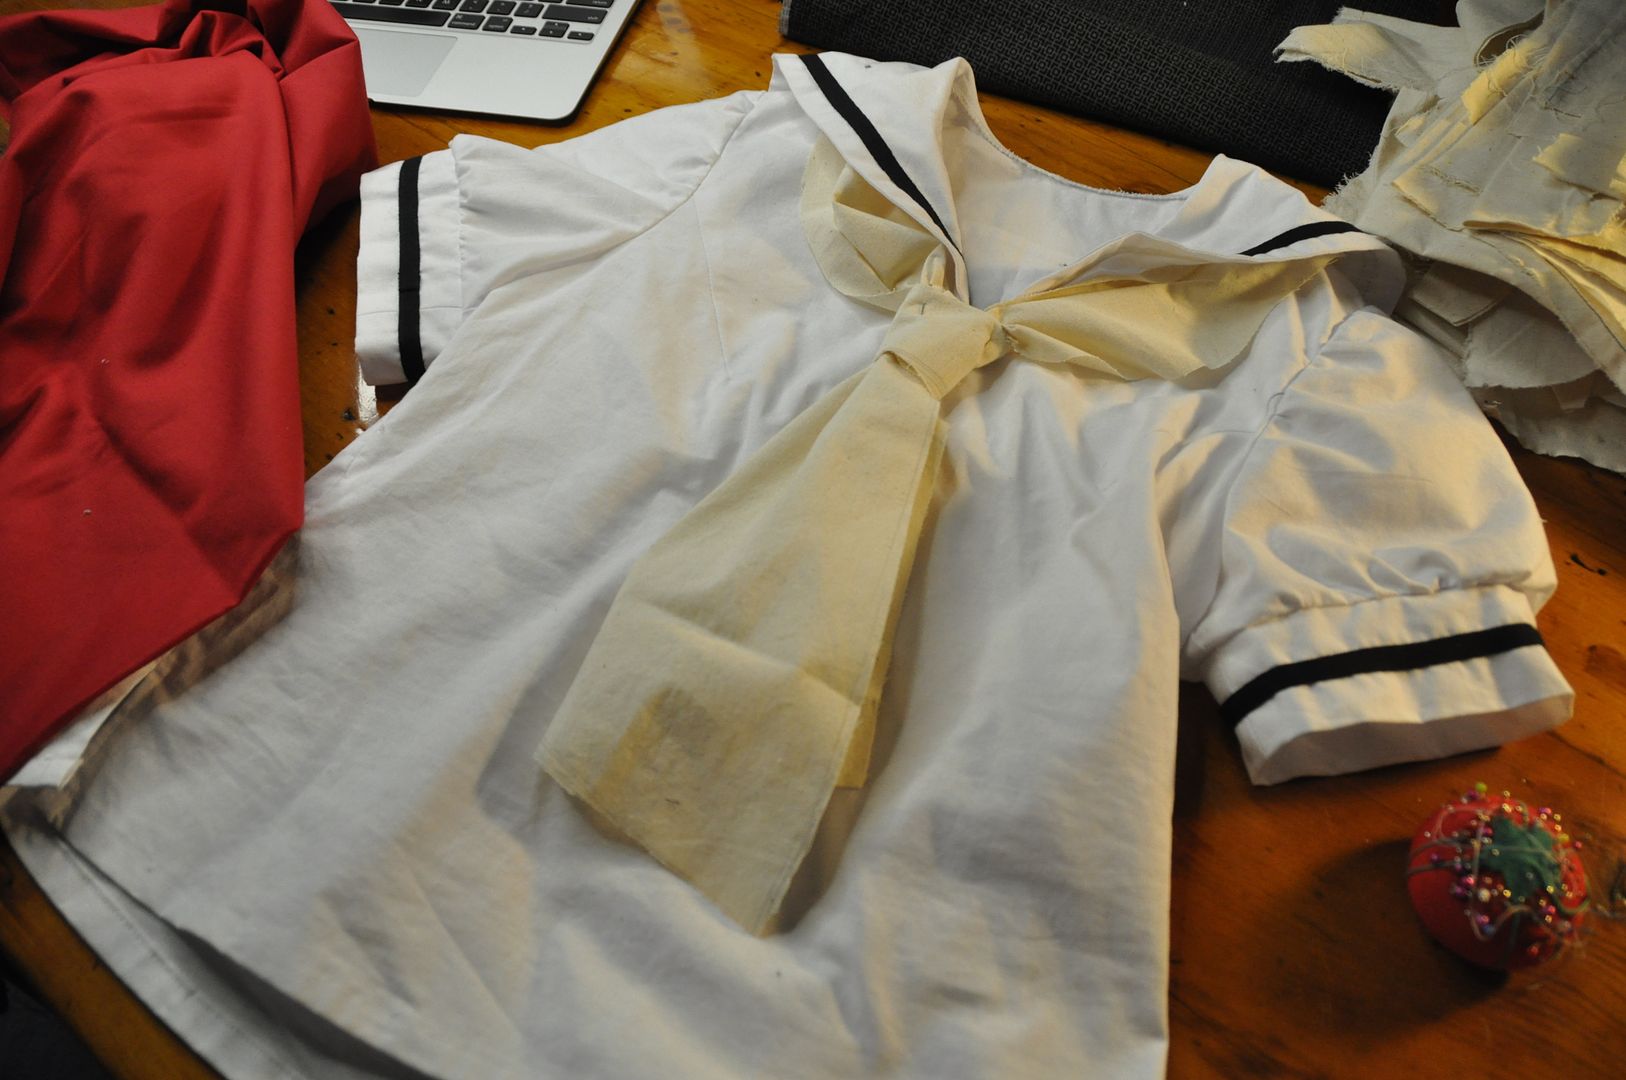
To start I patterned a basic block for the shirt, ignoring the usual front and back darts in favour of only having a small dart come in from the armhole at the bust. I curved in the sides a bit at the waist, but did not make the shirt tight fitting. This was to ensure that a) I could slip it on over my head even though it is not made of stretch fabrics, and b) so I looked younger. Sakura is supposed to be a between grades 4-6, meaning she is a child, so I wanted to make sure that I didn't look too old for the character. In spite of the fact that I am not particularly well-endowed, a fitted blouse would still reveal curves that a child would not have, so hence a more loose fitting shirt was in order.

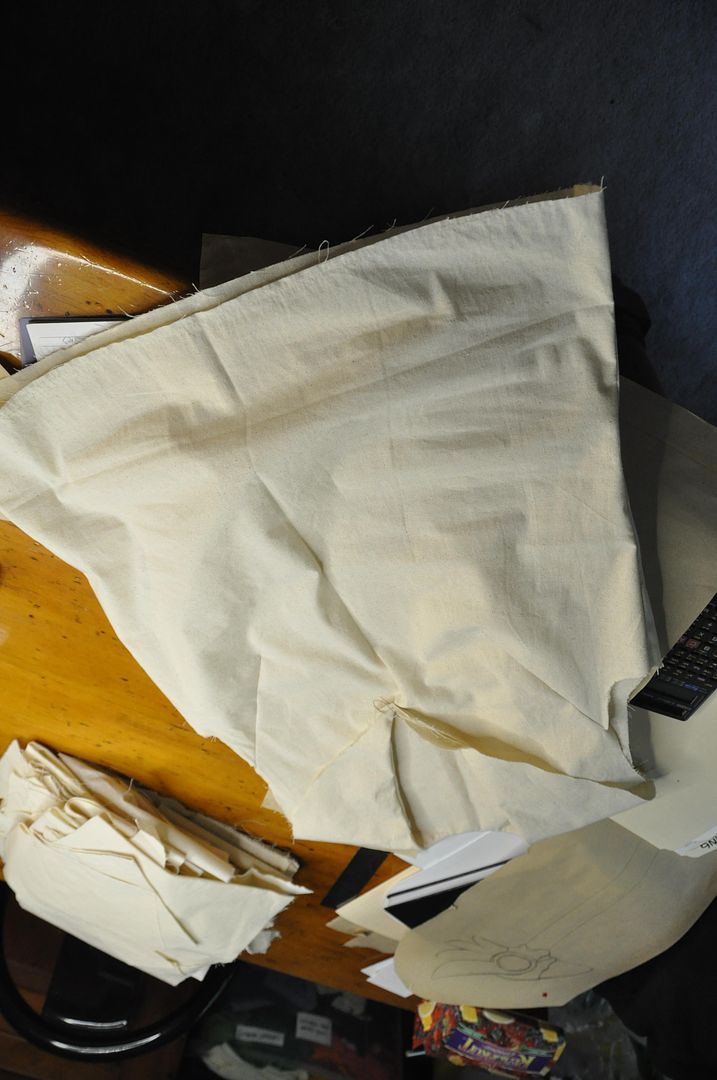
I patterned the neckline and sailor collar by creating a mockup of the shirt and then draping the collar on Molly (my Judy) with muslin. This way I was able to easily figure out the proportions.

Once that was done I laid out my fabric and cut out my pieces.

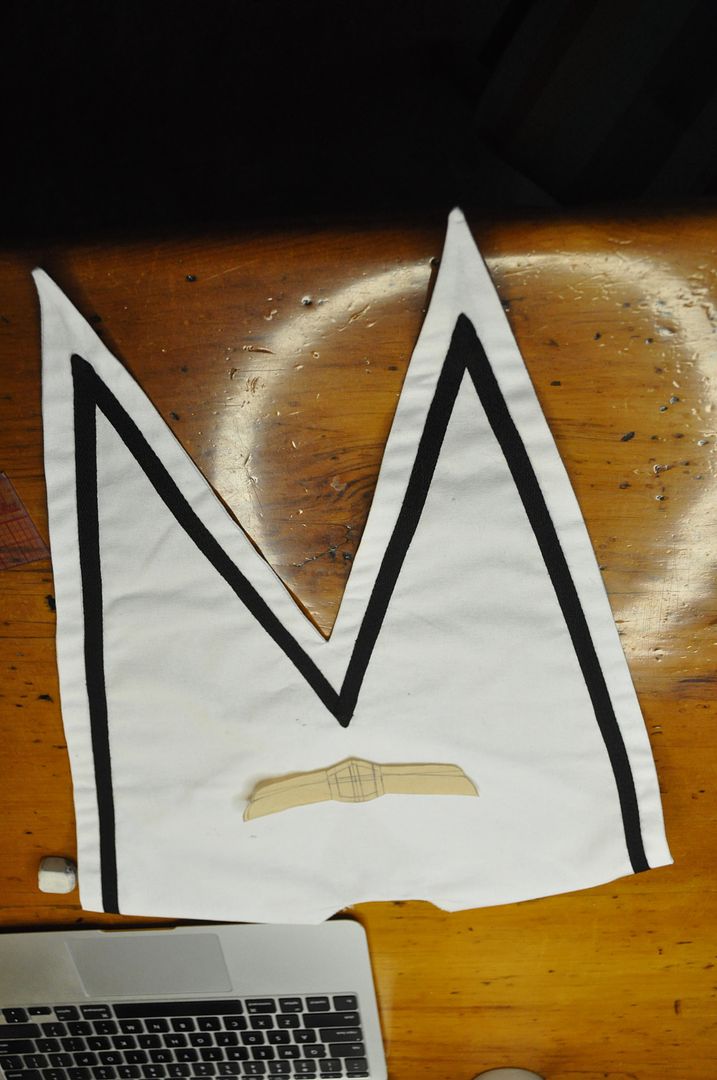
The collar was first sewn right sides together, excess fabric clipped and then flipped right way out and ironed.


I then top-stitched on 1/4" black twill tape to make the edge detail. I made sure my bobbin thread was white (as opposed to black to match my top thread) so my stitching would be virtually unnoticeable from the other side.

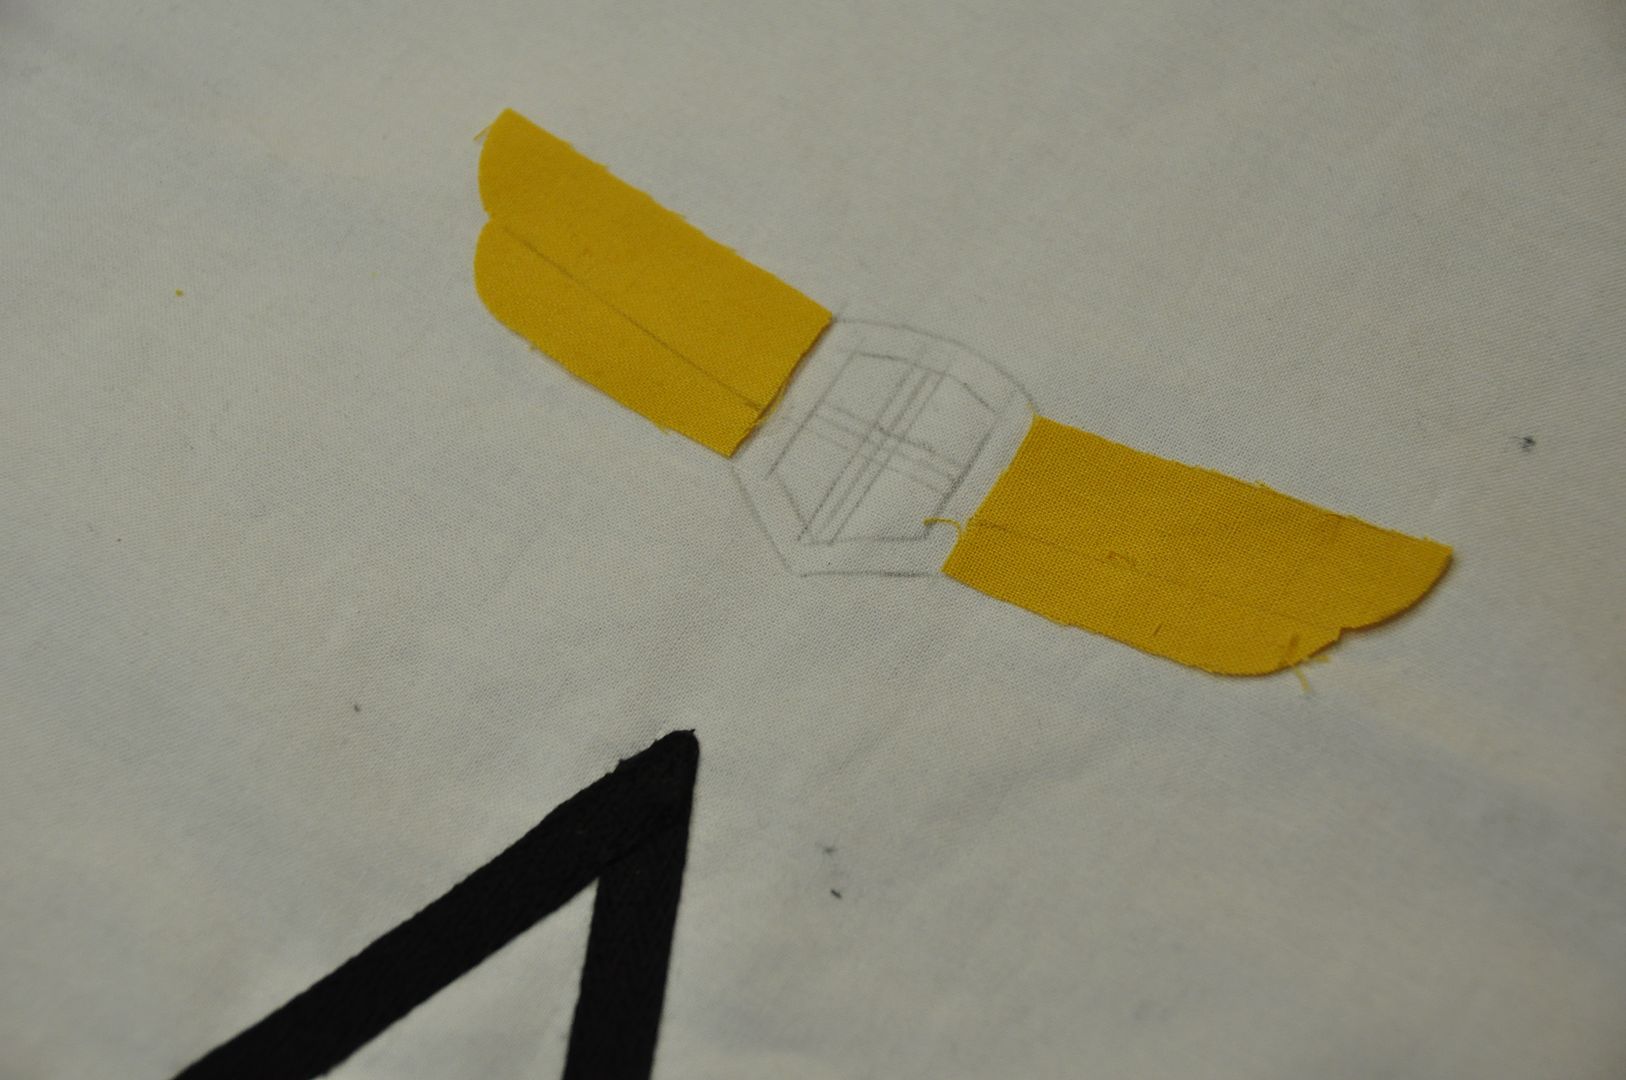
Then I sketched out the crest for the back detail.
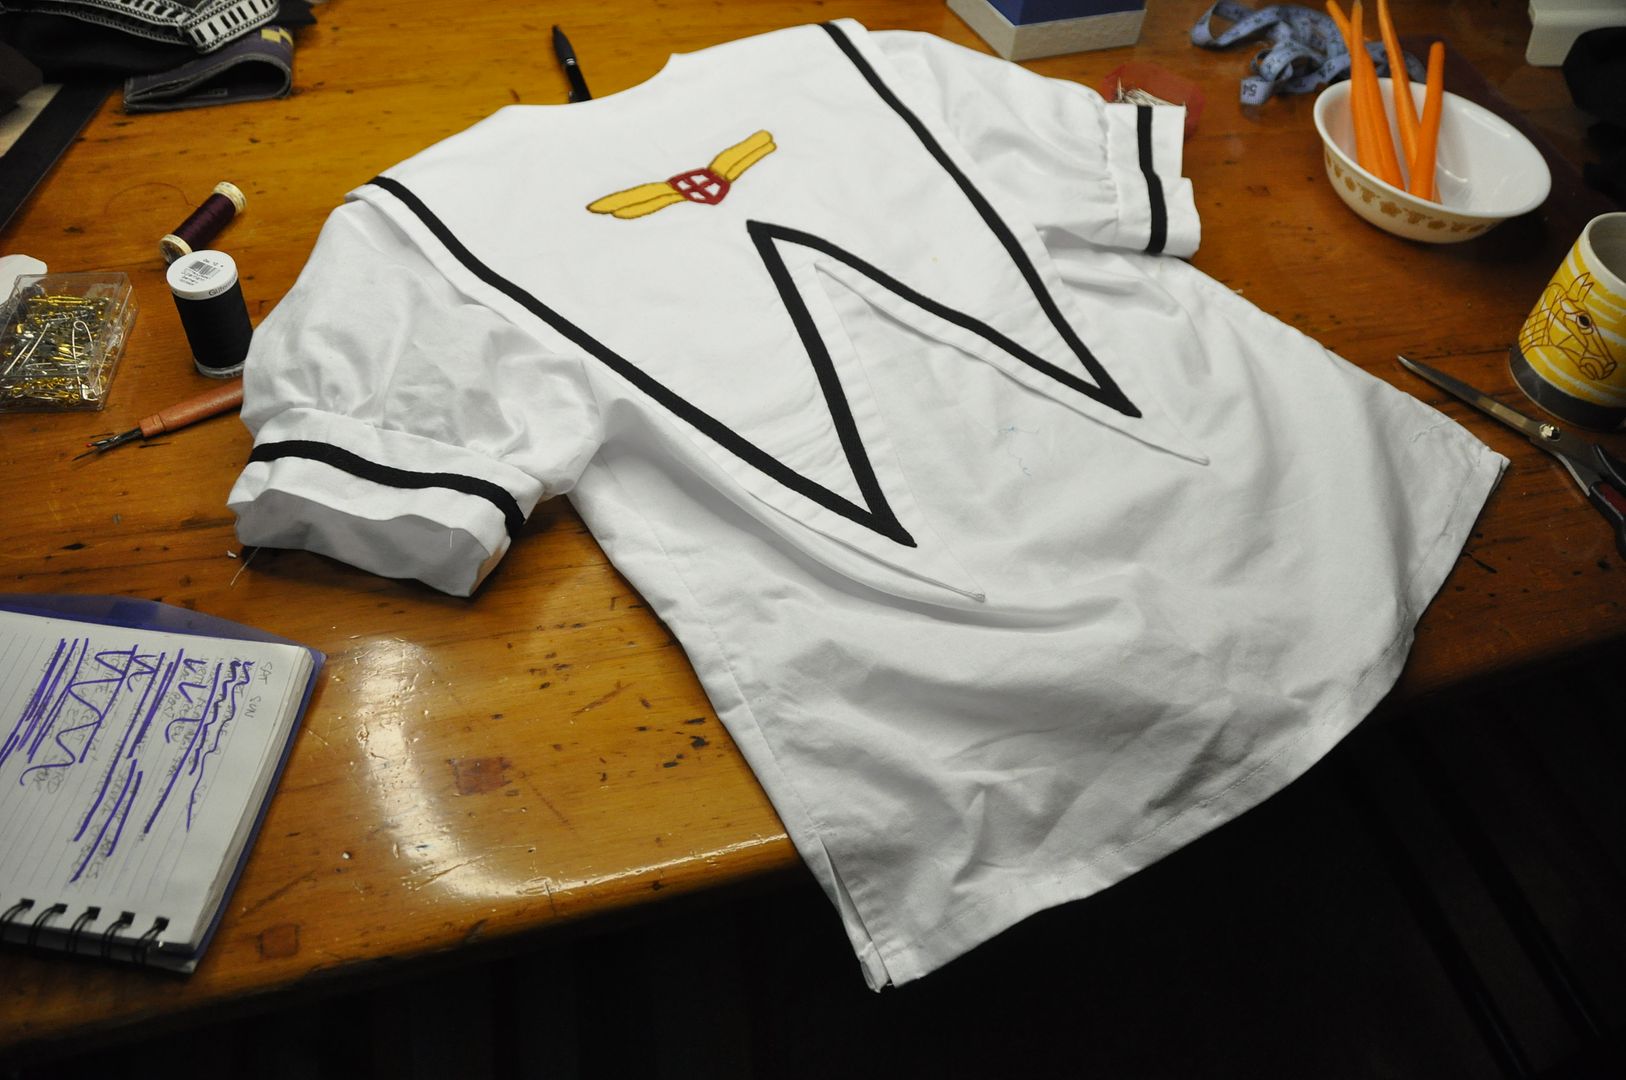
Next step was the appliqué and embroidery of the crest on the back. Using yellow fabric leftover from Kero, I blocked out the areas for the 'wing' part of the crest. This saved me from having to fill that area with an embroidery stitch. Instead I merely sewed around the edges. Next I did the red shield-shaped piece in the center.
After finishing all the seams inside the shirt,  I made some puffy sleeves. I made sure they weren't too puffy, so they were only slightly larger than the armhole. I used a basting stitch along the sleeve cap and bottom and cinched them to the right diameters before sewing them to the armhole and cuffs respectively. The cuffs are just rectangles sewn into a loop and folded in half lengthwise that I have sewn another stripe of black twill tape on.

I hemmed the bottom of the shirt with a simple rollover, but went back and changed the side seams to have a 2" slit up each side.

Then I attached the collar to the outside ans zigzagged the raw edge. I flipped it to the inside, pressed it, then top stitched it down. I took extra care to reinforce the point of the v-neckline.
The last step for the shirt was to create a little triangle  to sit under the v-shaped neckline. It was secured with dome fasteners so it could be removed so I could take the shirt on and off. 

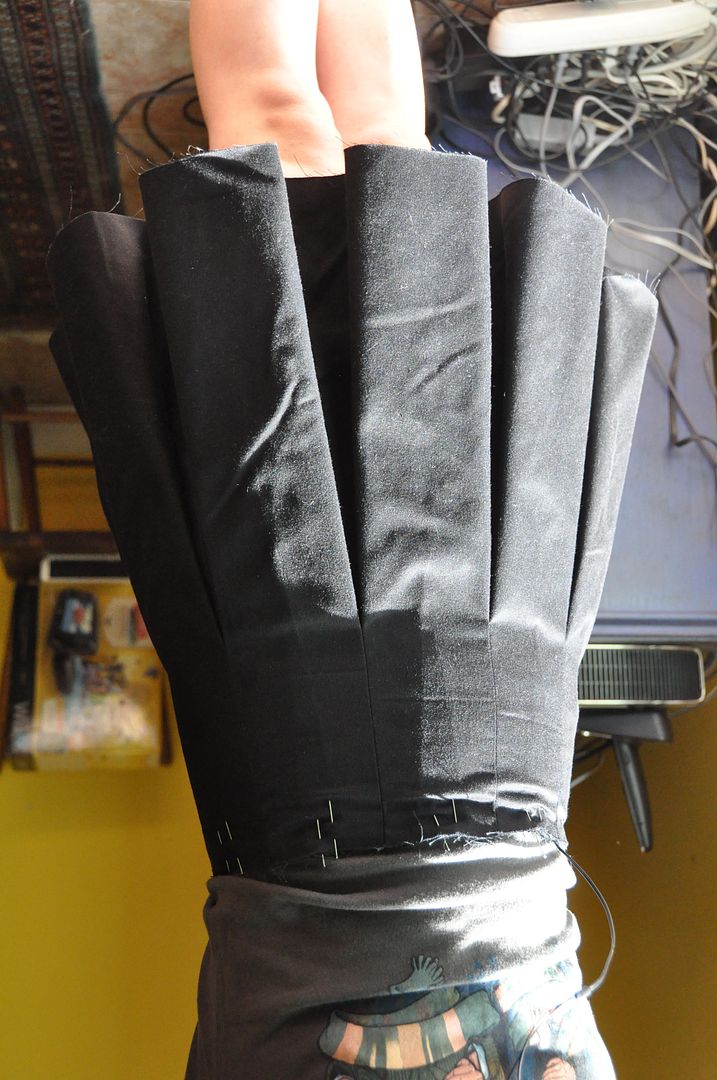
Now lets talk about the skirt. Creating a pleated garment is all about math, unfortunately. The garment has 10 pleats. In order to make it fit snugly at both waistband an over hips I had to take 2 measurements, one at waist, and on 4" down from waist. Then I divided those numbers into 10 equal parts and carefully drew out a pattern piece. Left you can see one of my side panels. The thin trapezoids are the parts that would be visible, the wide ones would be hidden in the folds. 

The hardest part of patterning this was making it so the side seams would be inside a pleat and therefore virtually invisible. 

The size of the skirt at the bottom was arbitrarily decided, but I knew I wanted it to be pretty full, because it's CardCaptor Sakura guys.
Each of my three skirt pieces I sewed the center pleats into before sewing the pieces together. I sewed the center back together and added in the zipper before finishing the pleats directly beside it.
I ironed the pleats centered, rather than off to one side (because that's how it looks in all the reference photos). I didn't press the pleats all the way to the hem either, because I wanted them to still have that soft, rounded look. For your own reference look at my Long Pleated Skirt to see what pleats look like when pressed to one side, all the way to the hem. Very different, right?

Once the pleating and waistband were finished I hemmed the skirt.
The saddest part is I couldn't figure out how to work pockets into the skirt, so this costume has no pockets. Oh well.

Above you can also see my mockup for the hat. Surprisingly this is the item I was most excited to make. I've always loved the hats that Clamp designs, particularly these adorable sailor hats. I love that they magically perch on the back of the head.

When making hat, always take the band measurement while wearing the wig you will be wearing under it, otherwise you run the risk of making it too small!

Below you can see the pattern pieces for this--the pieces on the right are both folded in half.

First I assembled the band, with is a long rectangle, sewn into a loop and then folded in half lengthwise. For the cap first I sewed the c-shaped piece into a circle, then sewed it right sides together with the top of the cap.
I finished the inner seams, then pressed it right way out. Next I attached the band, leaving a gap at center back to attach the black tails. The tails were sewn right sides together, clipped, flipped and pressed. These were then inserted into the gap at the back, splayed at a slight angle, and stitched in place. I then finished the inner seams of the hat.
Last piece to make was the under skirt. Above you can see the pattern, which is completely different from the pleated over skirt which is made of rectangles. This is because a) pleating is time consuming, b) all you see is the edge and c) I didn't want all that bulk under the already considerable bulk of those pleats.

Using the 2 measurements I took earlier to create my pleats, I made the top piece of the underskirt. Then I made a circle skirt piece to attach to that (of which I cut 3, making the bottom 1.5 circles). This ensured that all the flare of the underskirt would be below the stitch line of the pleats, reducing bulk.

I attached a lace trim to the bottom edge as an extra cute detail.
At the center back at the waist of the underskirt, it was finished to remain open. The underskirt was attached to the overskirt by buttons (holes on the underskirt, buttons on the inside of the overskirt). This way it was removable and could be washed separately.

Lastly I made a tie. I mocked it up with leftover muslin scraps, and then made a nice one out of red twill.

Each of the individual pieces were stitched right sides together then flipped right way out and pressed. I top stitched more black twill tape along the bottom of the tie edge. before hand stitching the pieces together. The last thing I did was make a velcro closure at the back.  Because I have no idea how to tie a real sailor tie.

Friday, August 22, 2014

Otakon 2014

Two weeks ago I was in Baltimore for Otakon! This was my 3rd year attending the con and I had a really great time once again. :) Though I must confess it was a little sad for me to have my sister not attend a con with me for pretty much the first time ever. :( (She's moved to Japan, so there will be more cons sans-Alex in the future.) This is so far, the only American con I have attended, but I always enjoy it, so the trek down south is definitely worth it.

Thursday: We made the long drive down, picking up our roomies on the way. Special thanks to Mike, aka EleventhPhotograph for driving us down! (I don't even know how to drive, so I probably would never make it there otherwise, because planes are expensive.) Trivia: How many American flags did we count on our way from border crossing at Niagara Falls to Baltimore? Answer: approximately 886.

Sadly, I didn't get my cosplay lineup completely finished for the weekend, as I ran out of time. I finished my essay for school in the car on the way there, and arrived at the con absolutely exhausted. With some difficulty we got our hotel room sorted out and then went to pick up badges. Unfortunately they had already cut off the line so we didn't get badges that night. Instead, Mike and I had dinner with the lovely ladies of Pro Voltage Cosplay at Kona Grill. :) I finished Sakura's wand in the hotel room that night! XD

Friday: I got up pretty early to get into costume and then go get my badge. I wore Sakura for friday. I did a short photoshoot in the afternoon with Mike before going for lunch. I explored the convention and looked around the Artist Alley. We met Mike's friend Andrea (whose cosplay handle I have subsequently forgotten! D:) and her boyfriend for dinner at PF Chang's.

Saturday: I wore my more casual Asuna outfit, complete with harisen (because my sword doesn't fit in the car). Funny enough, because I was in the same hotel again this year I made my way over to the same café for breakfast and bumped into the same gentleman that my sister and I had become acquainted with the year before. I was pleasantly surprised! :D And also amazed that he recognized me in a completely different costume, without my sister. Apparently he's a regular, so who knows, we might meet again next Otakon? Hahaha We chatted for a bit before I went off to enjoy the con. I finished the Dealers Room and wandered around the con before going for lunch. I made the trek to Chipotle in honour of Alex! And also because its delicious. I spent some time in the games room that afternoon. We met with Andrea and friends again for dinner, this time at Cheescake Factory. Mmm Cheesecake <3

Sunday: I attended a panel on Cosplay and Identity that was fairly interesting before heading out to get lunch (Chipotle again!). Did some last minute shopping before helping our roomies pack up their Artist Alley table. The drive home was fairly uneventful; only some minor detours due to construction (and no trips to Best Buy). We got to see some fireworks and the super moon on the way home, while singing along to Mike's crazy playlist.
My one serious issue with Otakon this year is that they didn't provide a paper schedule, instead they wanted you to download an app that I couldn't find. I went to the information desk for help on the saturday afternoon and they gave me a paper schedule, only for me to discover that I had missed pretty much all the panels/videos that I wanted to see. I wish they could have given us a paper copy in the first place, for people without smart devices, as the intermittent access to wifi would have meant I wouldn't have had much luck accessing it anyway. >:(

Other than that, the weather was much nicer this year (less hot and not rainy!). Definitely planning to attend again next year (providing nothing unexpected happens to me in the meantime).

[Can you believe I forgot what day of the week it was and only realized now that I missed my Thursday post? hahaha]