Showing posts with label millinery. Show all posts

Wednesday, January 11, 2017

Koi Fish Fascinator

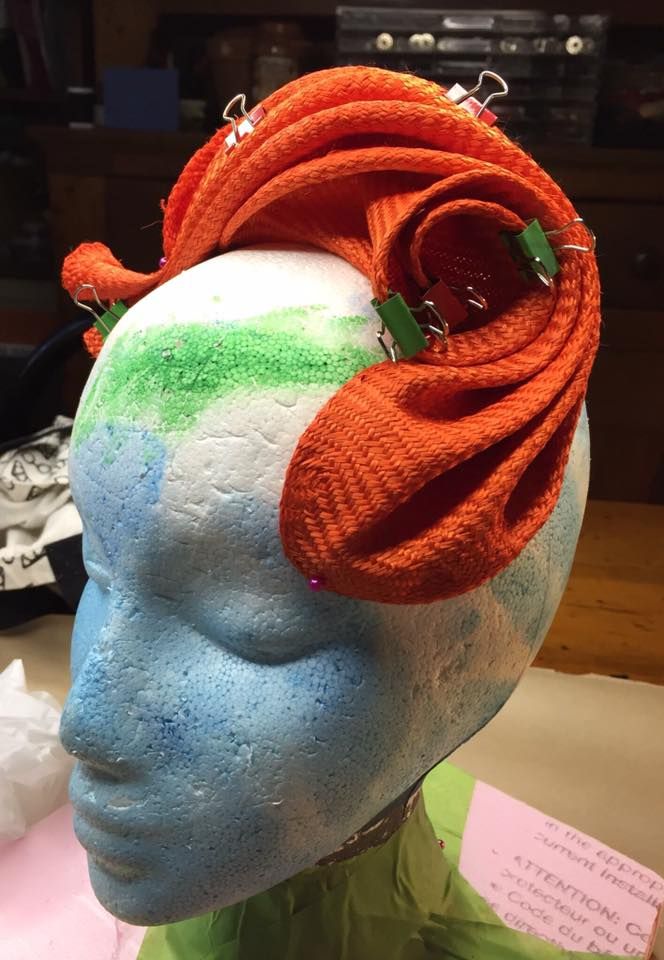
The first of my hat projects from my millinery course from this past fall--a straw fascinator! The goal was to take a straw capeline and freeform pin and block it into an abstract shape. I decided to make a fish?

It's not the type of work I would normally do. I'm a person who tends to plan out what I'm doing in advance. So taking on a project where you had to make up what you were doing on the fly was a bit of a challenge for me.

The basics of blocking straw is: you take the straw capeline and wet it with a watered down gelatin mixture. This will make it easy to sculpt and pin. Then you let it dry in that shape. The gelatin acts as a stiffener.

I don't have any pictures of this part of the process because I didn't want to get gelatin on my phone. Haha

The challenge with mine is that I didn't want to do a large fascinator, and only wanted to use half of the capeline. But you can't just cut a straw capeline, otherwise the weave will quickly start to unravel. Before you cut it, you must first do a zig-zag stitch on either side of your cutting line--so the part you want to keep and the excess both don't unravel. I had to do this before I sprayed it with the gelatin mixture so I didn't get that on my sewing machine.

The "head" of the fish is half the crown of the capeline.

I just blocked it on a regular foam wig head. I used pins and bulldog clips to hold it in place as it dried.

Once it had dried overnight I carefully hand-stitched it to a plain black headband.

As an afterthought, I added little fins. These were made out of some of the excess material. They are hand stitched on.

Overall I think it was a neat exercise and a cool project, but I will probably never wear it.


Wednesday, October 19, 2016

October Update


October is here! The spookiest of all months! And we passed 100,000 views! WOW DUDES!

I'm back in school again--I'm taking the 2nd part of the millinery course. Look forward to more cool hat projects! Also learning how do use Adobe Illustrator.

Fanexpo Cosplay Workmanship Competition results: I won the Best of Thursday award for my Leia costume. It was nice to compete in something for the first time in 2 years. I'm hoping to compete in more things this coming year, but we'll see.

Working on finishing up my posts on Presea. The last one left is on that battle axe...

I've been on a bit of a hiatus lately, I've felt a bit creatively drained. Looking to be inspired again... Got to start working on my hat projects soon though, so hopefully that will give me some motivation--at the very least to meet my project deadlines. Started working on my 1st hat project. It's going to be pretty epic.

It's going to be a pretty crazy month or two!

Later dudes! >:D

Friday, August 19, 2016

Brown Cloche Hat With Feathers


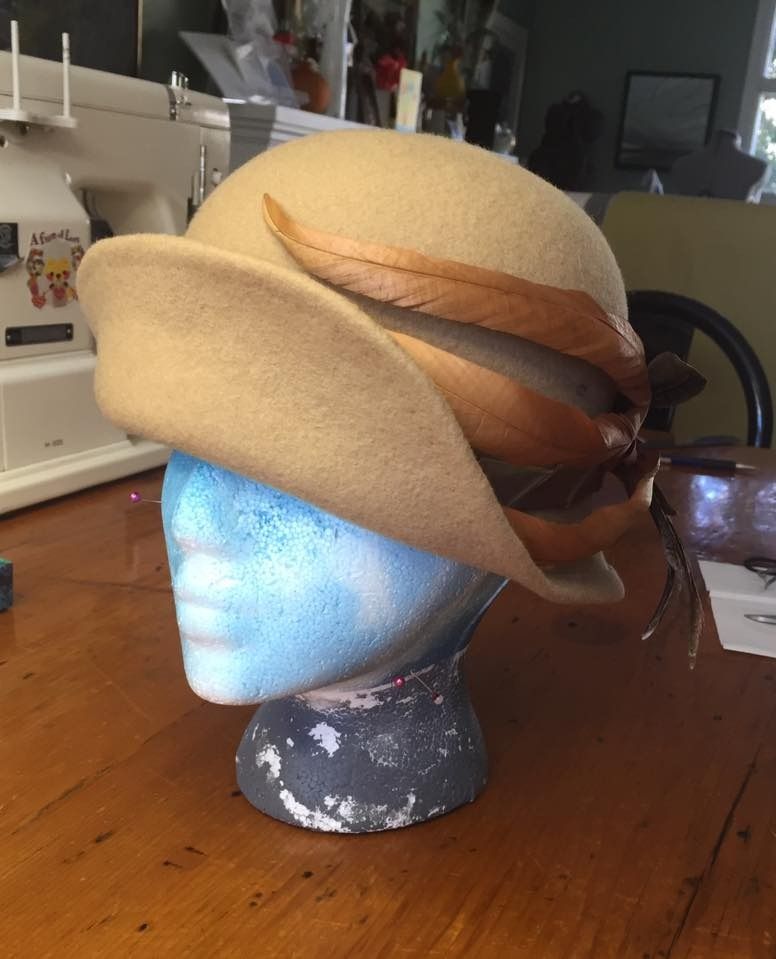
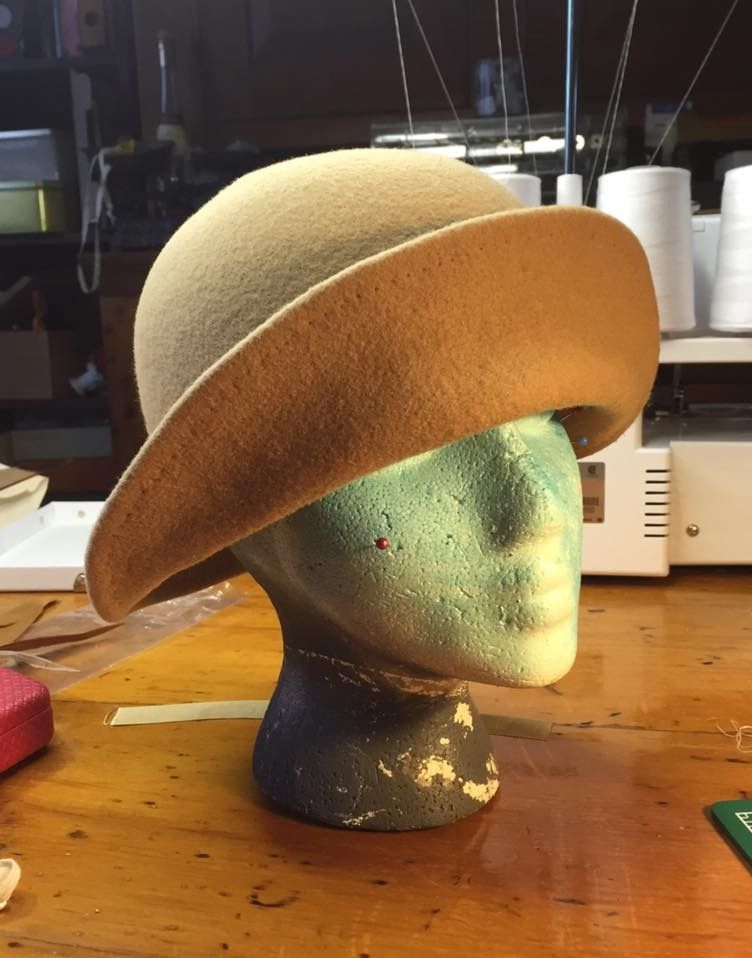
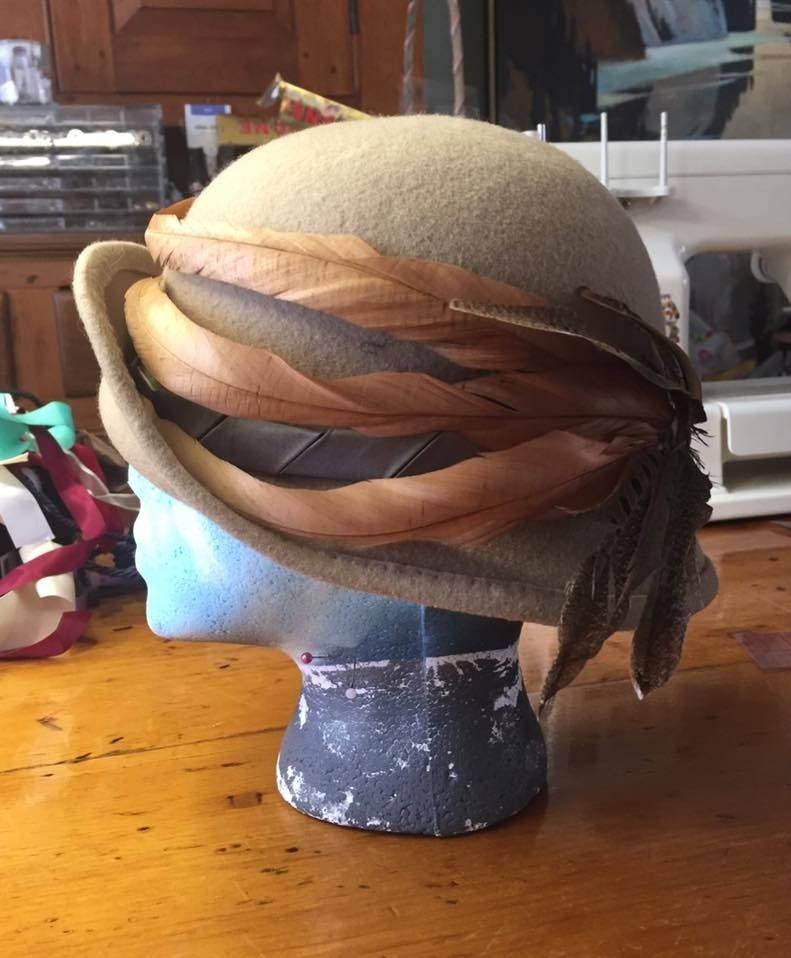
Let's take a look at my final millinery project: a blocked felt hat! I decided to do a simple cloche hat decorated with feathers. 
To make a blocked felt hat, you buy a "hood" or "capeline" which is 100% wool. (Or you can buy an 100% wool hat that has already been shaped and reshape it. You can get them at H&M.) 

You heat up a tea kettle that doesn't have an automatic shut off (so it will keep boiling--just make sure it doesn't run out of water, because you need the steam and to not set anything on fire). You place the hood/capeline over the steam spout and let it steam. It should have condensation on the outside and it will be really hot when it is ready for shaping. Use tongs to take the hood/capeline off the steam and place it over your desired block. I used a round crown top. Then you stretch it over the block, tie it tight and pin it in place. Let it dry for 24 hours. 

For my cloche, the crown and brim are all one piece. I was pressed for time with moving and was going to miss the last class, so doing a one piece hat was necessary--but also, I really like this style anyway.

If I were to do a separate blocked brim, at this point I would have carefully cut off the brim with an exacto-knife and blocked it on a brim block. For a one piece hat, I applied more steam and shaped the brim while the crown was still tied down on the block. I used rolled up pieces of fabric to shape around and let it sit while it dried. During this time I trimmed off some of the excess felt  from the brim to get it closer to the finished shape that I wanted.

When it was dry, I removed it from the block and set about finishing the edge of the brim. I decided to do a simple folded edge finish. I marked my finished edge and carefully trimmed the brim, leaving a 1/2" fold allowance. I folded it over, using bulldog clips to hold it in place so I could baste it. Then I carefully ironed it before stitching it as invisibly as possible. I ironed it again after stitching. This helped to give it a crisper edge.

Next I added the decorations and headband to the inside. I also gave it a label. I decided to accent it with more of that green silk I bought for the previous hat and feathers left over from my Forest Guardian costume. The goal is to stitch decorations on securely without making them look heavily stitched on,

I'm not too impressed with how the decorations turned out--specifically the feathers. I may replace them later. But I really love this shape--simple, yet elegant!


I've signed up for Millinery Part 2! So look forward to more hats, coming this fall! :D

Thursday, August 11, 2016

Edwardian Hat With Kanzashi


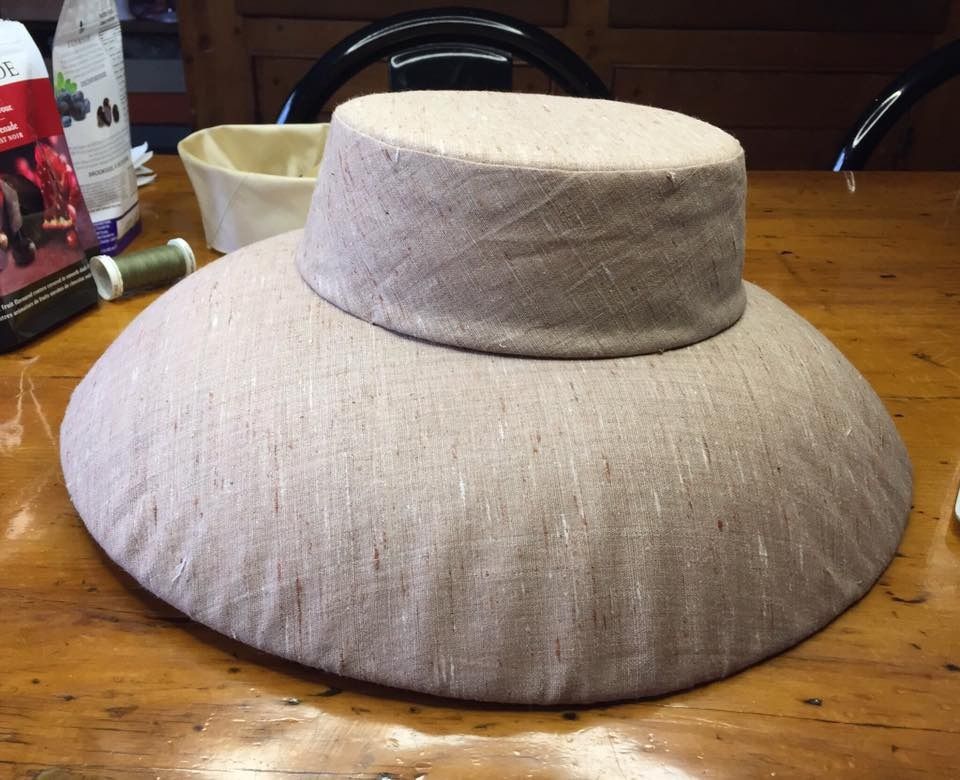
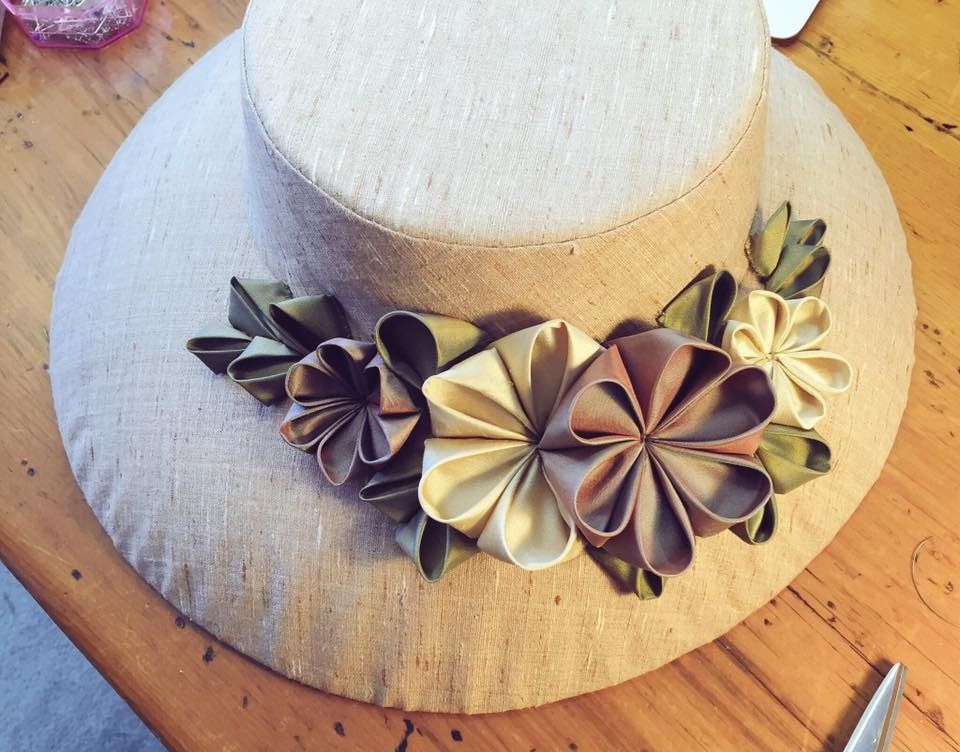
Let's talk about hat project #3: blocked buckram! We had to create a blocked buckram hat with crown & brim. I decided to design an Edwardian style hat. This process requires a lot of patience, as the entirety of it was painstakingly hand stitched.

I don't have photo documentation of the blocking process, but you essentially take the buckram, wet it and then stretch it over the block until there are no bumps/bubbles. Then you pin it in place and let it dry. I blocked the brim and the tip of the crown for this hat, the sloped side of the crown I flat patterned.

Once the pieces were dry I marked and cut them down to the desired size/shape. 
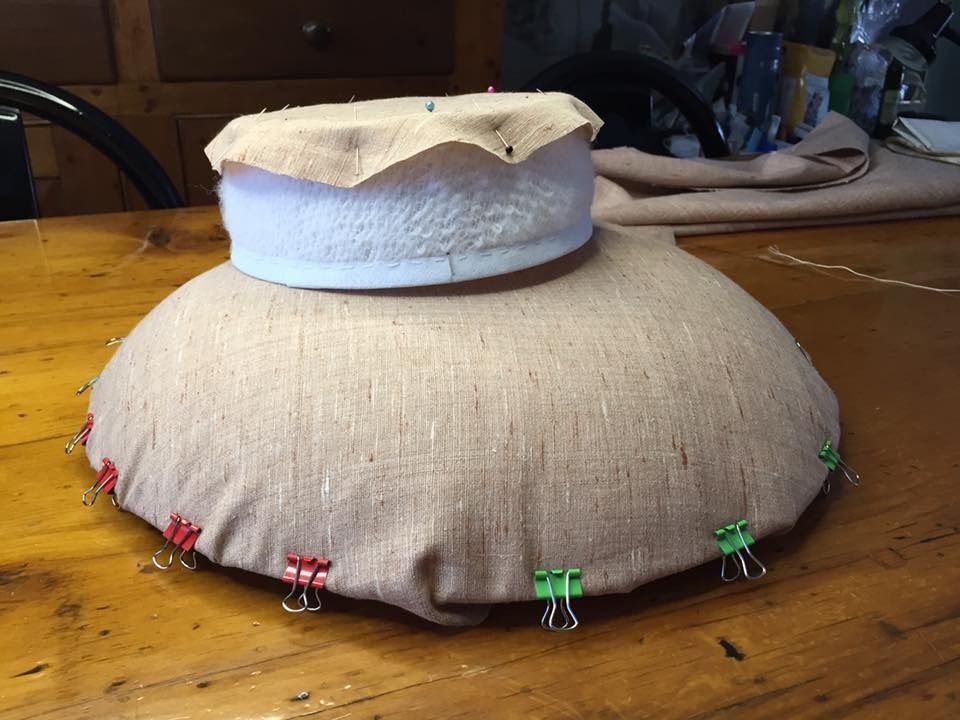
The crown and brim are covered and assembled separately, then sewn together. I used a layer of lambswool between the buckram and silk covering to give it a softer finish. All of the edges are finished on each buckram piece (excluding the head opening on the brim) before they are covered in the fashion fabric.

Bulldog clips are exceptionally helpful in holding your fabric in place. Also much of the finishing stitches were done with a curved needle on this project.

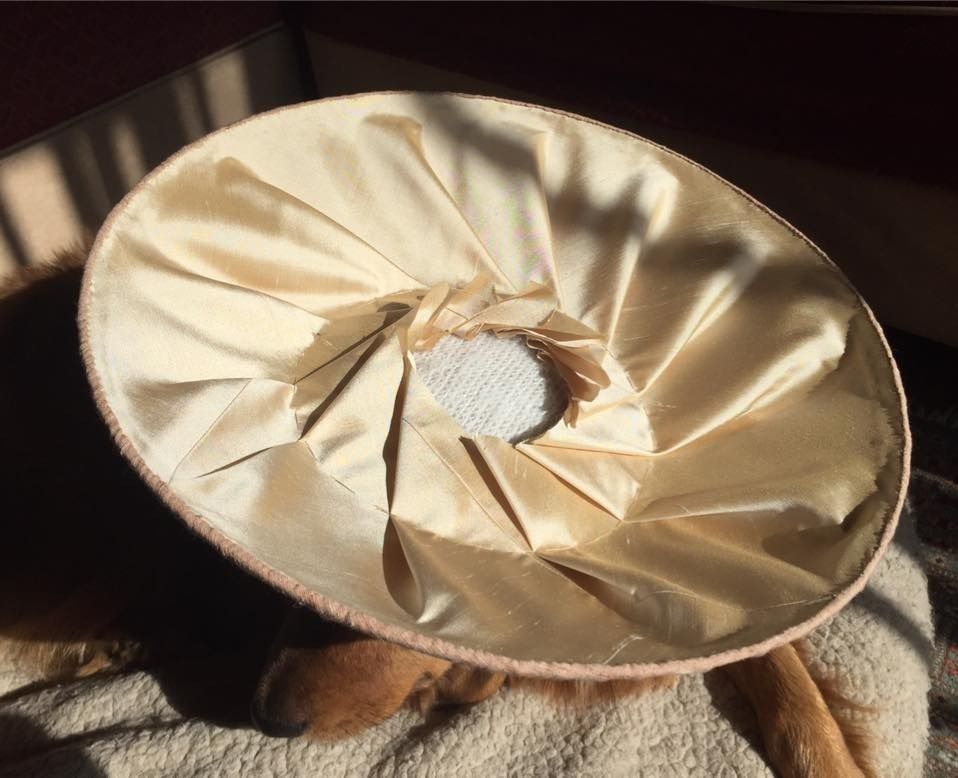
I first created my lining. It is a rectangle that I sewed into a loop that equaled the circumference of the brim. One edge was tacked down to the outer edge of the brim, and the other was carefully pleated into the center in a radial pattern. I made it as even as possible. I basted this down along the head size opening.

Next I draped the outer fabric layer over the top of the brim. I pulled it into place and tried to have as little rippling along the brim edge as possible. I folded the raw edge and turned it under. After basting it, I then slip stitched the edge down as invisibly as possible. The curved needle was really handy here.
To finish the crown, first I sewed down the circular pice to cover the tip. I notched the edges before folding them over the edge for a smoother finish. Then I draped the curved side band over the side. I folded over the raw top edge of the fabric aligning it just shy of the edge of the cylinder. I pinned it in place and then slip stitched the edges down. I left the center back seam open at this time. The bottom edge is simply folded up, but not attached. This meant I could still access the inside to attach the crown and brim.

I cut my head size opening hole in the brim, leaving 1/2" seam allowance. I cut notches into the seam allowance so the "tabs" could be folded up. The crown has no seam allowance--the brim seam allowance slots inside the crown, and they are stab stitched together along the brim seam allowance.

I ran into a few problems here--I didn't cut my head size opening large enough, so it didn't fit snugly inside the crown. It made sewing them together super difficult. And as a result the hat doesn't fit very well since its a touch small. But this is a learning process, so I just kind of rolled with it...

I then finished up the back seam of the crown cover. And I tacked down the lower edge in a few places.

Next was to finish the lining. I sewed the outer edge of the gros grain ribbon in along the edge of the opening. Then I carefully laid the crown lining inside. I sewed the inner edge of the ribbon to the crown lining, finishing the inside super cleanly.

You may notice I silk screened my new label into the lining! I'm getting so professional. ;D

Then I created a whole bunch of kanzashi flowers to decorate it with. Some were made of a really beautiful plum silk shot with blue. I also used more of the cream silk to match the lining. And accented with green silk "leaves".

I like the hat, but if I were to wear it (for a costume) I would probably need to fix up the size issue...

Wednesday, May 18, 2016

White Rabbit - Wire Frame Mini Tophat

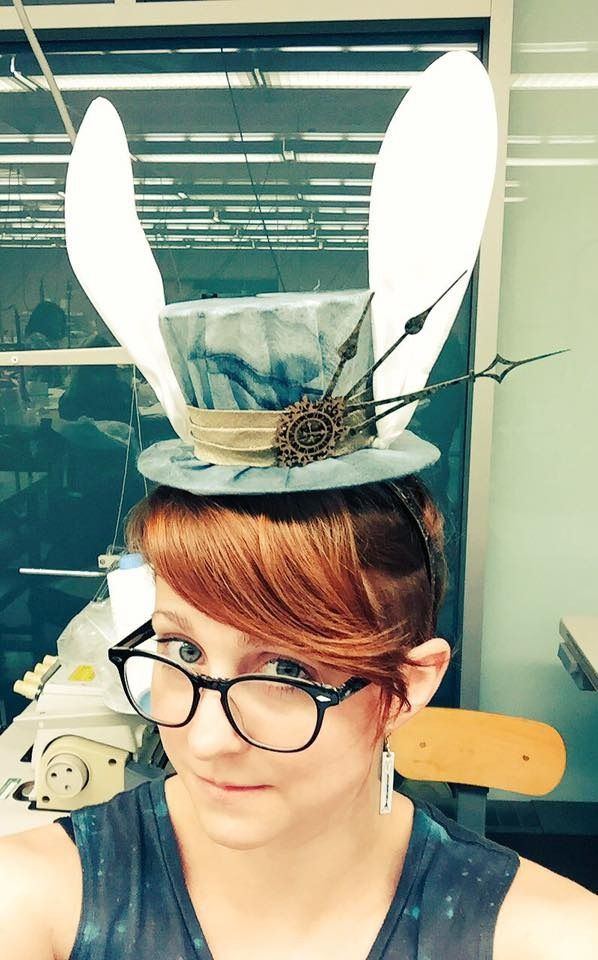
The second project from my millinery class--my White Rabbit top hat!

So the project outline was really open-ended: you had to make a wire frame hat, cover it with sheer fabric and decorate it to represent a theme/character. We were given the option of doing a mini top hat or boater that she had patterns for, or we could design our own hat shape. I picked the mini top hat because I didn't have time to pattern a new shape.

After going fabric shopping to get ideas, I found this really cool sheer blue-grey fabric. It had almost a paper-like quality to it. I thought it might make an interesting take on the White Rabbit. Since I have learned from theatre--stage lights wash out fabrics and make them look whiter, perhaps I could design a white rabbit while hardly using any white?
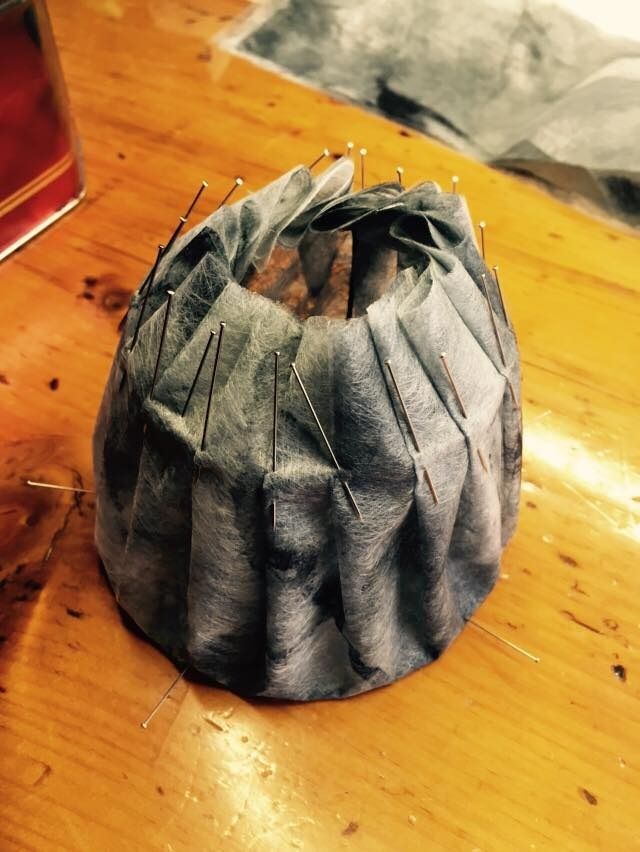
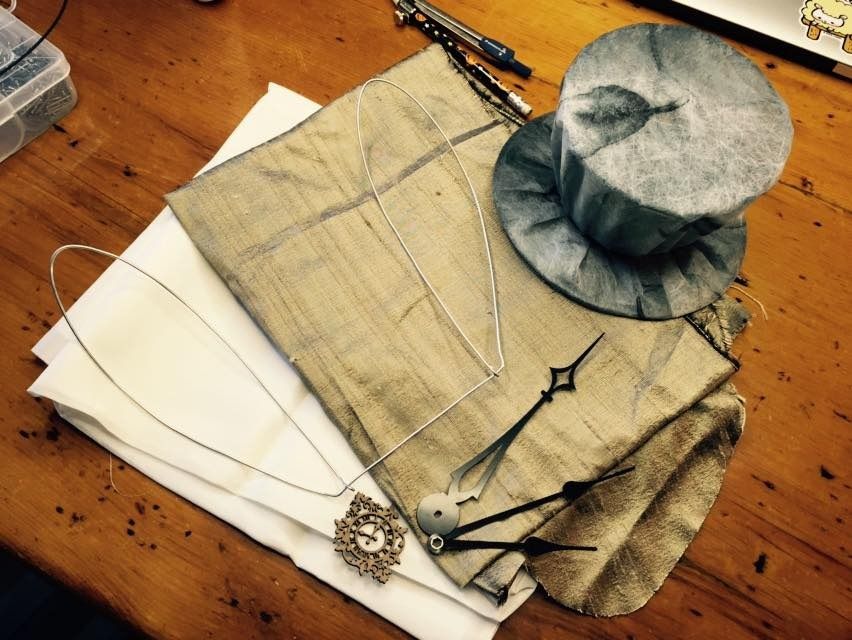
Here's a picture of the finished hat frame on top of the fabric. It shifts from blue to grey depending on lighting and instagram filters. Haha

I won't go into too much detail on how the frame was constructed. All the pieces of wire were carefully cut to length and bent into shape. I used quilting thread to tightly wrap the joints and then strengthened the bond with a mixture of white glue and water.

The brim and crown were not attached until after I covered it. It makes covering the pieces way easier.
I covered the crown and brim using 2 layers of my fabric. It was fairly sheer with just a single layer and I was worried it would rip. I like that with the double layer you get a ghost of the leaf pattern coming through.

For the crown I cut 2 circles overlayed, I draped these over the top holding them in place with pins. Then I pleated the fabric along the bottom edge to conform it to the shape of the crown. I basted this in place, attaching it to the frame. I cut off some of the excess fabric, but the rest would be tucked into the inside.

The brim was done in a similar way. I cut 2 long rectangles that measured the same as the outer circumference of the brim. These were each sewn into a long loop and folded in half over the edge. Then I pleated and basted them to the frame.
Next I created my ear shape. As you can see here, both ears are made out of one piece of wire. It would sit between the crown and brim and make them much stronger overall. I covered them with a white silk leftover from the painting and dye class I took last summer.

All of my cool accent pieces--laser cut clock, clock hands--were picked up from Michael's art store. It has a great selection of weird crafting bits. I got the clock hands in the DIY clock section, for example.

The gold fabric I used to make a hat band was leftover from my Steampunk Corset (I really did buy way too much fabric for that).
I sewed the ears to the brim base, then sewed my brim to the crown. Then I carefully tacked the side of the ears to the top of the top hat--I sewed the wire frame to the wire frame, not just the fabrics.

Next was the hat band and decoration. I sewed the hat band on, the sewed the decorations on. Before attaching the clock hands I sponged on some gold acrylic paint and sprayed them with a gloss finish sealer. This was to help them match the costume better.

Lastly, I sewed a felt circle to the bottom to cover the hole and seal it shut. Then I sewed a headband to it (which I also painted gold). I think later I will swap out the headband for alligator clips, but for now (and for handing it it) it was fine.

I'm really happy with how the hat turned out and I am in the process of completing a full design for the costume. I'm thinking I would really like to complete the outfit in the future...