Showing posts with label black. Show all posts

Tuesday, June 28, 2016

Make Up Cases


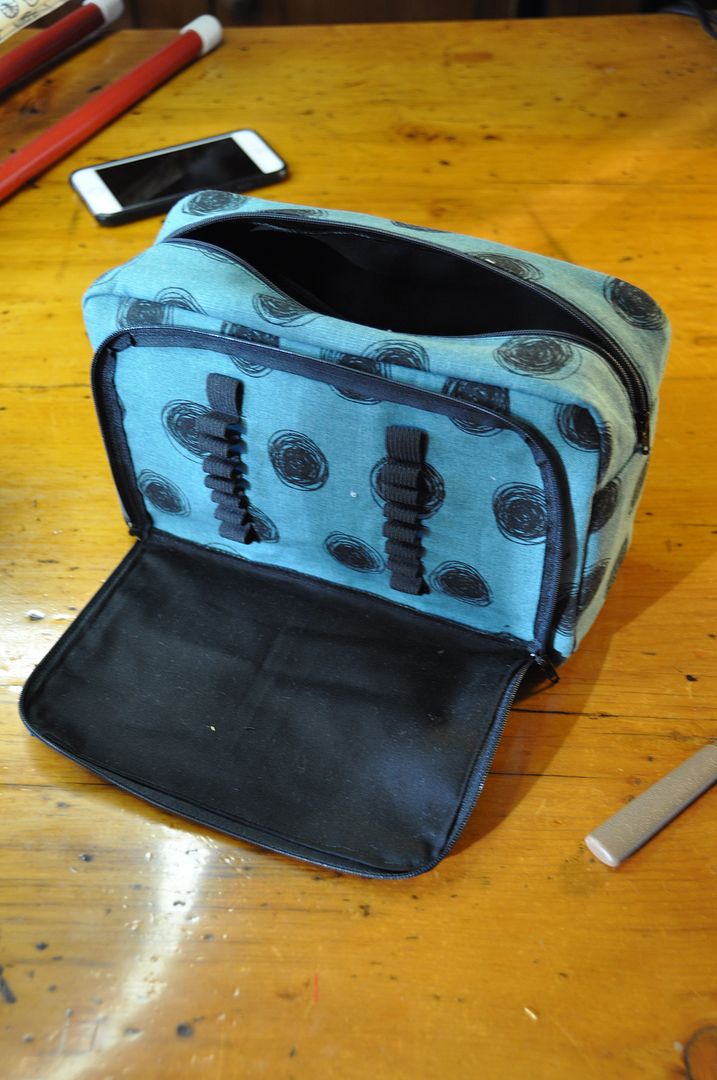
Just a quick post showcasing some custom make-up cases I made for my sisters this past Christmas.

Both have elastic loops to keep brushes/pencils organized. The front flap on the teal one was a little tricky, as I am not used to sewing zippers in on such a sharp curve.

I thought it was a pretty fun way to use some of the print fabrics my sister got me in Japan. :)

Wednesday, September 30, 2015

Inkling - Guns and Tanks - Splatoon

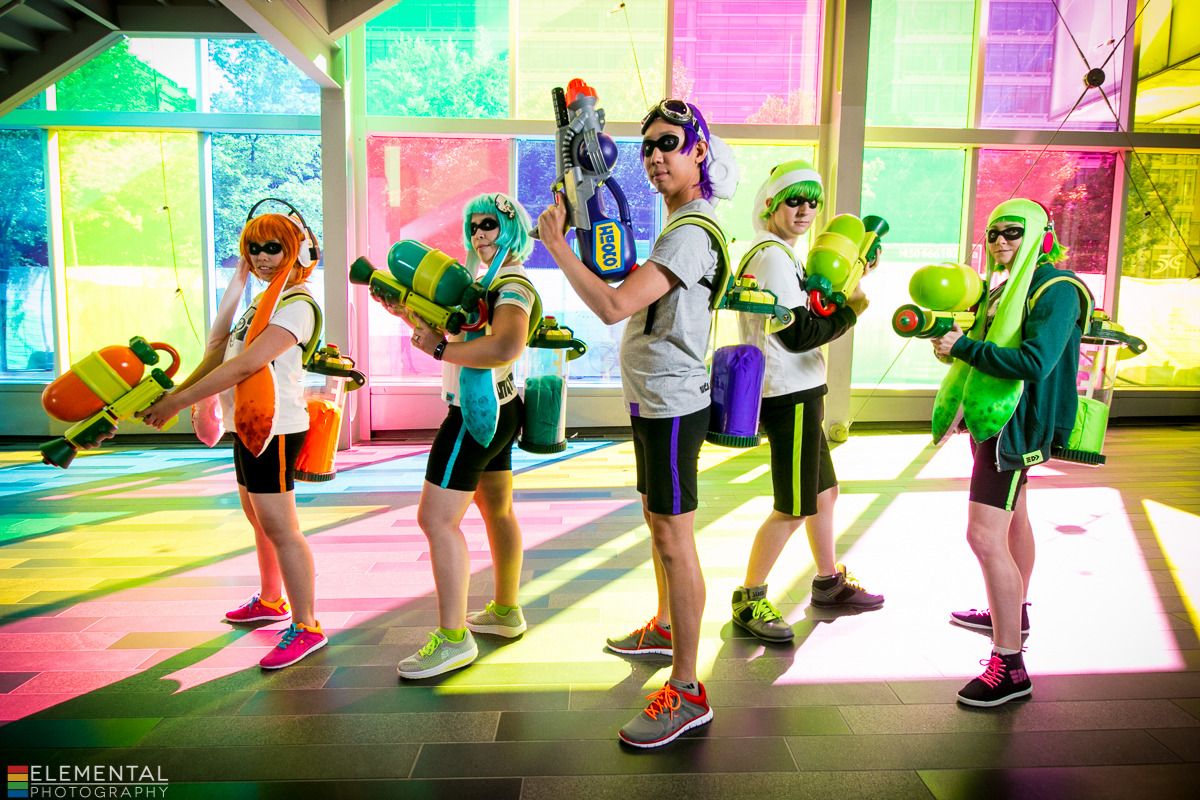
Part 3 of the Splatoon Squad posts! Lets talk armaments! >:D If you are interested in the tentacle hats, go here! If you want to see how we put together the outfits, go here! Once again hats off to Elemental for the great shots from the photoshoot!

Now we delve into territory that I know little to nothing about: The Armaments. I had very little involvement in this area. I was a helping hand in the mass production line for the harnesses, ink pillows, and I helped put the electrical tape gauges on the side of the tanks. That's about it. Credit goes to the real masterminds Brian (Ragz Cosplay) and Adrien, and their very best shop gnome Andy (Yavarice).

Based on a 3D model that Andy did of the tank, Brian broke down and printed all the components. These had to be cleaned up (sanded) and painted, and then these were assembled into a full team of tanks. Andy gave a hand in this process.

All I can tell you about 3D printers is that they operate by wizard magic. I am fairly certain Brian is a wizard, and Andy is a sorcerer's apprentice.

The pieces were painted up separately using spraypaints and then glued together using a glue called E6000. The bottom of the tank is removeable so that the ink pillow can be changed. By changing the ink pillow you can easily re-purpose the tank for a different colour team.

The pillows are made from the same spandex as our hats. Michelle (Mage Cosplay) and I made fabric cylinders of varying heights and stuffed them. The pattern is literally 2 circles and a rectangle. Except Brian's, he made the top of his wavy. Because he is not lazy like me.

The harness rigs are made out of foam mats from walmart, black webbing, buckles and hot glue. The shoulder straps are 2" wide and tapered at the front end. After being cut to the desired length, we put a slit at each end for the webbing to be fed through. The webbing had the female end of the buckle sewn on to one end. We carved out a small depression in the inside of the strap and glued this end of the buckle in place. The other end is the adjustable side. When we had the desired length, the excess webbing was cut off. We burned the ends with a lighter so they wouldn't fray.

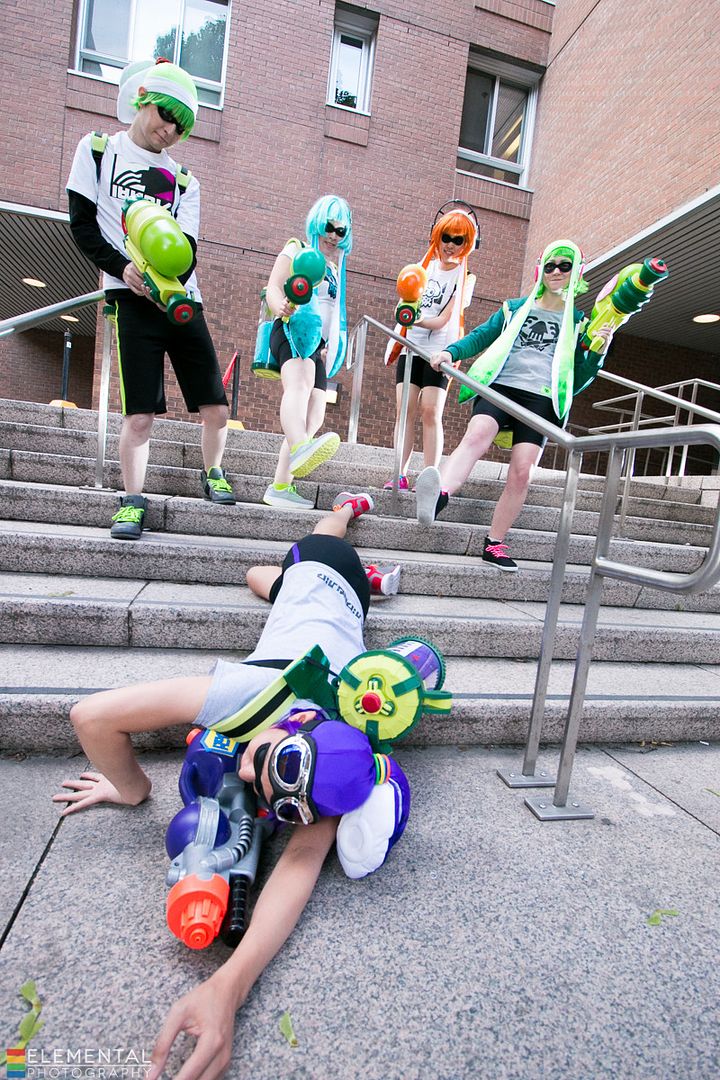
The two straps were glued to a back piece that is a dumbell shape that has a thinner webbing strap attached to it. This smaller straps has velcro and feeds through two slots on the tank. They make the tank removable from the harness. You can see where the tank attaches to the harness in this great shot of us beating up Andy.


As for the Splattershots, Adrien takes all the credit there. (Well, Andy does get some credit for being his resident shop gnome and doing much grunt work cutting out pieces.) Adrien created some foam pieces as templates and vaccuformed all the separate pieces over them. These were then cut out and glued together. But I assure you it is more complicated than I have described. I am still in awe of these, they are so professionally made!

I believe Andy's gun is a Nerf gun? With a logo added to make it look super legit. The logos were made from craft foam.

Overall I was really impressed how we were able to pull together a really cohesive looking group! I hope I get to take part in something like this again in the future. Special thanks goes to everyone who helped make this happen. I'm excited for Squids 2.0! :D

Wednesday, August 19, 2015

Toph (Fire Nation Disguise) - Wig - Avatar: The Last Airbender

This is my first post on Toph. Rather than the traditional green outfit, I decided to make her Fire Nation disguise outfit from season 3. Of all the nations, I really thought the Fire Nation had the nicest designs in the series, but Toph is one of my favorite characters--so this seemed like a good compromise.

This costume was originally supposed to debut at Otakon last summer, and I had managed to get everything finished except the wig and shoes. But without the wig, the costume isn't really wearable, so the costume went on the backburner for a while as I worked on the wig.

I really need to make time to do a real photoshoot of this costume. Perhaps next year...

I thought I would start by talking about the wig--easily the most difficult piece of the costume. This wig took me 3 attempts until I was satisfied with the end result.

It was a nightmare to construct, partially because the reference is so vague. All you can see is that she has a large black blob of hair at the back of her head--which is presumably a bun? I've seen people achieve this in different ways, some opting for a small bun (a bit of a cop-out, and not very accurate), others choosing to do an intricately braided style to create the mass. I wanted to create a smooth rounded "bun" that was as accurate as possible.

My main issue I encountered--which carries over to many costumes--is that I have a small head and not an abundance of hair. This means that 99% of all the wigs I ever bought are loose on me. Back in the day I had waist-length hair which I had difficulty stuffing under a wig, and this would keep it from slipping. But these days, any wig that is remotely back heavy slides out of position like nobody's business. It is a problem I have noticed since I have started to do more elaborate styled wigs (Asuna was a problem in particular because of the heavy metal bells).

To counteract this problem I have found the best way to keep a wig from sliding to to sew a small comb into the front of the wig and then french braid my actual bangs. The comb hooks into the braid and prevents it from sliding out of position. (I did the same thing on my Tomoyo wig.)

Black is such an easy colour of wigs to find, so I was not worried about finding a wig (for once!). To save myself some time, I ordered a ponytail wig from Epic Cosplay, this meant that I wouldn't have to also make my base wig into a ponytail wig first to cover the gaps in the wefts. Their ponytail wig is a short wig that comes with an extension you can wrap around the ponytail base to make it a long wig. This was great for my purposes, as the large extension would be put to use later in creating the bun.

I started by taking out some of the wefts from the middle of the back of the wig. This was done very carefully with a seam ripper. This was to remove bulk under the bun while also procuring more hair to make the bun with.

Out of some back fabric I made the base of the bun and loosely stuffed it. I hand stitched the wefts around the edge. I cut a hole in the middle of the fabric to stick the loose ends of the wefts in.

This is the point where I realized I wasn't going to finish the wig before Otakon, and put it on hold for a while. The next steps were done over the next couple of months before going on hold while I finished my degree and then finally finishing in the weeks leading up to AN.

After that I attached the bun at the top of the wig with a strong hand stitch. I tied the hair that would later be the bangs out of the way.

At this point I also made the wig slightly smaller smaller along the back with some darts that I stitched in to the netting. This helped it fit better. I also hand stitched the small comb into the front of the hairline.

Next I pulled the wig under the bun into a ponytail and stubbed it using regular white glue. Then I cut off the excess hair. 


I also stubbed the bottom of the hair that was draped over the top of the bun.


Next I cut and styled the bangs. The wig was quite thick at the front, so I had to thin it out a fair bit. Because although Toph's hair is supposed to fall into her eyes (which isn't a problem because the character is blind), I kind of needed to be able to see.

To finish off the wig I used some heavy duty hair pins to affix the bun in place.

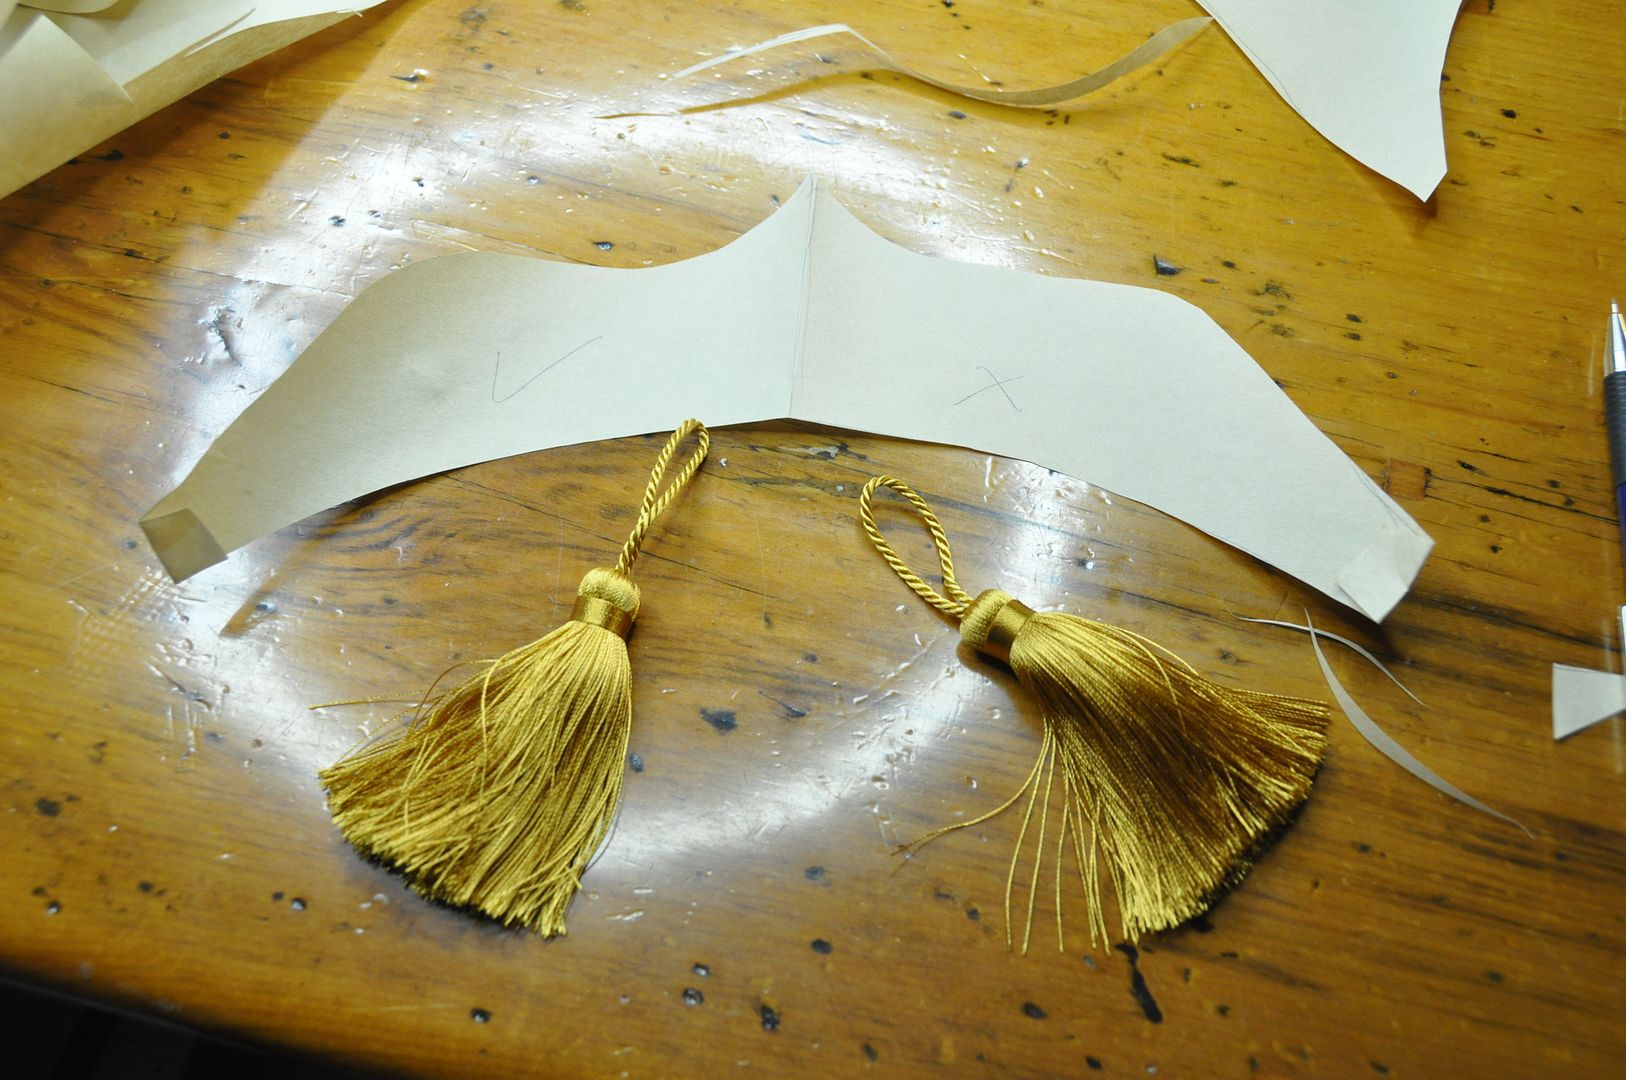
Next I paper patterned the tiara/headband. Once I was happy with the pattern I cut out 2 pieces of worbla and laminated them together with a heat gun. This was to make it sturdier.

This part of the costume was done after I had finished my independent study on worbla, so I used some of the leftover materials to make this tiara/headband.

I molded some scrap bits of worbla into a long roll and used that to make the raised detail along the edge. Then I heated the whole piece and gently curved it into the desired shape.

Using a dremel with a drill bit, I drilled a hole through the center of the raised loops at each end.

I made the tassels shorter to be more accurate.

Here you can also see how the finished wig looks from the side. The bun is a little smaller than the actual character's hair, but I think this is a more manageable size. It is already insanely back-heavy!


Next was priming the surface for painting. Worbla tends to have a slight bumpy texture to it, so I used a couple of coats of gesso and gorilla glue as a filler.

I primered it with a red spraypaint. The red colour underneath helps to counteract the green-ness that is common in most gold paints. I gave it a light sanding, before doing a second coat of red.

I painted it using a bronze acrylic paint as my main colour and then a gold for the raised detail. It required a few coats.

Then I used a clear gloss spraypaint as my final layer, to seal it and give it some shine. "Metallic" acrylic paints tend to be more sparkly than glossy.

I looped the tassels through the holes I created earlier and hot glued them in place.

To attach the headband to the wig I hot glued a small metal comb and two ties to the inside of the tiara. The metal comb would hook into the wig and then the ties were tied under the bun at the back. This made it secure, but also easily removable.

And in a nutshell, that's how I made the wig. Hopefully I can get some more side shots of the wig at another con.

Friday, May 1, 2015

Cloche Hat with Kanzashi

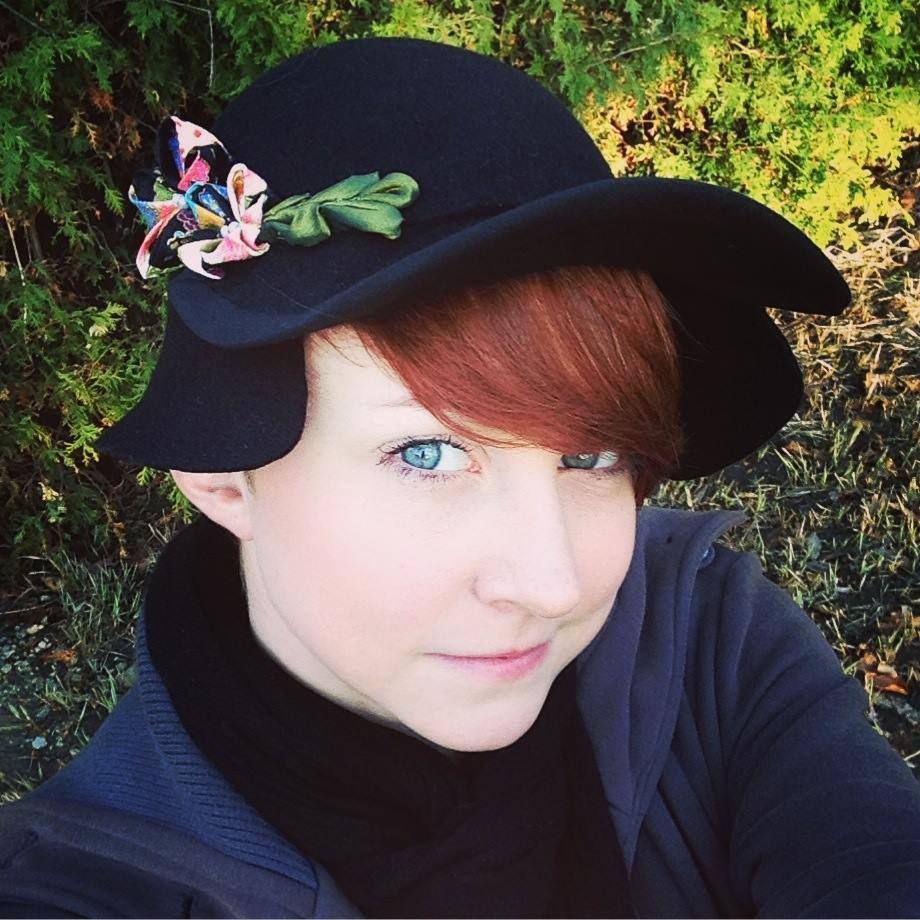
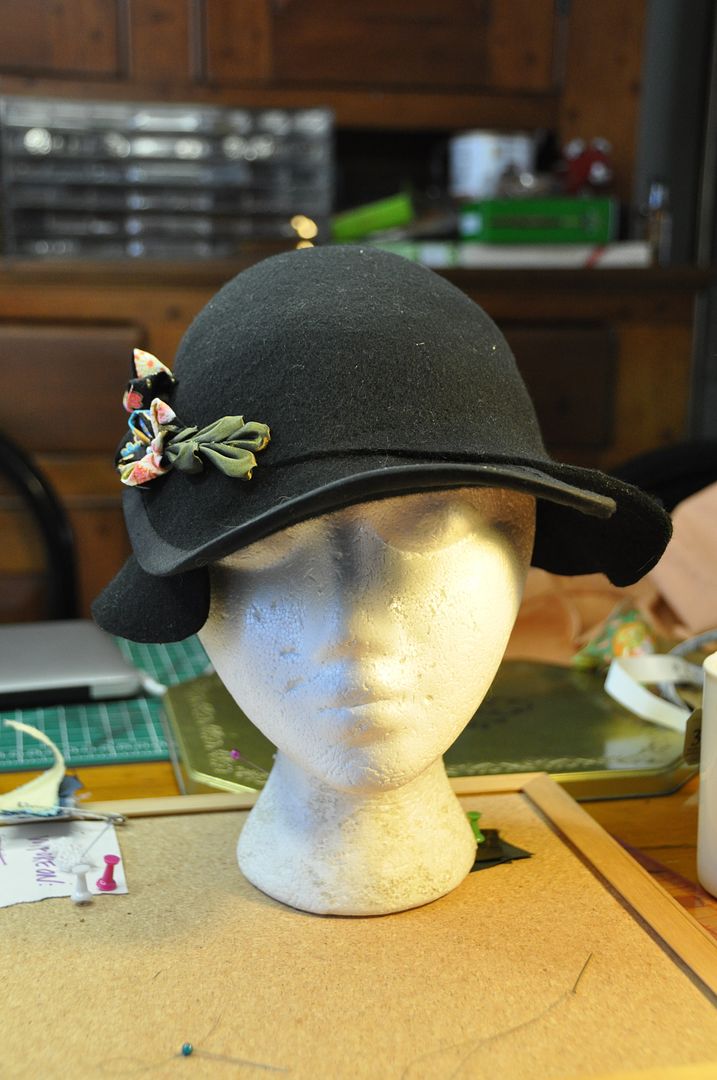
Today is a short entry about a project I did for school! The goal was to change the shape of an existing felt hat using steam, and decorate it. I created a 1920s inspired cloche hat that I decorated with kanzashi flowers. Pretty cute right? ;D

For doing this it is very important that the hat is 100% wool, otherwise it won't really work. I found this nondescript black hat at H&M for about $25.

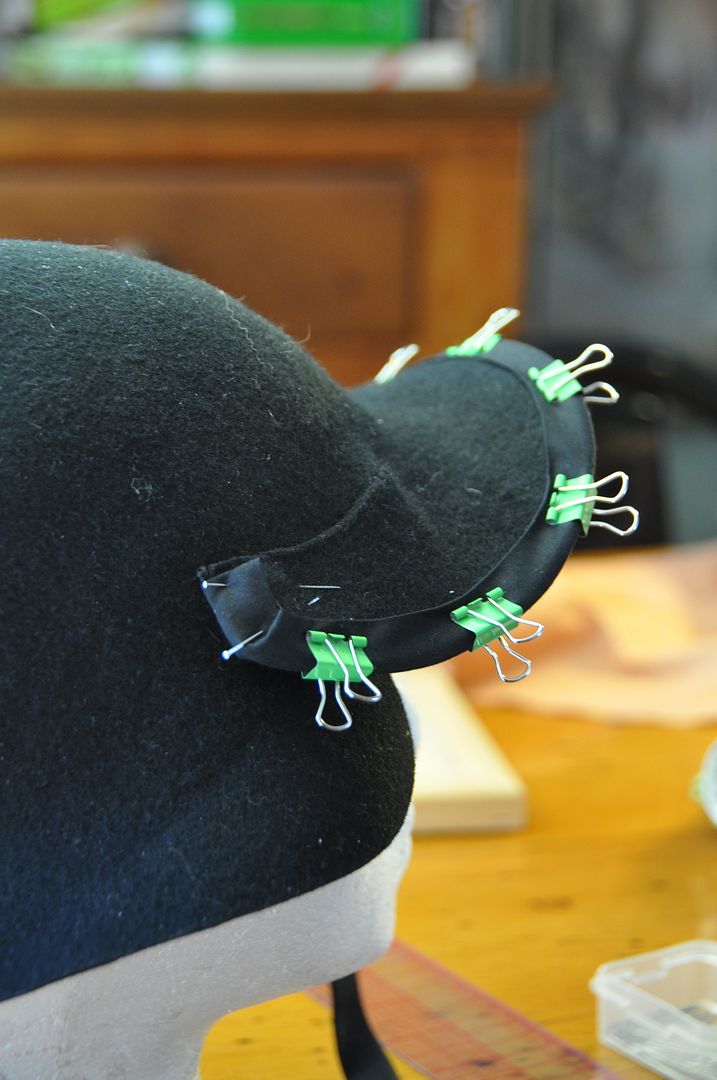
I cut off most of the brim, and from the cutaways I created the second brim layer. Using a tea kettle I let the hat steam and continued to stretch it by hand and over a metal bowl to change the shape. I did this until I was happy with it/the crease was gone. Then I hand stitched brim #2 on, then I wired the edge.  I finished the inside with a gros grain ribbon. This is so the hat wouldn't stretch later.

Once that was done I began to create the decorations. I found this great tutorial on making kanzashi flowers--Japanese style folded flowers. Using the same method I folded the leaves as well. It's basically like origami for fabric.

I finished the edge of the hat with a bias tape I had in my scrap bin.

I finished them by adding a couple of beads to the center, then I sewed them to the hat. I had a lot of fun making them and they turned out pretty great. I got the fabric when I was in Tokyo this past winter.

Then I had a cute hat to hand in! And to wear later! ;D

Friday, February 20, 2015

Suede Mittens


Hey all! It's a pretty chilly February day, so I thought I would post about some cute mittens I made this past Christmas! (This purple pair was for my Secret Santa gift!)

They were surprisingly easy to make, but look pretty professional. My one suggestion for anyone who wants to work with leather/suede: invest in the proper needles for your machine.

The pattern is based off of  pair of mittens that I actually own.
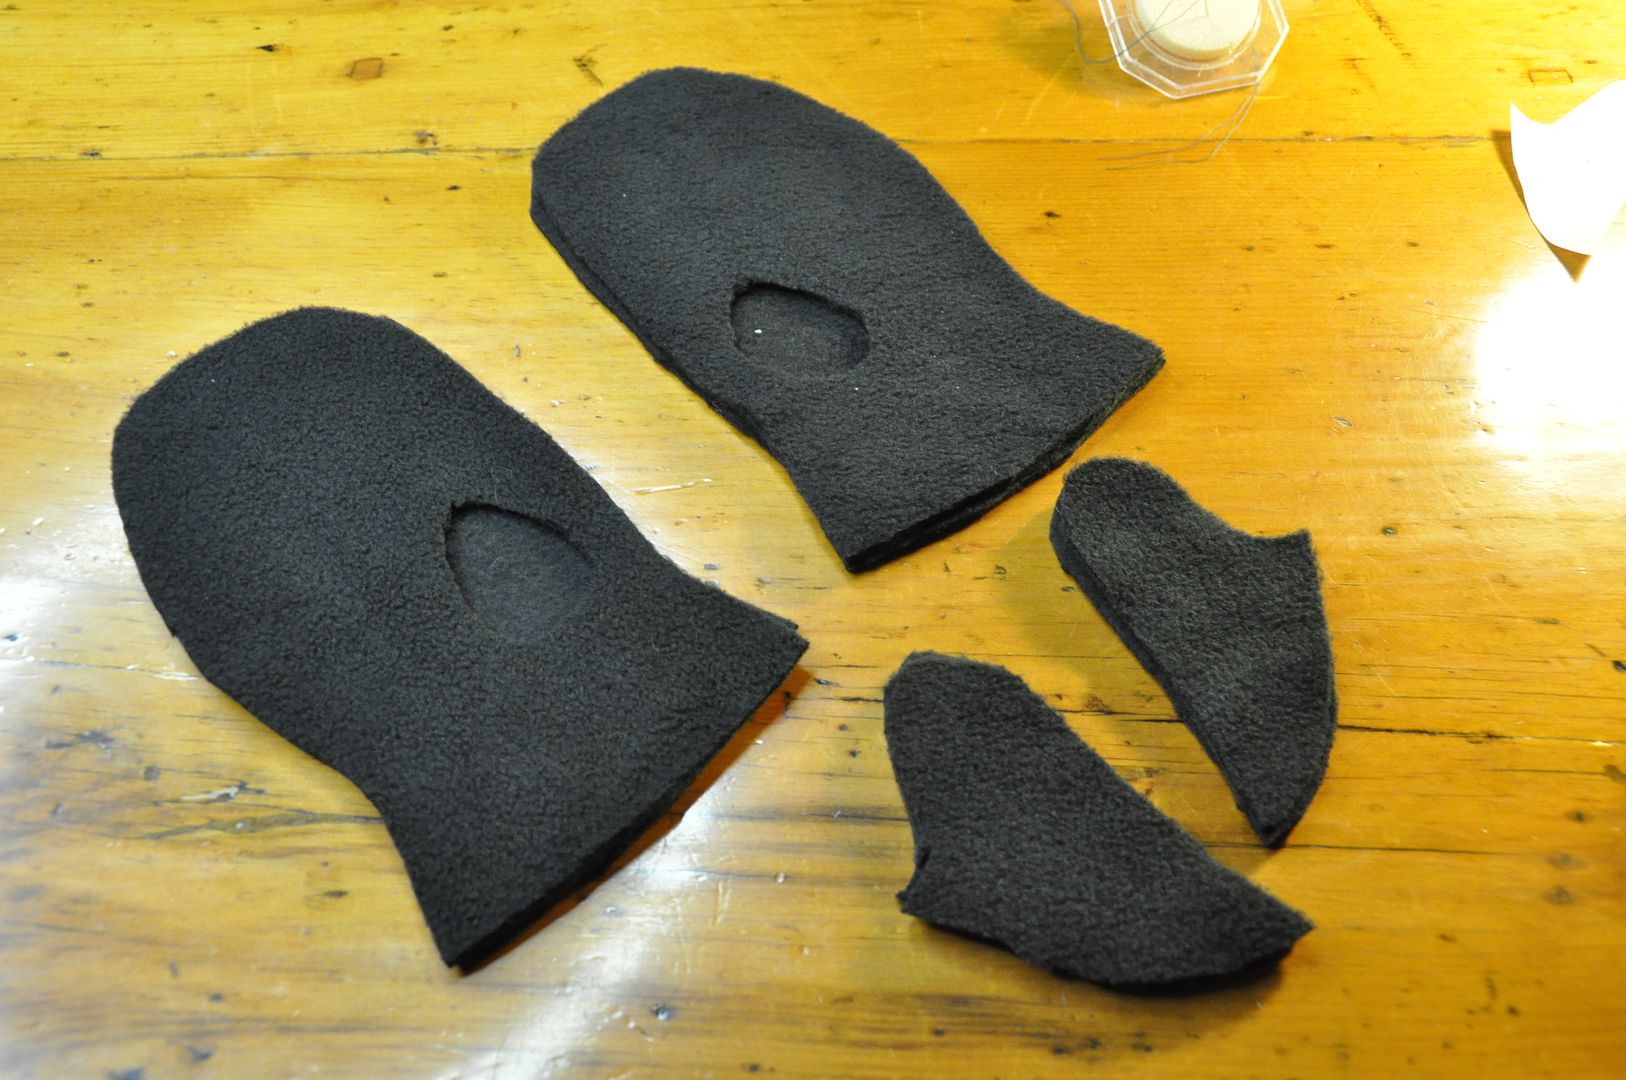
First I cut out all the lining pieces in black fleece (this fabric is leftover from my Toothless onesie!). Using those as a template I traced my outer suede pieces to be lightly larger. This is so that the lining fits comfortably inside. Because both fabrics are fairly bulky.
I also cut out the holes for the thumbs and the thumb pieces. You could alternatively just make a 2 piece mitten pattern (with the thumb part of the main piece), but I find these have more articulation.

Keep in mind when cutting out your pieces that you are supposed to be making 2 mirrored mittens and that the fabrics have good and bad sides. Make sure you don't end up with 2 rights or 2 lefts! When you construct the lining make sure the good side of the fabric is going to be on the inside.
I first sewed my linings together, for the main part of the mitten, assembled the thumb pieces and then sewed the thumb into the thumb hole.
Then you repeat the exact same process with the suede, except that the good side should face out and the seams should be on the inside. And also that the stitching will be a lot more challenging. I had some difficulties getting the thumb piece to properly fit in the hole...
Binder clips can be useful to a certain extent, but don't rely on them too much.

When both the inside and outside are assembled, they are slotted inside one another and a trim is sewn along the unfinished cuff to hold both pieces in place. On the purple ones I just used a strip of my purple suede folded over the edge. On the black pair, I ran out of black suede, so I used a contrasting green suede. This black pair with the green trim was made for my older sister! ;D

Thursday, October 16, 2014

Marimekko Tablecloth

Hey guys! Happy Canadian Thanksgiving!

For Thanksgiving this year we also took a trip up to our farm to have a bbq. Last bbq of the season, because it's gotten really cold all of a sudden. It's pretty much become a family tradition to do a bbq Thanksgiving weekend.

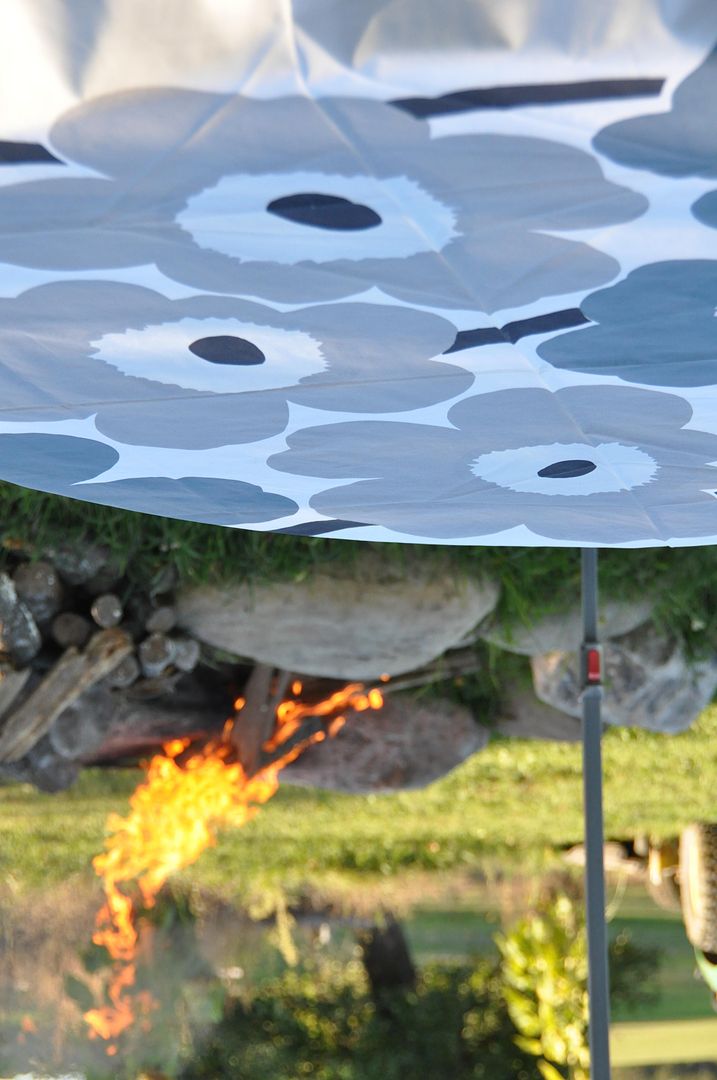
As a commission for my dad, I made a nice tablecloth for our round table at the farm. The fabric I used is a Marimekko print, with a black quilting cotton for the edges. This was a really easy sewing project, as it is a square of fabric that I put a wide border on.

Dad picked this large print from Marimekko. He wanted a blue-grey to match the giant spool we use as a table. 
First I cut a square out of my main fabric. The table itself is 4' in diameter, so I wanted to make sure it would overhang a bit, otherwise it would look a bit silly. I decided to just base my measurements off of the width of the fabric itself.
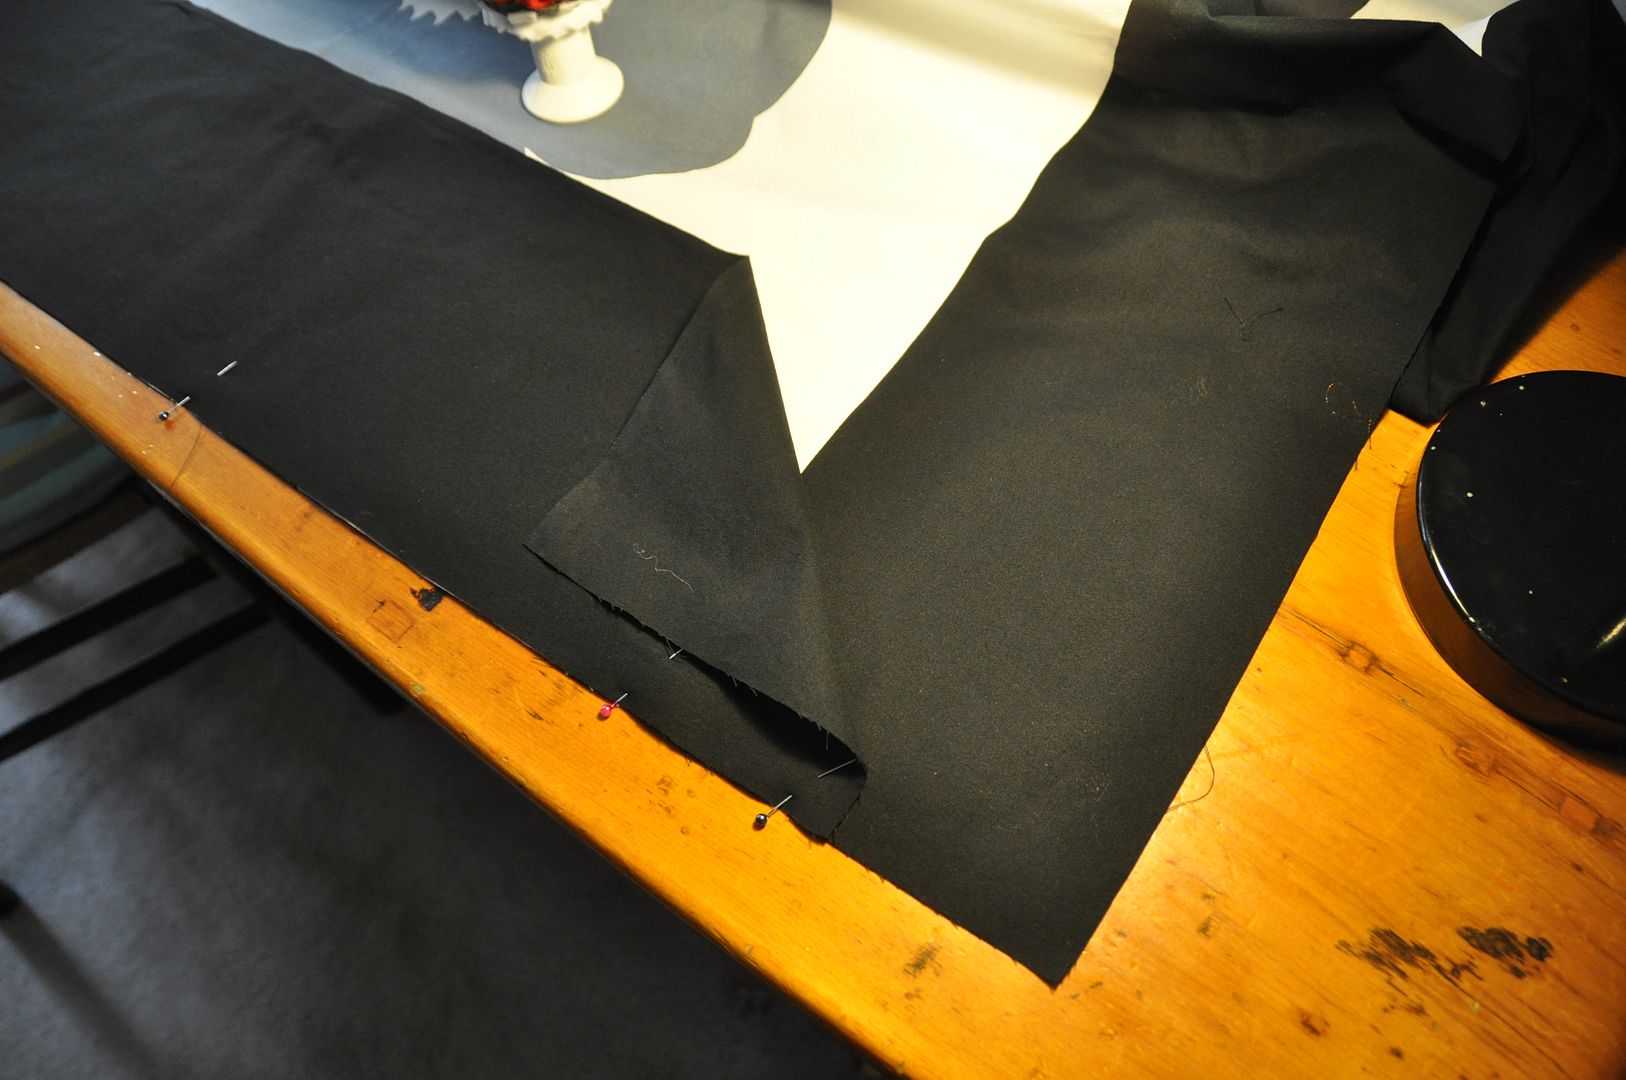
Next I cut the strips of fabric that would be the border pieces. These were all cut to measure 3" longer than the length of my square + 1/2" seam allowance on each end. The width of these strips was 7"--this would make a 3" border with 1/2" seam allowance when folded in half lengthwise.

I sewed my first strip onto the tablecloth, right sides together. Then I ironed the seam flat, pressing the seam allowance towards the outer edge.
The next one was sewn similarly to the first, the overlap now being sewn to the border instead of hanging. I repeated the process until all of the sides were attached.
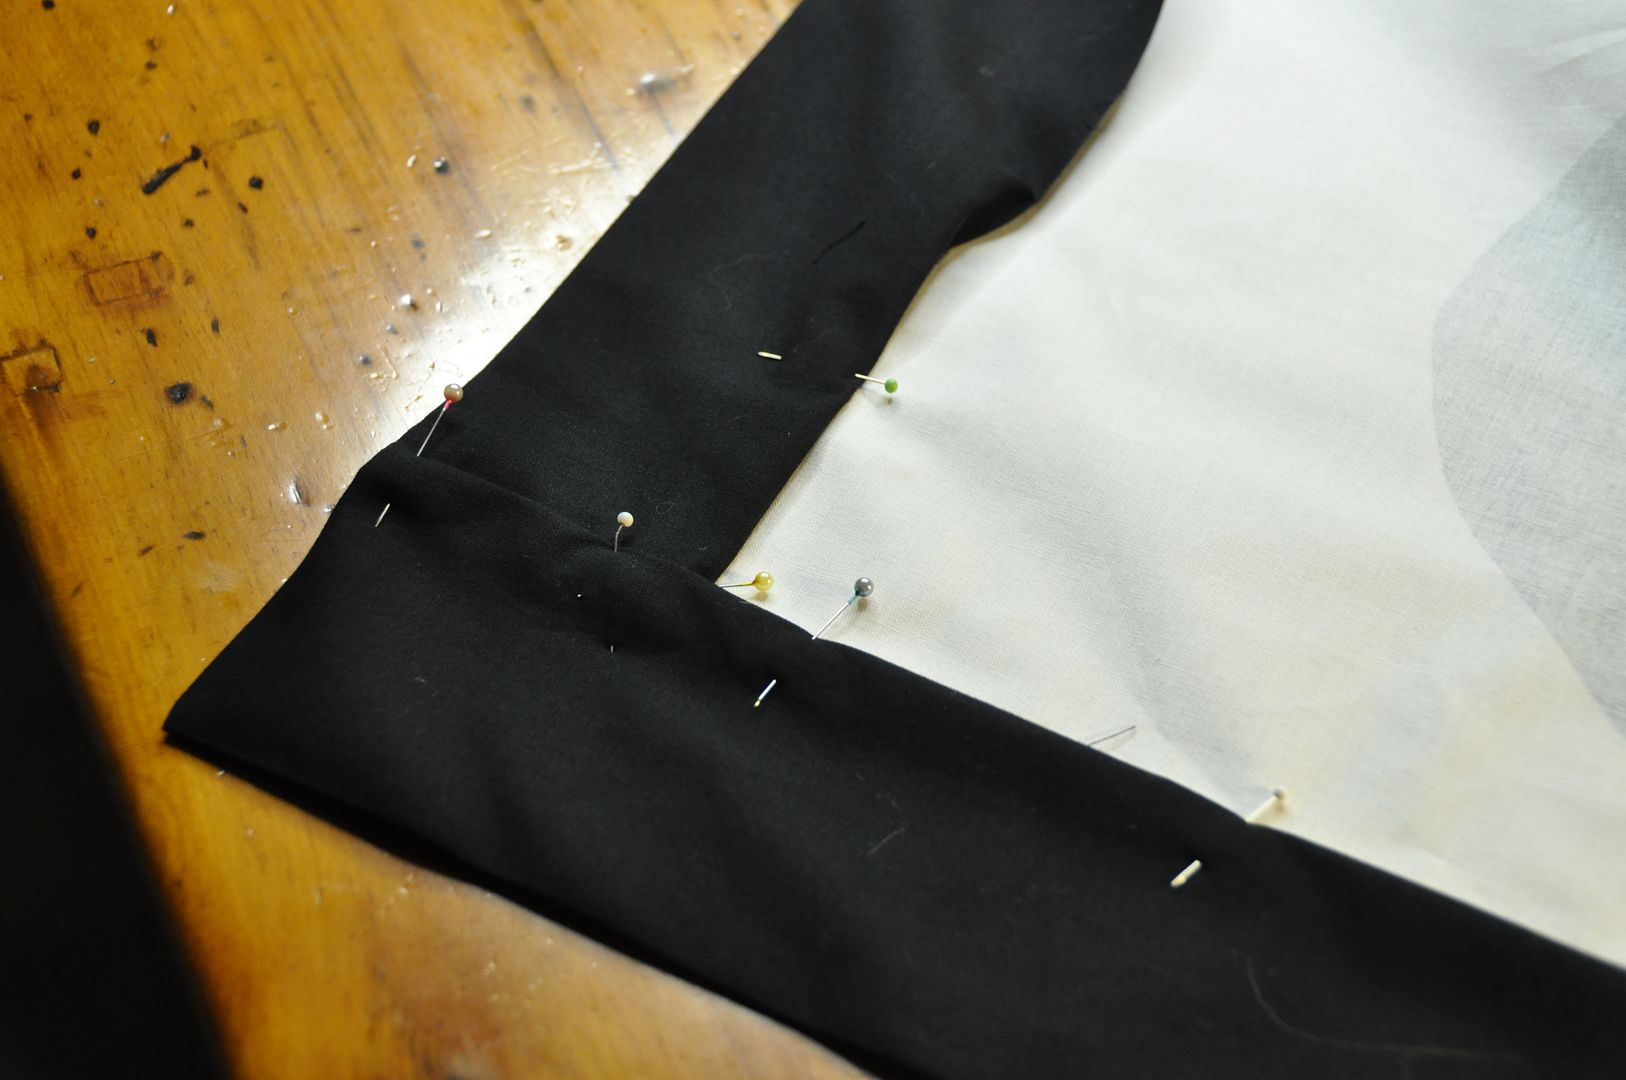
I carefully marked 3" from the seam line, folded and pressed the border. I folded the seam allowance to the inside and pinned it in place, making sure that it still overlapped the seam line. I ironed the whole piece, then I ditch stitched the border.

Lastly I closed up the open edges with a neat slip stitch. Presto!

Overlapped corners are much easier than mitered corners. 

Thursday, October 9, 2014

Sakura - Sailor Suit - CardCaptor Sakura

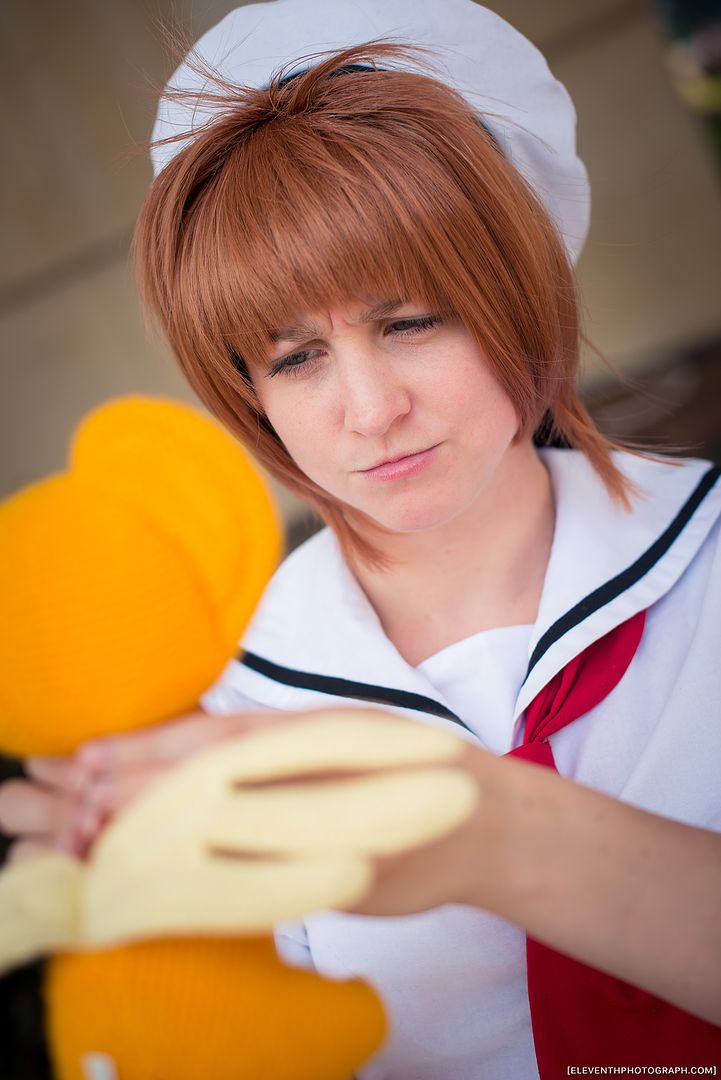
First let's take a look at my more casual Sakura outfit: her school uniform (spring/summer version). I've been cosplaying for over 10 years and this is my first school uniform/sailorsuit outfit I've ever made! Crazy huh? This cosplay was especially picked for Otakon because it packs into a suitcase really easily, I already had the wig, and it has very few layers which makes it great for insanely hot weather.

I got a couple cute pics with EleventhPhotograph at Otakon this summer! Many thanks! Also thanks to my sister Alex for lending me her adorable Kero plushie while she is away in Japan!

One thing I made sure of when I bought my fabrics for this costume was that none of my fabrics were shiny. I've seen many school uniform costumes done with shiny fabrics and I always think it looks cheap... Lets be honest, I've never seen a real school uniform that is shiny/satiny. It's also not coloured to look shiny in the show either.
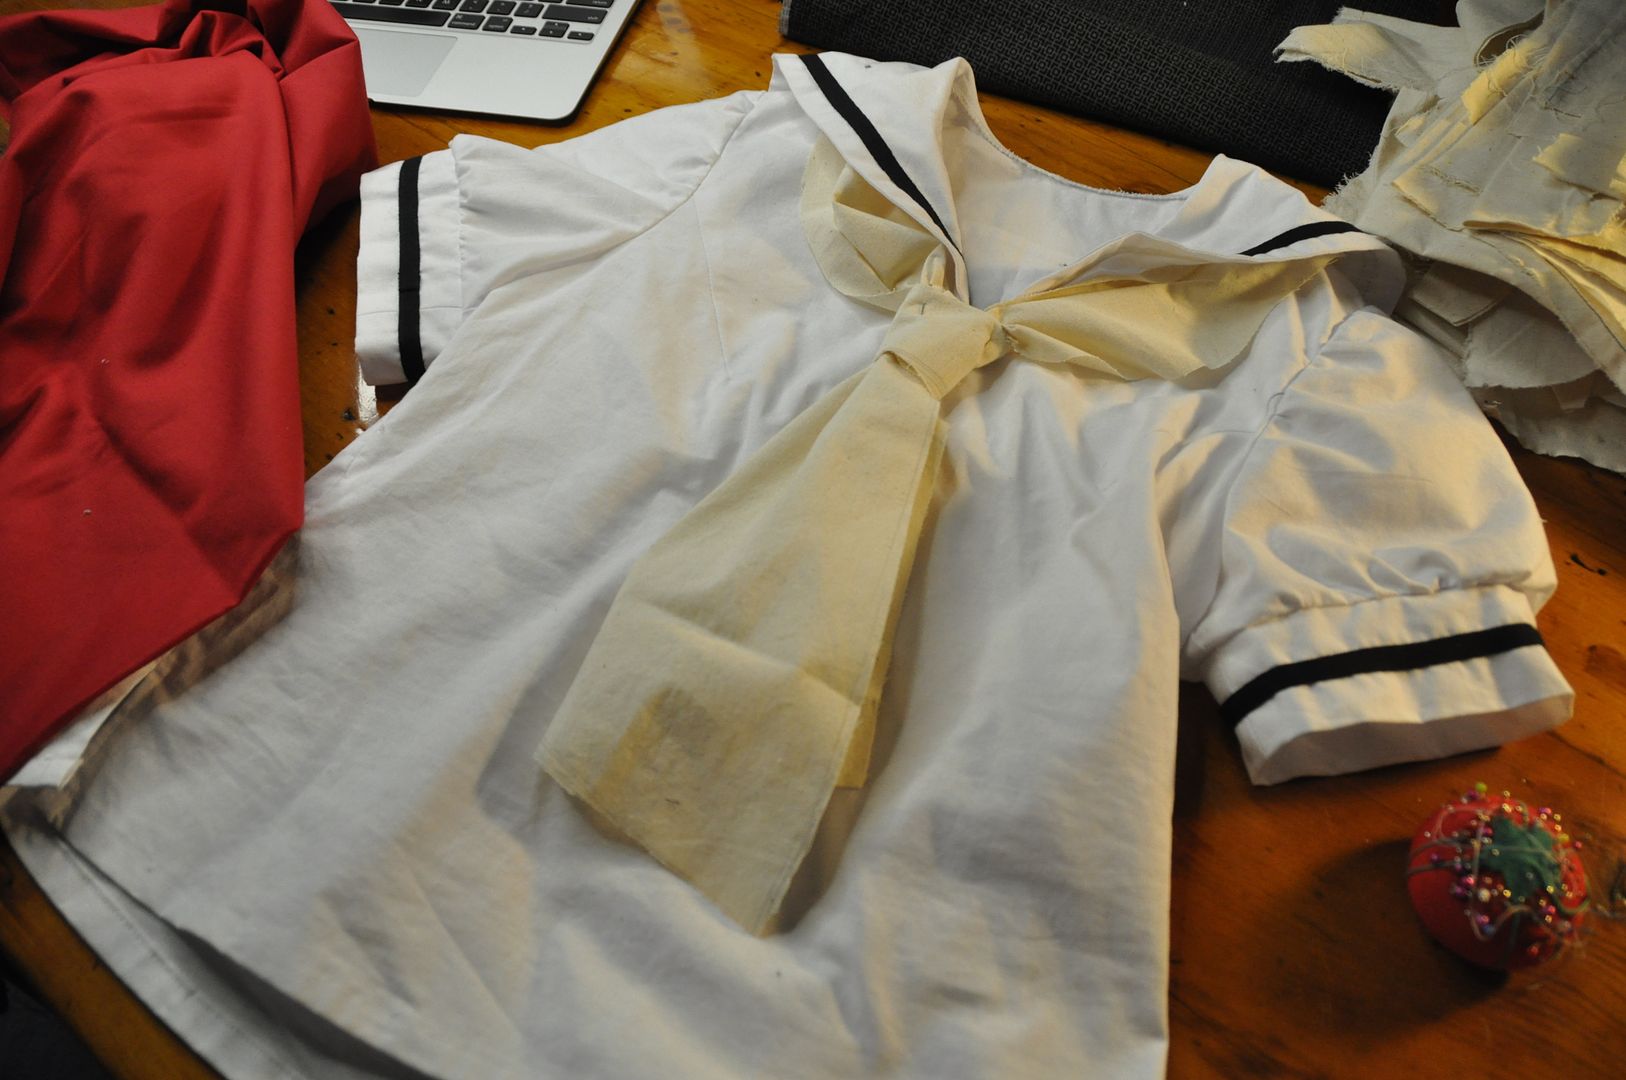
To start I patterned a basic block for the shirt, ignoring the usual front and back darts in favour of only having a small dart come in from the armhole at the bust. I curved in the sides a bit at the waist, but did not make the shirt tight fitting. This was to ensure that a) I could slip it on over my head even though it is not made of stretch fabrics, and b) so I looked younger. Sakura is supposed to be a between grades 4-6, meaning she is a child, so I wanted to make sure that I didn't look too old for the character. In spite of the fact that I am not particularly well-endowed, a fitted blouse would still reveal curves that a child would not have, so hence a more loose fitting shirt was in order.

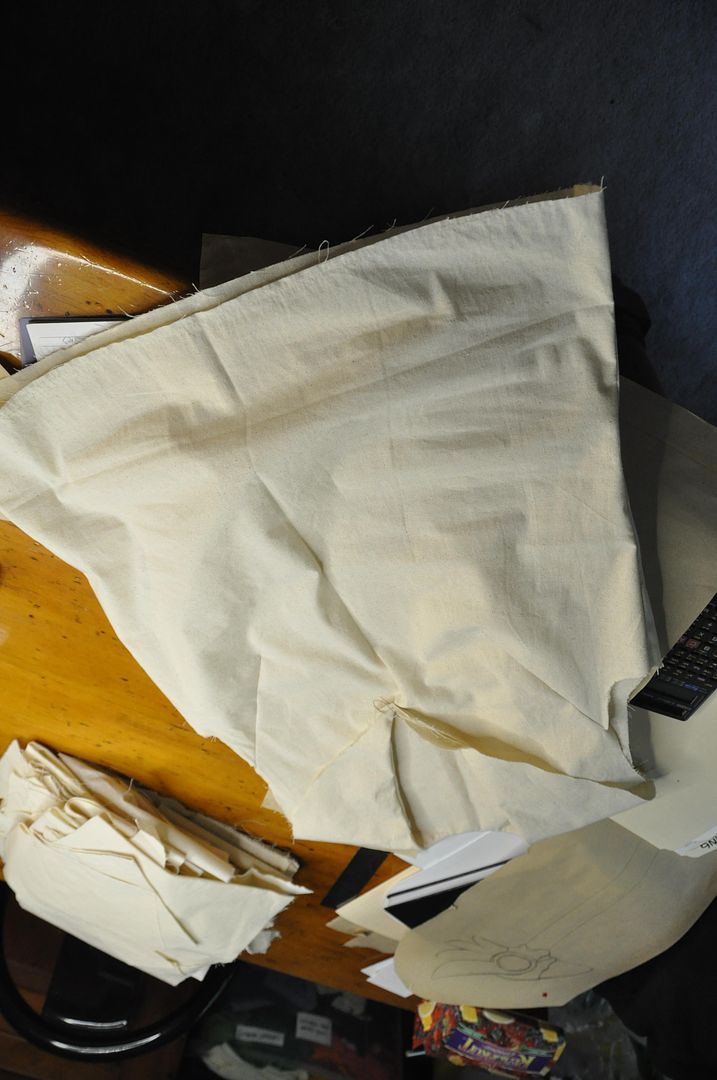
I patterned the neckline and sailor collar by creating a mockup of the shirt and then draping the collar on Molly (my Judy) with muslin. This way I was able to easily figure out the proportions.

Once that was done I laid out my fabric and cut out my pieces.

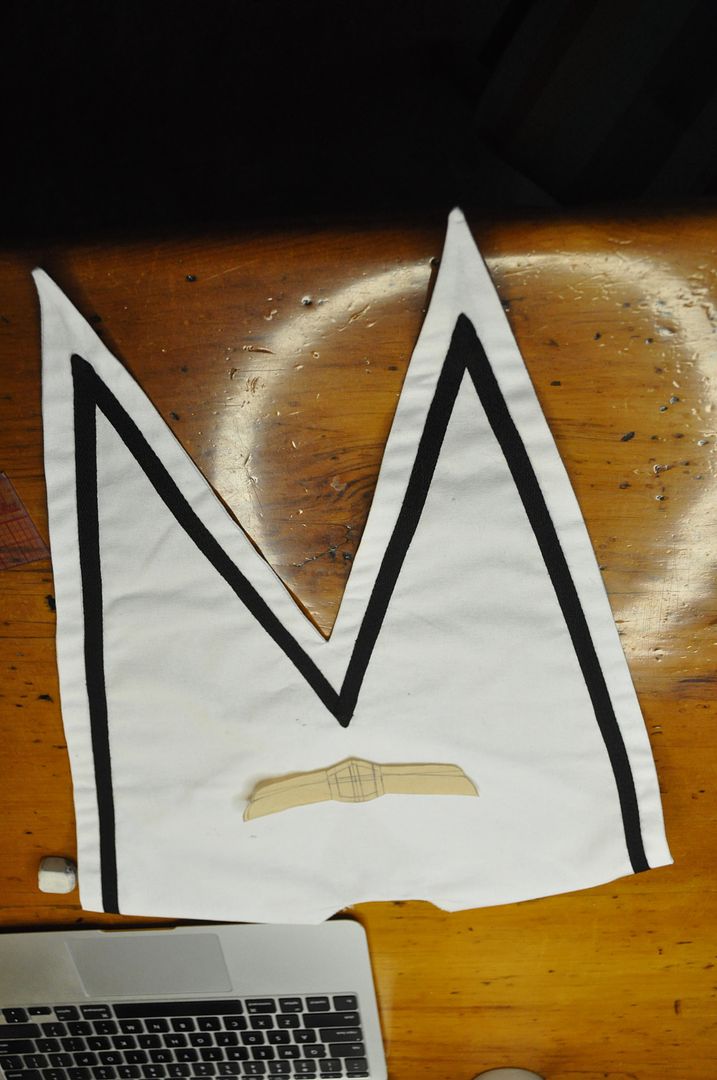
The collar was first sewn right sides together, excess fabric clipped and then flipped right way out and ironed.


I then top-stitched on 1/4" black twill tape to make the edge detail. I made sure my bobbin thread was white (as opposed to black to match my top thread) so my stitching would be virtually unnoticeable from the other side.

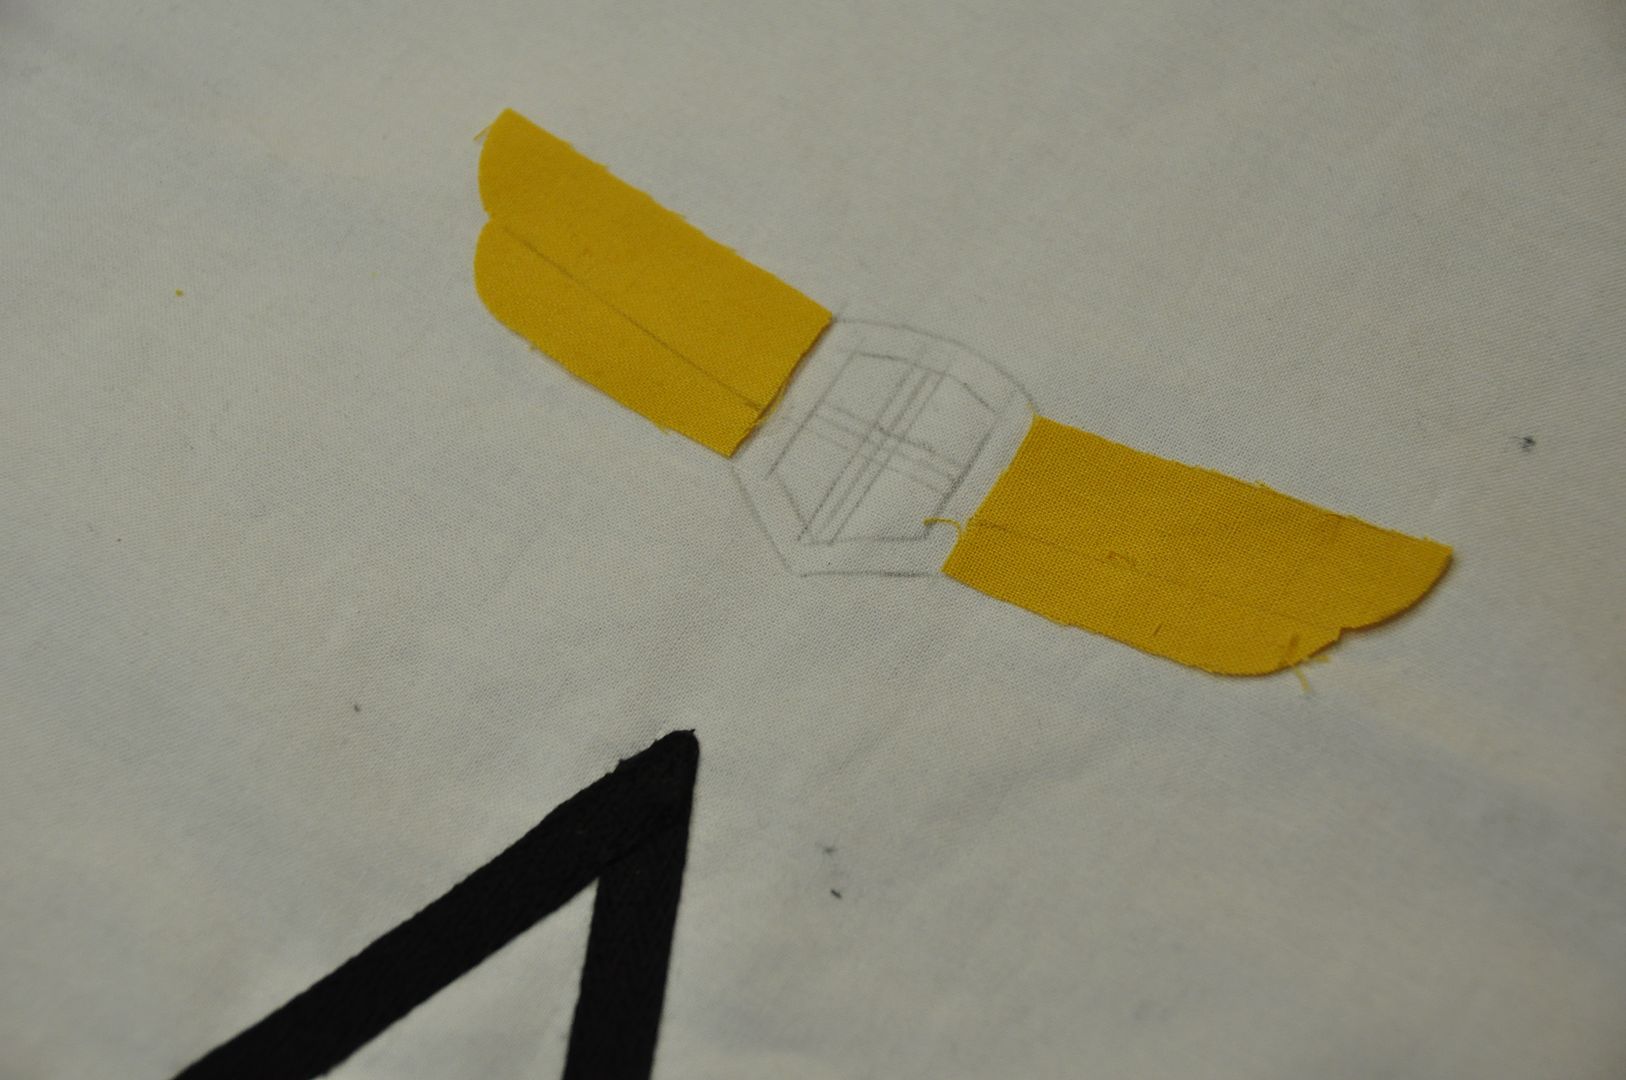
Then I sketched out the crest for the back detail.
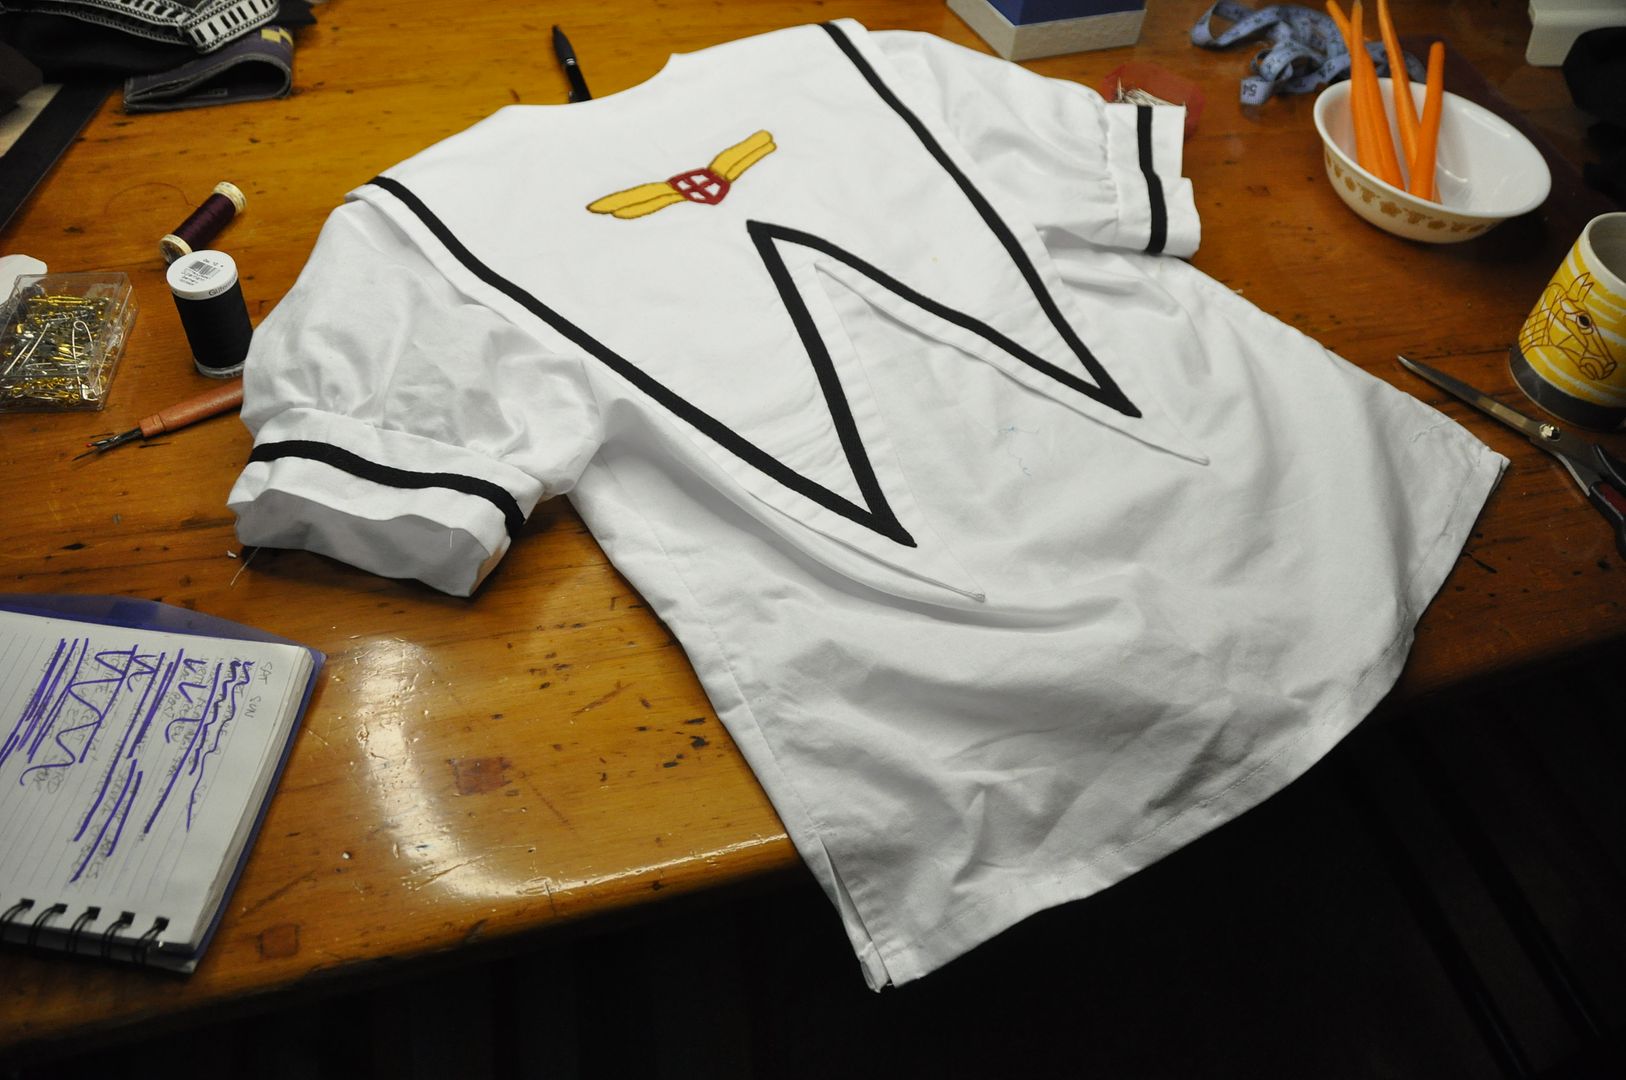
Next step was the appliqué and embroidery of the crest on the back. Using yellow fabric leftover from Kero, I blocked out the areas for the 'wing' part of the crest. This saved me from having to fill that area with an embroidery stitch. Instead I merely sewed around the edges. Next I did the red shield-shaped piece in the center.
After finishing all the seams inside the shirt,  I made some puffy sleeves. I made sure they weren't too puffy, so they were only slightly larger than the armhole. I used a basting stitch along the sleeve cap and bottom and cinched them to the right diameters before sewing them to the armhole and cuffs respectively. The cuffs are just rectangles sewn into a loop and folded in half lengthwise that I have sewn another stripe of black twill tape on.

I hemmed the bottom of the shirt with a simple rollover, but went back and changed the side seams to have a 2" slit up each side.

Then I attached the collar to the outside ans zigzagged the raw edge. I flipped it to the inside, pressed it, then top stitched it down. I took extra care to reinforce the point of the v-neckline.
The last step for the shirt was to create a little triangle  to sit under the v-shaped neckline. It was secured with dome fasteners so it could be removed so I could take the shirt on and off. 

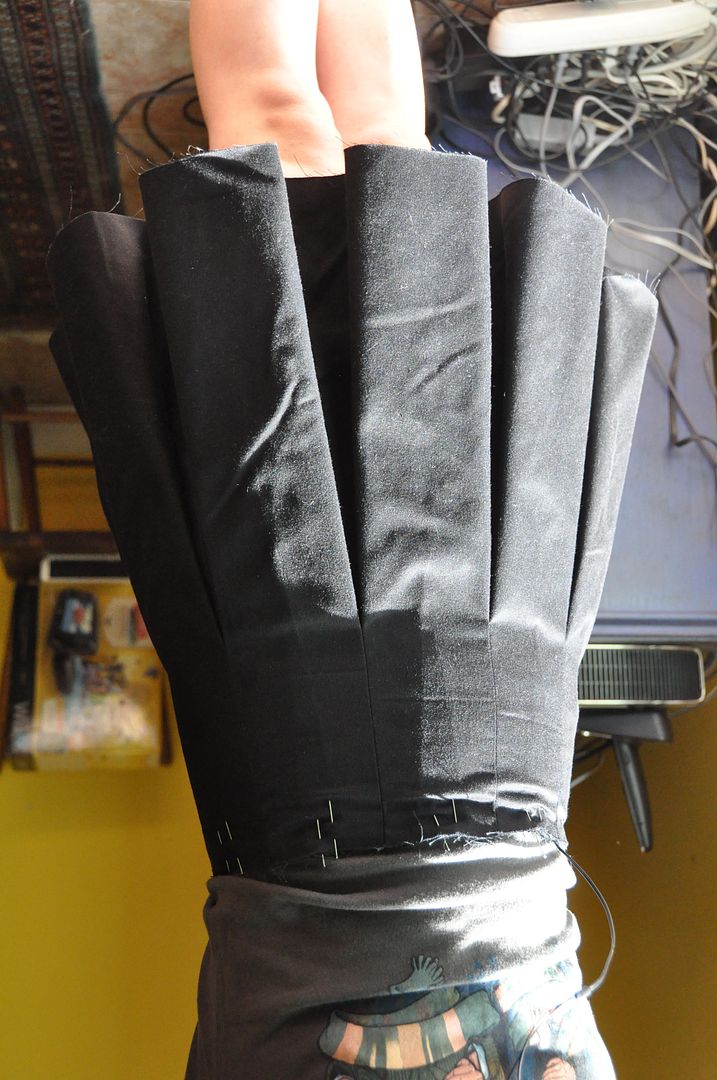
Now lets talk about the skirt. Creating a pleated garment is all about math, unfortunately. The garment has 10 pleats. In order to make it fit snugly at both waistband an over hips I had to take 2 measurements, one at waist, and on 4" down from waist. Then I divided those numbers into 10 equal parts and carefully drew out a pattern piece. Left you can see one of my side panels. The thin trapezoids are the parts that would be visible, the wide ones would be hidden in the folds. 

The hardest part of patterning this was making it so the side seams would be inside a pleat and therefore virtually invisible. 

The size of the skirt at the bottom was arbitrarily decided, but I knew I wanted it to be pretty full, because it's CardCaptor Sakura guys.
Each of my three skirt pieces I sewed the center pleats into before sewing the pieces together. I sewed the center back together and added in the zipper before finishing the pleats directly beside it.
I ironed the pleats centered, rather than off to one side (because that's how it looks in all the reference photos). I didn't press the pleats all the way to the hem either, because I wanted them to still have that soft, rounded look. For your own reference look at my Long Pleated Skirt to see what pleats look like when pressed to one side, all the way to the hem. Very different, right?

Once the pleating and waistband were finished I hemmed the skirt.
The saddest part is I couldn't figure out how to work pockets into the skirt, so this costume has no pockets. Oh well.

Above you can also see my mockup for the hat. Surprisingly this is the item I was most excited to make. I've always loved the hats that Clamp designs, particularly these adorable sailor hats. I love that they magically perch on the back of the head.

When making hat, always take the band measurement while wearing the wig you will be wearing under it, otherwise you run the risk of making it too small!

Below you can see the pattern pieces for this--the pieces on the right are both folded in half.

First I assembled the band, with is a long rectangle, sewn into a loop and then folded in half lengthwise. For the cap first I sewed the c-shaped piece into a circle, then sewed it right sides together with the top of the cap.
I finished the inner seams, then pressed it right way out. Next I attached the band, leaving a gap at center back to attach the black tails. The tails were sewn right sides together, clipped, flipped and pressed. These were then inserted into the gap at the back, splayed at a slight angle, and stitched in place. I then finished the inner seams of the hat.
Last piece to make was the under skirt. Above you can see the pattern, which is completely different from the pleated over skirt which is made of rectangles. This is because a) pleating is time consuming, b) all you see is the edge and c) I didn't want all that bulk under the already considerable bulk of those pleats.

Using the 2 measurements I took earlier to create my pleats, I made the top piece of the underskirt. Then I made a circle skirt piece to attach to that (of which I cut 3, making the bottom 1.5 circles). This ensured that all the flare of the underskirt would be below the stitch line of the pleats, reducing bulk.

I attached a lace trim to the bottom edge as an extra cute detail.
At the center back at the waist of the underskirt, it was finished to remain open. The underskirt was attached to the overskirt by buttons (holes on the underskirt, buttons on the inside of the overskirt). This way it was removable and could be washed separately.

Lastly I made a tie. I mocked it up with leftover muslin scraps, and then made a nice one out of red twill.

Each of the individual pieces were stitched right sides together then flipped right way out and pressed. I top stitched more black twill tape along the bottom of the tie edge. before hand stitching the pieces together. The last thing I did was make a velcro closure at the back.  Because I have no idea how to tie a real sailor tie.