Oh look, a giant sword! Having a sword that large out of metal would not be physically possible for such a slender girl to lift. I can barely lift the foam one with 2 hands, and it is only 5 pounds!?
Haha, weaponry is actually pretty fun to make. I enjoy making props a great deal, which is why I like to choose characters with weapons, items or tools.
This weapon is the blade form of
Ensis Exorcizans, which is Asuna's artifact is the story. (When it actually appears as a blade like it's supposed to!) With it she can exorcize demons and cleave through rock. >:D
This is the second part of my Asuna tutorials. You can find how I made
the wig here. More to follow obviously!
First I would like to talk about how I made the sword, but I would also like to talk about how I
should have made the sword. Ah... hindsight. I don't anticipate ever rebuilding this specific blade, but for future reference, these are some things that would have seriously helped with the weight factor
and the structural stability. My main problem is I was so focused on making this sword as solid as possible so it wouldn't break or get ruined, I failed to realize that the combined weight of all my materials (even if they were all really light materials, like foam and plastic) would make this blade impossible to lift one-handedly...
The first thing I did was actually draft my blade full scale using autocad. By doing this I was able to create an accurately proportioned replica, giving myself real measurements to work from when I went to cut out the pieces. Using reference pictures from the manga, I decided on a length measurement, using my own height as a starting point. The blade itself is a bit taller than the character, so I knew that the blade had to be taller than 5'-2" (my height). Then the handle and pommel piece extends beyond that by about 10". It took a lot of tweaking until I came up with a drawing I was satisfied with, but by doing this first I ensured that the sword would be exactly what I expected.
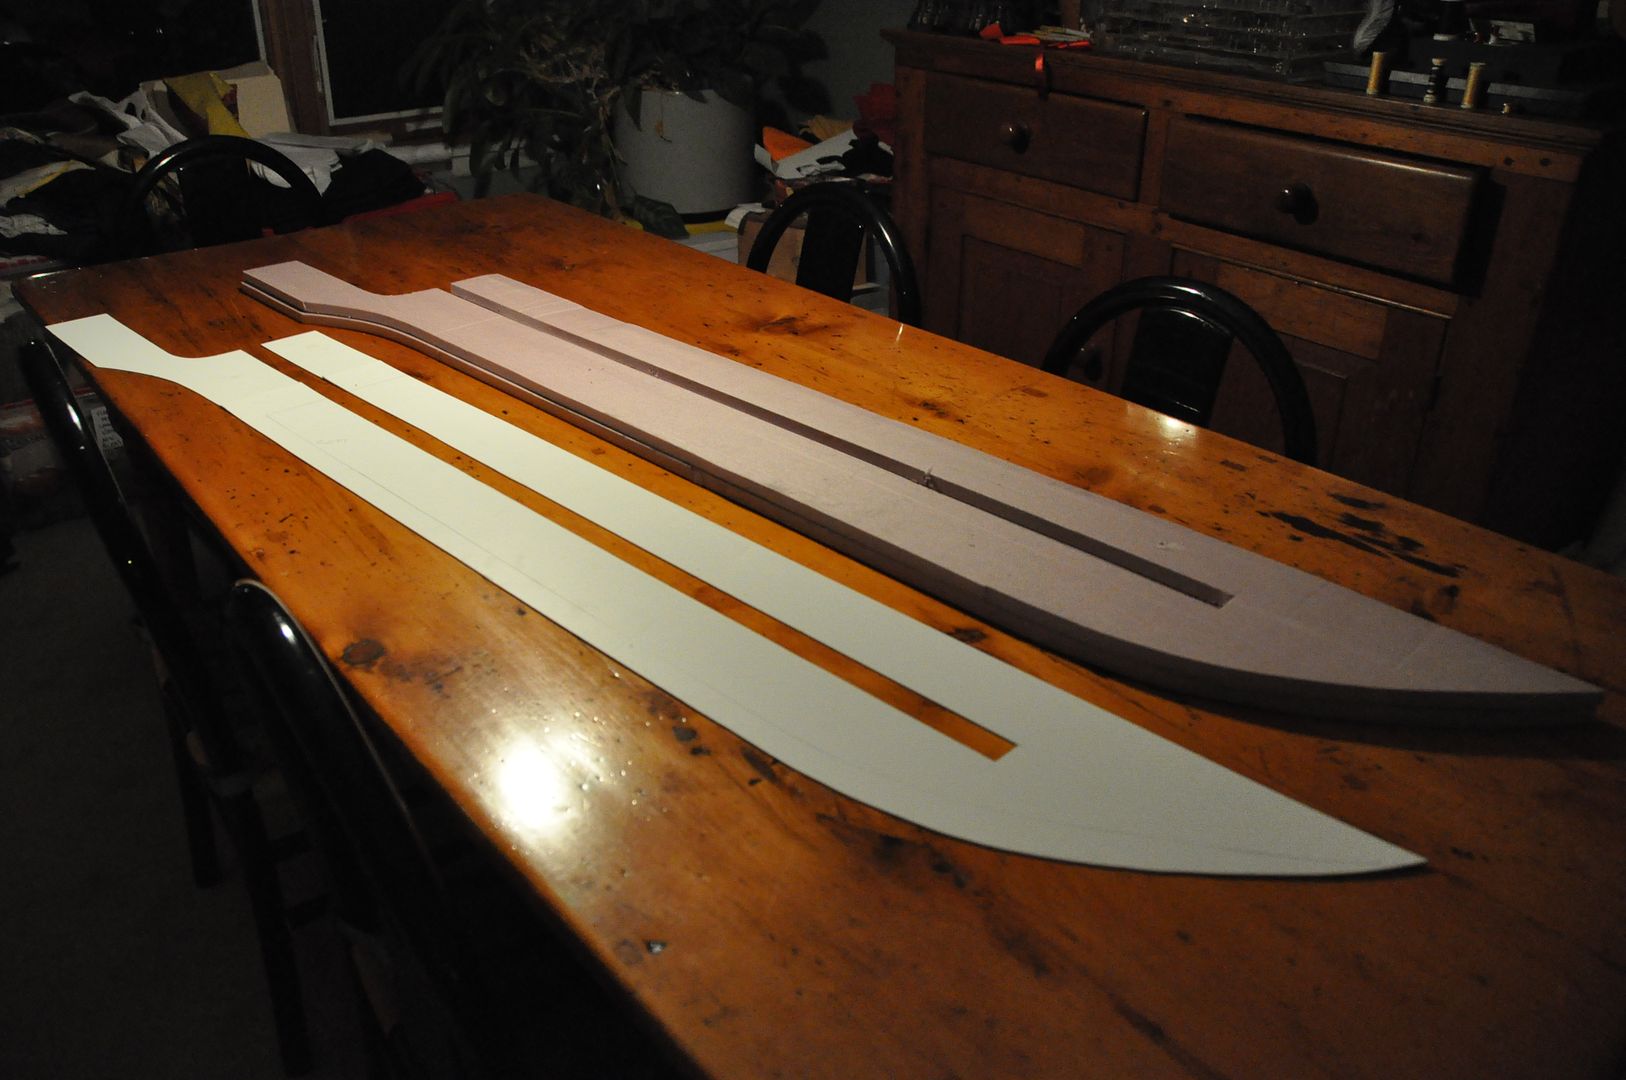
So after a couple false starts, I began the sword using a slightly different method than that of my previous blades. Basically the blade itself is a sandwich of layers. The center layer is styrene plastic, with two pieces of 1/2" insulation foam on either side. The styrene layer would be the pointed edge of the sword, by making it out of styrene, it ensured it would not be easily dented. The foam on either side would be beveled, carved to create the point. There are then two more, smaller styrene layers on each of the flat faces, protecting the flat part of the foam. These were all cut using an exacto knife.
In the middle 3 layers I cut a long trench where the handle dowel would be inserted down the length of the blade to increase structural stability. (This would be covered by the outer two panels.) The middle three layers were contact cemented together and left overnight to dry. (I needed the outer two left free for now so I could do detailing on them.)
Sounds pretty rock solid right? That's exactly the problem. I assumed that because all my materials are so light, it would be fine. I was wrong. This is where I made the first mistake.
What I should have done here is also cut several hollows into the inner layers of the blade. These air pockets would have kept the sword much lighter, while still keeping structural stability.
The trench I cut was just a touch too wide, so I wrapped the handle in some fleece to help it fit more snugly. It was then inserted and hot glued in place.
I used the outer panel to draw a line where I needed to bevel to, I traced the edge of the piece on each side. I carefully carved the edge out of the foam.
Meanwhile, on the outer panels I drew the inscription, "Ministra Magi Asuna". I had great difficulty finding decent reference pictures of inscription itself, so I am thankful for fan forums, where some lovely person on the internet was able to find me 2 decent reference pictures in the span of about 5 minutes. They were
this one and
this one. Because this is an illustration, the letters were just drawn on in very plain block letters. So I took a few liberties and made the lettering correspond to the design better. These letters were then painstakingly carved out of the face of each panel, giving texture to the piece. Special thanks to my friend Alli for helping me do this lettering, it never would have gotten finished without her!

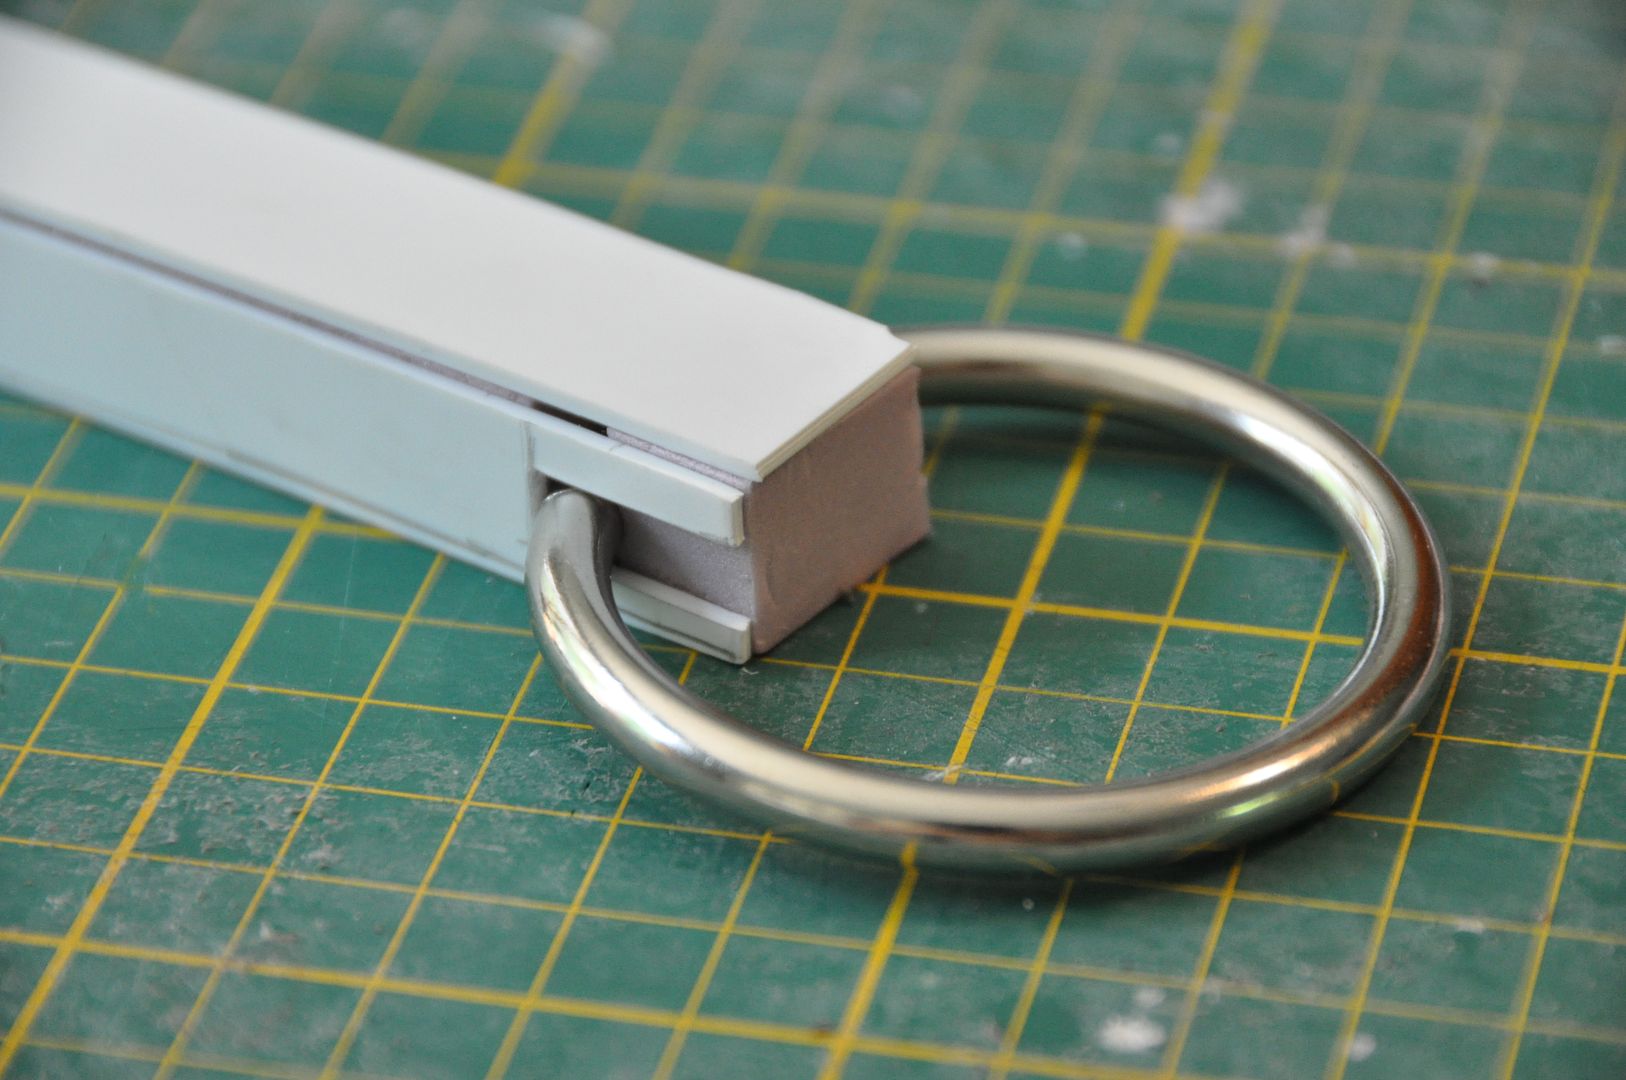
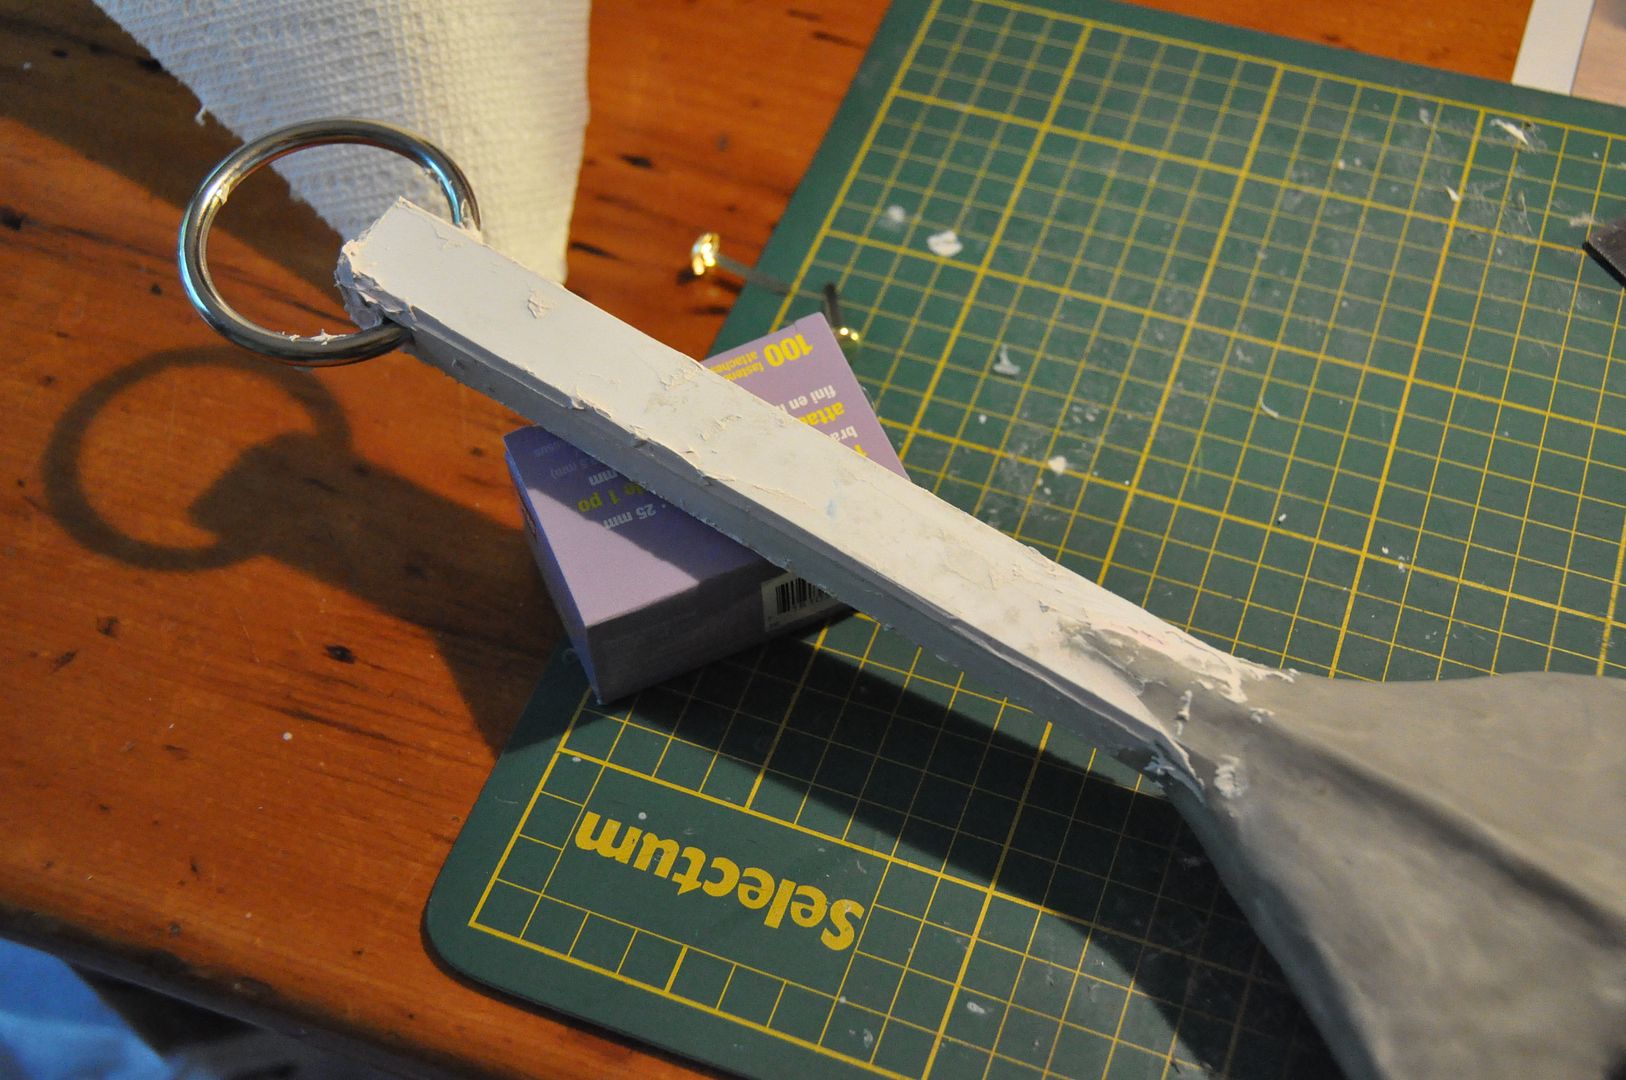
The next part I began working on was the pommel. I created the long piece with the metal ring on the end using a long strip of foam with styrene facings.
A slit was cut out of each side, so the ring could be slotted in. Then the pieces were hot glued together. (The little gaps would be filled later)
I also cut a long strip that I glued down the back edge of the blade, giving that edge and the point a cleaner finish.
Now, here is the second mistake. What I should have done was have the handle extend into the pommel piece, instead of just gluing it on the top. It would have been better both structurally and aesthetically.
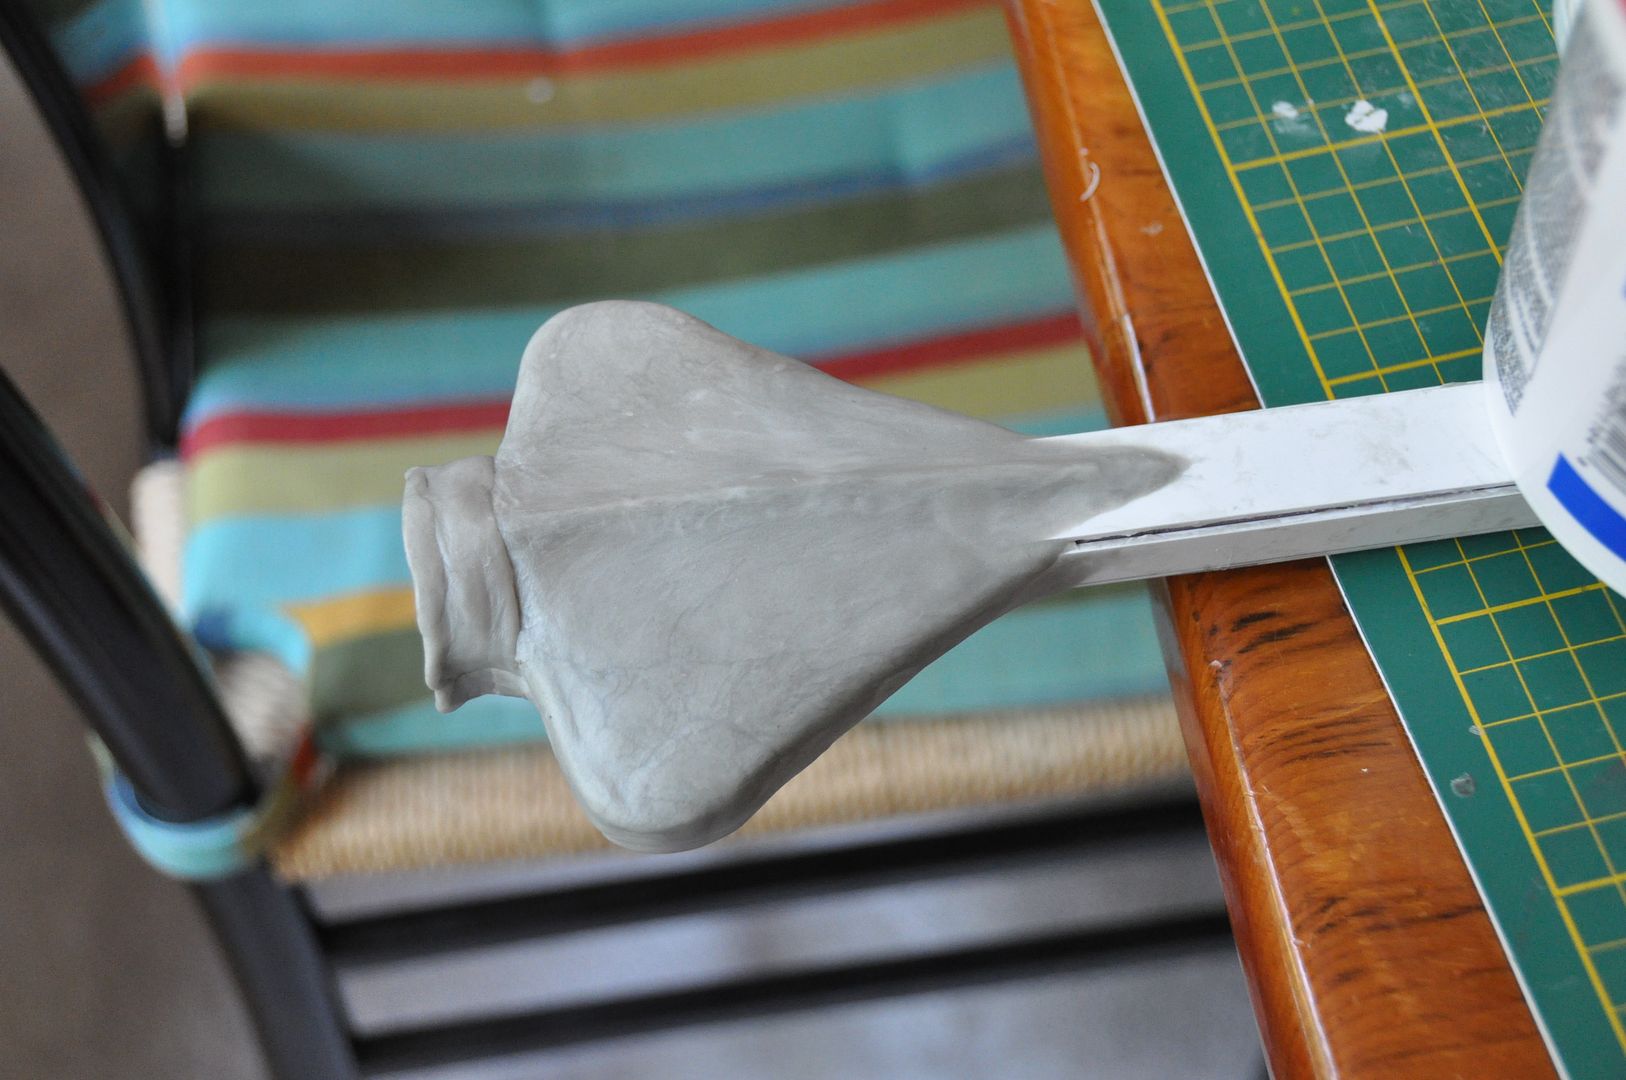
Next I sculpted my detail piece. I used apoxie sculpt, which is great because it dried rock hard and virtually indestructible, however it is quite heavy, hence the 2 fins created out of pink insulation foam that I would used as a base. Instead of being solid apoxie sculpt, I only had to do a thin layer to cover the foam center, making it much lighter than it would have been otherwise. I also made a socket to stick the handle in so it would attach more securely.
The faces were then glued on using contact cement.
I then covered the blade edge in a layer of drydex. (This is a wood filler used in construction projects.) After it dried I sanded it smooth and then applied any touch ups necessary. Those were sanded once more, then I coated the blade edge with clear gesso to prep it for spray painting. I did the same process with the pommel piece.
Next was paints. This was done in layers. First the whole word was painted with a grey primer. Then two coats of matte black. Then the whole sword was painted with a dark metallic coat. Lastly I used tape and newspaper to cover everything except the blade edge, which was finished with silver to match the armour. The whole paint job was then sanded using a fine grit sandpaper, making it look less sparkly, and more weathered.

Had I had more time, I would have used different paints (the dark metallic was too dark for what I wanted), but Home Depot does not carry Krylon products anymore, so I was stuck with Rustoleum brand, which doesn't have nearly as much selection in metallic paints...
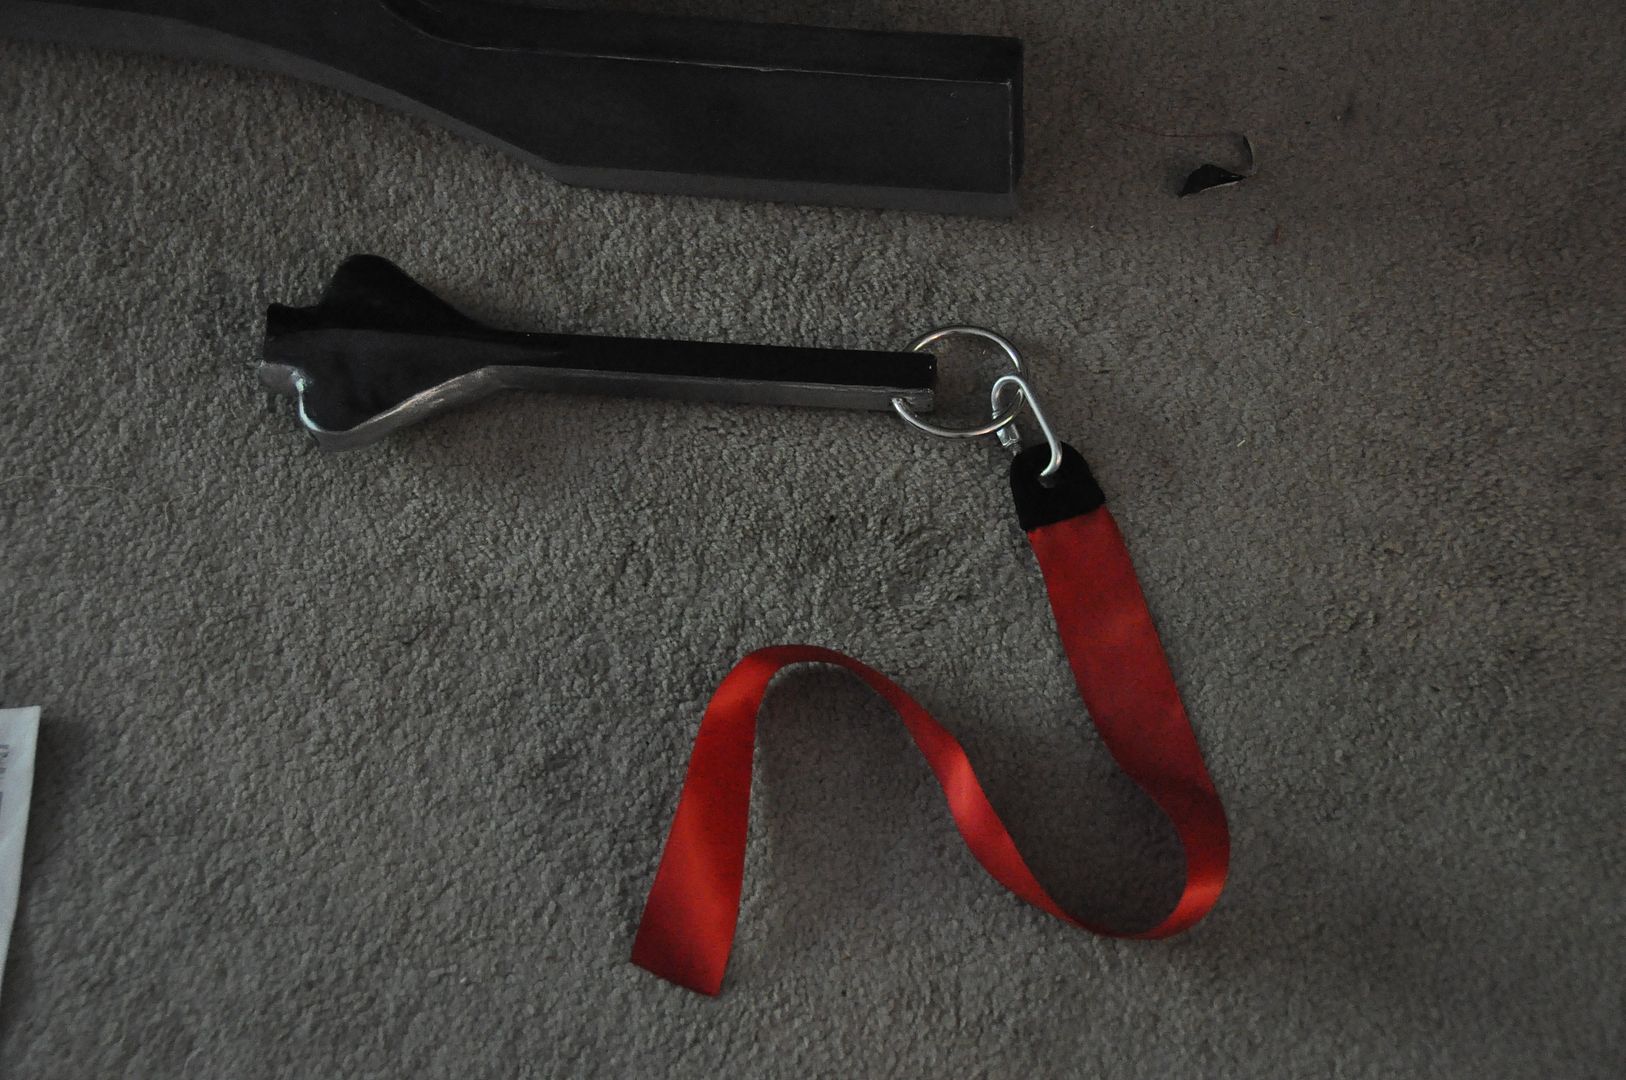
I made the ribbon end detail using my black fabric. I made 2 d-shaped pieces, that I stitched right sides together and flipped right way out. I cut a hole in the center which I zigzag stitched around the edges of the hole to prevent it from fraying. The hole was made large enough for my carabiner link to pass through.
The last step was to epoxy and then hot glue the pommel to the end of the grip. And voila! A giant sword!
Unfortunately, it sustained some damages at the convention, most noticeably on the tip, which will need repairs before I wear it again. Most likely I will use a combination of apoxie sculpt and drydex to fix the crack/chipped area and then retouch the paint in that area.

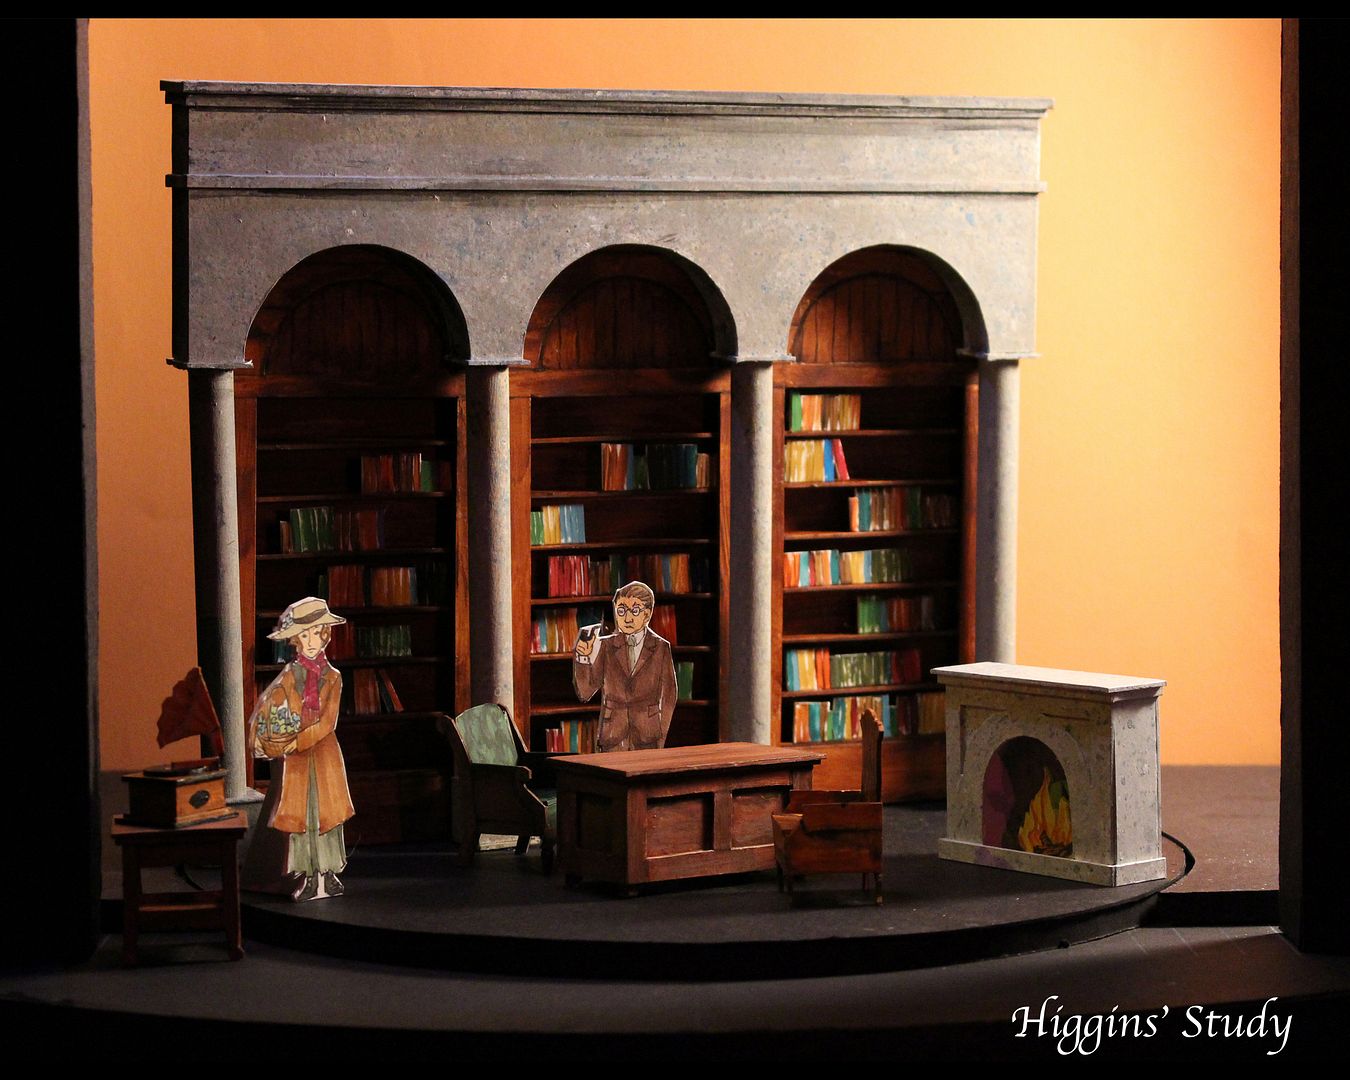

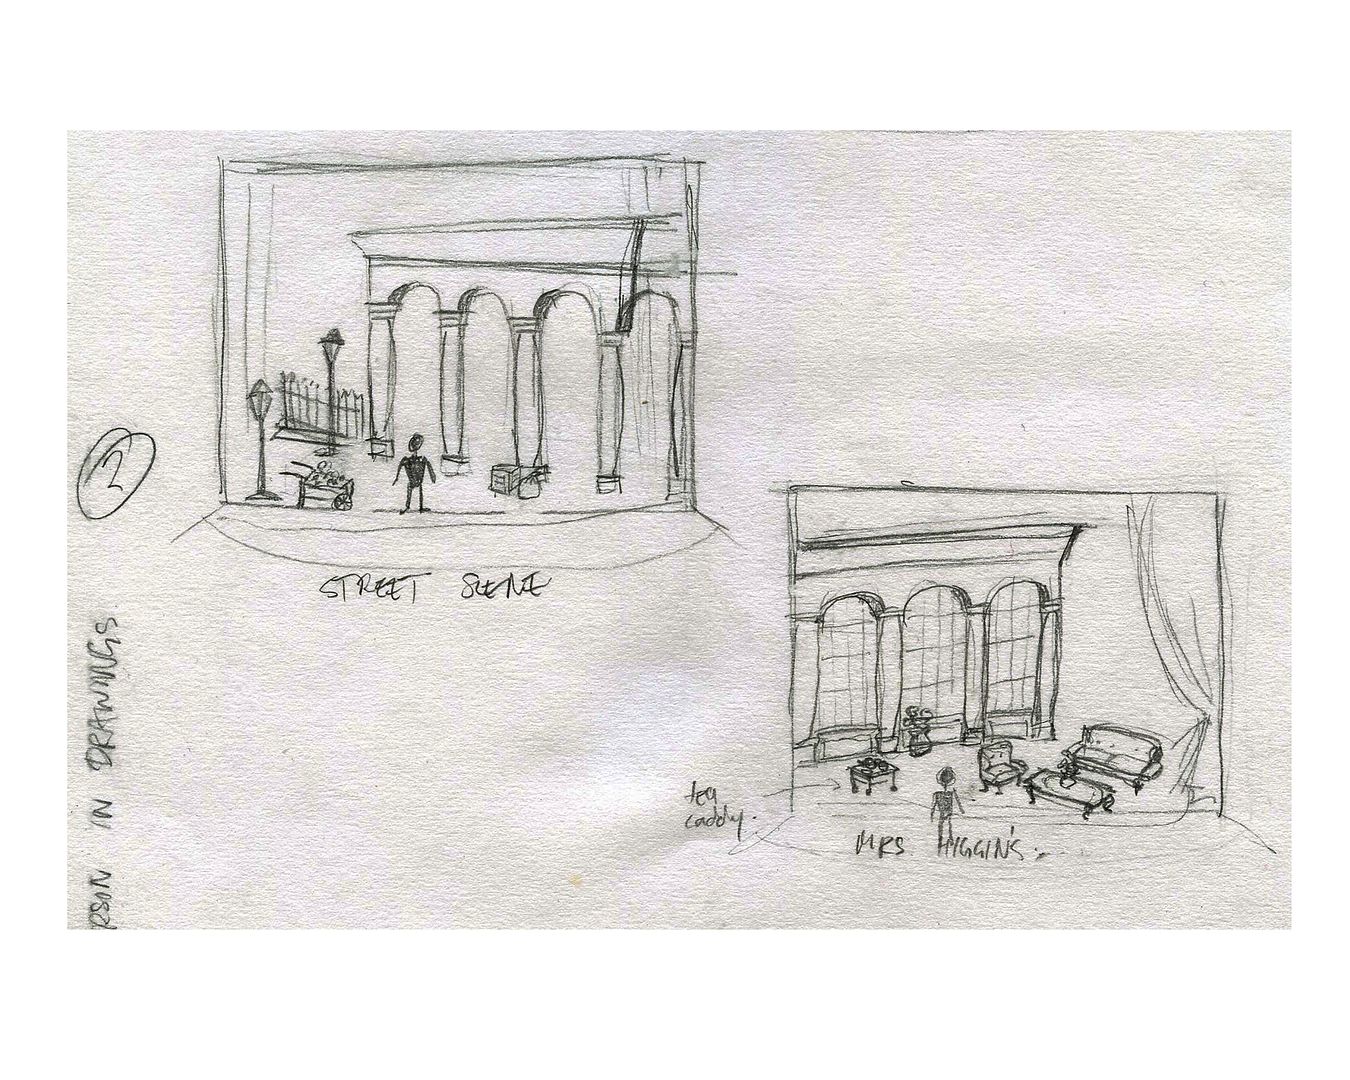
 The archway is the centerpiece of the design, onstage for the entirety of it. It sits on a turntable that allows it to rotate to create different locations/scenes both indoors and outdoors. I was inspired by both the architecture of London, as well as the woman's silhouette in the costume of 1912.


 There are a few other scenes I designed, such as the ball and the racetrack, but those were not built for the project as I ran out of time and energy. The ball would have had the arch centered at the back with drapes hung behind and at the side of the stage. The racetrack would have had the same placement except no drapes, instead using the fences at the back and cafe tables in front. The racetrack scene is by far my favourite scene in the whole play.