Showing posts with label turquoise. Show all posts

Tuesday, June 28, 2016

Make Up Cases


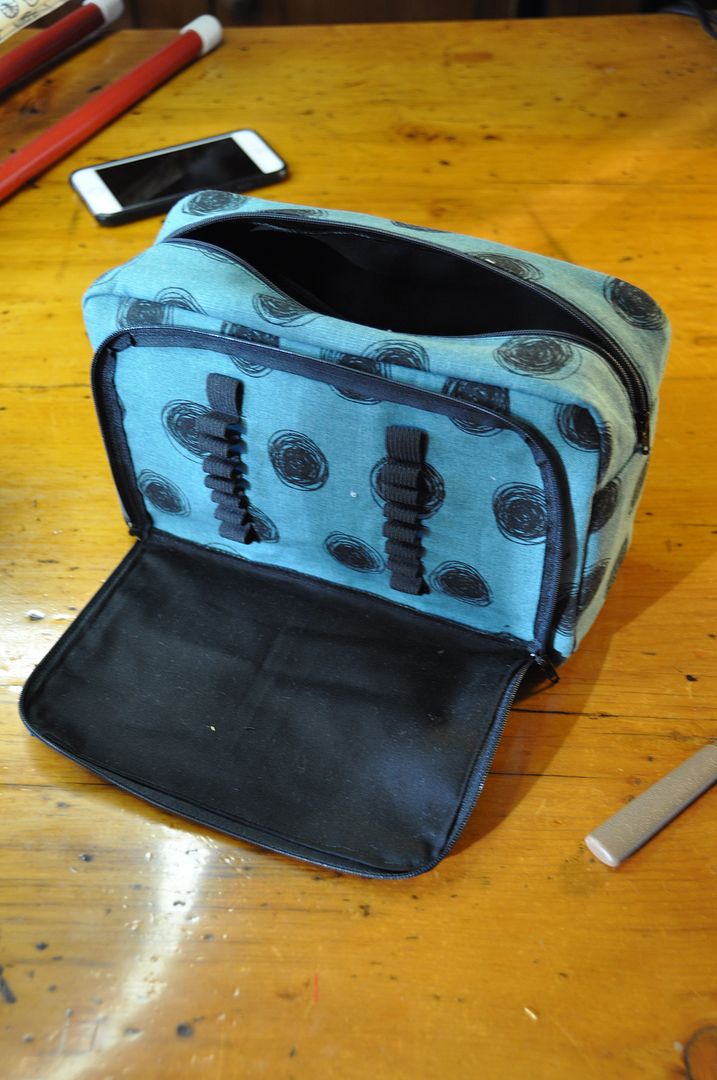
Just a quick post showcasing some custom make-up cases I made for my sisters this past Christmas.

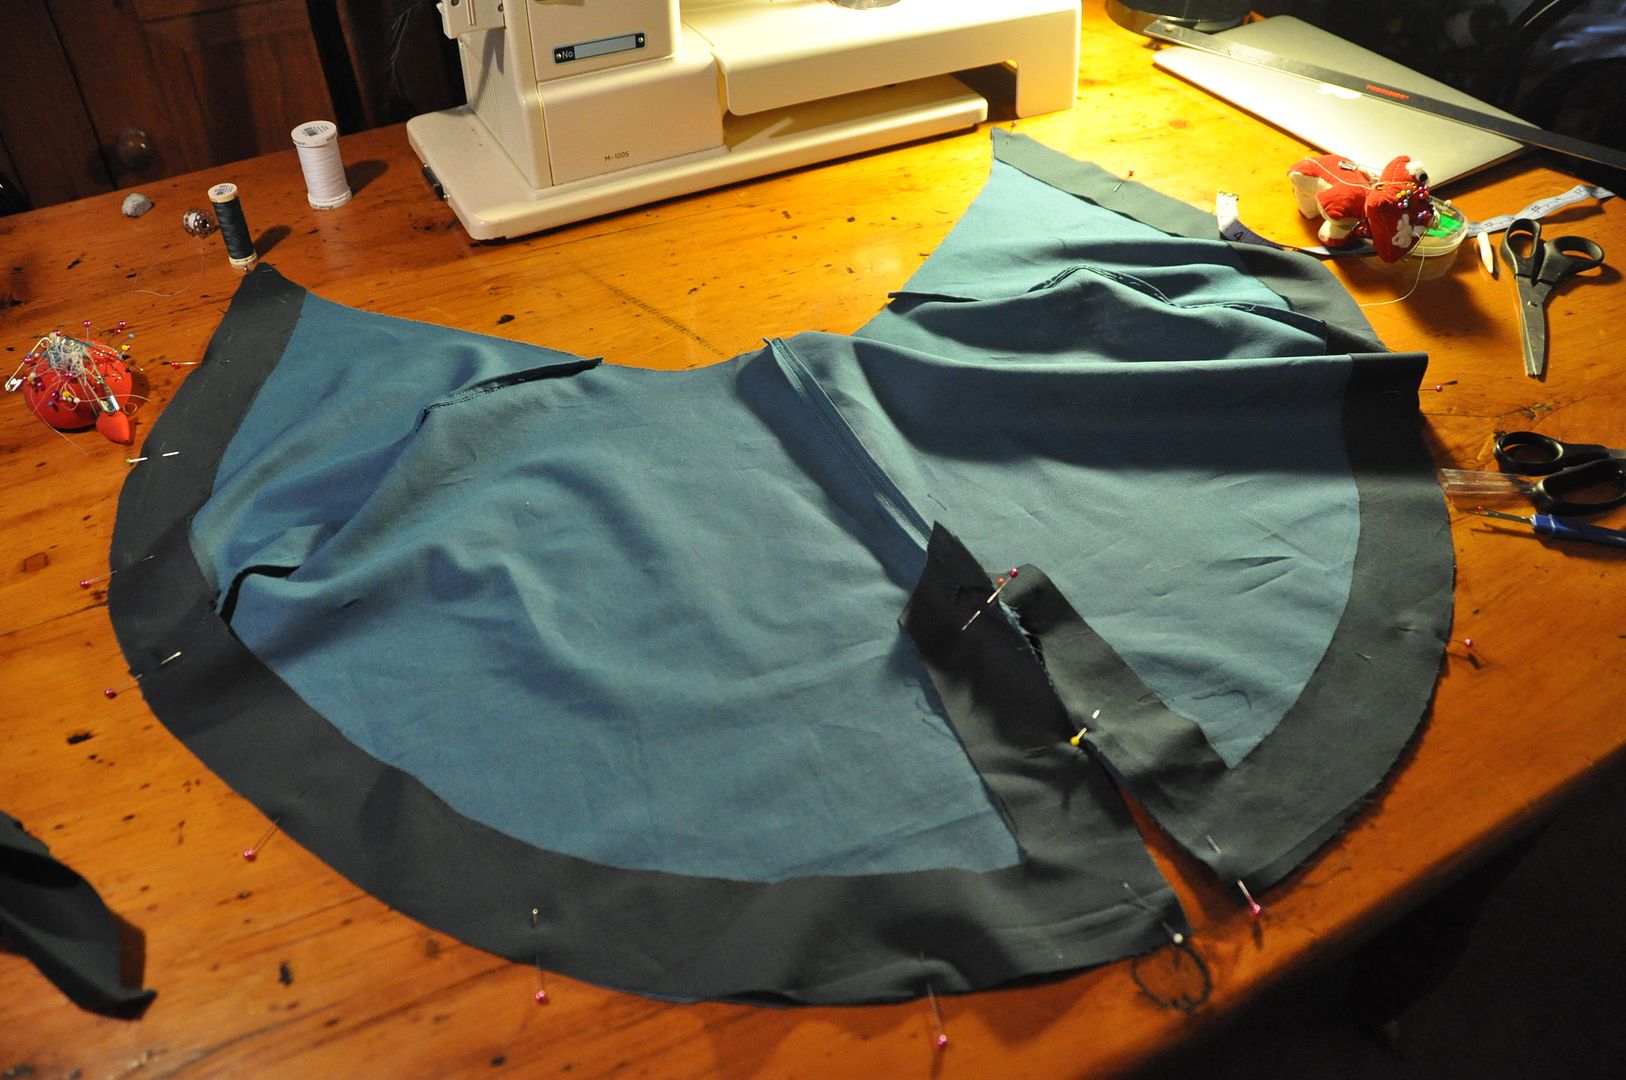
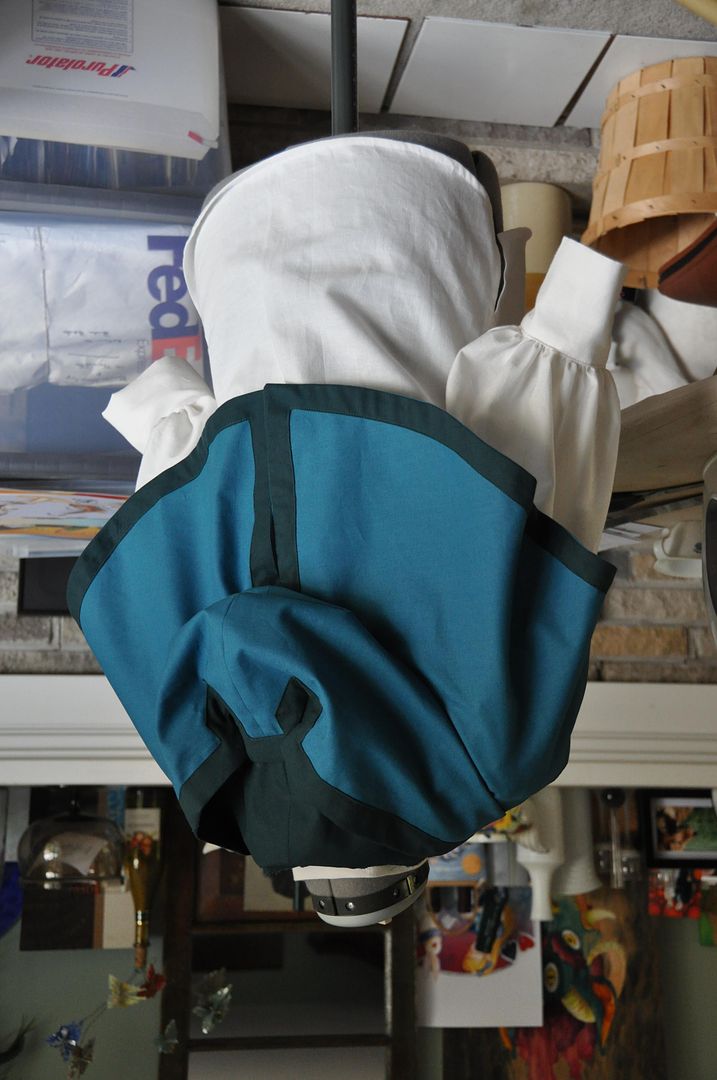
Both have elastic loops to keep brushes/pencils organized. The front flap on the teal one was a little tricky, as I am not used to sewing zippers in on such a sharp curve.

I thought it was a pretty fun way to use some of the print fabrics my sister got me in Japan. :)

Wednesday, September 30, 2015

Inkling - Guns and Tanks - Splatoon

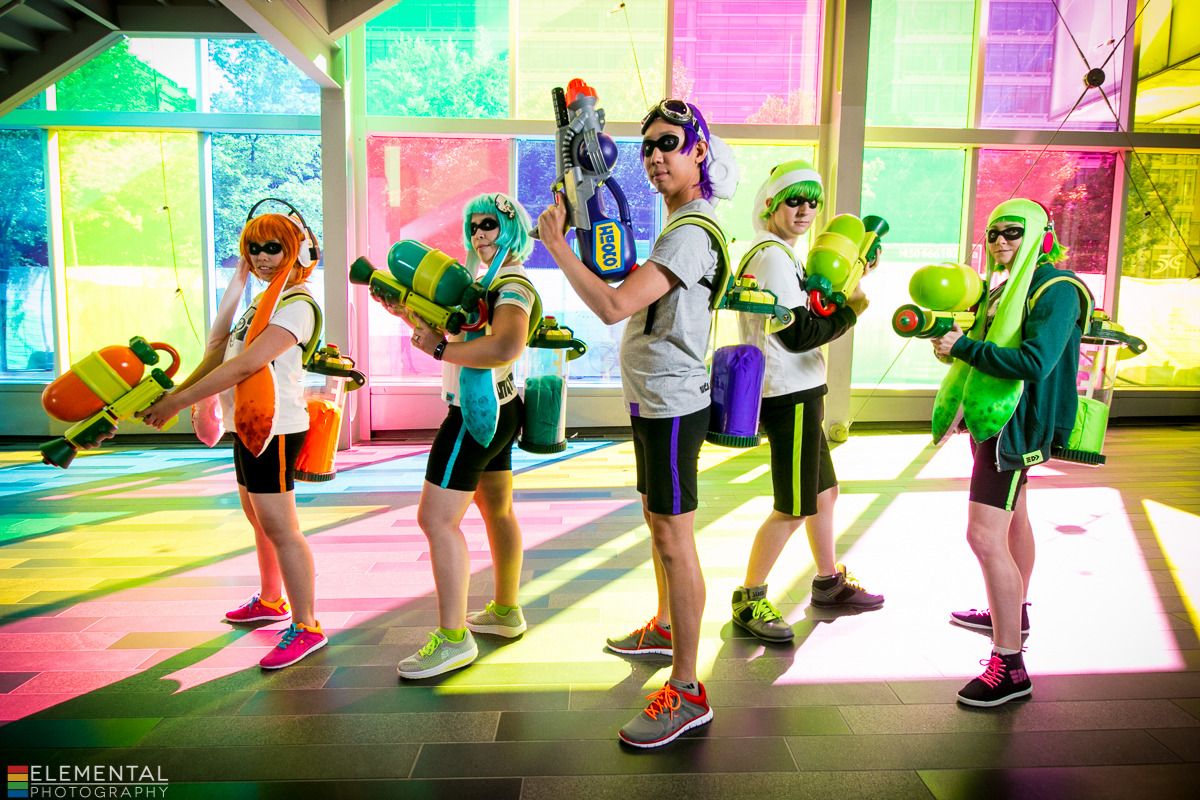
Part 3 of the Splatoon Squad posts! Lets talk armaments! >:D If you are interested in the tentacle hats, go here! If you want to see how we put together the outfits, go here! Once again hats off to Elemental for the great shots from the photoshoot!

Now we delve into territory that I know little to nothing about: The Armaments. I had very little involvement in this area. I was a helping hand in the mass production line for the harnesses, ink pillows, and I helped put the electrical tape gauges on the side of the tanks. That's about it. Credit goes to the real masterminds Brian (Ragz Cosplay) and Adrien, and their very best shop gnome Andy (Yavarice).

Based on a 3D model that Andy did of the tank, Brian broke down and printed all the components. These had to be cleaned up (sanded) and painted, and then these were assembled into a full team of tanks. Andy gave a hand in this process.

All I can tell you about 3D printers is that they operate by wizard magic. I am fairly certain Brian is a wizard, and Andy is a sorcerer's apprentice.

The pieces were painted up separately using spraypaints and then glued together using a glue called E6000. The bottom of the tank is removeable so that the ink pillow can be changed. By changing the ink pillow you can easily re-purpose the tank for a different colour team.

The pillows are made from the same spandex as our hats. Michelle (Mage Cosplay) and I made fabric cylinders of varying heights and stuffed them. The pattern is literally 2 circles and a rectangle. Except Brian's, he made the top of his wavy. Because he is not lazy like me.

The harness rigs are made out of foam mats from walmart, black webbing, buckles and hot glue. The shoulder straps are 2" wide and tapered at the front end. After being cut to the desired length, we put a slit at each end for the webbing to be fed through. The webbing had the female end of the buckle sewn on to one end. We carved out a small depression in the inside of the strap and glued this end of the buckle in place. The other end is the adjustable side. When we had the desired length, the excess webbing was cut off. We burned the ends with a lighter so they wouldn't fray.

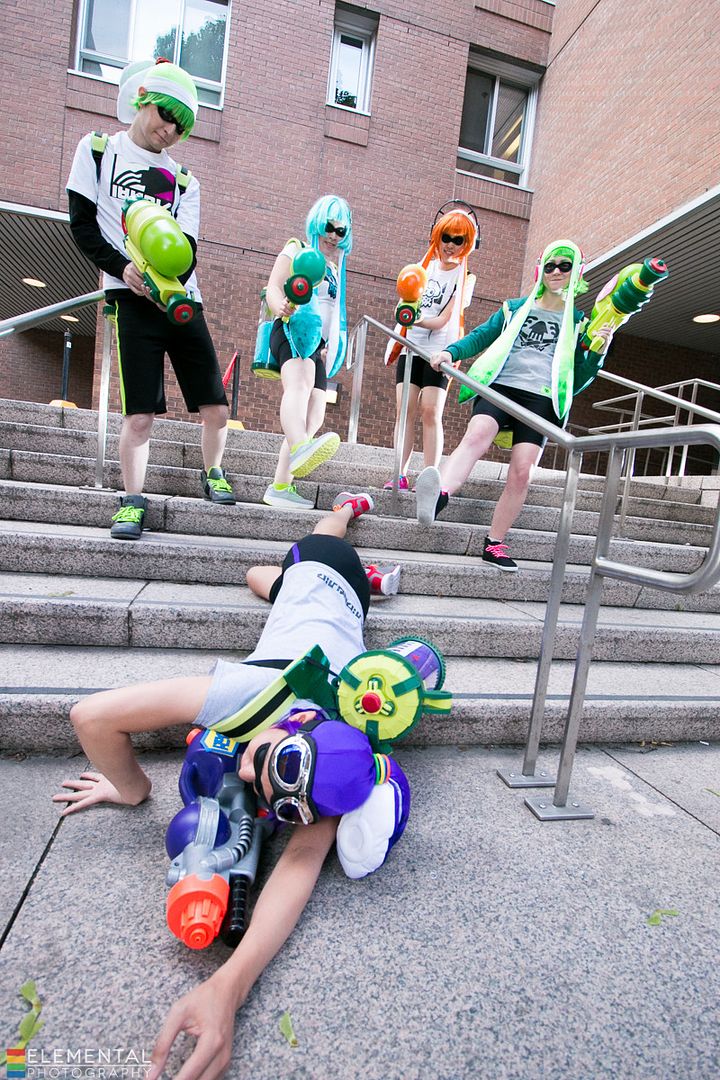
The two straps were glued to a back piece that is a dumbell shape that has a thinner webbing strap attached to it. This smaller straps has velcro and feeds through two slots on the tank. They make the tank removable from the harness. You can see where the tank attaches to the harness in this great shot of us beating up Andy.


As for the Splattershots, Adrien takes all the credit there. (Well, Andy does get some credit for being his resident shop gnome and doing much grunt work cutting out pieces.) Adrien created some foam pieces as templates and vaccuformed all the separate pieces over them. These were then cut out and glued together. But I assure you it is more complicated than I have described. I am still in awe of these, they are so professionally made!

I believe Andy's gun is a Nerf gun? With a logo added to make it look super legit. The logos were made from craft foam.

Overall I was really impressed how we were able to pull together a really cohesive looking group! I hope I get to take part in something like this again in the future. Special thanks goes to everyone who helped make this happen. I'm excited for Squids 2.0! :D

Thursday, September 24, 2015

Inkling - Tentacle Hats & Wigs - Splatoon


Part 2 of the Squids or Kids series! If you are interested in seeing how we put together the outfits and accessories, go here! Once again credit to Elemental for her fabulous job doing the group photoshoot! So many really great shots!

Let get down to business; time to talk about those crazy squid hats! Patterning and painting the tentacle hats was my big group contribution. It was a bit of a challenge for me, as I have very minimal experience working with spandex/stretch materials.

We did some google image research to see what other cosplayers had come up with. We saw quite a few who had made theirs out of fleece. We decided not to use fleece because we wanted to a) be shiny and b) be paintable for the gradient. We also saw ones who had made the tentacles and covered them in wig fibers. We all decided that was more effort than we were willing to put in. I decided to go with a hat, while the other girls were more partial to the "tentacles sticking out of the wig" idea. So for them we used the same tentacle pattern, but instead of sewing it into the hat, they stitched/pinned theirs directly to their wigs. I may go back and change mine to match the rest... I'm still on the fence about that.

For the girl hat I started with drafting a basic pattern. The patterning process was very loosely based on how I patterned the Newboy Cap a few months ago. It consists of 5 tapered panels of various sizes that meet at the top. 1 front panel, 2 back panels, and 2 side panels that were the fronts of the tentacles.

It is important to note that since these hats were being worn over wigs, all of the measurements were taken while wearing a wig and all mockups were tested over a wig for a more accurate fit.

The one difference between the mockup and the final hat is that after doing the mockup I realized that creating "bangs" with the front flap was going to be too challenging in spandex. So I opted to instead make the bangs of the wig stick out from underneath.

For the boy hats, I knew there needed to be a seam near the top that the tentacles could be attached from. The boy hat pattern ended up looking very different than that of the girl hat. It consists of two "semi circles" as the sides, and then a rectangular shape tapered near the top seam for the center front and back. After I put together a mock up that looked alright on me, I then had to create a second mockup in a larger size that looked alright on Andy. Because my head is really small.

After creating a mockup that I was satisfied with, I went fabric shopping. Affordable Textiles on Queen St. had a good colour selection of spandex for a decent price. When you are doing a group this large, it is more affordable to share materials--in my case the 1yd of white spandex I bought was enough for 3 pairs of girl tentacles with a bit of leftover. But the 1 yd length was necessary anyway because the tentacle pieces are so long.

After cutting the pieces out I realized that if I wanted to paint on a gradient on the green side and add a sucker to the white side I would have to do it before I sewed the two halves together. In both cases I wanted to work on a flat surface.

For the paint job I originally was only in charge of doing my own and Brian's (as payment for making my tank). But since I was the only real painter of the group, I was soon asked to do the full set so they would all match.

The gradient had a different tint to it in every reference photo. In gameplay most took on an almost purple-y hue at the tip, but in still photos it was a darker shade of the team colour. I decided to go with a darker shade of the team colour so it wouldn't look weird.

I was going for a watercolour & paint splatter look. I used round brushes and fabric paint. I did all the ones that had to be painted the same colour back to back so I could be consistent in my colour mixing. I started with the greens, then orange, then turquoise and lastly purple. I typically worked with a pair at a time.

I started by mixing my darkest colour. This would be the only colour I mixed for each. All of the hues in between were created by watering down my brush before painting. Sometimes I would only paint with water, to help blend the colours. At the very tips I used almost purely fabric paint. I would make darker spots here and there. Lastly I loaded up my paintbrush with paint and ran my thumb through the bristles to flick small spatters of paint onto the fabric. This left the dark little speckles. There was no real science to this process.

Above are the original 7 I painted, labelled as to who they belonged to. Louise and Patrick will be joining us for Squids 2.0.

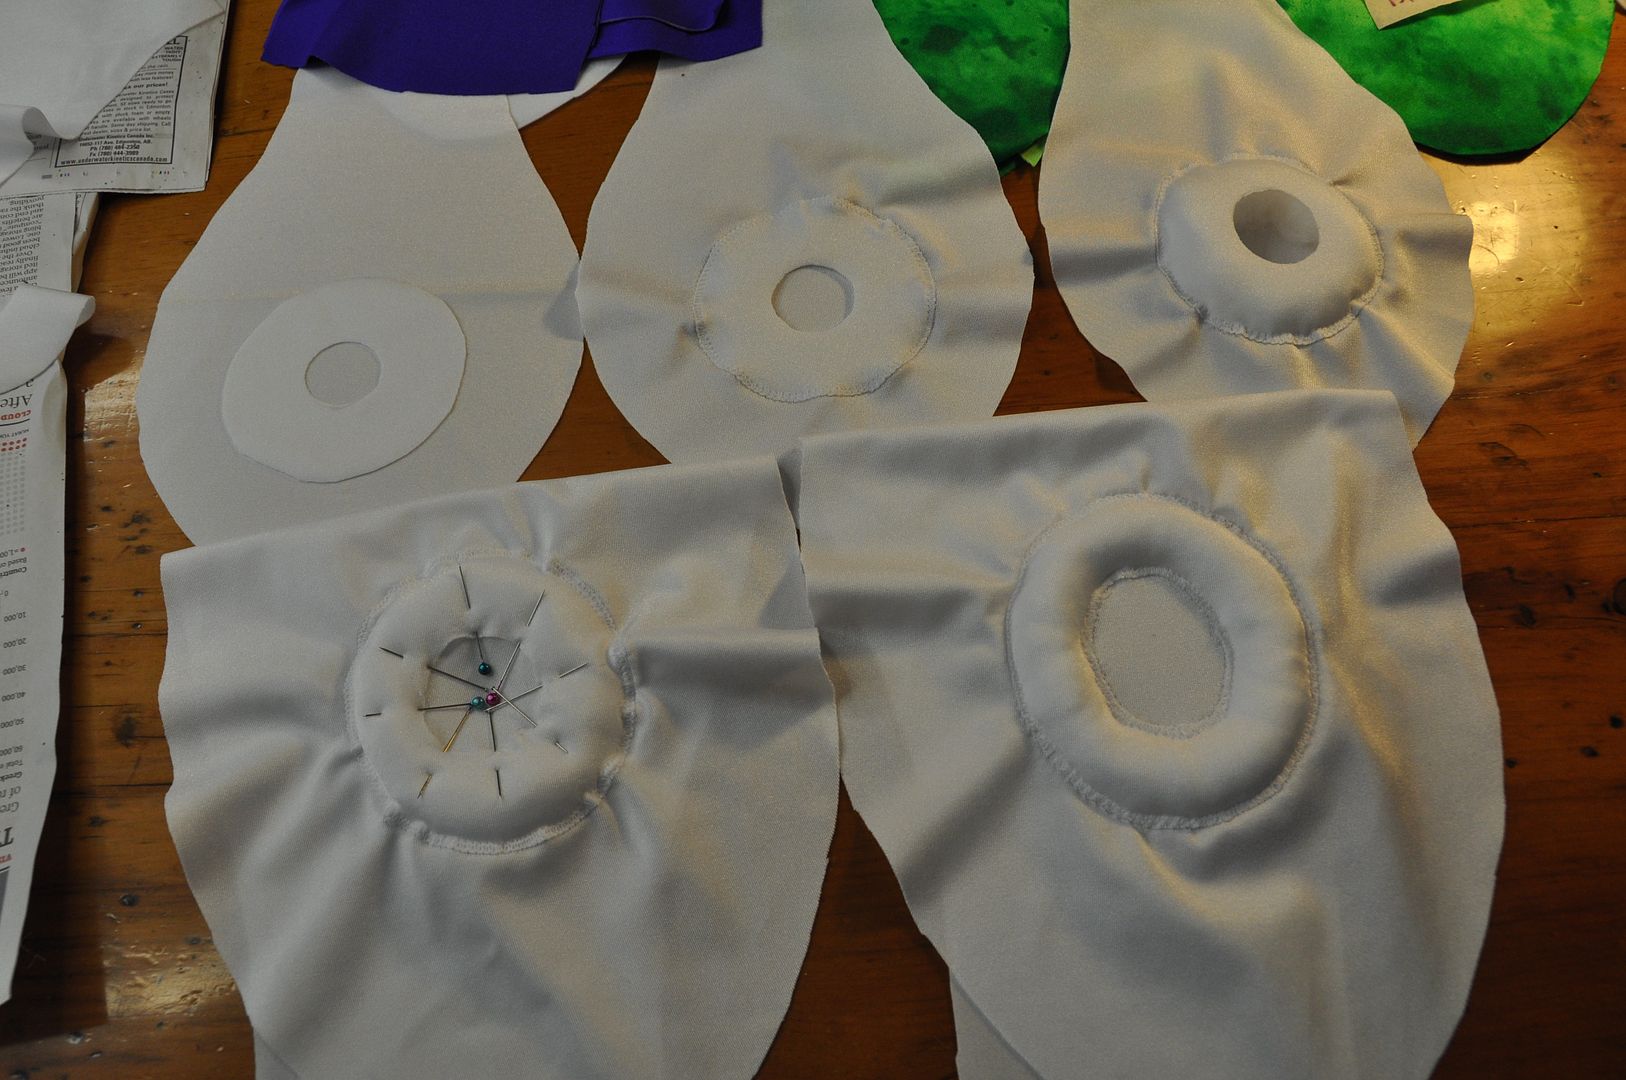
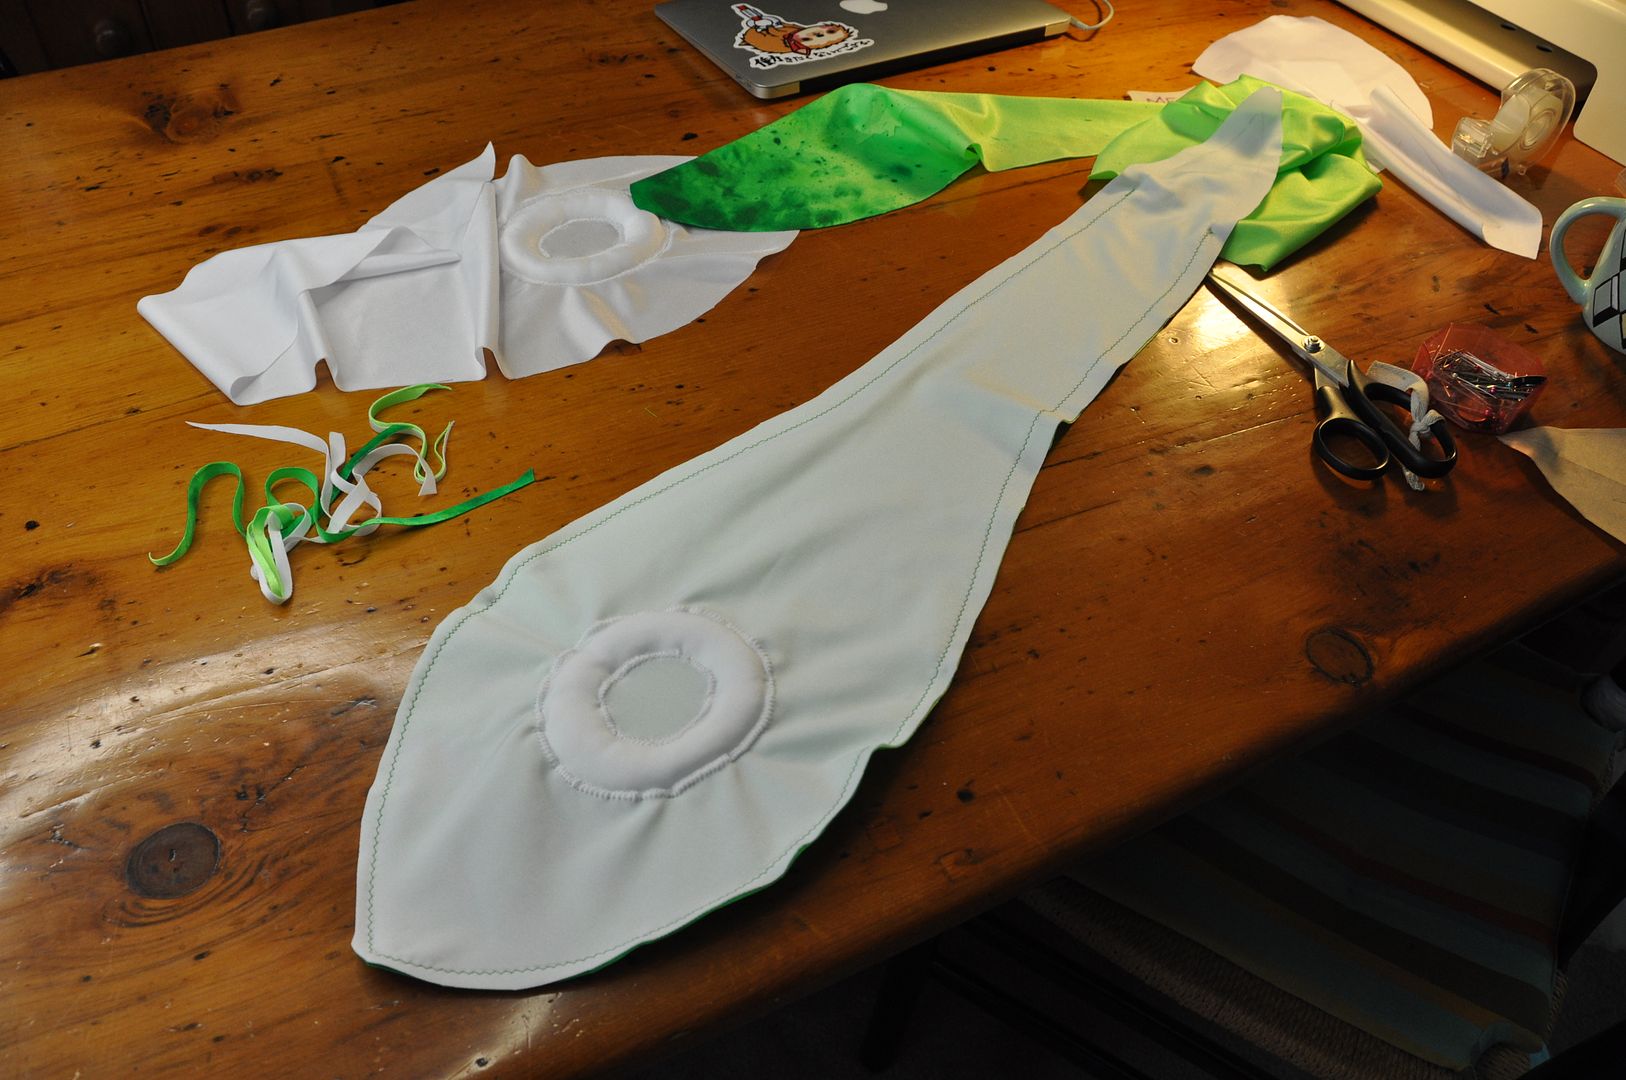
The process for the suckers was relatively simple. First I cut out a 'donut' shape in white spandex. Pinning it in place, I then used a zig-zag stitch to appliqué it to the tentacle around the outer edge. Then it would get stuffed from the center. Then the center edge was pinned down. Lastly the center hole edge would get carefully zig-zagged closed. The picture on the left shows each step of the process.

Many thanks to Michelle and Andy for coming over and assembly-lining the cutting, pinning and tentacle sewing process while I painted. They did a great job!

The next step was to sew the tentacles together. They were pinned right sides together and then sewed with a slight zig-zag stitch. We left a hole at the base so we could carefully flip them right way out and stuff them.  This many tentacles required a surprisingly large amount of stuffing!

For the girls who didn't want hats the tentacles were at this point handed off to them to attach to their wigs. For myself and the guys, the next step was putting together the hats.

For the guy hat the tentacles were first sewn into the top seam. Then the two semi circle side pieces were sewn on. Lastly it was hemmed.

For the girl hat I sewed the two back panels together first along the center back seam. Then I sewed the two side (tentacles) to the center front piece. Then I sewed the sides to the back panels and trimmed the excess seam allowance from inside the hat. Then I hemmed the hat, tacking down the white fabric on the inside in the same stitch. 

I picked up this green wig from EpicCosplay. The colour match is pretty darn good, especially since there are so few colours of green to choose from when it comes to buying wigs.

Excluding my wig--which I cut myself--the rest of the group's wigs were cut and styled by the ever lovely Louise, who will be joining us for Squids 2.0! For the girls we cut blunt bangs straight across the front and trimmed the backs a bit. I wanted the back of mine to be more flippy, so I pinned it up in sections, lightly sprayed it with hairspray and then used a warm hairdryer to set the curls. Then I combed them out. They were a bit too curly, so I used a warm hairdryer again to get them to relax a bit.

For the guys Andy and Brian went with two different styles. For Andy's wig, Louise took the bangs and pulled them completely back and pinned them out of the way, under the wig. She left the sideburns, which she trimmed a bit, and then trimmed the back as well.  For Brian, he wanted to keep the bangs, so she just trimmed them to be shorter and out of the eyes. The sideburns were done similarly to Andy's wig.

For both of theirs, because the weight of the tentacles made the hat back heavy and the spandex was super slippery, they had to have the hats hand stitched to the wigs. For a finishing touch they added their own hair accessories to the tentacle "topknot" hat. As far as I remember Andy used some bright coloured hair elastics. Brian added the white headband and a dollarstore bracelet as a hair tie.


Wednesday, July 30, 2014

Forest Guardian - Embroidered Panel

Everyone I apologize this post is late, I had a small accident yesterday and was unable to finish typing up this post. I will explain in more detail at the end of this post! Meanwhile, without further ado I present Forest Guardian, Part 3! Let's take a look at the embroidered panel, since I know that's what everyone has been dying to see! XD

For part 1 go here! For Part 2 go here!

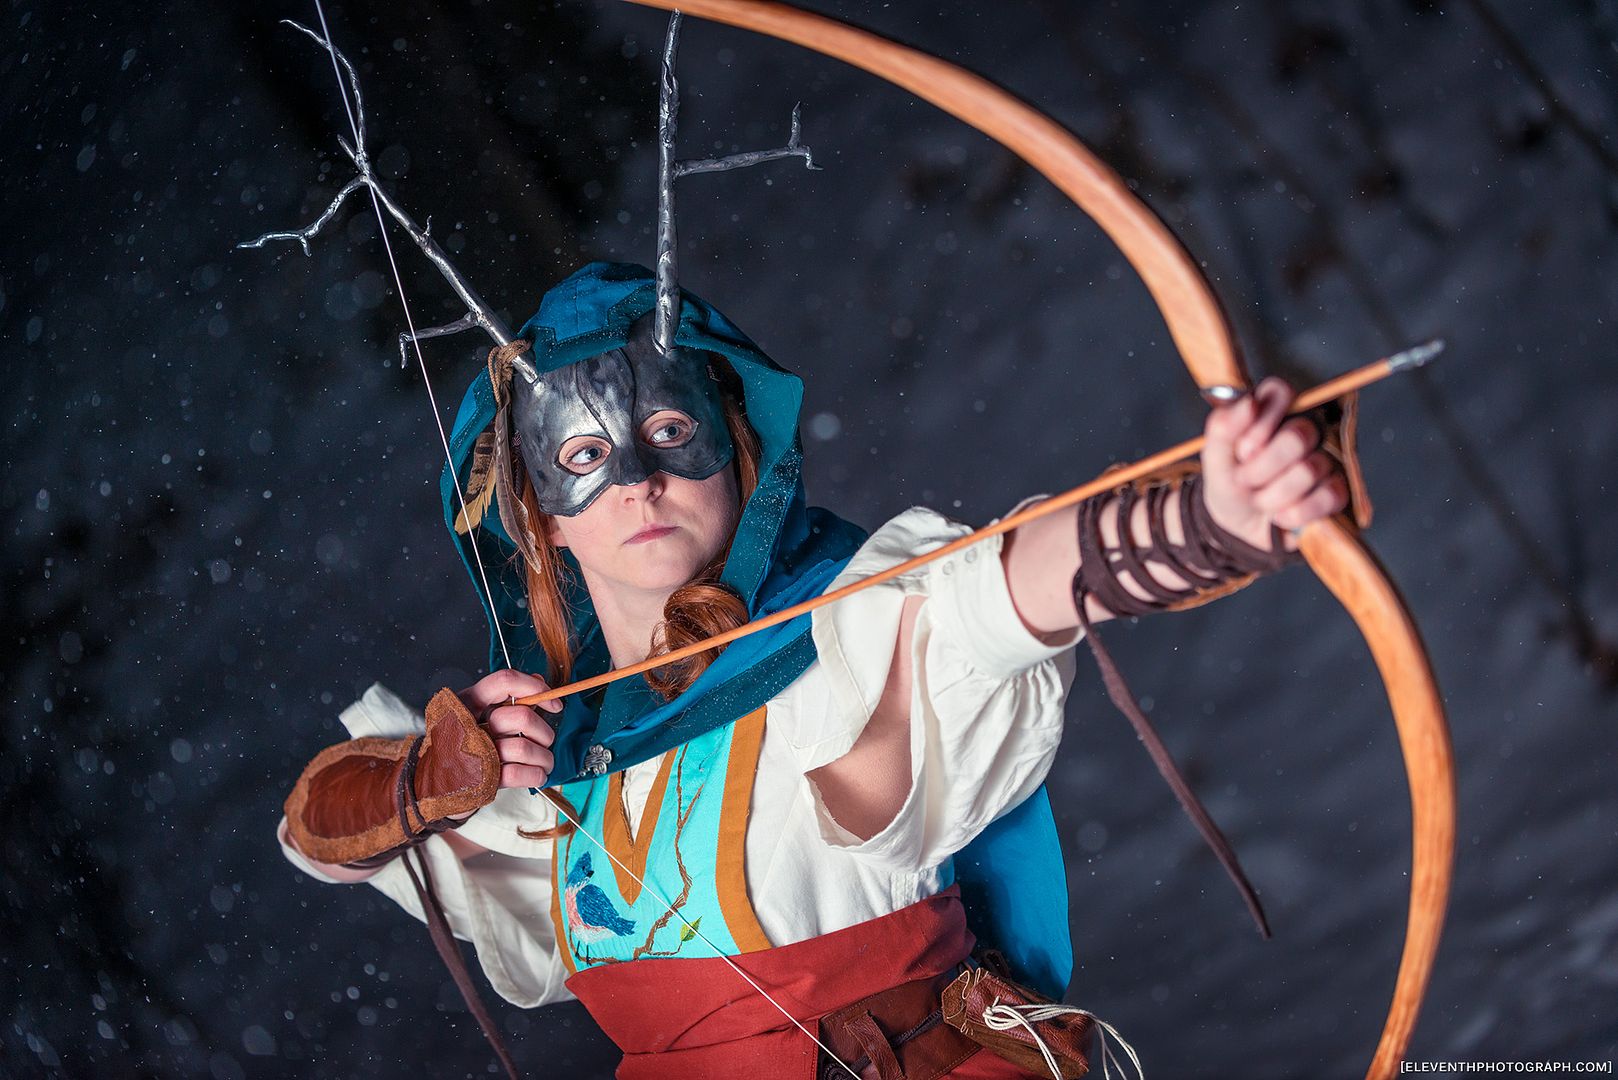
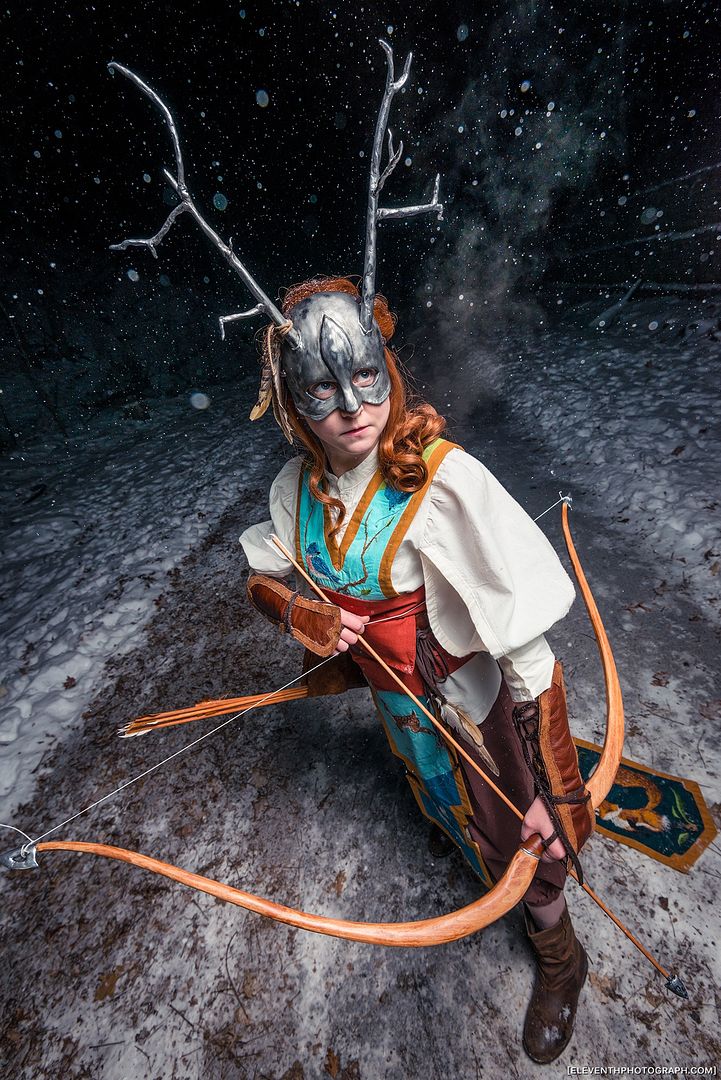
[New snowy photos were taken by EleventhPhotograph in Feb 2015! Thanks Mike! They look fab!]
Let me just preface this by saying this was my first time embroidering ever. I learned a lot doing this project. I have a new-found mad respect for the woman who does the embroidery on the Game of Thrones costumes. I highly suggest you take a look at that! It's crazy awesome!

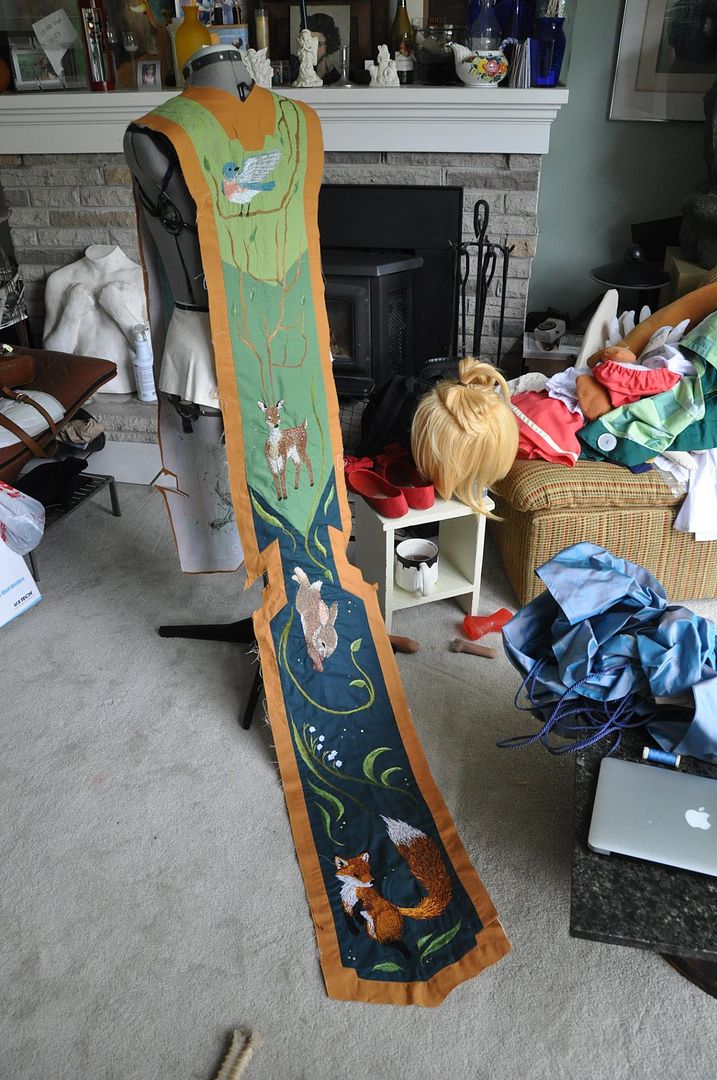
So now let's talk embroidery! The project (just the embroidery, not even the rest of the costume) took me about a month and a half--give or take. Some of those days were 14 hours, some I only worked on it for 2. I constructed the panel itself on my Christmas holidays, but didn't start embroidering until April. I knew this piece would be time consuming, but I didn't quite realized how time consuming. This piece is the reason I didn't compete this costume at CostumeCon 32 as intended: this was just not done. There were still 2' left of embroidery to complete on the back side, this included the rabbit and most of the vines between the deer and fox. Knowing my pace, 2 days was simply not going to work for the amount I had left, so I wore the otherwise completed costume to the convention, without the main piece.

First I had to make the panel. I drafted it out in paper, putting it over my shoulders so I could decide the finished length. Then I finalized my design and drew it out full scale on the paper. I cut out the different sections and cut those pieces out of the corresponding fabrics.

I sewed those together so it was all in one long piece.
Then I used the rest of my pattern pieces to construct the gold/yellow border around the edges.

I pressed all the seams flat, and top stitched down the corners.


Then I attached a white interfacing backing to the entire piece. This would make it easier to embroider as the cottons I used for the coloured panel were nice and light.

Above is what it looked like pre-embroidery. In the lead-up to actually starting this project I streamlined my embroidery design, re-drew some of the animals and cleaned up some of the messier areas. Some people have asked me where I got my embroidery pattern: there wasn't one. I designed it myself to suit the piece and to suit the character. When I was completely satisfied with the design I transferred the main shapes to the fabric. This was done using a combination of a spiky tracing wheel, pencil and grey pencil crayon.

I had to look at a lot of reference pictures to ensure my animals had the colours in the right place, and the most importantly the limbs bending in the right directions! I can't stress enough the importance of actually looking at animals when undertaking a project like this. You may think you know what a fox looks like. Your memory may not be so reliable! Mine wasn't! If you are trying to maintain some degree of realism, reference is key.

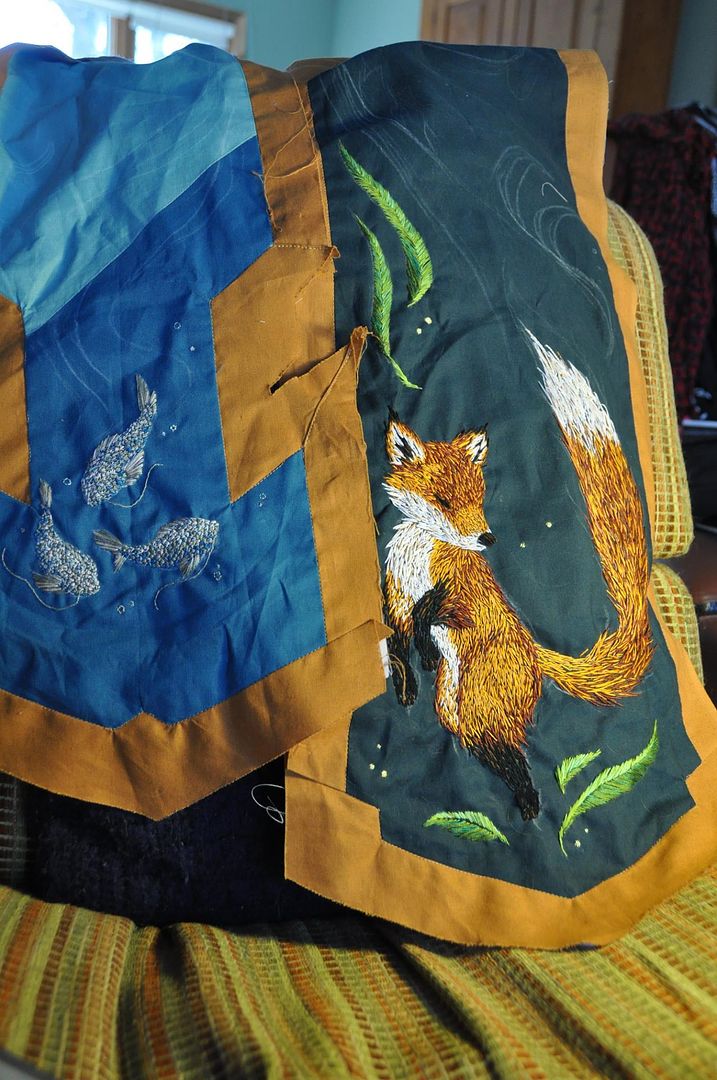
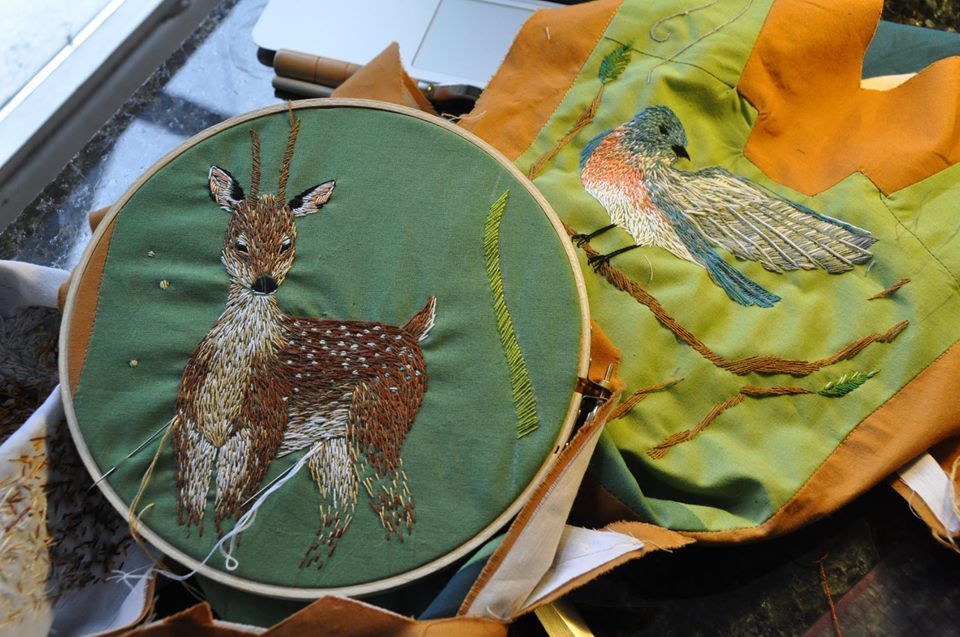
I didn't attack this in any particularly logical order, I mostly embroidered whatever I felt like doing next. I actually started with the fish on the front, then moved to the fox, then the birds, deer and lastly the rabbit. In between the major pieces I tackled the various branches and greenery.
 Mostly I created the different looks through experimentation: since I wanted to maintain some realism, even if the animals were stylized. The challenge was to create the different textures. Long haired animals had to be obviously different than short haired animals, while feathers again had to appear different than fur or scales. I would describe the process as a combination of painting and pointillism with thread.

In terms of process I don't think there is any real right or wrong way of doing this. On any given animal I typically started with the detail bits first (eyes, nose, beak, hooves, spots, fins, etc), these usually had stark contrast and so placement was important. The more stitches you get in there the harder it is to see the lines, so I would like to get those done first.

Next I would start in one of my main colours and go around the outside of a section, to ensure that I didn't go outside my lines. I typically started at the head and would work my way towards the tail. On the fox for example I started by doing the eyes, nose and black parts on the ears. Then I outlined and began to fill the white section in my main colour. Next I outlined and filled the light orange sections of the face, then did the same with the dark orange. Lastly I speckled in my secondary colours to breakup the transitions and give variation and texture. To continue with my fox example I speckled cream and light brown into the white sections, light brown into the orange sections, and orange and brown into the dark orange sections. This is because fur isn't just all one colour. 

For the birds I modeled them after blue-birds. I went with a slightly pinker colour for the breast than they actually do because I preferred that with my colour scheme. I started with the details, then simultaneously worked on the head and breast leaving the wings to last. For the head and tail I used a medium blue as my main with a blue-grey and warm grey as secondary, while for the breast I used a salmon-y pink as my main, with a peach and white as my secondary.

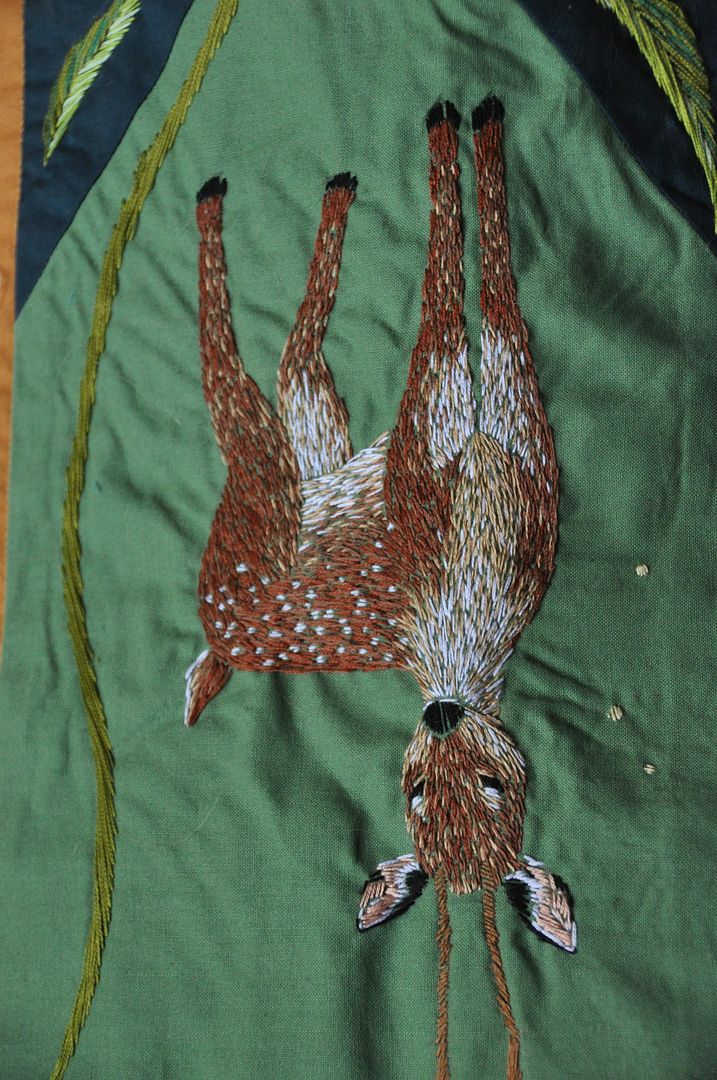
The deer were done much in the same way as the fox; details, light/dark main sections, then colour breakup. It was a bit different because I had to work around the spots, and also because I had to make my stitches smaller and more controlled to denote short fur.

For the branches they were just done haphazardly. On the original design I drew out exactly how the branches would look, but when I transferred the pattern I just drew out a single meandering line to follow for each branch, that way the path was the same, but the width and stitch direction was freer.

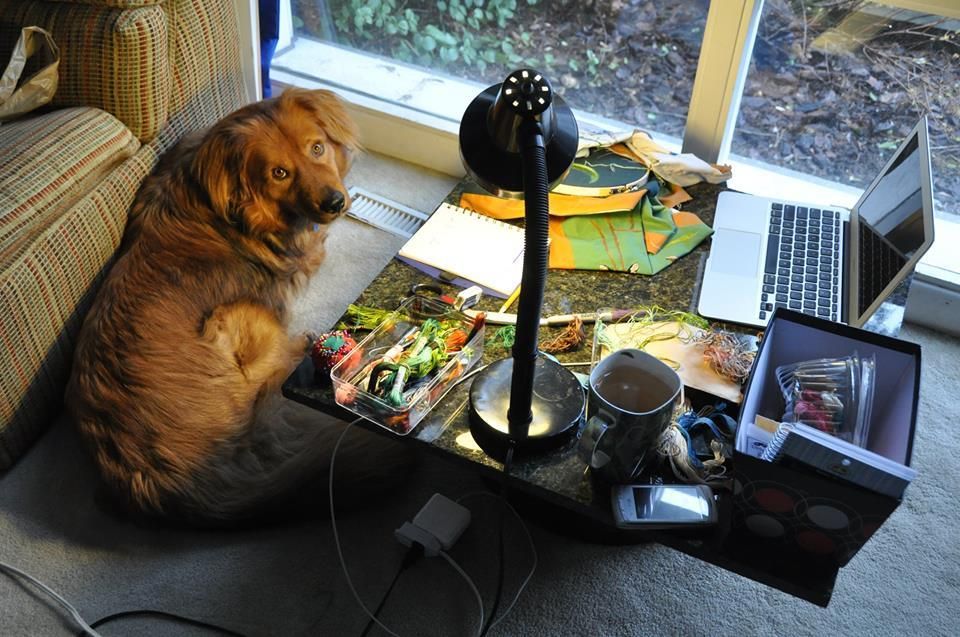
Jelly was not impressed that I took over his favourite spot for a month.

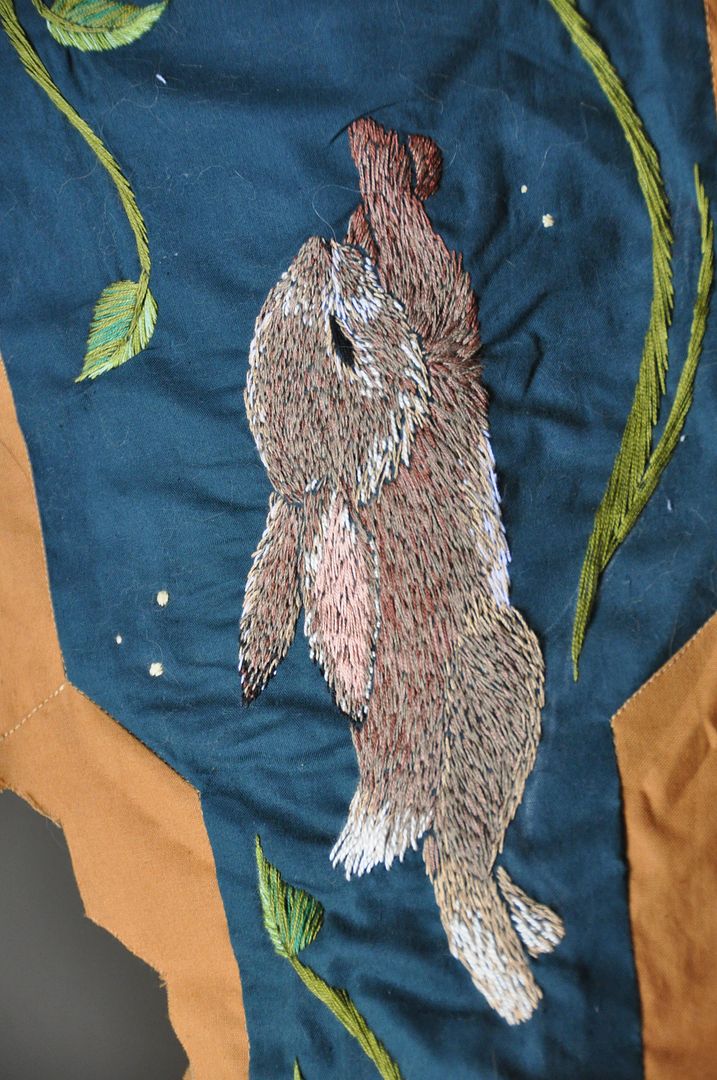
The rabbit was very similar to the rest, but a little more troublesome because rabbits don't have as much colour variation as other animals do. That actually made it more of a challenge than some of the others.

The greenery I had down to a science. It was very controlled and directional, with specific colours for all the parts. Every leaf was divided in half--it would have a dark half and a lighter half. I would go in with my 2 main greens and then add in a couple highlights with my secondary greens. All leaves were done with the strokes extending outward from the stem diagonally toward the tip.
Here is what it looked like with the finished embroidery! You can see that it doesn't stop at the places that are hidden under the belt.

Once that was done all that was left was to add the backing to the panel so you couldn't see all the threads. This was done in 2 pieces, which were bagged out, then carefully pinned and hand-stitched at the neck and shoulders.
Here are some close-ups of the finished embroidery.

In regards to the fish, I did the scales each stitching in a tiny radial pattern extending from a central point. My colour variation was don so that the lighter colours were concentrated on top, while the darker colours covered the bottom.

I had a lot of trouble trying to figure out how to do the extended wing on this bird, but it turned out alright in the end!
The fox is still perhaps my favourite, but I am most certainly proud of the piece as a whole. I will probably do another embroidery piece in the future, as I really enjoyed this project, but I think it is safe to say I am pretty burnt out on embroidery for a while.

More to come on this costume set!


In terms of why this post is late, I injured myself at work yesterday and had to go to the hospital. An embroidery machine needle pierced through the top of my finger nail, went all the way through and broke off inside. I am fine, bandages come off tomorrow, but my hand was frozen last night, making it difficult to operate a keyboard and finish typing this post. For the record, it was entirely my own damn fault. :P
 

Saturday, July 5, 2014

Forest Guardian - Pants, Shirt & Cape

[Edit: New photos added from Feb 2015 shoot with EleventhPhotograph!]

Welcome to my first look at the Forest Guardian! I thought we should start with the pants, shirt and cape because in terms of the actual build of the costume that's where I started. I think at this point it has been a full year since I started the concept sketches for this costume, wow! This is my first real original design costume and I'm pretty proud of it. 
I wore most of the costume to CostumeCon 32, excluding the embroidered panel, which I was sadly unable to finish in time. The costume was completed for Anime North, and I competed it in the Masquerade. I won an award for my embroidery in the Master Division, which I am super proud of! This was my entry.

I still need to do a photoshoot of this costume, hopefully that will happen sometime in the near future. I have been location scouting in the forest behind my house. :P 

I started the design concept of this last summer. I had bought my badge for CostumeCon 32 at Anime North last year, so I knew I wanted to make something original. There were several different designs leading up to this one, several different versions before I arrived at this one. I developed the design over the course of the summer and got started on the project after returning from Otakon. 

 The hardest part once I had the shapes down was colourizing everything. I knew I wanted the character to have auburn hair and that the shirt was going to be off-white but other than that I wasn't sure. I didn't even know if I wanted to make the mask look like metal or clay & bone. There were several different coloured versions before I settled on this one (there was even one where the animals on the embroidered panel were to be done as silver silhouettes). It ended up being quite colourful in the end, I was sort of going for ceremonial garb when I first started drawing it and ultimately I think the colour suits the design. Even then there have been several changes that developed over the course of the build since I did this "final" sketch. I purposefully designed the under clothing for this costume to be quite simple, as I wanted the focus to be on the embroidered panel and accessories. 

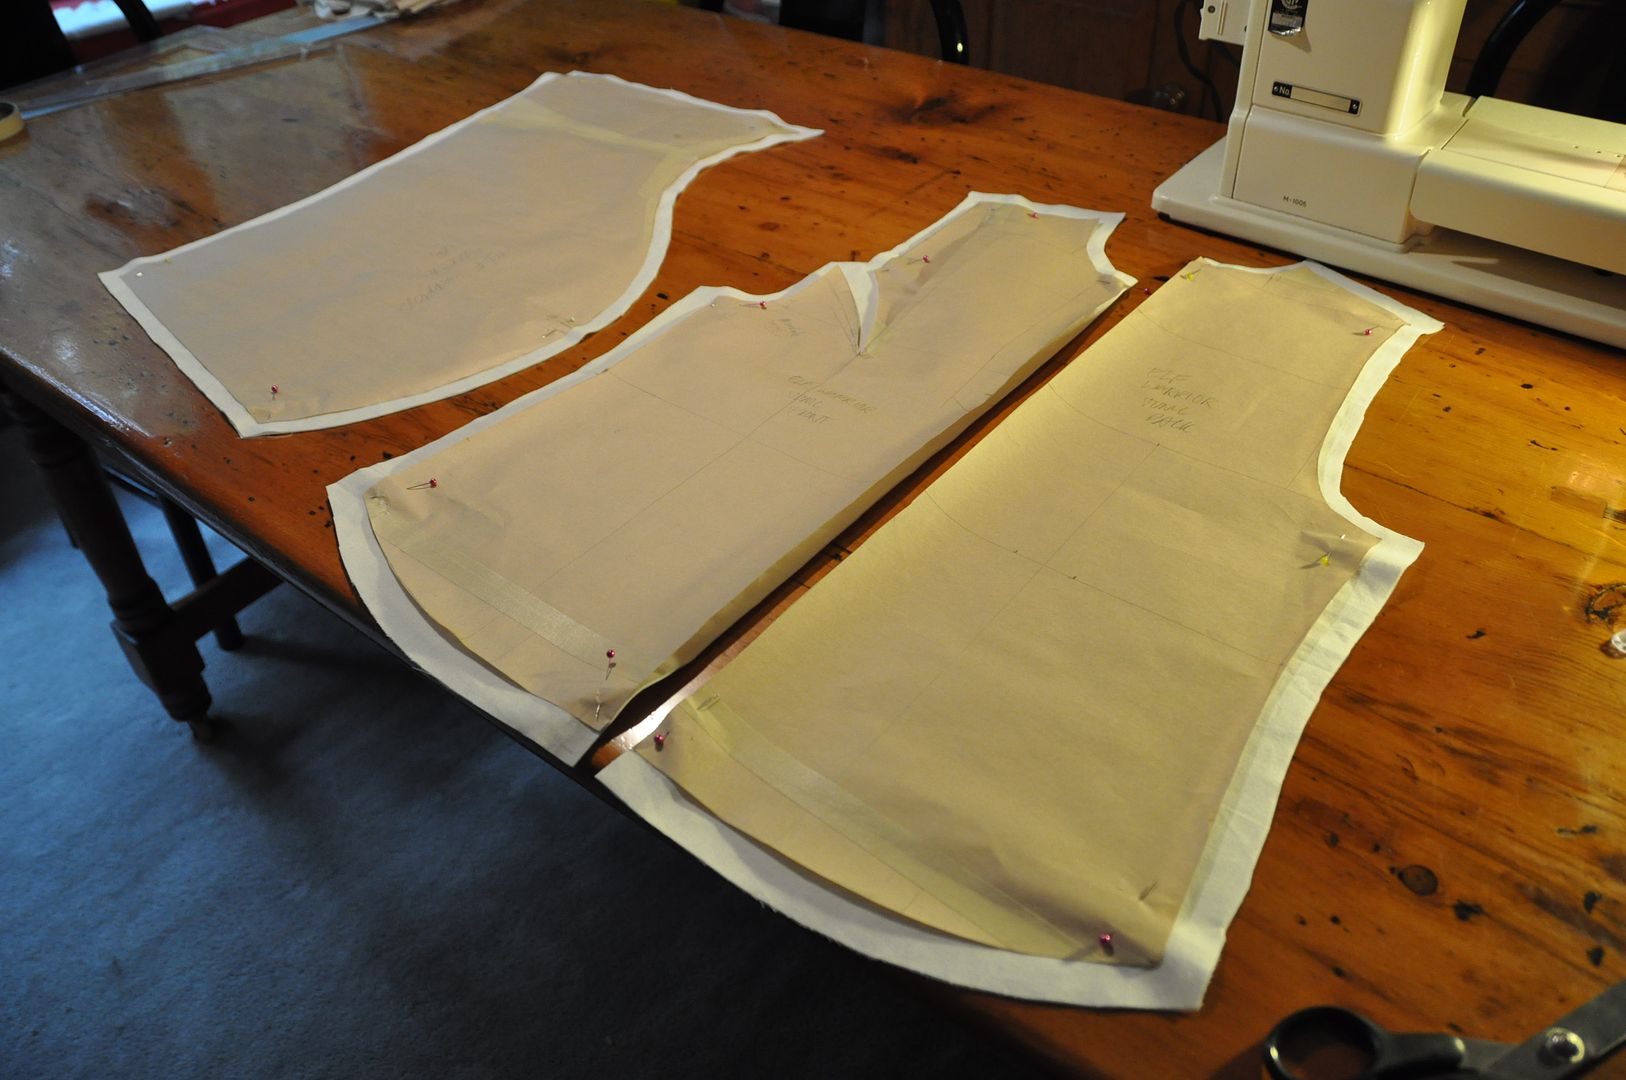
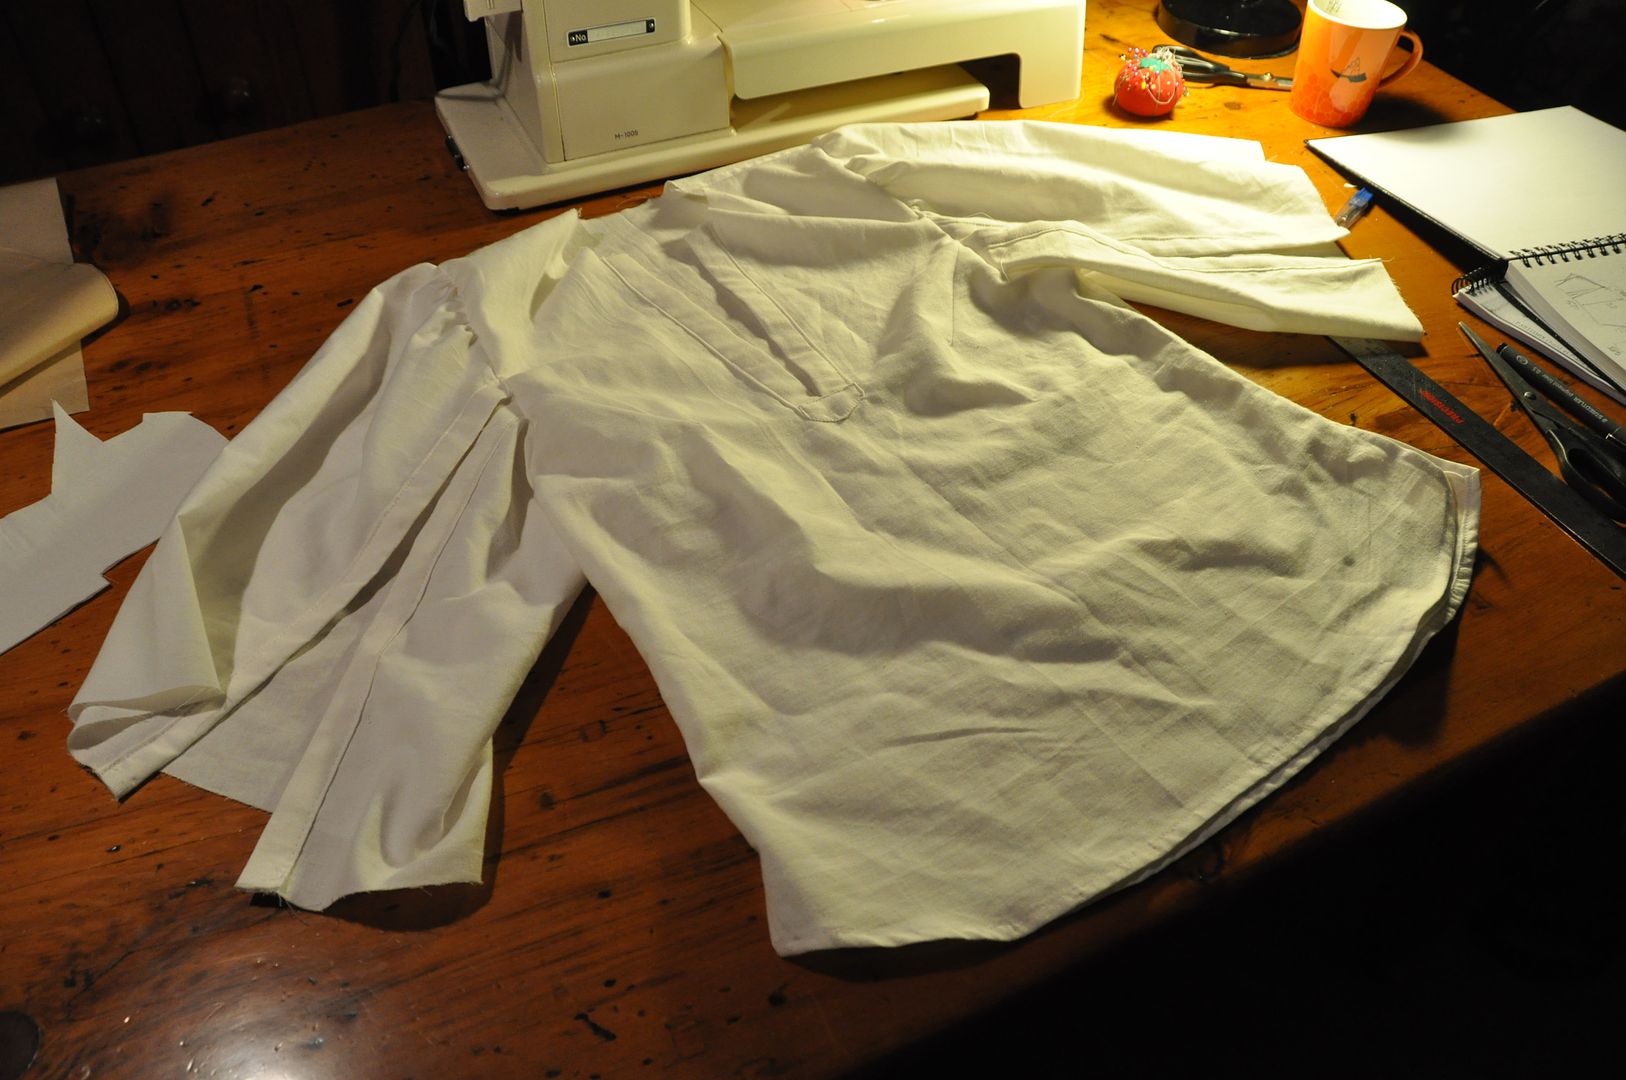
 I started by patterning and mocking up the shirt. The shirt was designed to be a looser fit, with flowy sleeves that would allow easy/unrestricted movement. The shirt itself only has 2 darts at the armhole to the bust, the waist get cinched in by the belt. The sleeve pattern had required some adjustments initially because unlike a regular sleeve this had a slit in the front. So I had to move the seam from the bottom to the front.
 
After doing a mockup, I cut and sewed the pieces. I closed the darts and then sewed the front and back pieces together, leaving a little slit open at the bottom of each side seam. I cut the slit open at the front and finished off the edges with a strip I made out of the same fabric. This would reinforce the fabric when I added the laces later.
I then sewed on the collar and gathered the sleeves. Then I finished/reinforced the edges of the sleeve opening. Originally I had intended for the sleeves to be laced shut, but I decided I really liked the look of them open and left them that way.

 I hemmed the bottom of the shirt.
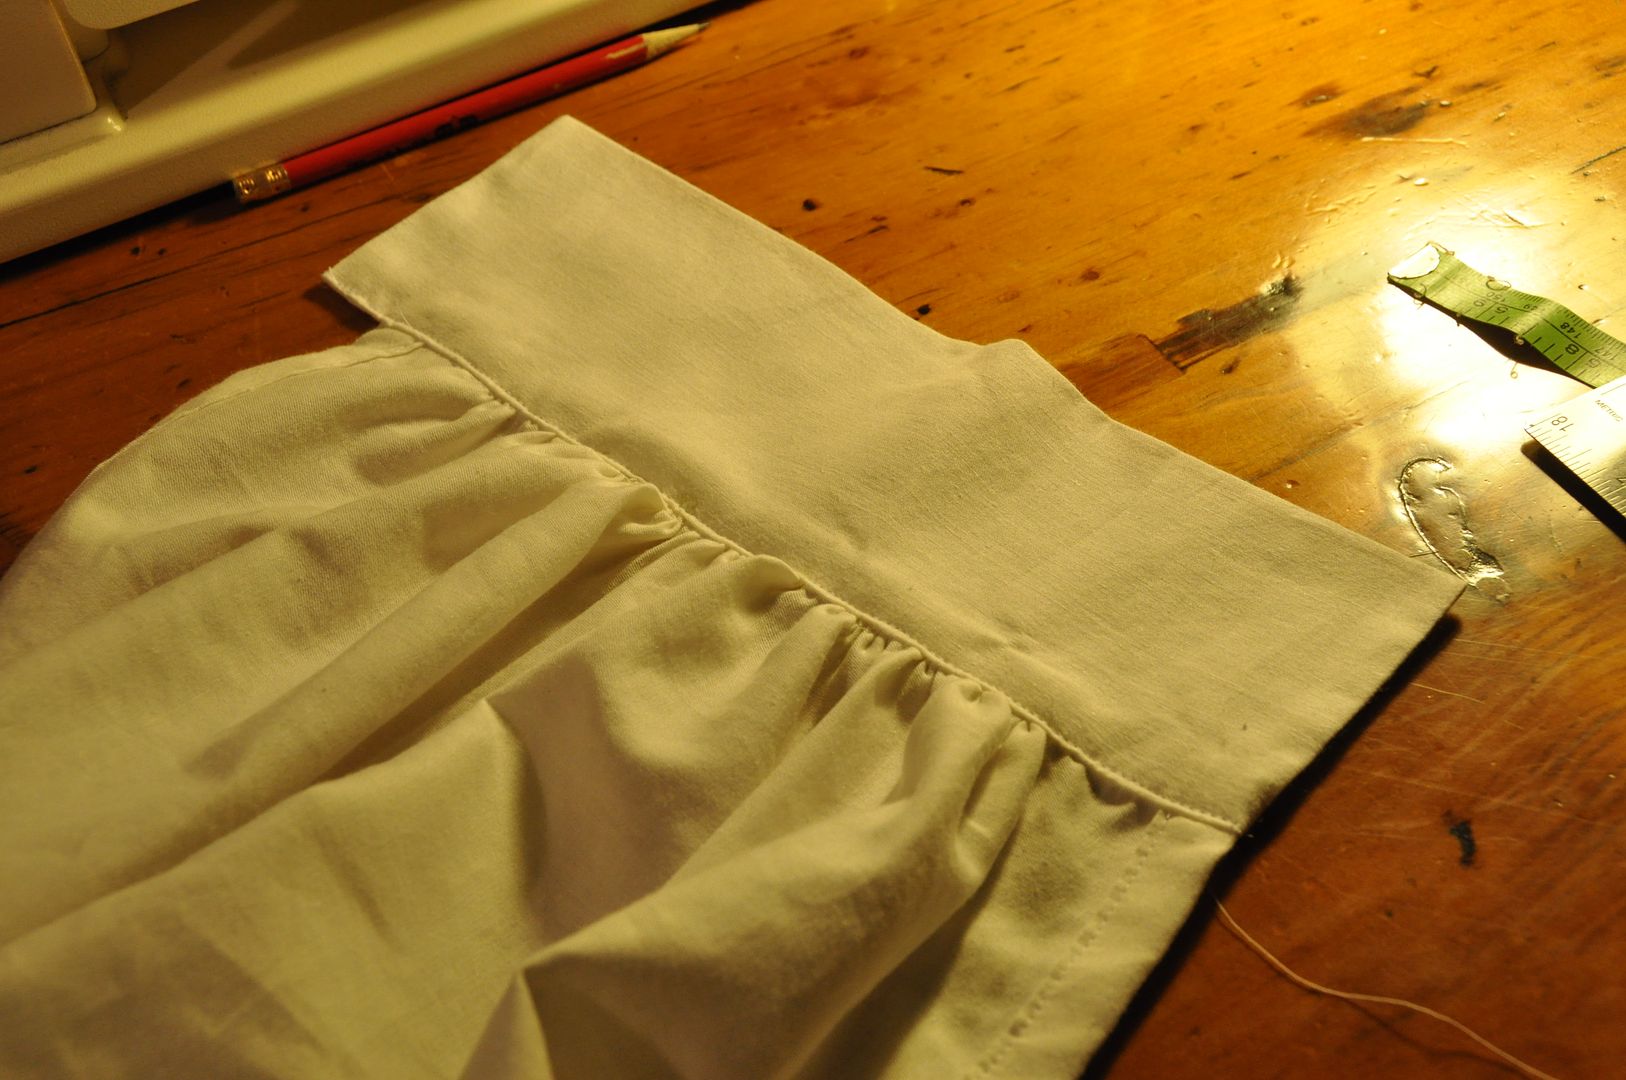
Then I gathered the edge of the sleeve and added the cuffs to the sleeve. Later I put 3 buttons & buttonholes on each to close them.I also added in the holes on the front closure for the laces. These were done in the same way as the button holes rather than with grommets.
 Once the shirt was done I began work on the cape.


The cape itself had originally been designed to be longer, but after much consideration I felt it would detract from the embroidered panel so I made it a short cape, but still kept the large hood. I am pretty inexperienced patterning hoods, and this was my first cape. It took a few tries to get it to look how I wanted it. The only advice I can give is make a mockup!
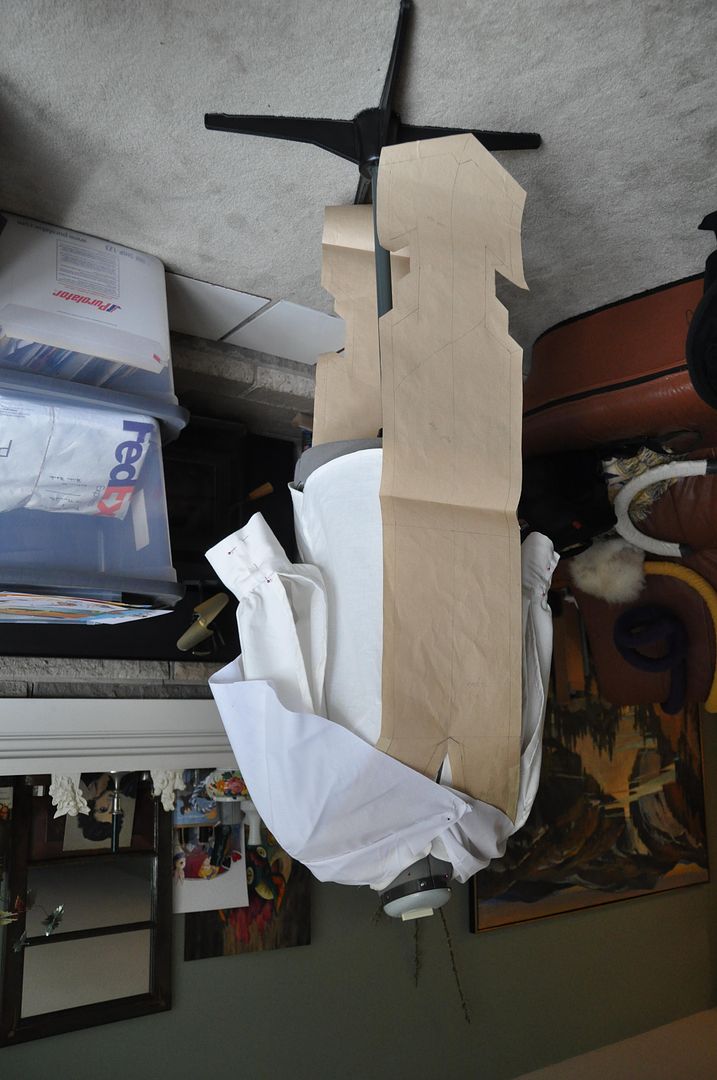
The pattern pieces for this look pretty odd!

My main design feature on the hood was the two slots for the antlers to stick through. It was one of the design elements from the initial concept sketch that came all the way through to the end. I had to make a reinforced edge piece that went all the way around the edge of the hood and the hem of the cape. It had to conform to all the odd angles and contours. It is made of the same fabric as the hood lining.

I started by sewing the sides and center seams on the hood, hood-lining and cape pieces. For the hood I attached the trim piece to the lining and bagged it out. Then I slotted the outer fabric under the trim and pinned it in place. I carefully measured and folded under the raw edges then top stitched the trim in place.


For the main part of the cape I bagged out the trim, having stitched it directly to the inside of the outer fabric. I folded it to the outside and finished the raw edges in the same way, top stitching it all in place. This way the raw edges are all hidden inside the trim, leaving for a clean look on the inside and outside!

You can see how the hood collapses in on itself. Which was frustrating as even when worn over the mask the edges of the antler slots just drooped. I later re-opened the seam and added in a wire to the hood, which kept it rigid and held the desired shape perfectly!

The red wrap around the stomach is simply a long strip of fabric that is wider at the ends (narrower in the middle) bagged out to finish the edges. It has velcro to close it, which is hidden by the belt. (The belt pictured here is actually from my Presea costume, which I was using when trying things on until I made the actual one.)

The pants are actually based on a pattern I had modified for a costume I started but never finished. (Jack Frost) I modified my modified pattern to get the pants I made for this costume. Haha

To make the leg wider I opened up the front of each pant leg and added in a pleat on each. I flared each pant leg out more as well. This way, it still fit nicely at the butt, but the legs would pouffe out a bit.

When I was satisfied with the changes to the pattern I cut and sewed the pieces.  I started with the pleats on the front, then the side seams. Then I partially closed the crotch seam and finished the inner seams.
Next I added my waistband. The pants front closure was a bit tricky. I decided I wanted laces rather than doing a fly-front... even though it isn't even visible, I wanted authenticity. hahaha I had to reinforce the edges where I put the holes, and add a modestly panel so you can't see my underwear through the gaps in the lacing. But in the end it worked well.

Lastly I finished the cuffs by cinching them and then adding on a strip of fabric that I had closed to be a circle.
I can definitely say that the base outfit for this costume is very comfortable.