Showing posts with label bells. Show all posts

Tuesday, June 17, 2014

Isabelle - Wig, Ears & Tail - Animal Crossing


 The first of my Anime North posts! Lets look at Isabelle! This was made for my older sister Alex. This past Christmas I didn't really have enough time to make a whole bunch of gifts at the end of term, so instead I made a "gift certificate" for my sisters for 1 costume each. Elanne picked Sakura, and Alex picked Isabelle.


Isabelle is a character from the popular game series Animal Crossing. (Called Shizue / しずえ in the original Japanese version.) She is the secretary to the Mayor (the player). I don't play it, but my sister is very much a fan! As you can see, this is a gijinka version of the character, but since the characters in this game are already pretty much humanoid already, there wasn't much redesign necessary to create a gijinka version. This is really just a wig with ears instead of a full mascot head.
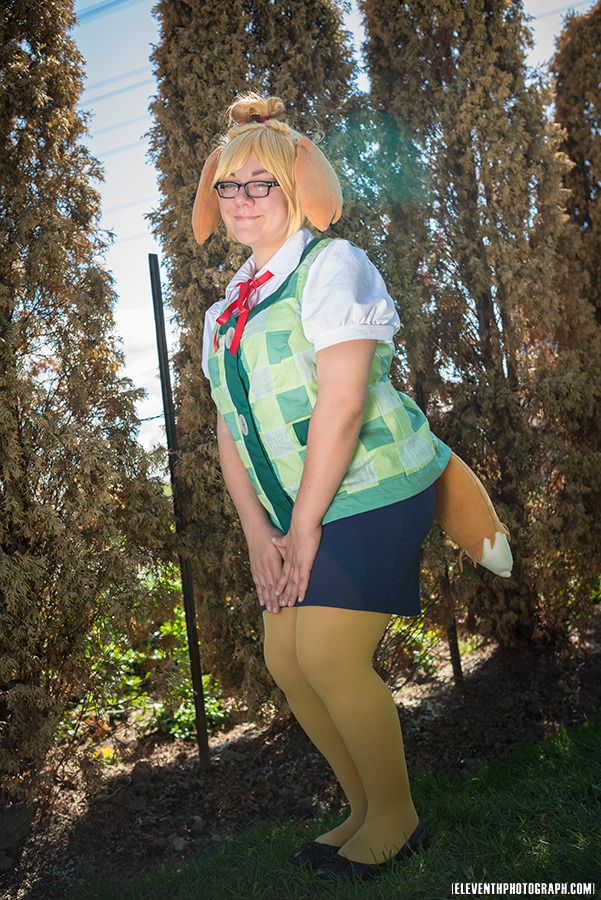
She wore this costume on the Saturday of Anime North, while running her Crafters' Corner table, which had her tied up for the majority of the weekend. She did manage to escape for a little bit and did a mini shoot of the costume with Mike of EleventhPhotograph . We got some really cute pics! :D Be sure to check out his con gallery!

The base wig we started with was this one from Epic Cosplay. I really liked this colour of blonde, we chose to go with a colour palette that was a little less yellow than the character is normally. I think it is technically listed as a Vocaloid wig, and it required a large amount of styling to get it to work as an Isabelle wig. First I put it on my sister's head and determined what part I wanted up in the ponytail. I tied that out of the way while I worked on hiding the part at the back. 
The problem with wigs it that when you pull the hair in pretty much any direction it reveals the gaps between the wefts. In order to prevent this you have to add in extra wefts to mask the part. Now, if they had had them in stock I would have bought extra wefts when I bought the wig, because I knew I had to pull the top of the wig into a ponytail, which would leave a gap about 1/2" wide. Unfortunately they did not have any in the colour I needed, so I resigned myself to some serious MacGyver-ing.

I selected 3 separate rows of wefts from the back of the wig--far enough down that they wouldn't be noticeable, and far enough apart that they wouldn't leave a bare patch--and I carefully picked them out with a seam ripper. I sewed this into a mega-weft (3 rows of wefts stacked on top of each other). That was then hand stitched onto the wig along the bottom of the gap. Using a pin I parted the wefts, making 2 go up into the ponytail and 1 go down into the back. Had I had more wefts at my disposal, I probably would have done 4 wefts, with 2 going down as the area under the part is a little bare. But it was still much better than when I started, so I considered it good enough!

At this point I tried it on my sister and gave the bangs, sides and back a little trim.
Then I was ready to permanently secure the ponytail--I double checked on my sister first and foremost, because her head is a different size from the wig head, so if the ponytail was pulled too tight it would look weird on her! Ensuring it was in the position I wanted, I then carefully dabbed/mashed some white glue in around the base of the ponytail. It dries clear, but I was still careful to not be messy during this process. (This is similar to the process of stubbing a wig except that this ponytail was not getting cut off!)

Normal white school glue is good for styling wigs, it dries clear and is washable; if you make a mistake, you can wash it out and try again.

Then my sister dyed the gradient into the ponytail. She did the colour to match the ears I made. She used a combination of brown india ink and rubbing alcohol (70%) to dilute it. She also apparently didn't look up any instructions before doing it. :/ This is the approximate method if you are interested!

After letting that dry sufficiently I artfully arranged the bun the way I wanted it, securing it with another hair elastic. The I hair-sprayed the bejeezuz out of it. (This is a technical term of course! ;D) I let it sit and air dry for several hours. Occasionally spraying it a bit more. Once it was fairly solid I added a touch more glue around the base to hold the ends of the bun in place.
The hair accessory is a piece or red ribbon folded in half length-wise, with 2 silver bells attached. These were simply hand stitched on, and the ribbon was fixed around the bun with a hand stitch. I got the bells downtown and they have little hearts on them, which I think suits the character so nicely. :)

The ears are fleece which was bagged out and lightly stuffed. I closed the stuffing hole with a hand stitch and then stitched them to the wig.
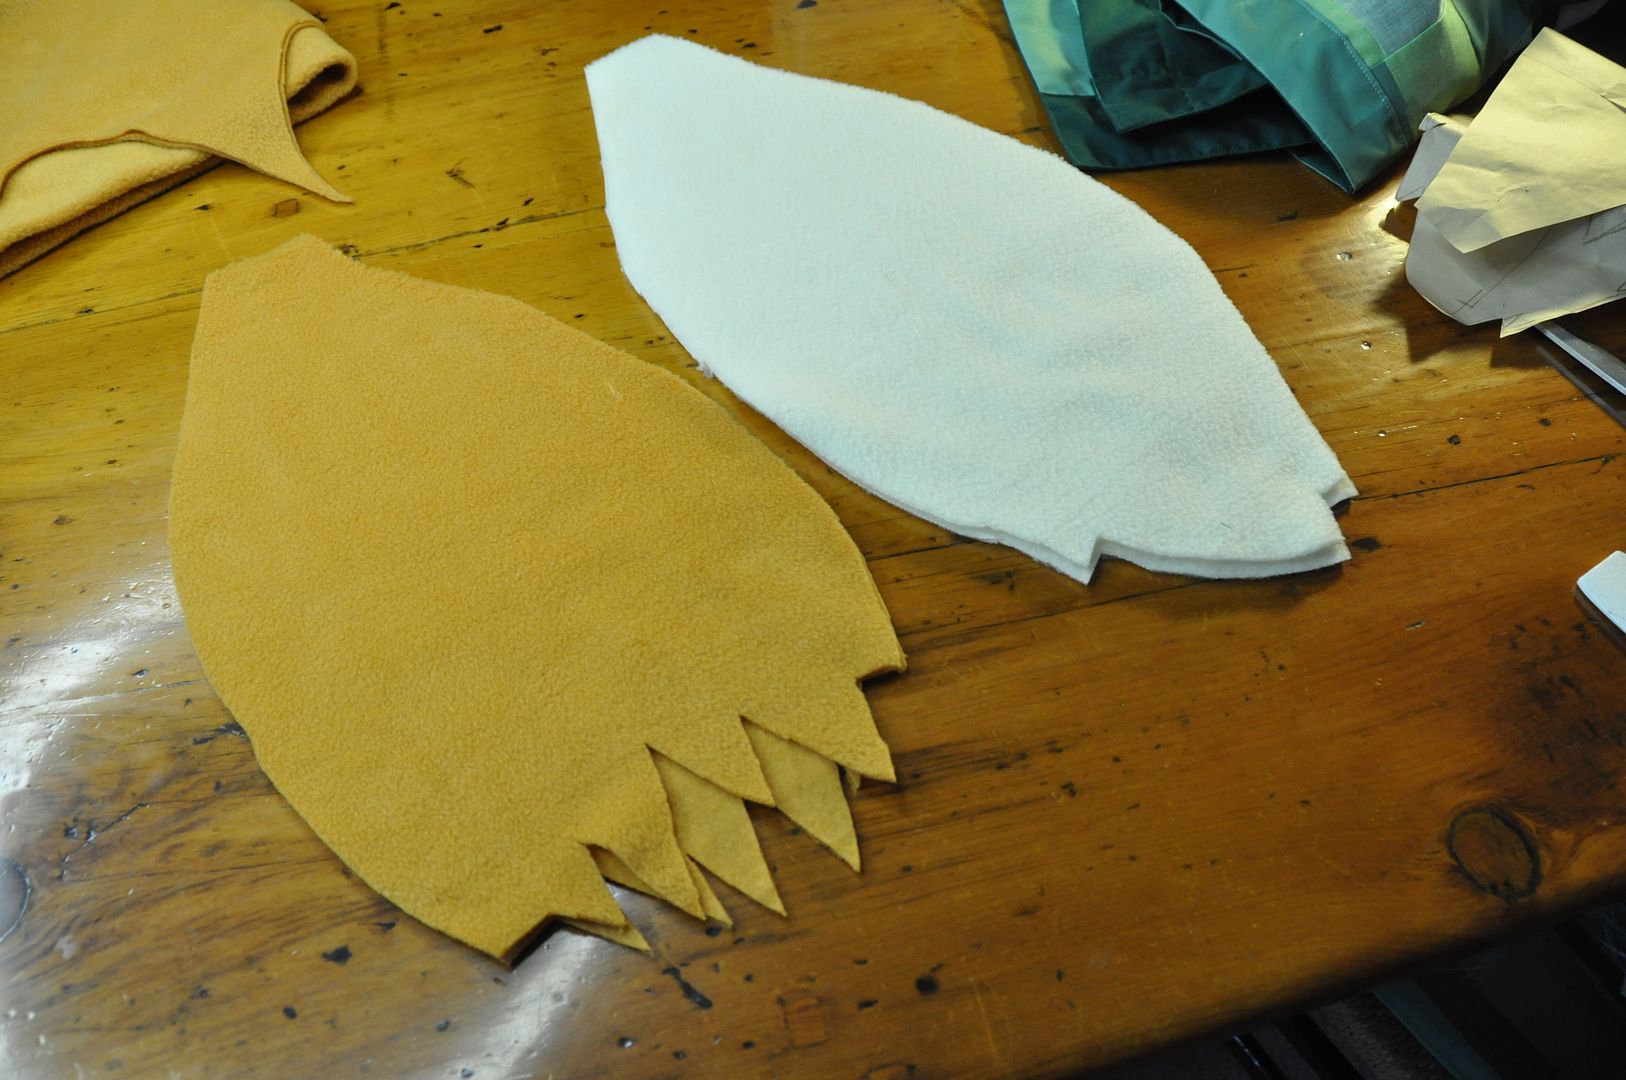
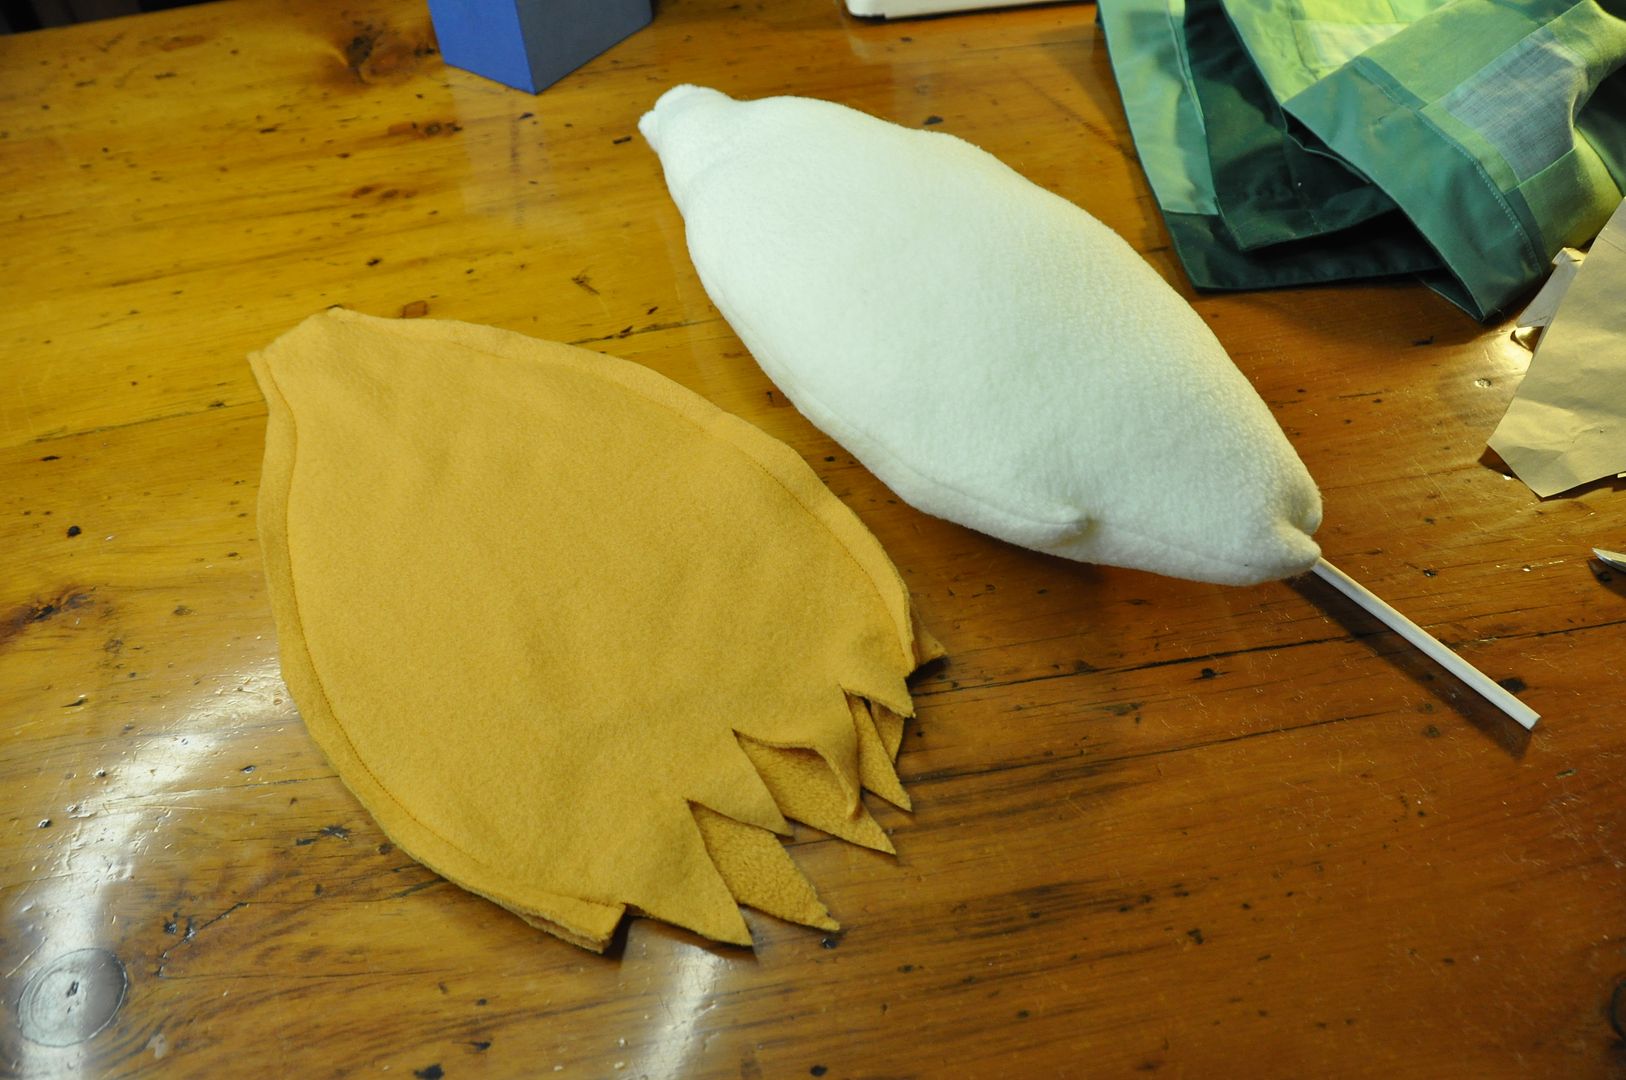


For the tail I made a paper pattern of the approximate shape I wanted and cut out a piece that was a lot wider at the widest point. This was so it would be nice and round I made an inner tail piece in a cream colour, and an outer tail piece in my yellow/gold. The yellow one ends in an open spiky end, which is different on each side. The nice thing about fleece is it isn't neccessary to finish the edges because it doesn't fray.
I bagged each of them out and stuffed the inner tail to be nice and round.

The gold/yellow colour matches the blonde wig and the tights, and the brown ears match the bun gradient like on the character. It was a bit of a challenge finding 2 complimenting colours that both matched the wig, and tights that would match the tail. But we managed it!

Then I slotted the outer tail over the inner tail and sewed them together at the tail base.

This piece was then attached to an elastic waistband, which was just slipped on over the skirt, under the vest. And presto! A cute tail!

Friday, June 7, 2013

Asuna Kagurazaka - Wig - Negima

Hey guys! This is the first of 6 posts that will feature my Asuna costume. Starting with the wig, which was possibly the easiest part of the costume.

I got my wigs off of EpicCosplay, which is a US based online wig store that has good quality wigs and doesn't charge an outrageous amount to ship to Canada. (They are the place I normally buy my wigs from.) I ended up buying 2 wigs to make this wig, as I needed the extra wefts to create the part up the back. I suppose I could have just used 1 wig and extensions, but I wasn't sure how much I would need/how much extensions I would get with one order, so I thought it would be more economical to buy a whole wig. I ended up with a lot of leftover, but I have a character in mind that I will need the extra hair for, so it will probably be fine.

This is a different method than I used on my Presea wig (a costume that will debut sometime this summer) where I chopped off the bottom of 60" wig to make the wefts myself. In this case I couldn't do that, because I needed all the length I could get.

 I had a bit of trouble deciding on a wig for this character, because although the colour of this 40" wig is perfect, the hair is not nearly as long as the actual character's. I had located a 60" wig on ebay, but it was a more vibrant orange (not exactly what I was going for). Also, I was unable to find matching extra wefts from the same seller to make the part. (Meaning I would have had to take the hair off other areas of the wig, which is not exactly ideal.)

I started by carefully detangling and brushing out my wig on my makeshift wig stand. Then I separated out the sections of hair, including the 2 pigtails and an approximation of where I wanted the part at the front.
By pulling the hair into pigtails I was able to get a good idea of what it would look like when finished so I could style the front accordingly.

By gently feathering the hair to make it look more natural, I cut in the bangs and sideburns. (Only cut straight across if that is the way the character's hair actually looks, and even then you should still thin the hair out a bit.)
With the front now out of the way, I could start on the back. First I deconstructed my second wig, using a seam-ripper to remove the wefts from the netting. Once that was done I started adding the wefts in a line down the center back, hand stitching the wefts into the netting.

For the center of the part I took 4 wefts and whip-stitched them together to make an ultra weft.When pulled apart from the center, this weft would make a clean part, showing none of the ugly stitching that was holding the wefts together. (Compare above left to above right.) I used a needle to part the wig, ensuring all of the wig fibers were going to the correct side and that I had a perfectly straight part.
Then I added a few more wefts in to cover the part that was pulled away on each side. Particularly at the bottom edge behind the ears, where it is not covered by the bangs.

You may notice the mohawk that was formed on the back of the wig. This is because there are little short hairs in each weft to help cover the netting without making the wig too thick. They had to be sprayed down, but that came later.
Whenever you need something small, red/gold and ornamental, I highly recommend taking the time to scour chinatown. I picked up these ornaments for a total of about 12$, which is not bad considering the effort I would have had to put into making them. These were essentially perfect for this character. All I had to do was remove them from the tassels and tacky lotus ornaments and I had 4 bells ready to go.

Be warned: I used my own key-rings to replace the jump-rings that came with the bells. They were made of cheap metal and the weight of the bell alone was enough to bend them open, causing the bells to fall off.

I re-brushed the wig with the new wefts in place and pulled the hair into pigtails again. I added the bells and red ribbon on top. I used hairspray to tack down the little mohawk at the back, and used it to keep the hair under the pigtails from slipping as much.

This wig had it's own fair share of problems. Because I didn't do a stubbed wig, the pigtails would slip during the day, because the bells were quite heavy. This just meant every morning I had to re-tie the pigtails, which wasn't too much of a hassle. Additionally, I feel if I am to wear this wig again, I need to add in a wig clip at the front, because it was too back-heavy and kept slipping (if only I had more hair to clip to, but that's a different problem). Also, as a side effect of being such a long wig, it would get tangled fairly easily (which I had anticipated), I ended up leaving the hair braided for most of the weekend because it was just too windy.

I'm really happy with how it turned out though. :D The bells jingling on my head only drove me a little crazy throughout the weekend. Hahaha