Showing posts with label foam. Show all posts

Thursday, October 22, 2015

Sakura - Wings - CardCaptor Sakura


Part 2 of my Sakura (1st Opening outfit) posts: lets talk about wings! If you want to see how I made the outfit, go here!

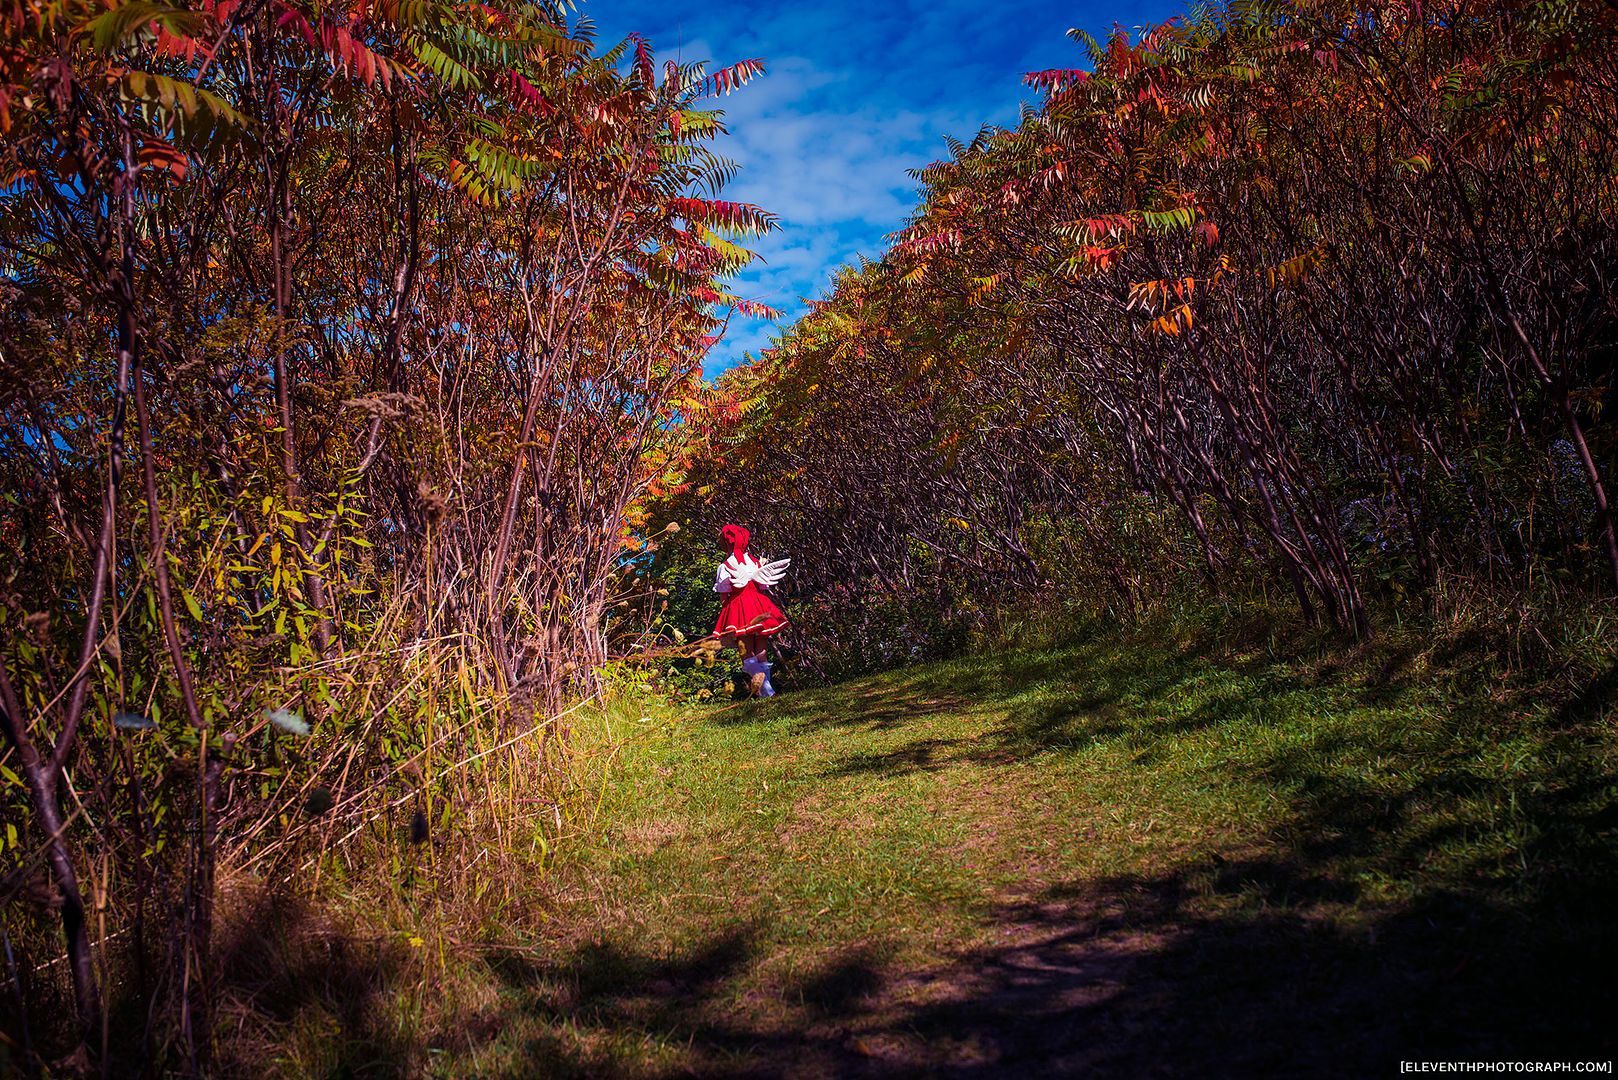
Once again thanks to EleventhPhotograph for the photoshoot. I really love the above shot! It reminds me of Alice in Wonderland.

This was an exercise in perfecting the foam wing style I had used for the Kero and Suppi gijinka costumes. Since I already knew what I was doing, this time around involved a lot less trial and error.

I like making foam wings this way because they are sturdy, and they aren't likely to get too damaged in crowded convention spaces. They are also fairly light and not horribly uncomfortable. I like the cartoon-y style of them as well. 

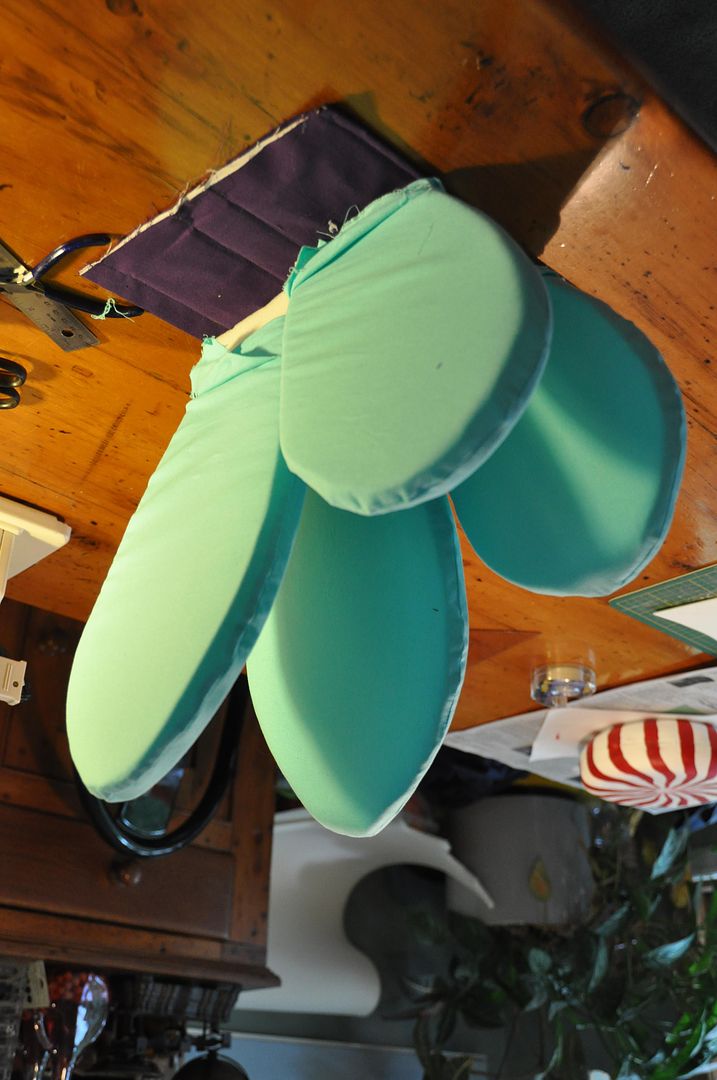
I traced out 4 wing shapes on the foam--2 for each wing. I cut these out with a pair of scissors.

Pairing them up I cut off the corners so they would be more rounded along the edges. This will help them fit into the cases better.

Using the same pattern as the wings I cut out my four pieces of white fabric. I made these about 1/4" bigger all around (+ seam allowance) to account for the depth of the foam.

I sewed the wing cases right sides together, trimmed the excess seam allowance and then flipped them right way out. I left a large gap along the base that extended up along the top edge--this is so I could get the foam wing inside the casing. Because of the friction, the foam really doesn't like to go into the case easily, so it takes a lot of patience and just a touch of brute force.

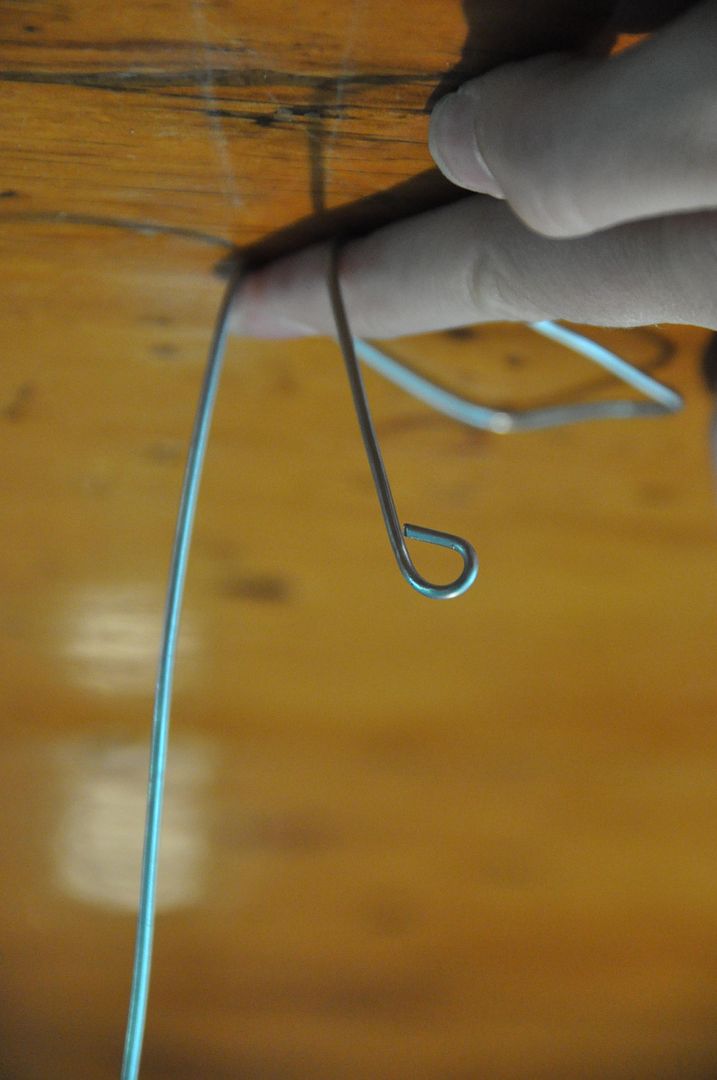
Using a heavy gauge wire, I created a wire base for each. You can see each wing has a wire base that is made of one continuous piece. The two "antennas" support the wing, the u-shape at the bottom is where the wing is attached to the base. Note how I bent the cut ends of the wire into little loops--this is so it wouldn't stab through the foam or fabric.

After taking some measurements and figuring out the spacing I began to pattern the harness. This was a bit tricky, because it had to fit under the pink dress, but sit high enough on the back so that the wings would sit above the dress' neckline. It also had to be tight fitting so that the wings wouldn't be droopy (a problem I encountered with Kero).

I cut a base plate out of styrene plastic. It was simply a rectangle with rounded corners--again so it wouldn't stab through the fabric cover later. The wires were attached to the base plate with copious amounts of hot glue. The nice thing about styrene is that hot glue bonds really well to it.

On the fabric covering I carefully measured and marked where the holes needed to be for the wires. Before sewing anything together I used the buttonhole function on my sewing machine to create small openings with finished edges for the wires to stick through. Then I sewed the styrene base plate into the fabric covering.

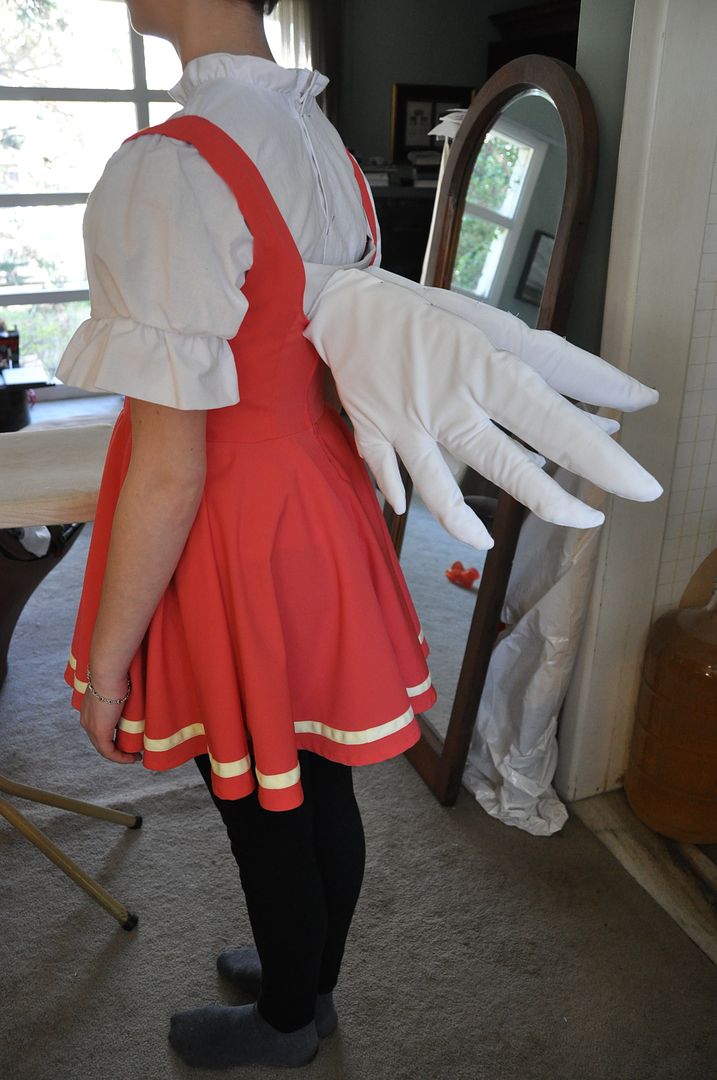
Once the back plate was finished I added a waistband and shoulder straps. I fit it on her so the shoulder straps would be tight, and allow the back plate to sit at the proper height. The straps were made to be a fixed length. The closure was a set of bra hooks on the front of the waistband, so it is easy to remove the wings for important daily tasks--like sitting.

We tested the wings with the dress. You can see here they are really droopy. Once I was satisfied with the fit I used hot glue to attach the foam wings to the wires on the inside.

Once the wings were actually attached to the base I could adjust the height that the wings sat by bending the wire at the base. Because the wings have weight that is sticking out from the body, even though they are really light science & gravity mean that they will be heavier the further distance the weight is from the base. As such, when you put them on, gravity causes them to pull and tilt the base plate slightly, which makes them look droopy and sad. You can see in the picture on the right how the base plate is pulling away from the back ever so slightly, but it is more than enough to make the wings droop.

While this problem is partially solved by making a tight fitting harness (minimizing the amount the base plate will tilt), to counteract this you simply have to overcompensate and position the wings pointing extra up to counteract the downward pull of gravity. This is so that when they fall to the position they want to sit at, it will be the position you want. Note the difference between the pictures above and below--in the second picture I have glued them internally and positioned the wings to point extra up. Now they don't look so sad.
The reason why I love making wings like this is because they are adjustable. You can bend the wires to suit your needs--whether that means you want to make the wings more open or closed, up or down.

My friend Alli (who helped me on my Asuna costume the previous year) helped to finish them off by neatly hand stitching the casings closed.

And then they were done! >:D


Wednesday, September 30, 2015

Inkling - Guns and Tanks - Splatoon

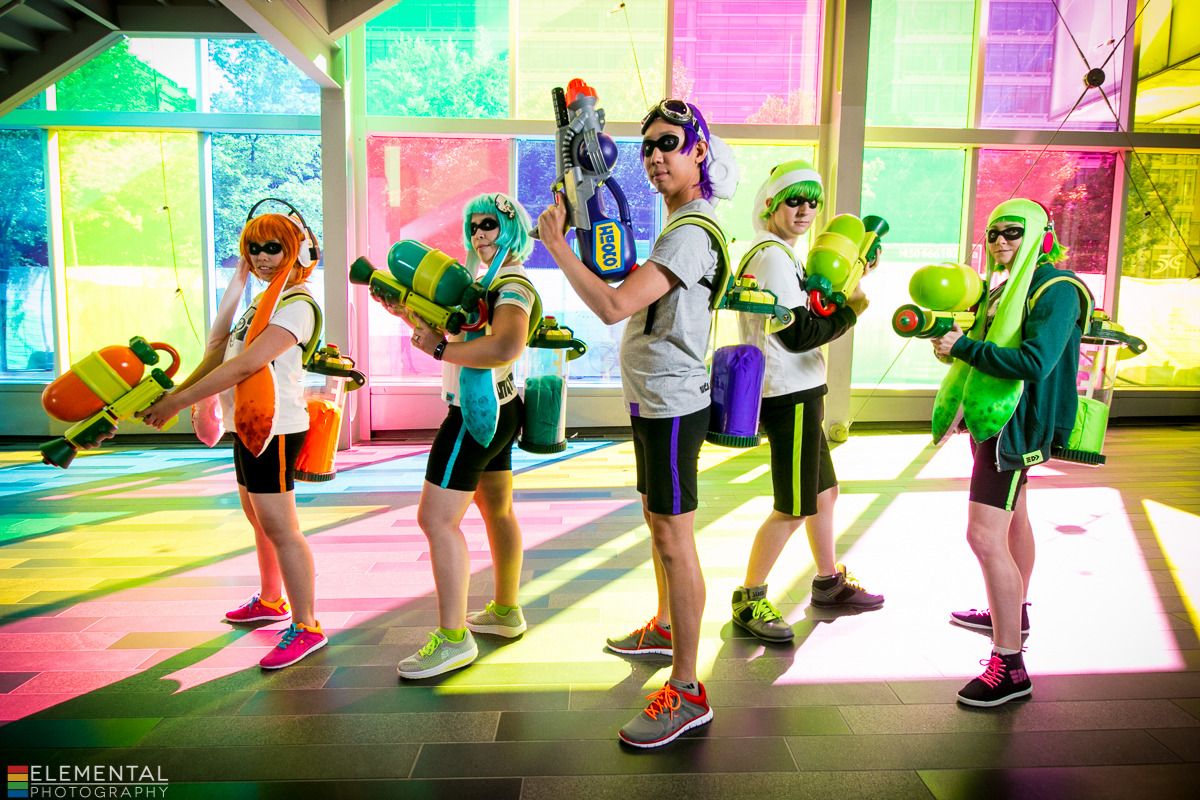
Part 3 of the Splatoon Squad posts! Lets talk armaments! >:D If you are interested in the tentacle hats, go here! If you want to see how we put together the outfits, go here! Once again hats off to Elemental for the great shots from the photoshoot!

Now we delve into territory that I know little to nothing about: The Armaments. I had very little involvement in this area. I was a helping hand in the mass production line for the harnesses, ink pillows, and I helped put the electrical tape gauges on the side of the tanks. That's about it. Credit goes to the real masterminds Brian (Ragz Cosplay) and Adrien, and their very best shop gnome Andy (Yavarice).

Based on a 3D model that Andy did of the tank, Brian broke down and printed all the components. These had to be cleaned up (sanded) and painted, and then these were assembled into a full team of tanks. Andy gave a hand in this process.

All I can tell you about 3D printers is that they operate by wizard magic. I am fairly certain Brian is a wizard, and Andy is a sorcerer's apprentice.

The pieces were painted up separately using spraypaints and then glued together using a glue called E6000. The bottom of the tank is removeable so that the ink pillow can be changed. By changing the ink pillow you can easily re-purpose the tank for a different colour team.

The pillows are made from the same spandex as our hats. Michelle (Mage Cosplay) and I made fabric cylinders of varying heights and stuffed them. The pattern is literally 2 circles and a rectangle. Except Brian's, he made the top of his wavy. Because he is not lazy like me.

The harness rigs are made out of foam mats from walmart, black webbing, buckles and hot glue. The shoulder straps are 2" wide and tapered at the front end. After being cut to the desired length, we put a slit at each end for the webbing to be fed through. The webbing had the female end of the buckle sewn on to one end. We carved out a small depression in the inside of the strap and glued this end of the buckle in place. The other end is the adjustable side. When we had the desired length, the excess webbing was cut off. We burned the ends with a lighter so they wouldn't fray.

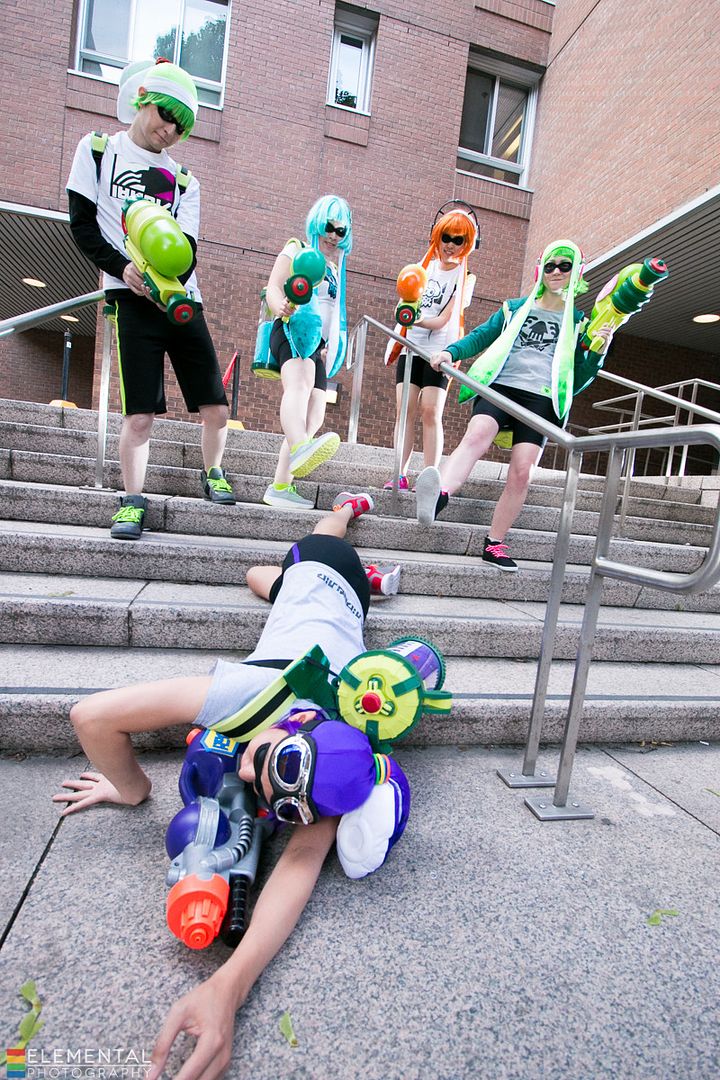
The two straps were glued to a back piece that is a dumbell shape that has a thinner webbing strap attached to it. This smaller straps has velcro and feeds through two slots on the tank. They make the tank removable from the harness. You can see where the tank attaches to the harness in this great shot of us beating up Andy.


As for the Splattershots, Adrien takes all the credit there. (Well, Andy does get some credit for being his resident shop gnome and doing much grunt work cutting out pieces.) Adrien created some foam pieces as templates and vaccuformed all the separate pieces over them. These were then cut out and glued together. But I assure you it is more complicated than I have described. I am still in awe of these, they are so professionally made!

I believe Andy's gun is a Nerf gun? With a logo added to make it look super legit. The logos were made from craft foam.

Overall I was really impressed how we were able to pull together a really cohesive looking group! I hope I get to take part in something like this again in the future. Special thanks goes to everyone who helped make this happen. I'm excited for Squids 2.0! :D

Thursday, August 28, 2014

Star Wars & Star Trek Pillows

A batch of nerdy home decor! These pillows were a belated birthday/anniversary/housewarming present for my boyfriend. Because he has a bench that he is currently using as a couch that didn't have any padding on it--not good for parties (which he has yet to host). :P

I must confess I liked both prints (which I picked up at affordable textiles on Queen St,), but I couldn't decide, so I got both. I'm pretty sure having these in the same room is blasphemy, much less having them on the same couch. I don't know much about Star trek, but I do know that yellow is the command colour, Spock wears blue and Red shirts always die (except Scotty??), so this may have influenced my decision? :P Interesting to note: the Star Wars fabric has every main character except Luke on it. Hahaha (And by that I mean from the original trilogy, not from the terrible movies from the 2000's.)

 I bought pillows and foam squares to cover. I measured them and cut squares from my print fabrics that were slightly larger than the pillows (plus seam allowances).

For the backs I made them out of 2 rectangles overlapping at the center. This opening allows them to be easily removed and washed. The open edges were finished off with a fold over hem then ironed.

Then I laid the front and back pieces right sides together and sewed around the edges. Then the pillow was turned right way out.

Lastly I added a piece of velcro at the back opening on each to keep them closed.

This project was really simple and a fun way to decorate the room!

Tuesday, October 1, 2013

Kero & Suppi - Tails - Cardcaptor Sakura

For the last part of this tutorial lets talk tails! This was my first time making tails, so there was a bit of trial and error to get it right, but these ones turned out really well, and I am super happy with them. Particularly Suppi's; look at that fabulous spiral! :,D

Go here for the Shirts & Shorts, Wigs & Ears, Aprons & Wings and Props & Accessories! Special thanks to Eleventh Photograph for taking some great pictures of us! See us in his Otakon gallery!

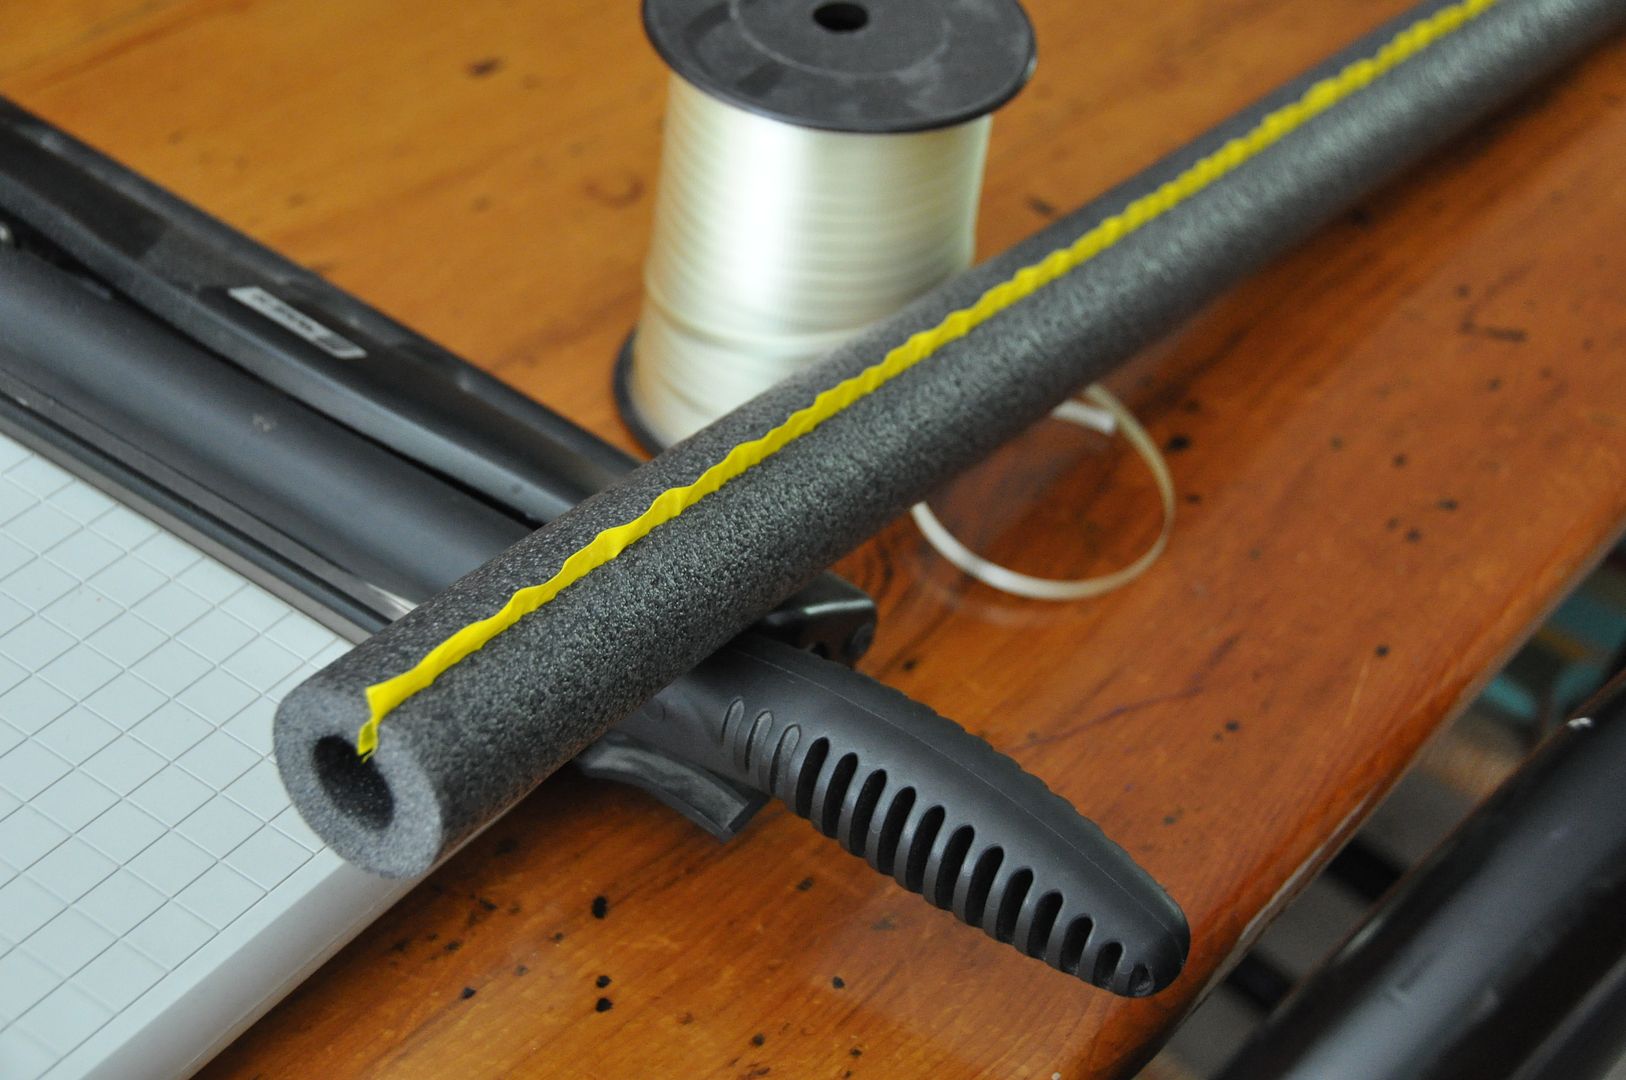
The secret to these tails is that they aren't stuffed; I used foam insulation tubing for 1/2" pipe. Normally this stuff is used in construction around pipes. It's a flexible foam tube with a slit in the side. You peel off the yellow strips and it adheres to become a complete tube. Also it's dirt cheap. Pretty cool stuff! 
Let's start with Kero's tail, as it was the easier of the two.
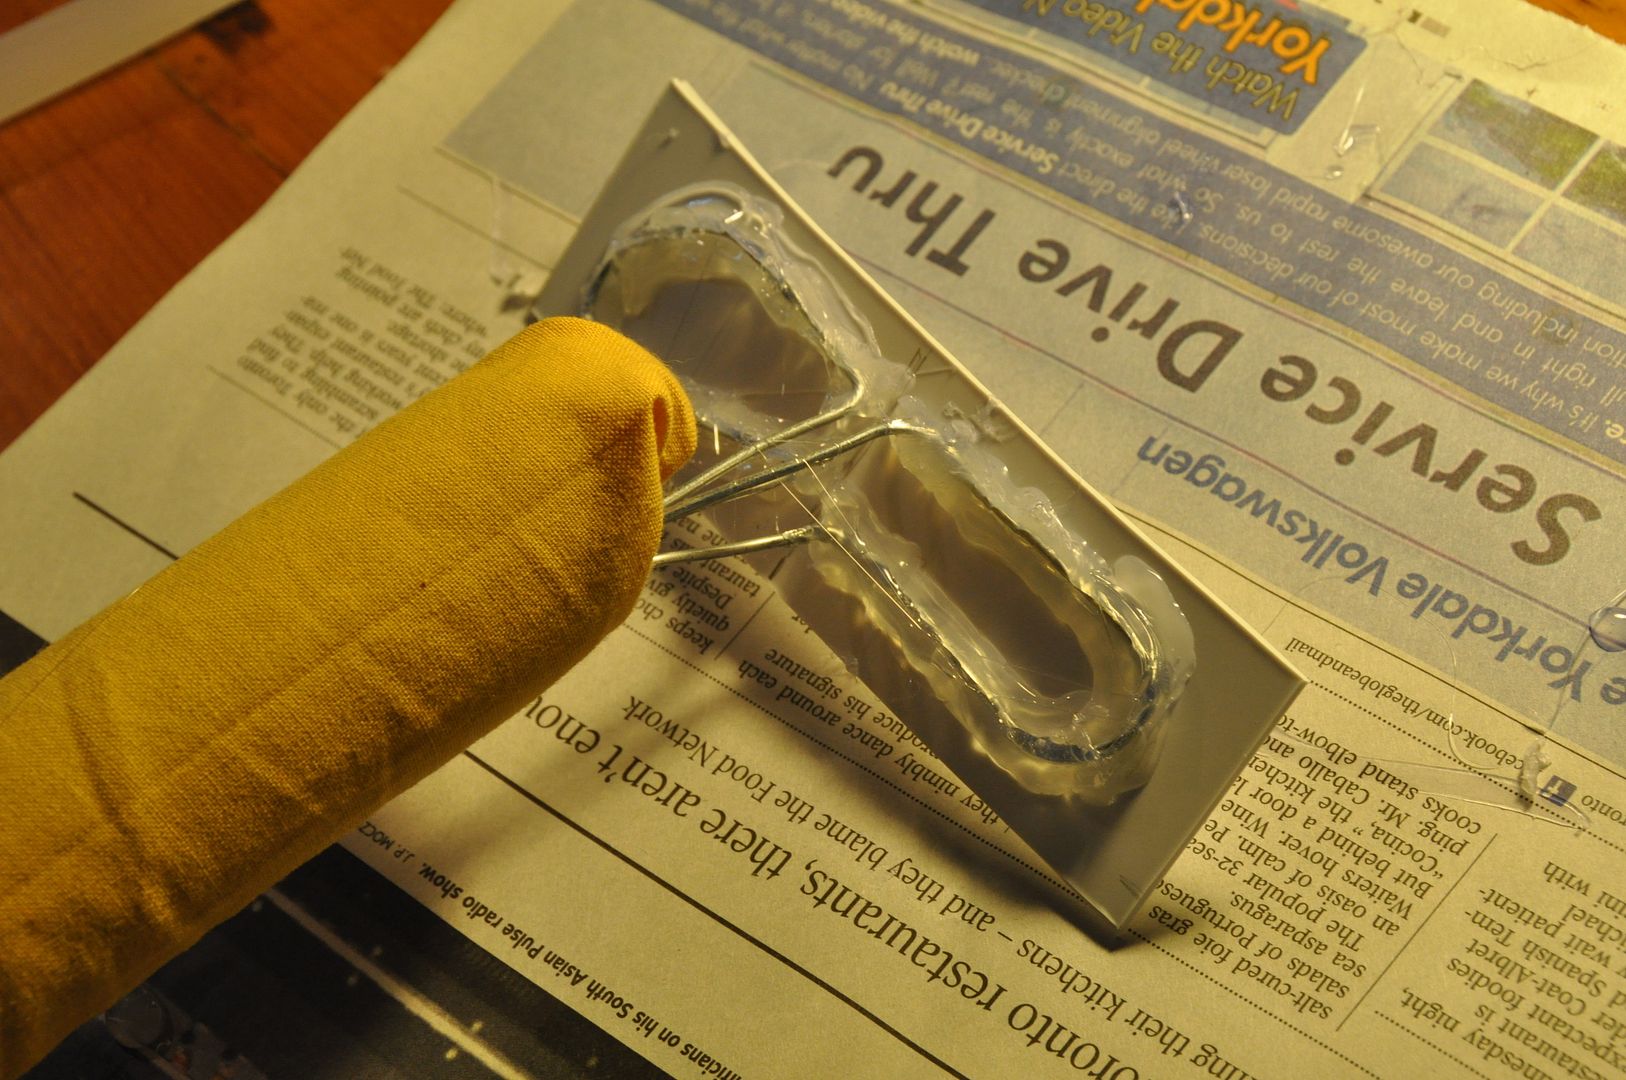
I started by cutting a section the length I wanted (keeping in mind the pouffe on the end would add to the length). Then I stuck 3 lengths of wire down the center, leaving excess at both ends. Then I pulled off the adhesive strip, closing the tube.
The end of the foam where the tail base would be I cut on an angle. Then I bent the wires into loops pressed off to one side. This would make the connection secure.

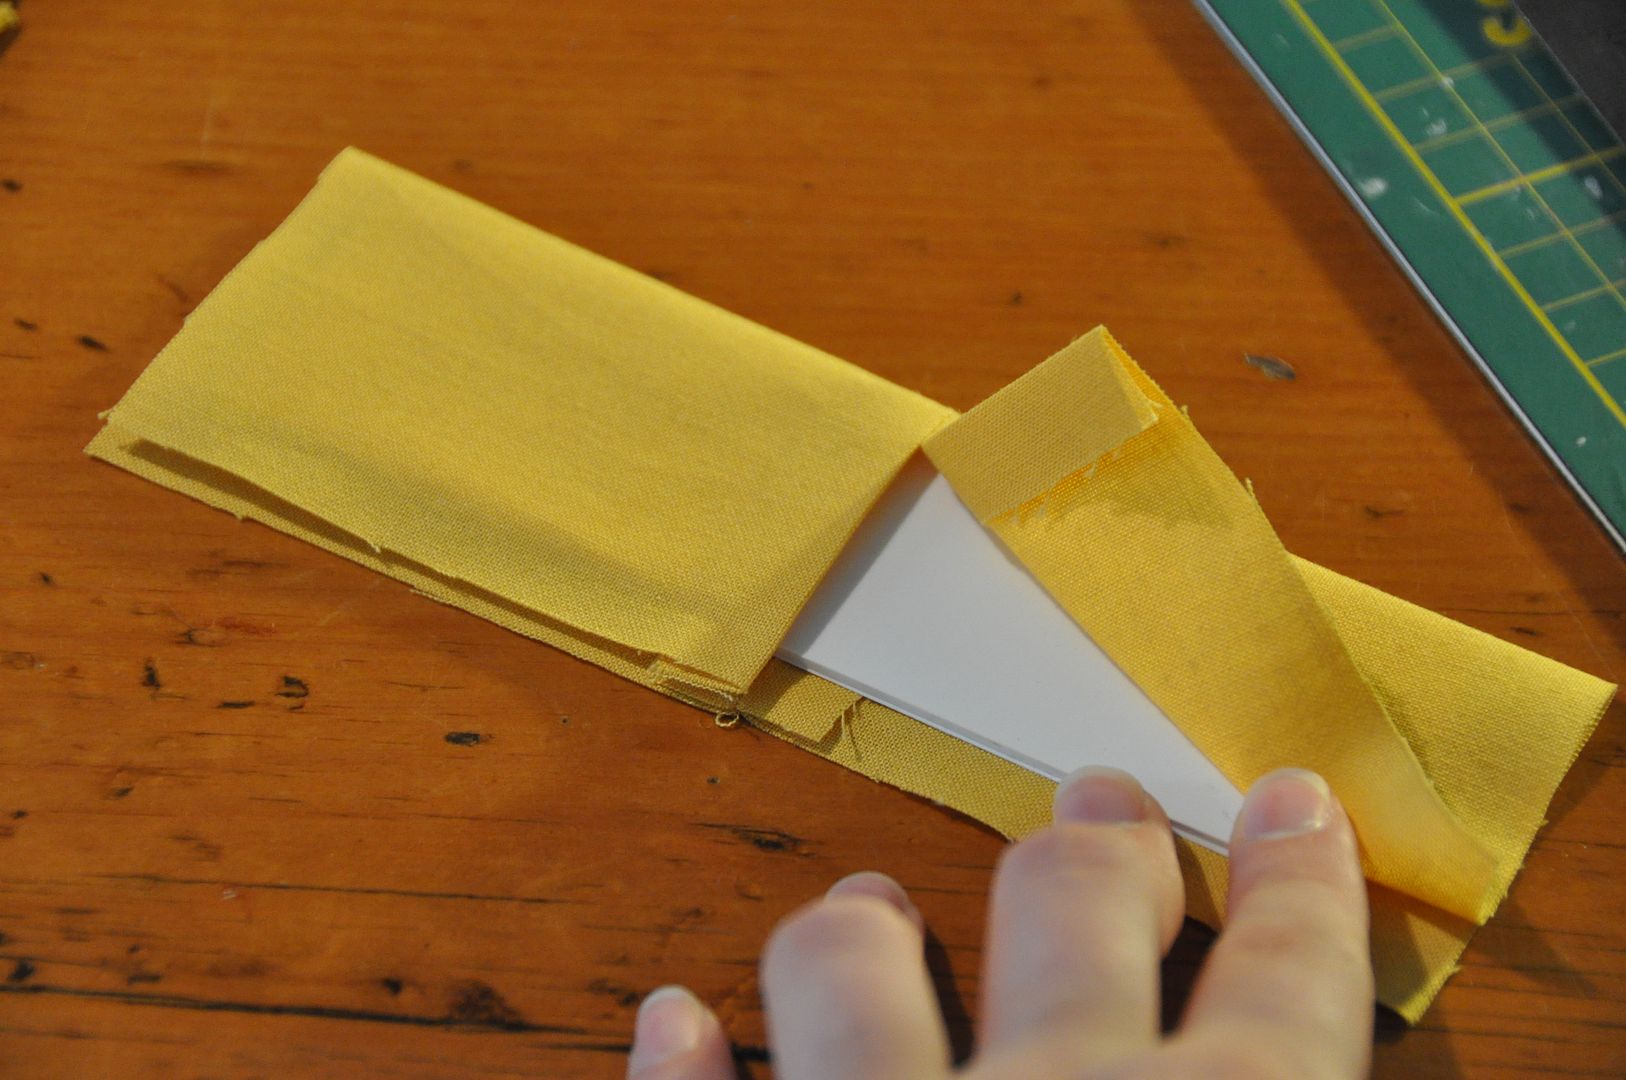
Then I made a long tube of my yellow fabric just slightly wider than the circumference of my foam tube that I snugly slipped over the tubing.
The base piece is a covered piece of styrene plastic. The cover has a slit built into it where the wires come out of it.

I drew a center line on this piece that would line up with the slit, then carefully glued down my wire loops using hot glue. The nice thing about styrene is that hot glue bond really well with it. But be warned if you make a mistake the lumpy glue will pretty much never come off.

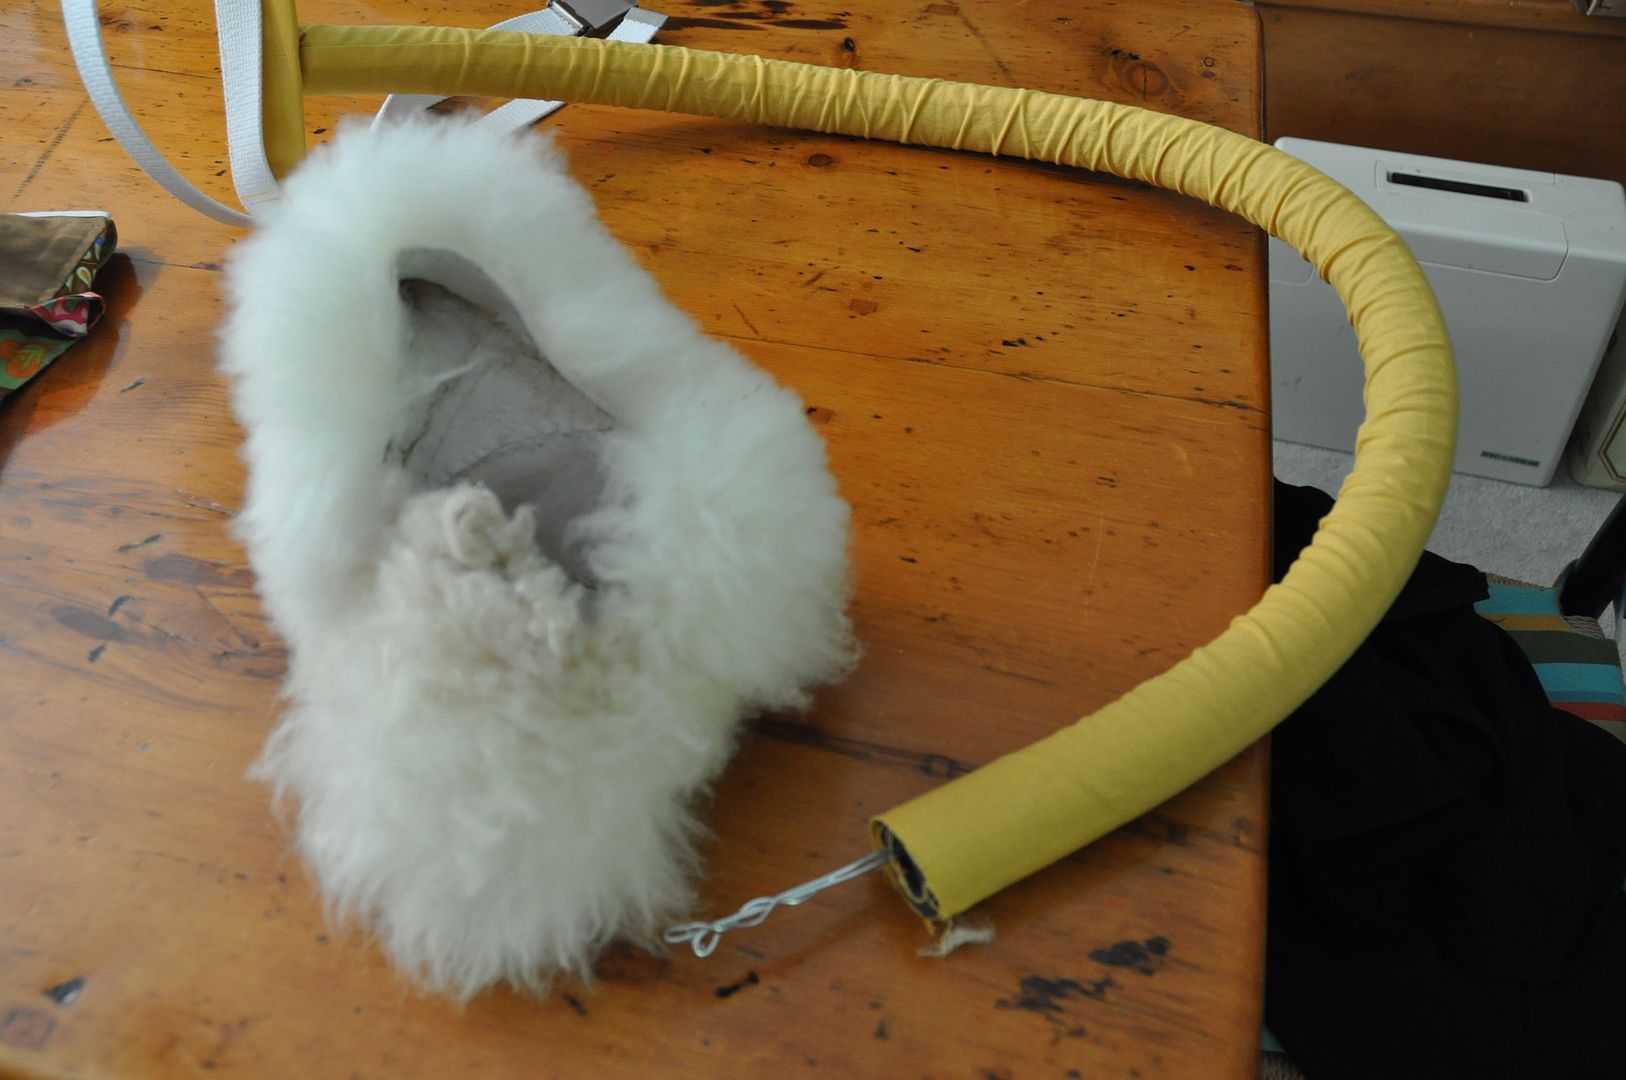
Then I cut off the excess fabric, stuffed it inside the tube and hot glued it in place.

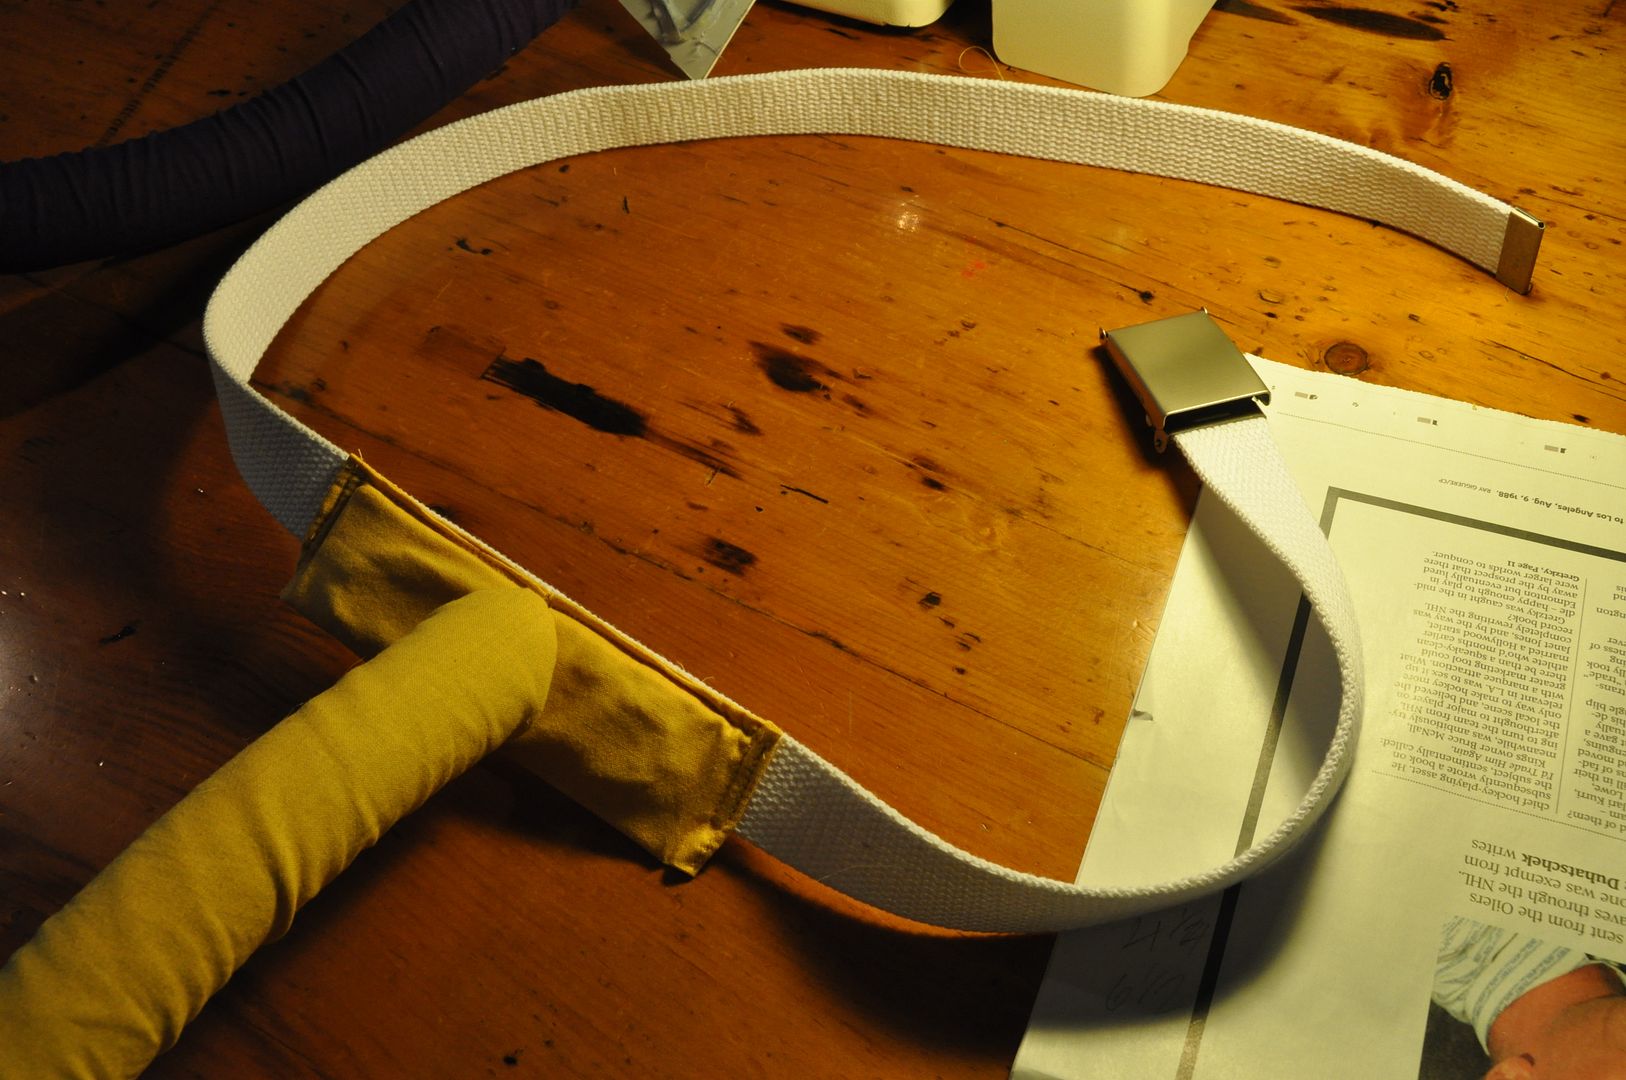
The slitted cover is then slotted around the wires and stitched together along the top edge. The cover is then sewn to a fabric belt. This kind of belt is easily picked up for cheap in Kensington Market in Toronto.

The pouffe was constructed out of leftover scraps from a costume of my sister's. That is actually part of a sheepskin rug from Ikea. :P

Suppi's tail was a lot more challenging to construct. The main issue was getting a spiral with a cover that wasn't completely wrinkly. This meant that part of the cover had to be a curved tube.

Making the spiral itself was pretty easy. I simply cut out triangle wedges from the inside edge of the tube to allow it to curve more sharply for the spiral portion. I fed 3 wires down the center, then removed the adhesive strip, sticking the tube together. Then I bent the wires into a spiral, keeping my slits on the inside edge. The length of tube was 4 ft, but I didn't cut it any shorter, as the length was necessary to make the spiral.
Then I made a test cover piece. How I patterned it is really quite easy. I measured the inside edge of the spiral, then the outside edge of the spiral. These two numbers I divided by 20. Using these two products I then made a trapezoid pattern piece that would then be drawn 20 times to form a C-shape.
I cut 2 of this shape, sewn right sides together, then flipped inside out. This was then slid over the spiral end of the tube. I made a normal rectangle tube to fit over the straight part of the tail.

Where the two covers met they were hand stitched together, and the tail end was hand stitched closed.

The base was done in the exact same way as Kero's. :)
And that's it for Kero and Suppi! These costumes were a blast to make and to wear! I loved having a tail, wings and ears. ;D I only managed to drag my tail through one puddle...

Wednesday, September 18, 2013

Kero & Suppi - Wings & Aprons - Cardcaptor Sakura

This is part 3 of Kero & Suppi's posts: lets have a look at the wings and aprons. On this costume the wing rigs are built into the aprons. (As opposed to on my Cosmo costume, where the rig was hidden under the costume, this rig is incorporated directly into the apron.)

The apron part was really easy, figuring out the wing rig was a little more tricky.

Check out Eleventh Photograph's Otakon gallery for more pictures of Kero and Suppi (and other awesome cosplayers!)

For more Kero and Suppi, see our Wigs & Ears and Shirts & Shorts!
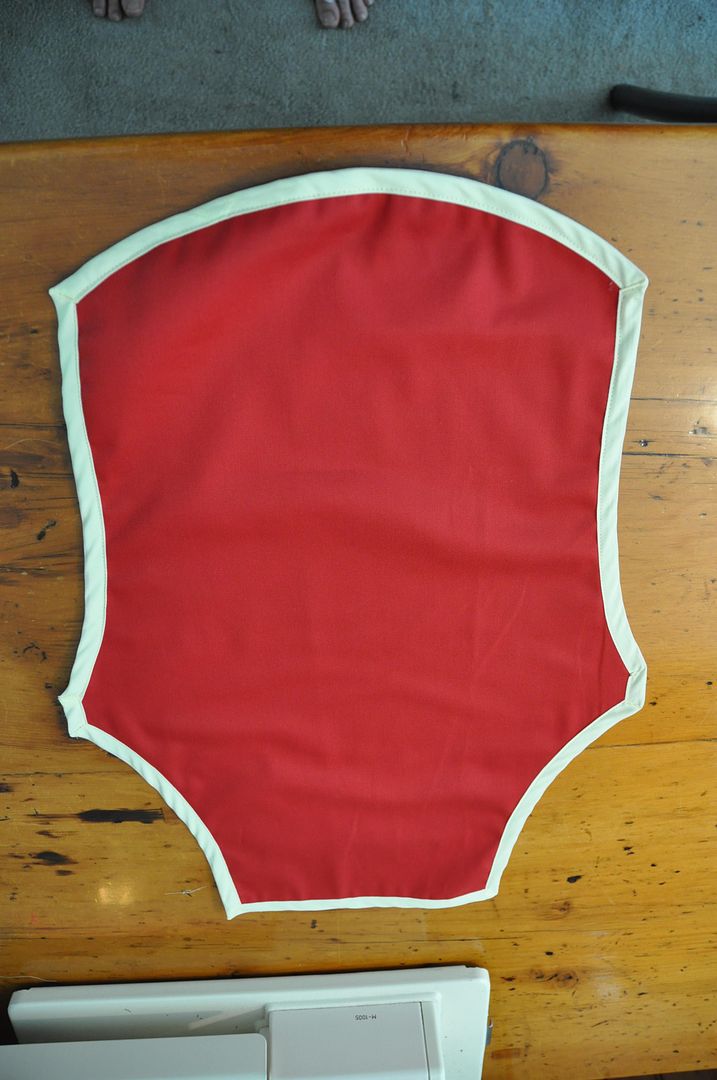
I started by making a paper tracer for each apron. I held it up to myself until I was satisfied with the shape, then cut out 2. The 2 layers were just for extra sturdiness.

I applied my contrasting bias tape trim around the edge of each apron.

This red is the leftover fabric from my red panda bag. :)  (Which is still for sale, if anyone is interested.)

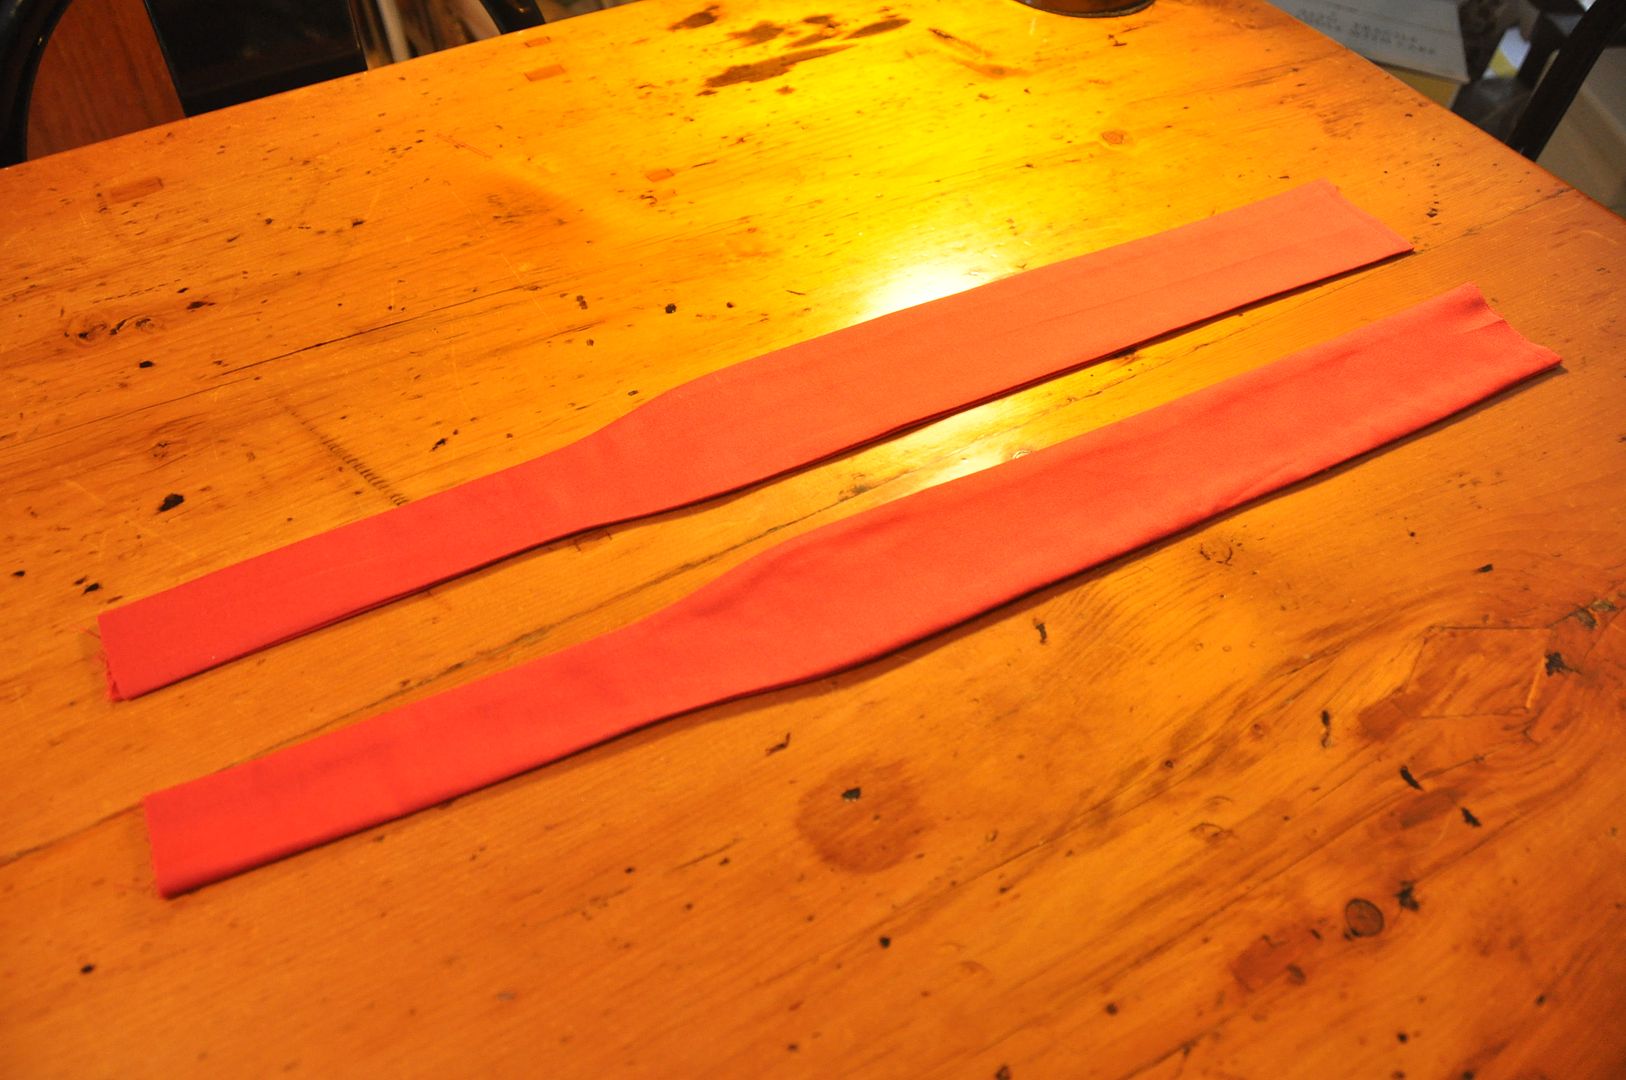
I then made two strips for the tie at the back. (I should have made mine a little longer.) These were narrower at the base where they attached to the apron and then widened partway. On these I marked 2 stripes going down the center. Along my marking lines I used my sewing machine to embroider a tight wide zig-zag stitch. This was much cleaner than attempting to paint the stripes on.

I made the 2 shoulder straps, marking where they needed to attach at the back and how long they needed to be. They needed to be fairly tight so the wings wouldn't droop, so I ended up having to tighten them later...

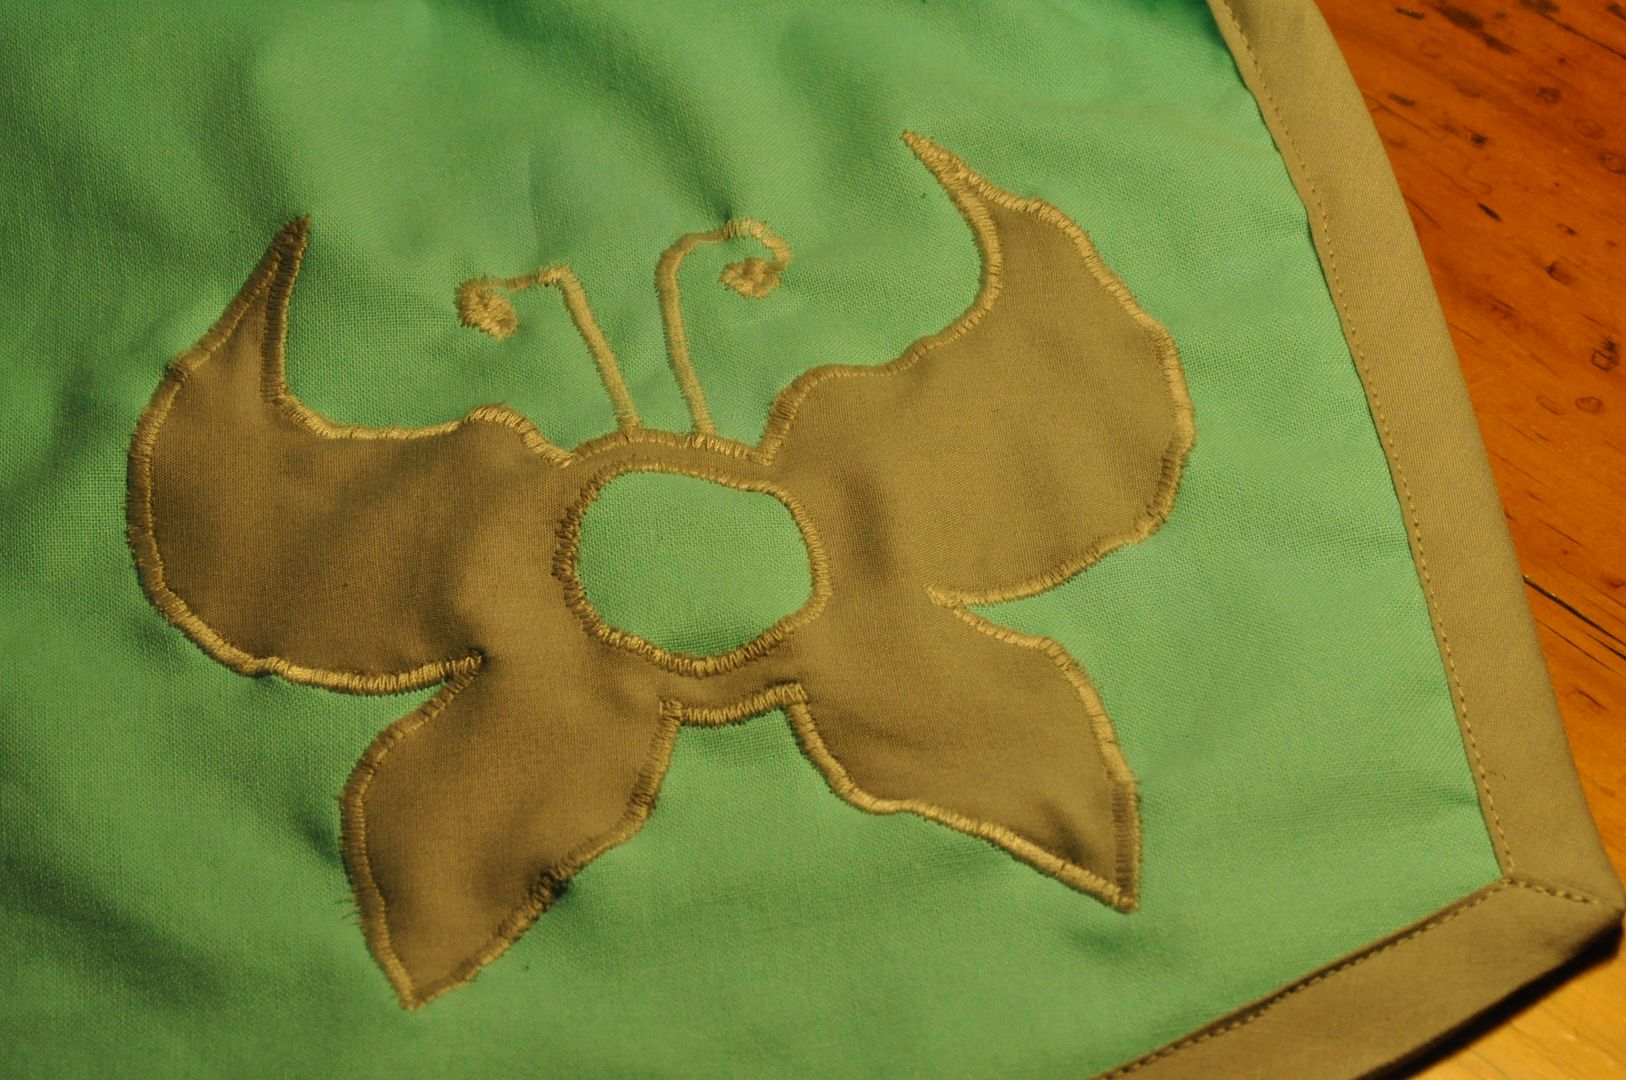
Then I cut out the pieces for the applique design. Suppi's symbol is based on the one from his "big form", Kero's is a simplified version of his sun symbol. (Meaning no wavy lines, as they would be impossible to do at this scale...)
Using a tight zig zag stich, I carefully followed the edges of my cut outs. For Kero's I did the pale star points, the inner lines and then the yellow star outline. For Suppi's I started with the inner circle, then the butterfly and lastly the antennae.
Once the apron bases were done, I started on the wings. Like many parts of this project I started with a paper tracer which I sized up to the actual person before cutting anything out.

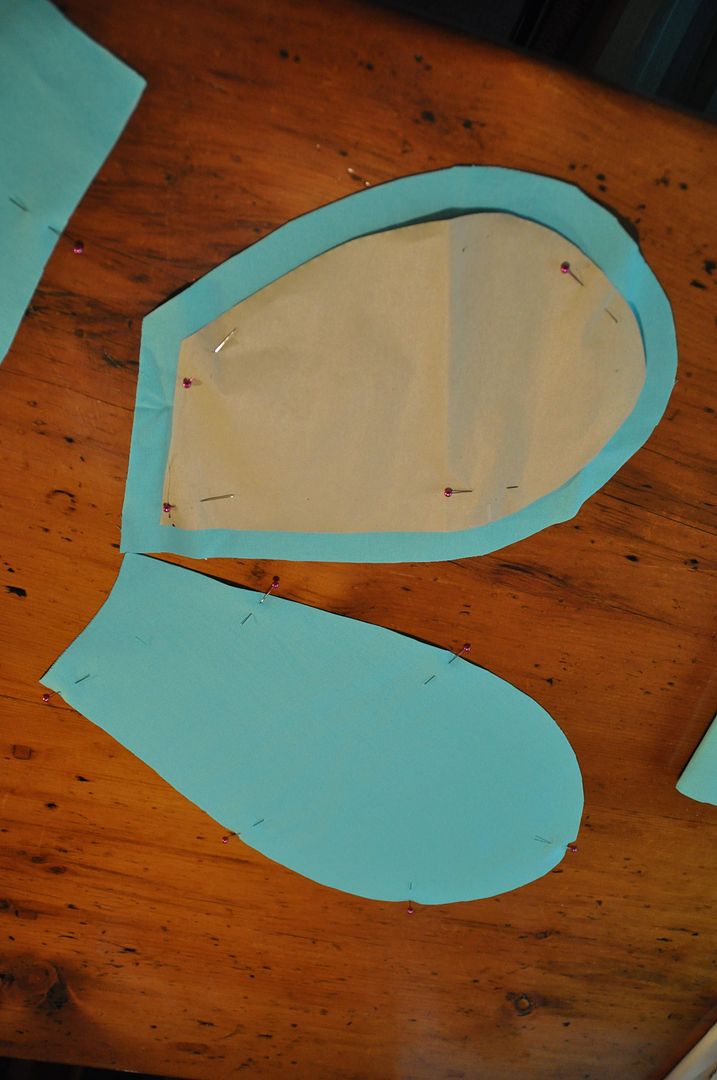
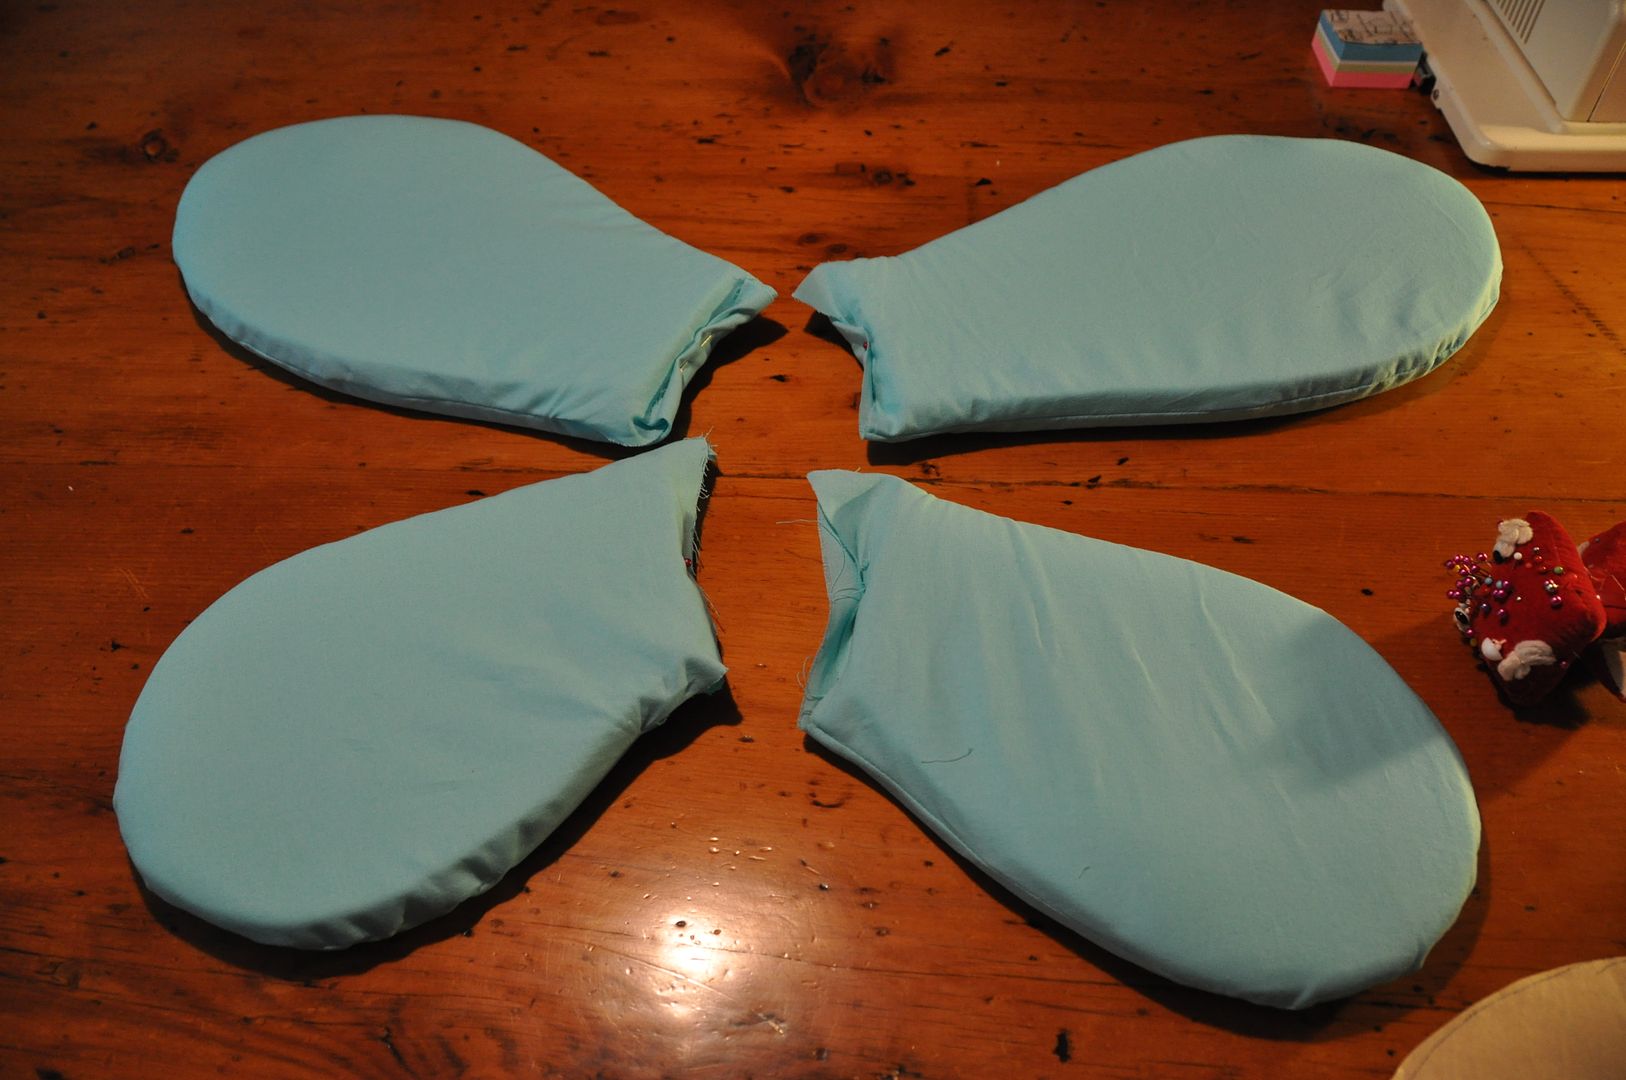
I then cut out the foam bits (double thickness for all wings), followed by the cover pieces. For the covers I made them slightly larger (by about 1/4"), as they had to go over an object with thickness.
I sewed the covers right sides together, leaving myself a large gap at the base through which I could stuff my foam cutouts.

On Kero's wing cut outs rounded out the edges, so they would fit the case better and look less blocky. Even then it was a struggle to get the wings in.

Then I started to work on the rigging. Kero's wings were sort of the trial and error run, before I figured it out and streamlined the process for Suppi's. I started with a piece of wire (1 for each wing) that I bent like in the picture above left.  These would slide through the opening in the base, up in between the 2 layers of 1/2" foam where they would be secured later.
I then cutout a back panel, using the fabric matching the shirts. The whole back piece would be made of styrene panels secured inside  a fabric casing.

I slid the wires inside the wings and placed them on the back panel to see how they would sit together. I marked where I needed to put the holes for the wire to stick out of the back panel. These holes I did in the same style as normal button holes. These were only on one side of the fabric cover.
Keeping the wires the same distance apart as on the panel, I marked and hot glued the wires down to my base pieces, made of rectangles of styrene.

Unbending the ends of the wires for the time being (they were bent over so they won't poke holes in the foam wings), I slid them between the 2 layers of fabric and out through the holes in the back panel. When in place I stitched a line  along the bottom and top edge of the panel to keep them from sliding around.

At this point I re-bent the ends of the wires. Then I carefully marked and hot glued the wings to the wires.
Then I had my friend Alli assist me by tucking all the covers underneath and hand stitching them together to finish them at the bases.

Lastly I made the 2 swirls for Kero's wings. This was simply 2 ovals of foam that I made cases for. When they were together I stitched the swirls directly onto them, through the foam layer, giving them the plush look.
These were a lot of fun to wear, though mine kept sliding down at the back. This could have been fixed by making my back panel bigger, as my sister did not have this problem at all.