Showing posts with label elastic. Show all posts

Monday, September 19, 2016

Presea - Boots, Gloves & Armour - Tales of Symphonia

Salutations! After years on the shelf, I would like to continue to take a look at how I made my Presea costume! Look here for a blast from the past: how I made the Dress and Wig! Seriously, I was posting about this in 2013 what-the-heckaroonie.

Getting this costume photoshoot worthy and documented is one of my 2016 goals and I'm pleased to say that with the costume and photoshoot done I can now finish documenting how I made it. From the depths of my computer hard-drive I have salvaged ye ancient progress photos.

Possibly the most challenging part of this costume and the main reason I put this costume on hiatus for a whole year (the other reason being my dog ate the tip off my battleaxe). This was my first time making boots, gloves and armour, and to be honest I had no idea what I was doing! I didn't get very far before I gave up. When I came back to this project a year later it was after I had done the armour for my Asuna costume and had much more sewing/patterning experience.

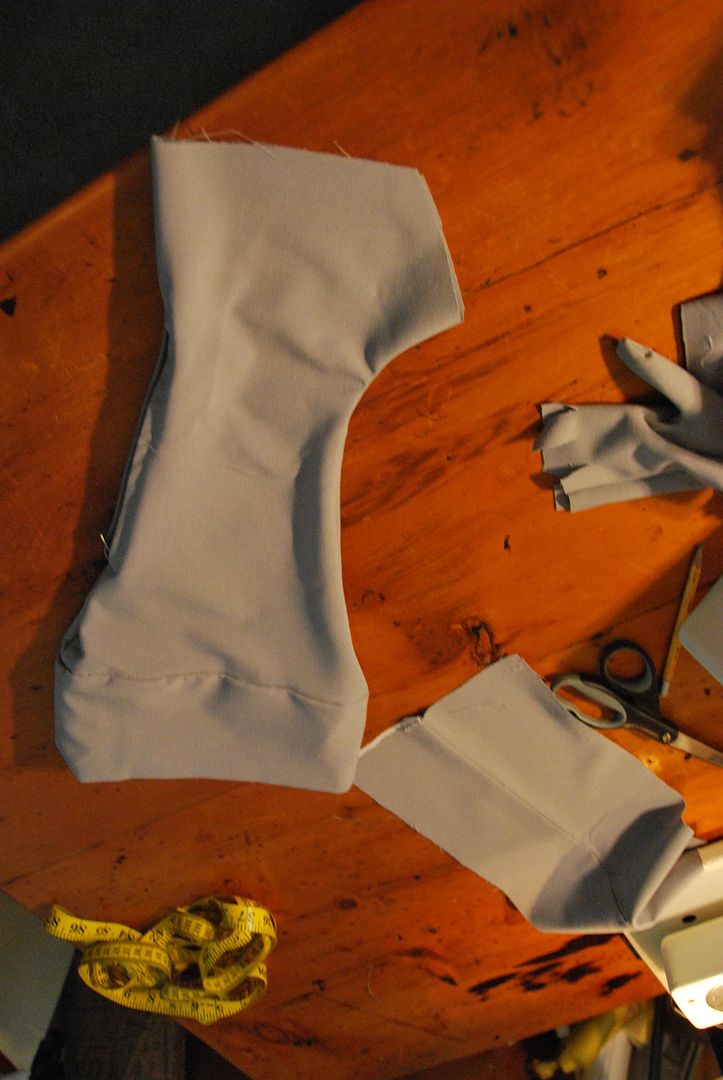
I started by buying and deconstructing a pair of well fitting costume gloves, from this I was able to make my own glove pattern. I made it go extra wide further up the arm so that it would be loose at the cuff.

My main problem was that the character's gloves are above the elbow, but loose fitting, meaning they essentially float there defying the laws of physics. My trouble was making them stay up without any seriously visible rigging...


It took hours of hand stitching to assemble those gloves. Above is the separate thumb piece which was slotted into the glove.

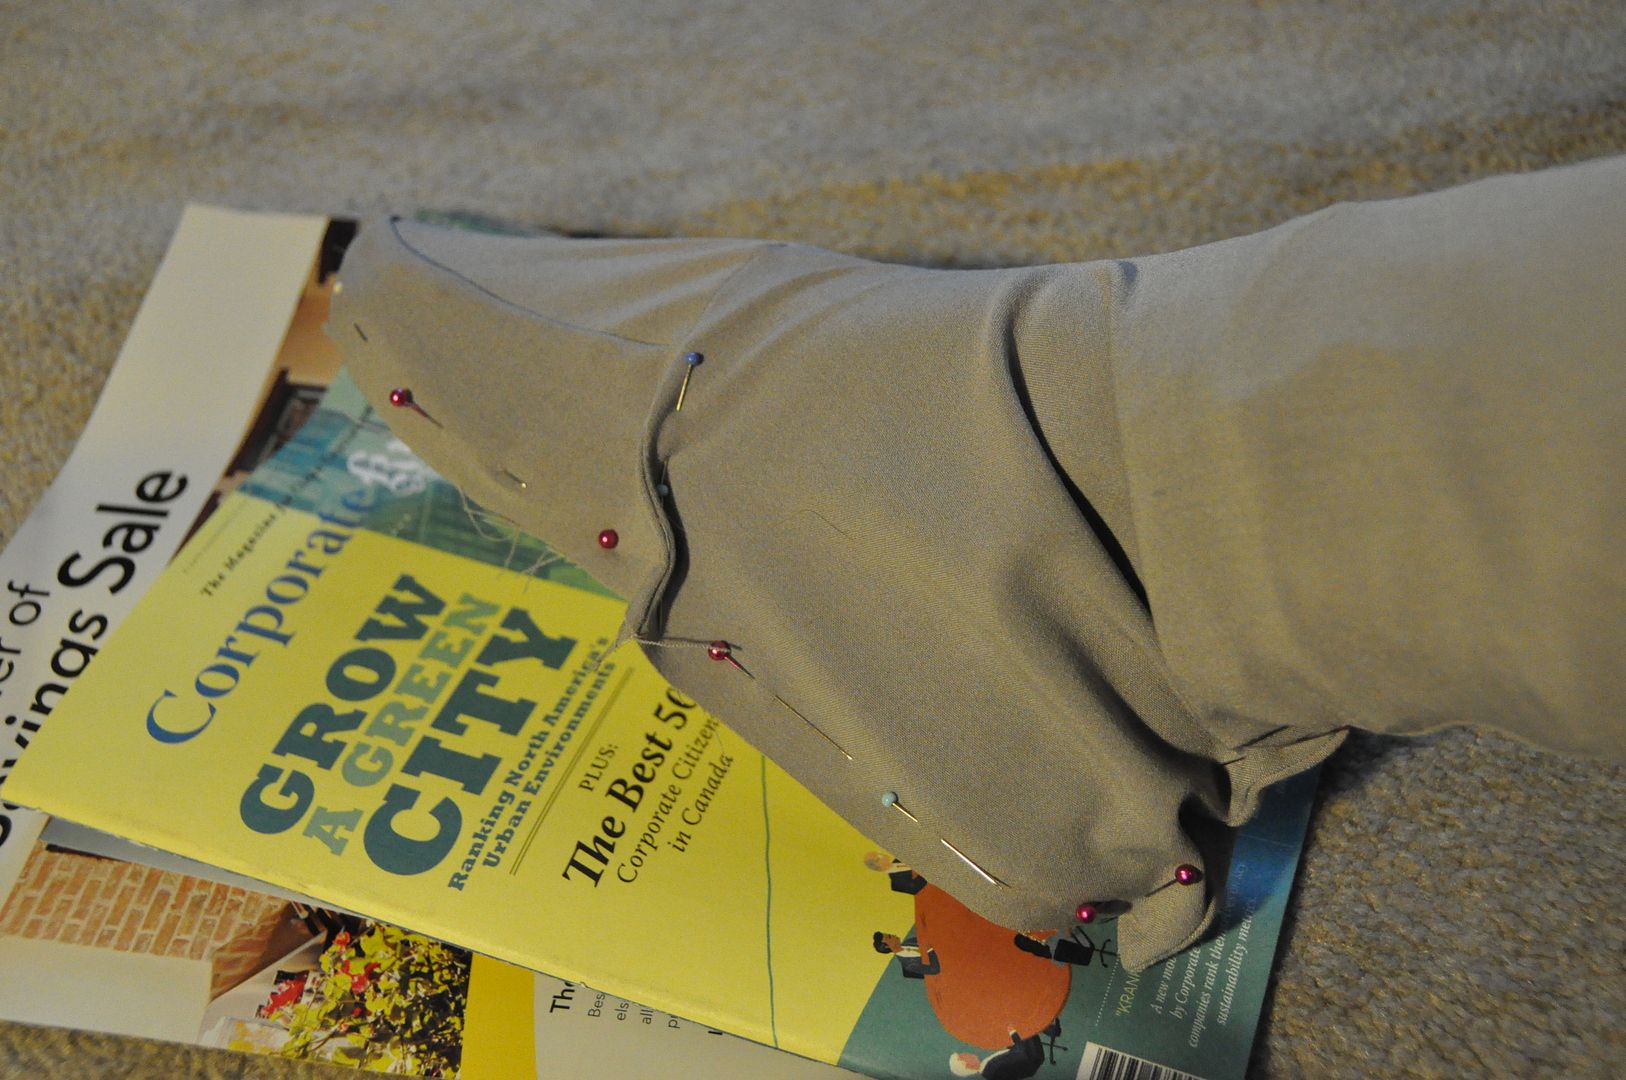
Left is my first attempt at making the boot covers, as you can see the cuff looks kind of wonky... Partially due to my inexperience working with stretch fabrics. This is where I stopped working on them for a year.
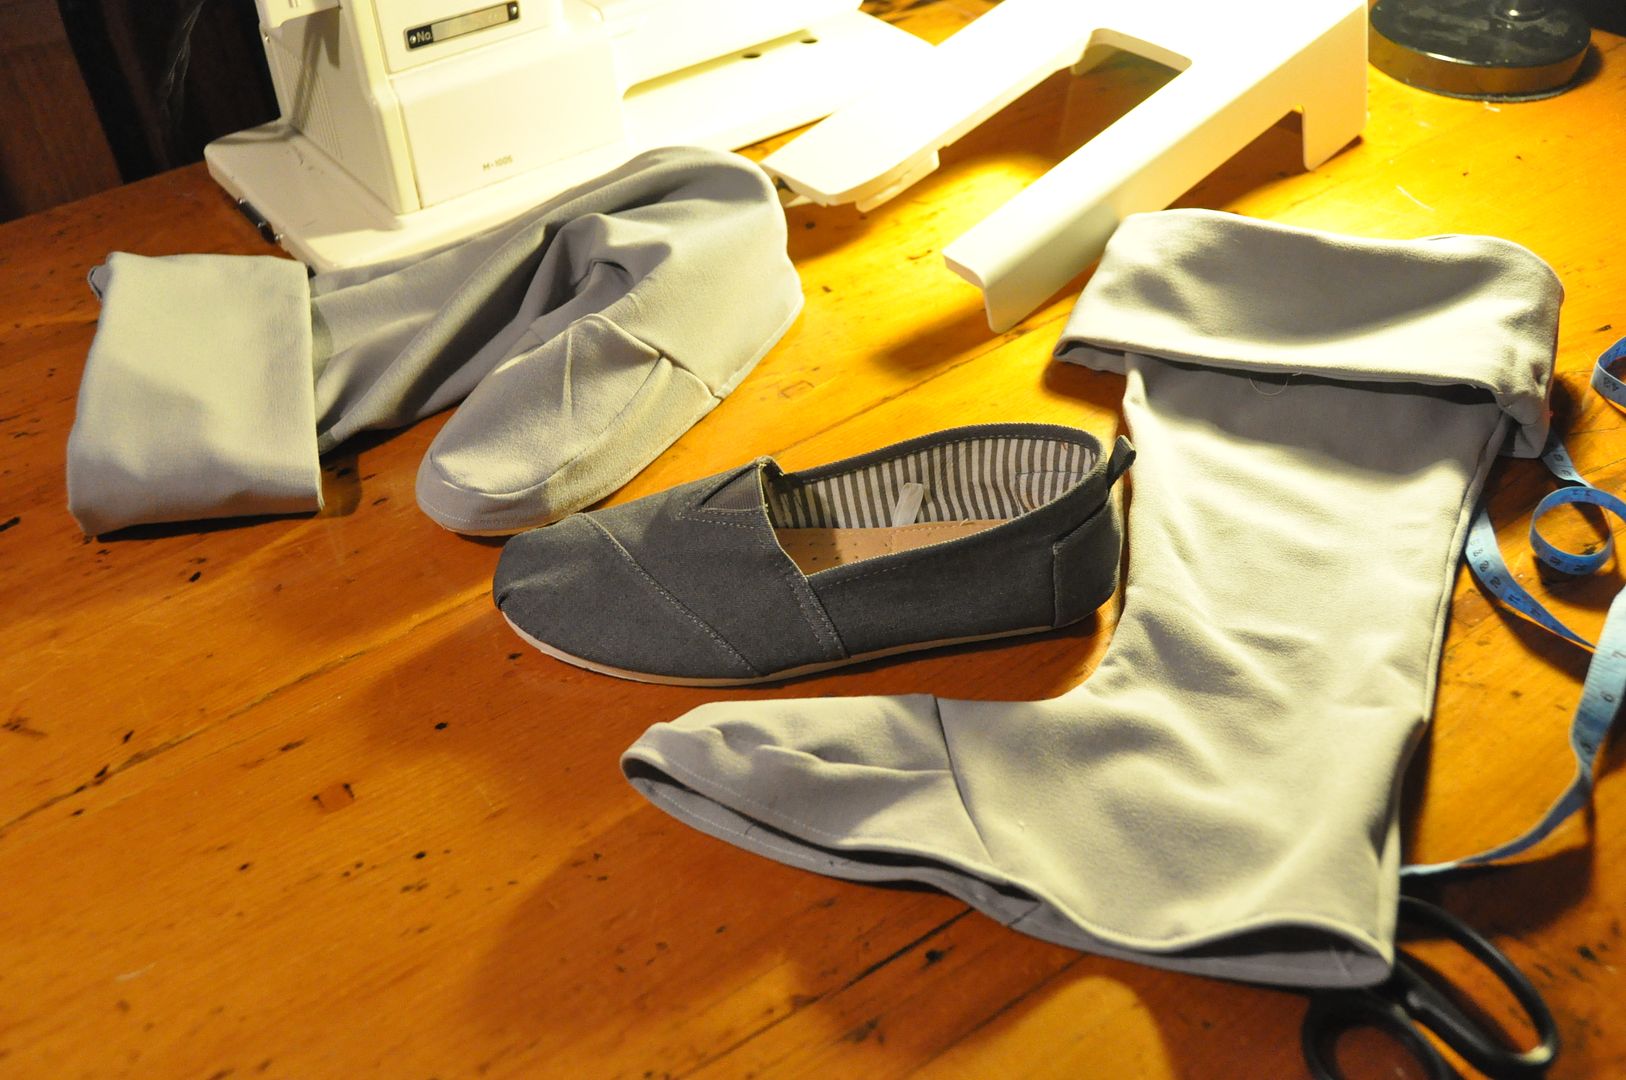
I patterned my boots to cover a cheap pair of canvas shoes I picked up at Ardenes. Above is the toe cover, left is the 2nd attempt at the boot cover. (from the inside)

I opted this time to do a fold-over cuff, which looked much cleaner, even though it isn't as accurate to the original design.
I replicated the cuffs on the gloves.

I marked where the shoe cover would be sewn to the shoes, then I hand stitched the two together. It took a while, but the result was a nice clean finished edge.
Then I sewed elastics to the inside so that the loose gloves and boots would stay up. These had to be far enough away from the edge so that they would be hidden inside. How I made the cuffs stay up was I sewed some short pieces of wire into the boot cover where it attached to the cuff.

At one point I had attempted to wire the whole boot, but I found it a) really uncomfortable, b) hard to keep it secure and c) it would be harder to pack into a suitcase, because the boots would have to remain upright. That and every time the wire got dented they were even more uncomfortable to wear... With the short wires only at the cuffs with fabric casings they were easy to fold up, and didn't cause any discomfort.
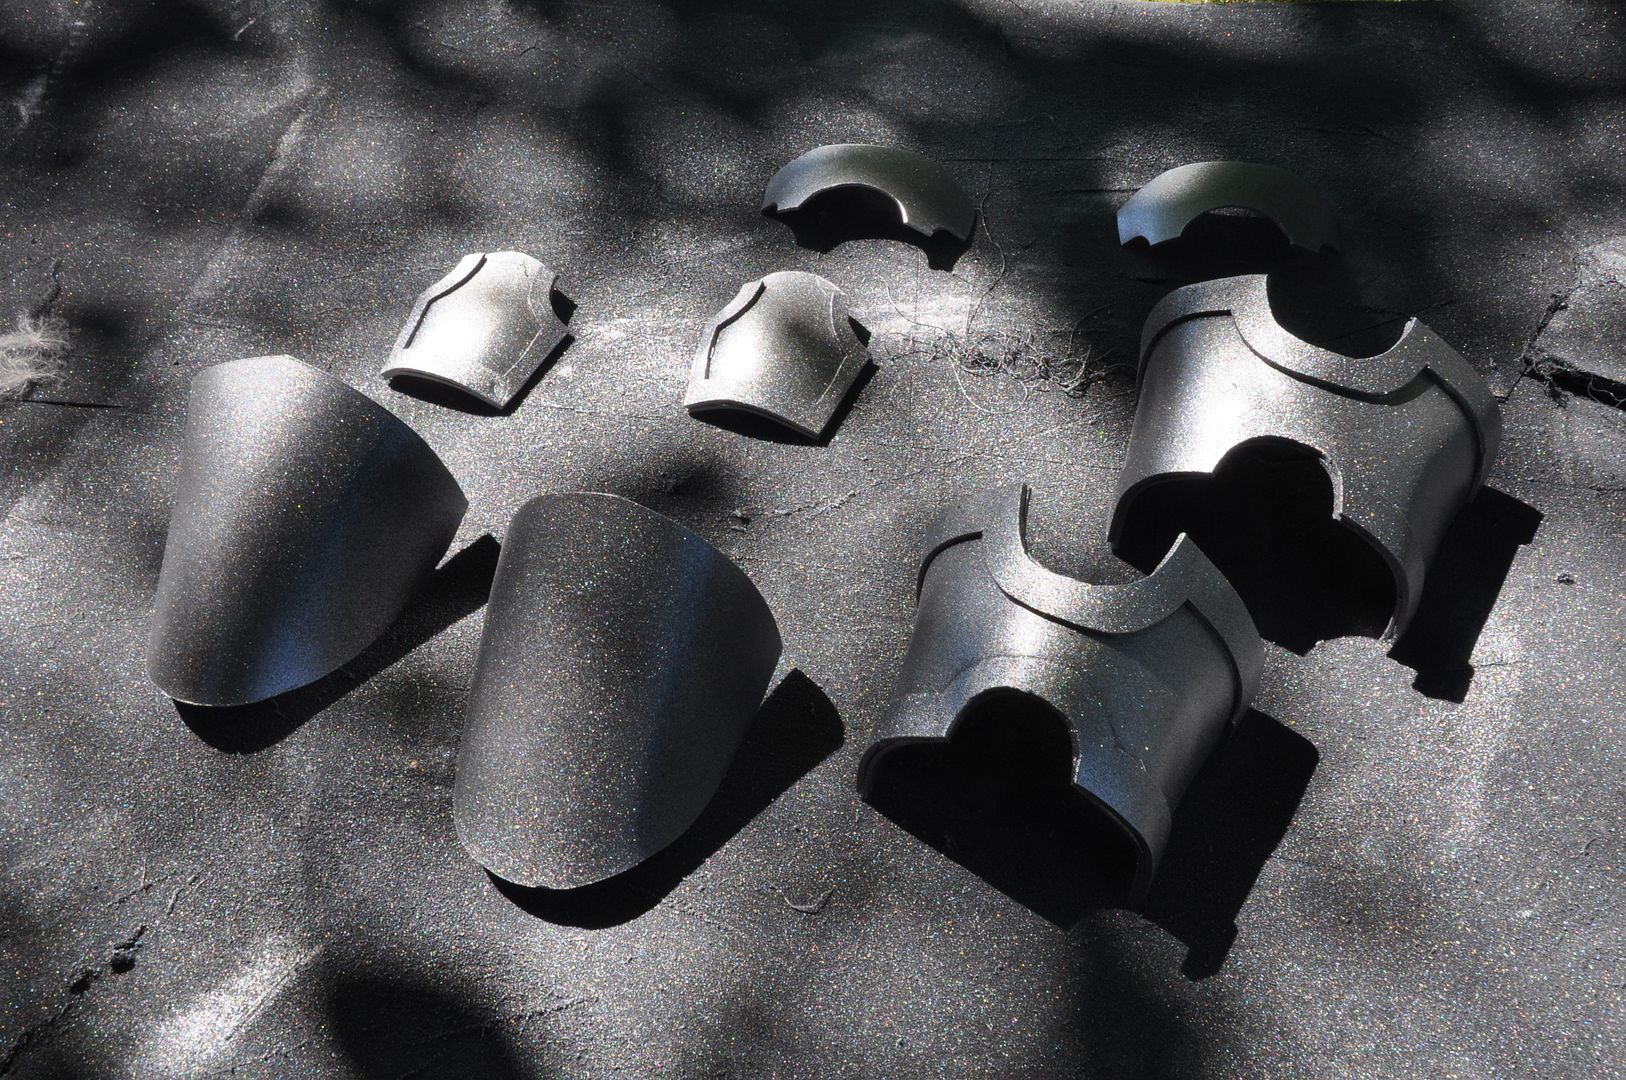
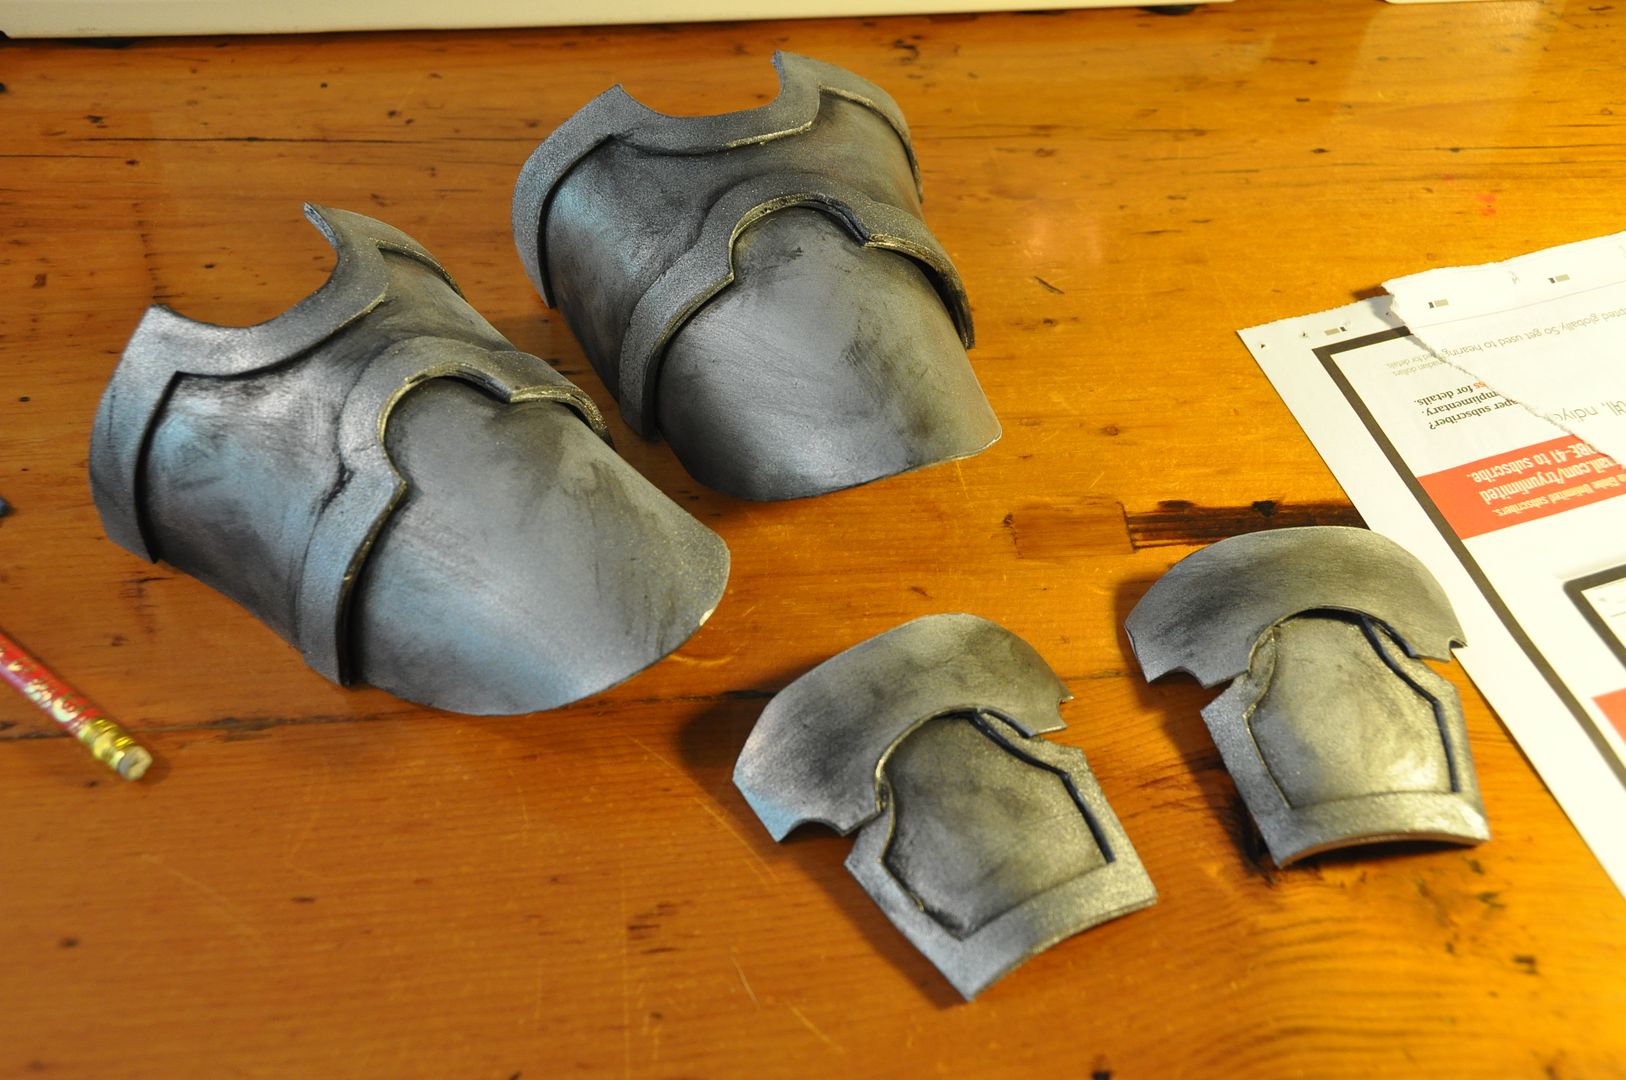
Next I got to work on the small bits of armour, following the same method as I did for Asuna. I used the leftover styrene from that costume to construct the toe and hand guards.

First I made paper patterns of the shapes I wanted, then traced them and cut them out. There were 8 pieces total. Compared to Asuna's this armour was total cakewalk.
I then made the raised bits out of craft foam, and hot glued them on.

I used the same spray paint treatment as Asuna's: primer, matte black, then silver.

I weathered with sandpaper, glued all the pieces together, then aged them with black dry-brushing.
Lastly, the shoe armour was hot glued to the boots (while I was wearing them, so the armour placement would be correct). Then I rigged the hand guards with some elastic so they would be easy to take on and off. I painted the elastic grey so it would match the gloves.

Overall this project really benefitted from me not rushing to finish it the first year and instead applying another years' worth of experience to finish the job.

Tuesday, February 23, 2016

Vaporeon Gijinka - Wraps, Bracers & Gloves - Pokémon


Part 5 of the Vaporeon saga! Let's talk about wraps, bracers and gloves! This was probably the most time consuming and difficult part of the entire costume to construct. Lots of hand painting and hand stitching was involved. The end result ended up looking even better than I had envisioned! >:D

Links to Part 1: BoleroPart 2: Under LayersPart 3: Wrap Skirt Tail, and Part 4: Wig and Hairpieces!

Thanks to Elemental Photography for the wonderful photoshoot! Credit for the original costume design goes to Cowslip!

The way I started drafting the pattern for these was super scientific! Not really. I literally traced my leg onto paper. This is so I could figure out the relational distance between my ankle, knee and thigh. This was purely to use to get the proportional heights of the bracers and wraps correct.

From there I was able to mark how tall I wanted the bracers and wraps to be. Then I drafted the pattern for the wraps and bracers separately. I also drafted the arm wraps and bracers at this time.

I'll start with the bracers first, since I finished the construction on those first.

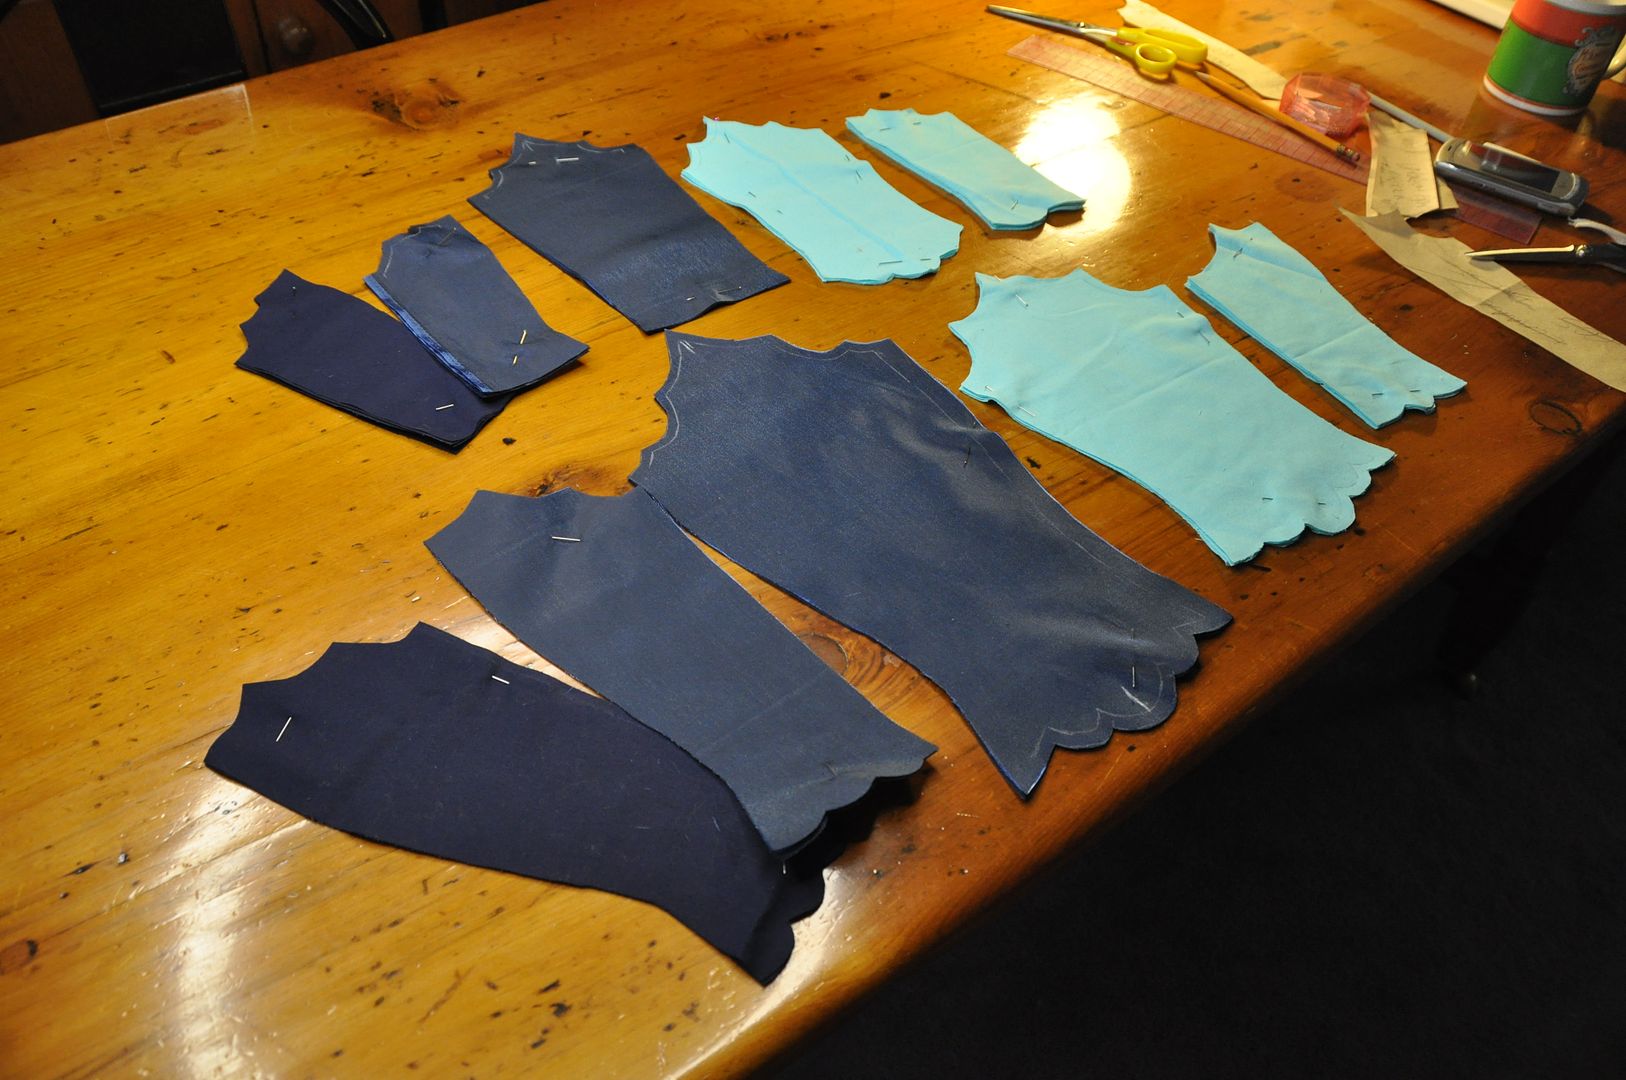
I cut out my pieces in the various fabrics. I had an under layer in a shiny synthetic navy blue fabric and an over layer in a light aqua cotton (which was leftover from the Suppi costume).

I nearly cut out the wrong amount of pieces when I was laying out my pattern. Every piece has a backing because I needed that to properly finish the scalloped edges on the top and bottom. This meant every piece was doubled. The navy under layer was backed with the same navy cotton as the bolero lining because I ran out of my other navy fabric.

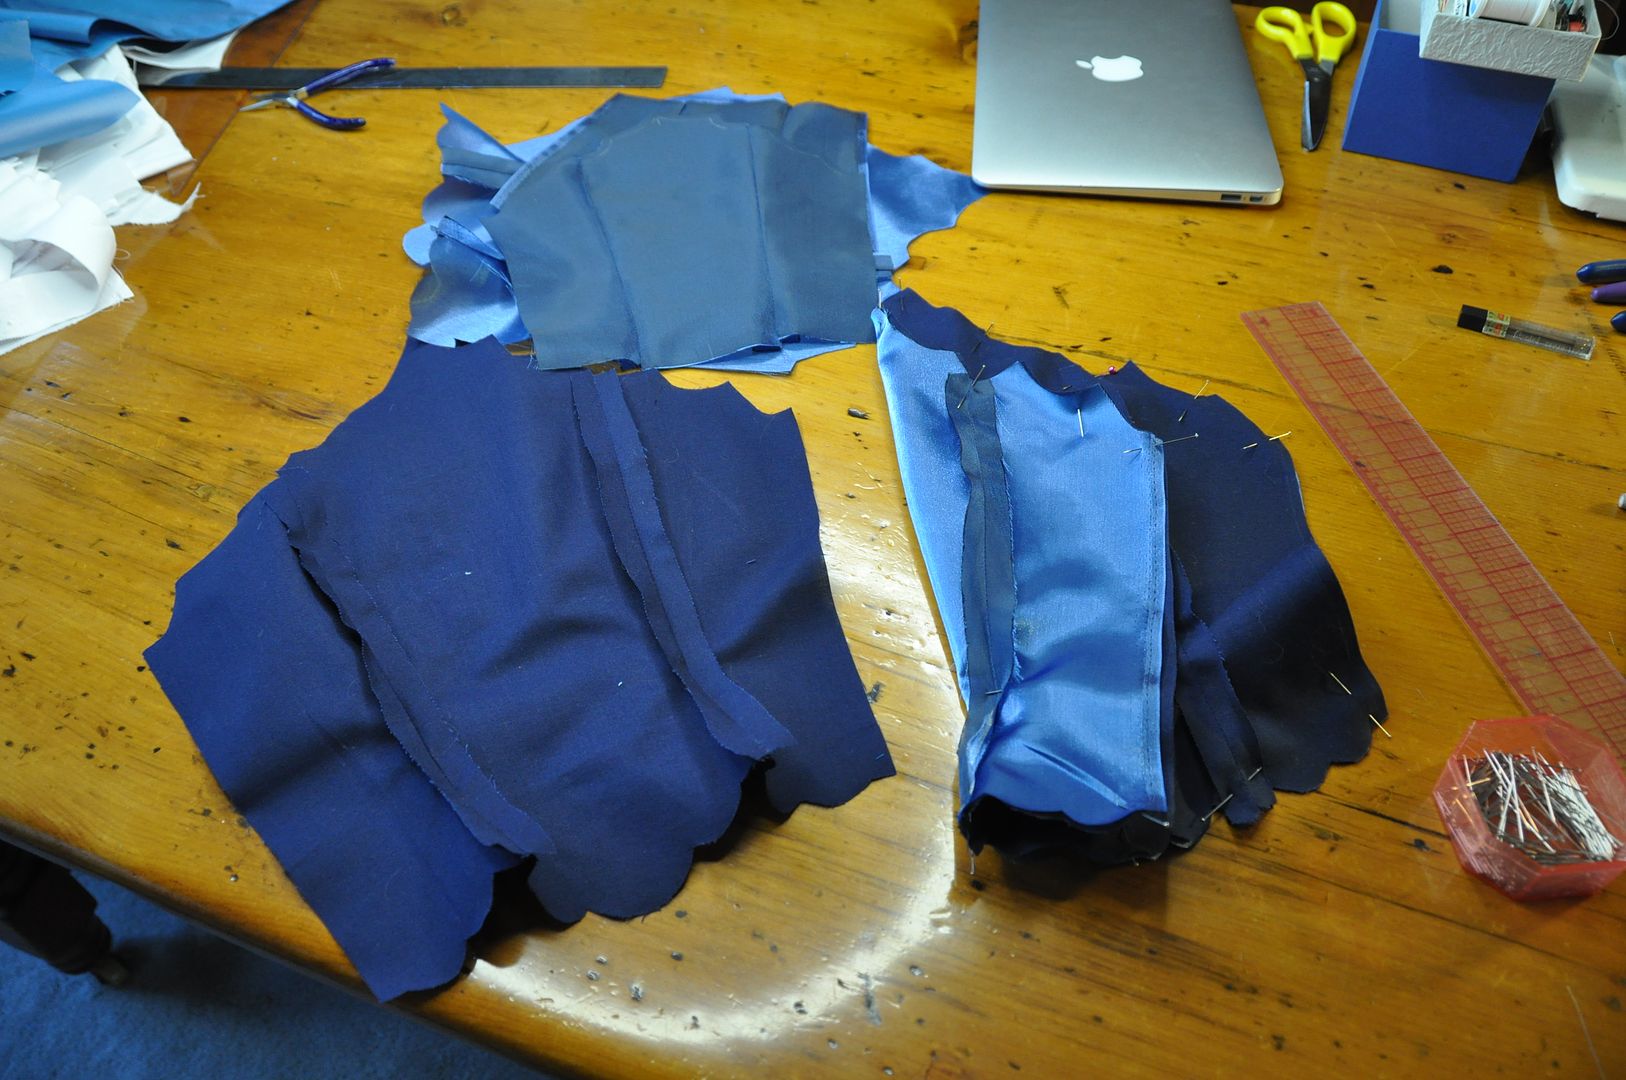
I assembled each of the fronts and backings separately, sewing them along the side seams. I ironed the seams open flat.

At this point I took the front over layer pieces of the bracers and painted on my scale pattern. I lightly drew this out in pencil and then traced over my lines with navy blue fabric paint. It sounds simple, but it took a really long time. I ironed them to set the paint before moving on.

Next I pinned each piece to its backing right sides together. I sewed them together along the top and bottom edges, leaving both sides open to turn them right way out. Before turning them out, I trimmed the excess seam allowance on the inside. I top stitched along the edges to neatly finish them.

I also added in my top stitching detail on the tops of the under layer at this time.

I aligned my side edges, zig zagged stitched over the raw edge of the fabric and then turned that to the inside and top stitched it down.

Then I used a punch to punch out the holes to put the grommets in for the laces. At this point I still had access to the grommet press at school, which I made good use of.

This was the point where I laid the project to rest for a year, because one of the main hurdles was the leg wraps, which I was positively stumped on. I didn't know how to rig them, I didn't know how to do the detailing and I didn't want to rush them and do a crappy job of it.

When I returned to the project, along with replacing the wig to fix the colour matching issue I also found another thing that was bothering me. The bracers were too teal for the rest of the costume, especially now that I had replaced the wig.

After re-evaluating, I decided to upgrade the paint job on the bracers, and in the process change the colour of them to be bluer. I added in depth to the scales, but also dry brushed over the whole thing to tint it. You can really see the difference it made in this progress shot.

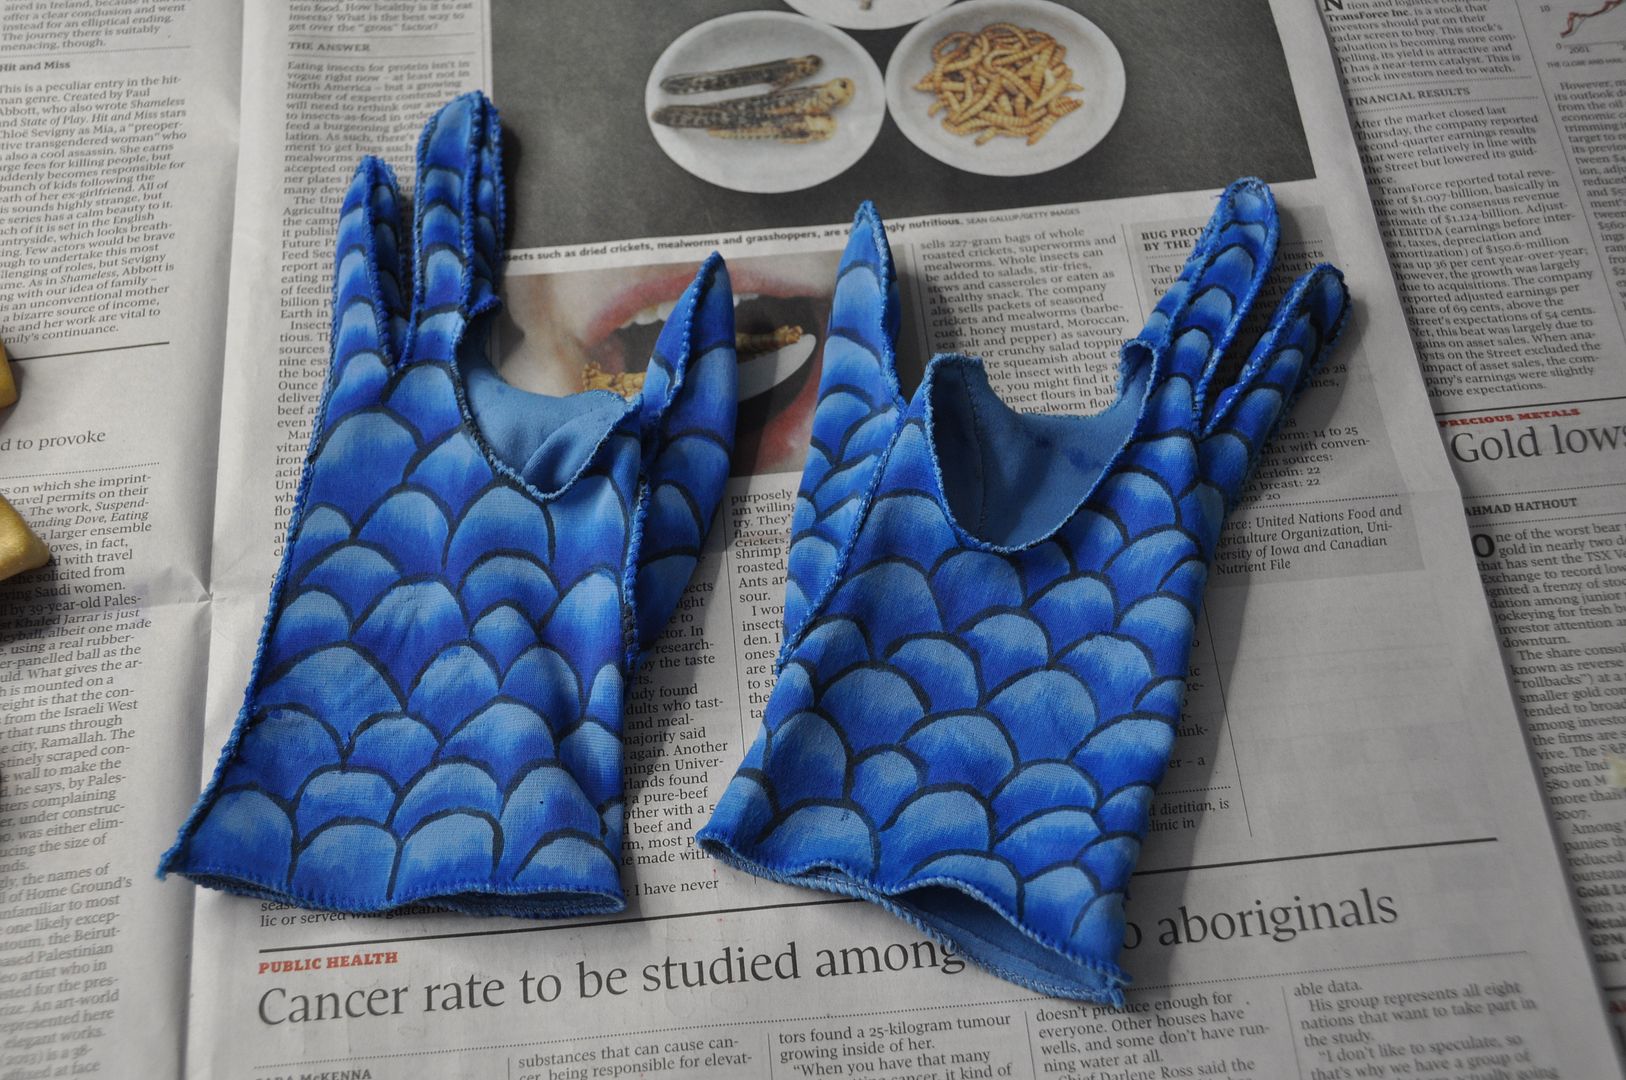
The gloves I bought in Kensington market. I made gloves for an earlier project and decided it was by far the most horribly tedious thing to do ever. So I decided to buy and alter a pair. I cut out the hole that encompassed the index and middle finger on each glove, then zig zagged stitched the edges to finish them so they wouldn't fray all over the place.

The gloves were painted in the same style, except instead of laying them flat, I had to wear them each on my left hand in turn to paint them.

By doing the scale pattern and adding the depth to both the gloves and bracers it helped to meld them together visually and also give the false impression that they are even remotely the same shade of blue. Because they really weren't.

Now let's travel back to the beginning of the project when I traced my leg and started patterning. For the wraps I was venturing into an area I didn't have much experience with at the time--stretch fabric. In this project I can freely admit that I had no idea what I was doing and problems I encountered in the construction of these wraps are one of the main reasons I stopped working on the project for a while.

I will start with my first mistake: I bought fabric that was one-way stretch. Somehow it was more unpredictable than stretch fabric. I don't know, I just didn't like working with it.

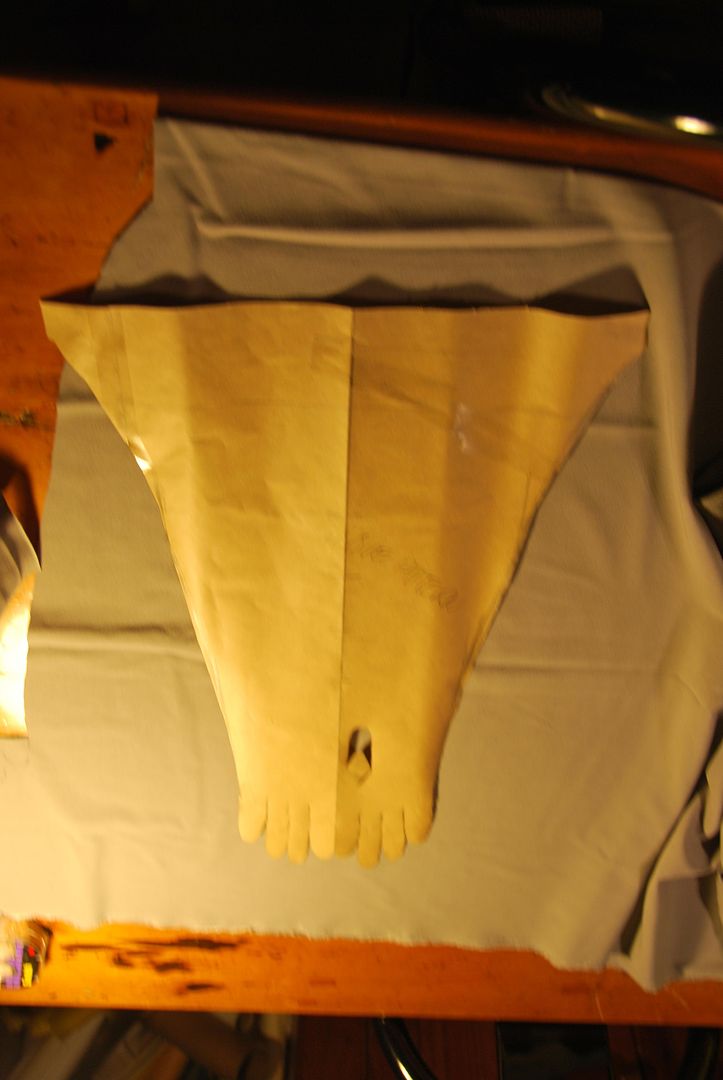
I patterned out my pieces, figuring out the overlap at the top. In this picture you can see the two pieces for a leg wrap on the left and the two pieces for an arm wrap on the right.

I took them to school to assemble them with the serger, because this fabric frayed like crazy. I ended up making them slightly uncomfortably snug, but since I had serged off the seam allowance I couldn't let them out, and I used up all my fabric so I couldn't remake them.

I used the silver silk bias tape I had made for the bolero to finish the top edges.

At this point, I had no idea how to rig them. They were super snug, but not enough to stay up without slipping. This is when I threw in the towel on the project.

Zoom forward to one year. I am one year wiser. And I have ideas about how to finish this project.

First I decided to actually add the floral pattern to the fabric, which I had originally decided to not bother with (because of time constraints).

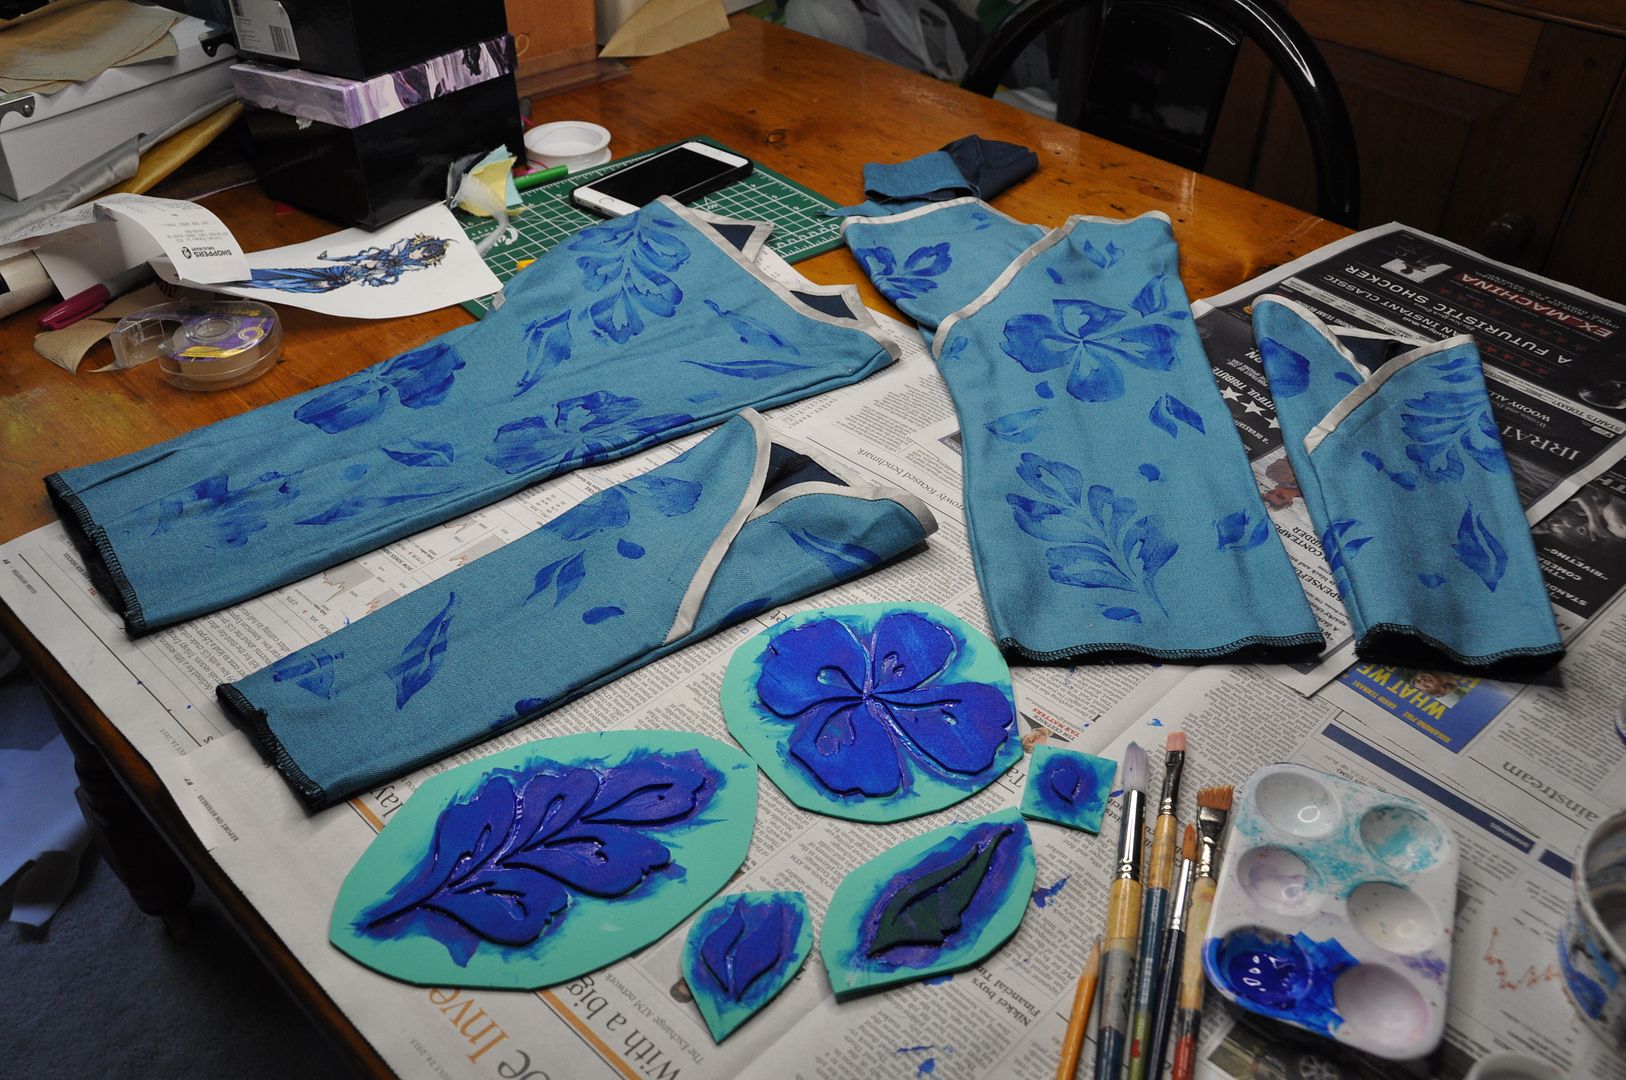
I decided to make stamps to create my design, rather than hand painting on the floral design. This is much quicker and easier if you are making repeating patterns/patterns with repeating elements. Based on the barely visible details in the reference image I sketched out some suitable flower and leaf designs, then traced those onto craft foam and cut them out. I glued the pieces onto a foam backing creating my stamps.

I laid out my wraps and began stamping. Using a blue fabric paint, I used a brush to apply the paint to the stamps and then pressed the stamp into a spot of my choosing on the wraps. I made the paint application purposely patchy. I didn't want the flowers to be solid. 

I wanted the flowers to be random and sporadic. There is no science to the design. I just made sure not to have too many of the same stamp to close to each other. 

I had to wait for them to dry before flipping them over and doing the sides and back. When everything was painted and dry I heat set the paint with an iron.

Next I decided to finish the overlaps differently. My original plan was to make the overlaps a functional closure. But it wasn't working--it pulled the fabric on a weird diagonal, and looked super bad. So I decided to sew it shut and just fake it. I sewed the frogs on top as decoration.

Next I used bias tape and hand stitched on all the fancy loops and detailing on each of the wraps. This took forever.

Lastly I had to rig them so they would stay up. As I mentioned in my wrap skirt section, the rigging for the wraps was attached to the inside of the skirt's waistband. At the back there is an elastic strap that attaches to each wrap using garter hooks. They are stretched to be pretty tight, but not so much that I can't bend or sit. Then I have a second backup strap made of webbing that doesn't put as much tension on it. This is for the sake of redundancy--if the first strap fails, the second will keep it up. You can see a bit of the rigging system in the picture below. I tried to keep it as invisible as possible.

The arm wraps are attached to the bolero with simple buttons and loops. Unfortunately they tend to pull the bolero sleeves down oddly. I plan to remedy this in the near future by stuffing the bolero sleeves.


Friday, October 30, 2015

Sakura - Wig, Hat & Accessories - Cardcaptor Sakura

Part 3 of Sakura (1st Opening outfit)--lets talk accessories! The details are really what make this costume. If you want to see how I made the wings, go here! If you want to see the rest of the outfit, go here!

I entered this costume in the Friday night Workmanship Competition at Anime North in 2014 and won an award for Best Accessories in my category. That was pretty cool. It was my first (and so far only) time entering in a competition without a stage presentation component.

Once again, thanks to EleventhPhotograph for the photoshoot. I really love this black and white shot.

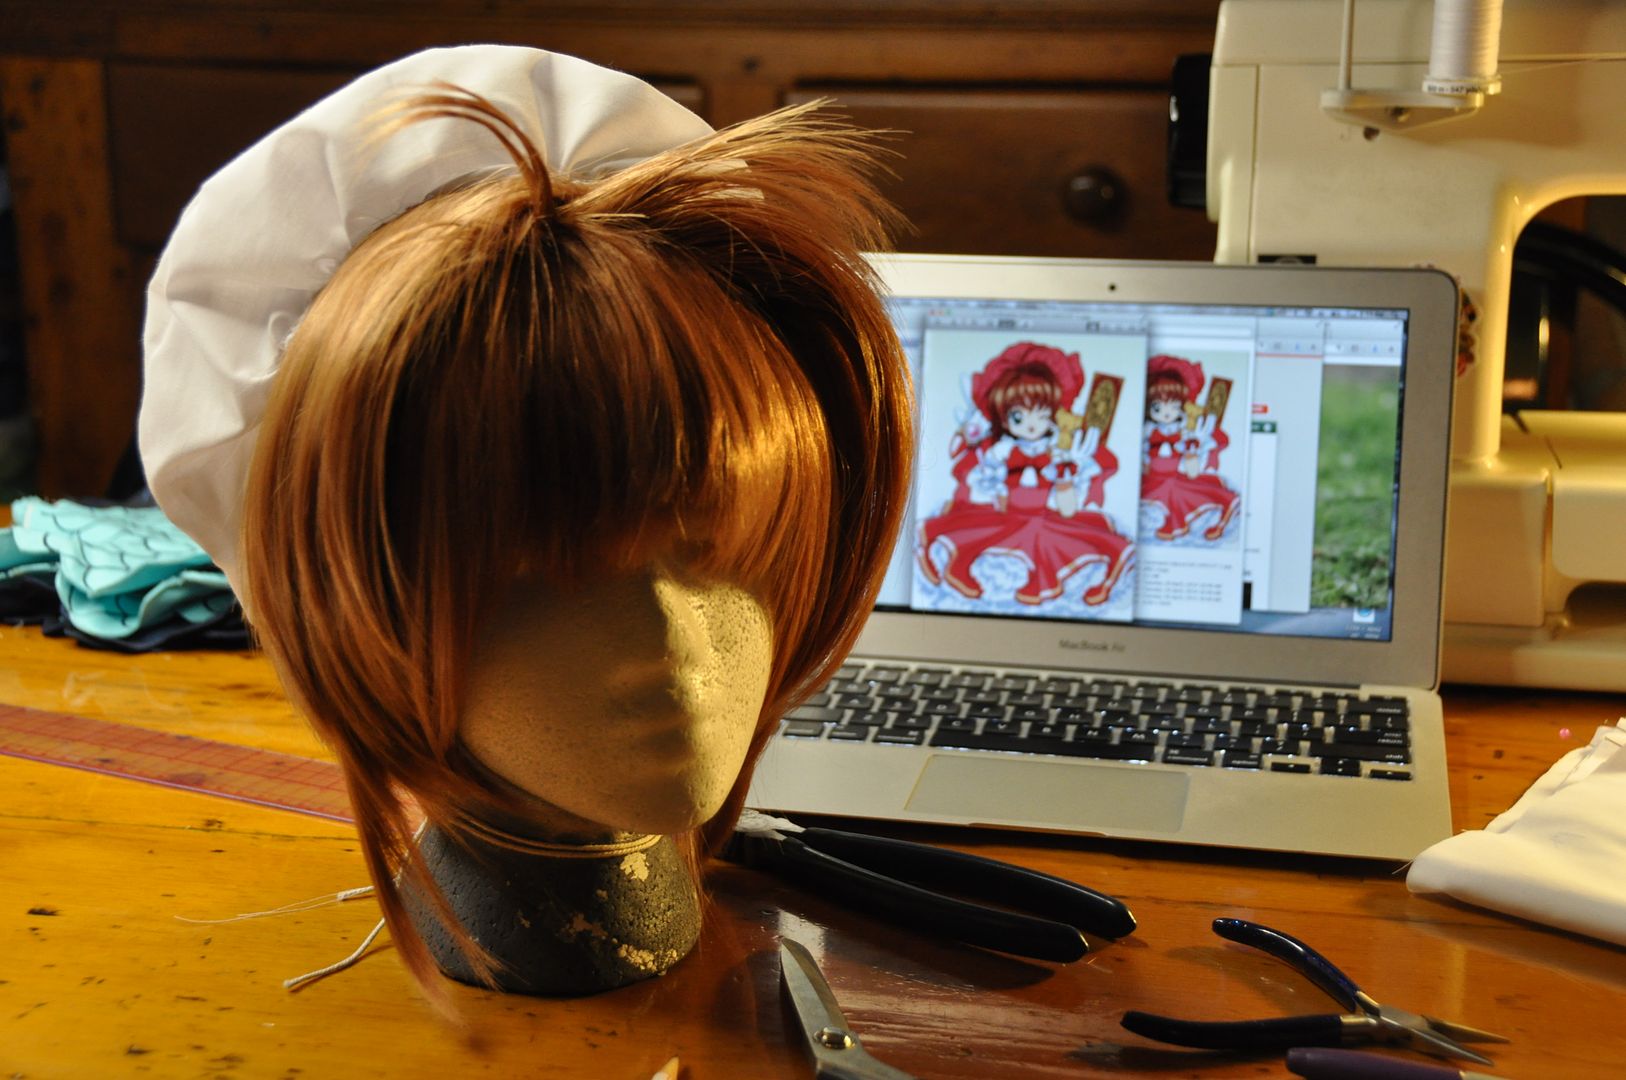
First we'll talk about the wig. I started with EpicCosplay's Aura in cocoa brown. I think this colour works really well for Sakura, it's not too brown or too blonde. It's almost a bit reddish. I think the colour works well on both my sister and myself.

Since I was doing a costume of hers with a hat, I didn't bother to add her iconic pigtails that she normally wears, because they wouldn't be visible. This has influenced my costume choices for my subsequent Sakura costumes to only be ones where Sakura is wearing a hat. Because this means I don't have to go back and fix the wig. And also because her costumes with hats are ridiculously cute.

As you can see the wig was pretty long. I purposefully picked a longer wig because she has those two small sections of longer hair in front of her ears. It is much easier to cut a wig shorter than it is to add in longer wefts.


I started by trimming the bangs. Using clips I separated off the different sections of the hair. The longer pieces were separated from the sides and the bangs. I left the long wisps at the original length, and simply thinned them out a bit. The sides were thinned and layered and trimmed to length. Then I trimmed the back of the wig.

The last step was to style the front of the wig to give the top that volume. I pulled sections of the hair up and hair sprayed them at the base. Then I used a blow dryer to set it. I made some shorter bits stick up while the rest parted and fell to each side. This created the look of her cute bob at the front.

Next I started work on the hat. Since I had very limited pink fabric left, I made a mockup. The hat's construction was pretty simple. The pattern consisted of a circle and a rectangle. The rectangle was the length of the circle's circumference.

First I rolled over the channel where the elastic would go later and ironed that. I didn't stitch it down yet, but pre-ironing saved me a ton of headaches later.

The next step was to sew the rectangle to the top of the hat, right sides together. Then I sewed the two ends of the rectangle together and then top stitched the channel for the elastic. I left an opening in the channel so I could feed the elastic through. The elastic both gathered the hat and helped it to stay on. When I was satisfied with the fit, I sewed the elastic ends together and closed the channel opening.

Lastly the bow was attached to the hat. Credit for completing the finishing touches goes to my friend Alli who handcrafted all the bows and hand stitched them on.

Instead of constructing socks and gloves I bought them, and made ruffles to add to them to help them match the rest of the costume.

Like the hat band, the ruffles are simply rectangles with a channel on on side for an elastic, which cinches them to fit and gathers them into a ruffle. These were tacked on to the gloves and socks.

Little red bows were also added to the gloves.

The shoes were an extremely lucky find. I managed to find flats at Ardene's in the perfect shade of red. They matched my red fabric perfectly. I added the bows to the toe. This is not 100% accurate to the design, but I didn't feel like adding straps to the shoe--I was worried it would make them uncomfortable. The bows were hot glued on.

I paid attention to the details so that everything would match perfectly. I wanted to do Sakura justice, and I think I achieved that. :)

Tuesday, June 17, 2014

Isabelle - Wig, Ears & Tail - Animal Crossing


 The first of my Anime North posts! Lets look at Isabelle! This was made for my older sister Alex. This past Christmas I didn't really have enough time to make a whole bunch of gifts at the end of term, so instead I made a "gift certificate" for my sisters for 1 costume each. Elanne picked Sakura, and Alex picked Isabelle.


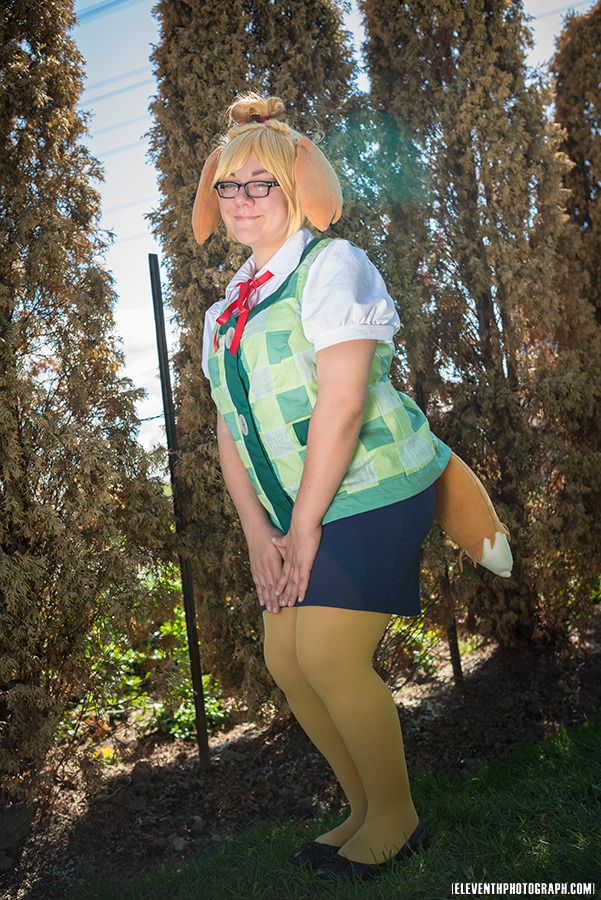
Isabelle is a character from the popular game series Animal Crossing. (Called Shizue / しずえ in the original Japanese version.) She is the secretary to the Mayor (the player). I don't play it, but my sister is very much a fan! As you can see, this is a gijinka version of the character, but since the characters in this game are already pretty much humanoid already, there wasn't much redesign necessary to create a gijinka version. This is really just a wig with ears instead of a full mascot head.

She wore this costume on the Saturday of Anime North, while running her Crafters' Corner table, which had her tied up for the majority of the weekend. She did manage to escape for a little bit and did a mini shoot of the costume with Mike of EleventhPhotograph . We got some really cute pics! :D Be sure to check out his con gallery!

The base wig we started with was this one from Epic Cosplay. I really liked this colour of blonde, we chose to go with a colour palette that was a little less yellow than the character is normally. I think it is technically listed as a Vocaloid wig, and it required a large amount of styling to get it to work as an Isabelle wig. First I put it on my sister's head and determined what part I wanted up in the ponytail. I tied that out of the way while I worked on hiding the part at the back. 
The problem with wigs it that when you pull the hair in pretty much any direction it reveals the gaps between the wefts. In order to prevent this you have to add in extra wefts to mask the part. Now, if they had had them in stock I would have bought extra wefts when I bought the wig, because I knew I had to pull the top of the wig into a ponytail, which would leave a gap about 1/2" wide. Unfortunately they did not have any in the colour I needed, so I resigned myself to some serious MacGyver-ing.
I selected 3 separate rows of wefts from the back of the wig--far enough down that they wouldn't be noticeable, and far enough apart that they wouldn't leave a bare patch--and I carefully picked them out with a seam ripper. I sewed this into a mega-weft (3 rows of wefts stacked on top of each other). That was then hand stitched onto the wig along the bottom of the gap. Using a pin I parted the wefts, making 2 go up into the ponytail and 1 go down into the back. Had I had more wefts at my disposal, I probably would have done 4 wefts, with 2 going down as the area under the part is a little bare. But it was still much better than when I started, so I considered it good enough!

At this point I tried it on my sister and gave the bangs, sides and back a little trim.
Then I was ready to permanently secure the ponytail--I double checked on my sister first and foremost, because her head is a different size from the wig head, so if the ponytail was pulled too tight it would look weird on her! Ensuring it was in the position I wanted, I then carefully dabbed/mashed some white glue in around the base of the ponytail. It dries clear, but I was still careful to not be messy during this process. (This is similar to the process of stubbing a wig except that this ponytail was not getting cut off!)

Normal white school glue is good for styling wigs, it dries clear and is washable; if you make a mistake, you can wash it out and try again.

Then my sister dyed the gradient into the ponytail. She did the colour to match the ears I made. She used a combination of brown india ink and rubbing alcohol (70%) to dilute it. She also apparently didn't look up any instructions before doing it. :/ This is the approximate method if you are interested!

After letting that dry sufficiently I artfully arranged the bun the way I wanted it, securing it with another hair elastic. The I hair-sprayed the bejeezuz out of it. (This is a technical term of course! ;D) I let it sit and air dry for several hours. Occasionally spraying it a bit more. Once it was fairly solid I added a touch more glue around the base to hold the ends of the bun in place.
The hair accessory is a piece or red ribbon folded in half length-wise, with 2 silver bells attached. These were simply hand stitched on, and the ribbon was fixed around the bun with a hand stitch. I got the bells downtown and they have little hearts on them, which I think suits the character so nicely. :)

The ears are fleece which was bagged out and lightly stuffed. I closed the stuffing hole with a hand stitch and then stitched them to the wig.


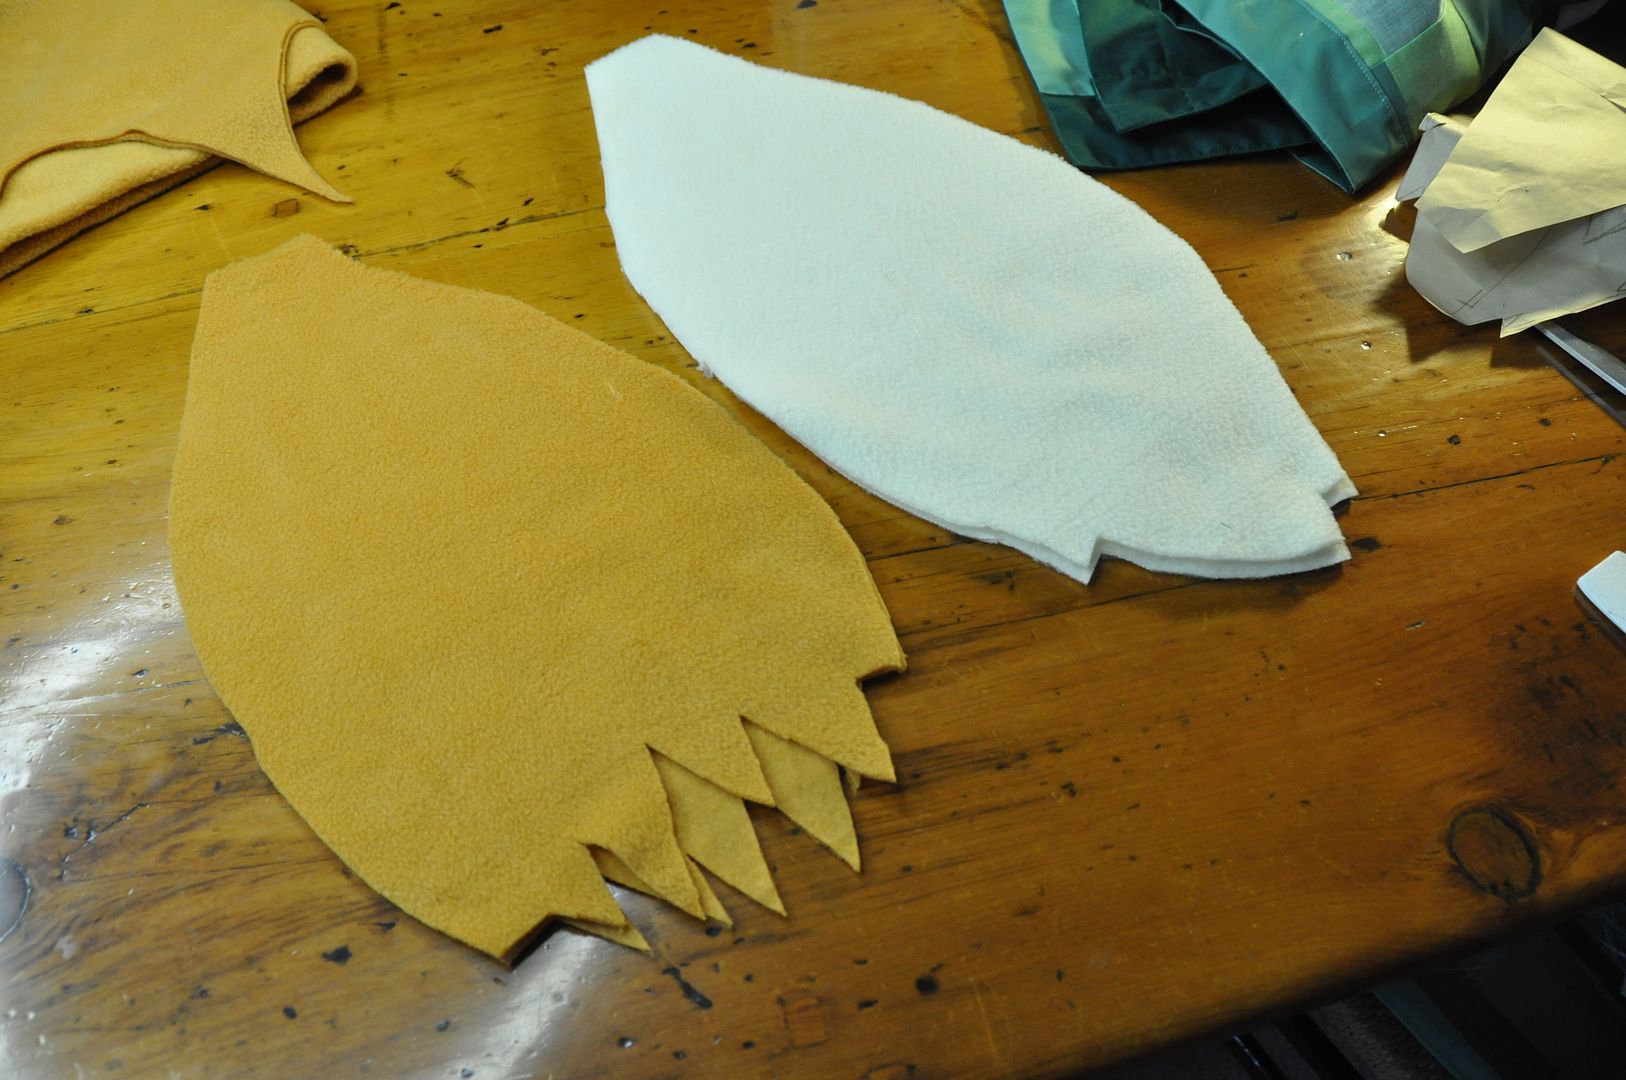
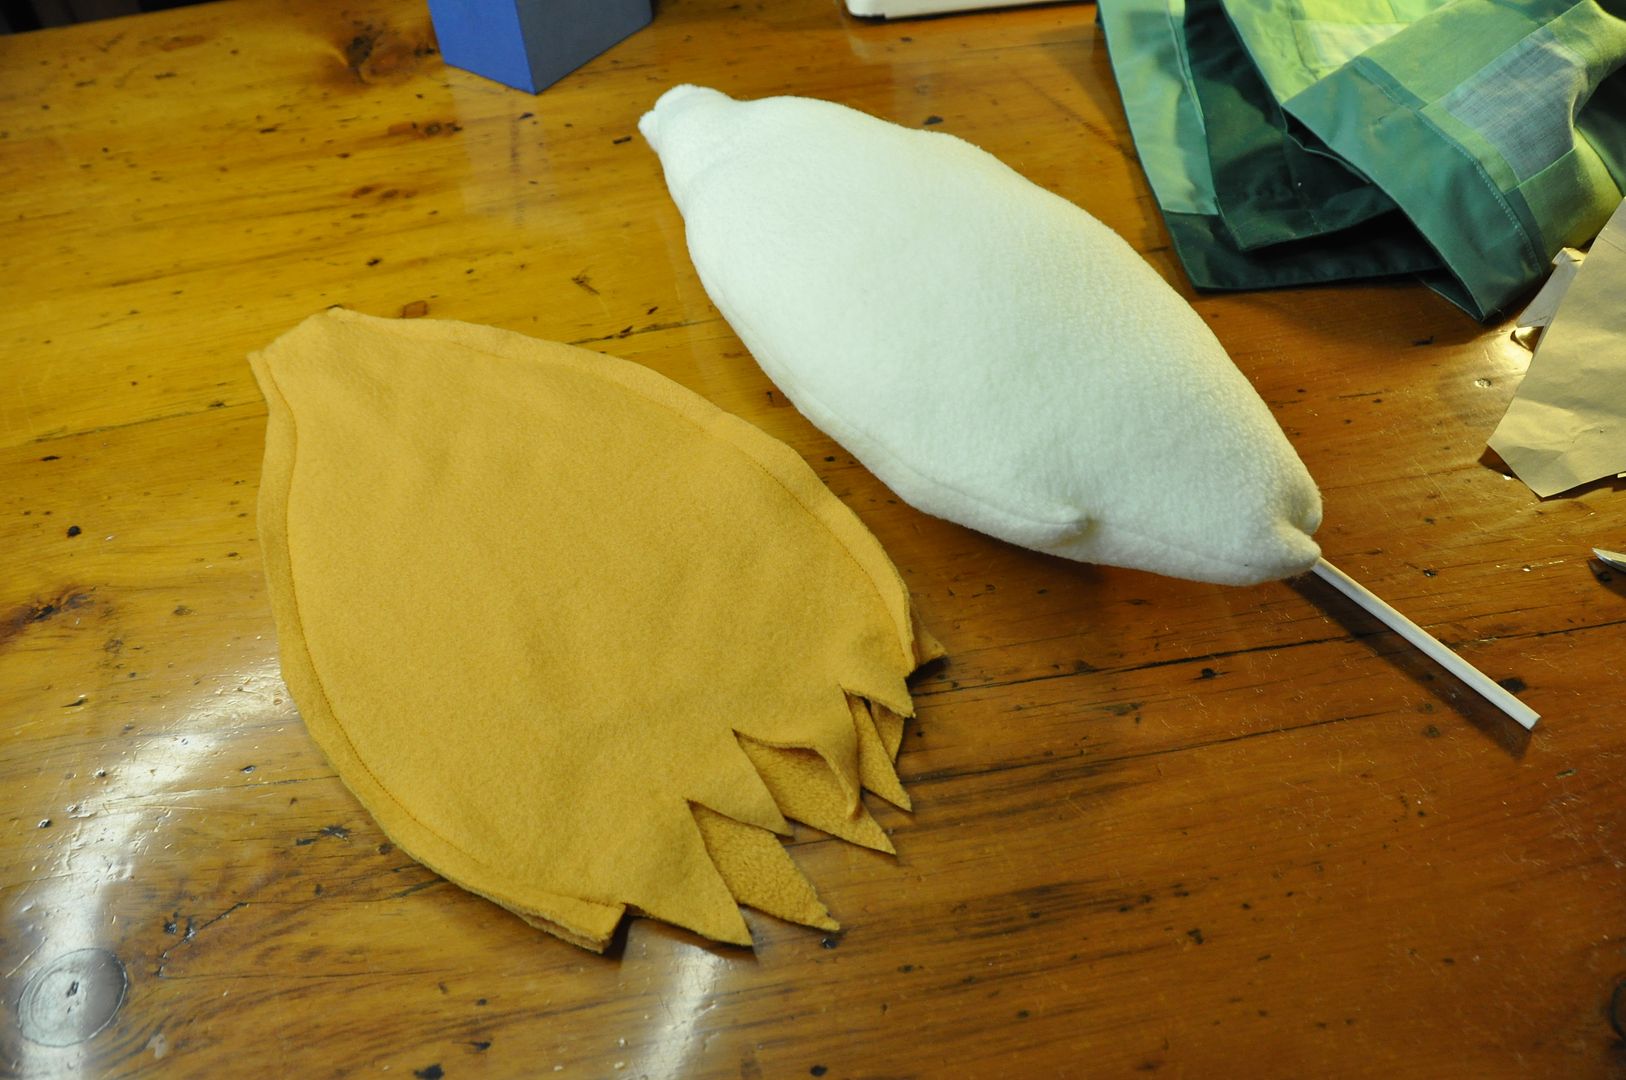
For the tail I made a paper pattern of the approximate shape I wanted and cut out a piece that was a lot wider at the widest point. This was so it would be nice and round I made an inner tail piece in a cream colour, and an outer tail piece in my yellow/gold. The yellow one ends in an open spiky end, which is different on each side. The nice thing about fleece is it isn't neccessary to finish the edges because it doesn't fray.
I bagged each of them out and stuffed the inner tail to be nice and round.

The gold/yellow colour matches the blonde wig and the tights, and the brown ears match the bun gradient like on the character. It was a bit of a challenge finding 2 complimenting colours that both matched the wig, and tights that would match the tail. But we managed it!

Then I slotted the outer tail over the inner tail and sewed them together at the tail base.

This piece was then attached to an elastic waistband, which was just slipped on over the skirt, under the vest. And presto! A cute tail!