Showing posts with label bias tape. Show all posts

Tuesday, March 8, 2016

Vaporeon Gijinka - Sandals & Accessories - Pokémon


The 6th and final instalment of my Vaporeon building quest: Sandals & Accessories! This costume was all about the details and finishing touches. Beading, painting, trimming, gems, accessories, props--all elements that helped give this costume the extra wow-factor. It's not often I break a costume down into 6 posts, but this one is certainly worthy of that.

Links to Part 1: BoleroPart 2: Under LayersPart 3: Wrap Skirt TailPart 4: Wig & Hairpieces, and Part 5: Wraps & Bracers!

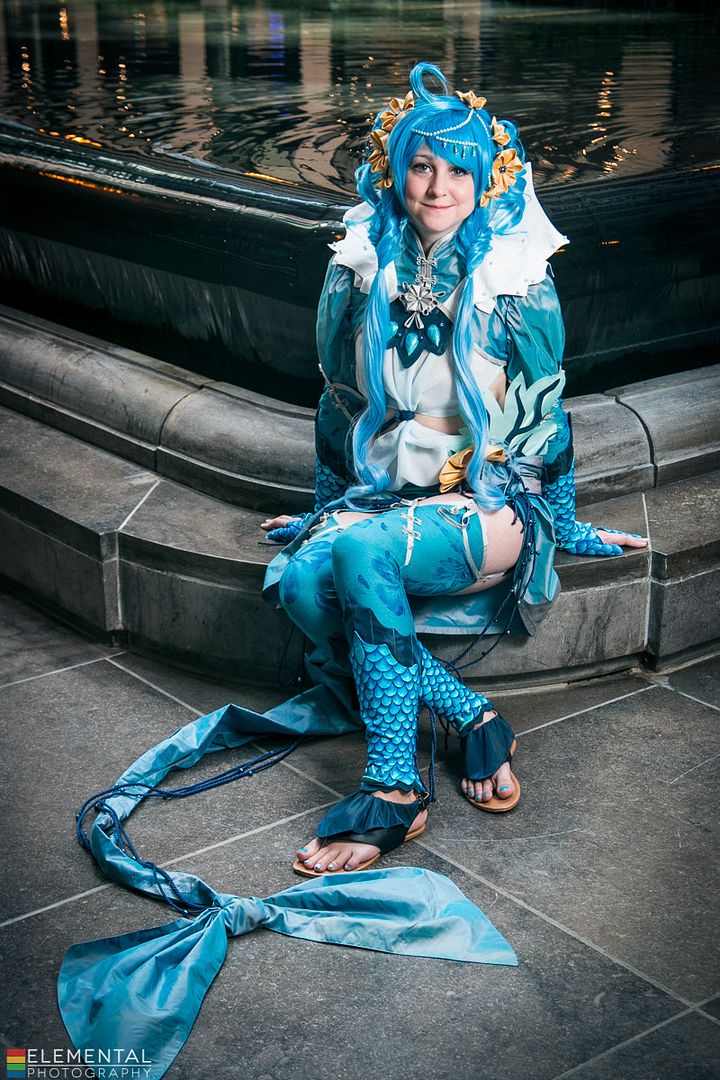
Thanks to Elemental Photography for the fantastical photoshoot! Credit for the original costume design goes to Cowslip!

Firstly I would like to thank my friend Harriet for lending me her fan! She does Chinese fan dancing and allowed me to borrow hers for this shoot. Thanks muchly!

For the sandals I started by buying a plain pair of cheapo flip flops from Ardene's. Which is a great place to buy shoes you don't care about.

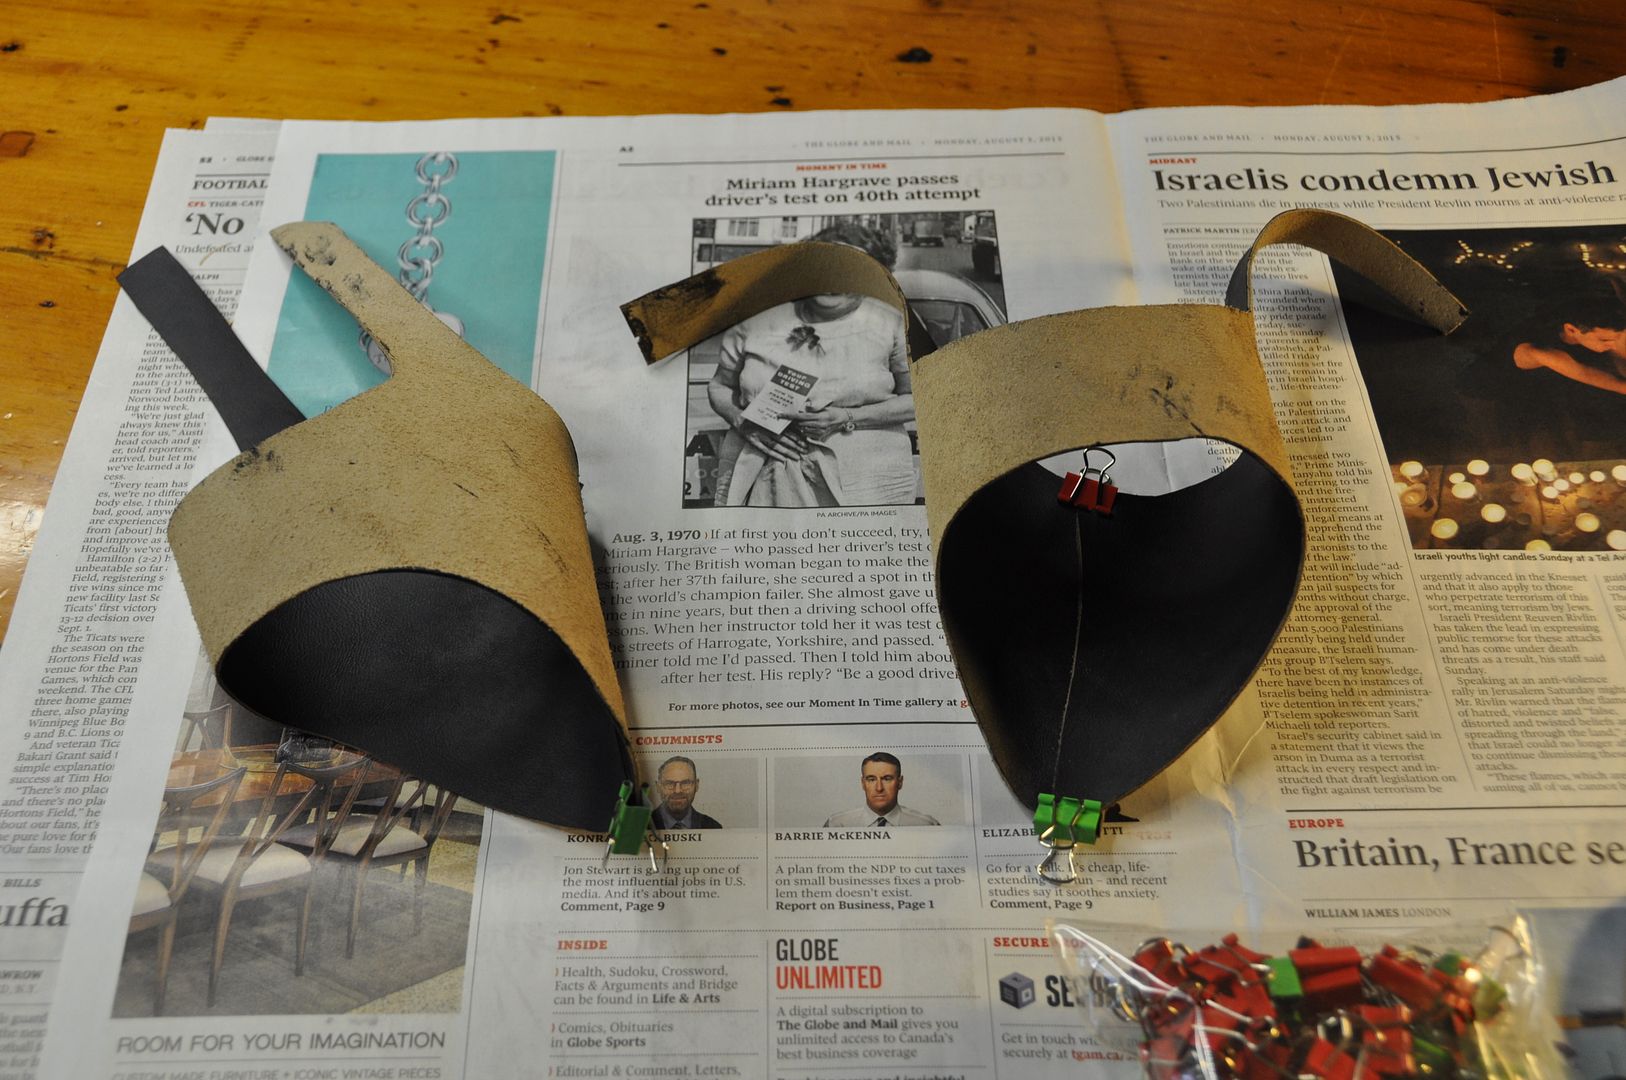
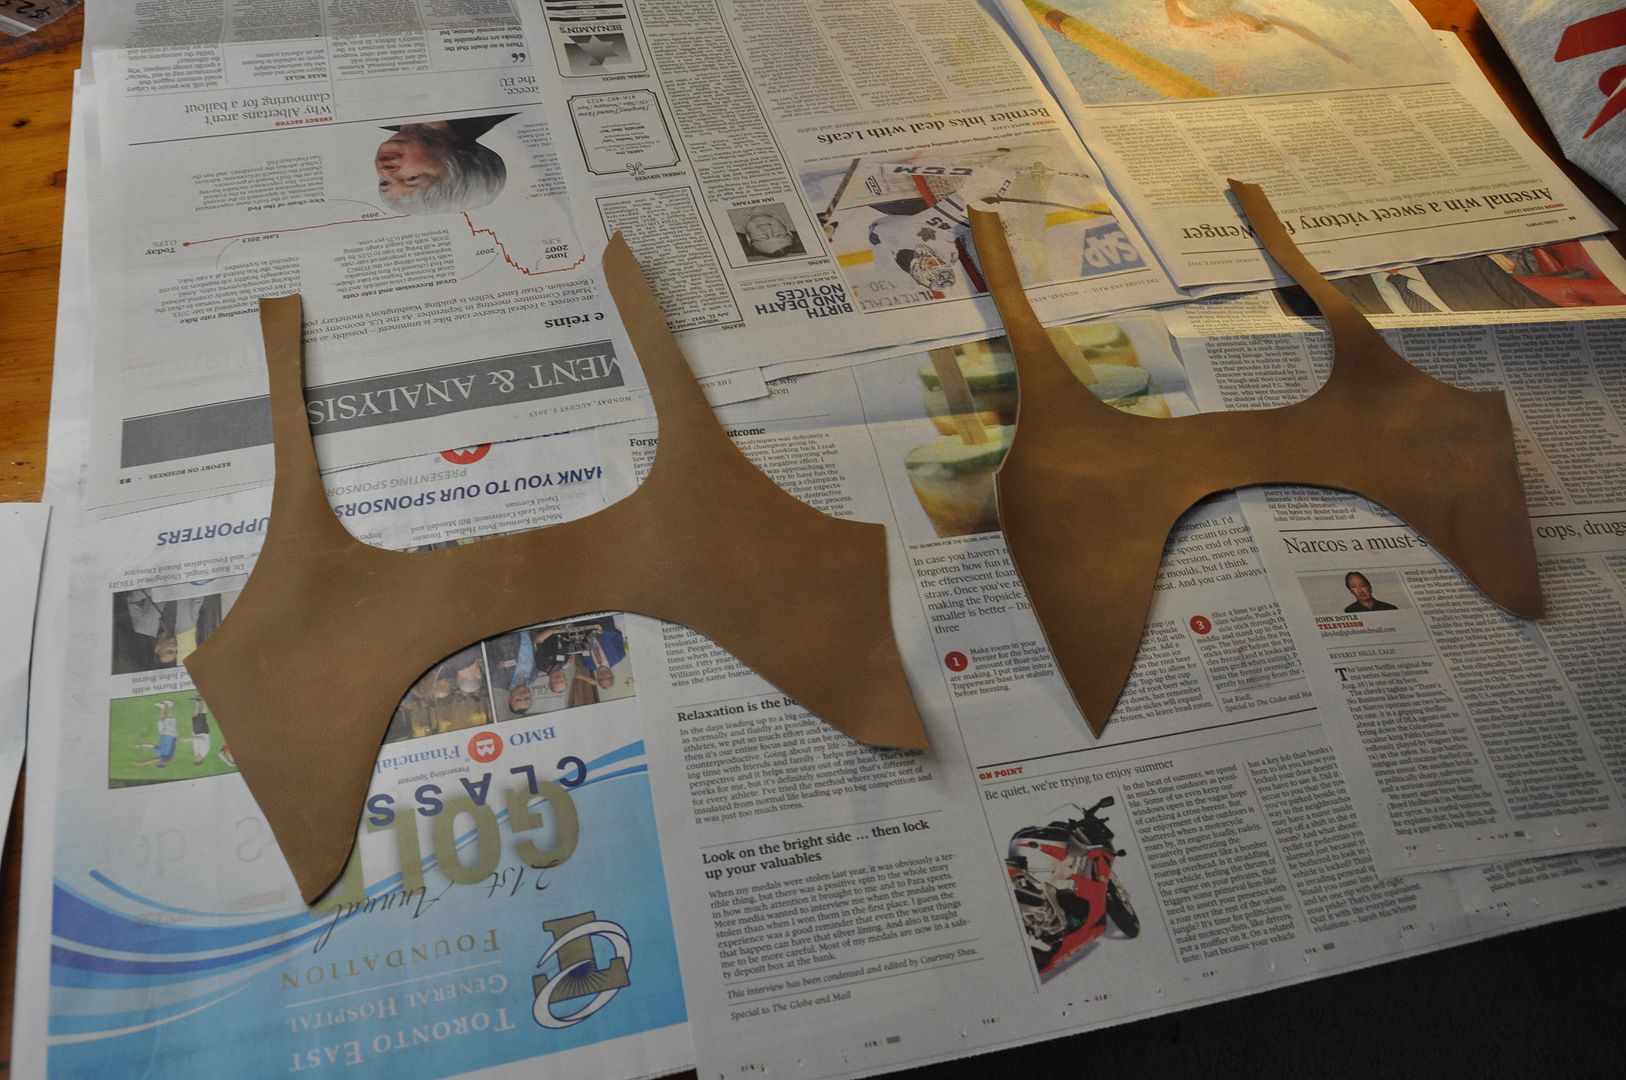
I patterned my base cover shape out of paper, then cut out my pieces (making sure they were mirror images) in leather. Using acrylic paint, I painted these leather pieces navy blue to match the costume.

These pieces would wrap under the bottom of the shoe, with a single seam in the top. The long tails would be used to make a buckle strap around the back of the heel.

Once I was happy with the fit, I machine stitched that top seam.

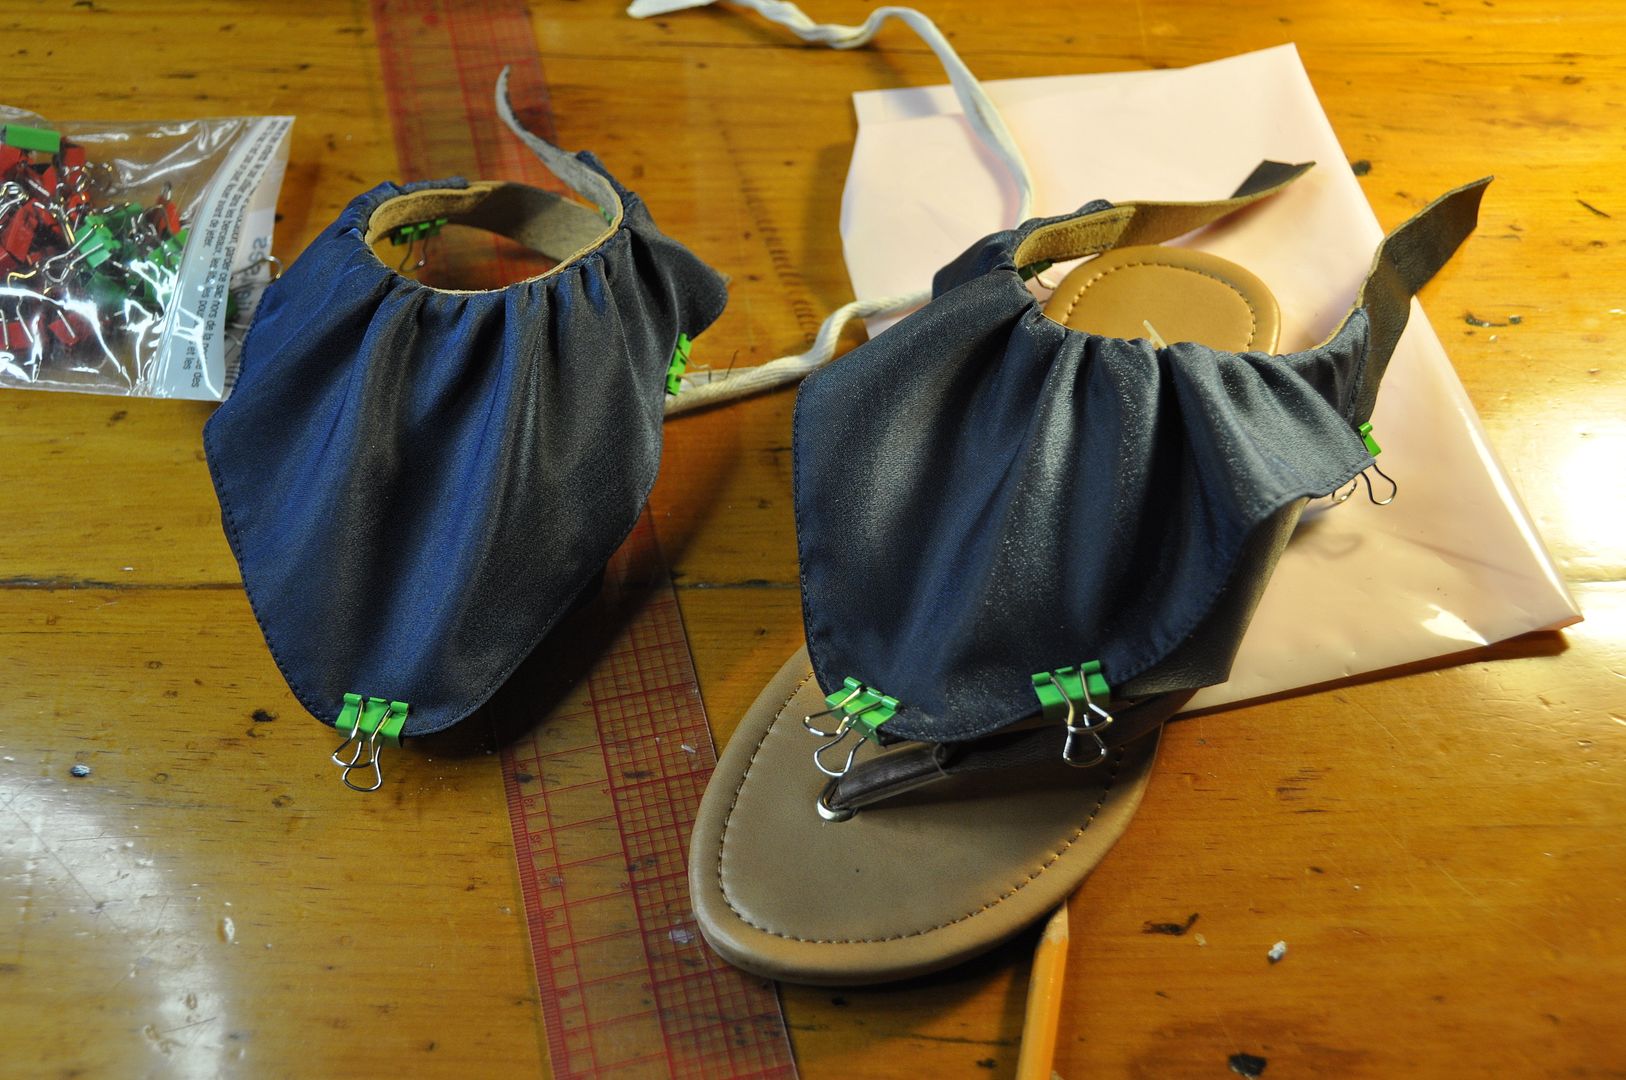
Next step was to create ruffle bit. Using leftover navy fabric from the bracers I created the two pieces. Each is made of two layers, sewn right sides together along the outer edge, then flipped inside out and top stitched. 

These were then gathered and stitched onto the top of the leather part of the sandal. I also tacked them down with a hand stitch in a few places on the outer edge, because the fabric was super stiff and didn't want to lie flat. 

Next I sewed a buckle into the back of each and punched holes to finish the closure. 

The last step was to glue the leather piece to the sole of the shoe to keep it in place/stop it from rotating. I used e6000 to glue it and it worked quite well. 

Another step in the detailing process for this costume was creating the gems for the center front and the edge of each bracer. 

I sculpted them using apoxie sculpt and then I painted them using a few different shades of nail polish. I did a splotchy application of my dark blue and light teal. And then went over that with a translucent shimmery blue, before finishing it off with a coat of clear gloss.

I applied the same paint to my toenails later! Details are important!

All of the gems were glued onto the costume with e6000. 

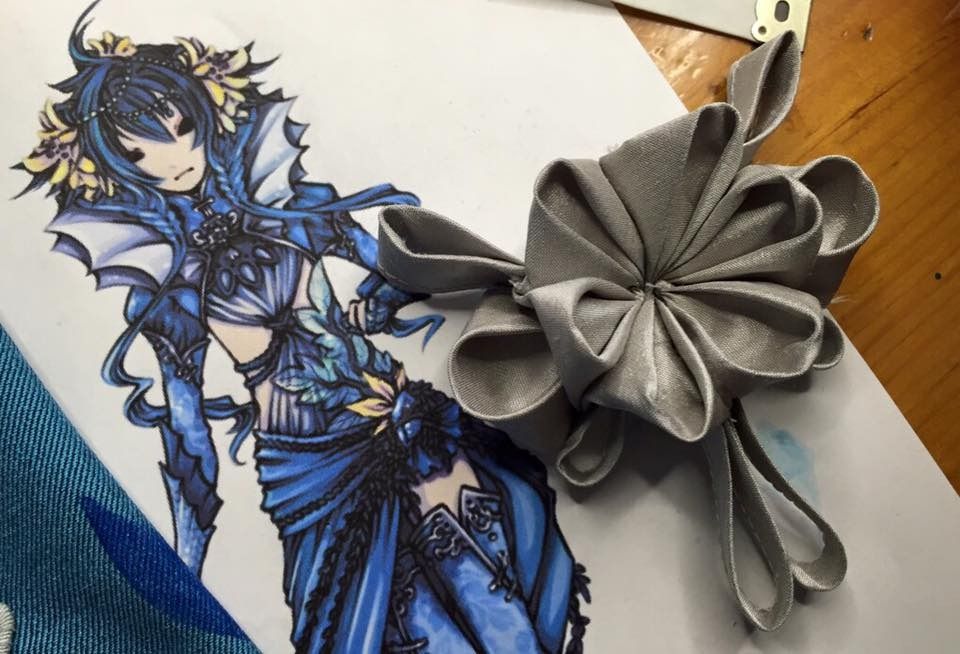
My last accessory was a brooch I created for the front of the costume. It was based on the very faint squiggle in the illustration. I got to interpret it how I wanted and this was the result. (I think I sewed beads to  the center later?)
Overall I am very satisfied with how this project turned out, and look forward to starting my next complicated fancy project.

Once again thanks for all your support! Now that this is done I can move on with my life! Hooray!

Tuesday, February 23, 2016

Vaporeon Gijinka - Wraps, Bracers & Gloves - Pokémon


Part 5 of the Vaporeon saga! Let's talk about wraps, bracers and gloves! This was probably the most time consuming and difficult part of the entire costume to construct. Lots of hand painting and hand stitching was involved. The end result ended up looking even better than I had envisioned! >:D

Links to Part 1: BoleroPart 2: Under LayersPart 3: Wrap Skirt Tail, and Part 4: Wig and Hairpieces!

Thanks to Elemental Photography for the wonderful photoshoot! Credit for the original costume design goes to Cowslip!

The way I started drafting the pattern for these was super scientific! Not really. I literally traced my leg onto paper. This is so I could figure out the relational distance between my ankle, knee and thigh. This was purely to use to get the proportional heights of the bracers and wraps correct.

From there I was able to mark how tall I wanted the bracers and wraps to be. Then I drafted the pattern for the wraps and bracers separately. I also drafted the arm wraps and bracers at this time.

I'll start with the bracers first, since I finished the construction on those first.

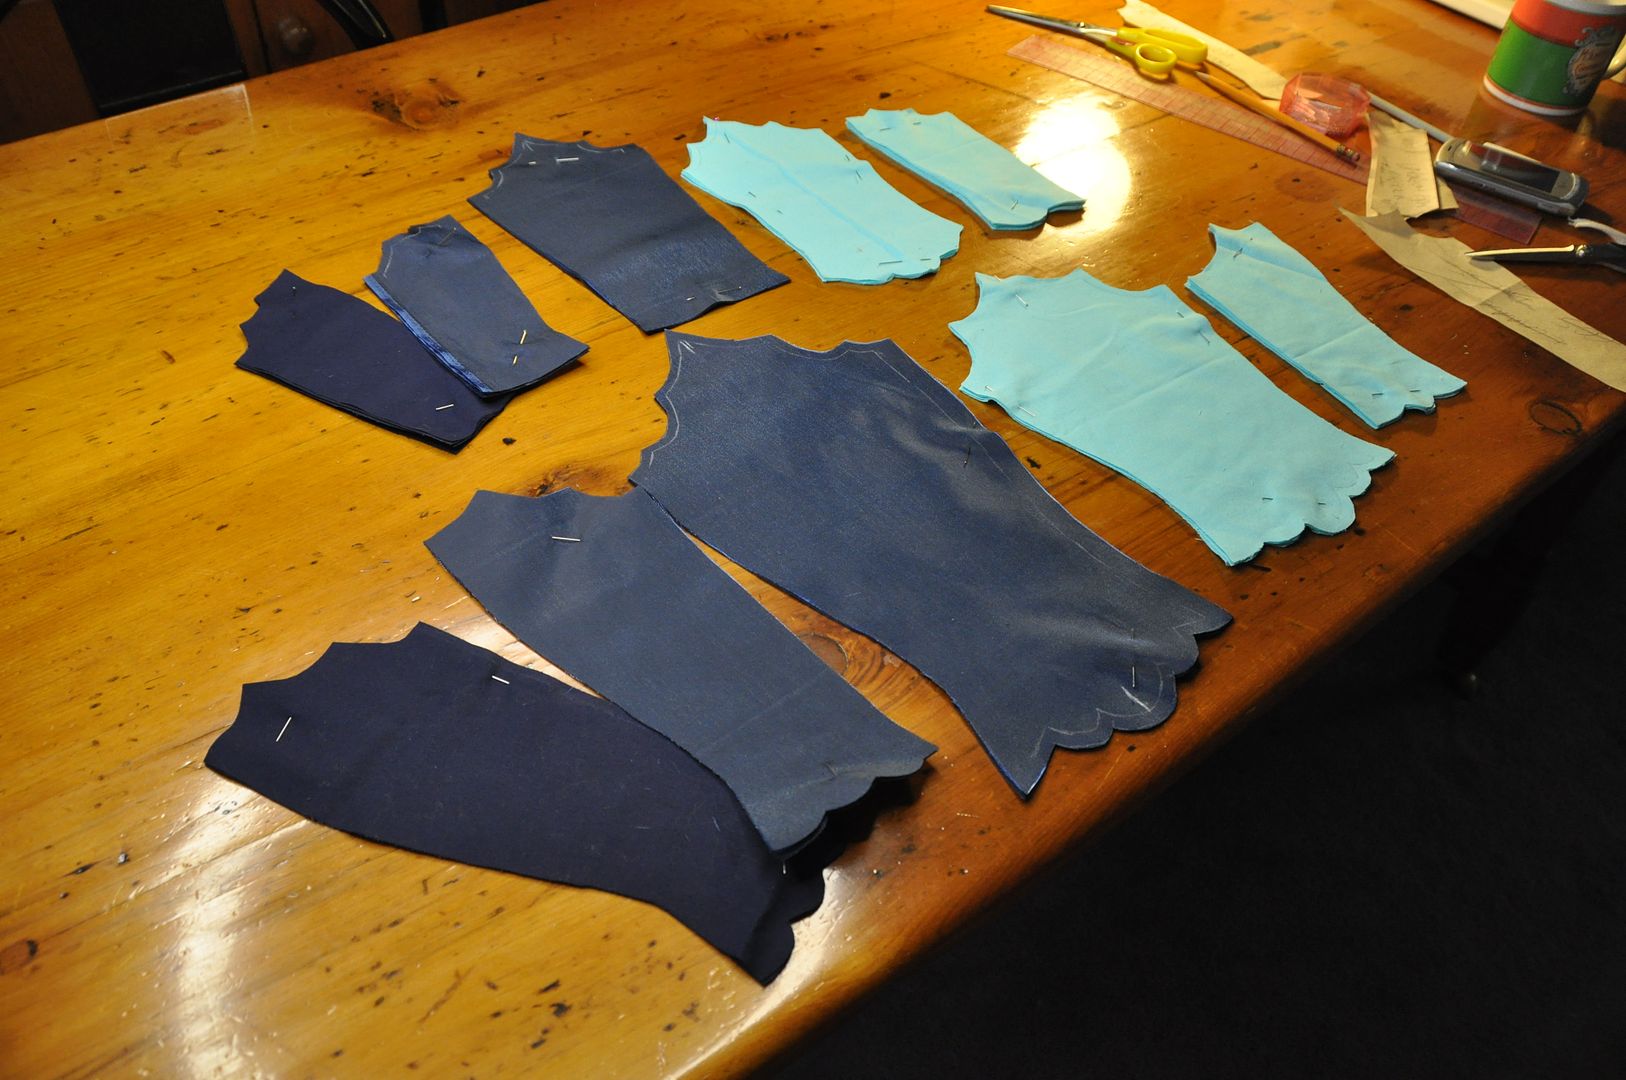
I cut out my pieces in the various fabrics. I had an under layer in a shiny synthetic navy blue fabric and an over layer in a light aqua cotton (which was leftover from the Suppi costume).

I nearly cut out the wrong amount of pieces when I was laying out my pattern. Every piece has a backing because I needed that to properly finish the scalloped edges on the top and bottom. This meant every piece was doubled. The navy under layer was backed with the same navy cotton as the bolero lining because I ran out of my other navy fabric.

I assembled each of the fronts and backings separately, sewing them along the side seams. I ironed the seams open flat.

At this point I took the front over layer pieces of the bracers and painted on my scale pattern. I lightly drew this out in pencil and then traced over my lines with navy blue fabric paint. It sounds simple, but it took a really long time. I ironed them to set the paint before moving on.

Next I pinned each piece to its backing right sides together. I sewed them together along the top and bottom edges, leaving both sides open to turn them right way out. Before turning them out, I trimmed the excess seam allowance on the inside. I top stitched along the edges to neatly finish them.

I also added in my top stitching detail on the tops of the under layer at this time.

I aligned my side edges, zig zagged stitched over the raw edge of the fabric and then turned that to the inside and top stitched it down.

Then I used a punch to punch out the holes to put the grommets in for the laces. At this point I still had access to the grommet press at school, which I made good use of.

This was the point where I laid the project to rest for a year, because one of the main hurdles was the leg wraps, which I was positively stumped on. I didn't know how to rig them, I didn't know how to do the detailing and I didn't want to rush them and do a crappy job of it.

When I returned to the project, along with replacing the wig to fix the colour matching issue I also found another thing that was bothering me. The bracers were too teal for the rest of the costume, especially now that I had replaced the wig.

After re-evaluating, I decided to upgrade the paint job on the bracers, and in the process change the colour of them to be bluer. I added in depth to the scales, but also dry brushed over the whole thing to tint it. You can really see the difference it made in this progress shot.

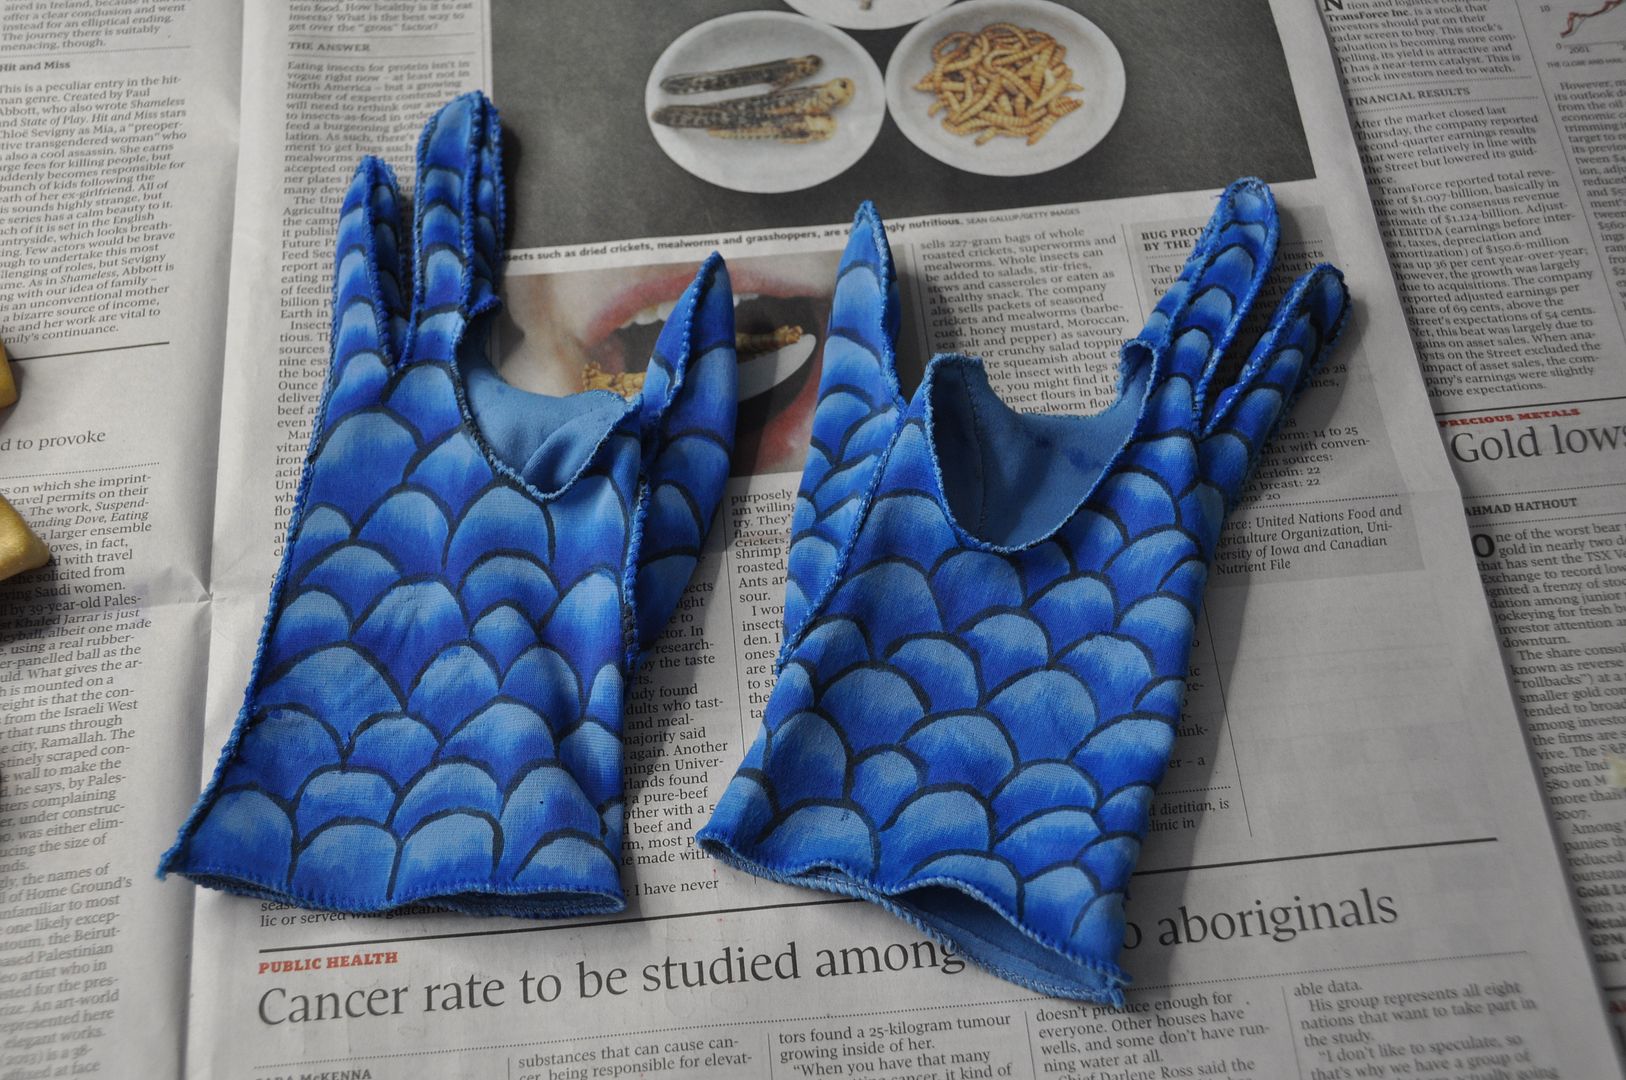
The gloves I bought in Kensington market. I made gloves for an earlier project and decided it was by far the most horribly tedious thing to do ever. So I decided to buy and alter a pair. I cut out the hole that encompassed the index and middle finger on each glove, then zig zagged stitched the edges to finish them so they wouldn't fray all over the place.

The gloves were painted in the same style, except instead of laying them flat, I had to wear them each on my left hand in turn to paint them.

By doing the scale pattern and adding the depth to both the gloves and bracers it helped to meld them together visually and also give the false impression that they are even remotely the same shade of blue. Because they really weren't.

Now let's travel back to the beginning of the project when I traced my leg and started patterning. For the wraps I was venturing into an area I didn't have much experience with at the time--stretch fabric. In this project I can freely admit that I had no idea what I was doing and problems I encountered in the construction of these wraps are one of the main reasons I stopped working on the project for a while.

I will start with my first mistake: I bought fabric that was one-way stretch. Somehow it was more unpredictable than stretch fabric. I don't know, I just didn't like working with it.

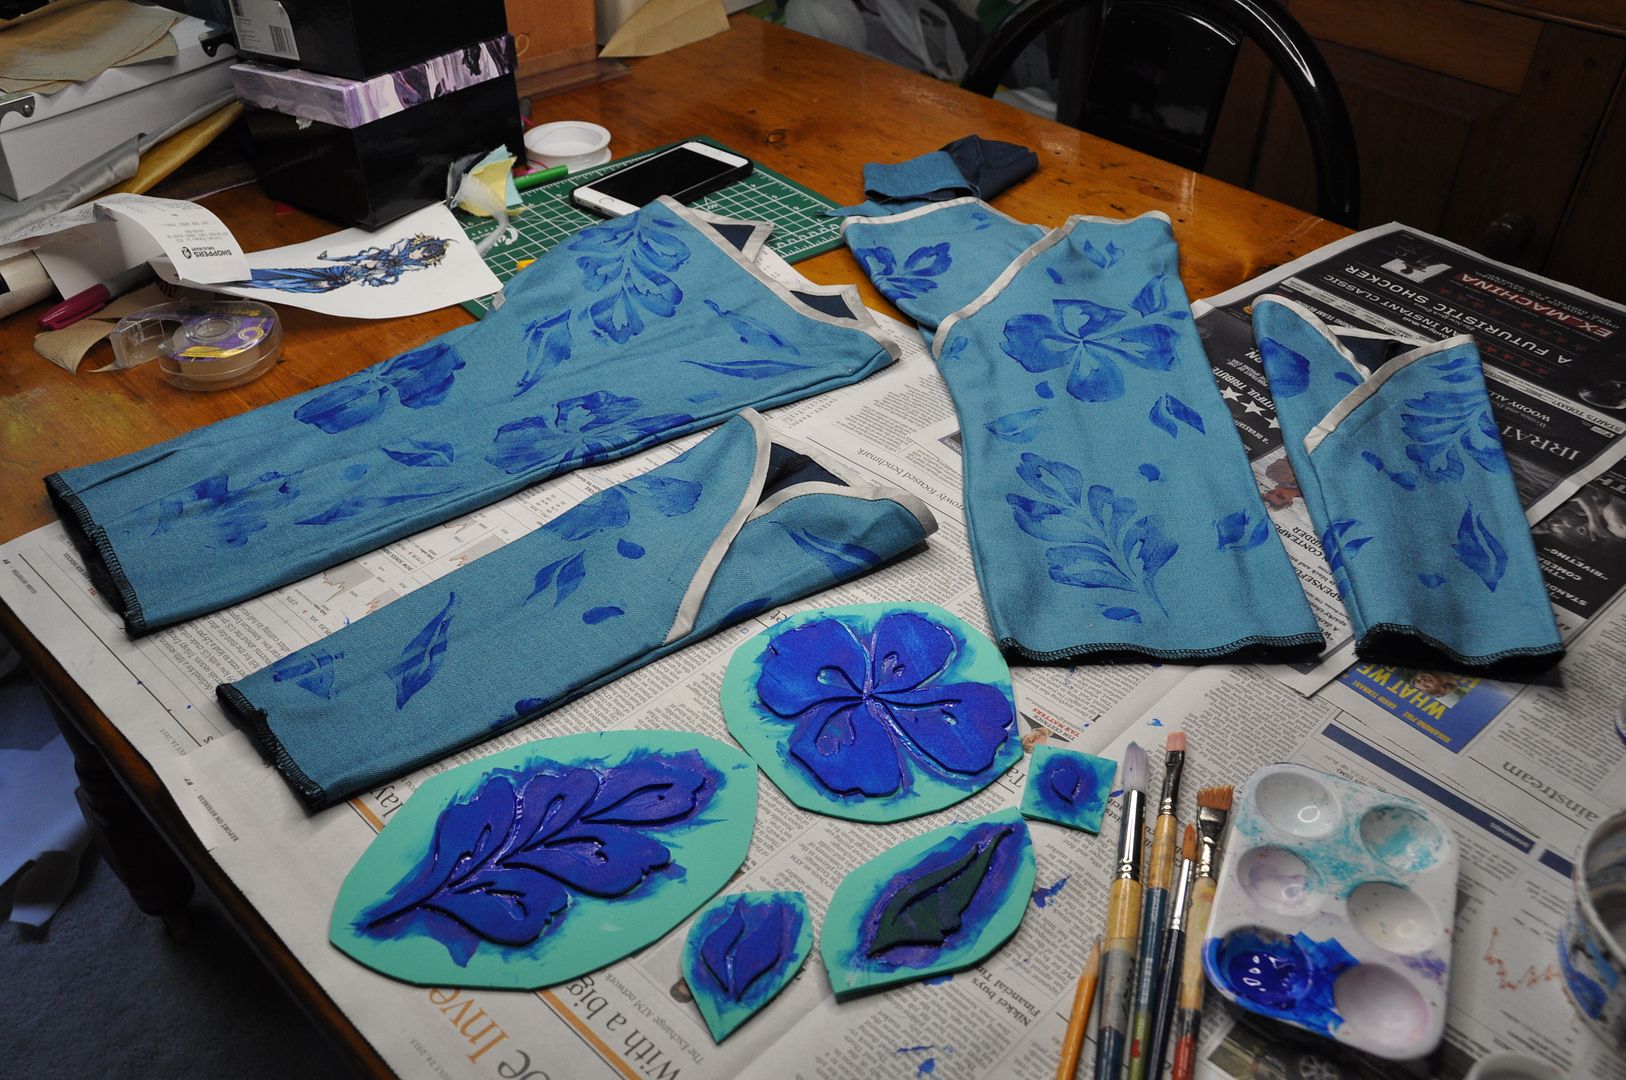
I patterned out my pieces, figuring out the overlap at the top. In this picture you can see the two pieces for a leg wrap on the left and the two pieces for an arm wrap on the right.

I took them to school to assemble them with the serger, because this fabric frayed like crazy. I ended up making them slightly uncomfortably snug, but since I had serged off the seam allowance I couldn't let them out, and I used up all my fabric so I couldn't remake them.

I used the silver silk bias tape I had made for the bolero to finish the top edges.

At this point, I had no idea how to rig them. They were super snug, but not enough to stay up without slipping. This is when I threw in the towel on the project.

Zoom forward to one year. I am one year wiser. And I have ideas about how to finish this project.

First I decided to actually add the floral pattern to the fabric, which I had originally decided to not bother with (because of time constraints).

I decided to make stamps to create my design, rather than hand painting on the floral design. This is much quicker and easier if you are making repeating patterns/patterns with repeating elements. Based on the barely visible details in the reference image I sketched out some suitable flower and leaf designs, then traced those onto craft foam and cut them out. I glued the pieces onto a foam backing creating my stamps.

I laid out my wraps and began stamping. Using a blue fabric paint, I used a brush to apply the paint to the stamps and then pressed the stamp into a spot of my choosing on the wraps. I made the paint application purposely patchy. I didn't want the flowers to be solid. 

I wanted the flowers to be random and sporadic. There is no science to the design. I just made sure not to have too many of the same stamp to close to each other. 

I had to wait for them to dry before flipping them over and doing the sides and back. When everything was painted and dry I heat set the paint with an iron.

Next I decided to finish the overlaps differently. My original plan was to make the overlaps a functional closure. But it wasn't working--it pulled the fabric on a weird diagonal, and looked super bad. So I decided to sew it shut and just fake it. I sewed the frogs on top as decoration.

Next I used bias tape and hand stitched on all the fancy loops and detailing on each of the wraps. This took forever.

Lastly I had to rig them so they would stay up. As I mentioned in my wrap skirt section, the rigging for the wraps was attached to the inside of the skirt's waistband. At the back there is an elastic strap that attaches to each wrap using garter hooks. They are stretched to be pretty tight, but not so much that I can't bend or sit. Then I have a second backup strap made of webbing that doesn't put as much tension on it. This is for the sake of redundancy--if the first strap fails, the second will keep it up. You can see a bit of the rigging system in the picture below. I tried to keep it as invisible as possible.

The arm wraps are attached to the bolero with simple buttons and loops. Unfortunately they tend to pull the bolero sleeves down oddly. I plan to remedy this in the near future by stuffing the bolero sleeves.


Thursday, December 10, 2015

Vaporeon Gijinka - Bolero Jacket - Pokémon

It's finally here, the one you've been waiting for--Vaporeon. In terms of quantity of pieces alone this is perhaps one of the most complicated costumes I have ever constructed. Hence, this one will be broken up into 5 shorter posts.

First of all I would just like to my deepest gratitude for the huge amount of support I received working on this costume. This one was a long time in the works. Special thanks go to my friend Harriet who dedicated many hours of her time and hand-stitched on 95% of the beads, hooks and clasps. Seriously, this costume wouldn't be nearly as sparkly without her help. I gave her the official title of Bead-Dazzler. Another shout out to my friend Alex who accompanied me on my initial fabric shopping scavenger hunt and helped me pick out the perfect fabrics for this costume.

Secondly, a million thank you's to Elemental Photography for the wonderful photoshoot and the wonderful pictures. I wasn't feeling so confident in a costume with so much exposed skin, but Amanda made me look and feel like a million bucks! You rock!

Credit for this amazing design goes to Cowslip. I discovered the Pokemon Gijinkadex collection of designs about 2 years ago now, and I fell in love with them. There are so many beautiful ones to choose from--I knew immediately that I wanted to cosplay one eventually. Picking between them was a challenge. I think I narrowed it down to 4, and then I let you--the fans--give your opinions on which you wanted to see me do. The votes were pretty divided--the Moltres design was also pretty popular--but eventually the decision was reached that Vaporeon would be the best one to do. Perhaps I will revisit the Gijinkadex in the future and do another one, but for now I am satisfied with Vaporeon.

I started the costume in May of 2014, originally intended to compete in the Anime North Masquerade later that month. This was at the same time I was working on completing the last 2ft of embroidery on my Forest Guardian and also building Sakura (1st opening outfit) and Isabelle--both sizeable projects. You can definitely say that I over-extended myself, particularly because I hadn't planned to still be working on the Forest Guardian at the time--I had intended to complete that for CostumeCon32 in April. By the time I hit AN prep suffice to say I was already super burnt-out.

I knew from the start that Vaporeon would be a challenging build--there was tons of detailing on every single piece. And there were so many pieces. No seriously, this costume has 22 individual pieces. It is actually kind of amazing that this costume is the one with the most pieces, and the most layers, while simultaneously being the costume with the most exposed skin I've ever done.

Ultimately, I underestimated the complexity of the project, by the time Anime North rolled around it was still not even at a point where it was wearable. I decided it was not possible to finish on the timeline I had and decided to compete in Forest Guardian instead. So I made my new goal completing it for AN2015.

...Unfortunately due to my hectic job schedule, that didn't happen either. Hahaha I didn't even try I was so busy. I finally completed it for Otakuthon later that summer--it took another month to fully complete the costume. I am pretty happy with the end result. There are only a few small things I want to adjust with the sleeves, but the rest of it worked out fabulously.


(Credit for the above shot goes to Don Dolce Photography!)

Let's talk about the first part of the build--the bolero jacket. It is the first piece I started and one of the last things I finished.

I started by draping the pattern for the bolero. I first outlined the edges and the seam where the big collar would be inserted using twill tape, then I used scrap pieces of muslin to pin in place, following the curves of the body form and trace my pattern pieces. It created 4 pieces. I then tested this pattern by making a mockup.

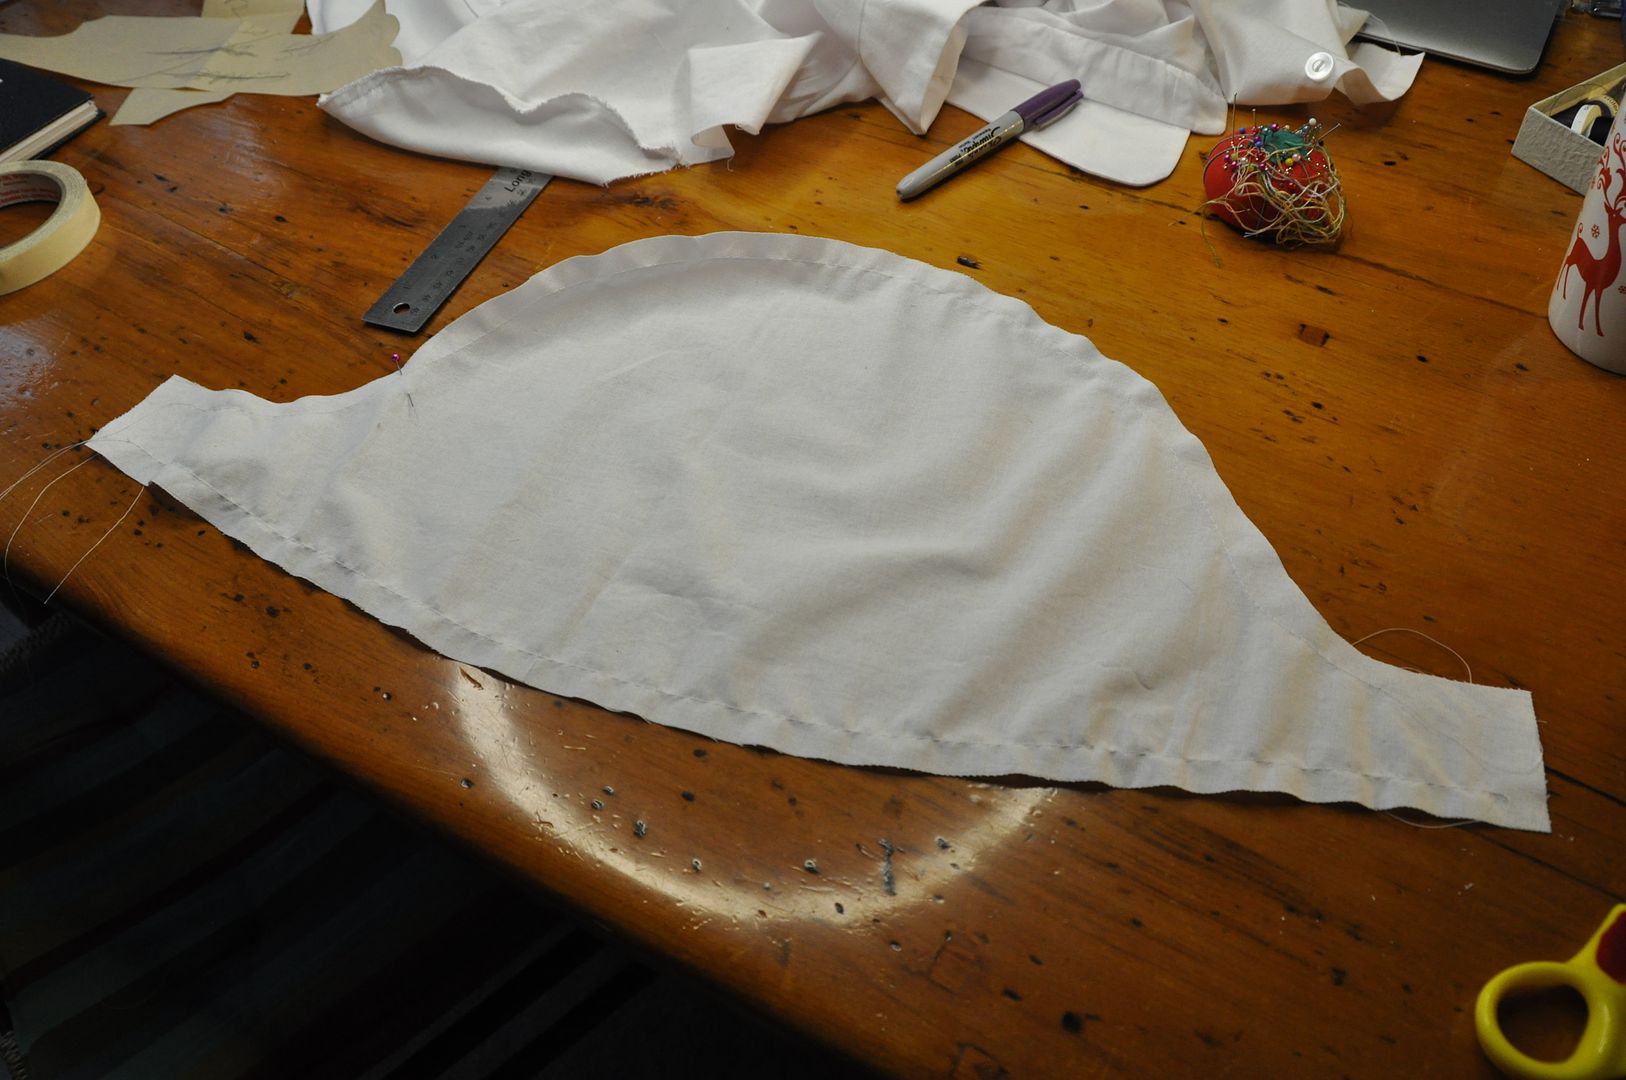
The next step was to pattern the big collar pieces. I made the first upper collar mockup out of paper so that it would be rigid, which would give me a better idea of what the final wired collar would look like. I ended up altering it slightly, then I made the second under collar with the offset spines.

Below you can see the pattern for the upper collar with the under collar below it.


I cut my collar pieces out of their corresponding fabrics. The upper collar was made with two layers of white cotton, sewn right sides together along the spined edge and then carefully clipped and flipped right way out. I ironed it and top stitched 1/8" from the edge to finish it nicely.

The under collar was made in the same fashion-except that it was made with the bottom side in the blue silk to match the rest of the bolero.
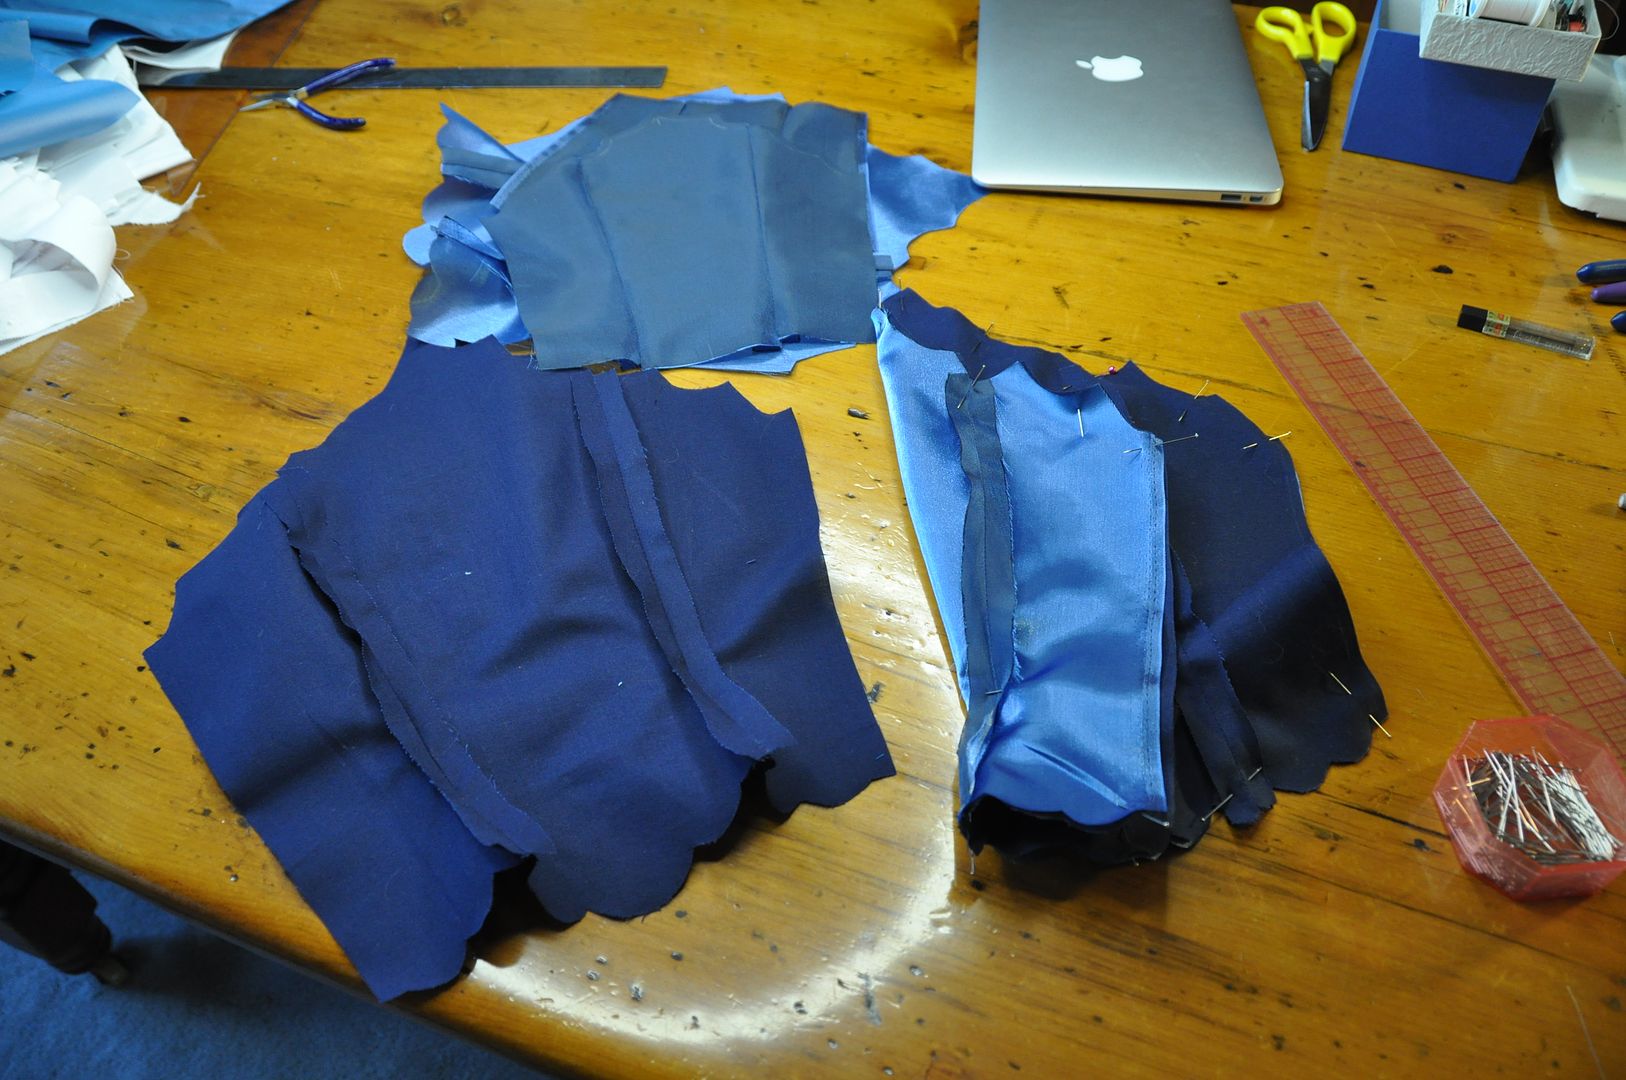
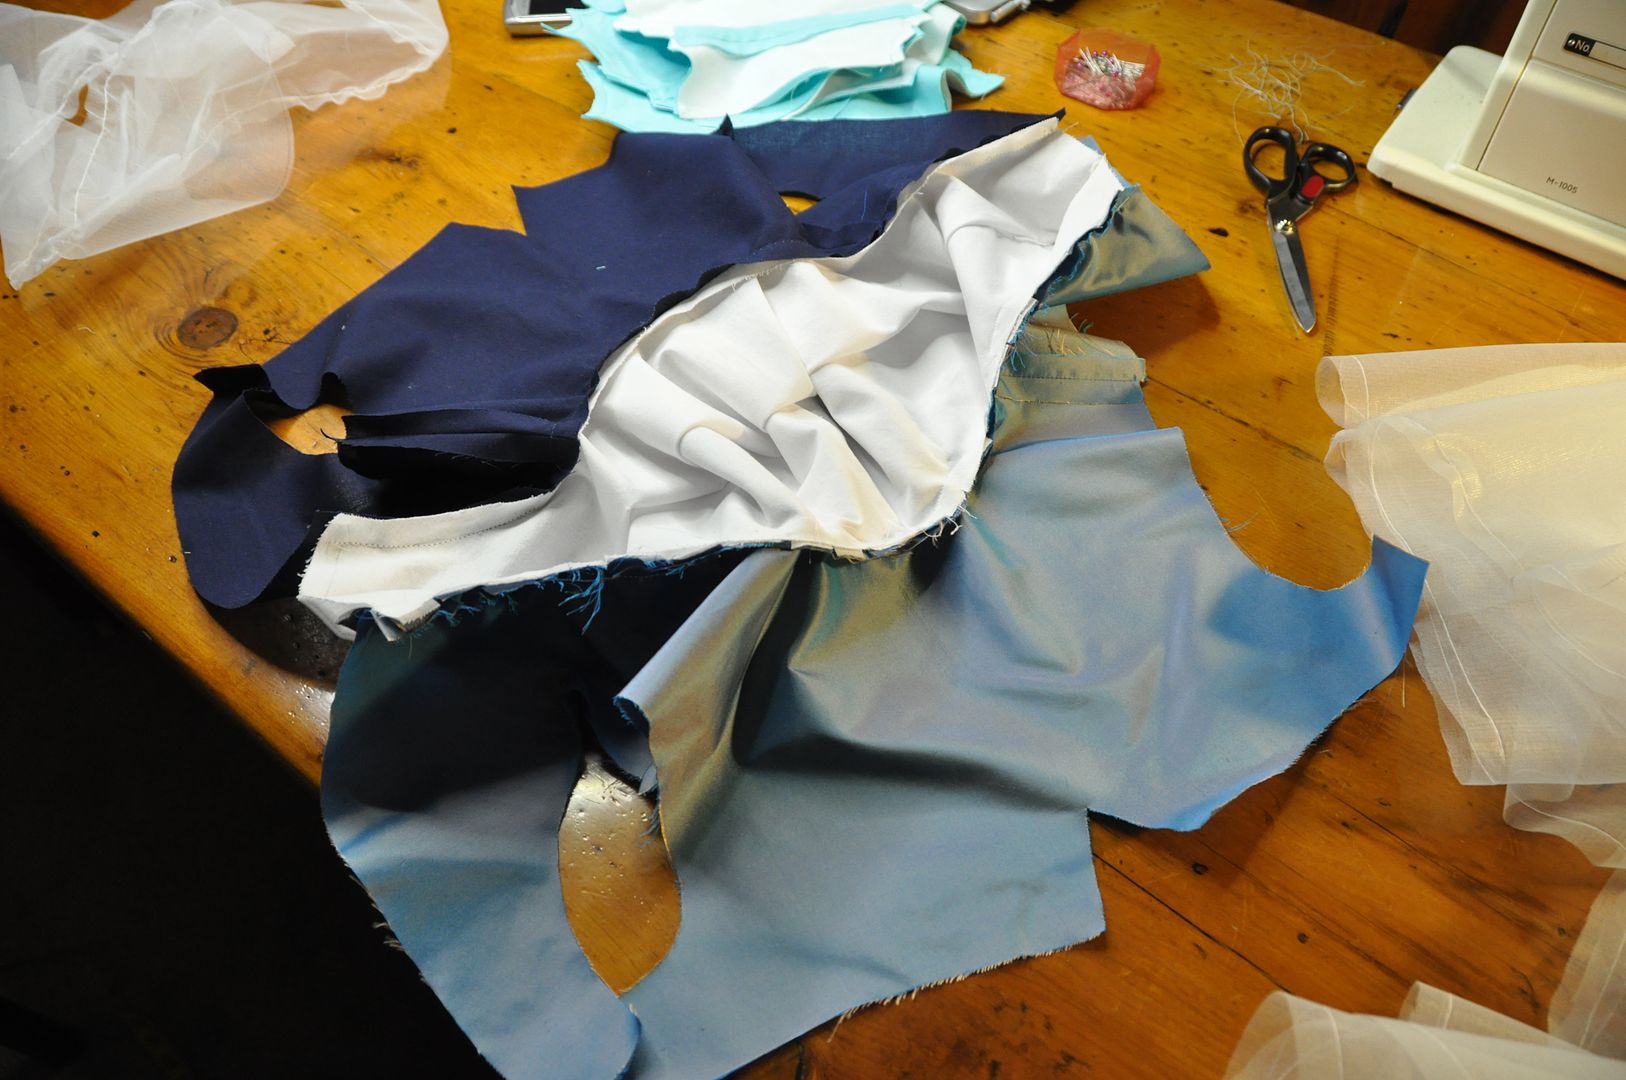
Here you can see all the pieces that made up the bolero jacket. Since the blue silk was so thin, I decided to line the body of it with a leftover navy cotton I had in stock (leftover from my bicycle skirt).

The piecing together of the collar was exceedingly complicated. I will do my best to explain, but ultimately I will have to say that I barely understood what I was doing. hahaha

There are 3 collars: the blue silk inner collar, the white wired collar, and the white and blue floppy under collar.

First I flat basted the blue inner collar to it's navy cotton lining. (The raw edge would get finished with bias tape later.)

I sewed the bottom side of the top collar to the bottom collar along the unfinished edge. This was sewn to the silk outer part of the jacket body along the collar seam. (So: jacket body, bottom collar --both edges, top collar (bottom edge).)

I sewed the top side of the top collar to the inner collar and the navy lining of the jacket body. (So: top collar (top edge), inner collar (and its lining), jacket body lining.)

Pictured left you can see how this left the top collar wide open for me to add the channels for the wires. Which was the next step.

Once the wires were in place I glued some felt to cover the ends that would sit in the jacket body. The felt helped to both keep them in place and make them less likely to wear through the fabric. The wires have an angle in them and extend past the collar seam and into the back of the jacket so that they rest against my back and therefore actually provide structural support.

Then carefully aligned it and I sewed the collar closed--this meant all 3 collars, the jacket body and lining were attached. The order from bottom to top is: jacket body, bottom collar (both edges), top collar (now both edges), inner collar (and its lining), jacket body lining.


I ironed the seam, pressing the jacket lining down, which hid all of this construction on the inside--giving it a nice, clean finish. Then I sewed channels for the bottoms of the wires to sit between the jacket layers. Then I basted the lining to the body along the raw edges--including the armholes. 
I used a basting stitch along the sleeve tops and cuffs to create puffed sleeves, which I then attached to the armholes. A year later I would return and finish the sleeve hem with a simple rectangular cuff. 

Next I finished the edges with a silver bias tape I made myself. I also used bias tape to finish the armhole seam neatly. 

Here you can see the inside of the jacket.

After this I sewed on some frogs for the closure on the top collar.
This pointy edged navy bit was top stitched to one side of the front opening of the bolero. It has dome fasteners to attach it to the other side of the opening for easy removal.

Details such as gems and beads were added later, I will go into details on those in a later post.

Wednesday, October 14, 2015

Sakura - Dress, Blouse & Petticoat - Cardcaptor Sakura

So guys, it finally happened: I finally got some finished shots of this costume. Special thanks to EleventhPhotograph for the amazing fall shoot! I loved the use of colour gels in the trees to pump up the colour even more!

You may have already guessed that I have a slight obsession with the 90s series CardCaptor Sakura. It was the first anime I ever watched in Japanese with subtitles. The numerous other CCS costumes should have clued you in to my obsession at this point.

I've already made Suppi & Kero, Sakura's sailor suit, and Tomoyo. Adding this one and the one I am currently working on, that brings my total up to 6 costumes from the same series. Which is kind of crazy. Although, not all of these costumes are for me. Suppi was for my older sister Alex, and this iconic Sakura outfit was made for my lovely sister Elanne.

It may not be totally apparent that my sister is actually 7 years younger than me (we have been told on numerous occasions that we look like twins...), but this means that she was not old enough/actually alive to watch the series with me in the 90s. She only watched it for the first time about 3 years ago when Alex and I were having a nostalgia trip. And she quickly became a fan. She hadn't cosplayed in a few years, but asked me if I would consider making something CCS for her. How could I refuse? And behold, the cutest Sakura I know!

So lets get started talking about how I made the dress, blouse and petticoat!

This is definitely one of the most iconic Sakura outfits, this one is featured in the season 1 opening theme. Fabric shopping proved a bit of a challenge for this costume, as I had difficulty finding the correct colour of pink. Because the dress is pink, not red, as some people make it--though that may be to better match one of the manga illustrations? I don't know. It's a reddish/salmon-y/flamingo-ish pink depending on which reference picture you look at. The fabric I found was a medium salmon-y pink colour. When compared to the red fabric I already had on hand for the bow details it had a nice contrast and the colours looked good together. Which is an important part of colour matching any costume.

The most difficult thing about CLAMP is that the way they draw their CCS designs is so simple. They look simple. But they aren't. My main issue is that they don't typically draw seams onto the clothes. This can make it extraordinarily difficult to determine how exactly the clothes should be constructed.

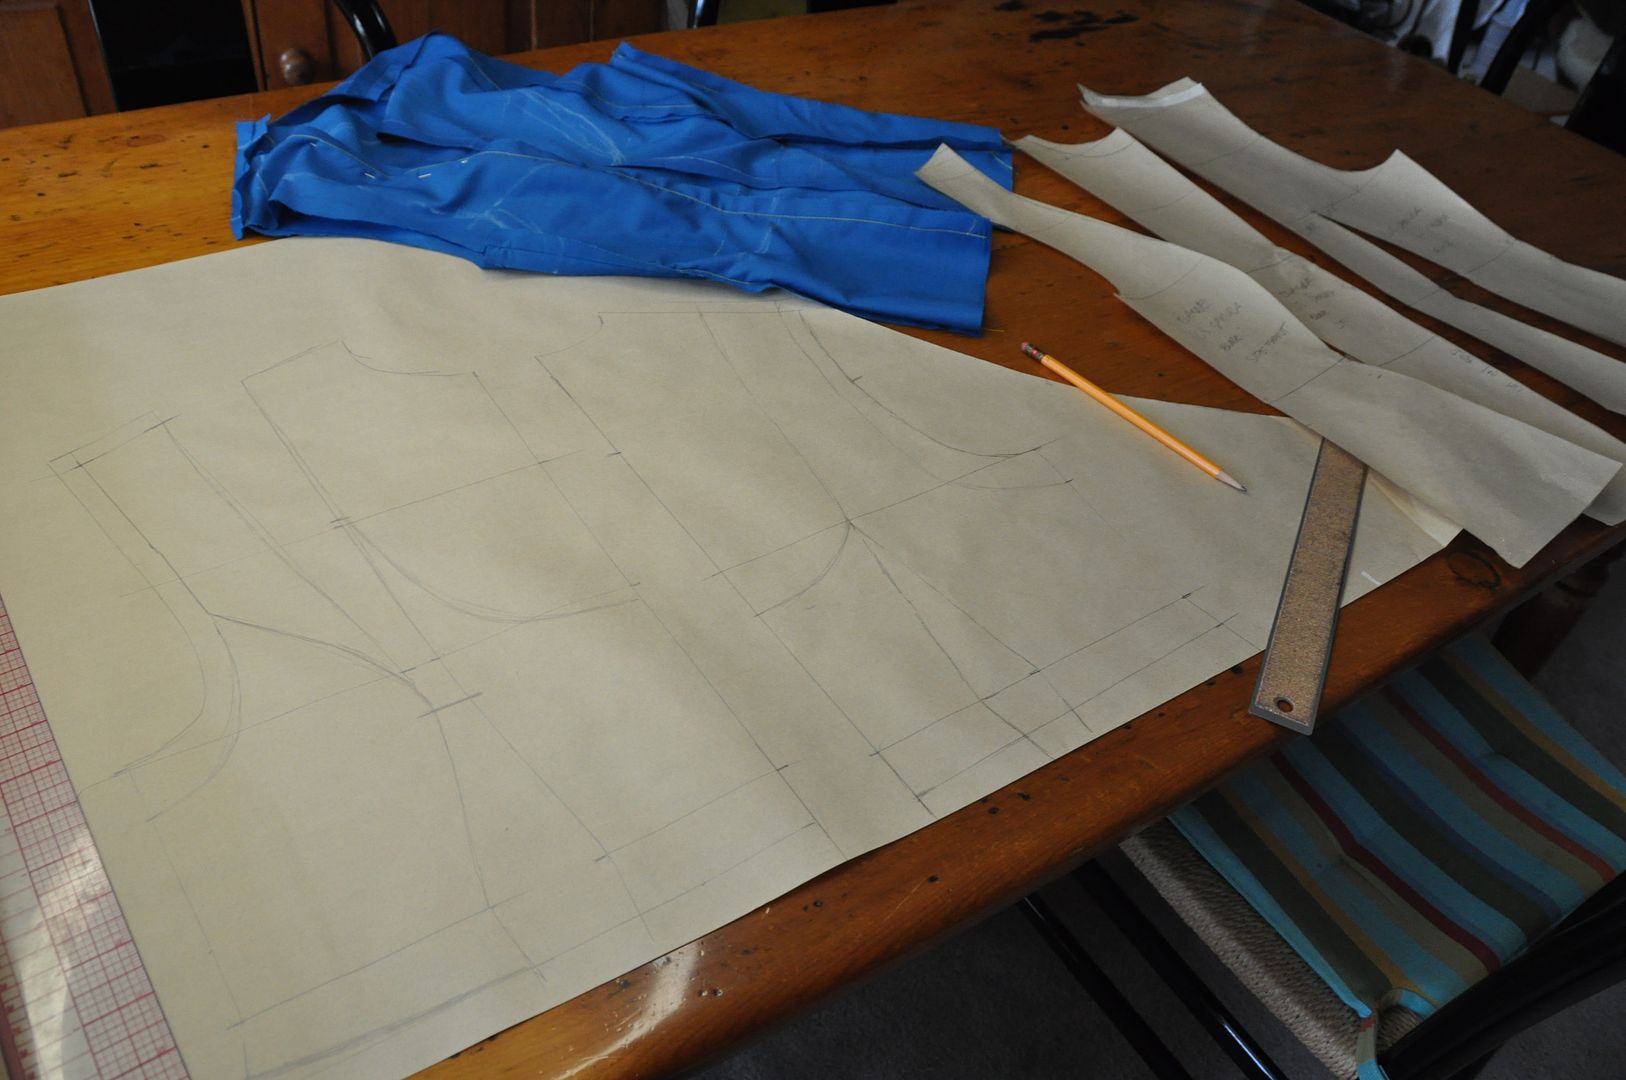
I started off by patterning a basic block, which I heavily modified to create the pattern for the bodice.

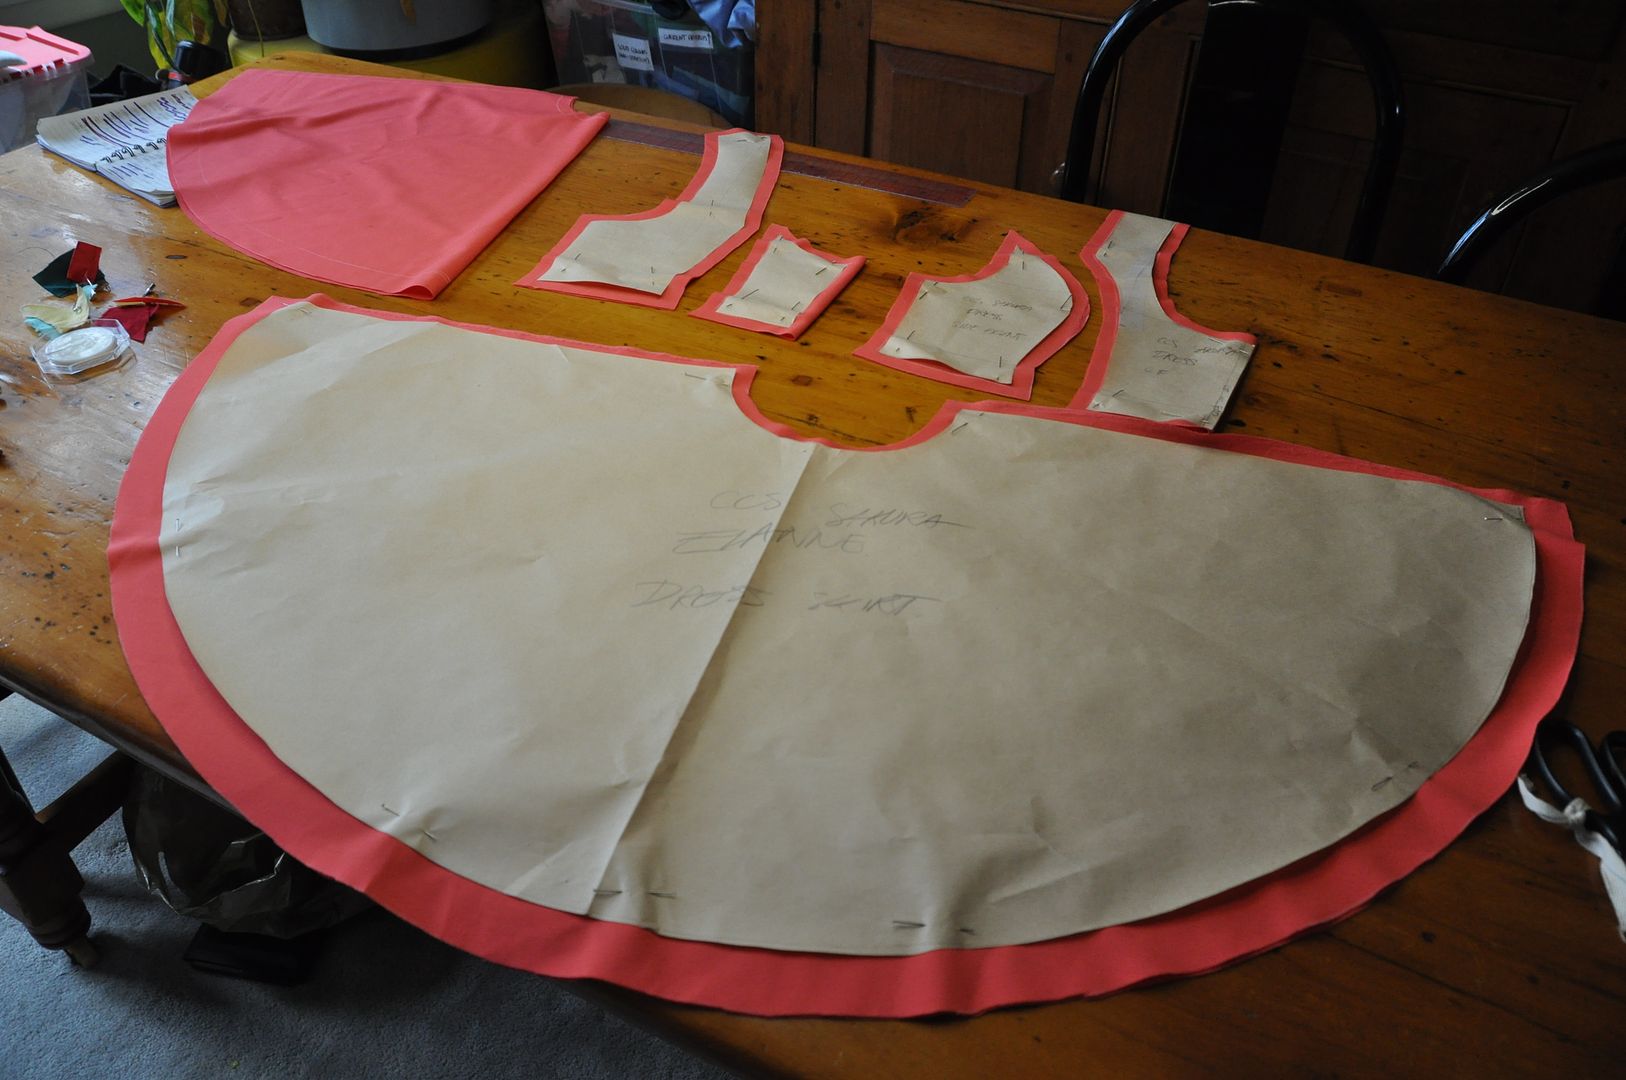
The skirt is a full circle and a half. It has been too long since for me to explain the mathematics of how I did that. It consists of 3 panels which are 1/2 of a circle each. This is so I can have a seam down the center back for the zipper, but not one down the center front (which I think looks bad).


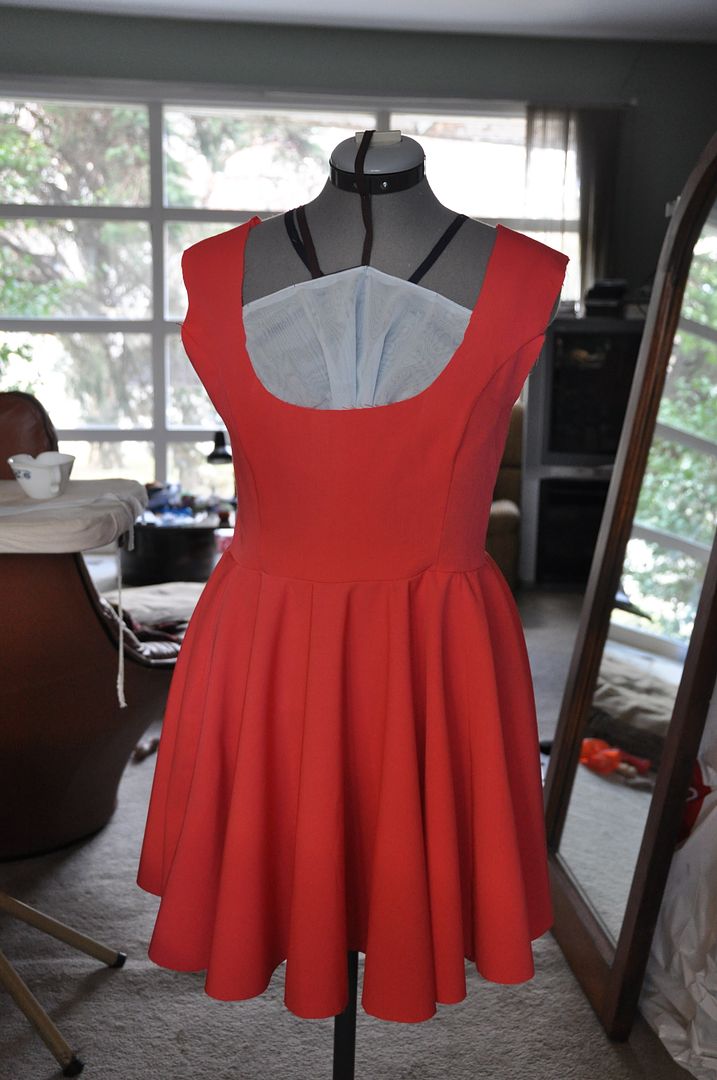
I cut out my pieces and then began assembling it.

The bodice was designed not to be super fitted to her curves in spite of having a princess seam--Sakura is supposed to be like 10, so emphasizing curves does not really emulate the character accurately. But not having the seam would have made the bodice gape weirdly at the armholes. Also, it couldn't be too fitted, because there were several layers going underneath: the wing rig being the bulkiest, but also the blouse and the petticoat waistband. If it was super fitted she would look lumpy. Sakura is not lumpy.

I finished the seams on the inside.

You can see how full the skirt is as it hangs. This is what the skirt looks like without the petticoat underneath. Pretty sad and not floofy. I always think it looks so sad when a character is supposed to have a giant floofy skirt and cosplayers aren't wearing a petticoat. :( Sometimes it's understructure that can make or break a costume.
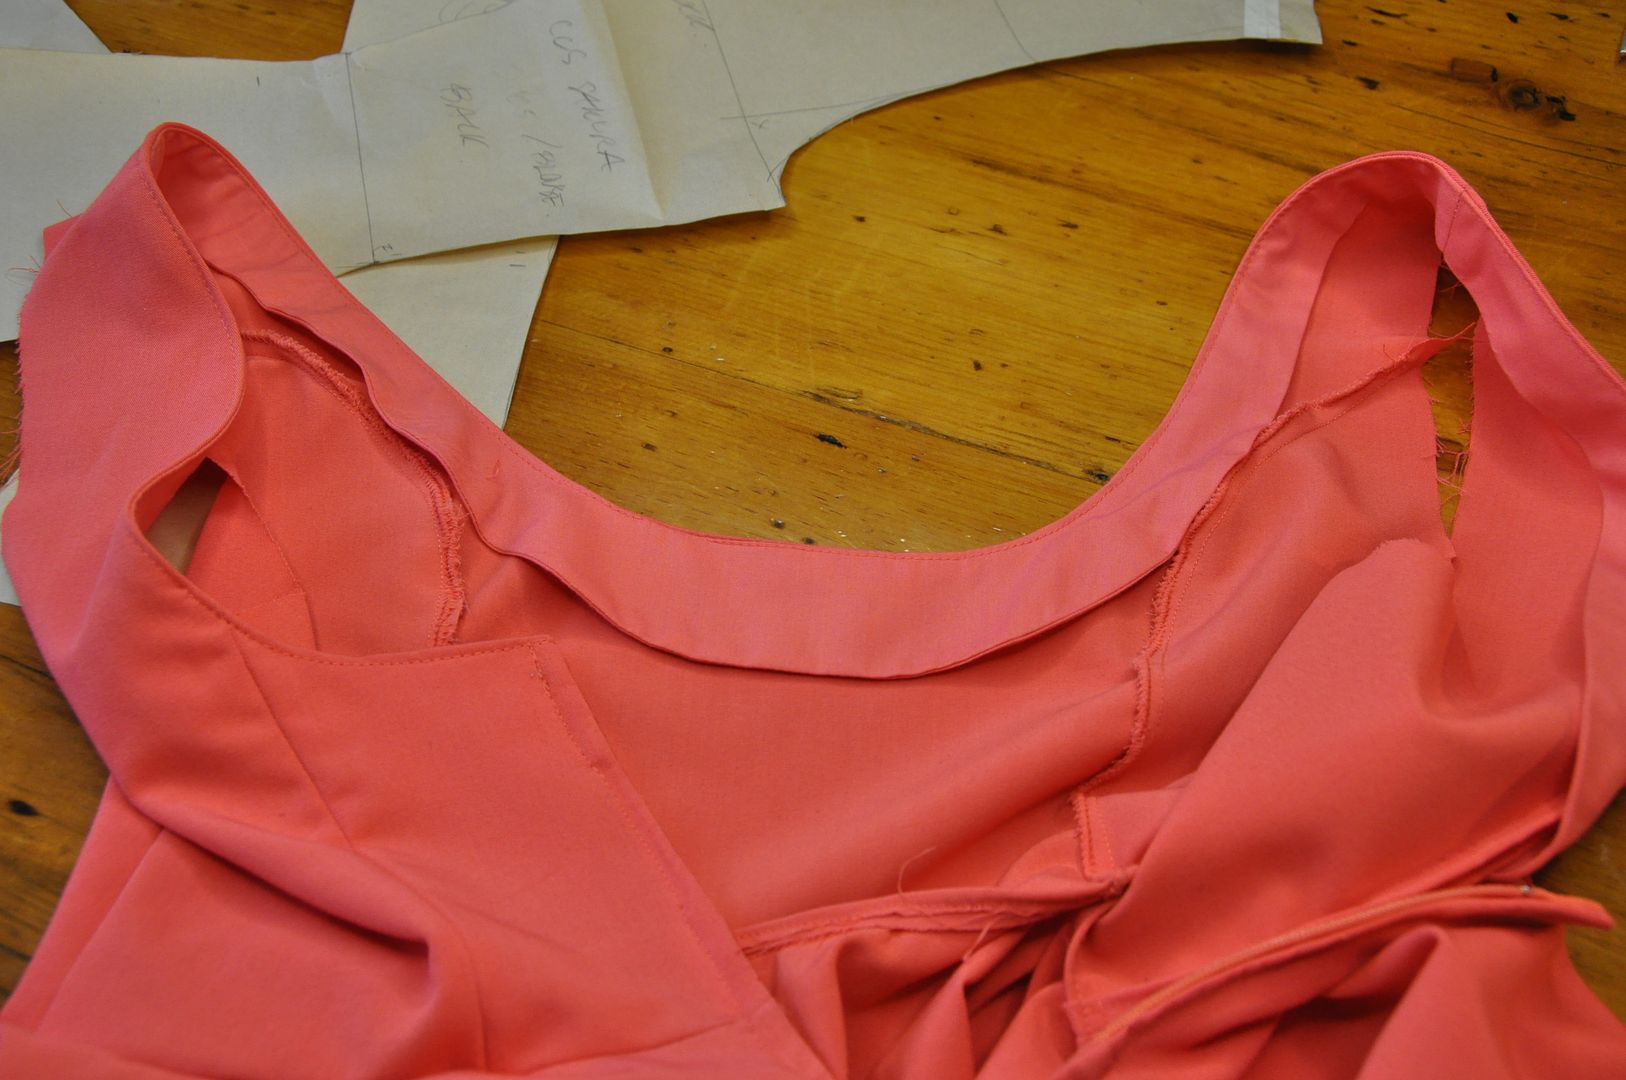
Next I added a zipper into the center back seam. Next I finished the edge of the neckline with a facing. This was tacked down on the inside to keep it from flapping about.


Next I made a facing for the armholes. This was also tacked to the inside.

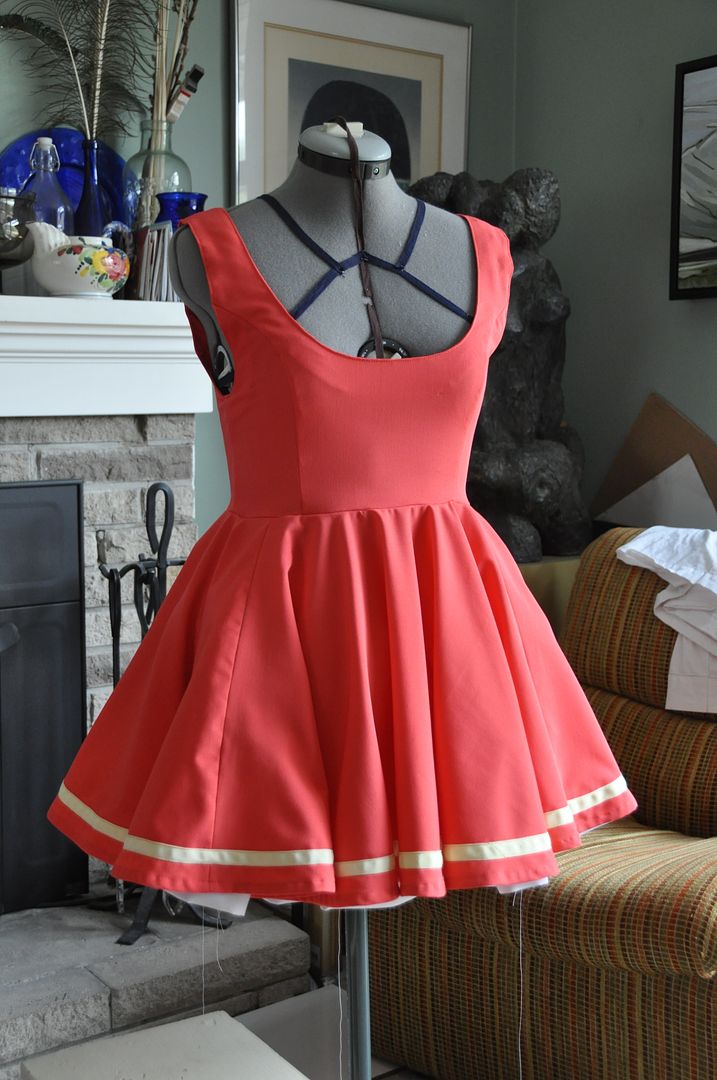
Next the stripe was added to the bottom of the dress with a pale yellow bias tape, and the dress was hemmed.

Special thanks must go to my wardrobe gnome Alli, who helped me with finishing up this dress. She did 99% of the hand stitching on this costume. Which included hand basting the yellow bias tape stripe along the bottom edge and the hem (as well as making and attaching all of the bows!). This was so I could machine stitch it with absolute precision (and no wrinkles later. Hand basting is one of those tasks I loathe doing, even though it can be super helpful.

Here you can see I have tested out the dress with 1 layer of the petticoat. Even then I decided I would need almost 3 times as much floof. And even still, I feel I could have done 1 more layer.

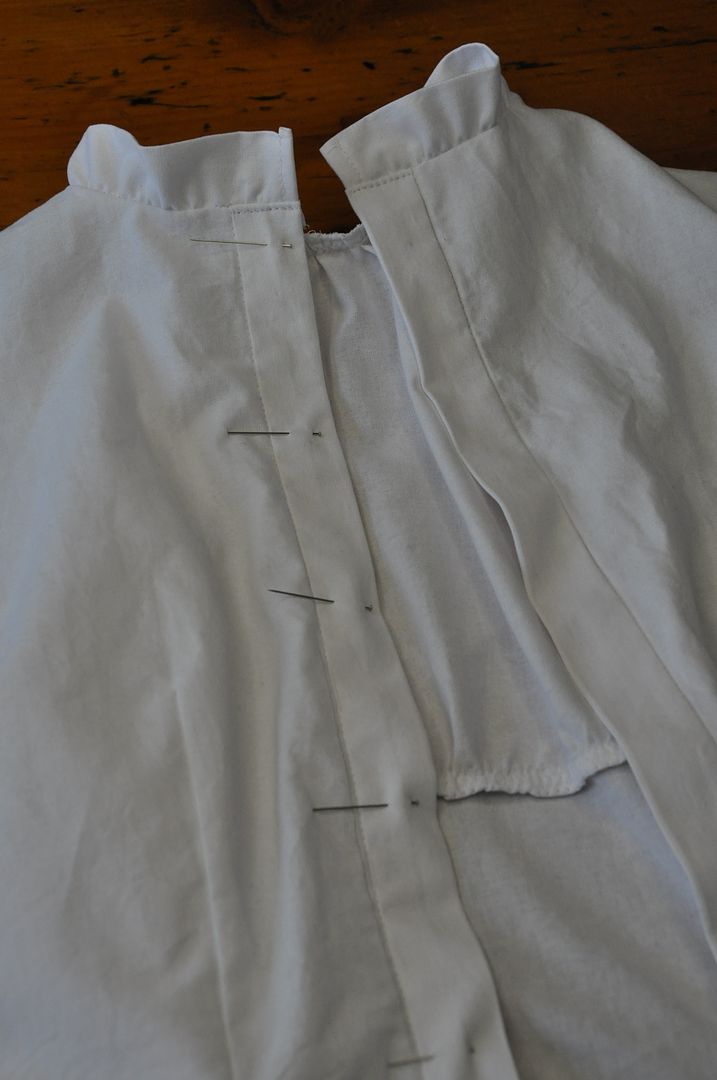
Simultaneously I was making the blouse. It started off as the same basic block, but the similarities end there. For the top front portion of the blouse (that would be revealed by the neckline of the pink dress) I created a panel that was wider than the center front piece below by about 2 inches. I gathered  this panel along the bottom edge and neckline so that it would appear ruffled along the center front. The rest of the blouse was fitted, so there wouldn't be too much added bulk under the dress.

The collar is simply a long rectangle of fabric folded in half lengthwise. It was made long and gathered to fit the neck hole. Again, this costume is nothing but ruffles, ruffles, and more ruffles.
For the back closure I decided to make it button up, because it looked adorable. Although it was a bit of a challenge for her to take on and off, she managed!

The sleeve took a few tries to get the correct proportion of poof. They are larger than the sleeve hole and gathered to fit.

The sleeve cuffs were done in the same way as the collar.
The last step in the project was the petticoat. It is surprisingly labour intensive to make one. With this I used up all the crinoline I had left from when I bought it for my Alice petticoat.

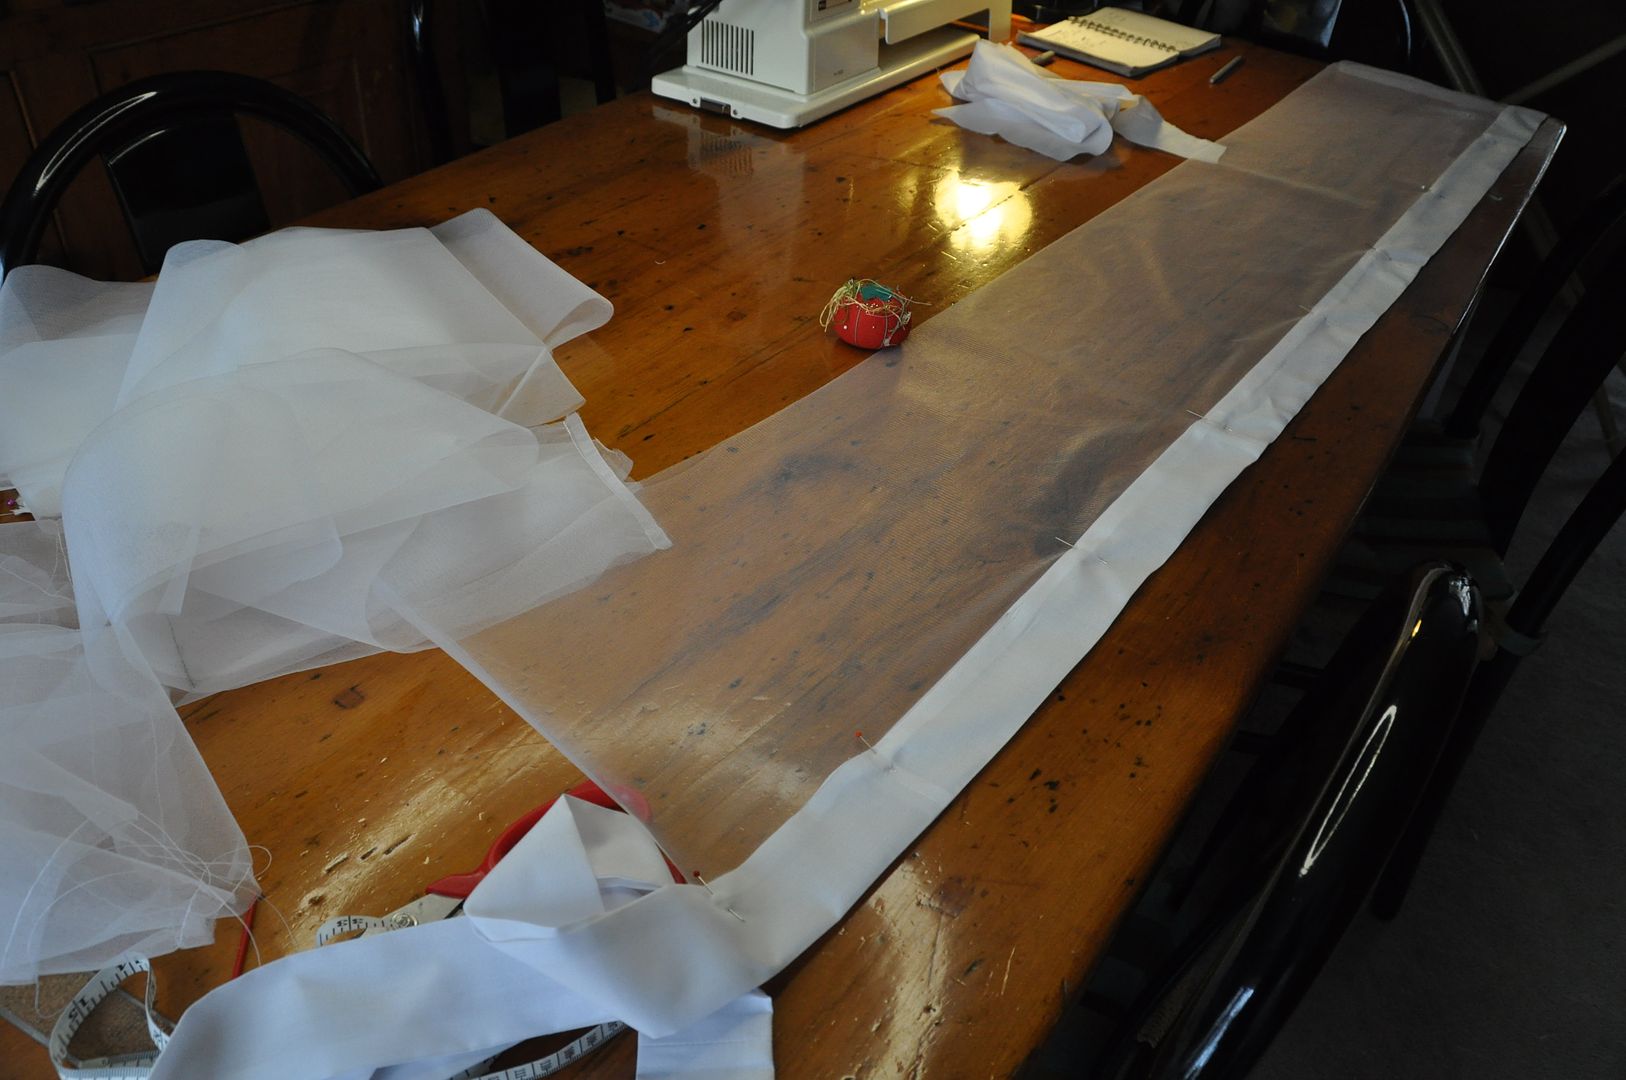
After determining how long I wanted it to be, I cut as many strips as I could of crinoline in each width I needed. I sewed these together, with french seams.

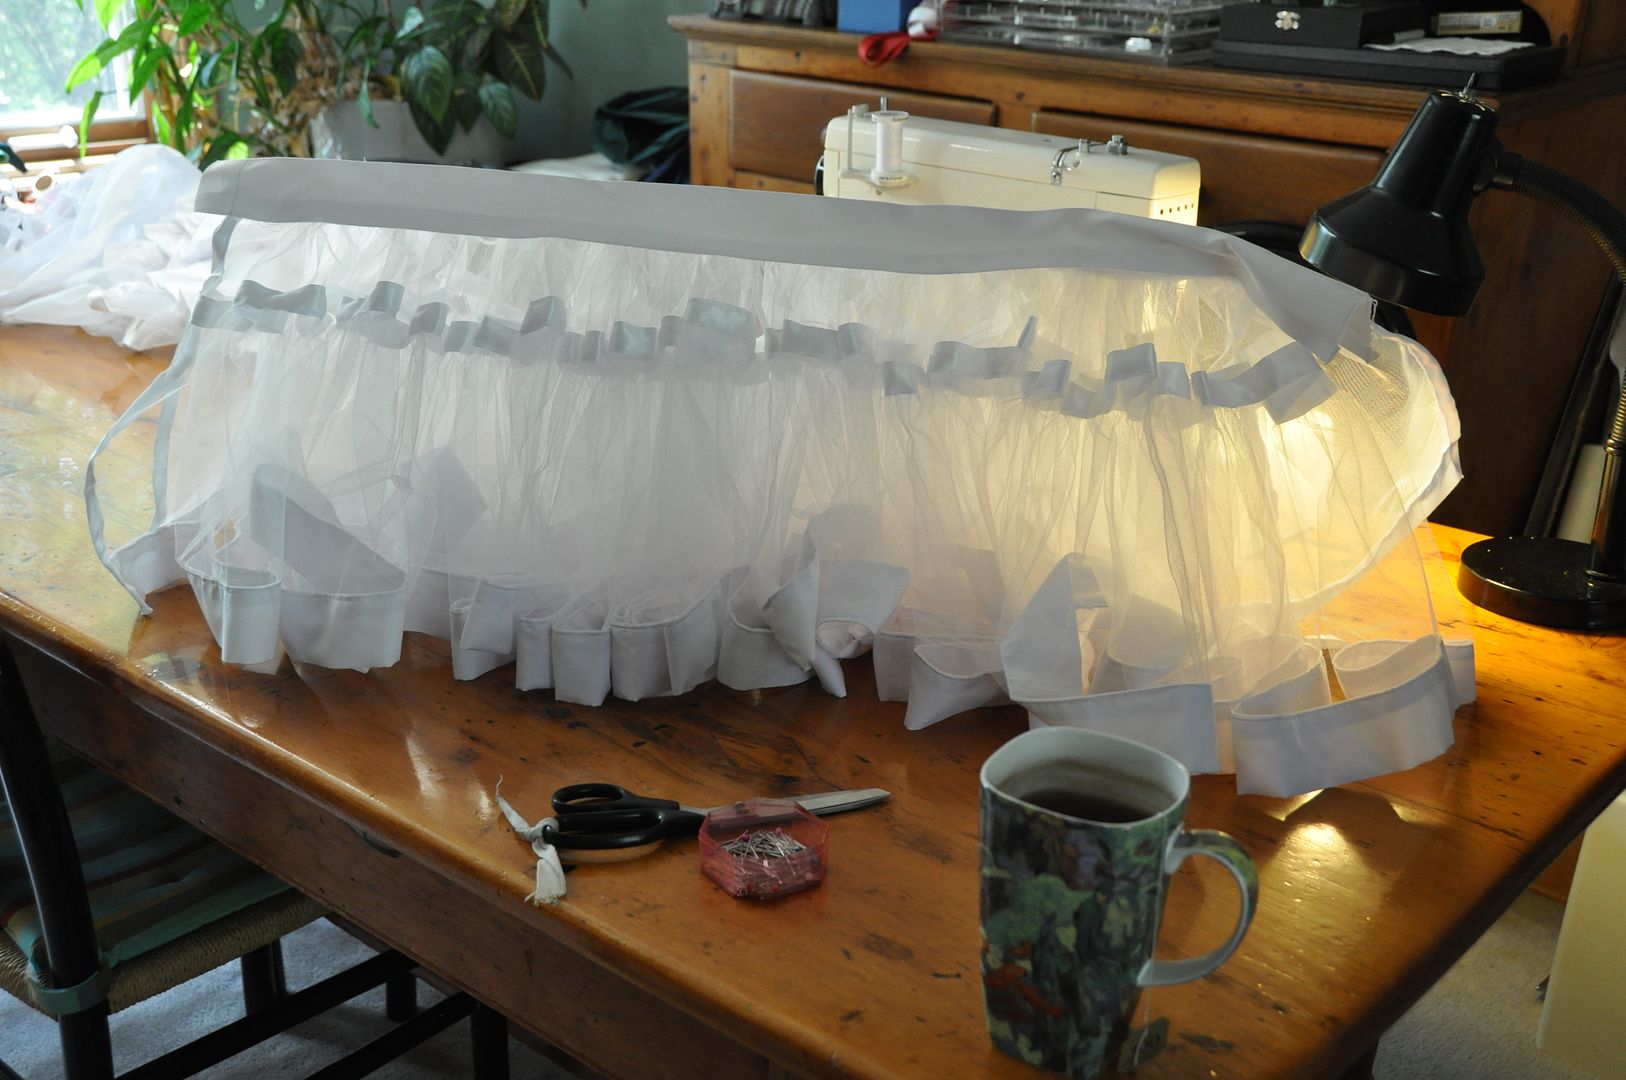
Much like layer cakes, petticoats are easiest to construct from the bottom up. You make the bottom tier first--finish the hem, ruffle it along the top edge--then attach it to the tier above and repeat until you get to the waistband. You make each layer separately.

You can see that each layer in this petticoat has 2 tiers of crinoline--a small one at the waistband. This was to cut down on the already substantial bulk that would have to be sewn into the waistband.

To finish the bottom hem, I created a strip of broadcloth to fold over the bottom edge. This created the look I wanted for the bottom visible edge. While still having the structure that crinoline provided. Making the petticoat entirely out of broadcloth would have been far too flimsy.

To give you an idea of just how much fabric this is: the petticoat can stand on its own. This is only 2 layers, this is before I decided to make a third.


After making layer number 3, I also made a simple white circle skirt (1 full circle) to go over top of it. Like the blouse I made a ruffle to add along the bottom edge. This was long enough so it would be visible below the edge of the skirt.
To give you some perspective, this is how much petticoat I put into this costume. And I could have done more. I would probably have used a stiffer crinoline layer.

This one is 3 layers of crinoline, plus a white circle skirt with a ruffle along the edge over top.


The completed dress looked pretty good!