Showing posts with label cardboard. Show all posts

Saturday, June 16, 2012

Nickel - Body - Katamari


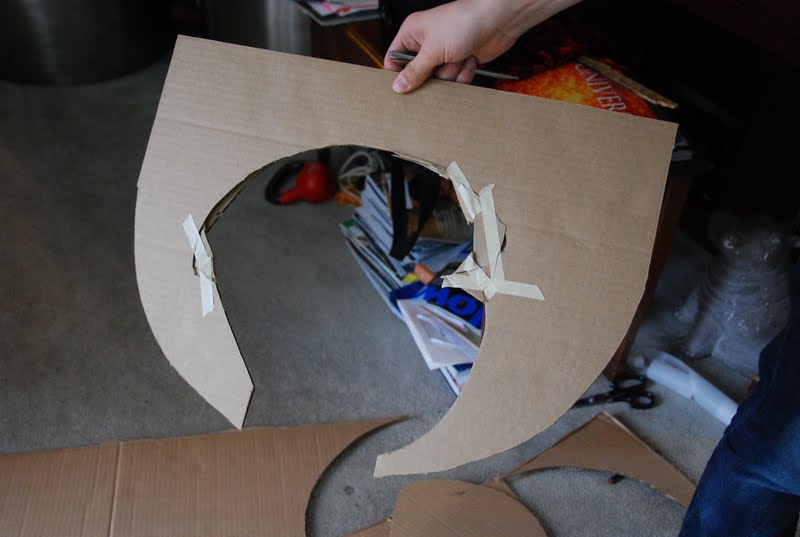
How do you make an awesome robot body? You start with cardboard. No, seriously. The final body is made out of hardboard, (which is like a thin masonite) but I started by making a cardboard mock-up so I could make sure it fit perfectly without wasting time, money and materials.

(Side note: I am totally running out of finished pictures of this costume, hence the recycled images. :P)


The main concern here was getting it to fit as tight as possible, so that the profile could be as slim as possible, while still keeping in mind that I had to have room for all the circuitry and batteries to fit in behind the front panel. I guesstimated some arm holes.


I ended up with these two pieces which would make up the body. 


Once I was happy with my mock-up, I set about replicating it in hardboard. I had to keep in mind the difference in material thickness and alter some of my measurements with that in mind.  

 I got my pieces cut at home depot to start because my table saw is just a little bit busted, but several of them were the wrong size, or cut badly. >:/  I ended up having to recut those ones.

Then I traced my arm and neck holes onto the pieces, and cut them out with a jigsaw.

 Then I cut the hole out of the front for the control panel by drilling holes in the corners so I could get the jigsaw in and cut the rectangle.

Once those pieces were prepped, I cut the supports that would go in the corners and would act as a frame to hold it together.


 The problem with using hardboard is that although the super-thin-ness is an asset, it also means that there is essentially no material to nail into. In order to make it work you have to add blocks into the corner to support the structure so it doesn't fall apart.

Now I needed some help from a friend with more shop expertise, the rest of the build was a two man job. :P Special thanks to Ian for making this happen! :D

Those blocks were first applied with wood glue and then brad nailed into place. The brad nails helped to suck the two pieces of wood together and the glue help to make the bond even stronger.


I repeated this process on all 4 corners.


Fits like a glove! Which it should if you made a mock-up first! Hahaha

The top panels were added in a similar fashion. Same with the insert for the control panel. You can see below the inside with all the supports in the corners.


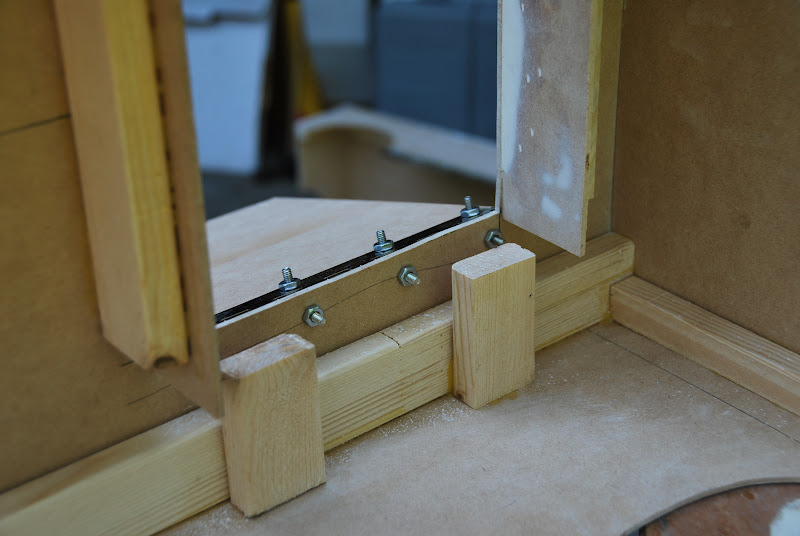
This side of the insert had to be made a little differently. This is the side where the hinge was going for the door on the front. I order to attach that, I needed to have the space at the back free, which meant I couldn't put a corner block. Instead, we put two beams with copious amounts of wood glue to hold that panel in place so I could still drill in and attach my nuts and bolts.

Once that was done I spackled and sanded all the little holes left by the brad nailer so the surface would be smooth after painting.

Then I measured and drilled the holes for the bolts so I could attach the hinges. The problem with the hinge on the front panel is that I couldn;t find bolts short enough, so there was a fair sized stub left over on the inside. Luckily, I was able to work it so that the bolts swung inside the insert so that the door would close properly.

Then I attached the side hinge.By having a hinge in the side it meant I could make this box as tight as possible without having to worry about not being able to get it over my head.


Now the base of my body was done.


...Just as soon as I glued in the final piece. XD

Then we set up the pieces to get the full spray treatment. Which is: primer, paint, paint, paint, paint, etc.

Then I prepped the control panel to move into its new home. More on that piece in a later post.

The quick solution to closing the box was velcro, as I was unable to find tiny clasps at home depot. these were just glued to a couple panels that overlapped the openings.

Once the base grey was done, the masking was put on and the details were added in and acrylic paint.

The final touch was the nuts that were added as detailing, and the control panel.

The extra final touch that you can't see, but made all the difference in the world to me was the foam layer that I put on the inside above the shoulders so I didn't die. XD

Saturday, July 9, 2011

Cousin Miso - Soup Bowl

Wow I'm behind! I meant to post this as soon as I got back, but it's over a week later and I've been too busy to do anything! XD

So once again, I have no pictures of the beginning of this project! D: Although in this case, it's because this is not my work! This is about 0.3% my work! Hahaha! No, I was involved in the sewing of the outfit, but for the head, I was merely a helping hand for tools that were out of reach and a second opinion! And I would take pictures. So here they are!
Like me, she started with a bike helmet, only she built the base frame out of cardboard. She figured out the curve she wanted for the bowl, and cut 2 pieces of cardboard in this shape. Then she measured the shape of the helmet and cut that out of the pieces. And cut a slit into each so they would interlock to make a cross shape. And she also cut a circle to make the flat top.

The fallout, the wire measuring the shape of the helmet and the failed piece.

She then glued the whole base frame to the helmet. She added a shelf and made braces to make it more stable, and also to support the layer of foam. (Which is added later)


Then she added in ribs along the bottom, and connected them together with a wire.

She extended the bowl to be taller.

She cut out large rectangles of foam and put slits up the bottom so it would curve easily.


Cutting out the excess and gluing the bottom in place.

Looking good~! :D Just a bit of a squeeze getting her head in and out, and not with her glasses on. Next I (yeah, something I actually did!) drew an estimate guideline of the size and placement of the face.

So smooth over the joins, she covered the entire thing with cotton batting. then measured and cut the hole for the eyehole.


She constructed the rectangle for the face, using bias tape on the edge to save herself some trouble. She had to find a fabric that she could see out of.

She spraypainted the inside of the bowl, and cut chunks of upholstery foam to be the tofu. Gessoed and then painted white.

We got the antenna parts of of a friend in the katamari group who had bought a whole bunch so the antennas on all the characters would be identical. So many people dropped out of the group that we were able to obtain some extra parts, for my costume later.

She filled the cardboard bowl she made with more foam, as we realized that that much resin would be too expensive! DX Painted brown to save her the trouble of tinting it.

Mum was enlisted to help her make the cover, as I was busy working on my beak (and crying....).  They made a ring and then sewed a rectangle to it.

A fair amount of photos missing here, but mum tacked the excess together and basted the seams together so it would be easier to machine stitch when she took it off than if she pinned it.


Pouring the resin on the front lawn. It smelt dreadful! DX


The white was put there so the see-through-ish face wouldn't look pink! XD

Finally cutting the hole in the cover and securing it inside with hot glue. Newspaper was used to protect the face. It looks like they are performing dental surgery.

OM NOM NOM. Delicious.

Face was hand stitched into place.

We waited for the resin to cure properly with our fingers crossed... and presto! Fini! :D