Showing posts with label presea. Show all posts

Thursday, January 5, 2017

January Update

Hey all! I guess it's been a while. Happy New Year!

2016 was not a very productive year on the cosplay front. That's primarily because I've been getting more work in my industry but also due to me taking some time to step back from my projects a bit. I have not been as active on this blog as I would like, but that's partially due to a lack of finished material to post about.


For me this has been a year of learning and career progress.

I finished 2 costumes this year from my ongoing projects list and completed several more smaller projects (mostly hats!).

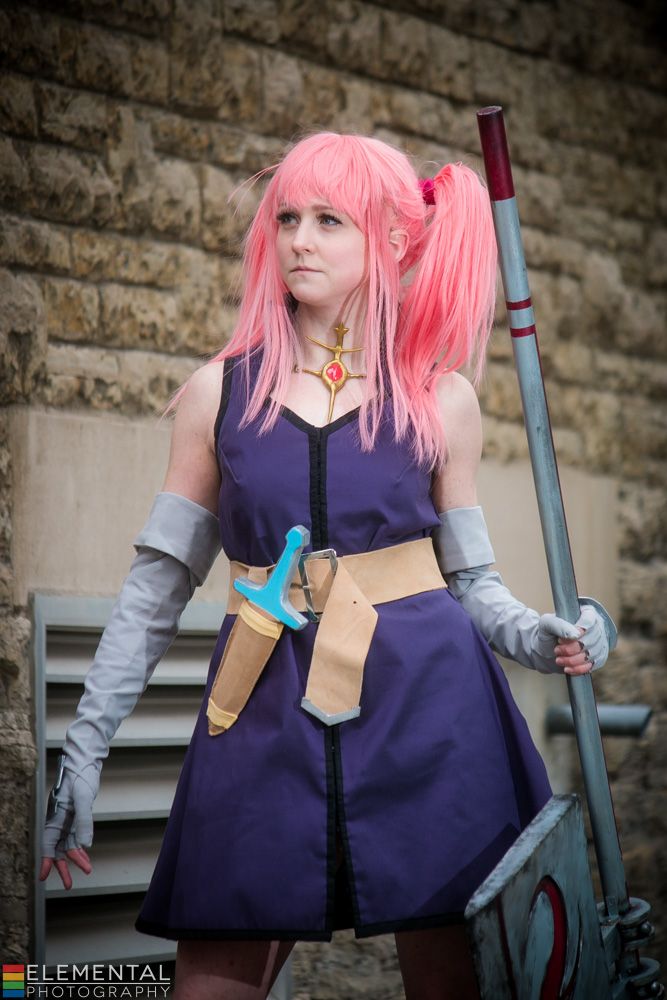
The first was Presea. This one was in progress and then on hiatus for several years--with the bulk of the work having been completed more than 3 years ago. I'm glad I was able to finally complete the battle axe this year with my current skill-level in painting. :)
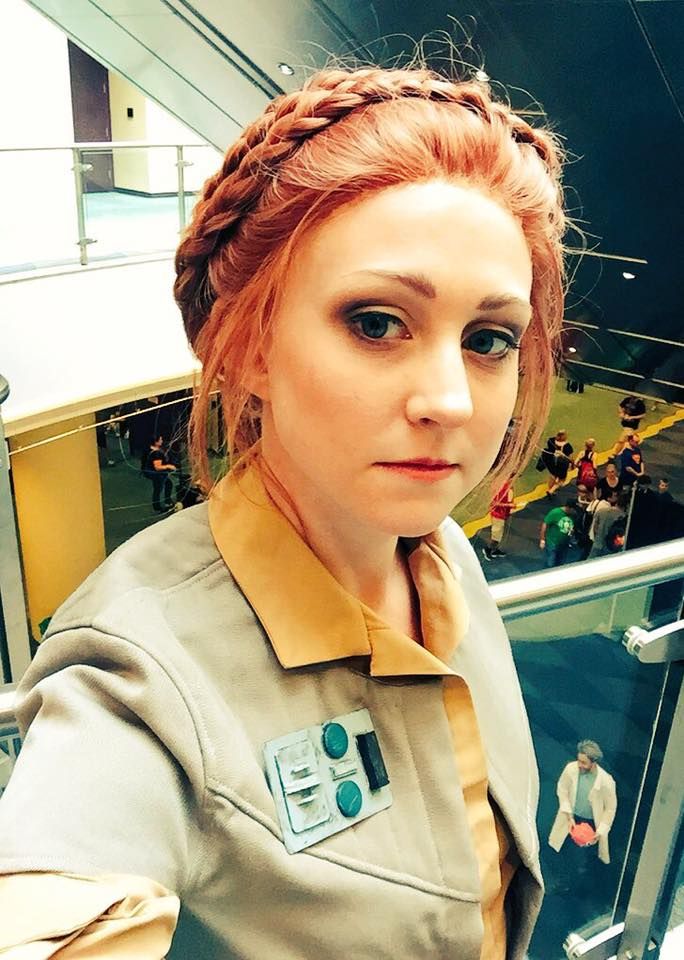
The second (and final) costume I completed was Princess Leia from Return of the Jedi--her Rebel Scout outfit. I've been a Star Wars fan since forever and Leia and Han were always my favourite characters. It was nice to finally cosplay from that series. And also to step-up my wig game.

I still need to get some finished shots of this costume--aiming for late spring to do a photoshoot in the park behind my house.


So, what does 2017 have in store for me?

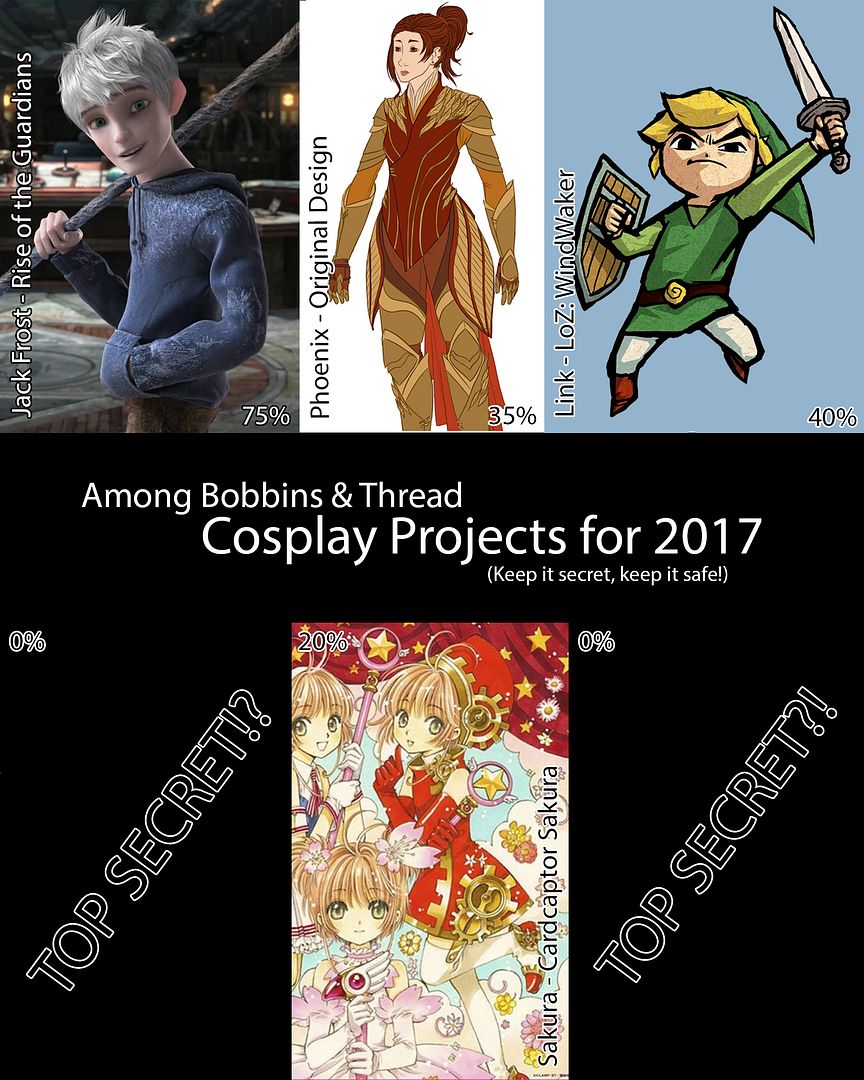
On the cosplay front: Completing the last 4 costumes I have left on the go! Plus 2 new secret projects? Secret mostly means I haven't quite finalized the list yet, and I don't want you guys to hold me to any promised future costumes. Hoping to complete the top row in the first half of the year, and announce my 2 new costumes halfway through the year.

On the personal front: Well, I have some product ideas that I am taking off the backburner. I've been working on some designs for a while and need to finish prototyping. Looking at debuting some things to sell early spring.

On the blog front: I'll try to keep up! Haha

That's all for now folks! Looking forward to 2017 with a positive mind! Gotta get back in the groove!

Wednesday, October 19, 2016

October Update


October is here! The spookiest of all months! And we passed 100,000 views! WOW DUDES!

I'm back in school again--I'm taking the 2nd part of the millinery course. Look forward to more cool hat projects! Also learning how do use Adobe Illustrator.

Fanexpo Cosplay Workmanship Competition results: I won the Best of Thursday award for my Leia costume. It was nice to compete in something for the first time in 2 years. I'm hoping to compete in more things this coming year, but we'll see.

Working on finishing up my posts on Presea. The last one left is on that battle axe...

I've been on a bit of a hiatus lately, I've felt a bit creatively drained. Looking to be inspired again... Got to start working on my hat projects soon though, so hopefully that will give me some motivation--at the very least to meet my project deadlines. Started working on my 1st hat project. It's going to be pretty epic.

It's going to be a pretty crazy month or two!

Later dudes! >:D

Thursday, October 13, 2016

Presea - Accessories - Tales of Symphonia

Welcome to Presea Part 4: Accessories! Feel free to venture back and check out the Gloves & Boots, Dress, and Wig. Many thanks to the ever fabulous Elemental for the amazing photos! We braved the cold and pulled it off!

This costume had a lot of smaller pieces involved. This post covers the belt, pouch, dagger, and Exsphere (necklace).

For this project I actually bought a piece of real leather to work with. I used the suede-like side as the outside (as opposed to the shiny side), because I thought it was more true to the character.

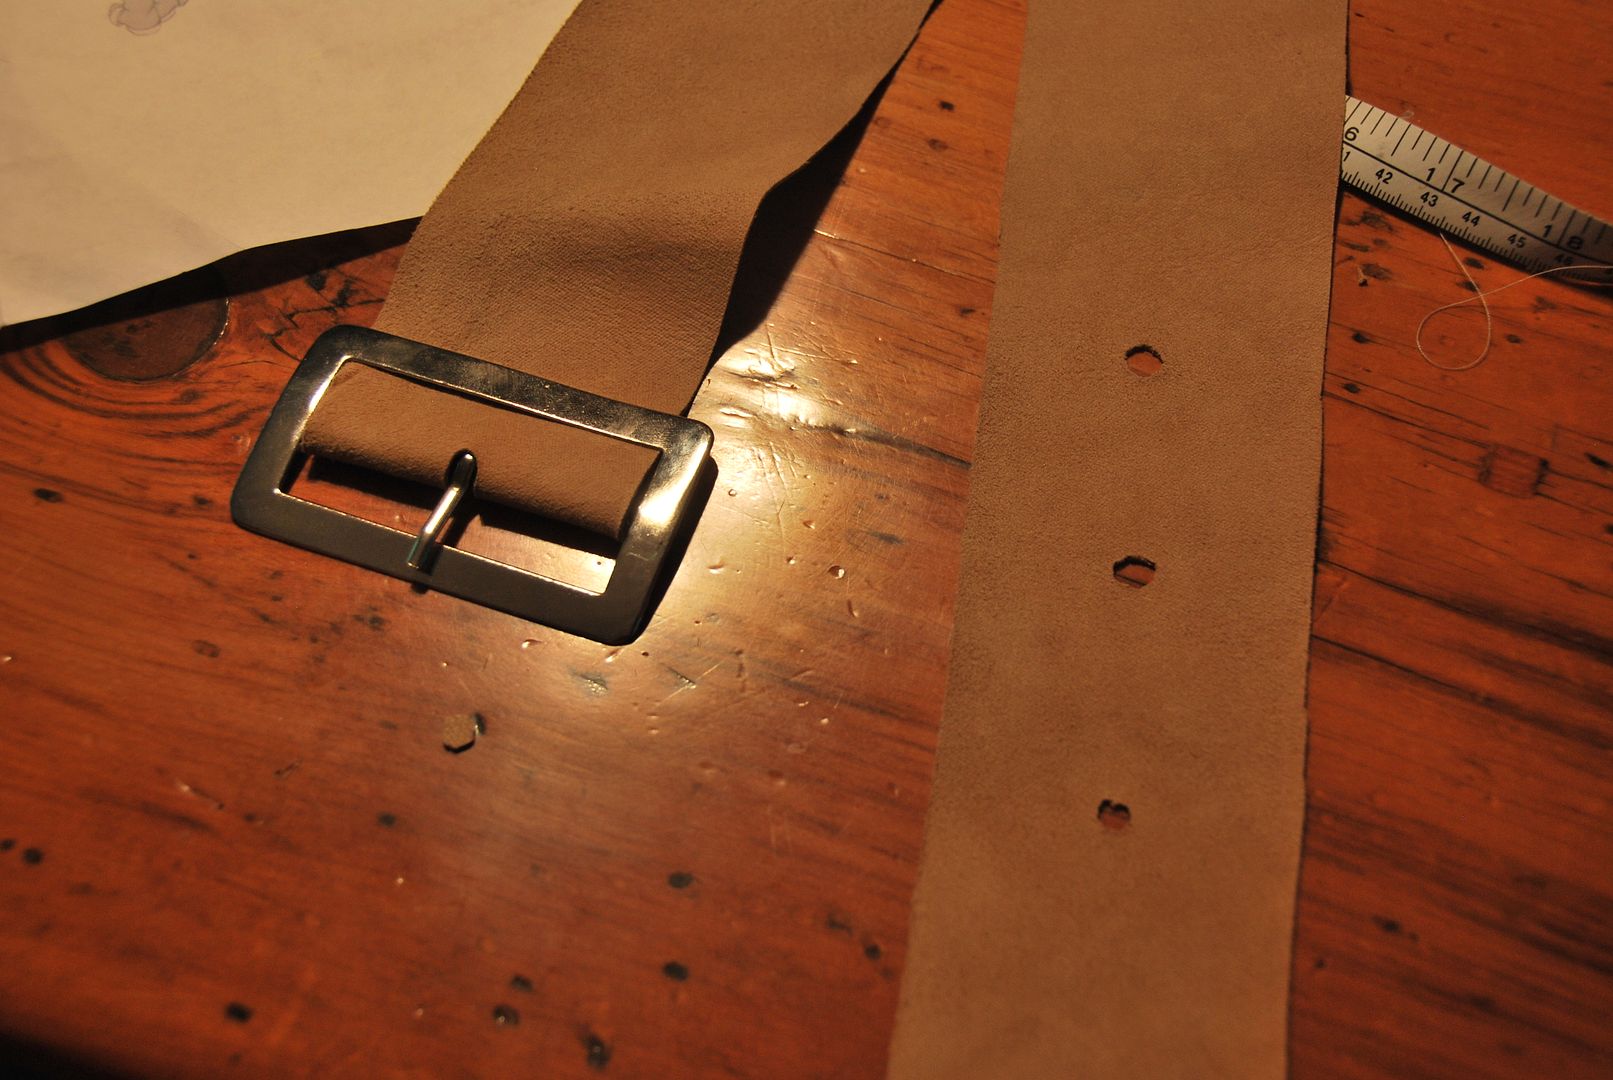
The first piece I cut was the long strip for the belt. Later I went back and reinforced this strip by sewing a second layer to it. I used scissors and carefully cut out the holes. The buckle was found in an store on Queen street after much searching.

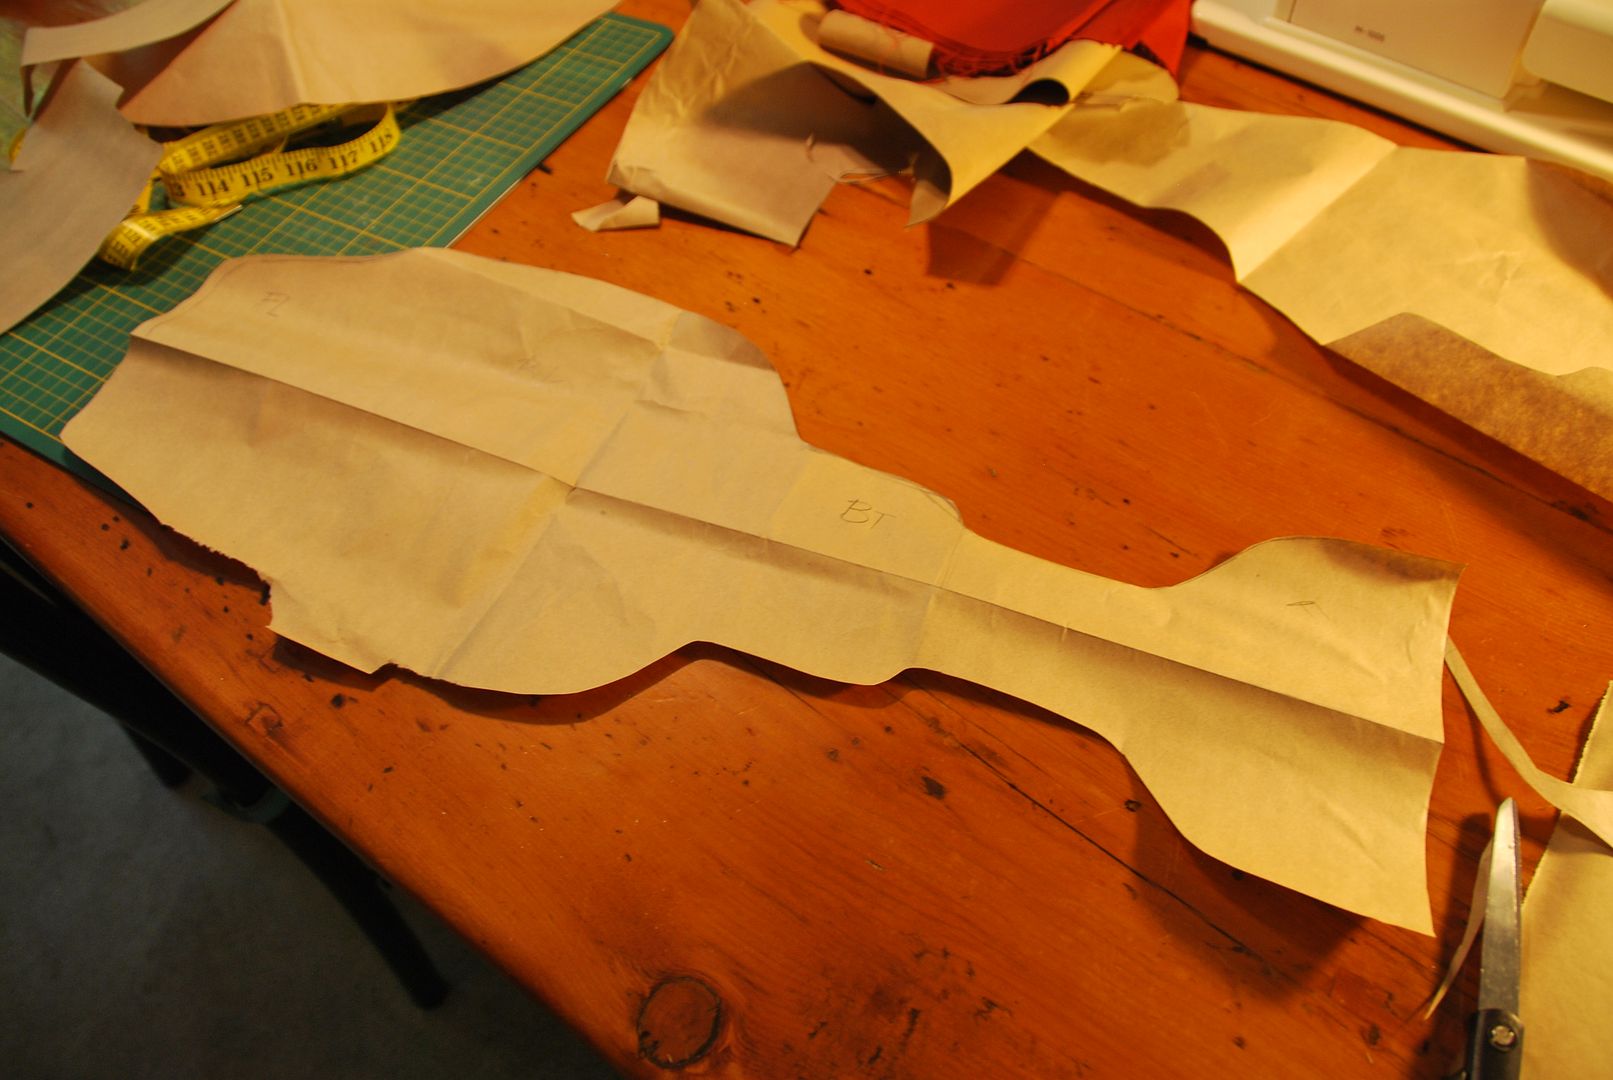
Then I patterned the pouch.
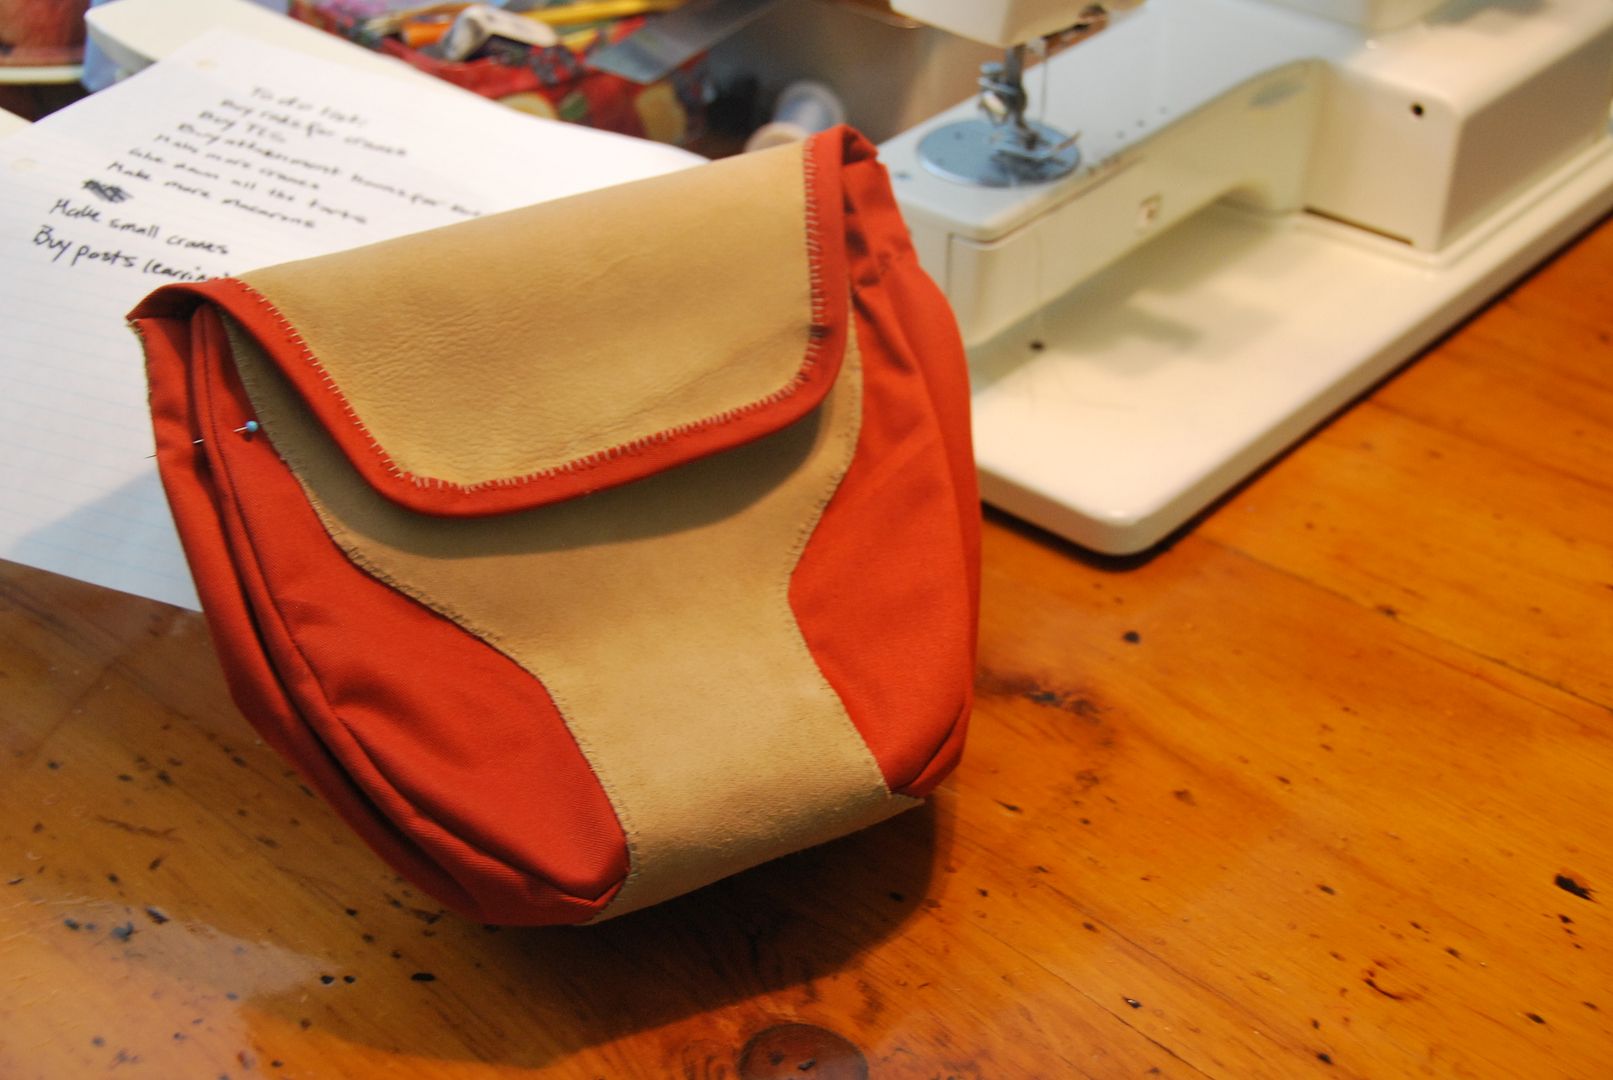
The pouch consists of one curvy strip of leather that folds over on itself to be the front, bottom, back and flap of the pouch.
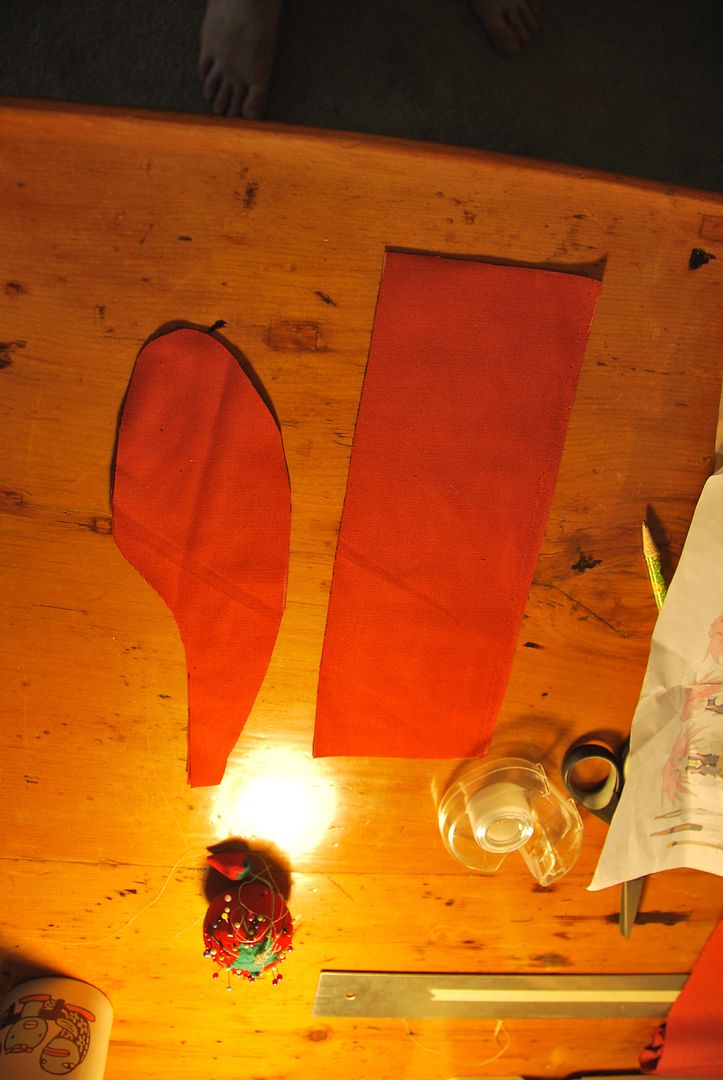
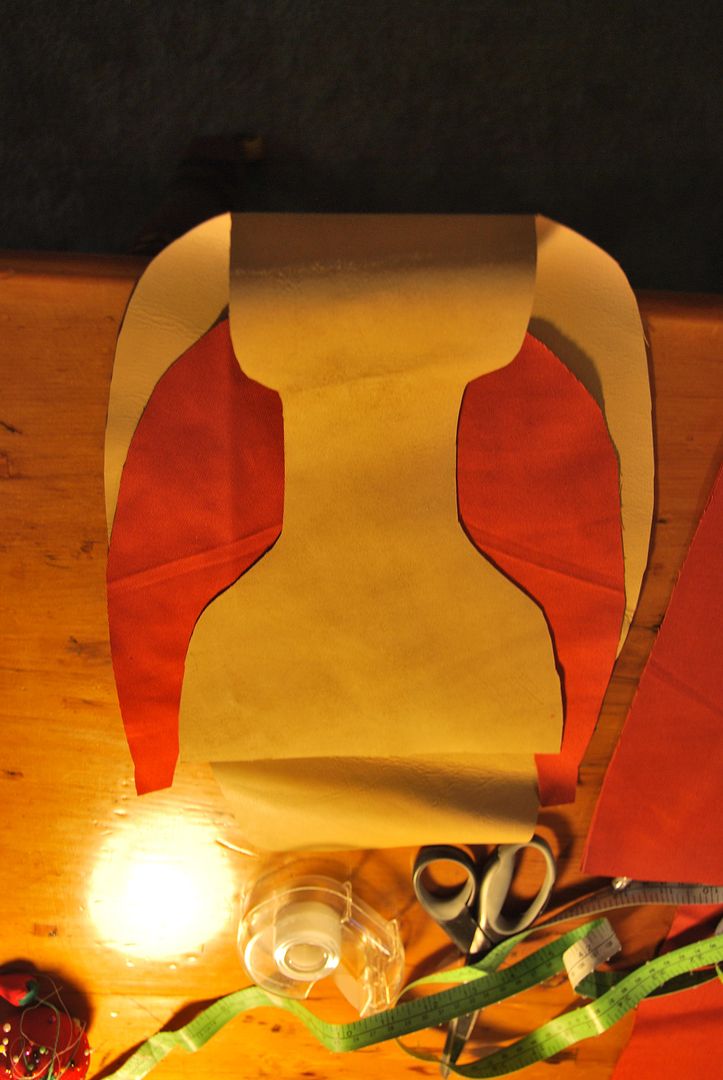
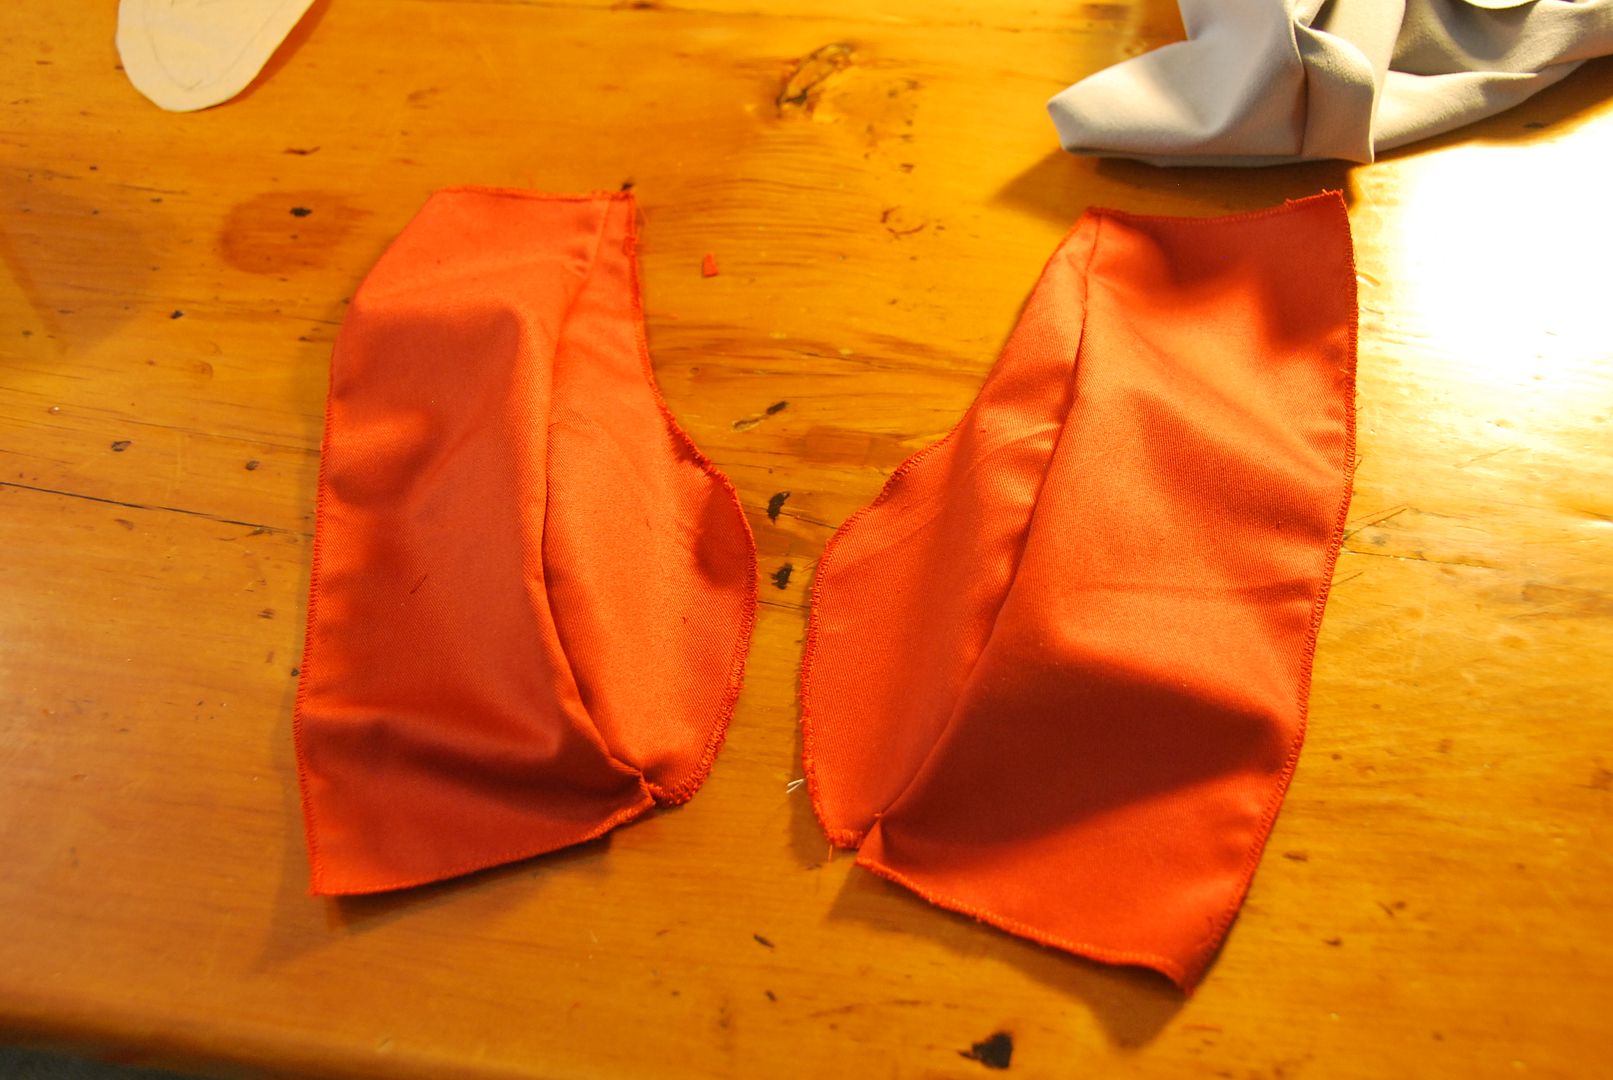
Then there are the 2 panels that form the two orange curved sides of the bag.


These were stitched together, then all the edges were finished.

These were then marked and very carefully hand stitched to the leather. At this time I was unsure if my sewing machine could handle leather, so I hand stitched all the leather on this costume. Turns out it can, with the right needle, which I found 1 year later when I returned to finish the project. Unfortunately I finished all the leather work before then...
I made a matching bias tape and stitched that on as well. The last step was to cut 2 slits in the back so the belt could be fed through the pouch.

I had intended for this bag to be functional, but unfortunately it was too floppy to hold it's shape with anything inside...
Next up is the dagger! The dagger is also attached to the belt, but the character never uses it, it seems purely part of the design.

I made the dagger out of wood, cutting it out with a jigsaw.

I had my friend Ian dremel out the blade edges because at the time the sanding bit on my dremel was not working. When I received it back I hand sanded it even smoother.
I created a sheath and loop to attach to the belt. The loop was on an angle so the dagger would be angled like it is on the character.

I started the paint treatment with grey primer, then silver and finally a light blue acrylic for the face of the blade.

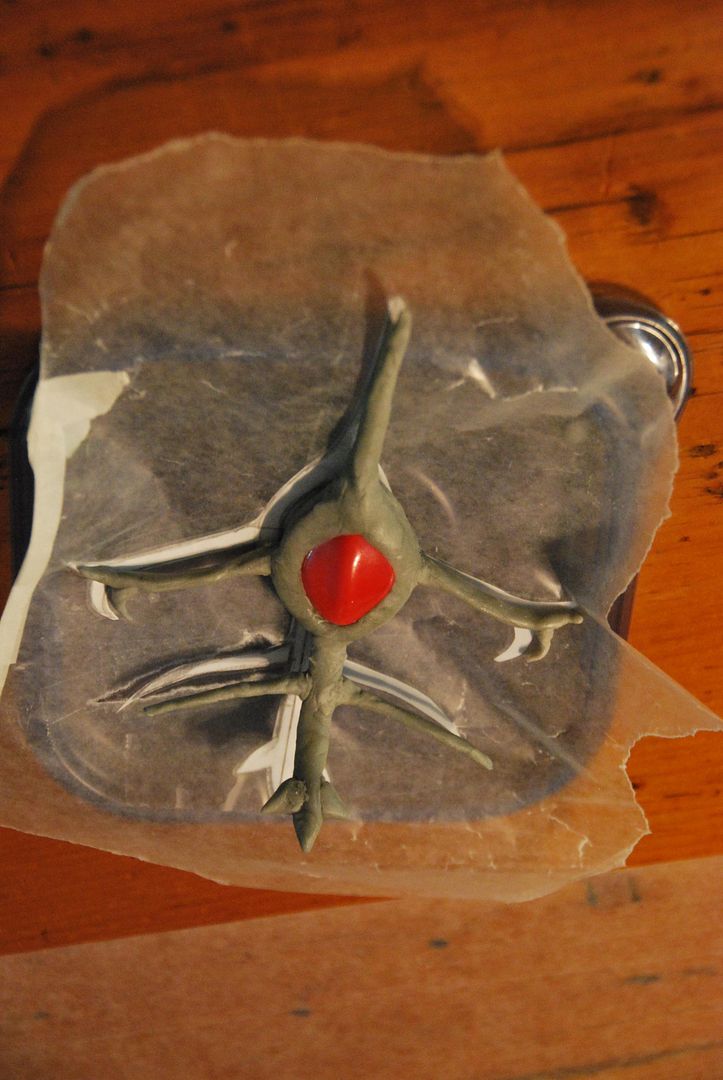
The last detail was the Exsphere. I started by drawing out the piece full scale, then making a wire frame for it. I bought a large red bead for the gem in the center. I sculpted the piece with apoxie sculpt, which is great for this kind of thing as it dries super solid. Later I went back and broke the two side arms and bent them further back to better contour the neck. I filled in any divots with more apoxie sculpt and sanded it smooth.
 

I masked off the gem with painter's tape and then sprayed the piece a matte black. Then I painted over that with a gold acrylic paint. Lastly I created a short chain so it could be worn. The actual character has this gold piece built around the gem, which is fused into her skin, I didn't think that was necessary for me! Hahaha I just had to be careful not to look down suddenly, otherwise I would be jabbed in the neck.

Monday, September 19, 2016

Presea - Boots, Gloves & Armour - Tales of Symphonia

Salutations! After years on the shelf, I would like to continue to take a look at how I made my Presea costume! Look here for a blast from the past: how I made the Dress and Wig! Seriously, I was posting about this in 2013 what-the-heckaroonie.

Getting this costume photoshoot worthy and documented is one of my 2016 goals and I'm pleased to say that with the costume and photoshoot done I can now finish documenting how I made it. From the depths of my computer hard-drive I have salvaged ye ancient progress photos.

Possibly the most challenging part of this costume and the main reason I put this costume on hiatus for a whole year (the other reason being my dog ate the tip off my battleaxe). This was my first time making boots, gloves and armour, and to be honest I had no idea what I was doing! I didn't get very far before I gave up. When I came back to this project a year later it was after I had done the armour for my Asuna costume and had much more sewing/patterning experience.
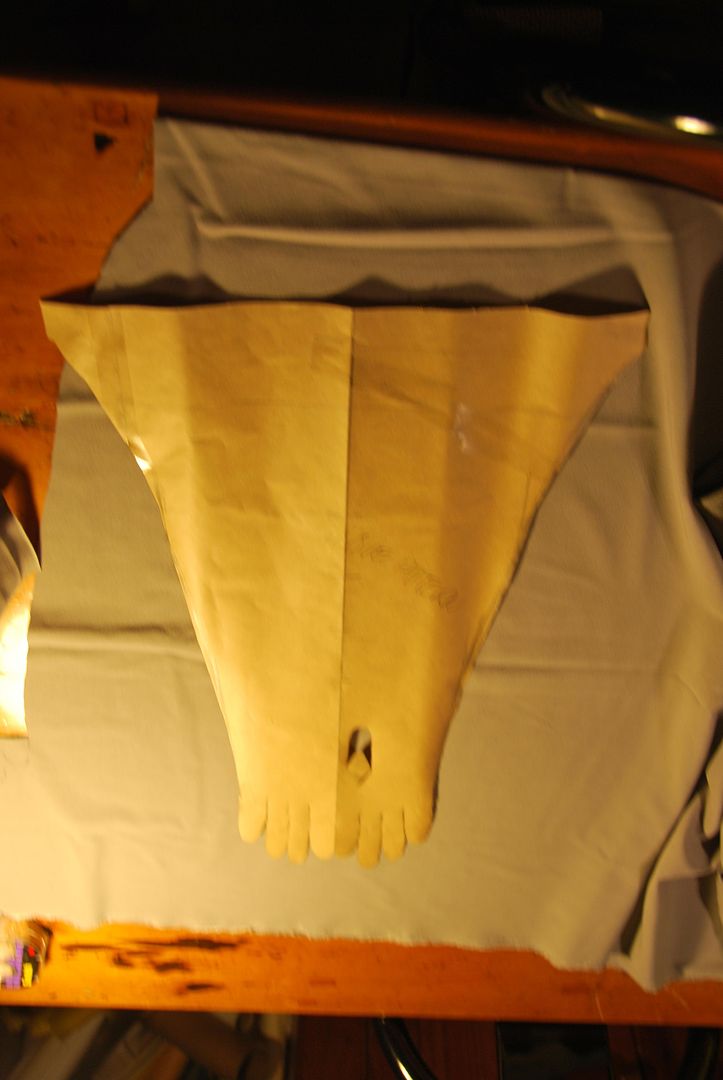
I started by buying and deconstructing a pair of well fitting costume gloves, from this I was able to make my own glove pattern. I made it go extra wide further up the arm so that it would be loose at the cuff.

My main problem was that the character's gloves are above the elbow, but loose fitting, meaning they essentially float there defying the laws of physics. My trouble was making them stay up without any seriously visible rigging...
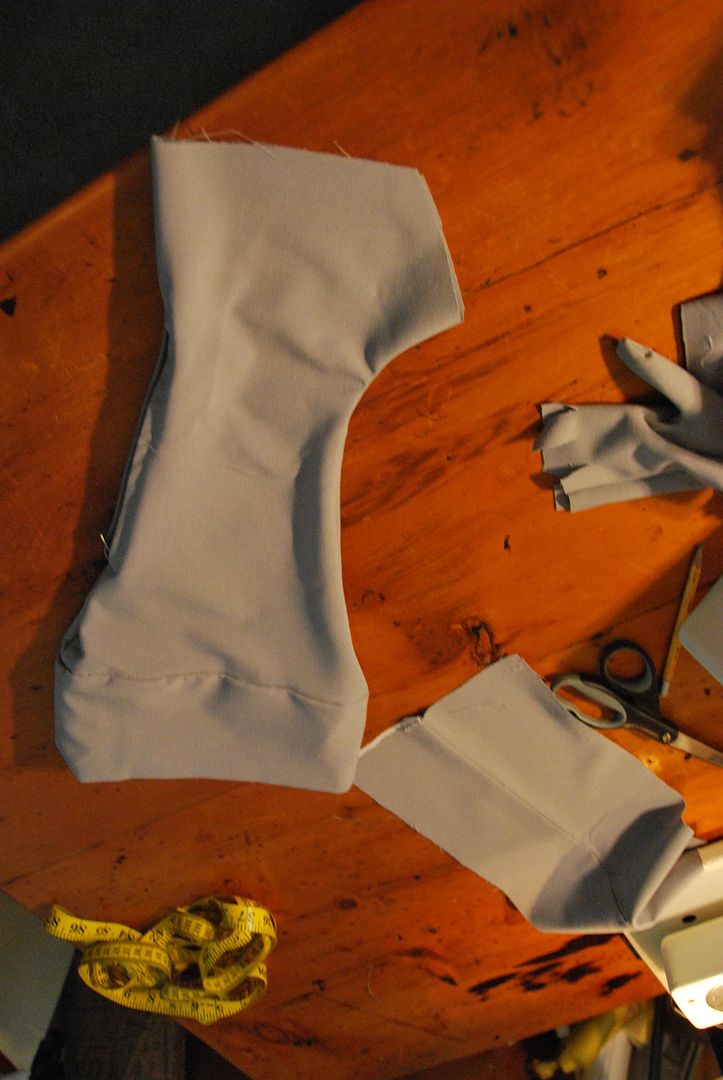


It took hours of hand stitching to assemble those gloves. Above is the separate thumb piece which was slotted into the glove.

Left is my first attempt at making the boot covers, as you can see the cuff looks kind of wonky... Partially due to my inexperience working with stretch fabrics. This is where I stopped working on them for a year.
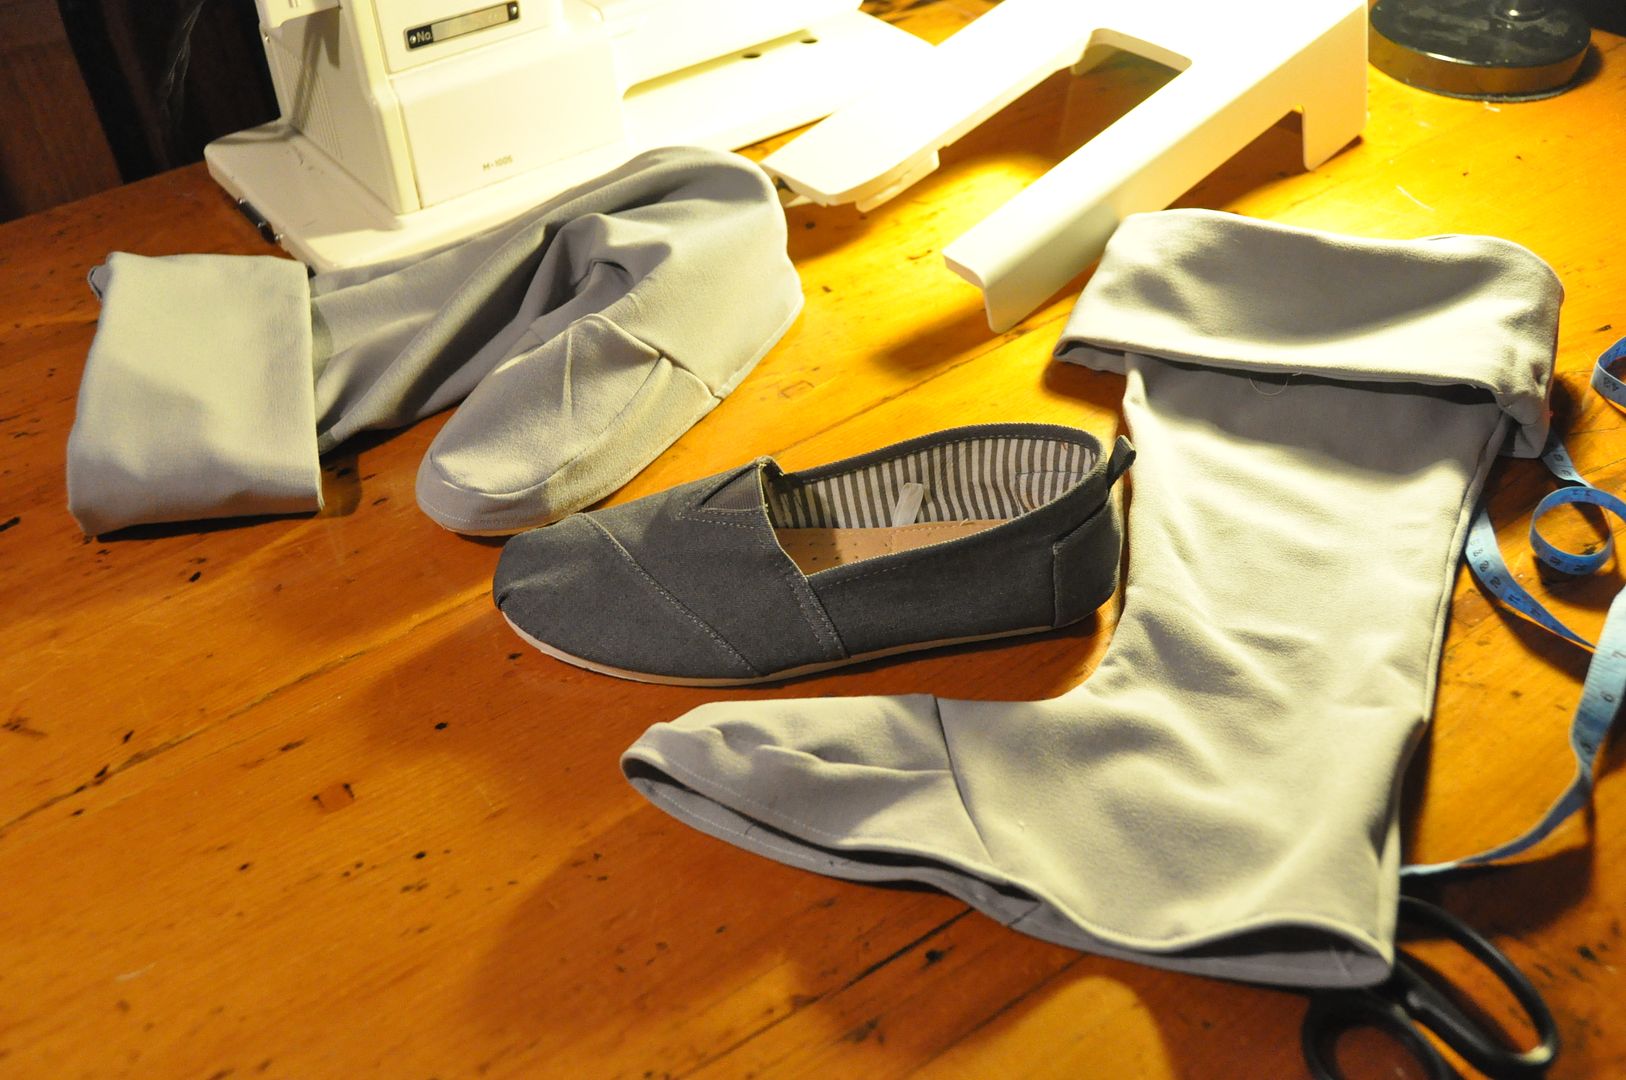
I patterned my boots to cover a cheap pair of canvas shoes I picked up at Ardenes. Above is the toe cover, left is the 2nd attempt at the boot cover. (from the inside)

I opted this time to do a fold-over cuff, which looked much cleaner, even though it isn't as accurate to the original design.
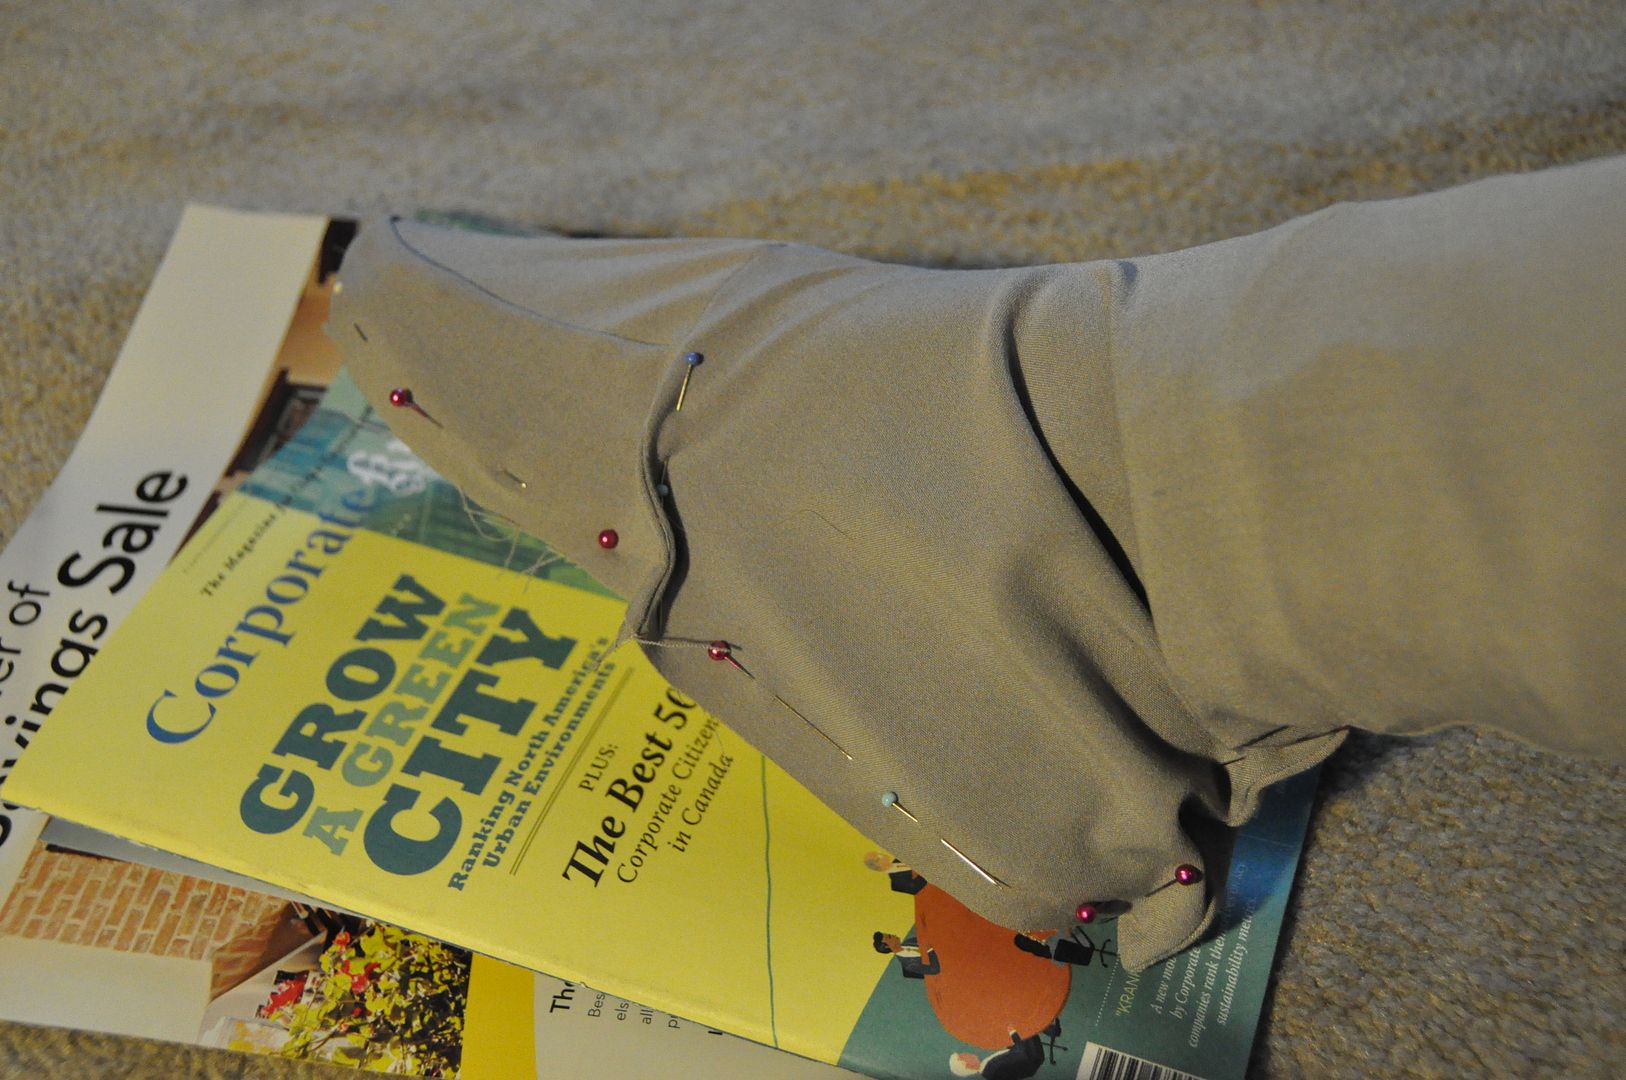
I replicated the cuffs on the gloves.

I marked where the shoe cover would be sewn to the shoes, then I hand stitched the two together. It took a while, but the result was a nice clean finished edge.
Then I sewed elastics to the inside so that the loose gloves and boots would stay up. These had to be far enough away from the edge so that they would be hidden inside. How I made the cuffs stay up was I sewed some short pieces of wire into the boot cover where it attached to the cuff.

At one point I had attempted to wire the whole boot, but I found it a) really uncomfortable, b) hard to keep it secure and c) it would be harder to pack into a suitcase, because the boots would have to remain upright. That and every time the wire got dented they were even more uncomfortable to wear... With the short wires only at the cuffs with fabric casings they were easy to fold up, and didn't cause any discomfort.
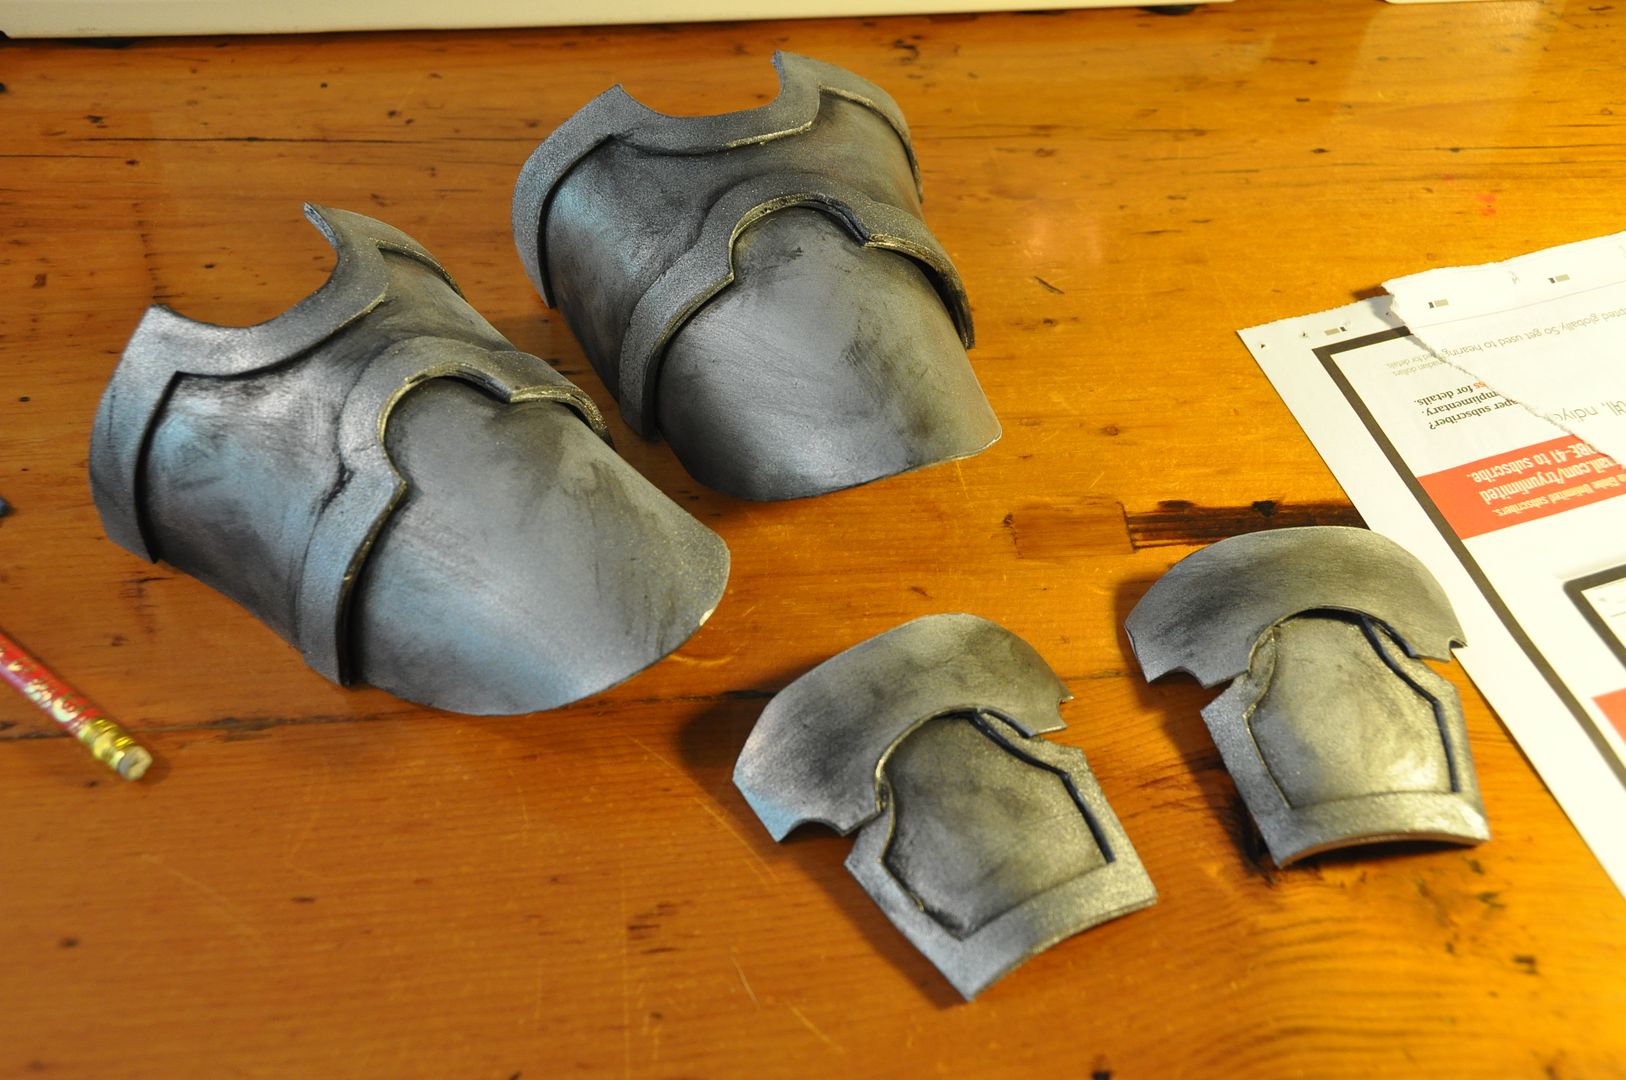
Next I got to work on the small bits of armour, following the same method as I did for Asuna. I used the leftover styrene from that costume to construct the toe and hand guards.

First I made paper patterns of the shapes I wanted, then traced them and cut them out. There were 8 pieces total. Compared to Asuna's this armour was total cakewalk.
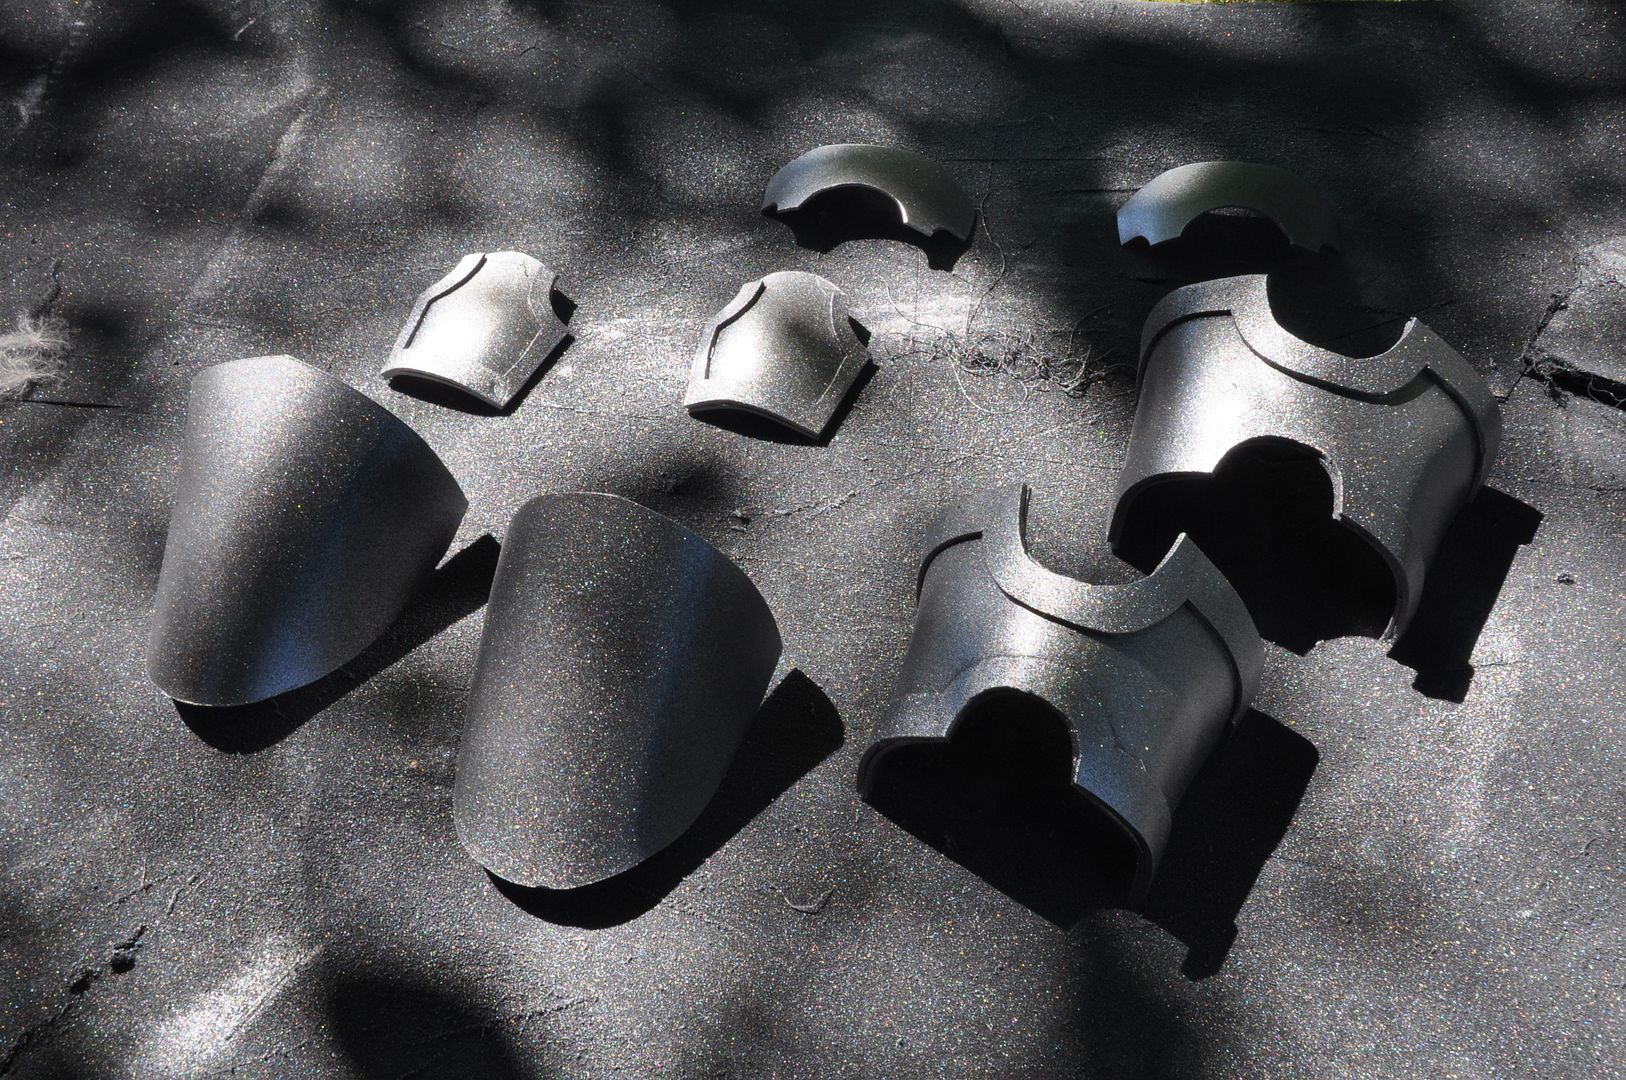
I then made the raised bits out of craft foam, and hot glued them on.

I used the same spray paint treatment as Asuna's: primer, matte black, then silver.

I weathered with sandpaper, glued all the pieces together, then aged them with black dry-brushing.
Lastly, the shoe armour was hot glued to the boots (while I was wearing them, so the armour placement would be correct). Then I rigged the hand guards with some elastic so they would be easy to take on and off. I painted the elastic grey so it would match the gloves.

Overall this project really benefitted from me not rushing to finish it the first year and instead applying another years' worth of experience to finish the job.

Wednesday, July 6, 2016

July Update

Hello all! It's hard to believe 2016 is already halfway done?? I have just under a month left of my contract in Alberta before I move back to Toronto. And by that extension I have about 1 month left to Otakuthon. Costume progress is coming along pretty well, considering I have also done 7 "Costume Saturday Challenges" and helped create over 300 costumes for the show I am working on--all in the last 2 months.


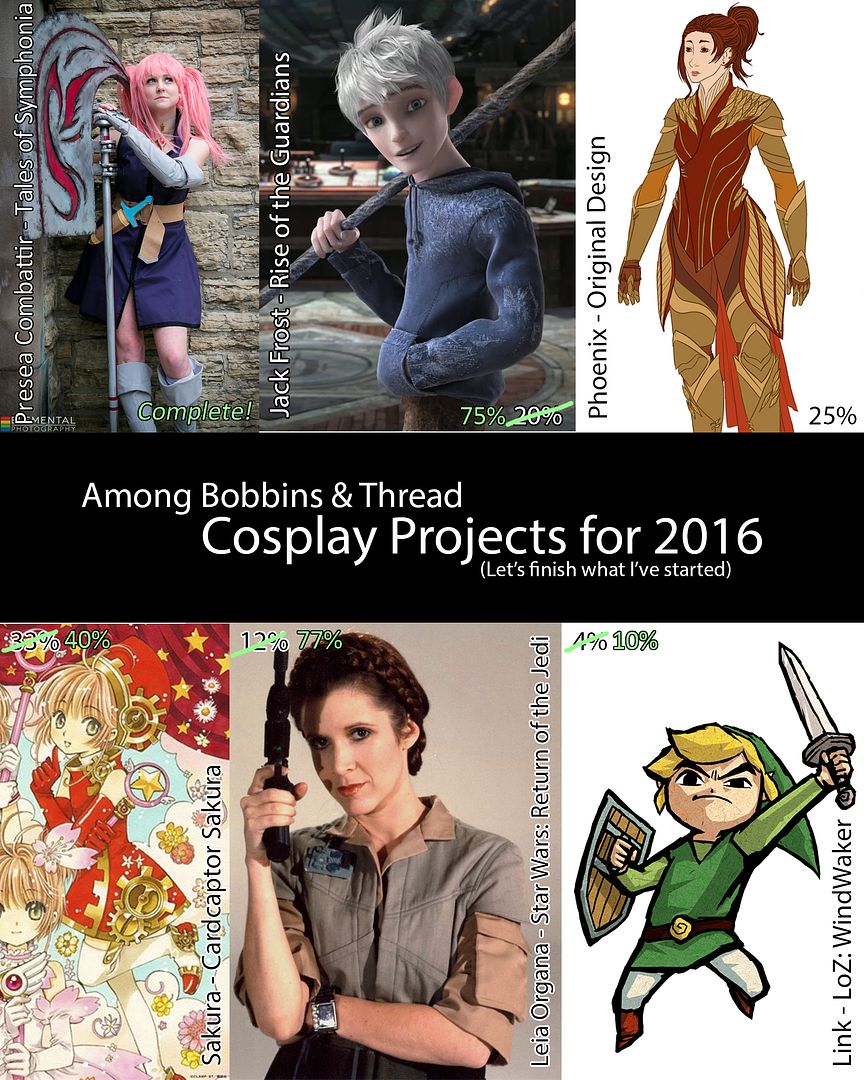
Since we're halfway through 2016, I have updated my costume progress collage. Again the percentages are just arbitrary numbers I assigned based on how I feel how much I have left to do.

Presea: Finally complete! Huzzah! It's been years in the making~!

Jack Frost: That sweater took forever. I am not looking forward to "frosting" the pants. Still need a staff.

Phoenix: Probably won't make any progress on this until the fall.

Sakura: I hate my fabric choice, a lot. Considering starting the dress over with new fabric that isn't awful satin. But I have a buckram base hat and the bodysuit constructed at least?

Leia: Pushing it for Otakuthon! Costume needs some tweaks to fit better, wig needs styling, and accessories still to do.

Link: Fabric things have been patterned and cut. I should probably sew them.

I think that's all for now. I need to work on those blog posts...

Thursday, June 23, 2016

June Update

It's been a while! I'm being kept very busy with work, and have been neglecting writing more posts. Between my full time job and weekly dress up challenge, it feels like I'm running a marathon. We're about 2 weeks to opening, so it will only get crazier.

I will do a more in-depth post on my dress-up challenges, but for now you can enjoy the group of us dressed as the Pink Ladies from Grease! The challenge is to make a costume to fit the theme using only things you have or can find at Dollarama or the local thrift store. 6 weeks done, only 2 left to go... I don't think I've ever been to the thrift store so much in my entire life.

I got my photos from the photo shoot of my Presea costume I did with Elemental Photography back in April. They look fabulous and I am super happy! :) I'm excited to finish posting about that costume--it's only been like 3 years...

Making leaps and bounds in my progress on Leia! I'm in good shape to have it ready for Otakuthon. Wig arrived this week, so I can finally get started on that part as well.

Sunday, April 10, 2016

April Update

You may be thinking: Is this the blog I'm looking for? Why yes it is! We've had a huge makeover! It's been a few years, so I thought it was about time. We have a new logo, courtesy of my fab sister Alex! Check out her cool art stuff at Alex Boake Illustration! >;D  And using my newfound knowledge I also made a silkscreen version of my new logo to label stuff with! Badass!


Wow, this is a crazy month! The first big news item is that I'm moving to Alberta for 3 months. I got a job in Drumheller. So I get to hang out with dinosaurs.

This means I will be missing Anime North for the first time in 11 years... I'm a little sad. But I will be back in time for Otakuthon, so I am looking forward to that. I may also attend AdAstra here in Toronto at the end of the month, but since it's 2 days before I move and I don't have a ride there yet... it may not happen.

I have a lot to get in order before I leave. I still have yet to officially decide what sewing projects to bring with me when I go, but I will most likely be taking some of my Link and Leia costume sewing to work on while I'm away.  I have LOTS of packing and prep to do this month, so there may not be much in the way of blog content in the next few weeks while I get my life in order...

In other news Presea is finished! After 3 years! Excitement! :D I did a photoshoot last month with Elemental Photography. So I will have actual photos as proof that that costume exists. Aw yeah.

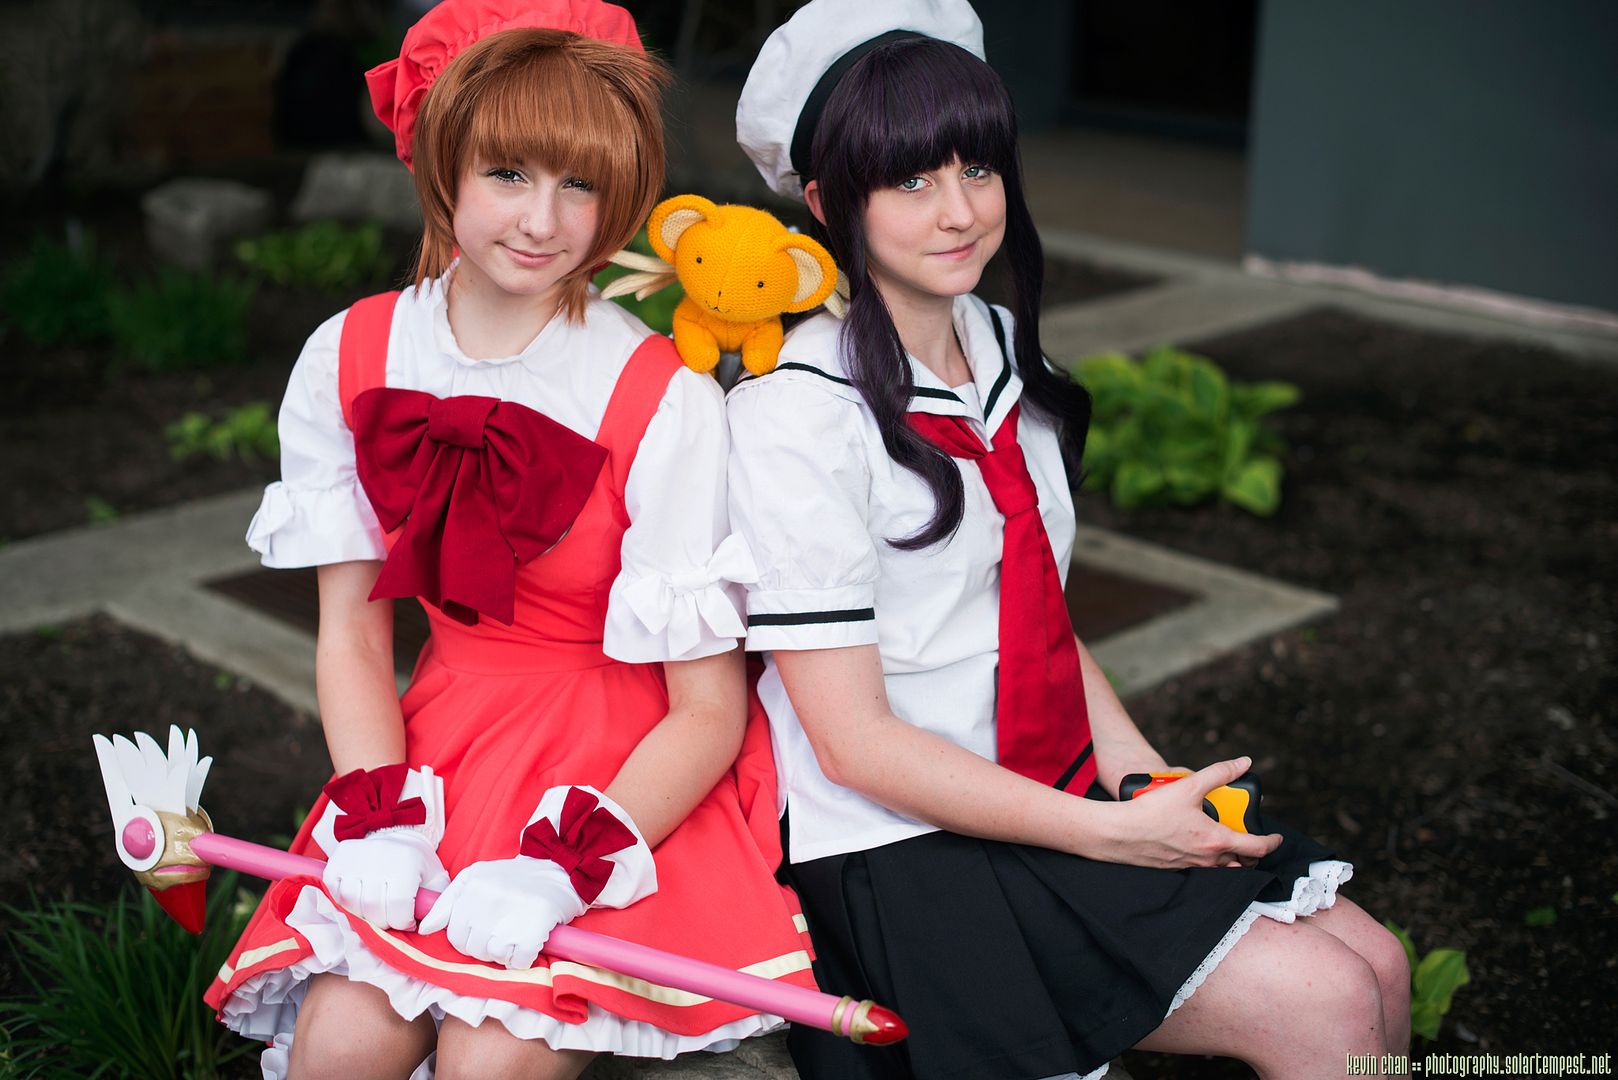
In other other news, I got pictures back from Kevin Chan Photography for our Sakura and Tomoyo shoot! :D They look great! So pretty! I will be going back and adding them to their respective costume posts.


Madly working on my hat projects for my millinery class. Progress shots are on facebook. Since I will miss the final class I have 1 less week to do all my projects. Yikes.

Lots to do before I leave and running out of time to get it all done! I'd say posts are coming soon, but probably not until later this month...

Mischief managed... for now.