This costume was originally supposed to debut at Otakon last summer, and I had managed to get everything finished except the wig and shoes. But without the wig, the costume isn't really wearable, so the costume went on the backburner for a while as I worked on the wig.
I really need to make time to do a real photoshoot of this costume. Perhaps next year...
I thought I would start by talking about the wig--easily the most difficult piece of the costume. This wig took me 3 attempts until I was satisfied with the end result.
 It was a nightmare to construct, partially because the reference is so vague. All you can see is that she has a large black blob of hair at the back of her head--which is presumably a bun? I've seen people achieve this in different ways, some opting for a small bun (a bit of a cop-out, and not very accurate), others choosing to do an intricately braided style to create the mass. I wanted to create a smooth rounded "bun" that was as accurate as possible.
 My main issue I encountered--which carries over to many costumes--is that I have a small head and not an abundance of hair. This means that 99% of all the wigs I ever bought are loose on me. Back in the day I had waist-length hair which I had difficulty stuffing under a wig, and this would keep it from slipping. But these days, any wig that is remotely back heavy slides out of position like nobody's business. It is a problem I have noticed since I have started to do more elaborate styled wigs (Asuna was a problem in particular because of the heavy metal bells).
To counteract this problem I have found the best way to keep a wig from sliding to to sew a small comb into the front of the wig and then french braid my actual bangs. The comb hooks into the braid and prevents it from sliding out of position. (I did the same thing on my Tomoyo wig.)
 Black is such an easy colour of wigs to find, so I was not worried about finding a wig (for once!). To save myself some time, I ordered a ponytail wig from Epic Cosplay, this meant that I wouldn't have to also make my base wig into a ponytail wig first to cover the gaps in the wefts. Their ponytail wig is a short wig that comes with an extension you can wrap around the ponytail base to make it a long wig. This was great for my purposes, as the large extension would be put to use later in creating the bun.
I started by taking out some of the wefts from the middle of the back of the wig. This was done very carefully with a seam ripper. This was to remove bulk under the bun while also procuring more hair to make the bun with.
Out of some back fabric I made the base of the bun and loosely stuffed it. I hand stitched the wefts around the edge. I cut a hole in the middle of the fabric to stick the loose ends of the wefts in.


This is the point where I realized I wasn't going to finish the wig before Otakon, and put it on hold for a while. The next steps were done over the next couple of months before going on hold while I finished my degree and then finally finishing in the weeks leading up to AN.
After that I attached the bun at the top of the wig with a strong hand stitch. I tied the hair that would later be the bangs out of the way.
 At this point I also made the wig slightly smaller smaller along the back with some darts that I stitched in to the netting. This helped it fit better. I also hand stitched the small comb into the front of the hairline.
 Next I pulled the wig under the bun into a ponytail and stubbed it using regular white glue. Then I cut off the excess hair.

 I also stubbed the bottom of the hair that was draped over the top of the bun.
 Next I cut and styled the bangs. The wig was quite thick at the front, so I had to thin it out a fair bit. Because although Toph's hair is supposed to fall into her eyes (which isn't a problem because the character is blind), I kind of needed to be able to see.
To finish off the wig I used some heavy duty hair pins to affix the bun in place.
Next I paper patterned the tiara/headband. Once I was happy with the pattern I cut out 2 pieces of worbla and laminated them together with a heat gun. This was to make it sturdier.
This part of the costume was done after I had finished my independent study on worbla, so I used some of the leftover materials to make this tiara/headband.
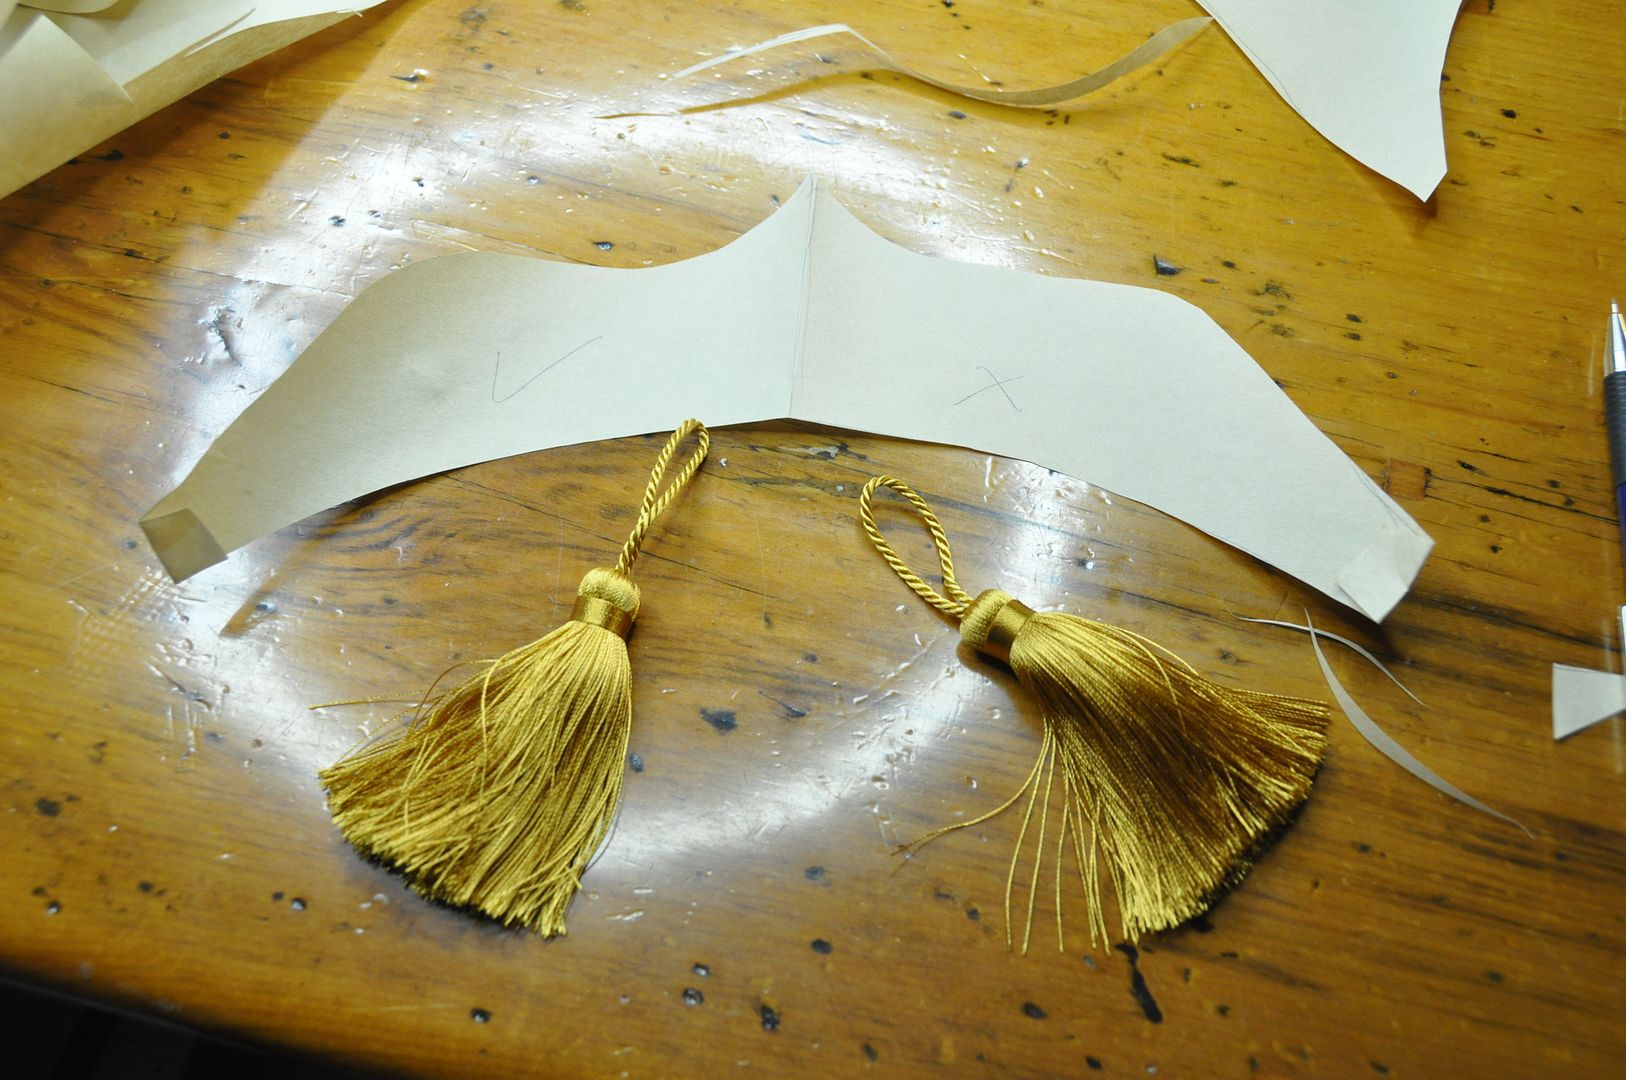

Using a dremel with a drill bit, I drilled a hole through the center of the raised loops at each end.
I made the tassels shorter to be more accurate.
Here you can also see how the finished wig looks from the side. The bun is a little smaller than the actual character's hair, but I think this is a more manageable size. It is already insanely back-heavy!

 Next was priming the surface for painting. Worbla tends to have a slight bumpy texture to it, so I used a couple of coats of gesso and gorilla glue as a filler.
I primered it with a red spraypaint. The red colour underneath helps to counteract the green-ness that is common in most gold paints. I gave it a light sanding, before doing a second coat of red.

Then I used a clear gloss spraypaint as my final layer, to seal it and give it some shine. "Metallic" acrylic paints tend to be more sparkly than glossy.
I looped the tassels through the holes I created earlier and hot glued them in place.
To attach the headband to the wig I hot glued a small metal comb and two ties to the inside of the tiara. The metal comb would hook into the wig and then the ties were tied under the bun at the back. This made it secure, but also easily removable.
And in a nutshell, that's how I made the wig. Hopefully I can get some more side shots of the wig at another con.