Showing posts with label bead. Show all posts

Thursday, October 13, 2016

Presea - Accessories - Tales of Symphonia

Welcome to Presea Part 4: Accessories! Feel free to venture back and check out the Gloves & Boots, Dress, and Wig. Many thanks to the ever fabulous Elemental for the amazing photos! We braved the cold and pulled it off!

This costume had a lot of smaller pieces involved. This post covers the belt, pouch, dagger, and Exsphere (necklace).

For this project I actually bought a piece of real leather to work with. I used the suede-like side as the outside (as opposed to the shiny side), because I thought it was more true to the character.

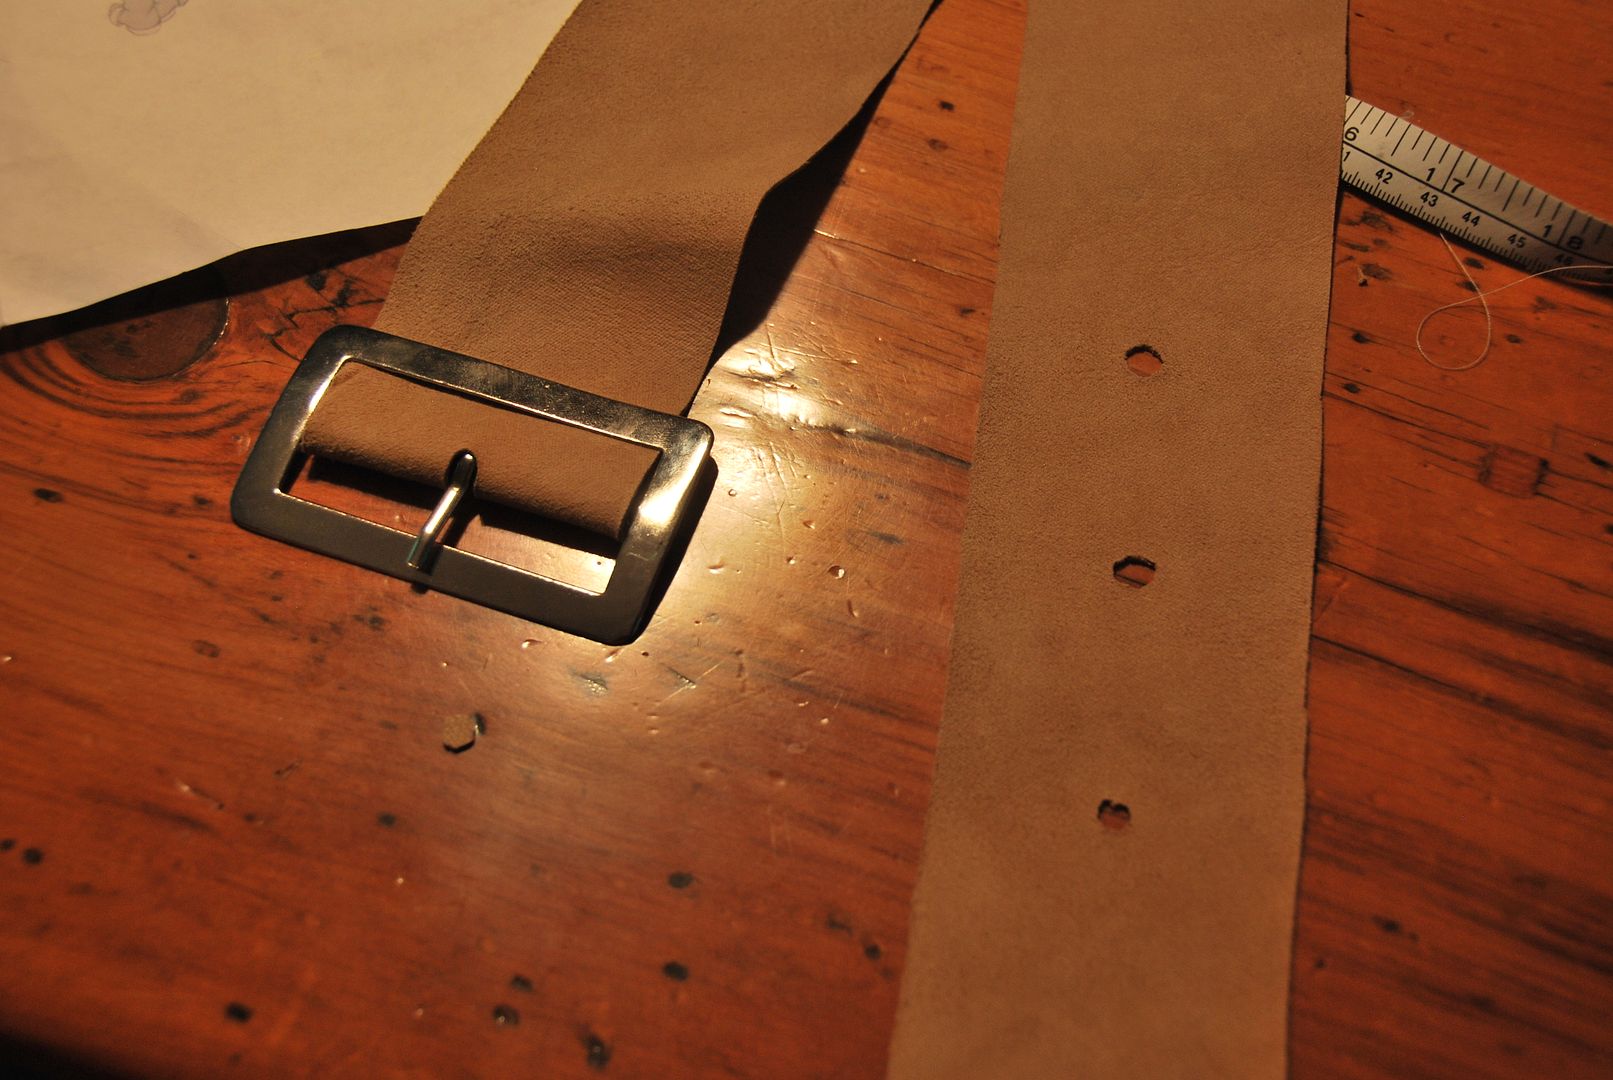
The first piece I cut was the long strip for the belt. Later I went back and reinforced this strip by sewing a second layer to it. I used scissors and carefully cut out the holes. The buckle was found in an store on Queen street after much searching.

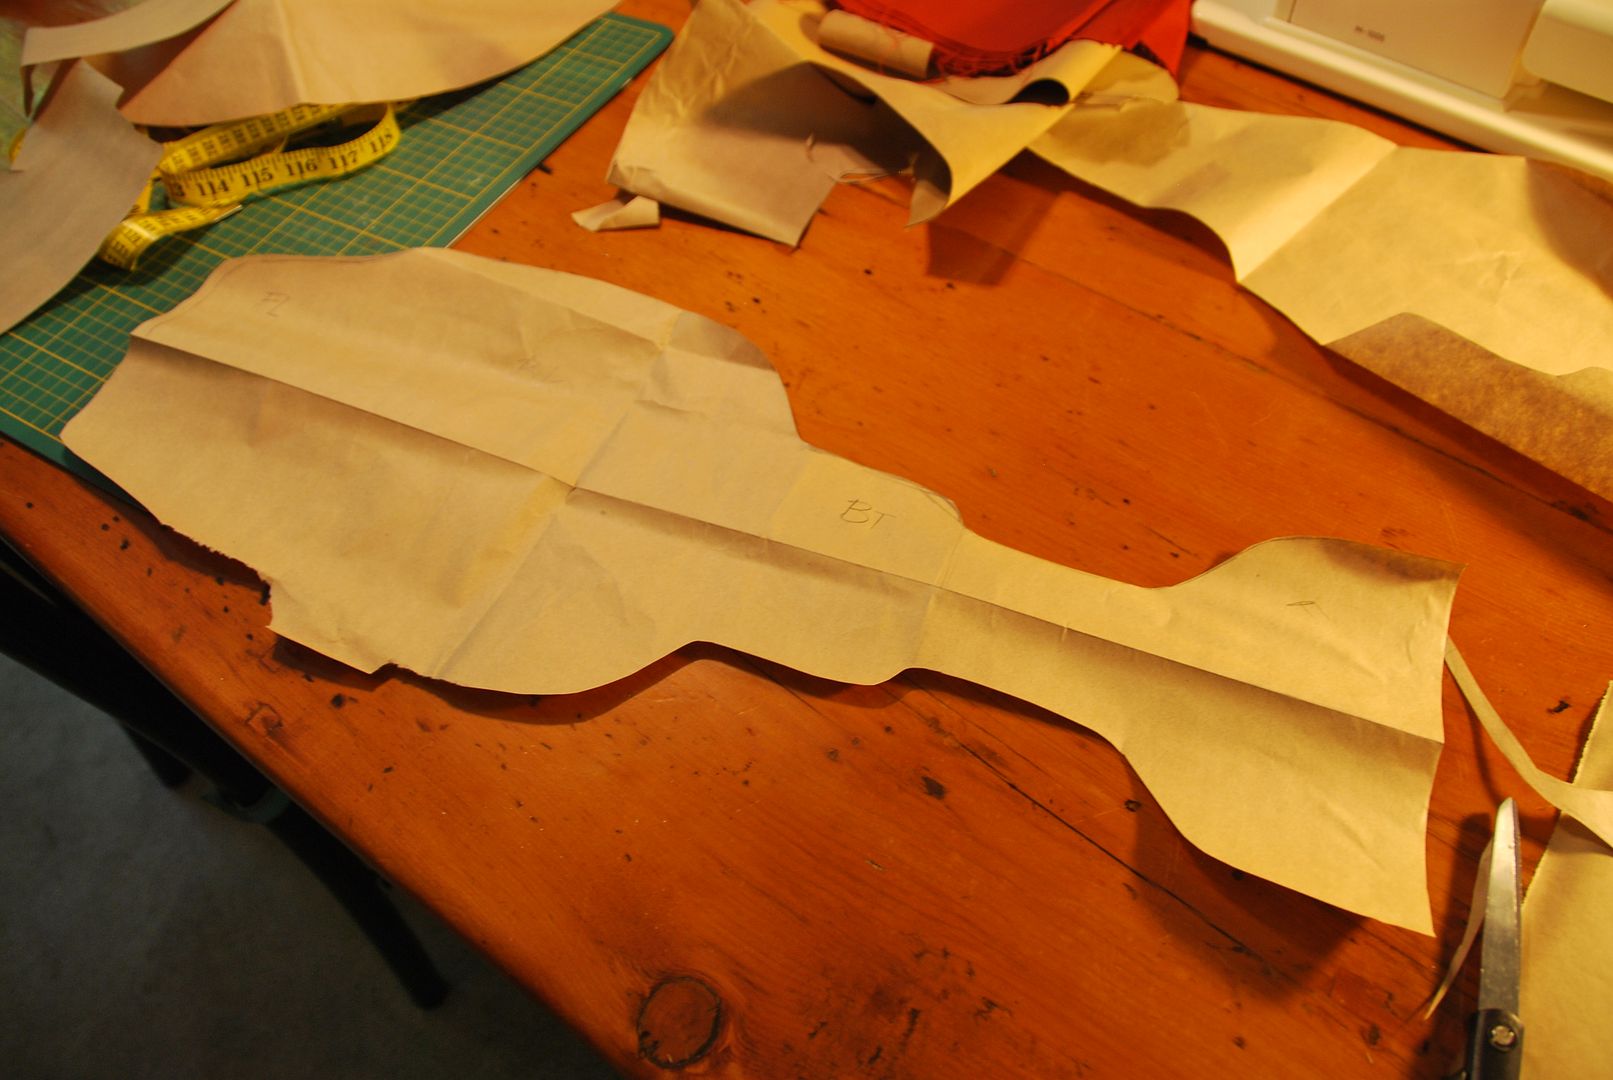
Then I patterned the pouch.
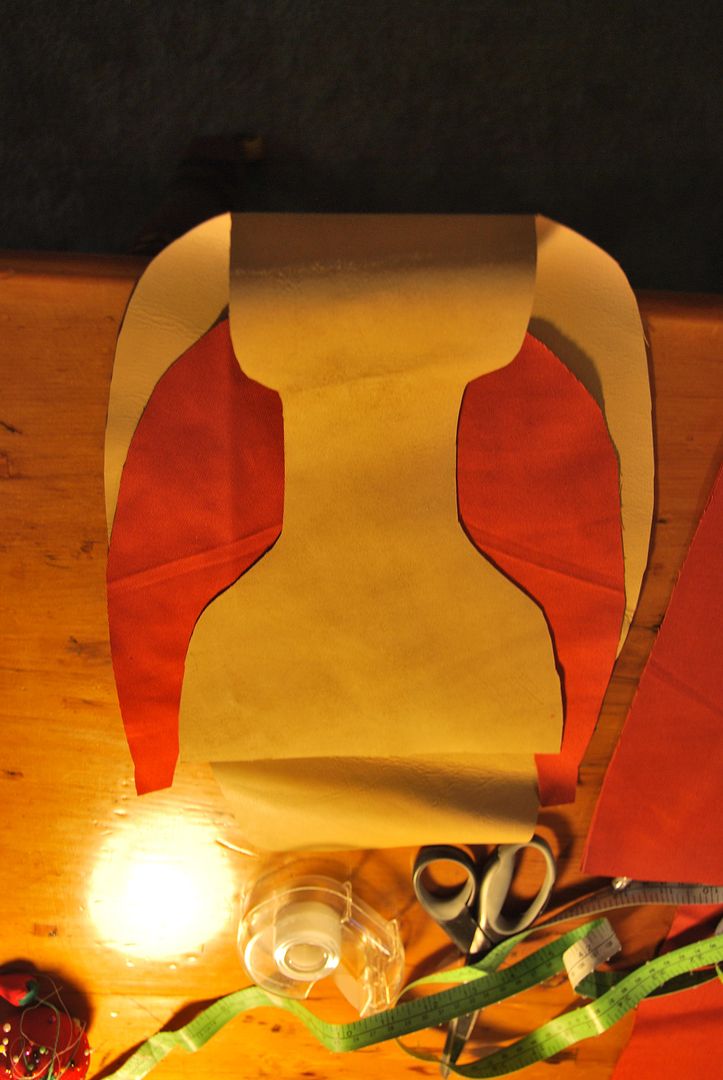
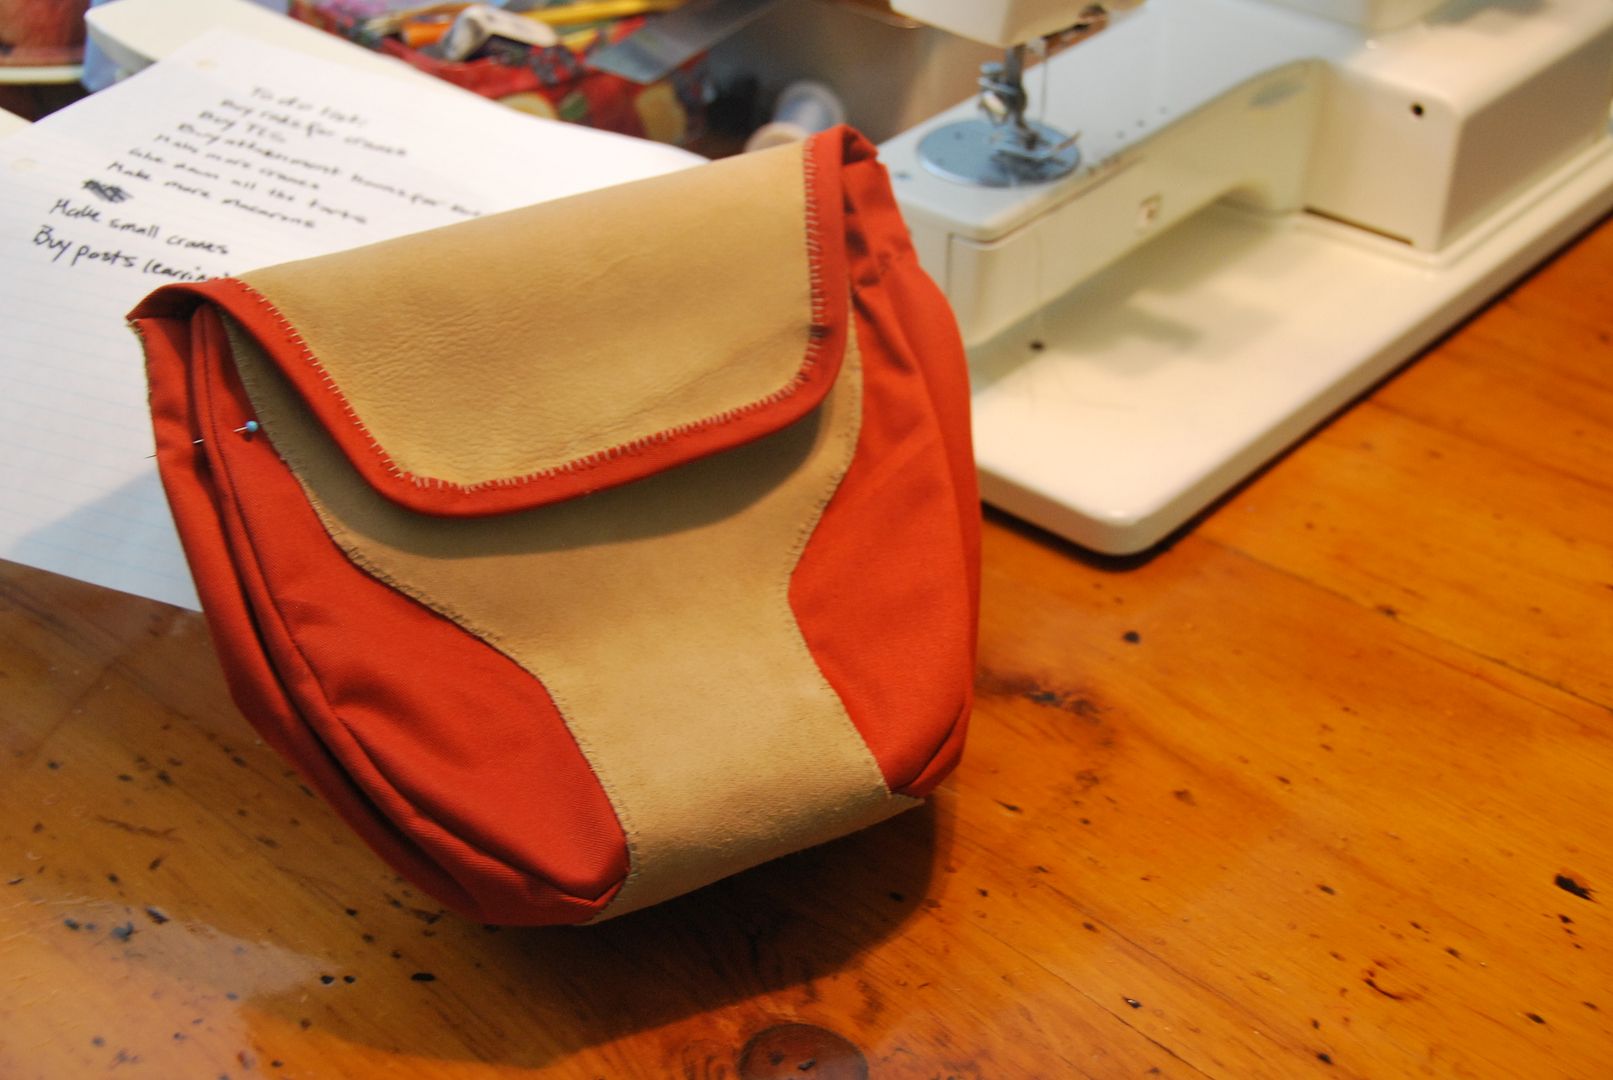
The pouch consists of one curvy strip of leather that folds over on itself to be the front, bottom, back and flap of the pouch.
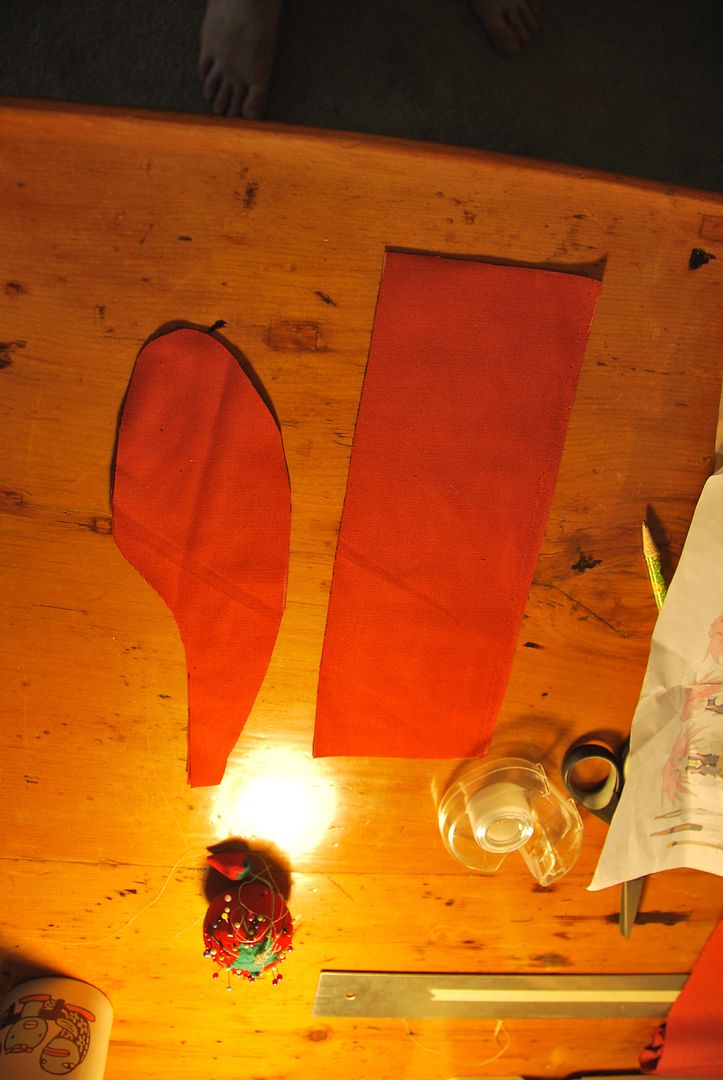
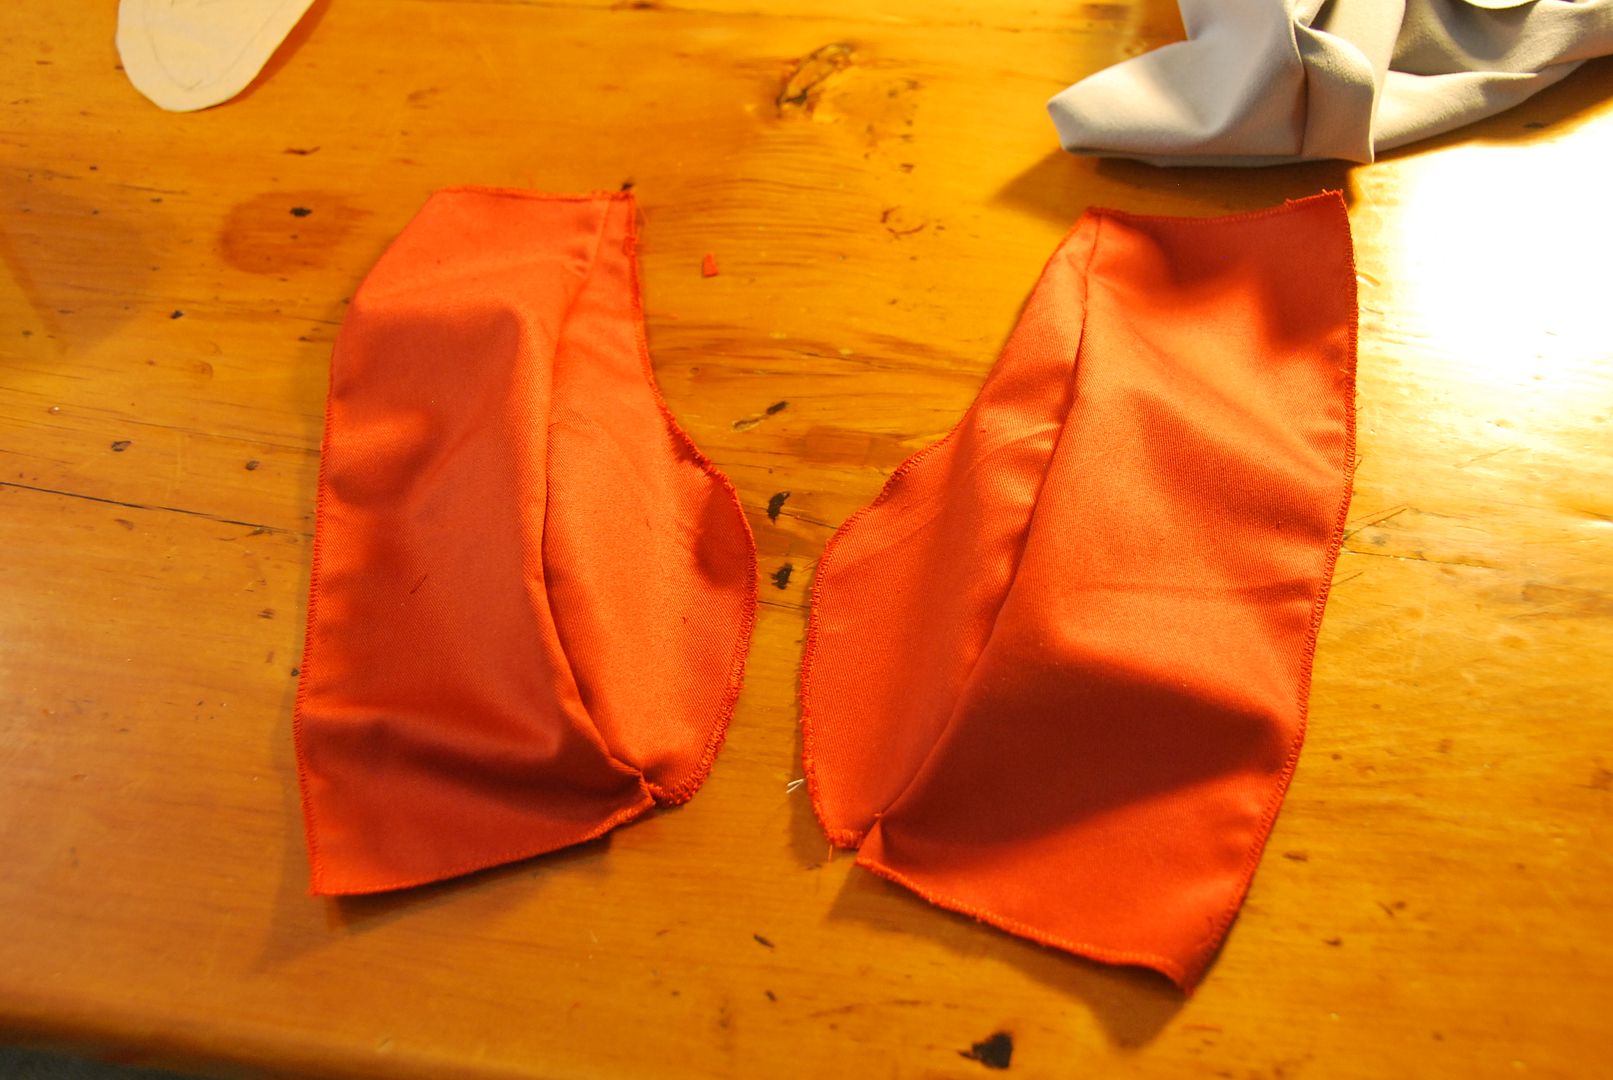
Then there are the 2 panels that form the two orange curved sides of the bag.


These were stitched together, then all the edges were finished.

These were then marked and very carefully hand stitched to the leather. At this time I was unsure if my sewing machine could handle leather, so I hand stitched all the leather on this costume. Turns out it can, with the right needle, which I found 1 year later when I returned to finish the project. Unfortunately I finished all the leather work before then...
I made a matching bias tape and stitched that on as well. The last step was to cut 2 slits in the back so the belt could be fed through the pouch.

I had intended for this bag to be functional, but unfortunately it was too floppy to hold it's shape with anything inside...
Next up is the dagger! The dagger is also attached to the belt, but the character never uses it, it seems purely part of the design.

I made the dagger out of wood, cutting it out with a jigsaw.

I had my friend Ian dremel out the blade edges because at the time the sanding bit on my dremel was not working. When I received it back I hand sanded it even smoother.
I created a sheath and loop to attach to the belt. The loop was on an angle so the dagger would be angled like it is on the character.

I started the paint treatment with grey primer, then silver and finally a light blue acrylic for the face of the blade.

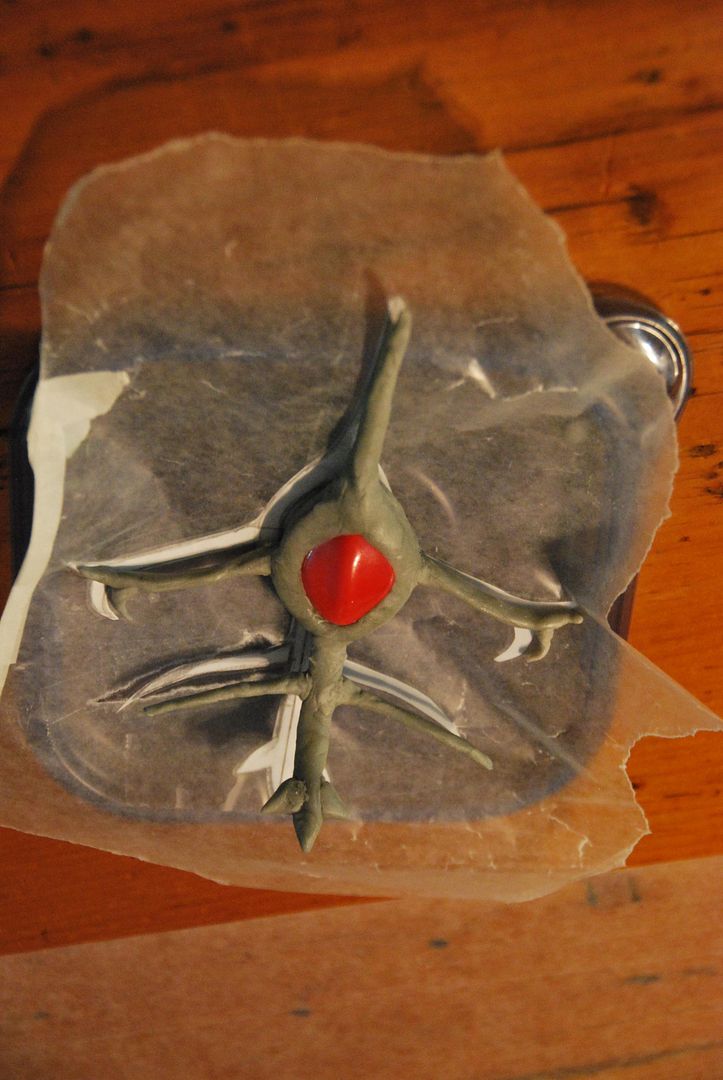
The last detail was the Exsphere. I started by drawing out the piece full scale, then making a wire frame for it. I bought a large red bead for the gem in the center. I sculpted the piece with apoxie sculpt, which is great for this kind of thing as it dries super solid. Later I went back and broke the two side arms and bent them further back to better contour the neck. I filled in any divots with more apoxie sculpt and sanded it smooth.
 

I masked off the gem with painter's tape and then sprayed the piece a matte black. Then I painted over that with a gold acrylic paint. Lastly I created a short chain so it could be worn. The actual character has this gold piece built around the gem, which is fused into her skin, I didn't think that was necessary for me! Hahaha I just had to be careful not to look down suddenly, otherwise I would be jabbed in the neck.

Tuesday, February 9, 2016

Vaporeon Gijinka - Wig & Hairpieces - Pokémon


Part 4 of the Vaporeon saga--Wig and Hairpieces. After my initial rocky start, I quite enjoyed creating the decorations for this wig. Though not the most construction heavy wig (like my Presea or Asuna wigs) it required a lot of labour and styling. This wig presented a new challenge for me: dyeing.

Links to Part 1: Bolero, Part 2: Under Layers, and Part 3: Wrap Skirt Tail!

Thanks to Elemental Photography for the great photoshoot! Credit for the original costume design goes to Cowslip!

It's a complaint I have made many times before but I'll say it again: it is really difficult to find a base wig that perfectly matches your character if you need it to be a specific shade of grey, green, blue or purple. And even if you find one that matches you may not be able to find it in the length you need. I had similar problems with finding a wig for Tomoyo and Suppi because they fell into this colour spectrum where there is just not a lot of wig selection.

My problem was that I ordered my wig first, before I went fabric shopping. The wig I picked was a teal wig from Epic Cosplay (though it is really difficult to see here, believe me when I say it is really teal). When I was shopping for fabric I ended up shifting the colour palette to be more blue. When the wig arrived in the mail it really didn't match the costume. Also the wig I picked did not have enough length for the desired style...

(For the record, I don't blame Epic Cosplay for the teal wig, I blame myself for choosing a teal wig and then changing my mind about making the costume blue!)

At the time I was still under the impression that I could meet my original deadline, so I didn't have time to order another a wig--it wouldn't have arrived in time for me to style it.

I went ahead and styled the wig I had, but was super dissatisfied with it. Shown right is the original wig I styled with the original hairpieces I ended up later discarding.

A year later I re-thought my plan for this wig and decided that I really wanted to attempt the slight gradient that is in the original rendering. To do this I needed to order another wig that was longer, and much lighter--so I could dye it to the desired colour.

The second wig I bought was much closer to what I wanted for my base. I ordered a much longer curly wig in "ice blue" from Epic Cosplay.

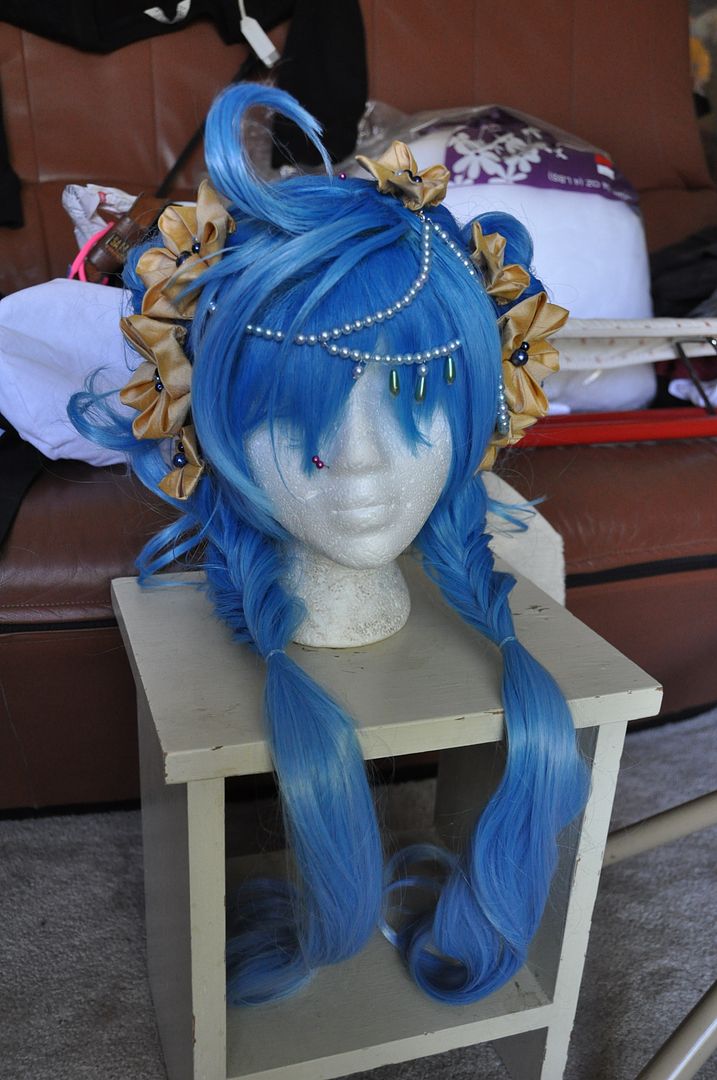
The first thing I did was trim the bangs to the desired length/style. Then I sectioned off the remaining hair into 4 parts: the two lower pigtails would form the long braids, and the two upper pigtails would form the buns. The lower pigtails I took scissors to and thinned the hair. The bottom needed to be these two wisps rather than the chunky sections you can see in the picture on the left.

I changed the design of the hair a bit, because the upper part was actually supposed to have a lot volume before feeding into the braids, with these spikes of shorter hair sticking out. After the problems I encountered on my first failed styling I decided to add the buns to the top half and use the curls in the wig to create the shorter strands of hair sticking out. This gave me the width/apparent volume without me having to tease it/add it in with hair spray. Suffice to say because the wig was curly I was worried that any attempt to add volume was going to lead to a messy tangled disaster... So the deviation from the actual design was quite intentional.

Looking at some tutorials, I began by creating my dyes. I tested them of the off-cut hair from the bangs until I was satisfied with the colour. The dye was made using 99% alcohol and india ink. I created two bottles of dye--one that was blue and one that was more teal. There was no scientific formula for mixing these, I just added drops of ink until the colour was dark enough. Just write down what you did because if it is a long wig like mine was, you will probably have to make more. Which I did.

The bottles of 99% alcohol I bought already had these hand spray nozzles, but if not I would have bought spray bottles at the dollar store and mixed my dye in there. That makes the application easy.

I did this outside, because I didn't want to end up with blue dye residue everywhere. As it was, my fingers were blue for days after. I covered my stool (which is vintage and actually belongs to my mum) with a heavy duty garbage bag to protect it also.

I started with the bangs. To apply it I simply spritzed it with dye and combed it through. The more saturated you make it, the darker the concentration of colour. In the design, the crown of the head is where the darkest tint is, so I did the bangs first so as to give myself a reference point to compare to for the gradient.

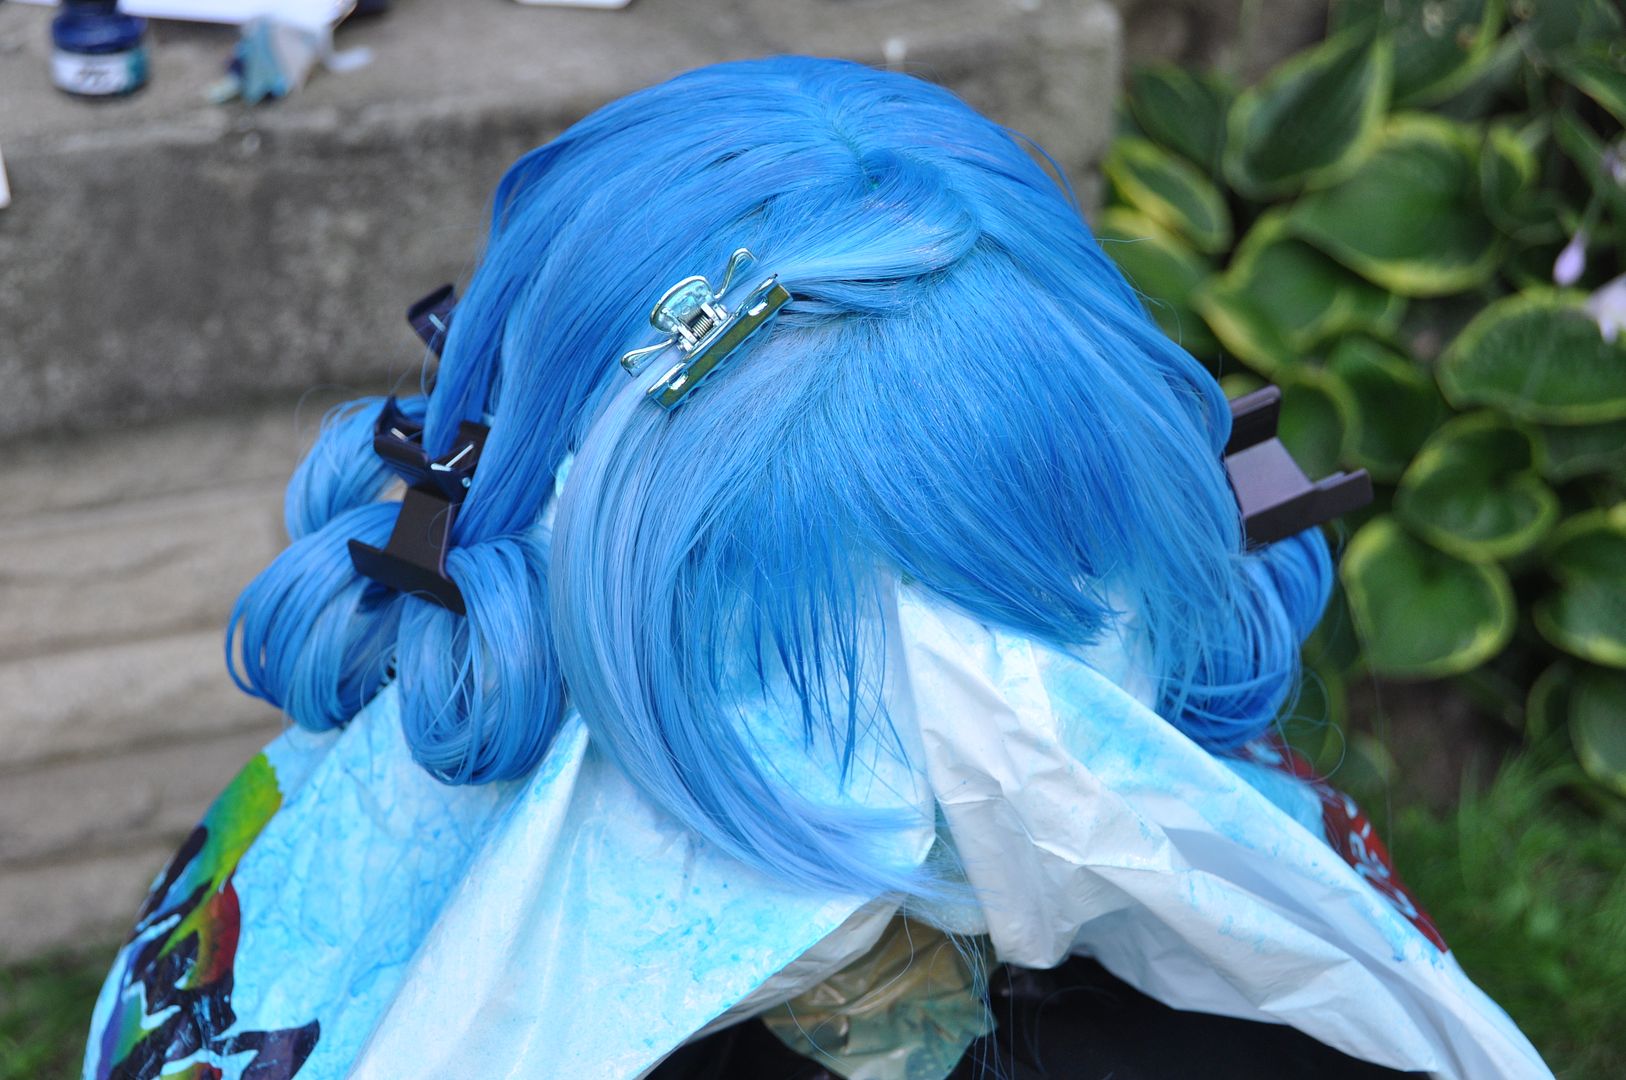
I tied the upper layers out of my way and worked on each bottom pigtail next. I would let down the pigtail and carefully comb out the hair. Since I was trying to preserve the curls and keep the wig from tangling, I dyed each curl individually. Once That section was finished, I would carefully roll up the curl and pin it in position, allowing it to dry. If you leave them hanging wet it can straighten the fibers out a bit, leaving the wig more wavy than curly--which can be a good thing, but not what I was going for. To give it the gradient it had to be most saturated at the base, and I would carefully comb it down to pull the dye down through the hair.

You can see at the back that I parted the hair in a sharp zig-zag so as not to reveal the base of the wefts/netting. This was to save me from having to add in wefts to make a proper part. This works fine for this particular project since the lower half of the hair did not have to pull upwards into the high buns.
Using straight pins and plastic bags, I covered the bottom half of the wig while I worked on the top half.

The top half was done to be much darker than the bottom. I simply made it more saturated with dye. Same with the bottom, I did each curl individually and pinned it up to dry.

The finished dye job, before I brushed out the curls again. You can see the gradient best here. It was meant to be subtle, and mostly to match the wig colour to the costume. I think if I would revisit this wig I would make the crown another shade darker.


This is what it looked like once I brushed it out.

Next I went about styling the sections. I did a quick test style first (pictured left). Many bobby pins were used to create the buns. The lower braids were done in a fishtail braid style. I didn't pull the braiding too tight at the start of the braid, because I wanted it to retain some volume. I sprayed the finished braids and buns with hairspray to keep them looking tidy. I later replaced the black elastics with clear ones.

After doing the back, I moved on to styling the bangs. I used hairspray and a hair dryer to create the big curl and the large section that crossed over.

I decided to take my scissors and thin the ends of the hair even more. Reducing volume, but not length.

I made the silk flowers for the hair in a kanzashi style, like I did with my Cloche Hat last year. A good tutorial for how to make them can be found here! I sewed an assortment of beads into the center of each. The beads on this costume are a range of colours: navy, medium blue, pearly blue and teal. Each flower was hot glued onto a hairclip base. The barrettes I used had a little hole in each end, this came in hand later for attaching the bead strings.

I strung the beads on tiger tail and used claw hooks to attached the ends to my barrettes. This means they are removable.

Overall this wig was super fun to make and looked great. As much as it hurt my pride to do so, I am glad I scrapped the first wig and started again fresh.


Tuesday, January 26, 2016

Vaporeon Gijinka - Wrap Skirt "Tail" - Pokémon


This is the third part of my Vaporeon Gijinka costume. If you want to see how I made the Bolero, go here! If you want to see how I made the under layers, go here!

Thanks to Elemental Photography for the great photoshoot! Credit for the original costume design goes to Cowslip!

One thing I loved about this design was the way that the tail was incorporated into this wrap skirt.

The "tail" was made from the same blue silk as the bolero jacket. It has a really nice shine to it--without being overly shiny. The fabric itself actually has a salmon-y pinkish colour woven in, which you can see in the shine. It helps to break up a bit of the blue overload.

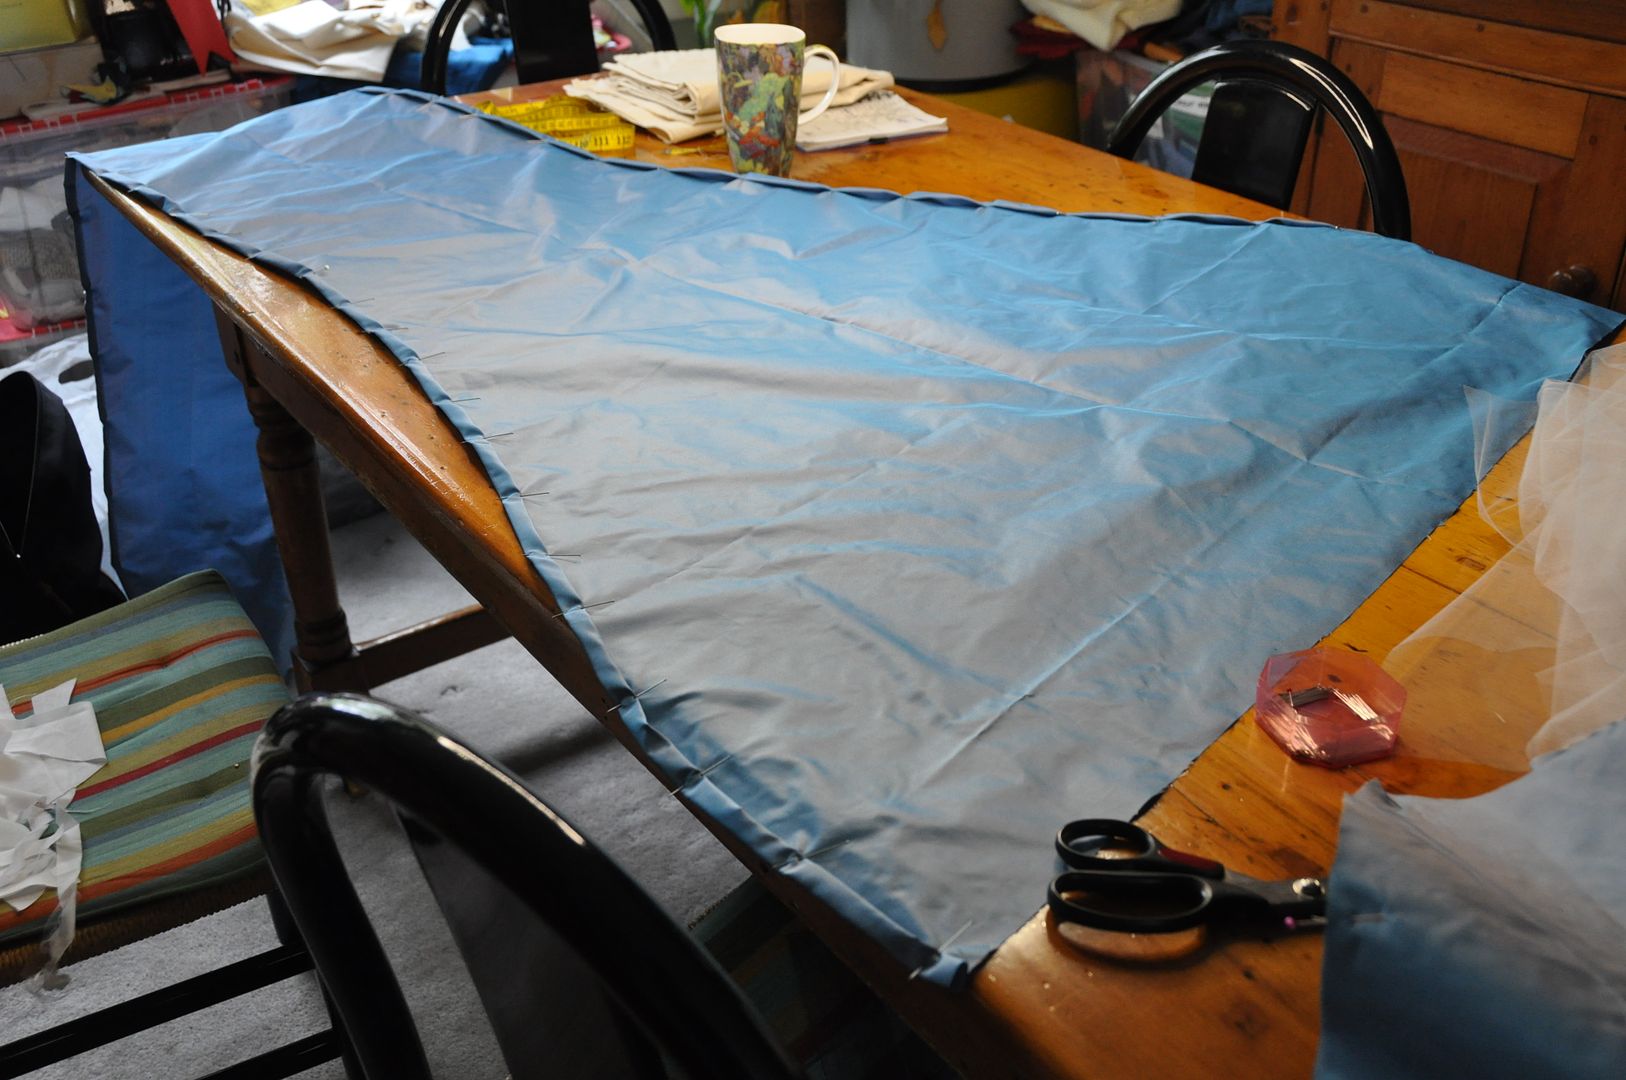
This piece took a bit of adjustment before I was satisfied. It was first draped and pinned in muslin to create the pattern--a much less scientific method than I am used to.

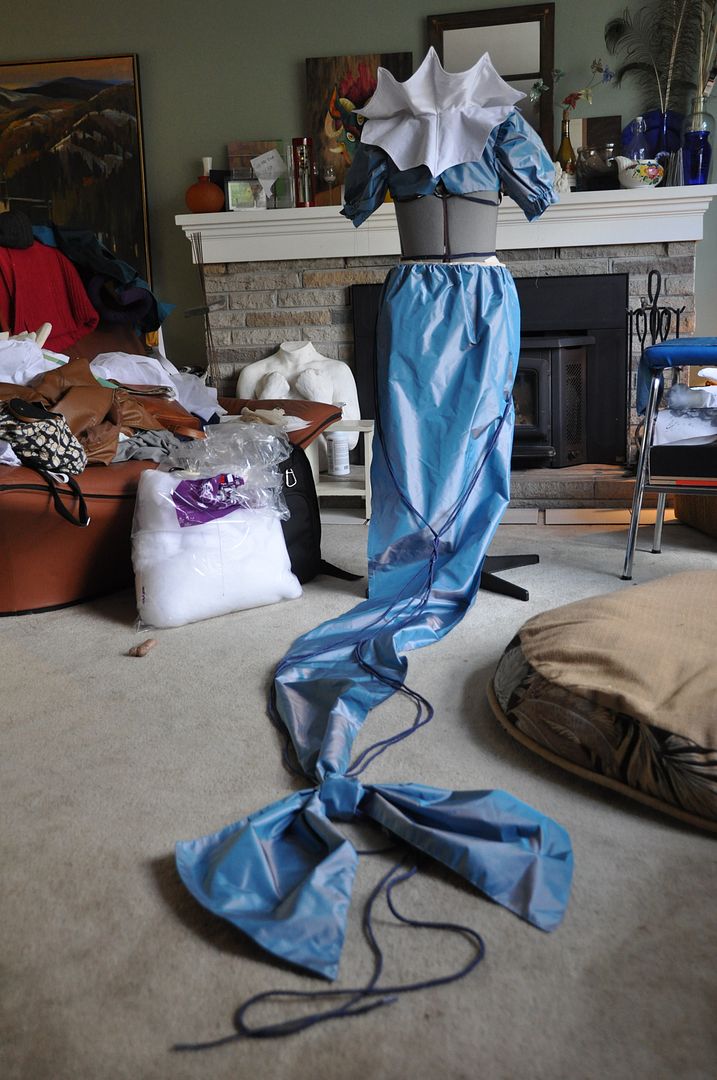
The tail itself ended up being over 5ft long. It was a bit cumbersome, so I pinned it up to walk about the con.
You can see how it tapers from the waistband down.

The next step was to finish off the edges. I neatly rolled them over and top stitched it. I wanted to make sure it looked neat from both sides, as the inside would be quite visible. Also, this fabric frayed like nobody's business. I wanted to make sure the edges wouldn't get destroyed.

I gathered it to the desired size and attached it to the waistband. The waistband was a simple rectangle of beige cotton that had a hook and eye closure. I would later reinforce the waistband with nylon webbing I had leftover from my Splatoon Inkling harness rig. This reinforcement was necessary, as later the leg wrapping rigging would be sewn into the waistband.

The tail fin pieces and decorative waistband ruffle were sewn right sides together, clipped, turned right way out and then top stitched to finished them off.

I used 4 long pieces of navy cording as my detailing on the train. I hand stitched them on at the top and tacked them at various points as they wrapped around the tail. There is easily over 12 yds of cording on this costume (including all the lacing on the bracers).

I pinned the tail fin to the end of the tail, arranging the ruffled look how I wanted it and then tacked it on with my most invisible hand-stitching. It's basically like a giant bow.

It was around this point that I realized I would not be meeting my original deadline (AN 2014) and gracefully admitted defeat. I took a year-long break from this costume.

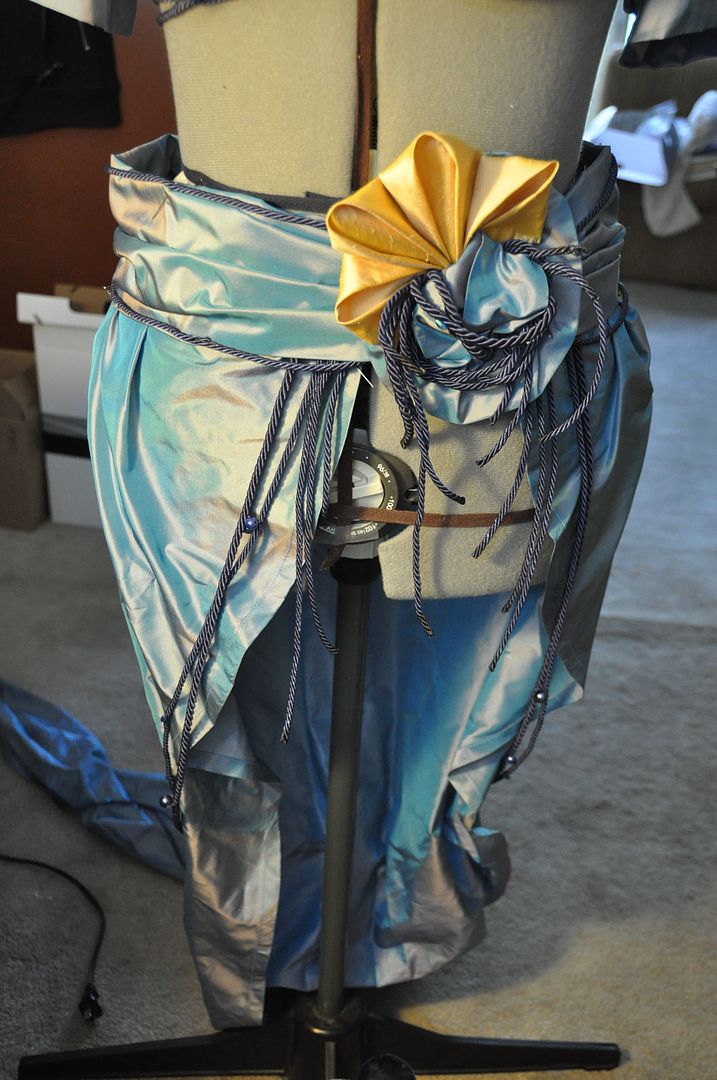
The next step was to attach the decorative waistband ruffle. I arranged it and pinned it in place until I was satisfied with the look then tacked it on with hand stitching.

Then I went about creating the brooch that attaches to the waistband, covering the clasp. It was all made of scrap materials--leftover cording, fabric, beads, etc. I used some of the yellow silk from the hairpiece flowers to create a matching kanzashi style detail for the petals (I will go into more detail on my wig and hairpiece post for this costume.). The entire thing was sewn to a felt backing that was glued to a brooch pin.

Extra cording was used to decorate the waistband and create more dangling bits near the opening at the front.

Then I had my friend Harriet (the official Bead-Dazzler) sew on tons of beads. Props to her for her hours of hard work (in exchange for food)--I certainly have the skills to sew beads myself, but I definitely lacked the time.

The detailing is what really makes the design. There is such richness and embellishments, and I had a lot of fun realizing those little details.

Next I had to create the leaf detail that sticks up from the waistband of the skirt. The problem was, it need to be rigid, but also sheer. The fabric I had was nice and sheer, but super flimsy. 

On the Splatoon project I was introduced to this magical stuff called "heat n bond".  I essentially used it to fuse my fabrics together around a central support structure made of leftover corset bones. I have to say--I had no idea if my crazy idea would work, but it did, so YAY! 

First I traced out the shape I wanted on the paper side of the heat n bond. I cut this out and then ironed it to my first layer of silk. Then I used fray check and applied it all around the outline of the leaf shape and let it dry before cutting it out--this way, when I cut it out it would not fray. 

Then I laid the leaf shape heat n bond side down on the second layer of silk. I carefully lined up my corset bones where I wanted them and pinned them in place. I carefully sewed around them using the machine's zipper foot. The bones were now sandwiched between the two layers of silk. 

Then I ironed the whole thing, fusing my layers together.  

The next step was to apply more fray check, around the edge of layer two, allow that to dry and then cut it out.

The finished leaf feels completely different than the fabric I started with.

To create the veins on the leaf I used a similar process. 

First I traced out the desired shape in heat n bond. I then cut that out and used an iron to apply it to the first layer.

Then I fused it to the second side. I fray checked the outline, allowed it to dry and then cut it out.
This was then tacked on the leaf by hand in a few key spots.

The leaf was simply tucked into the waistband when I wore the costume.


Thursday, December 10, 2015

Vaporeon Gijinka - Bolero Jacket - Pokémon

It's finally here, the one you've been waiting for--Vaporeon. In terms of quantity of pieces alone this is perhaps one of the most complicated costumes I have ever constructed. Hence, this one will be broken up into 5 shorter posts.

First of all I would just like to my deepest gratitude for the huge amount of support I received working on this costume. This one was a long time in the works. Special thanks go to my friend Harriet who dedicated many hours of her time and hand-stitched on 95% of the beads, hooks and clasps. Seriously, this costume wouldn't be nearly as sparkly without her help. I gave her the official title of Bead-Dazzler. Another shout out to my friend Alex who accompanied me on my initial fabric shopping scavenger hunt and helped me pick out the perfect fabrics for this costume.

Secondly, a million thank you's to Elemental Photography for the wonderful photoshoot and the wonderful pictures. I wasn't feeling so confident in a costume with so much exposed skin, but Amanda made me look and feel like a million bucks! You rock!

Credit for this amazing design goes to Cowslip. I discovered the Pokemon Gijinkadex collection of designs about 2 years ago now, and I fell in love with them. There are so many beautiful ones to choose from--I knew immediately that I wanted to cosplay one eventually. Picking between them was a challenge. I think I narrowed it down to 4, and then I let you--the fans--give your opinions on which you wanted to see me do. The votes were pretty divided--the Moltres design was also pretty popular--but eventually the decision was reached that Vaporeon would be the best one to do. Perhaps I will revisit the Gijinkadex in the future and do another one, but for now I am satisfied with Vaporeon.

I started the costume in May of 2014, originally intended to compete in the Anime North Masquerade later that month. This was at the same time I was working on completing the last 2ft of embroidery on my Forest Guardian and also building Sakura (1st opening outfit) and Isabelle--both sizeable projects. You can definitely say that I over-extended myself, particularly because I hadn't planned to still be working on the Forest Guardian at the time--I had intended to complete that for CostumeCon32 in April. By the time I hit AN prep suffice to say I was already super burnt-out.

I knew from the start that Vaporeon would be a challenging build--there was tons of detailing on every single piece. And there were so many pieces. No seriously, this costume has 22 individual pieces. It is actually kind of amazing that this costume is the one with the most pieces, and the most layers, while simultaneously being the costume with the most exposed skin I've ever done.

Ultimately, I underestimated the complexity of the project, by the time Anime North rolled around it was still not even at a point where it was wearable. I decided it was not possible to finish on the timeline I had and decided to compete in Forest Guardian instead. So I made my new goal completing it for AN2015.

...Unfortunately due to my hectic job schedule, that didn't happen either. Hahaha I didn't even try I was so busy. I finally completed it for Otakuthon later that summer--it took another month to fully complete the costume. I am pretty happy with the end result. There are only a few small things I want to adjust with the sleeves, but the rest of it worked out fabulously.


(Credit for the above shot goes to Don Dolce Photography!)

Let's talk about the first part of the build--the bolero jacket. It is the first piece I started and one of the last things I finished.

I started by draping the pattern for the bolero. I first outlined the edges and the seam where the big collar would be inserted using twill tape, then I used scrap pieces of muslin to pin in place, following the curves of the body form and trace my pattern pieces. It created 4 pieces. I then tested this pattern by making a mockup.

The next step was to pattern the big collar pieces. I made the first upper collar mockup out of paper so that it would be rigid, which would give me a better idea of what the final wired collar would look like. I ended up altering it slightly, then I made the second under collar with the offset spines.

Below you can see the pattern for the upper collar with the under collar below it.


I cut my collar pieces out of their corresponding fabrics. The upper collar was made with two layers of white cotton, sewn right sides together along the spined edge and then carefully clipped and flipped right way out. I ironed it and top stitched 1/8" from the edge to finish it nicely.

The under collar was made in the same fashion-except that it was made with the bottom side in the blue silk to match the rest of the bolero.
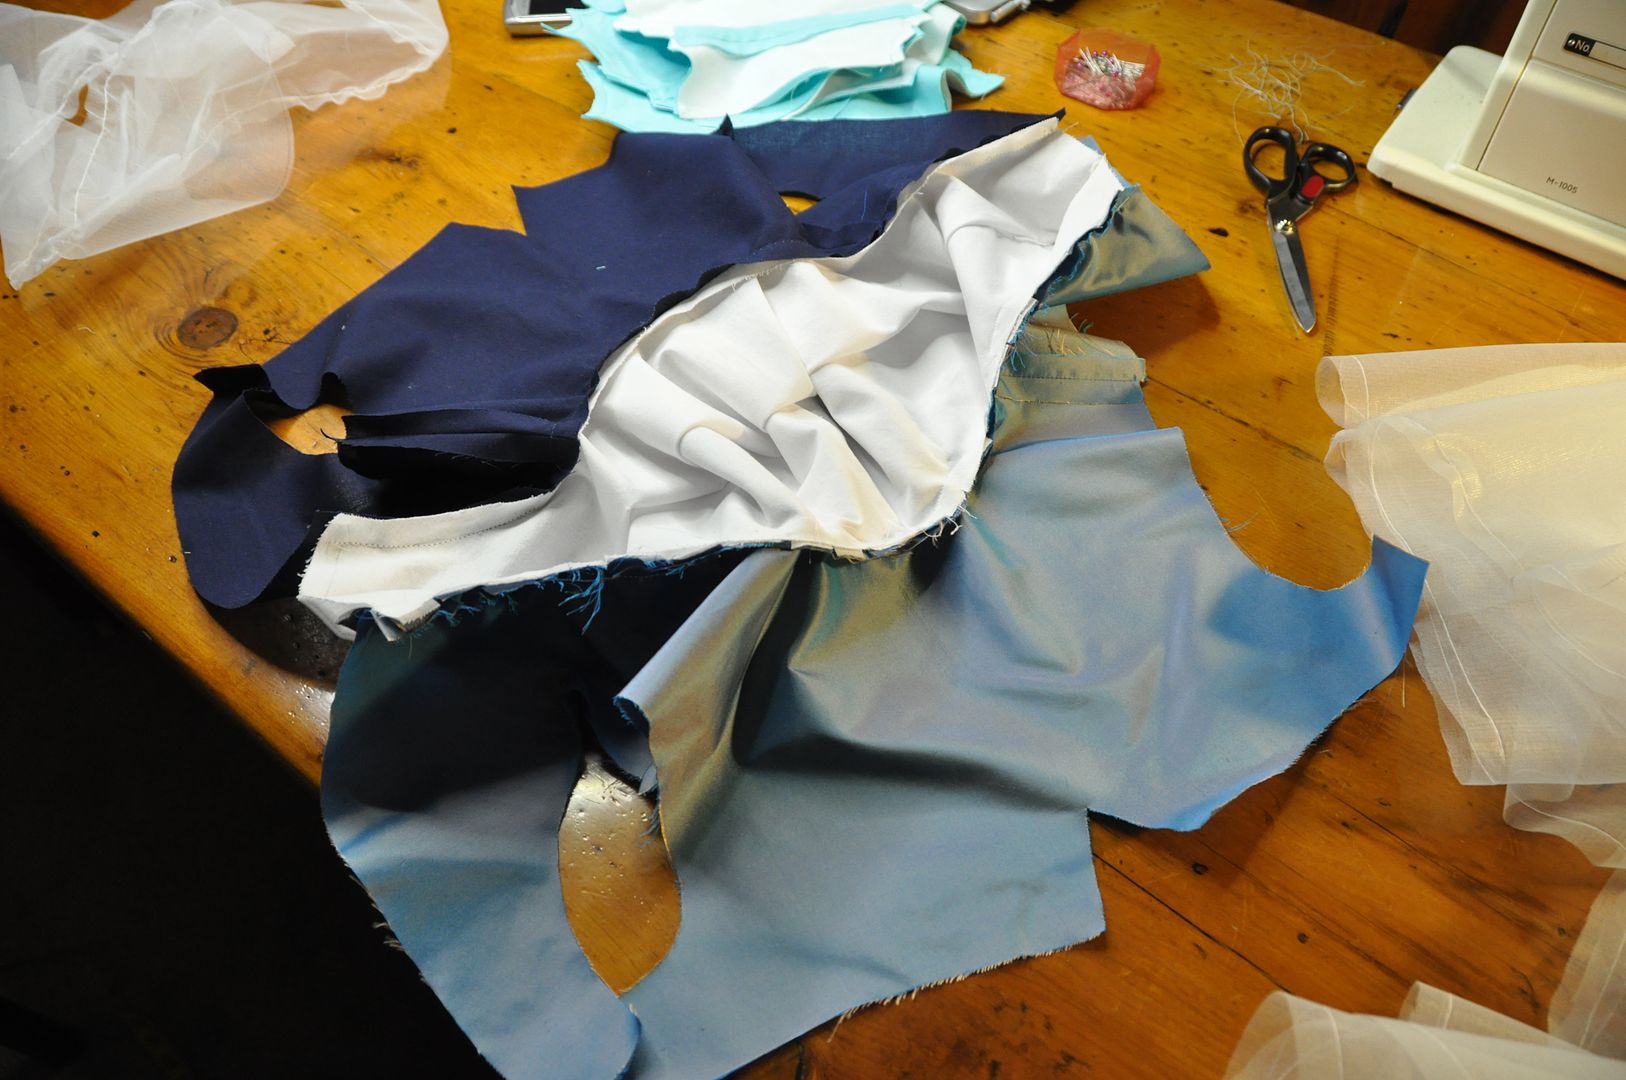
Here you can see all the pieces that made up the bolero jacket. Since the blue silk was so thin, I decided to line the body of it with a leftover navy cotton I had in stock (leftover from my bicycle skirt).

The piecing together of the collar was exceedingly complicated. I will do my best to explain, but ultimately I will have to say that I barely understood what I was doing. hahaha

There are 3 collars: the blue silk inner collar, the white wired collar, and the white and blue floppy under collar.

First I flat basted the blue inner collar to it's navy cotton lining. (The raw edge would get finished with bias tape later.)

I sewed the bottom side of the top collar to the bottom collar along the unfinished edge. This was sewn to the silk outer part of the jacket body along the collar seam. (So: jacket body, bottom collar --both edges, top collar (bottom edge).)

I sewed the top side of the top collar to the inner collar and the navy lining of the jacket body. (So: top collar (top edge), inner collar (and its lining), jacket body lining.)

Pictured left you can see how this left the top collar wide open for me to add the channels for the wires. Which was the next step.

Once the wires were in place I glued some felt to cover the ends that would sit in the jacket body. The felt helped to both keep them in place and make them less likely to wear through the fabric. The wires have an angle in them and extend past the collar seam and into the back of the jacket so that they rest against my back and therefore actually provide structural support.

Then carefully aligned it and I sewed the collar closed--this meant all 3 collars, the jacket body and lining were attached. The order from bottom to top is: jacket body, bottom collar (both edges), top collar (now both edges), inner collar (and its lining), jacket body lining.


I ironed the seam, pressing the jacket lining down, which hid all of this construction on the inside--giving it a nice, clean finish. Then I sewed channels for the bottoms of the wires to sit between the jacket layers. Then I basted the lining to the body along the raw edges--including the armholes. 
I used a basting stitch along the sleeve tops and cuffs to create puffed sleeves, which I then attached to the armholes. A year later I would return and finish the sleeve hem with a simple rectangular cuff. 

Next I finished the edges with a silver bias tape I made myself. I also used bias tape to finish the armhole seam neatly. 

Here you can see the inside of the jacket.

After this I sewed on some frogs for the closure on the top collar.
This pointy edged navy bit was top stitched to one side of the front opening of the bolero. It has dome fasteners to attach it to the other side of the opening for easy removal.

Details such as gems and beads were added later, I will go into details on those in a later post.