Showing posts with label beige. Show all posts

Friday, August 19, 2016

Brown Cloche Hat With Feathers


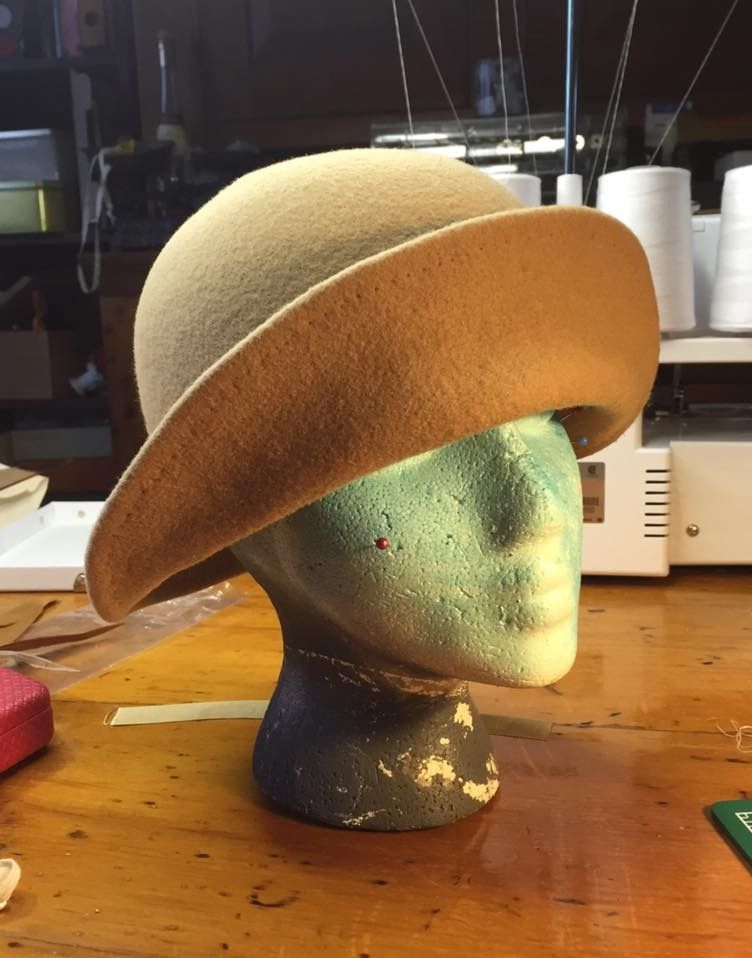
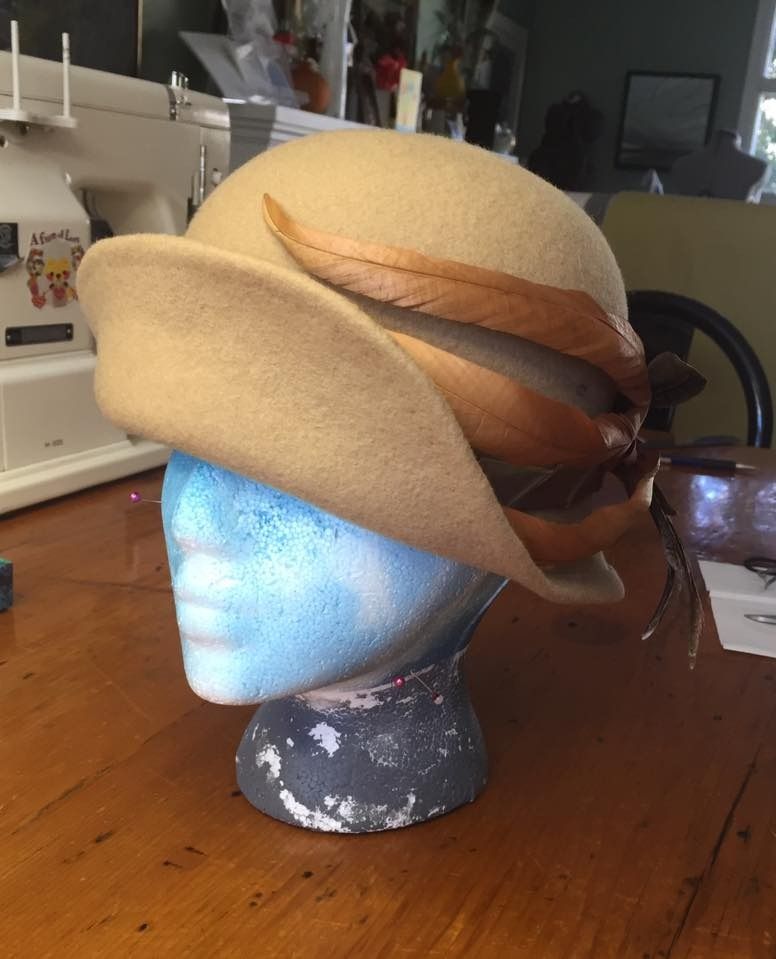
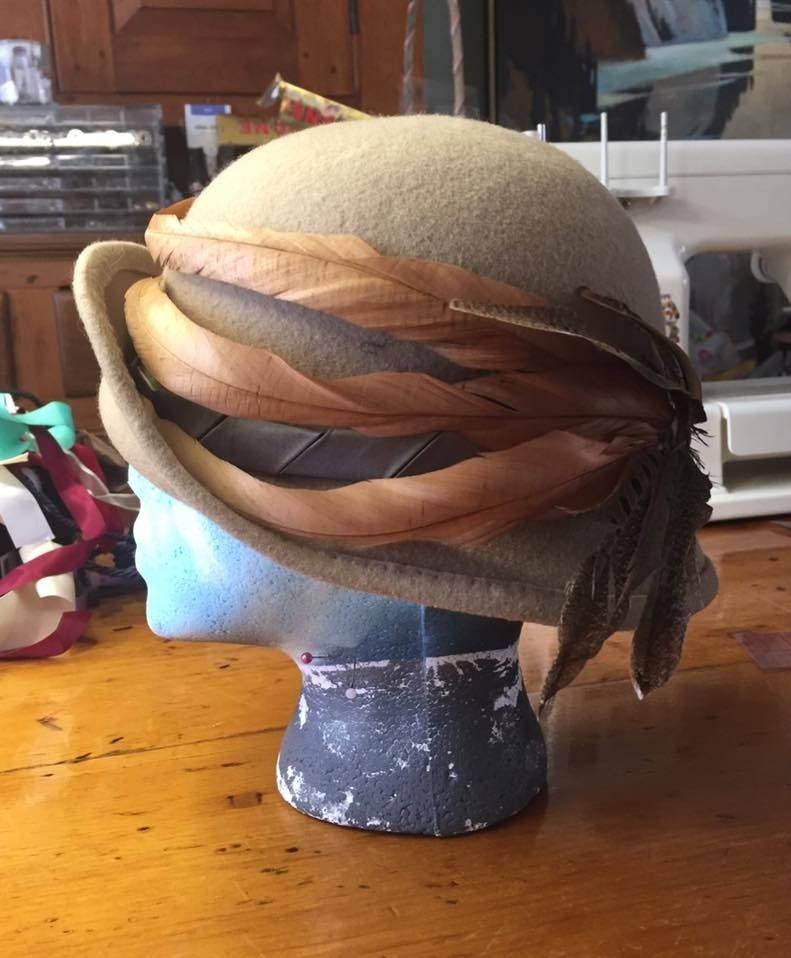
Let's take a look at my final millinery project: a blocked felt hat! I decided to do a simple cloche hat decorated with feathers. 
To make a blocked felt hat, you buy a "hood" or "capeline" which is 100% wool. (Or you can buy an 100% wool hat that has already been shaped and reshape it. You can get them at H&M.) 

You heat up a tea kettle that doesn't have an automatic shut off (so it will keep boiling--just make sure it doesn't run out of water, because you need the steam and to not set anything on fire). You place the hood/capeline over the steam spout and let it steam. It should have condensation on the outside and it will be really hot when it is ready for shaping. Use tongs to take the hood/capeline off the steam and place it over your desired block. I used a round crown top. Then you stretch it over the block, tie it tight and pin it in place. Let it dry for 24 hours. 

For my cloche, the crown and brim are all one piece. I was pressed for time with moving and was going to miss the last class, so doing a one piece hat was necessary--but also, I really like this style anyway.

If I were to do a separate blocked brim, at this point I would have carefully cut off the brim with an exacto-knife and blocked it on a brim block. For a one piece hat, I applied more steam and shaped the brim while the crown was still tied down on the block. I used rolled up pieces of fabric to shape around and let it sit while it dried. During this time I trimmed off some of the excess felt  from the brim to get it closer to the finished shape that I wanted.

When it was dry, I removed it from the block and set about finishing the edge of the brim. I decided to do a simple folded edge finish. I marked my finished edge and carefully trimmed the brim, leaving a 1/2" fold allowance. I folded it over, using bulldog clips to hold it in place so I could baste it. Then I carefully ironed it before stitching it as invisibly as possible. I ironed it again after stitching. This helped to give it a crisper edge.

Next I added the decorations and headband to the inside. I also gave it a label. I decided to accent it with more of that green silk I bought for the previous hat and feathers left over from my Forest Guardian costume. The goal is to stitch decorations on securely without making them look heavily stitched on,

I'm not too impressed with how the decorations turned out--specifically the feathers. I may replace them later. But I really love this shape--simple, yet elegant!


I've signed up for Millinery Part 2! So look forward to more hats, coming this fall! :D
Tuesday, January 12, 2016

Vaporeon Gijinka - Under Layers - Pokémon


Let's talk about under layers!  This includes the front drape--with its built-in bra--and the navy booty shorts I constructed. If you want to see how I made the Bolero Jacket, go here!

Once again many thanks to Elemental Photography for the great photoshoot! I love this reflection shot. :) Credit for the original costume design goes to Cowslip!

Since the design only shows how the front looked I had to design a suitable back for the costume. I decided to make a second drape at the back, since it seemed logical and would cover more skin. Also, the design itself was originally designated as one of her "male" designs. I made a slight alteration to the design of the drape at the front for the purposes of female modesty--I changed the proportion of how the drape sat across the chest so it came further back towards my armpits at the top and would therefore properly cover my bust. This is one of the few minor changes I made to make the design work for me.

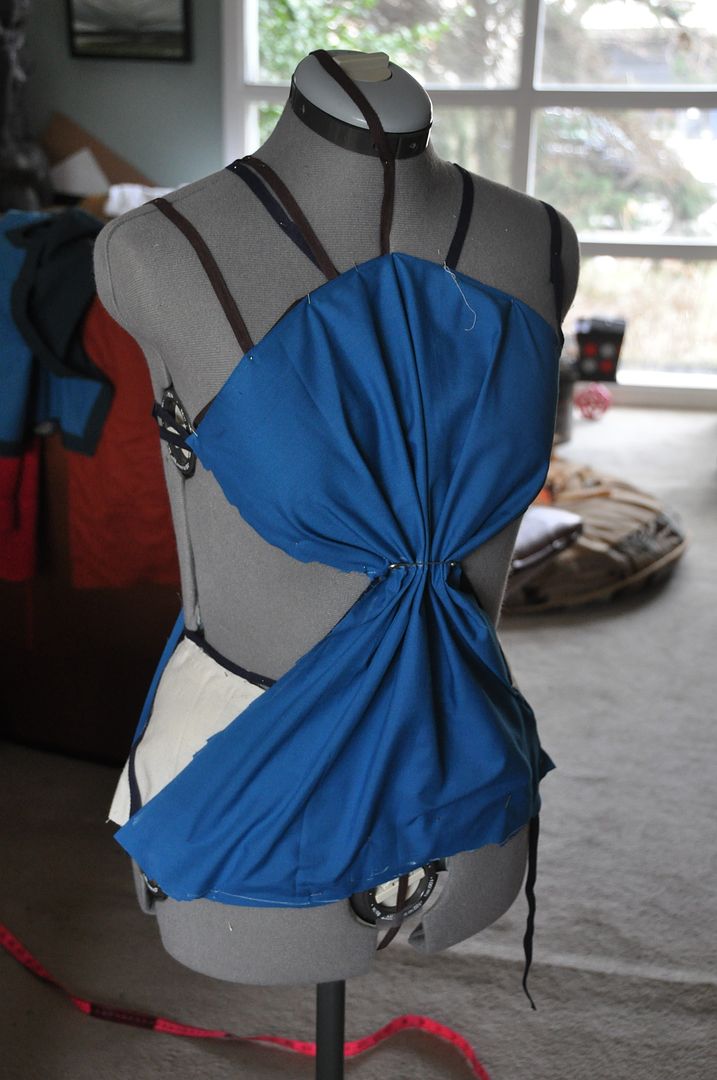
I started by using twill tape to outline on Molly where I wanted the gaps at the sides to be. I used some cheap broadcloth to drape the pieces.
I pinned and trimmed the fabric until I was satisfied with the way it gathered. I used these to create my pattern pieces.

The fabric I bought was pretty see through, so I double layered both sides. Each piece was sewn rights sides together along the side edges and turned right way out. Then I top stitched those edges to keep them from shifting about. This fabric was fairly uncooperative...


I created shoulder straps for the drape piece in the same beige cotton. The close using velcro to make them a bit more adjustable.

The bottom edge of the drape was finished with a band of beige cotton. On both sides where it overlaps it has velcro to adjust the size around the hips and allow me easy on/off.
 
I had to build a bra of sorts into this costume. I bought nude coloured bra cups in the right size. Awkward shopping moments include me trying to find the right size by holding them up to my body and comparing. Hahaha

Using beige cotton fabric and elastic I made the bra layer to fit comfortably. It opens at the back of the band with hook and eyes. I tacked the bra into the draped piece at the front so it would shift and be revealed. The band at the side peeks out a bit when I lift my arms, but it is not the end of the world.

The bra itself provides moderate support--I am not super busty, so I don't need that much support. Mostly it needed to be something that I could a) sew into the costume, and b) choose the placement of the straps so they wouldn't stick out too much and look weird. Had I used a regular bra bought in a store, the band would be clearly visible at the sides. This one I made comes up higher in the sides and back than a typical store bought bra--which is why it doesn't give maximum support. Also I didn't give it an underwire. Because I didn't think it would be super necessary.

The last detail was the cording. I bought tons and tons of navy blue cording for this costume. It wrapped around the gather at the center front and looped to the back. It's tacked in place so it doesn't move. The ends of the cord were dipped in clear nail polish so they wouldn't fray.

The other under-layer for this costume was a pair of booty shorts. Somehow I didn't clue in until the very last minute that the wrap-skirt did not actually cover all at the front and I didn't have anything suitable to wear underneath. Hence, I decided to make a very simple but unobtrusive pair of matching shorts.

They were made of some navy blue jersey I picked up at the last minute. I patterned them based off some leggings I own. I pieced them together at a friend's house so I could use a serger.

The hem was done with a zig-zag stitch on my own machine. The waistband had a roll-over where I inserted an elastic band.

I think this is one thing that convinced me I needed to get a serger of my own... I have been avoiding stretch fabrics for so long because I lacked the equipment to work with them.

Wednesday, February 19, 2014

Makar Plushie - Legend of Zelda: Wind Waker

This is a plushie I made for my sister's birthday gift. Yes, it's Makar, and yes, Makar is adorable. He was pretty easy to make, and turned out as well as I'd hoped. :D

This plushie is made out of felt, which was a very different material for me to work with. It's always good to experiment with different fabrics. The beige felt I chose for this project is sort of mottled in colour, which suits the character well. (He is supposed to be a tree sprout thing.)

For those of you unfamiliar with the character, Makar is from the video game Wind Waker in the Legend of Zelda series. He is a Korok from the Forest Haven. My sister is a big fan of the game, and Makar is her favourite character. Probably because he is adorable.
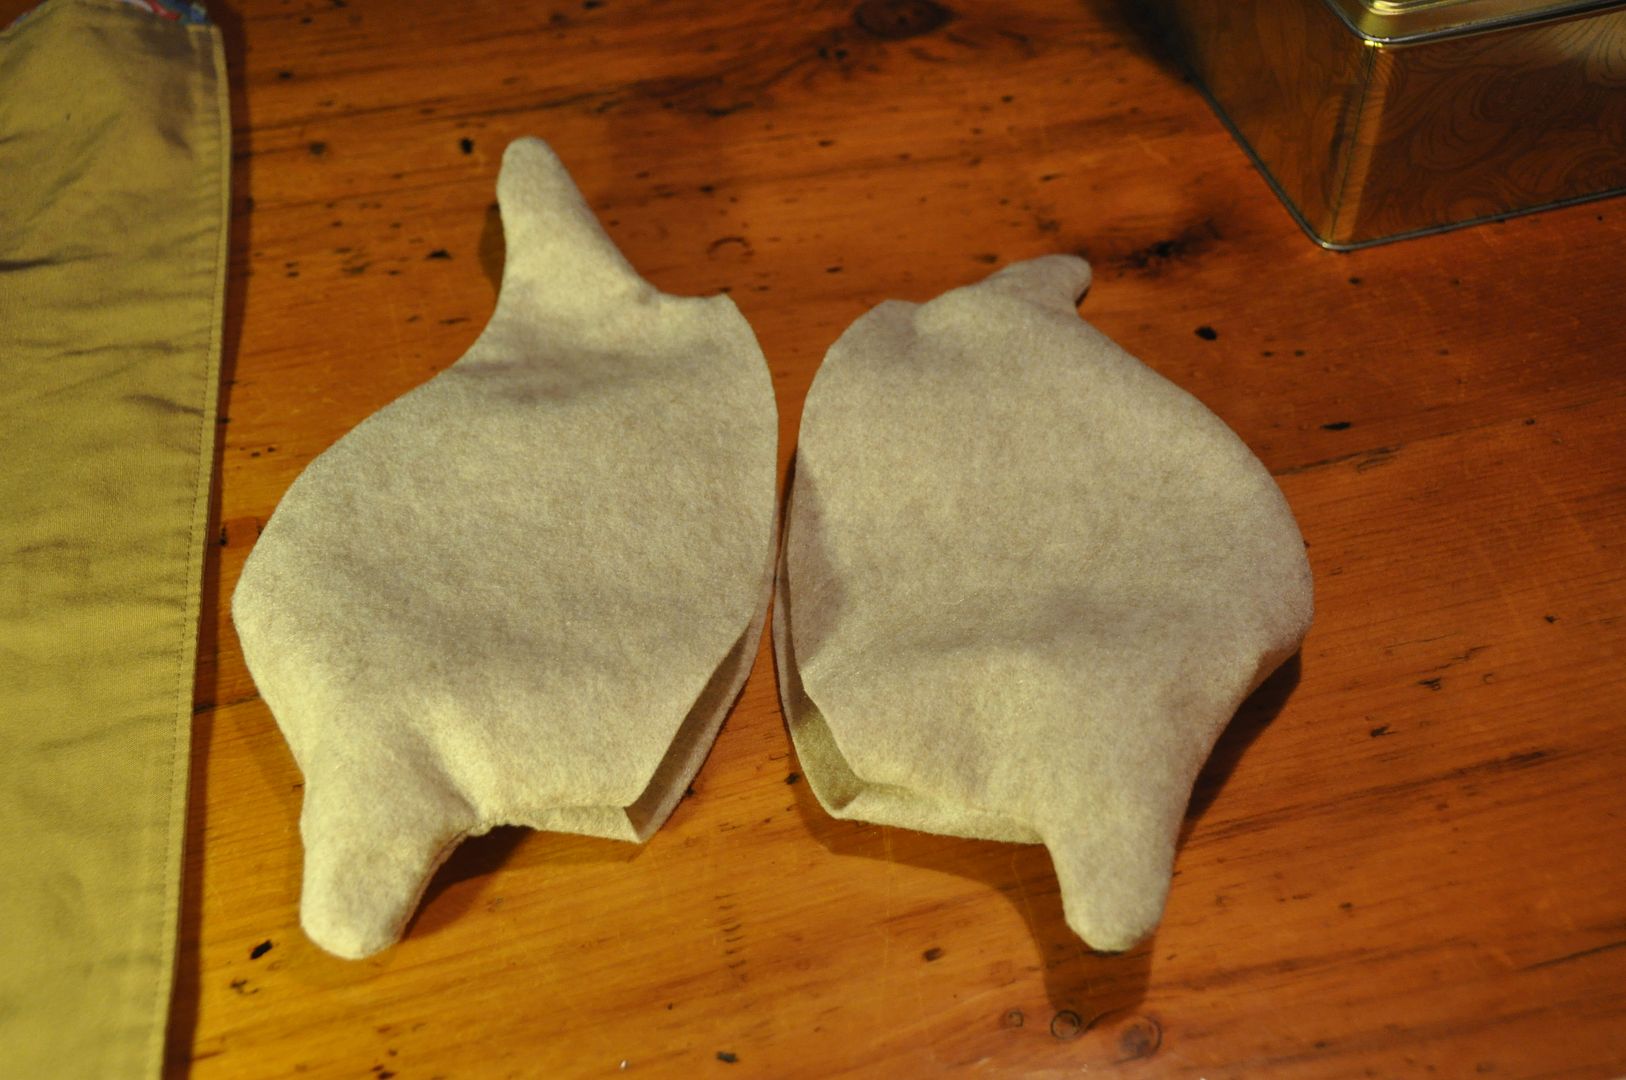
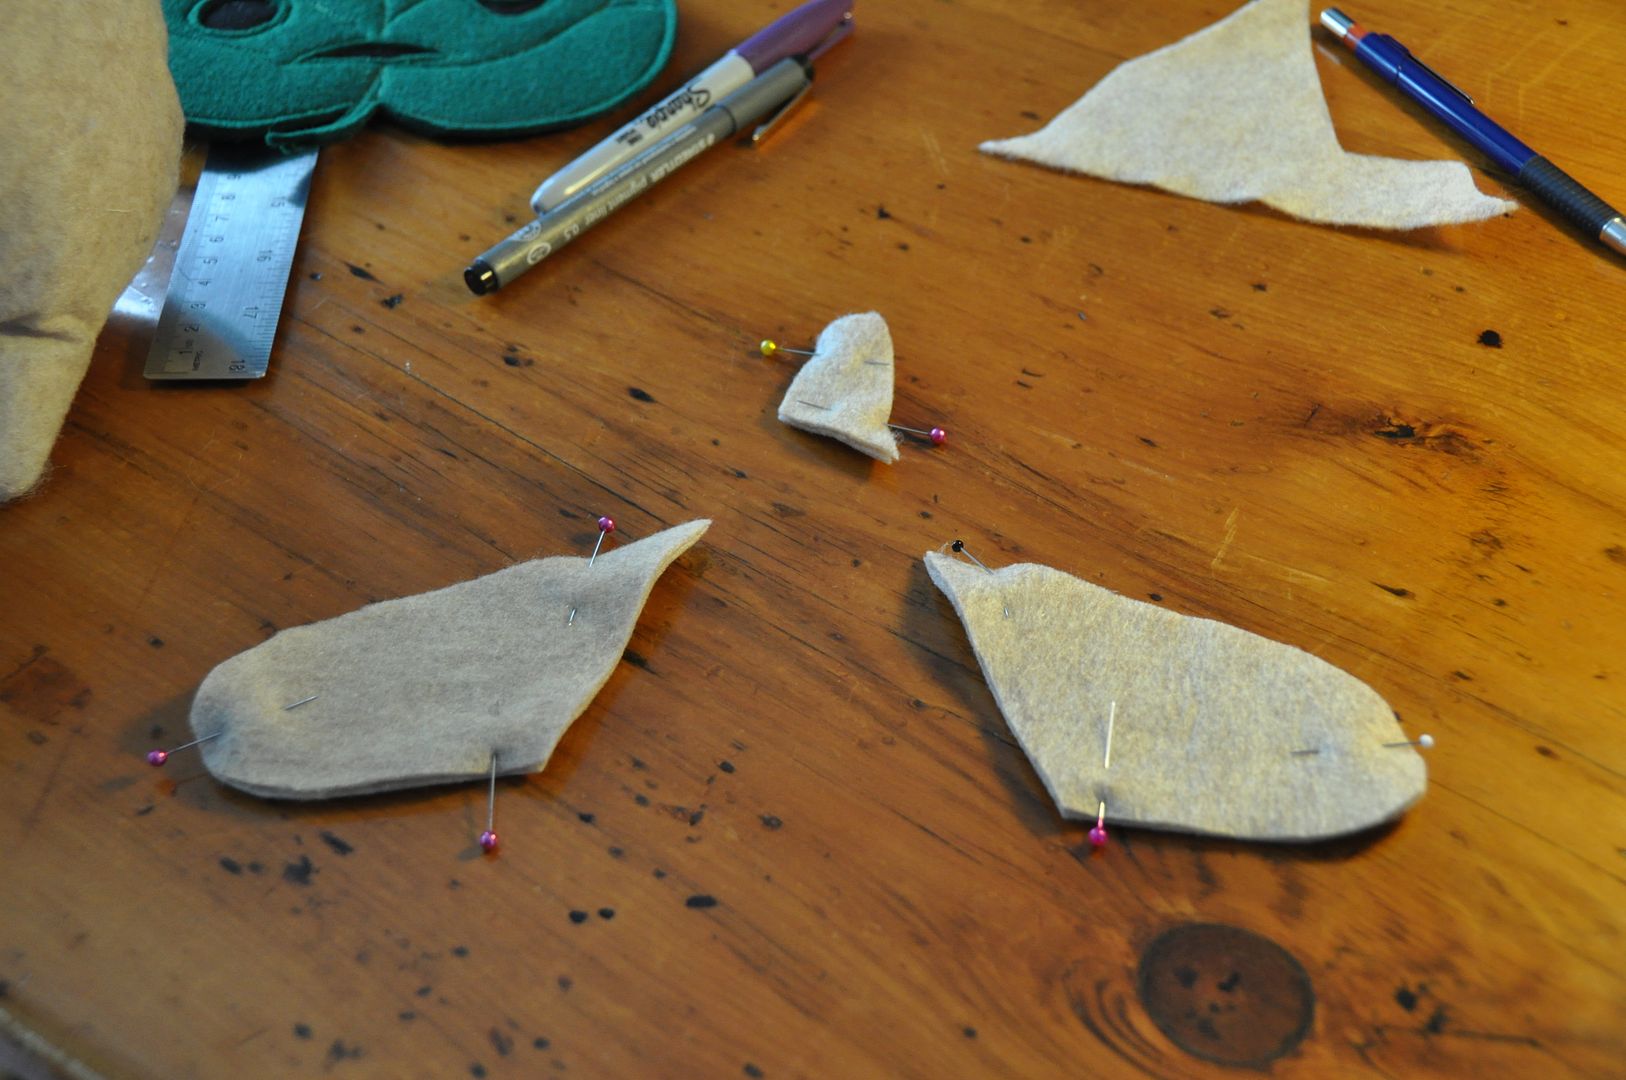
First I patterned the body. The two halves are different at the top. I started by making a mockup in muslin. This was a good idea, because this is my first time patterning a plushie, and so it looked a bit wonky.

The curve I originally had on the front and back seam of the body was too extreme, so I pinned and took it in on the mockup. You can see the change I made in red on the pattern pieces to reflect the change on the mockup.
Once I was satisfied with my mockup I started on the final version.

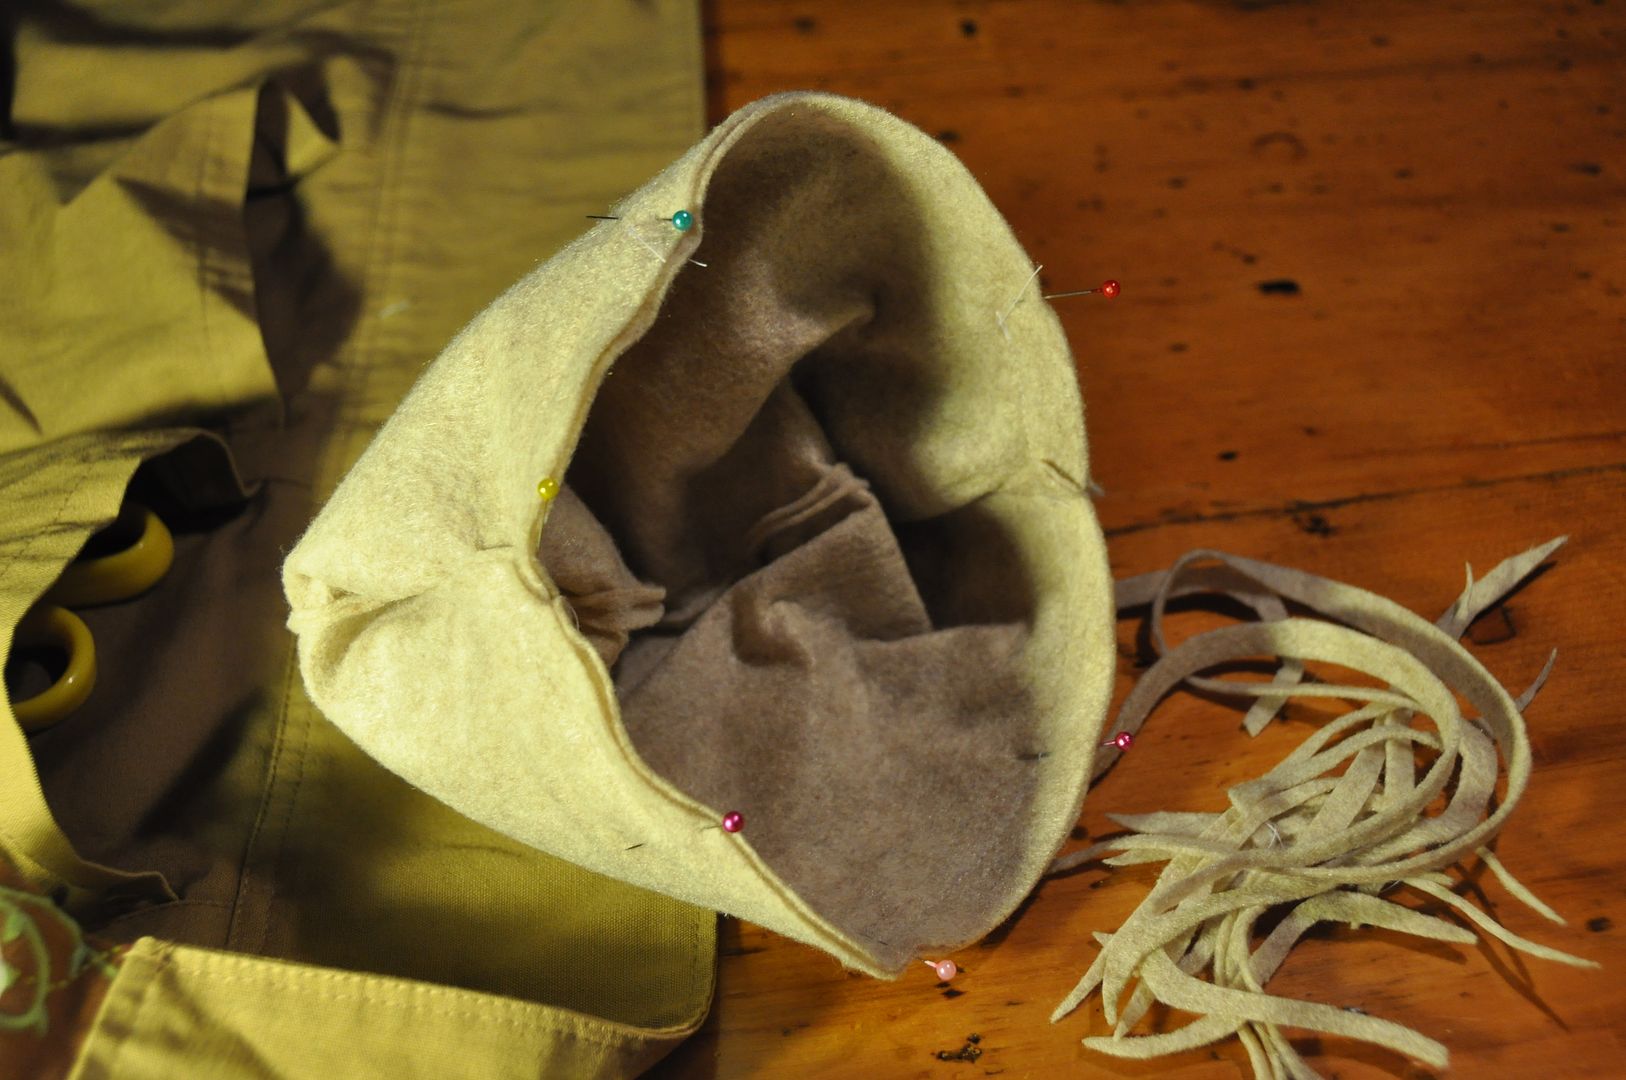
I cut 2 pieces for each half (one for the front, one for the back). I sewed the side seams together, clipped the excess fabric on the inside so it would be easier to turn right way out.

Leaving one right way out, and one inside out I lined up the center seams and sewed them together. I left a gap to turn it right way out and stuff it. This gap was left where it would be covered by the leaf face.
After sufficiently stuffing it--ensuring the stuffing got into all the extremities--I hand-stitched up the center seam.

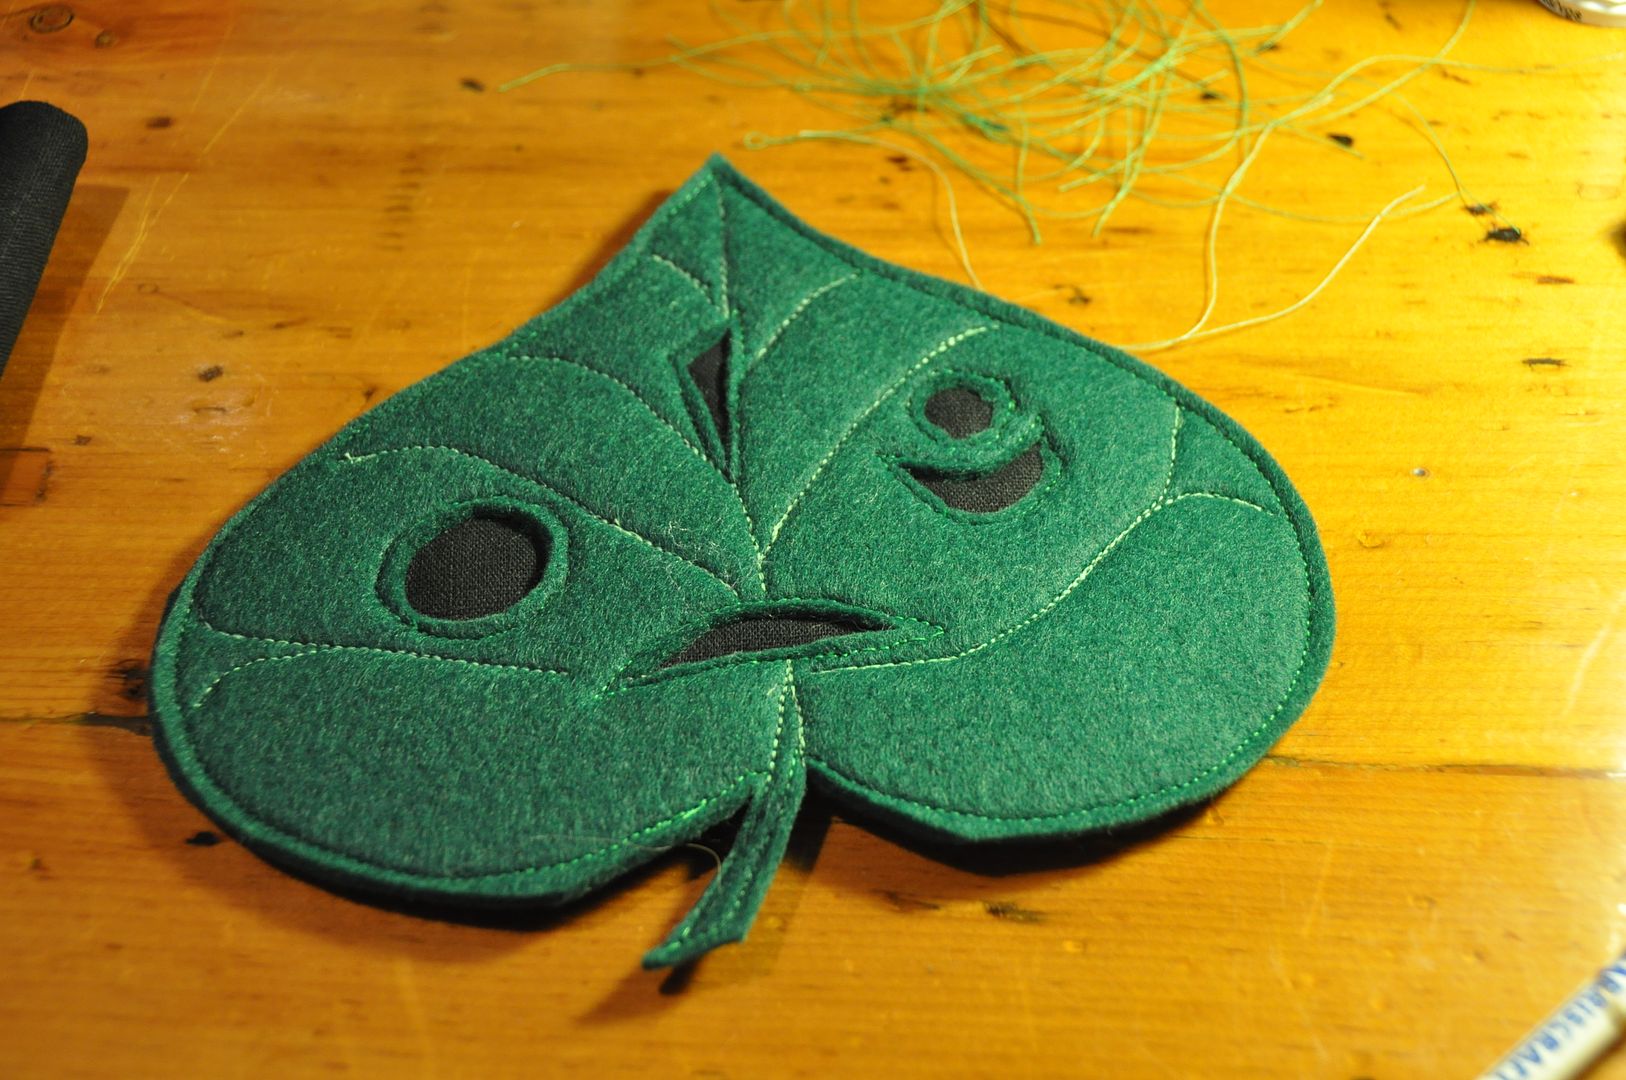
I made a pattern piece for the face. I cut 2 in green felt and one smaller piece in black fabric. I cut the holes out of the top piece of felt only, the black fabric in between the layers made the facial expression stand out rather nicely.
First I stitched around the outside of the face, then outlined all the facial features. Then in a lighter green thread I stitched the vein pattern onto the leaf.

Then I made some arms and a little twig. These were stitched together leaving one end open, seam allowance clipped, and then flipped right way out. I stuffed them and hand stitched them onto the body.

Lastly I tacked down the leaf face with a secure hand stitch.

The result was one cute plushie!

Tuesday, December 31, 2013

Jersey Beaded Scarf

This was a gift I made for my older sister. It's a cross between a scarf and a necklace (a scarflace?).

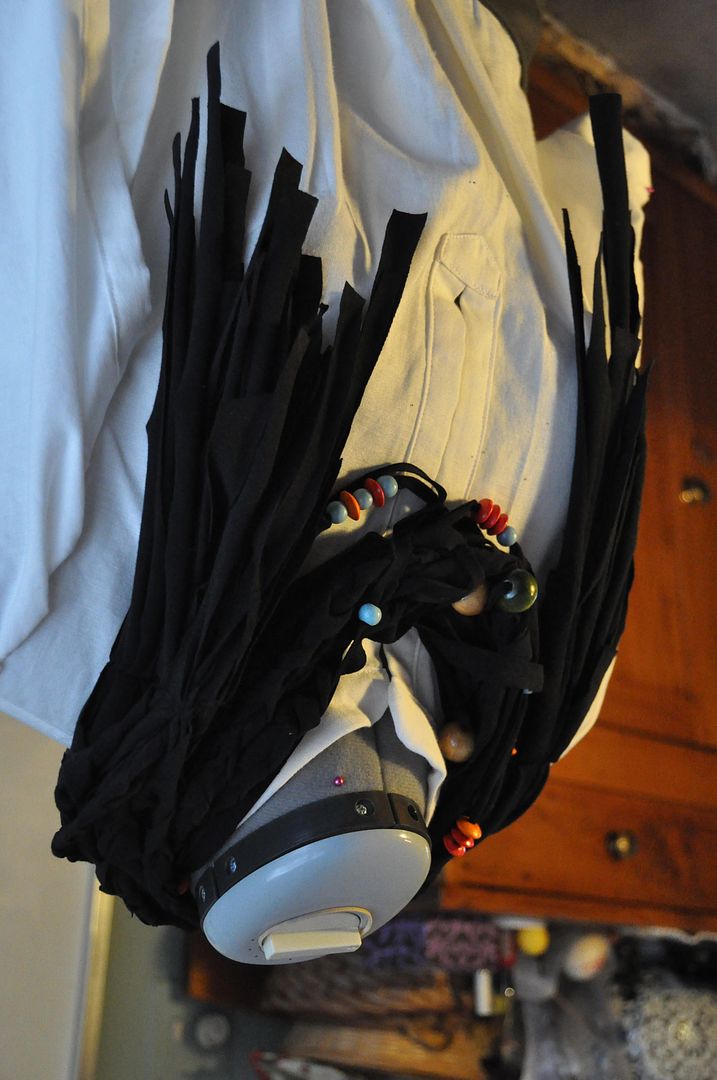
It was fairly easy to make: I cut black jersey into long strips, some of which I braided, some of which I added a few coloured wooden beads to. The most difficult part was getting the beads on the jersey. This was done with  straight pin, a needle and needle-nose pliers. It was therefore important that I picked beads with sizeable holes.

I twisted the fabric strips together and put a line of stitching on each end to hold the bundle together.