Thursday, April 25, 2013

Greyscale Checked Jumper

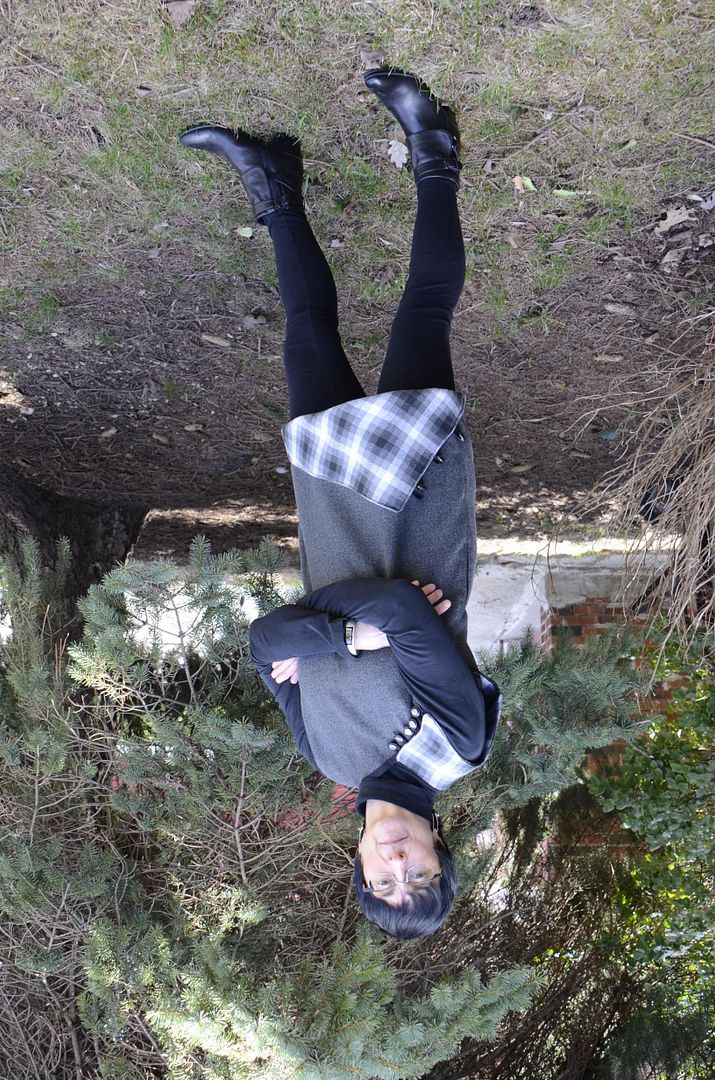
So it's my mum's birthday today! This post is in honour of the incredible woman who took the time to teach me how to sew, puts up with my crazy cosplay antics, supporting me in my hobbies and through life in general! An incredible lady! And also very stylish! :D

People say we look the same, I am inclined to agree?

This post is of a jumper I made 2 years ago. 2 years late, but better late than never! ;D

(And back to regular posting hopefully!)
This is a Christmas present I made for my mum. An original design of a jumper. I patterned it myself from scratch. :D

Using a fabric that had a pattern on one side and a solid on the other, I decided which parts I wanted to be checked, and which ones I wanted to be grey.


I cut out my fabrics, accounting for seam allowance.

The checked shoulder piece I cut 2 of, so I could sew it inside out and then reverse it to get clean edges. This made sewing it onto the garment much easier.

That's the before and after of when I reversed it. You can see below how it looks on the garment where it drapes over the shoulder.

I sewed up the side seams, knowing I would have to take the left one out later to put in the zipper. That seam I basted.


After ironing my shoulder piece, I pinned it in place to see how it would look.
I tried to zig-zag the edges of the fabric, which was really thick and would not cooperate for a double rollover seam, but that didn't work very well, and neither did the single rollover seam...

So I scrapped that idea and applied a black bias tape to the edge.

Then I pinned and sewed my shoulder piece into place.


I also folded over a piece of bias tape and sewed that together to create my button loops.

I measured where my buttons would go and marked those spots with a pin.

And now the neckline is finished! :D


The next bit was the bottom piece that would incorporate a pocket into the design. I cut the large triangle twice so I could turn it inside out to finish the edge in the same way as the shoulder piece.

I made it large enough so it would wrap around to the back of the garment.

Sewing it on was terrible. With this many layers, the sewing machine just barely made it through!

I added the topstitching on the pocket opening so it would match where I stitched the other side to the garment. Then I added buttons and loops.

Lastly was the zipper, which I affixed in my usual fashion.

Wednesday, March 6, 2013

Navy "Bicycle Trim" Circle Skirt

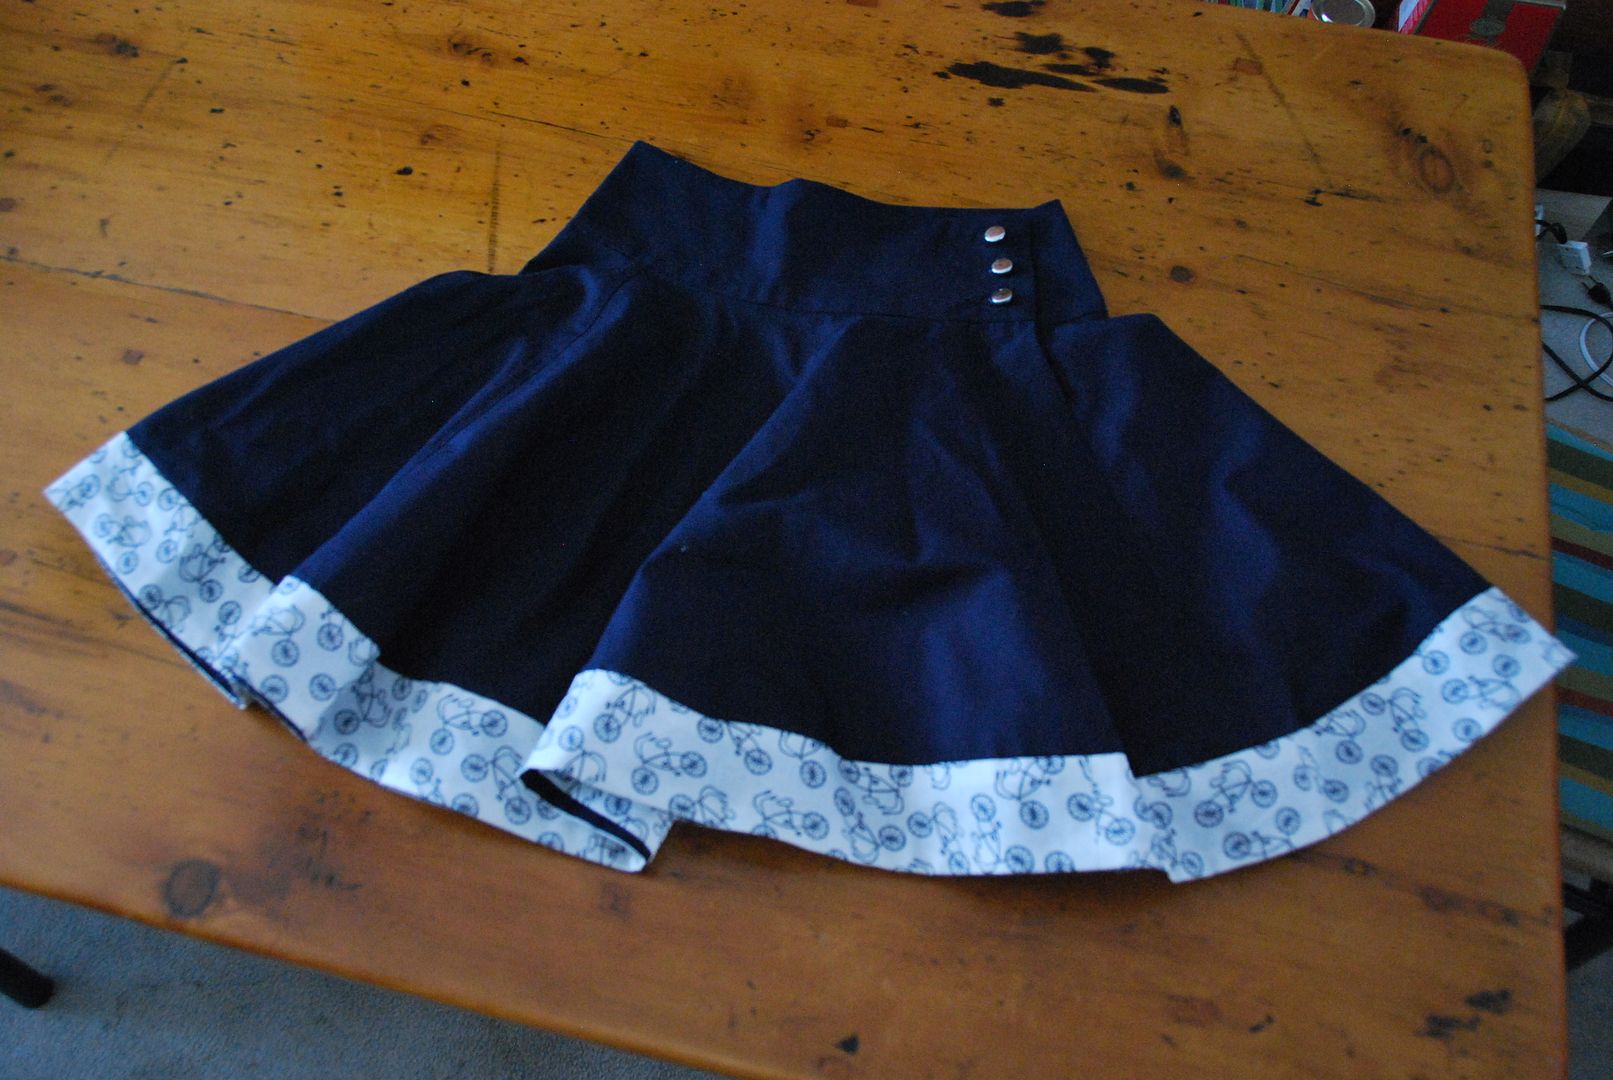
I think I have finally gotten over my aversion to navy blue. Having to wear the same colour to school everyday for 4 years gets a bit tiring. 2 years later I am just finally getting back into wearing navy again. Hahaha The print fabric featured on this skirt I got in a cute little shop on Granville Island when I was in Vancouver last summer. :D

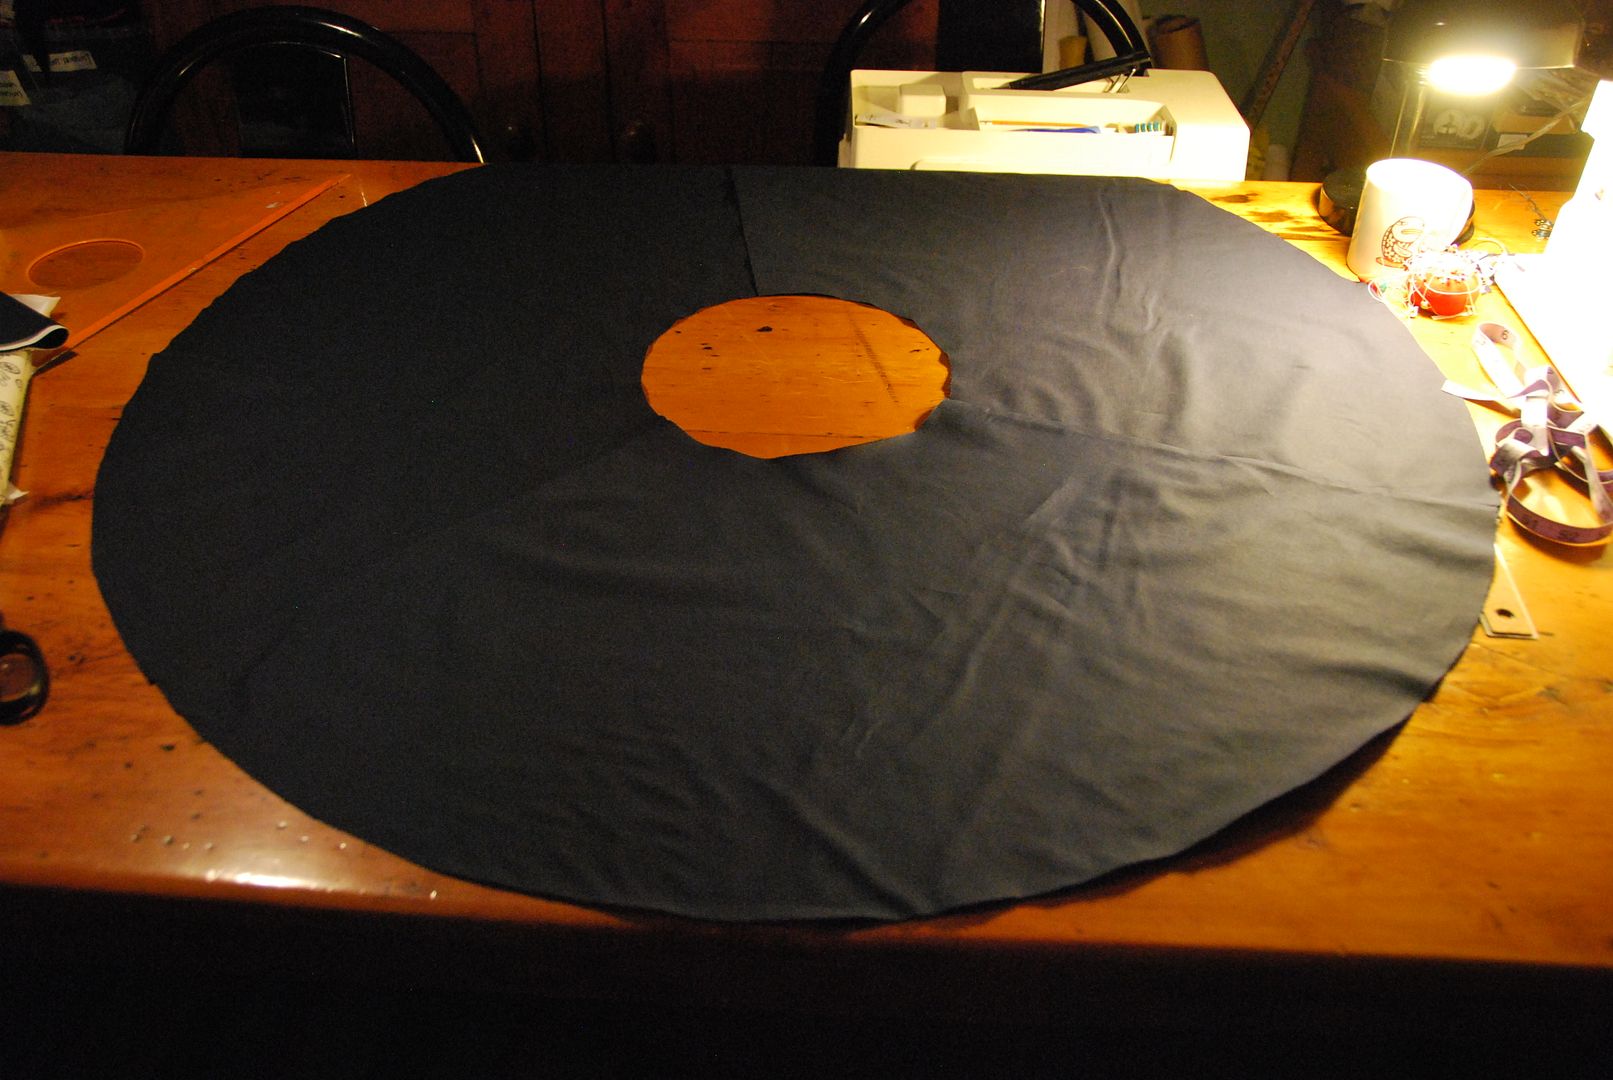
This time I decided to make a circle skirt without a gather at the waistband. I drafted and cut 3 panels that would form a full circle to get a skirt with a lot of volume. 

In order to draft it I figured out the radius measurement for a circle that was my waist measurement. First I marked a center point. Then taped a string to that spot. Using the radius measurement I found, I tied the string to a pencil at the distance and drew an arc. Then I decided how long I wanted it to be, retied the pencil at that point on the string and the drew the arc for the bottom edge of the skirt panel.

I divided the waist measurement by 3 then added seam allowance and overlap for the closure. I marked this measurement on my top arc. Using the string pulled tight from the center point I marked and drew a straight line that passed through my marker point to the bottom arc.

Of the cut panels I sewed up 2 of the seams leaving the closure seam open. I finished these seams before continuing on.
Then I drafted a waistband with a slight curve, adding in the same amount of overlap as for the skirt panel.

I wanted a wide waistband on this skirt with a button closure on one side. 

I cut this piece 3 times (2 navy blue and 1 white). The white would just be an added layer of stability to help keep the waistband a little stiffer.

Like a collar it was sewn right sides together, leaving the bottom edge open. Then it was flipped right way out (clipped and pressed). One side was stitched to the skirt panels, then the raw edges were tucked up inside the waistband and ditch stitched to finish the seam. 
I ironed the waistband/skirt connection flat.

Then, with right sides together, I marked the overlap and pinned where the panels would be sewed together. I stitched up the marked line, leaving an opening partway up until the top of the waistband. This would be left open, closed with buttons later.

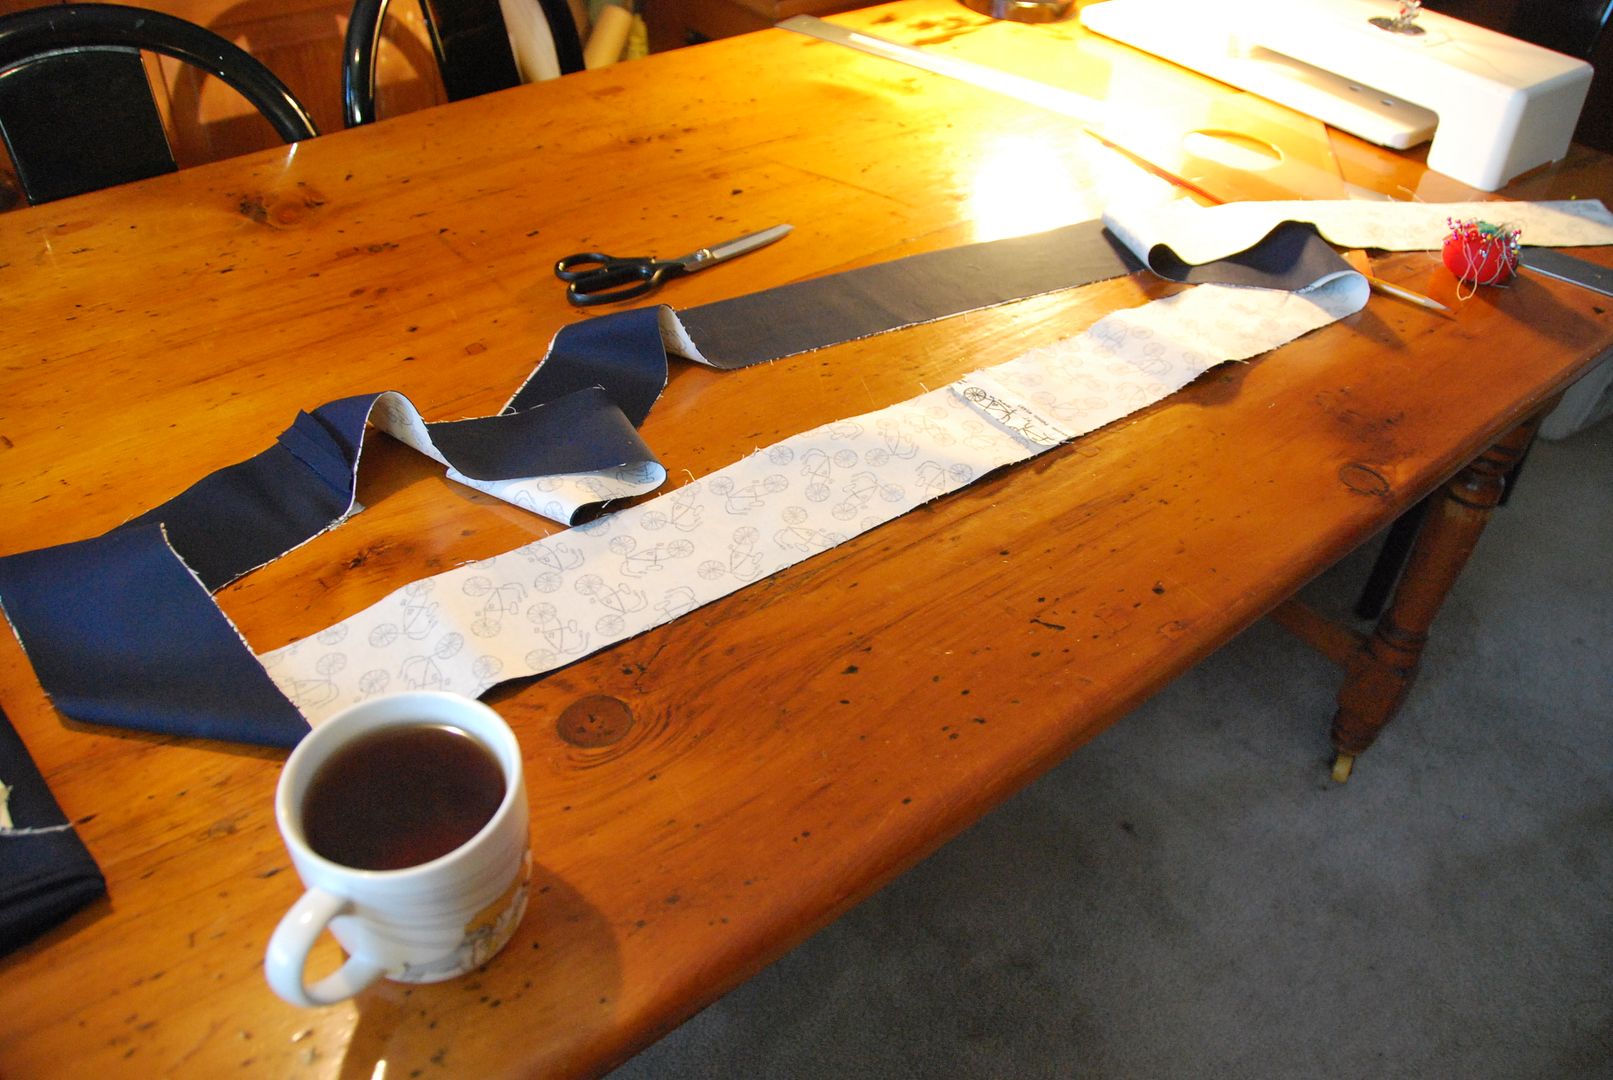
Then I measured the final edge of the skirt. I measured and cut a piece of my detail fabric a little bit longer than the finished edge, and 4.5" wide. This included seam allowances. I cut a matching piece in my navy fabric that would act as a lining for this piece.

These two long strip were placed right sides together and sewn along one edge. Then I flipped it right way out and pressed it flat.
Similarly to how I attached the waistband, I placed the right side of the bicycle fabric to the outside of the skirt, pinned the edges together and then stitched it in place all the way around. After ironing this flat I closed off the strip, turning it into a closed loop.

After clipping the excess fabric away, I folded up the navy half of my strip to the inside of the skirt, folding the raw edges inside the bottom hem detail, ditch-stitching it closed. (Ditch-stitching was done from the outside to ensure that the stitch line was hidden in the ditch caused by the seam between the skirt panels and the bicycle detail strip.)
 
Then I marked and added the buttons and button holes. Presto!

Wednesday, February 20, 2013

Simple Pencil Case

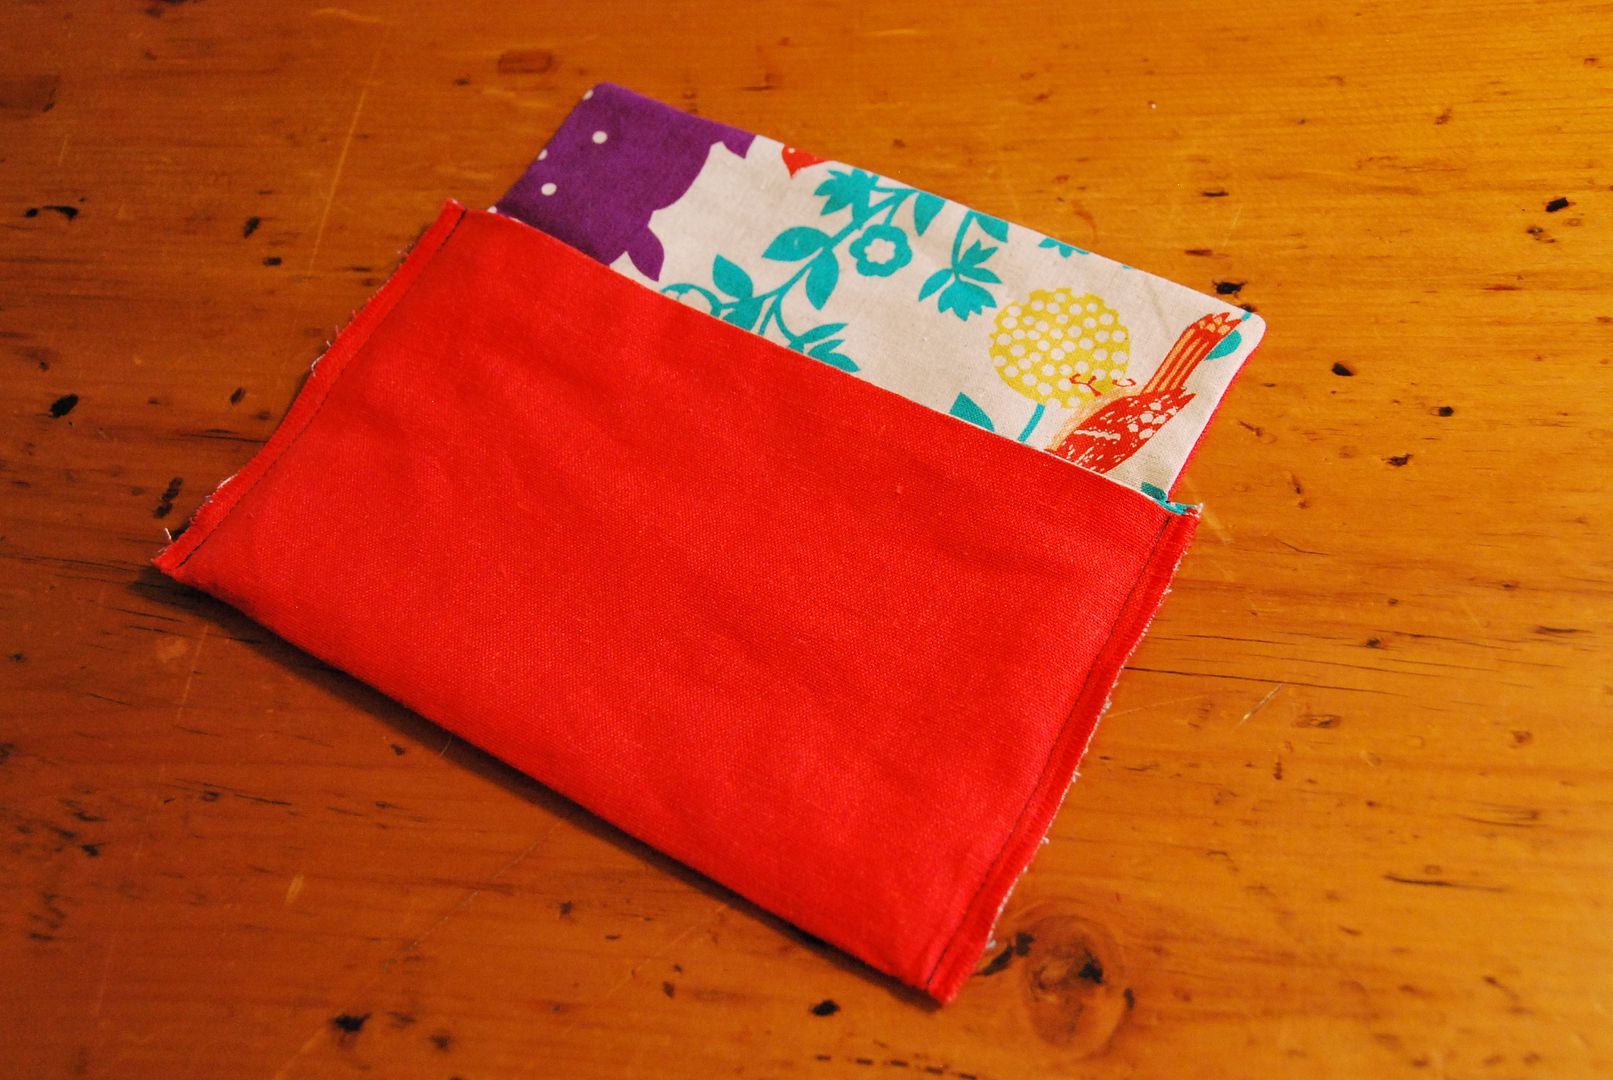
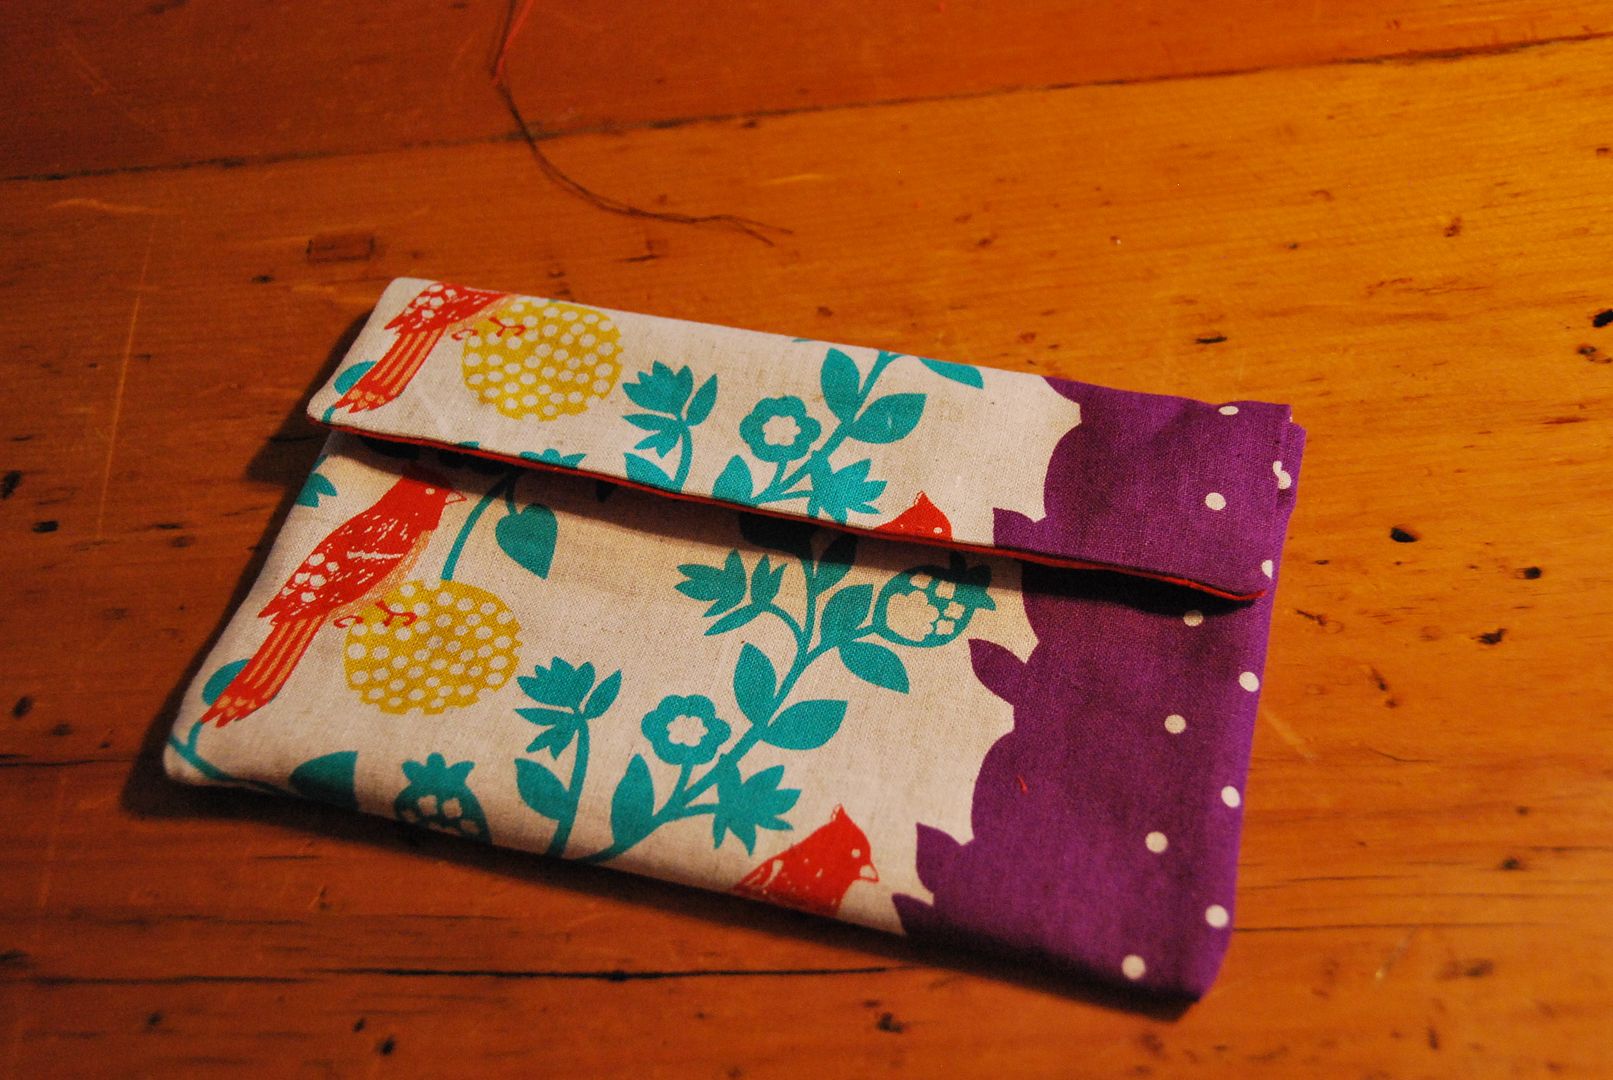
So here's a quick tutorial of how to make a simple pencil case! I made this for a friend for Christmas, for our Secret Santa gift exchange. I used some of the leftover fabric from my Echino Dress.

To start, cut 2 rectangles of fabric that are the same size. One will be the outside, the other will be the lining. You can line it with the same fabric as the outside if you want, I simply chose a contrasting colour for style points. ;D Remember to choose a heavier weight fabric for this project, as it will need to stand up to everyday wear and tear.

The size of the rectangle pattern should be as follows: 1/2" wider than your longest pencil and 2.5 times your desired finished height (this will wrap around to be the front, back and flap). To each of those numbers add 1", which will translate to a 1/2" seam allowance on all sides.  So for example if your finished width is 8 and your finished height is 5" (x2.5 which will be then 12 1/2"), cut a rectangle that is 9"x13 1/2".


Then with the fabric right sides together sew along the bottom edge and the top part that will become the flap. You can see in my picture above the faint stitch line. Then clip the top corners and turn it right way out. Press flat.

Then face the outsides together and align the finished edge with the base of the flap. Sew up the 2 side seams and finish the raw edge with a zig-zag stitch (or your own preferred method of finishing stitches). Turn it right way out and iron it again.

Mark and add in some dome fasteners, or velcro.

And voila! ;D

This pattern is easy to modify to fit your needs, you can make it as big or small as you want. You can also change it around to have the flap on the short end rather than the wide side simply change around the measurements accordingly!

If anyone uses this tutorial, be sure to send me a finished pic! ;D

Wednesday, February 13, 2013

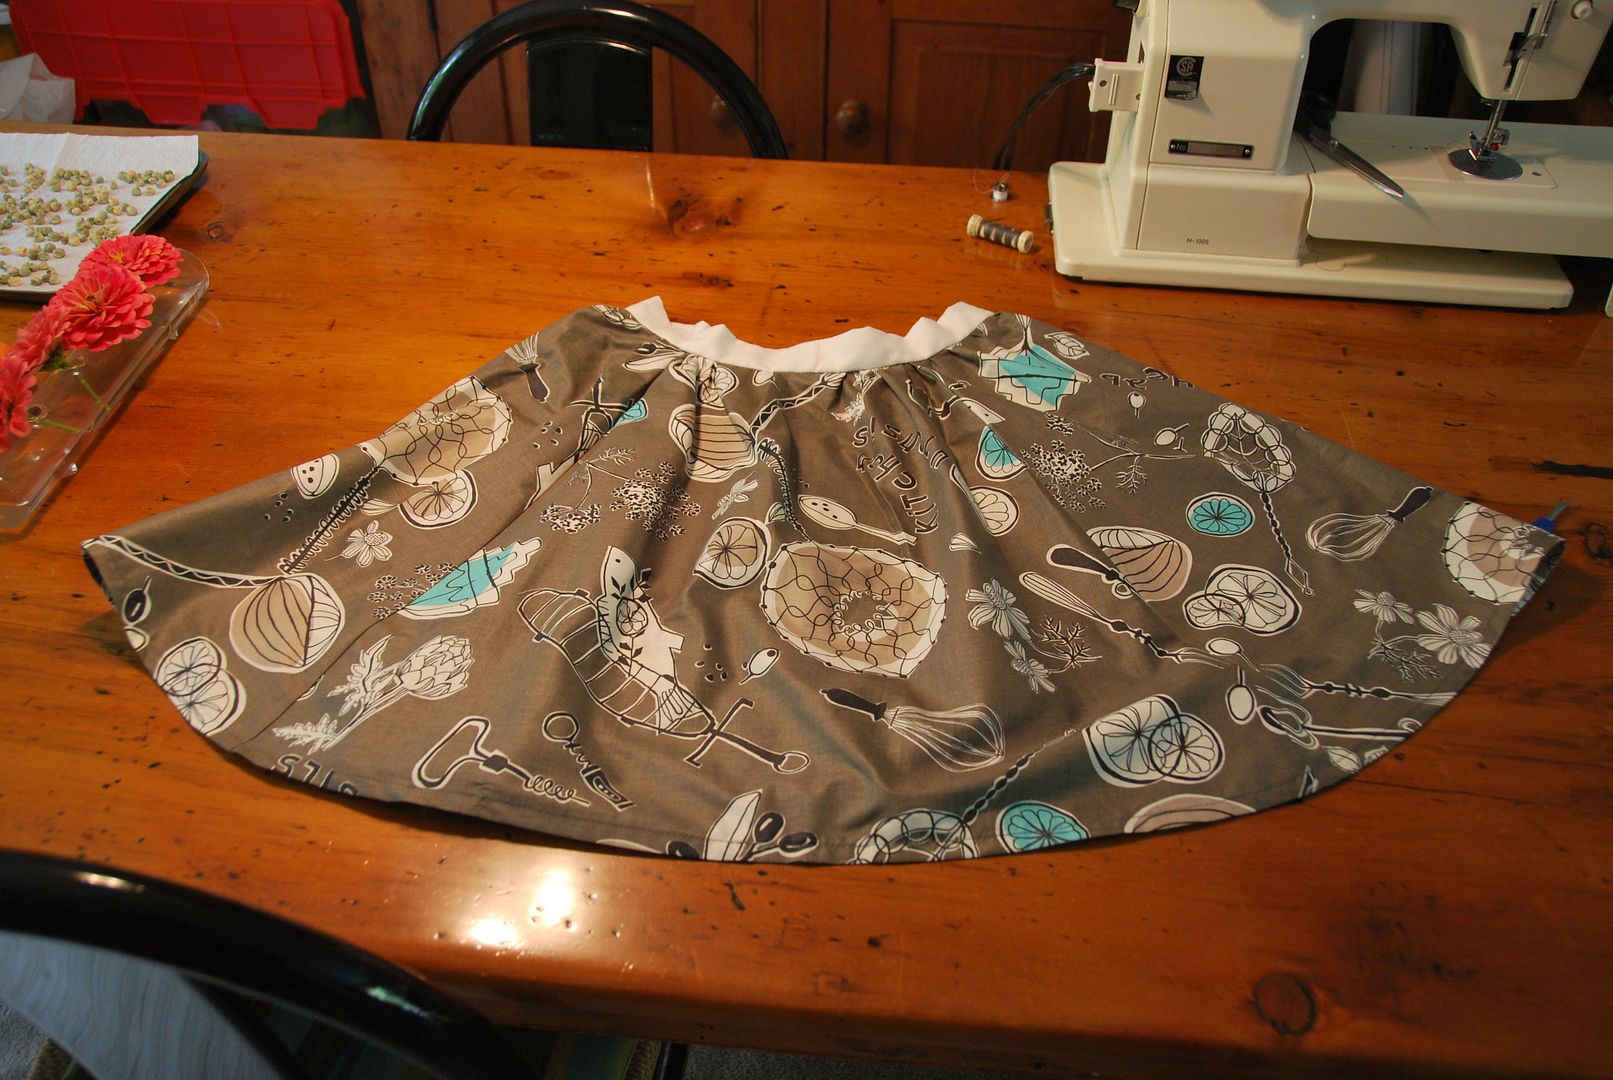
Kitchen Utensils Gathered Skirt

So here is my "Kitchen Utensils" skirt. Kitchen Utensils is the name of the fabric print that my sister got me for Christmas last year. She got the fabric on Super Buzzy, which is a online Japanese fabric shop. Lots of cute prints.
This is a simple gathered skirt with a zipper in the back. It is an original design.  I made this skirt in time to wear to the Legend of Zelda 25th Anniversary Symphony this past fall. Lots of fun!
I started by cutting 4 panels out of my fabric like this. The total inches at the top of the panels was made much larger than my actual waist size which would leave me fabric with which to do the gather. THe bottom was flared out and curved up at each side so the skirt length would be the same all the way around the skirt.

One of the panels was cut in half down the center. This would become the center back of the skirt where the zipper would go.
I stitched the panels together leaving the center back open then pressed the seams flat and finished them off.

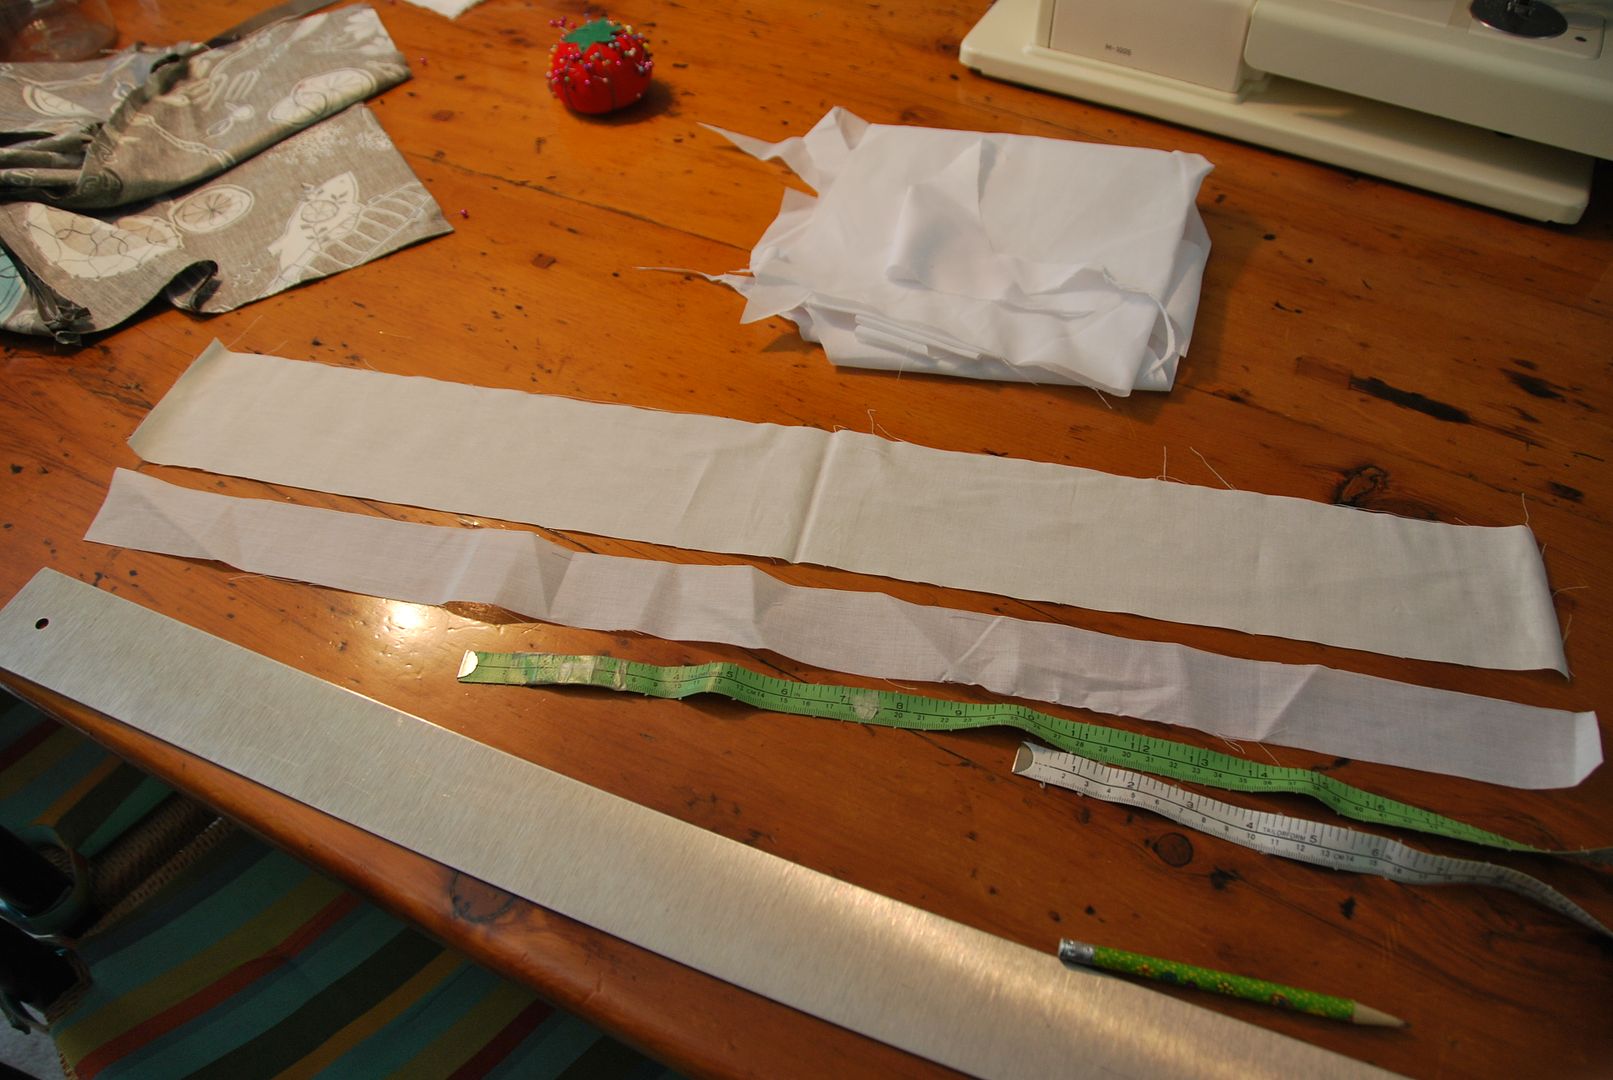
Then I cut a rectangle for the waistband. This would be a fold over waistband. I also cut a rectangle of interfacing that was half the width of first one.
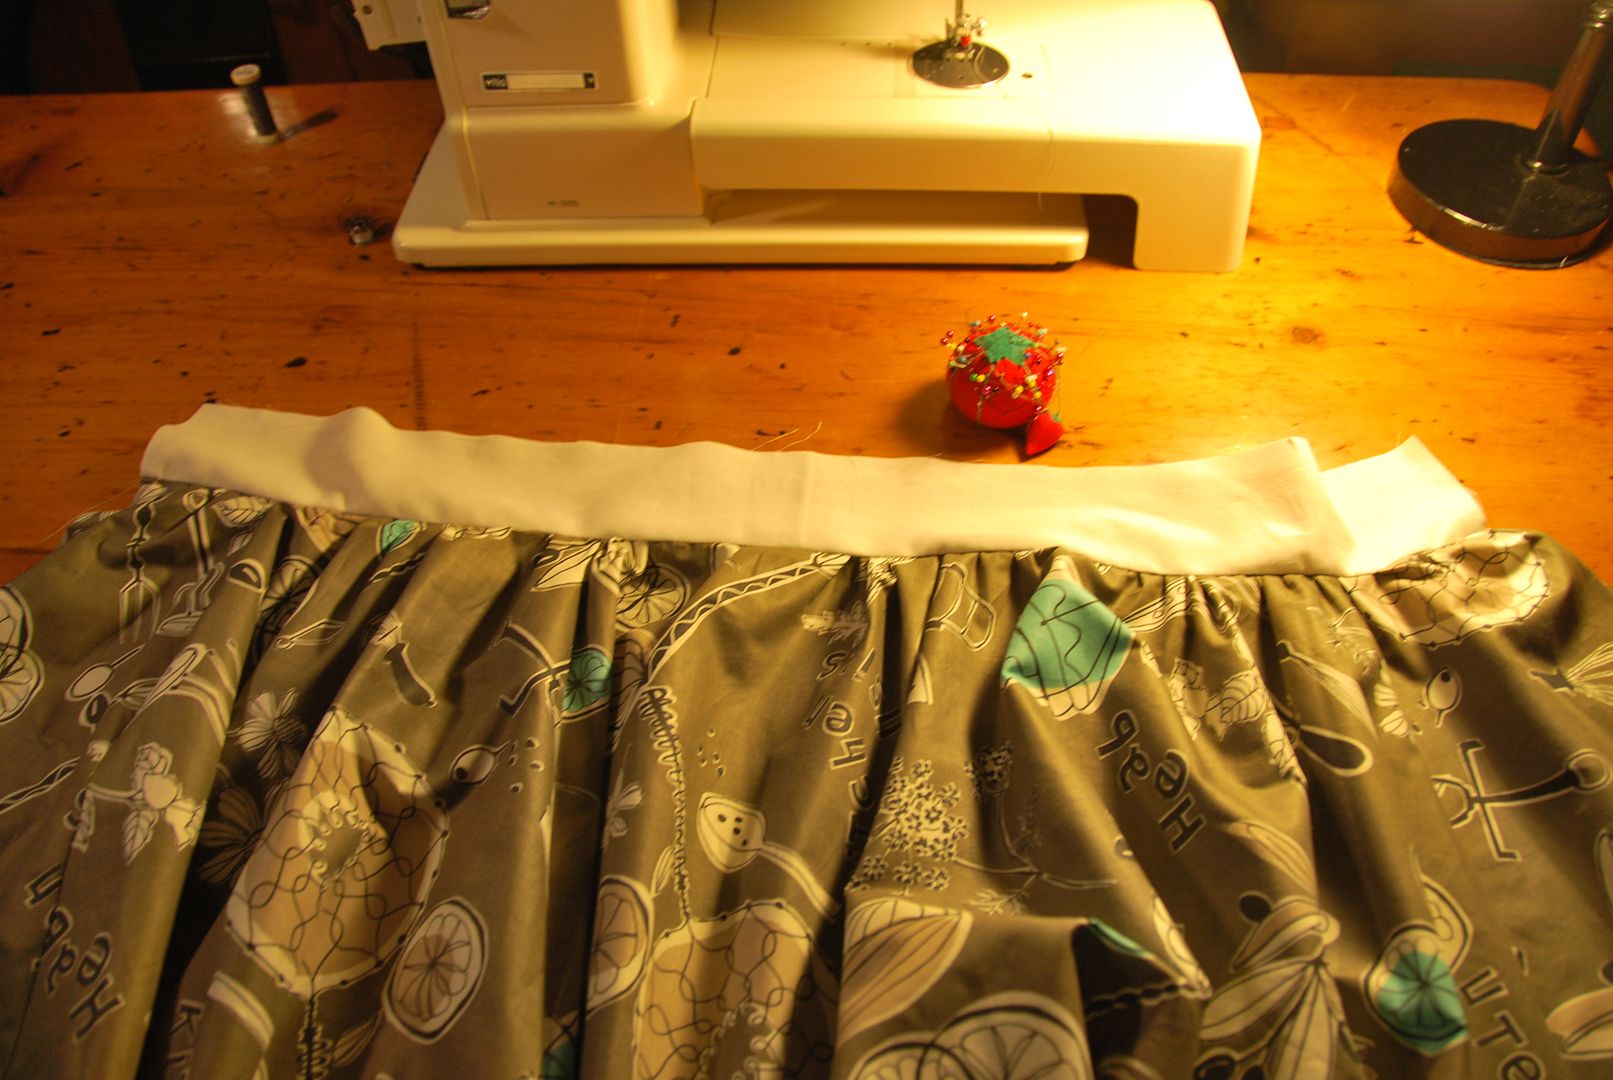
I used a basting stitch to gather up the skirt to the waistband. Once that was done I pinned and stitched the waistband to the front of the skirt (right sides together).

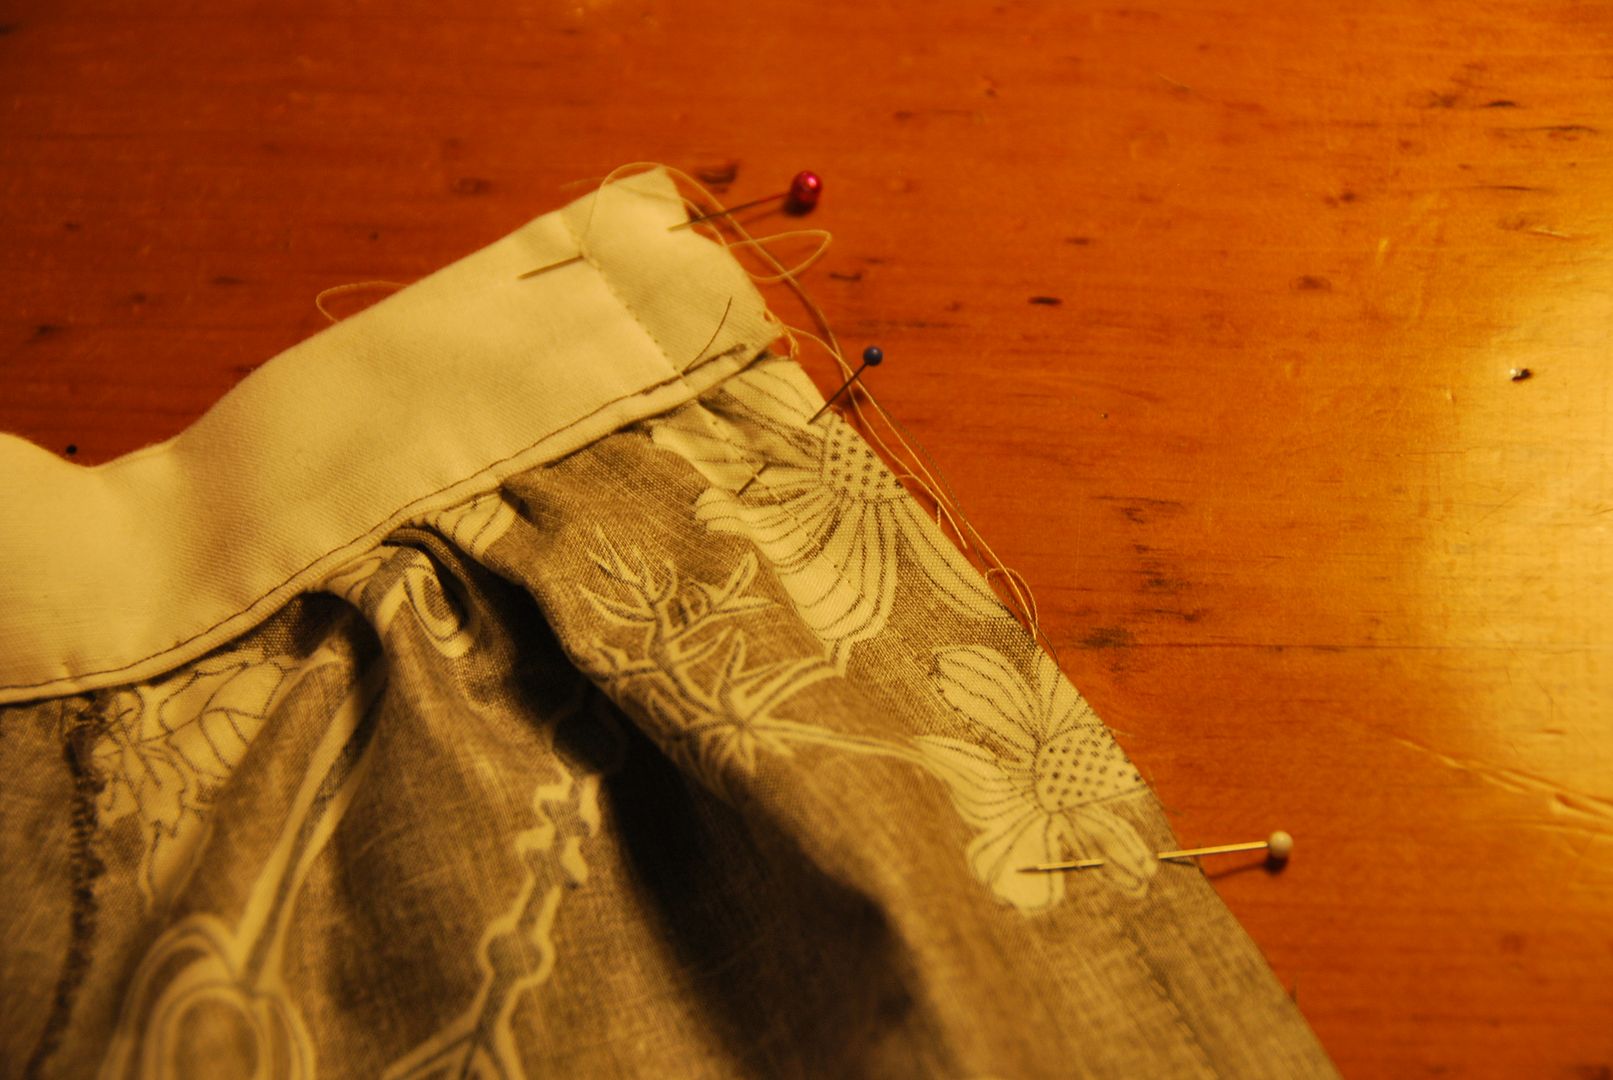
Then I ironed the waistband upwards and in half. The seam allowance was then neatly tucked up and ditch-stitched at the back.
Then I basted up the back seam. I pressed it flat and hand basted in the zipper. Then I machine stitched it in securely and opened up the seam, removing all the basting stitches.
Then I hemmed the skirt and added a bow detail at the waistband.


So I have changed my posting day to Wednesday evenings to better work with my new schedule for this term. Hopefully I can stick to it! ;D